Store
 
Using your emails to link out to an upcoming calendar event is a great way to ensure that attendees don't forget to add the event to their calendar.

Below, you will find easy-to-follow instructions on how to link out to events created with Google, Apple and Outlook calendars in your Mail Designer 365 email designs.

Google Calendar


If you've created a Google Calendar event which you want to share with your email subscribers, you will need to create an event link to include in your email.

Here's how:
  1. Set up your event in your Google Calendar.
  2. Click on "Options" > "Publish Event"
  3. Copy the event link to include in your email template. Important: Make sure your calendar is set to public to ensure all recipients will be able to view the event.
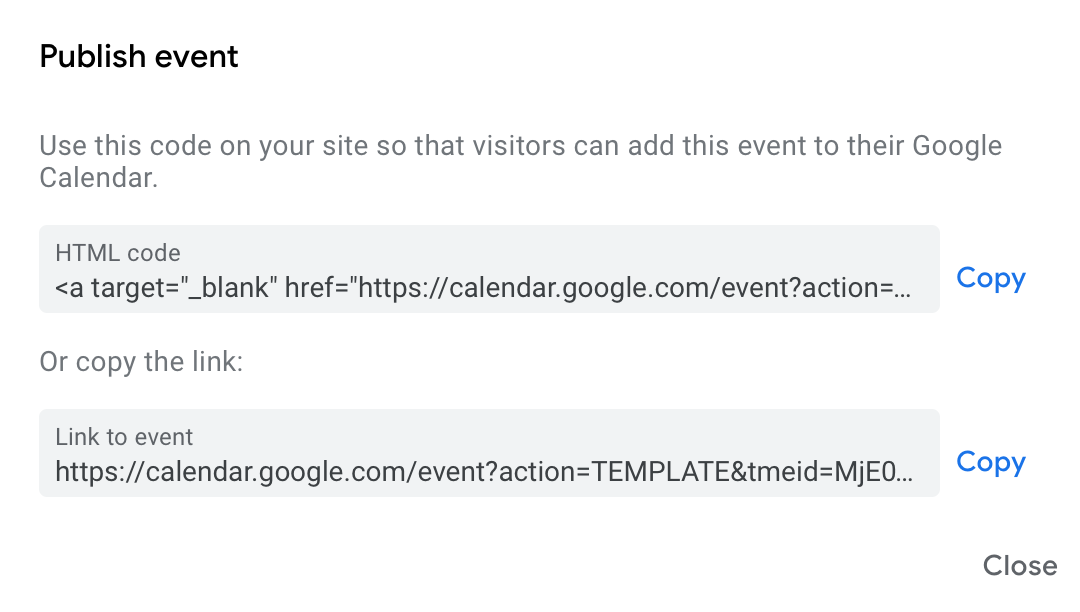
{S_1190}

Now you can insert the link into your Mail Designer 365 template; either as a text link, or attached to a call to action button:
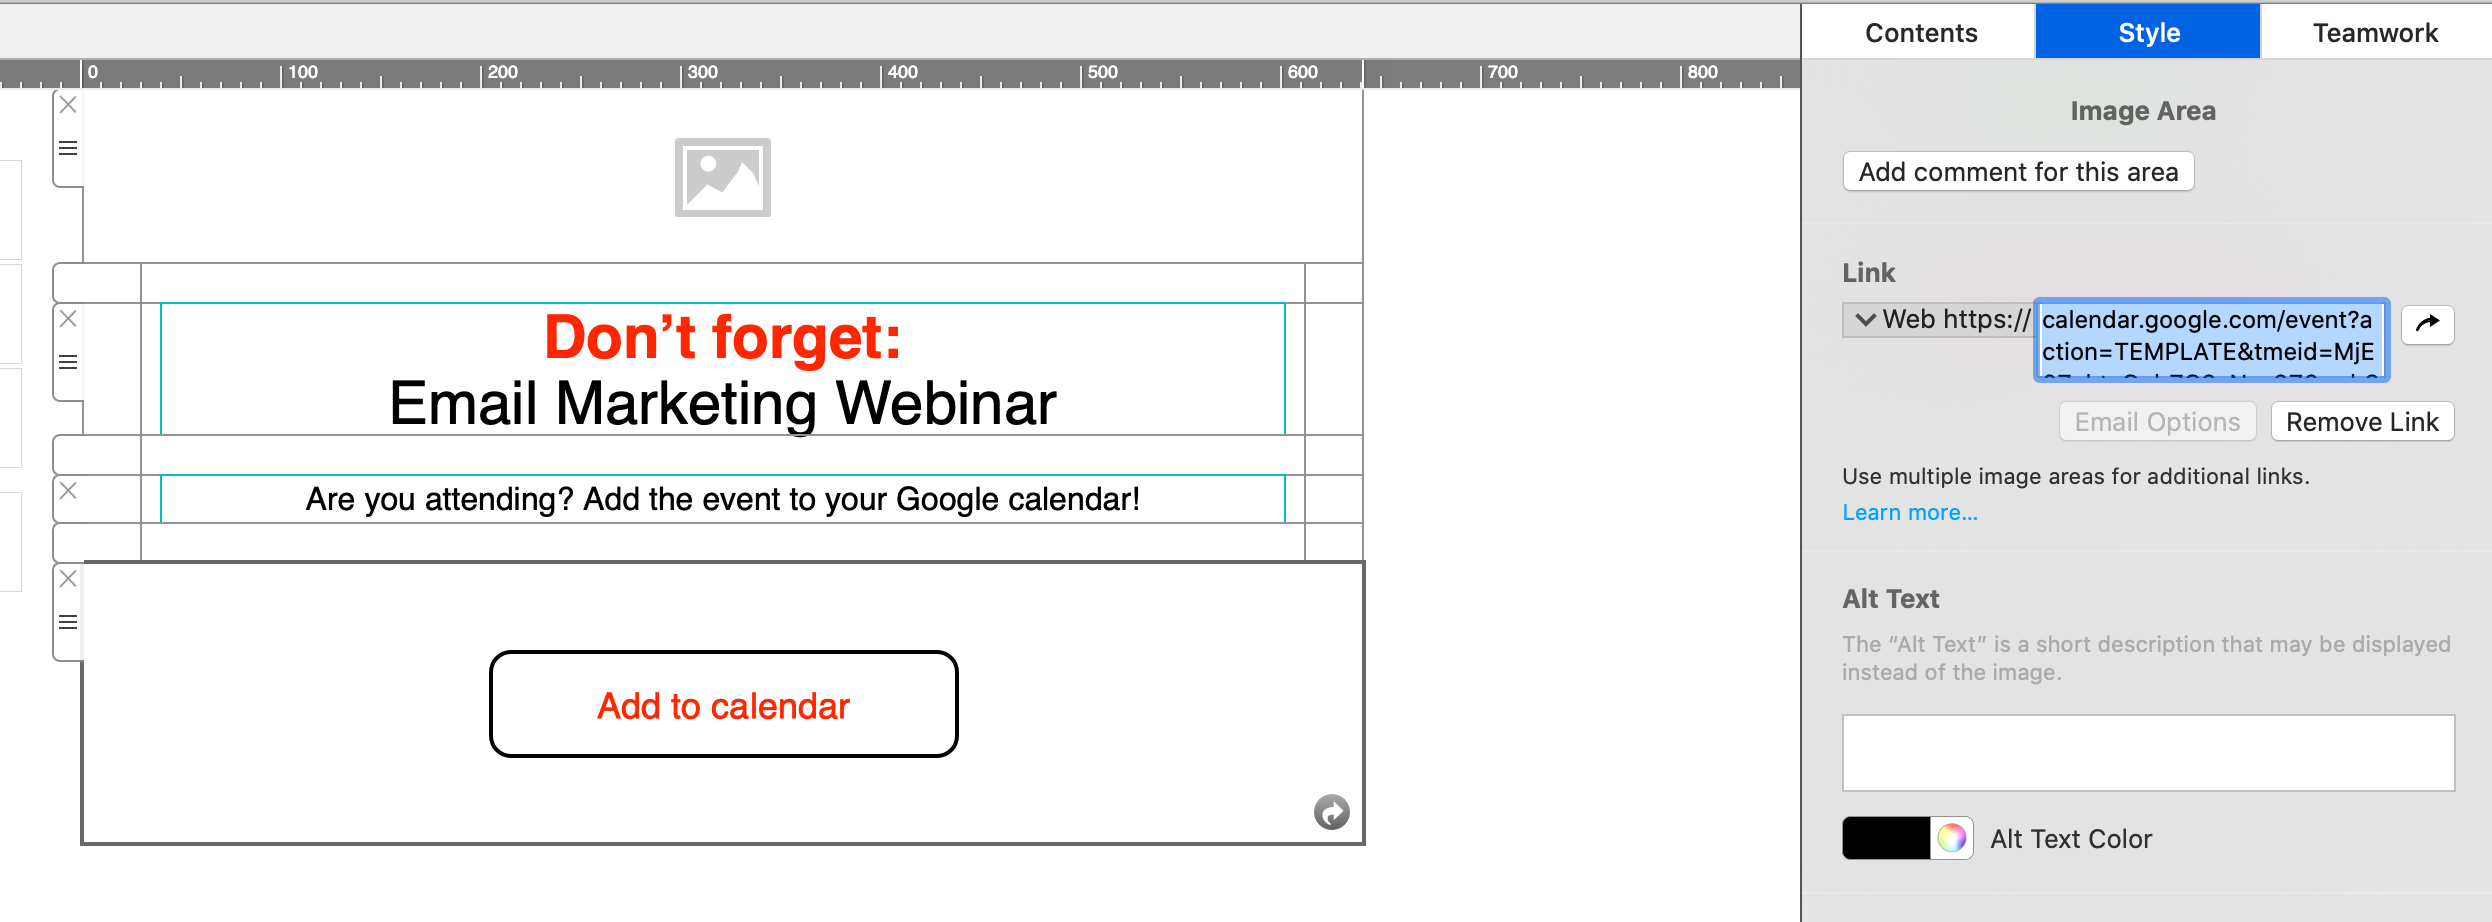
{S_1191}

Apple and Outlook Calendar


For Apple and Outlook calendars, you will need to create an .ics file for the calendar event.

Simply set up your event in the calendar, then drag it on to your desktop to create the file:
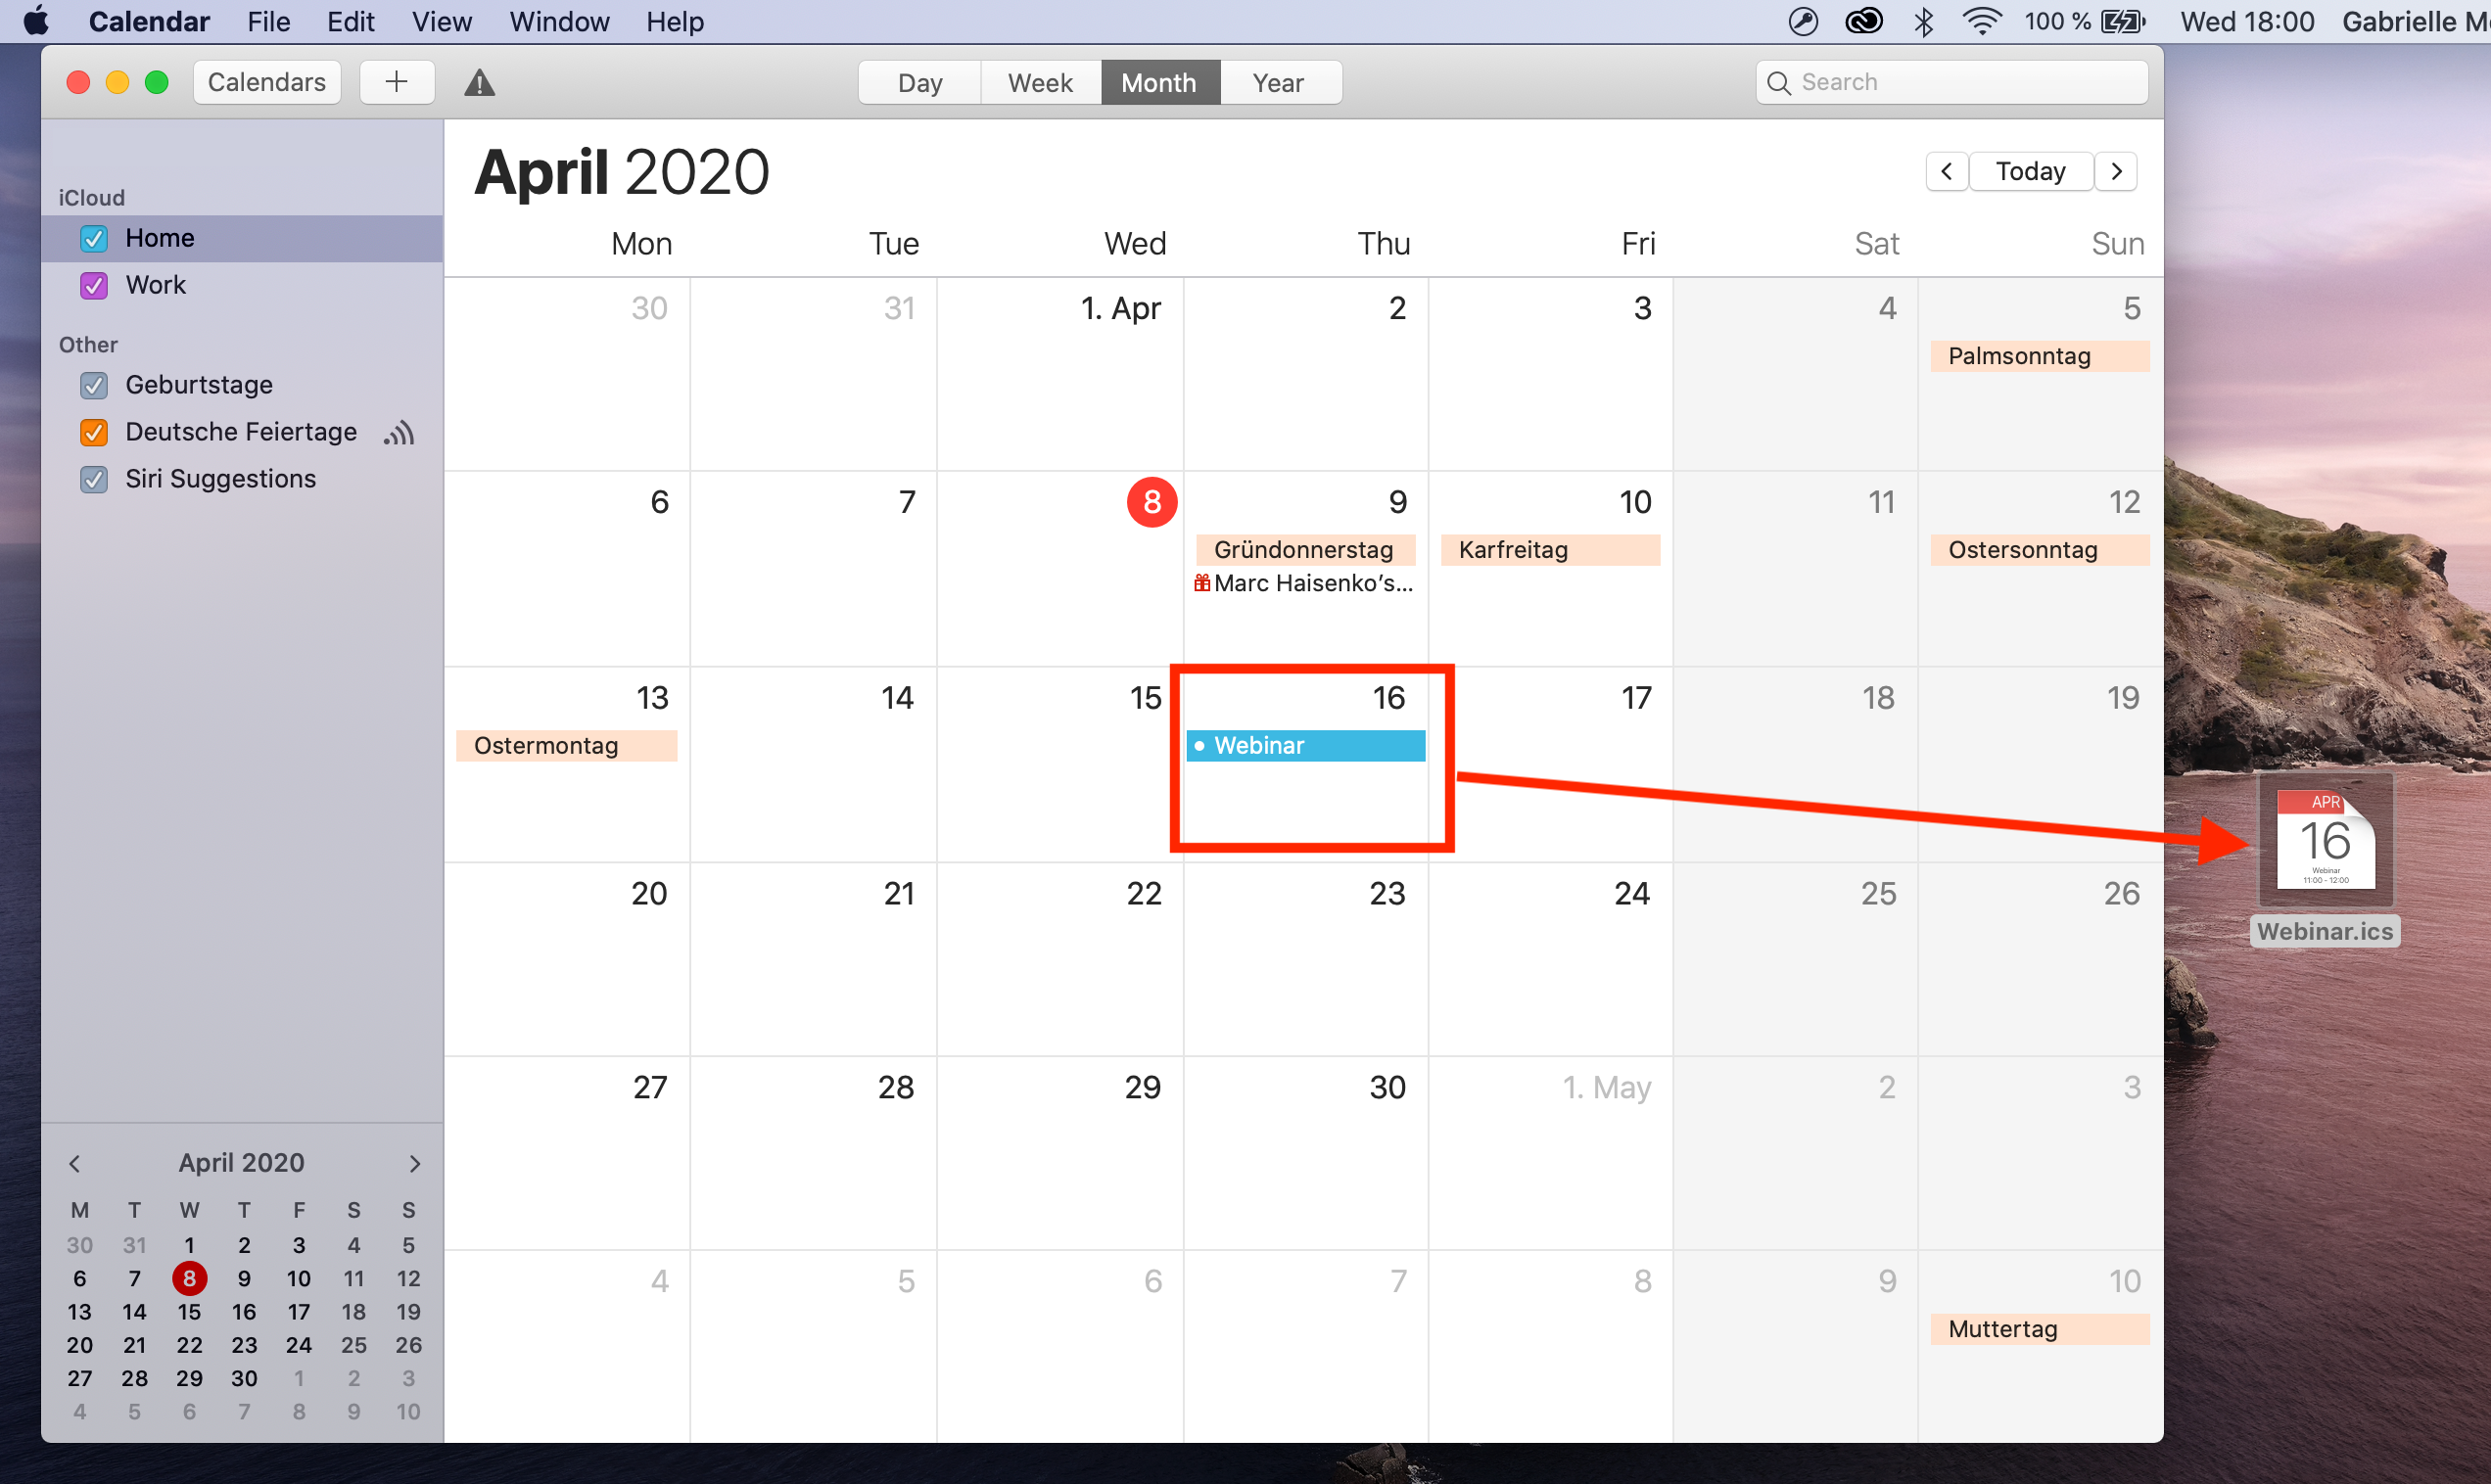
{S_1192}

Now, upload the file to an online file hosting service (in this example, we will use Google Drive.) Right click the file to create a shareable link which you can insert into your email design:
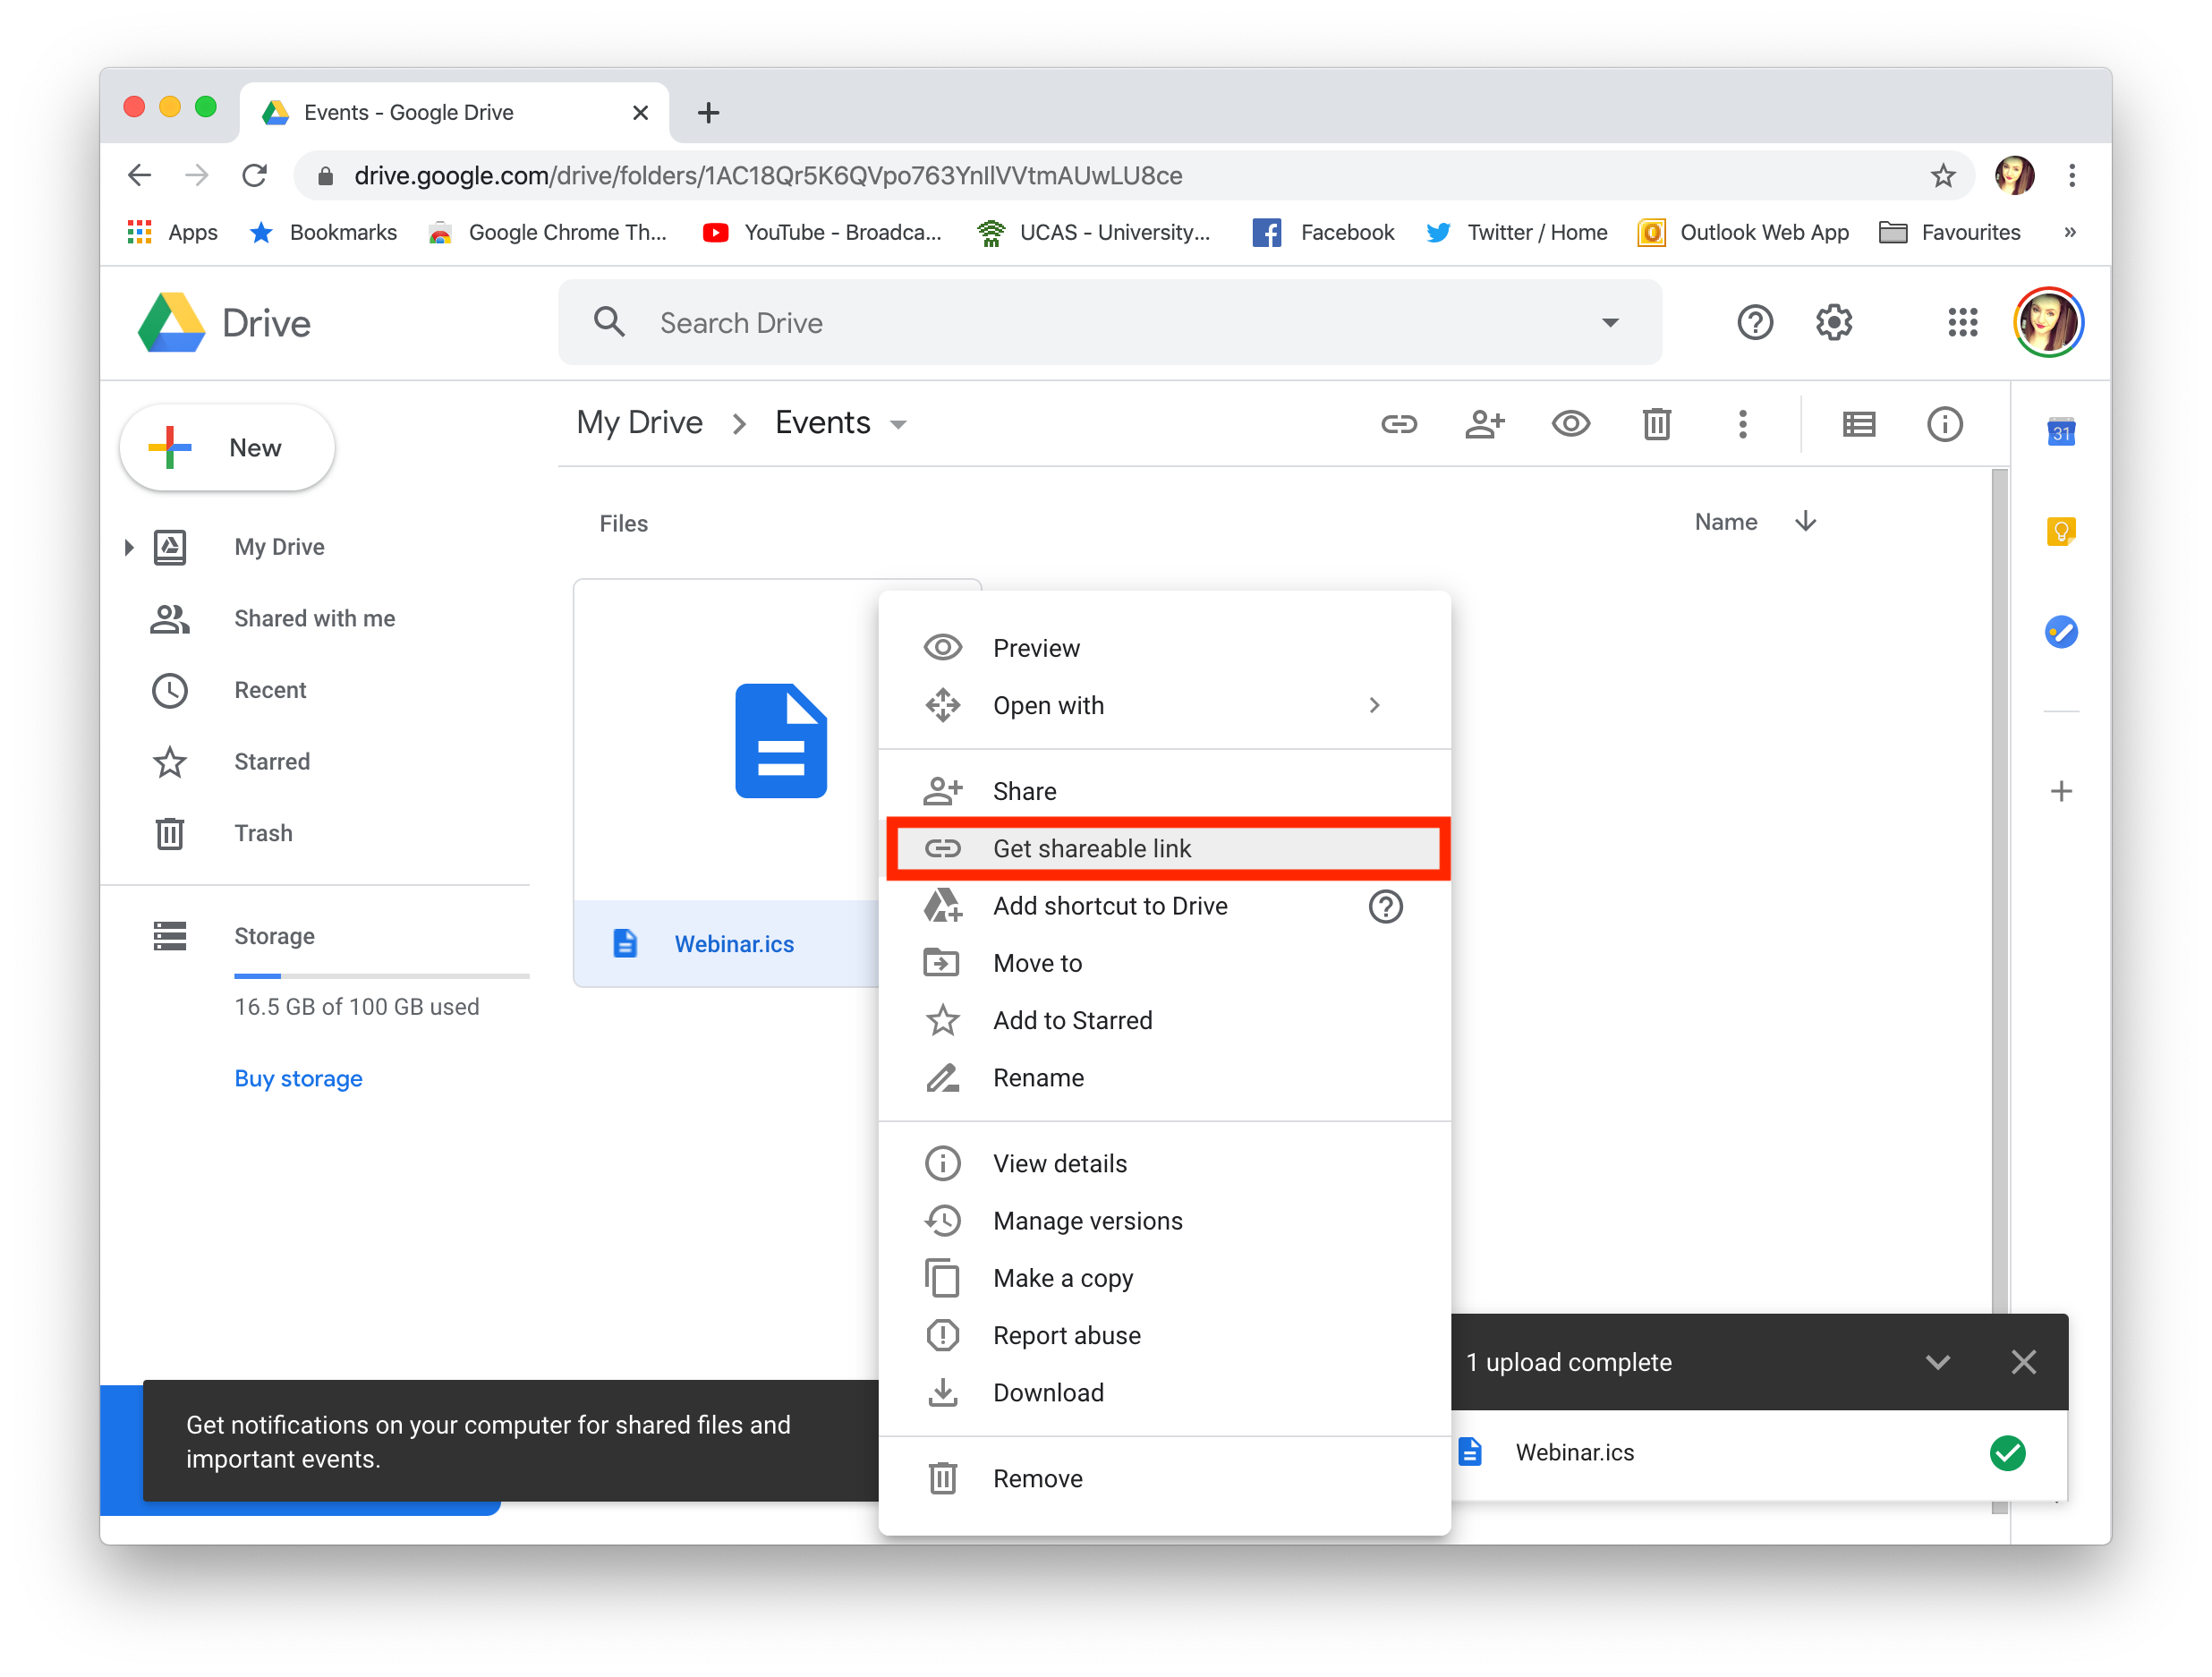
{S_1193}

Remember to set the file to public if you are sharing it:
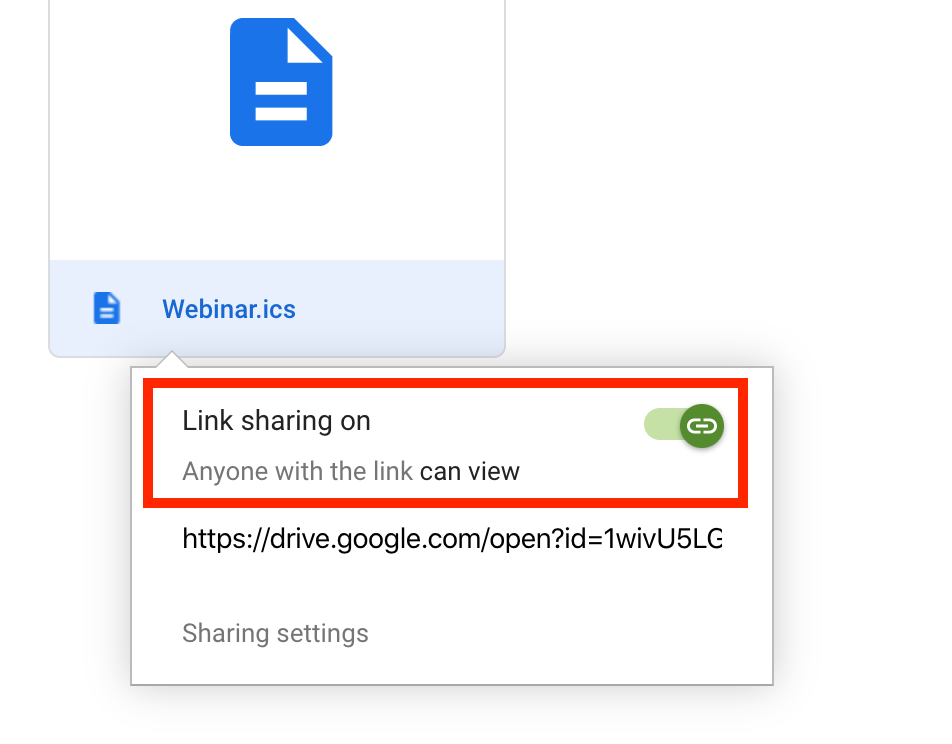
{S_1194}

You can now send a link to the calendar event to your subscribers, who can simply download the .ics file to add to their own calendar.

Tip: This tool is another great way of creating custom add to calendar links. Fill out your event's details and select the calendar service you wish to generate a link for (i.e. Google, Office 365, Outlook or Yahoo.) You can then copy the result to use in your Mail Designer 365 design.
Adding rounded corners to the background of a text area is not supported directly. However, to create this effect, drag a quadrilateral into an image area. You can find this shape under the "Basic Shapes" category.
{S_892_50%}

Adjust the size of the image area as well as the size of the shape to fit your needs. You can also change the color of the shape. On right side, you can adjust the corners by moving the corner radius slide.
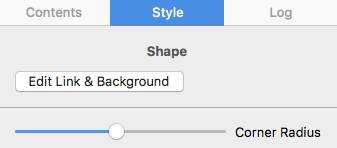
{S_893_50%}

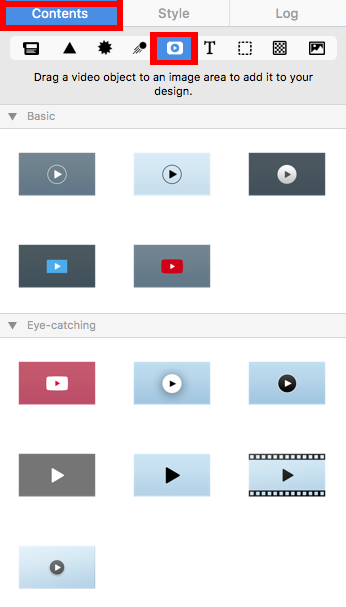
Then, drag a text object into the image area to create a text box effect. You can find text objects under "T" icon within the "Contents" tab. Feel free to position the text box and change its font style, font weight, font size, font color, etc. to fit your needs.
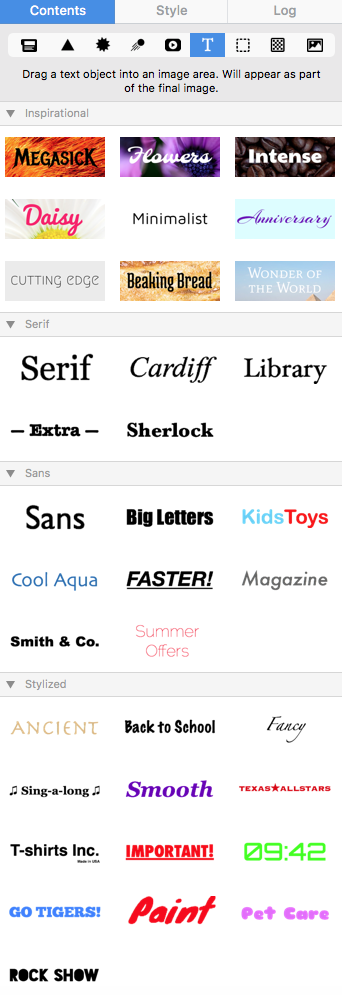
{S_894_40%}

Please refer to the following page for further information on how to create the effect of having rounded text box corners:


Quick summary of what to avoid when using Unsplash photos:


    people's faces are recognizable (unless you can get model release of those people)
    photos that show logos, trademarks, brands
    images that put people in a bad light
    photos of private property (e.g. private homes and buildings)


Is the Unsplash license the same as the CC0 license?


When it comes to using images that you did not take, create, or do not own, you should stay mindful of the laws and licensing types that guide images. Many image libraries are published under "CC0,” which means “no rights reserved." A CC0 license is also a way for photographers and artists to publish their work and give permission to the public to use their work for free.

Curators who publish their works under CC0 and waive copyright of their works place them for public use. An image that has CC0 that carries this designation has “No Rights Reserved” and is free of copyright restrictions, and likely other restrictions (i.e., moral, publicity, and privacy rights). This is a very broad designation and it is clearly understood within the Creative Commons community that no work carries this designation unless it is explicitly marked as a CC0 work. As a result, anyone can use them, edit them, etc. without restriction of copyright law.

Unsplash is similar to a CC0 license with one difference: the Unsplash license does not include the right to compile images from Unsplash and then use them to create a similar or competing service.

While the Unsplash license give people a lot of freedom, keep these exceptions in mind before using an image:


    Are people’s faces identifiable? If they are, you will require their individual consent – and not just the consent of the artist or photographer who took the picture. Only use these photos if you are able to get model release from each person whose face is showing on the image.

    Does the photo show people in a negative way or can be interpreted in a negative way? If yes, then avoid using these photos. Otherwise, you will need to get model release from each person whose face is showing on the image.

    Does the picture show other products, trademarks, or logos? Refrain from using these types of photos because they may suggest that the other brand or product is endorsing your product or service.

    Do you see landmarks, buildings, homes, automobiles, etc. that are actually private property within the photos? If yes, avoid these pictures unless you can acquire the permission of the owner of the private property. Make sure that the photos you use do not show valuable information about other people's property like the address, license plate, etc.


The Unsplash license and the CC0 license have these in common:


    ‣ They are both sub-licensable (so you can use them)
    ‣ They are non-revocable, which means that you are able to use them forever.
    ‣ They allow users to use the photos for free.
    ‣ They allow you to modify and/or distribute, perform the photos for free.
    ‣ They allow users to use the images for personal and commercial purposes.
    ‣ They do not require attribution, although it would be nice.


Although you are not legally obligated to follow the list below, these are still good practice suggestions:


    ‣ You can use Unsplash photos for commercial use. However, try to edit or add to the photo creatively through image editing or other methods.
    ‣ Unsplash photos are non-revocable. However, if a photographer decides to remove his or her photo, it is good practice that you respect the photographer's wishes and refrain from using the photo.


To get more detailed information, please make sure you read the terms and conditions of Unsplash here.
Generally speaking, you should only have to log in to Mail Designer 365 when you first install the app (to ensure this is the case, we would always recommend that you have downloaded the latest version of Mail Designer.)

However, despite this, it can sometimes be the case that your Mac doesn't store your login details in the Keychain. To manually fix this problem and stop the app prompting you to sign in every time you open it, please do the following:

  • Quit the Mail Designer 365 app.
  • Open the "Keychain Access.app"
  • Search for "Mail Designer" using the search field in the upper right corner of the window.
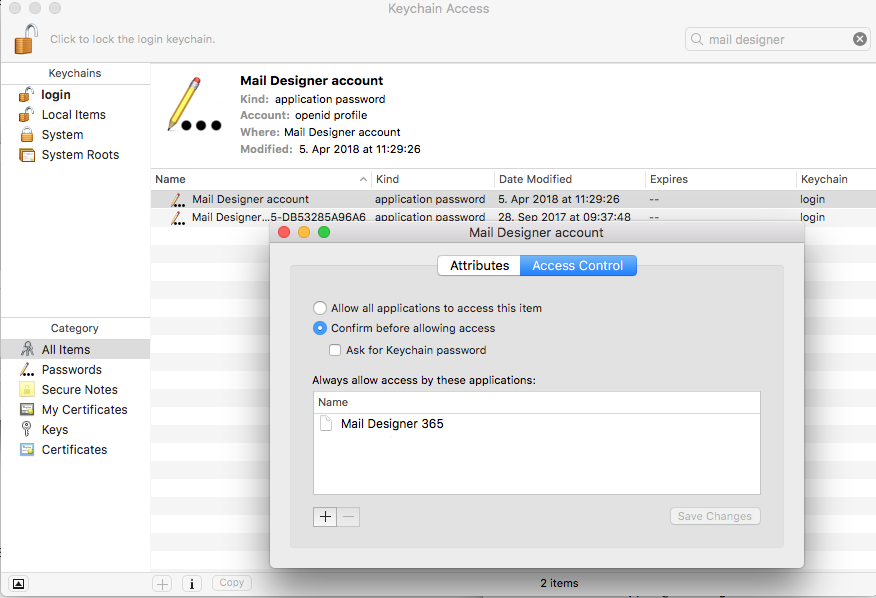
  • Here you should find the entry "Mail Designer account." Double click on this entry to get details.
  • Go to the "Access Control" tab and check to see if Mail Designer 365 is located under the "Always allow access to these applications" list.
  • If you cannot see Mail Designer 365 on the list, please press the "+" underneath the list, find Mail Designer 365, and add it.
  • Restart the app and login if prompted.

{S_1093}

Your login details for Mail Designer 365 should now be stored on your Mac. If you are still experiencing problems, please send us your debug logs and let us know via support@maildesigner365.com.

If you're trying to set up your email account in Mail Designer 365 and your password is being rejected, you may need to set up an app-specific password.

What is an app-specific password for? Many email providers now require a separate password to be used in 3rd party apps, in order to increase your overall account security. This may be required, even if you do not use 2-factor authentication to sign in to your email.

This means that you may need to create a separate password and use that in Mail Designer 365 in order to send emails directly from Mail Designer 365.

Please refer to your email provider's security or account settings, or visit your email provider's help pages on how to set up a 3rd party email app.

Links for selected email providers

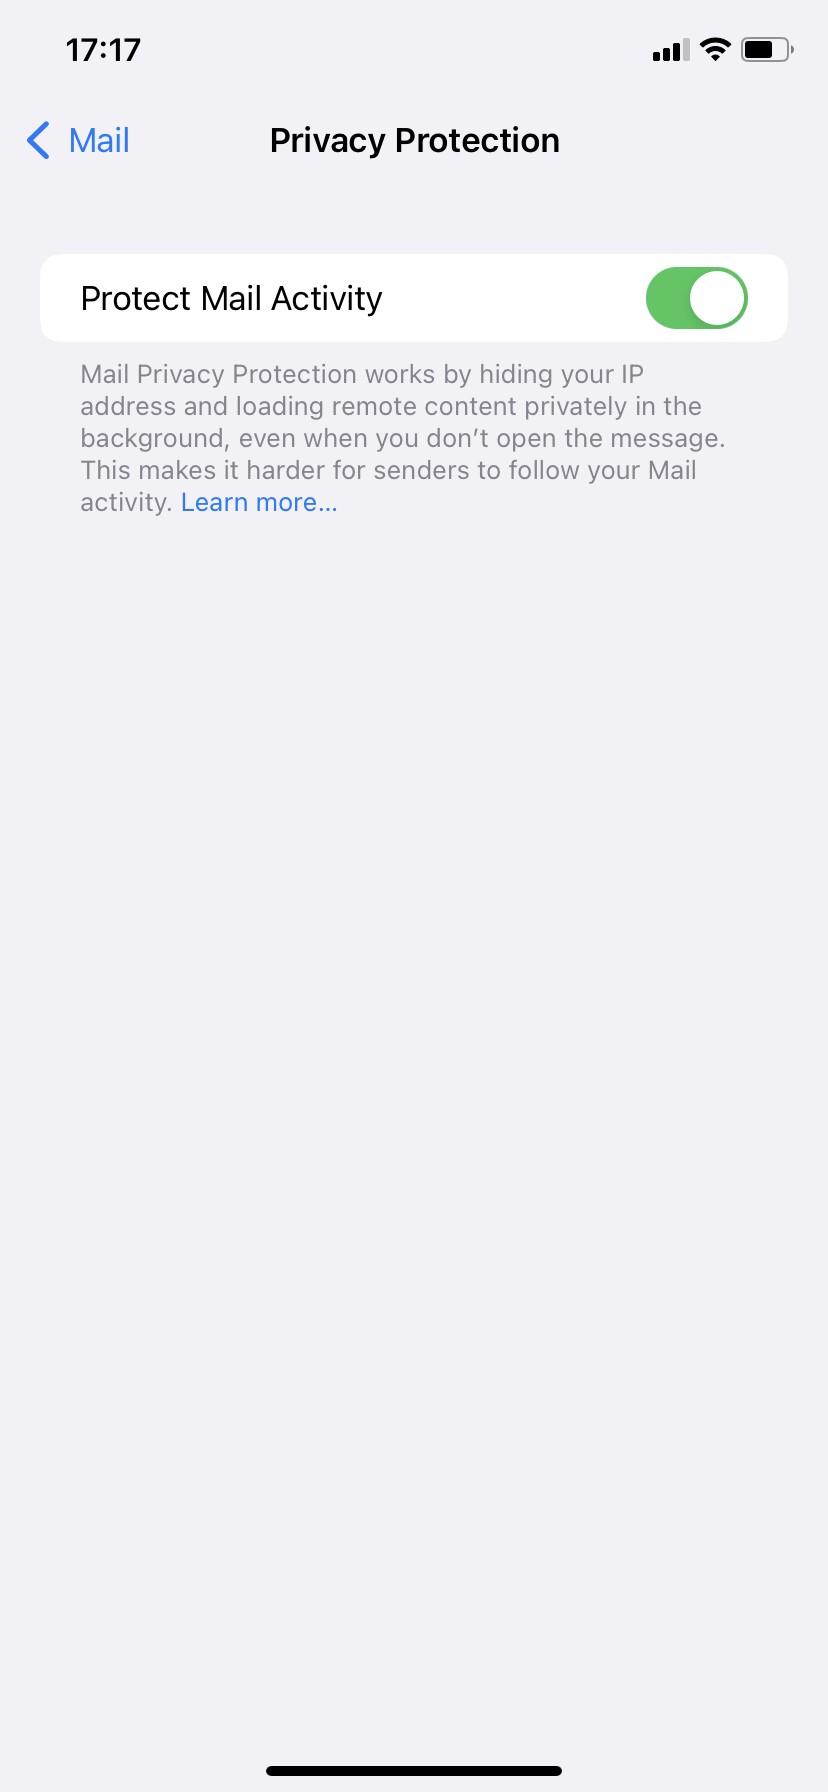
iOS 15 introduced new privacy features, including one big change called 'Mail Privacy Protection'. When enabled, all images are loaded via Apple's proxy servers to mask the recipient's IP address.

In our testing, this has occasionally caused certain mail images to not load correctly at all (you should see a hint at the top of the Mail app):
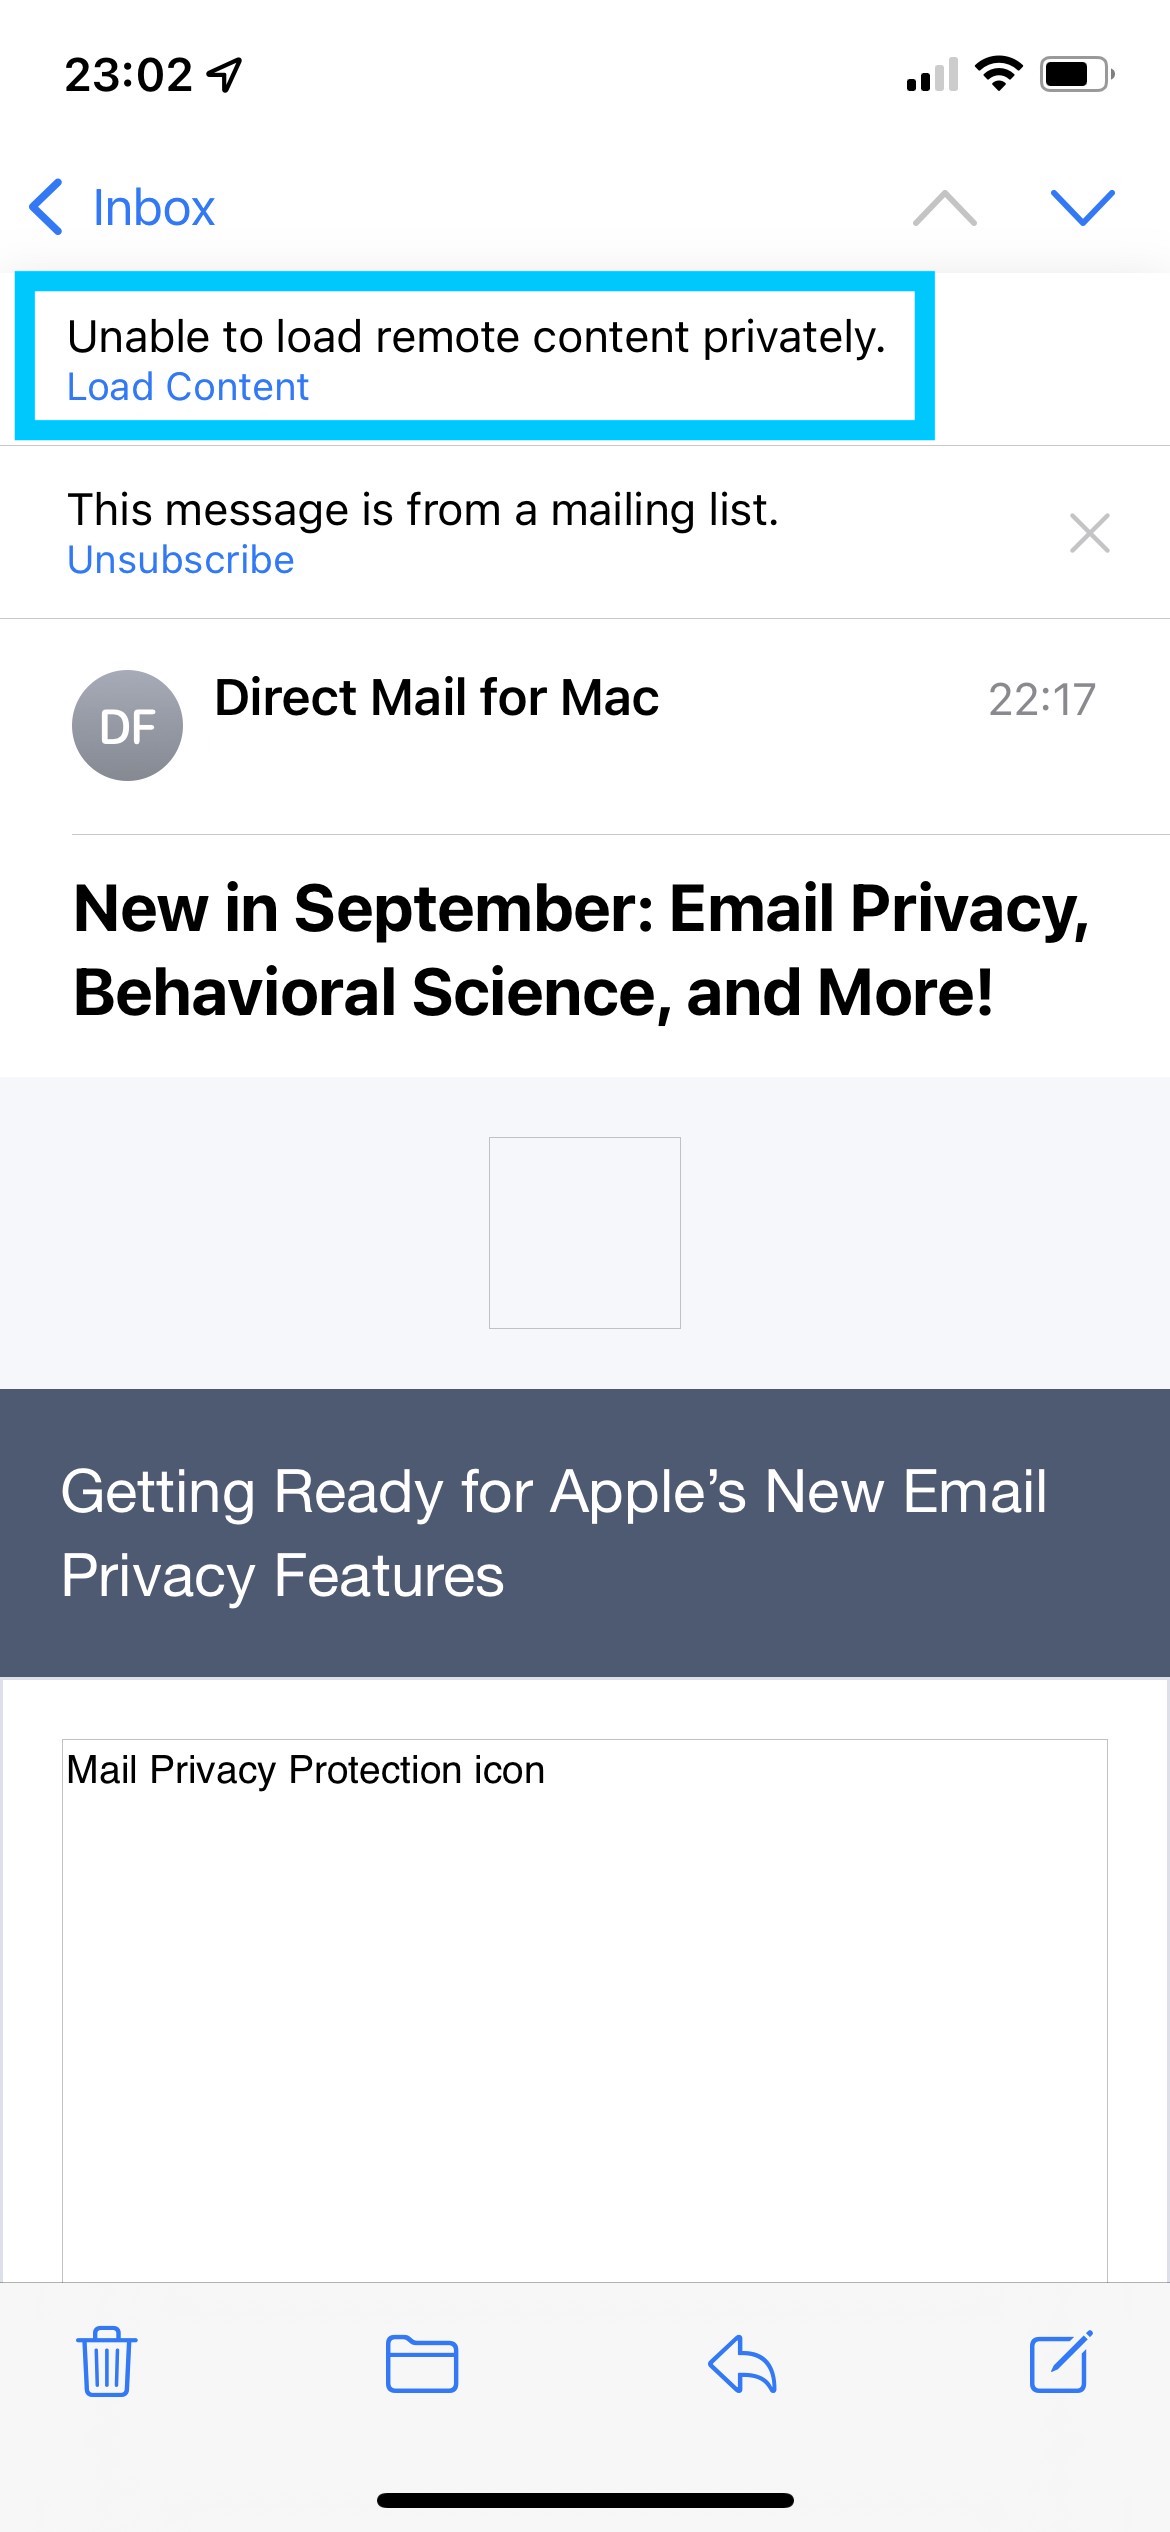
{S_1285_50%}

If you are unable to load the images in your email, try deactivating this feature and sending your email again.

To deactivate Mail Privacy Protection, open the Settings app on your iPhone, and choose Mail > Privacy Protection > Protect Mail Activity
{S_1286_50%}
You are only allowed to add one link per image area.

{S_847}

However, if you want to create the effect of having one image with multiple links, then check out our video tutorial:

Watch our video tutorial here:


{YOUTUBE_zKnpE88y8Tc}

Also, please refer to the following page for a step-by-step guide on how to create the effect of having one image with multiple links:

To send your first email campaign, you first need to set up your email address and domain, so it's ok for Mail Designer 365 Delivery Hub to send emails on your behalf.

There are a few technical steps involved during setup. These steps are crucial, as leading email service providers will check that DKIM, SPF and DMARC authentication are configured in order to prevent spam.

Rest assured we've done all we can to make the setup process as simple and fuss free as possible for you. We recommend that you add all three methods to your domain so that your emails reach all recipients. If you require assistance at any point, reach out to your IT admin or get in touch with our support team.

Ready? Let's get started!

Step 1: Add and Verify your Email Address

Before you start, make sure that you have already set up a Mail Designer team. (If you have not done so already, check out our easy team setup guide).

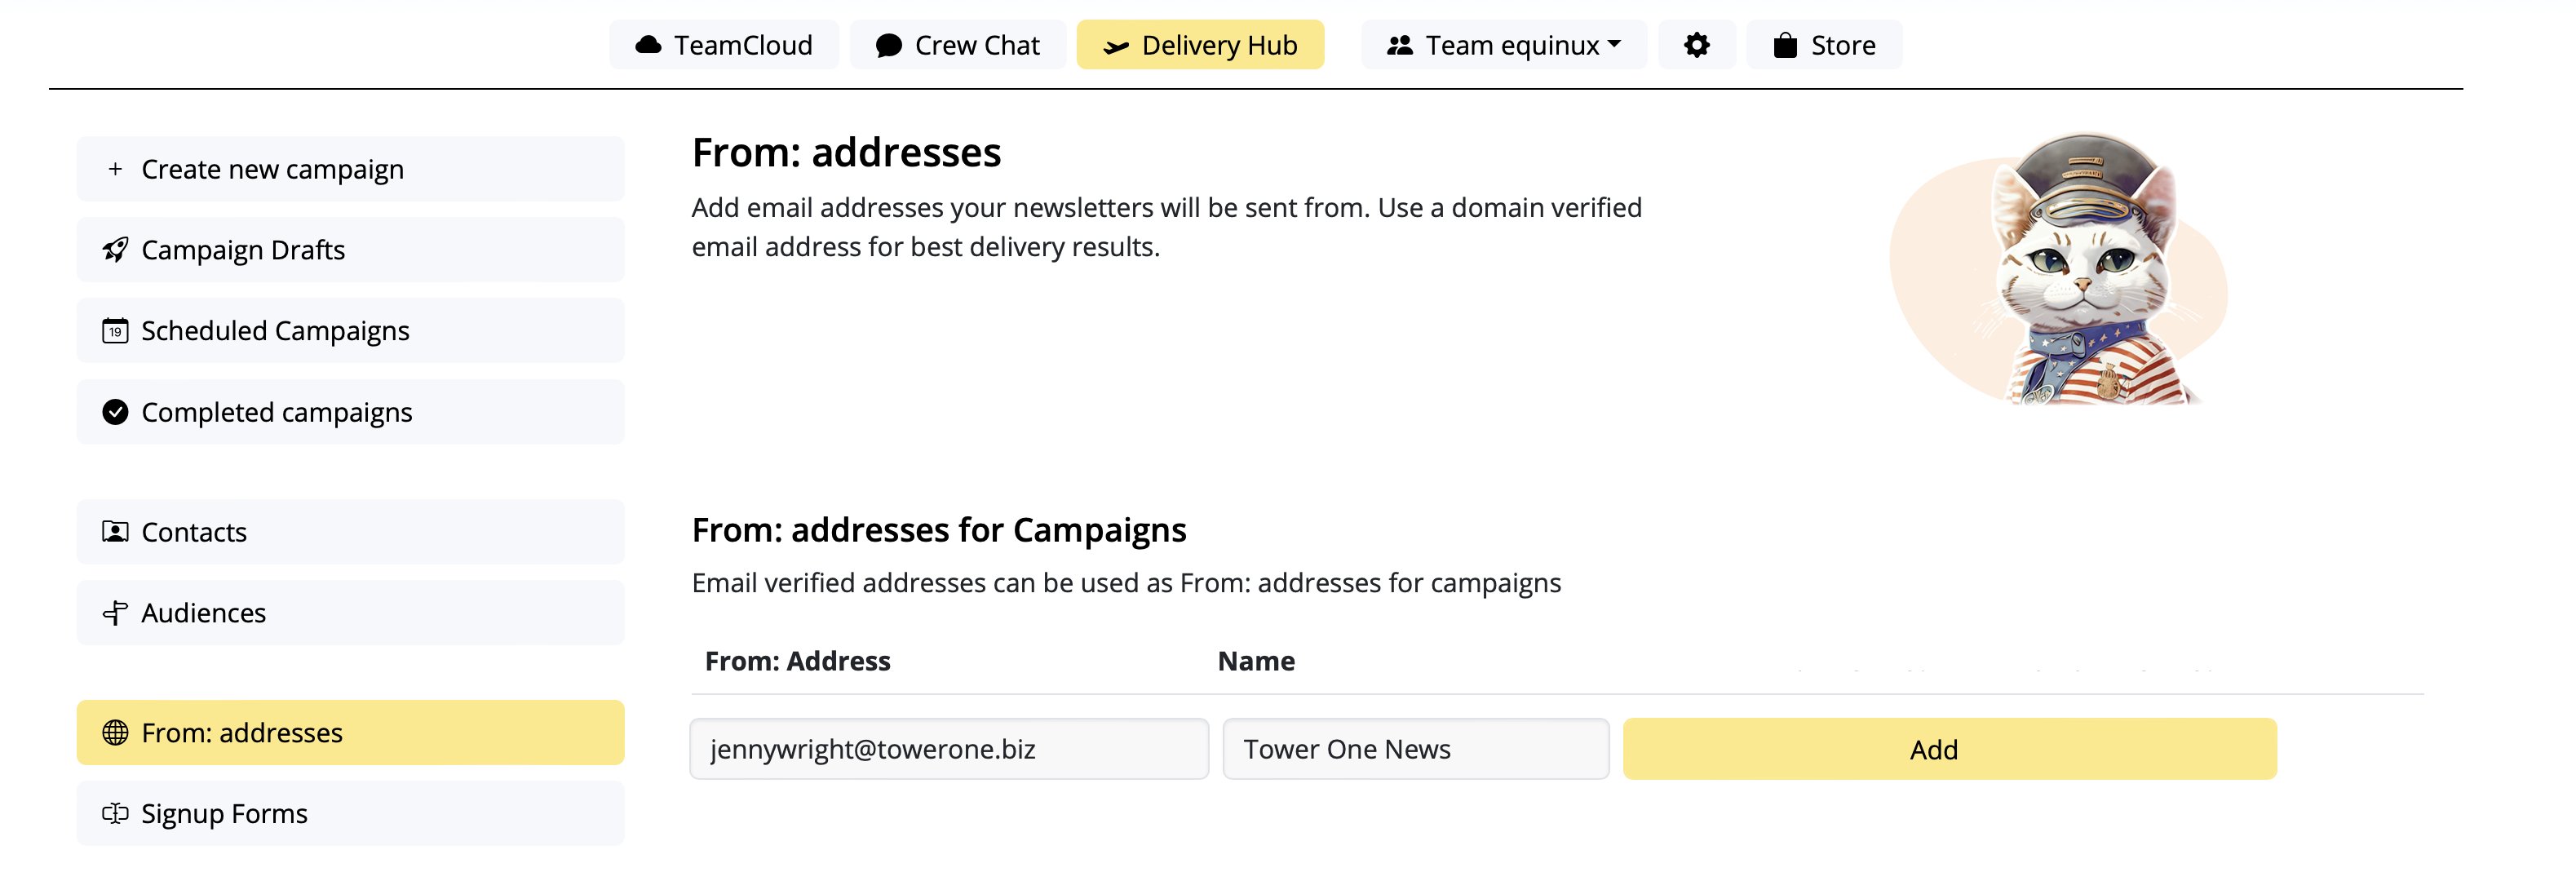
  • Go to Settings > "From: addresses"
  • Under "From: addresses for Campaigns", add a new sender by entering the "From Name" and email address your campaign will be sent from

  • {S_1363_75%}
  • You'll now receive a verification email. Click the link to confirm you own the email address:
  • {S_1364_75%}

    {S_1365_75%}

Step 2: To avoid to get marked as spam: Set up DKIM

For this you'll need to create a DNS entry for DKIM (DomainKeys Identified Mail) (more details about DKIM and why it's essential. You should definitely set up DKIM if you want to avoid your mailings ending up in the spam folder.

  • Stay in "From: addresses" and scroll down to "Domain verification". You will now see the domain for the email address you just set up
  • Now it's time to determine the DNS provider for your domain. Most likely, our system has already identified the provider and displayed it as a "Potential Provider," along with a link to the provider's guide. Tip: We've also compiled a list of links to setup guides for common providers in this article.
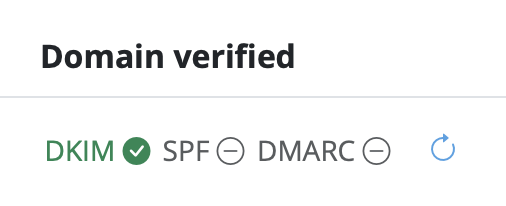
  • Click on the "DKIM" icon in the "Domain verified" column:

  • {S_1366_75%}
  • A DKIM record will be generated for your domain, along with the necessary type, name, and value of the record. Please use the exact information shown to set up the DNS record (including any special characters such as " or . ).

  • {S_1367_75%}
  • Depending on your DNS provider, it may take up to 48 hours for the changes to propagate. Delivery Hub will periodically perform automatic checks. Alternatively, click the refresh icon to update results in real time:

  • {S_1368_75%}
  • Once you've completed the setup, and the verification is successful, you'll see a green checkmark next to the DKIM icon:

  • {S_1369_50%}

Step 3: To avoid to get marked as spam: Set up SPF

Now, let's ensure your emails are properly authenticated with SPF (Sender Policy Framework), which prevents email spoofing (more details on SPF).

  • Go back to your domain under "Domain Verification" and click "SPF":

  • {S_1370_75%}
  • Next, go to your DNS provider and create an SPF record for your domain. The exact steps vary depending on your provider, so follow their guidelines.
  • Note: If you or your company have already created an SPF record, our system will try to include the required part and display the full record value respecting your previous content. If you feel confident and know what you are doing, you can also manually edit your existing record and add the following part: include: spf.welovemails.com.
  • Once the verification has successfully completed, you'll see a green checkmark next to the SPF icon:

  • {S_1371_50%}

Step 4: Set up DMARC

Although not mandatory, setting up DMARC (Domain-based Message Authentication, Reporting, and Conformance) is recommended to add an extra layer of security to your emails (more details on DMARC).

  • Click on the "DMARC" icon under "Domain Verification":

  • {S_1372_75%}
  • Then, create a DMARC DNS record for your domain
  • Feel free to use the suggested record, or your own values. If you're unsure, check your organization's policies or ask your IT team
  • Just like with SPF and DKIM, once the DMARC verification has successfully completed, you'll see a green checkmark next to the DMARC icon:

  • {S_1373_50%}

Congratulations! You've now set up and verified your from address and can start sending email campaigns to your audience.

In certain browsers - for example, Google Chrome - mixed http and https content is blocked by default. This can cause images to not be displayed.

At the moment, Mailchimp are serving the images exported from Mail Designer 365 over http. If your browser blocks mixed http and https content on web pages, this will explain why you are unable to see the images when you preview your templates via the Preview Mode.

We are aware of this issue and are currently working with the Mailchimp team to get it rectified.

Workaround
As a workaround, you can update your browser preferences to allow mixed content or switch to a different browser such as Safari, which by default allows mixed content.
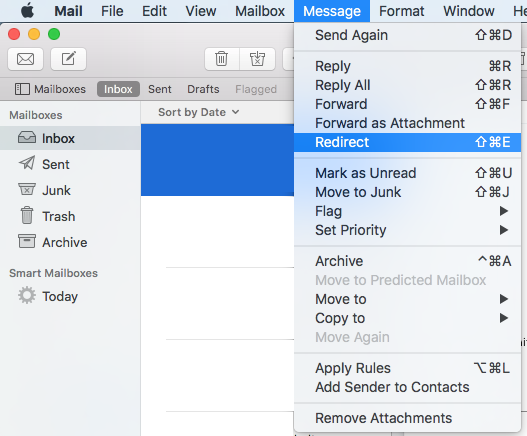
Whenever you want to forward your email newsletter, please make sure to use your mail client's "Forward as Attachment" or "Redirect" feature. This ensures that the email design is forwarded and not modified. Refrain from using the forward button that you typically use to forward emails. The normal forwarding can break the email template.

What happens when you use the normal forwarding button is that the mail client will need to modify the email newsletter, so you, the user, will be able to add your own content. This typical whenever you forward a message - the forward action will prompt the mail client to give you space to write an additional message to the person you are forwarding the email to. Unfortunately, with this process, most mail clients can break the email layout and there is nothing we can do to prevent that from happening. So when you want to forward your email template to someone, our best email design practice is to use your mail client's "Forward as Attachment" or "Redirect" feature.
Mailchimp have recently updated their image upload API, which has resulted in some compatibility issues when uploading email designs from third party services.

What can I do?
The latest Mail Designer 365 version includes support for the new image upload API. Templates uploaded using this version will not be affected.

What about older email templates?
If you need assistance with older designs that you've previously uploaded to Mailchimp and are now not working, please contact the Mailchimp team directly to report the problem. We generally suggest to re-upload the old template.

Older Mail Designer versions
Mailchimp no longer supports older versions of Mail Designer, such as Mail Designer 2 and Mail Designer Pro 2. For this reason, if you try exporting a design created using an older version of Mail Designer, you may notice that images are missing from your design.

To ensure compatibility with Mailchimp and other leading email service providers, you should consider upgrading to Mail Designer 365.
We're pleased to announce the latest Mail Designer 365 version offers support for macOS Sequoia, so you can upgrade your Mac to macOS 15 and continue using Mail Designer 365 as usual.

Download the latest Mail Designer 365 version here.
Like many other email clients today, AOL require app-specific passwords when setting up your AOL email address in another app or service.

If you want to use your AOL email account to send email designs via Mail Designer 365, you will need to generate a special password. Here's how:

  1. Log in to your AOL account and go to your account settings
  2. Go to the "Account Security" tab and choose "Manage app passwords."
  3. From the dropdown menu, select "Other" and give the app a name (i.e. Mail Designer 365)
  4. Click "Generate" to create a new password. This will appear on your screen

{S_1240_70%}

This password you have just created is the password you will need to use to set up your AOL account in Mail Designer 365.

We have put together a list of the best known providers including a link to the corresponding DNS setup guide.

If you cannot find your provider in the list please do not hesitate to contact our support team for assistance.

Domain Name DNS Setup Guide
1&1 IONOS https://www.ionos.de/hilfe/domains/txt-und-srv-records-konfigurieren/txt-records-hinzufuegen-aendern-oder-entfernen/ (de)
123-reg (GoDaddy) https://www.123-reg.co.uk/support/domains/how-do-i-set-up-a-txt-record-on-my-domain-name/
Amazon AWS Route53 https://docs.aws.amazon.com/Route53/latest/DeveloperGuide/resource-record-sets-creating.html
Bluehost https://www.bluehost.com/help/article/dns-management-add-edit-or-delete-dns-entries
Cloudflare https://www.cloudflare.com/learning/dns/dns-records/dns-dkim-record/
Domain.com https://www.domain.com/help/article/dns-management-how-to-update-txt-spf-records
Domaindiscount24 (Key-Systems GmbH) https://support.domaindiscount24.com/hc/de/articles/4409774008593-Wie-erstelle-ich-einen-TXT-Record-- (de)
domainfactory GmbH https://www.df.eu/de/support/df-faq/domains/nameserver/#accordion-1384 (de)
EuroDNS https://help.eurodns.com/s/article/how-do-i-add-a-txt-record
Fasthosts https://help.fasthosts.co.uk/app/answers/detail/a_id/9
Gandi.net https://docs.gandi.net/en/domain_names/common_operations/dns_records.html#editing-your-dns-records
GoDaddy https://au.godaddy.com/help/add-a-txt-record-19232
Google Workspace Admin https://support.google.com/a/answer/180504
Hetzner Online GmbH https://docs.hetzner.com/dns-console/dns/manage-records/managing-txt-records/
Host Europe GmbH https://www.hosteurope.de/faq/domains/verwaltung/nameserver-eintraege/ (de)
Hostinger https://support.hostinger.com/en/articles/4469063-how-to-add-and-remove-txt-records-in-cpanel
INWX GmbH & Co. KG https://kb.inwx.com/en-us/3-nameserver/107-wie-richte-ich-einen-txt-eintrag-ein
Microsoft https://learn.microsoft.com/en-us/defender-office-365/email-authentication-dkim-configure?source=recommendations
Name.com https://www.name.com/support/articles/115004972547-adding-a-txt-record
Namecheap https://www.namecheap.com/support/knowledgebase/article.aspx/317/2237/how-do-i-add-txtspfdkimdmarc-records-for-my-domain/
Netcup GmbH https://helpcenter.netcup.com/en/wiki/domain/dns-settings
Network Solutions https://www.networksolutions.com/manage-it/dns.jsp
OVH https://help.ovhcloud.com/csm/de-dns-edit-dns-zone?id=kb_article_view&sysparm_article=KB0051668 (de)
Reg.eu (Openprovider) https://support.openprovider.eu/hc/en-us/articles/216648808-DNS-Records
Strato AG https://www.strato.de/faq/domains/was-ist-der-txt-record-und-wie-kann-ich-ihn-verwenden/ (de)
united-domains AG https://www.uniteddomains.com/faq/question/17
Variomedia AG https://www.variomedia.de/faq/Was-sind-TXT-Eintraege-und-wie-funktionieren-sie/article/361
World4You Internet Services GmbH https://www.world4you.com/faq/en/domains/faq.dns-records.html
Key-Systems GmbH (now part of CentralNic Group) Not available
InterNetworX Not available
Schlund Technologies GmbH (now part of GoDaddy) Not available
InternetX GmbH Not available
All Apple subscriptions are managed in iTunes.

This link will directly take you to your profile administration:

https://apple.co/2Th4vqI


You will find all running subscriptions under "Subscriptions." You can also disable the automatic extension of your subscriptions.
If your newsletter is very long, Gmail may cut off part of your content. There are a few things you can do to make the HTML document shorter:
  • In general, try to reduce the number of layout blocks used. Each layout block has a HTML structure that adds to the total size of your newsletter and by reducing the number of blocks you reduce the amount of space needed for these structures.
  • Avoid repeating blocks and try to find solutions for “merging” blocks. For example, don't add two or more consecutive spacer blocks. Instead, use just one spacer block and change its height accordingly.
  • Sometimes you can avoid using spacer blocks altogether, for example by adding the space to a nearby image block instead, using the “spacing before/after” feature in “Styles” or simply adding blank lines.
  • Instead of using several consecutive text blocks, use just one and style the paragraphs using the “Styles” feature.
  • Avoid detaching blocks (that is, avoid doing modifications that only affect the mobile or desktop version). A detached block results in two blocks in the document: one for desktop and another one for mobile, which uses more space than if the same block can be used for both mobile and desktop.
Creating a Mail Designer 365 Team is the first step towards achieving effective collaboration on email campaigns. All Mail Designer 365 teams benefit from exclusive features to help improve your campaign workflow.

To set up a team, head to your my.maildesigner365 account and sign in with your equinux ID and password.

New users are automatically created a team which you can start adding members to straight away.

The Settings icon takes you to your team's overview page:

{S_1346}

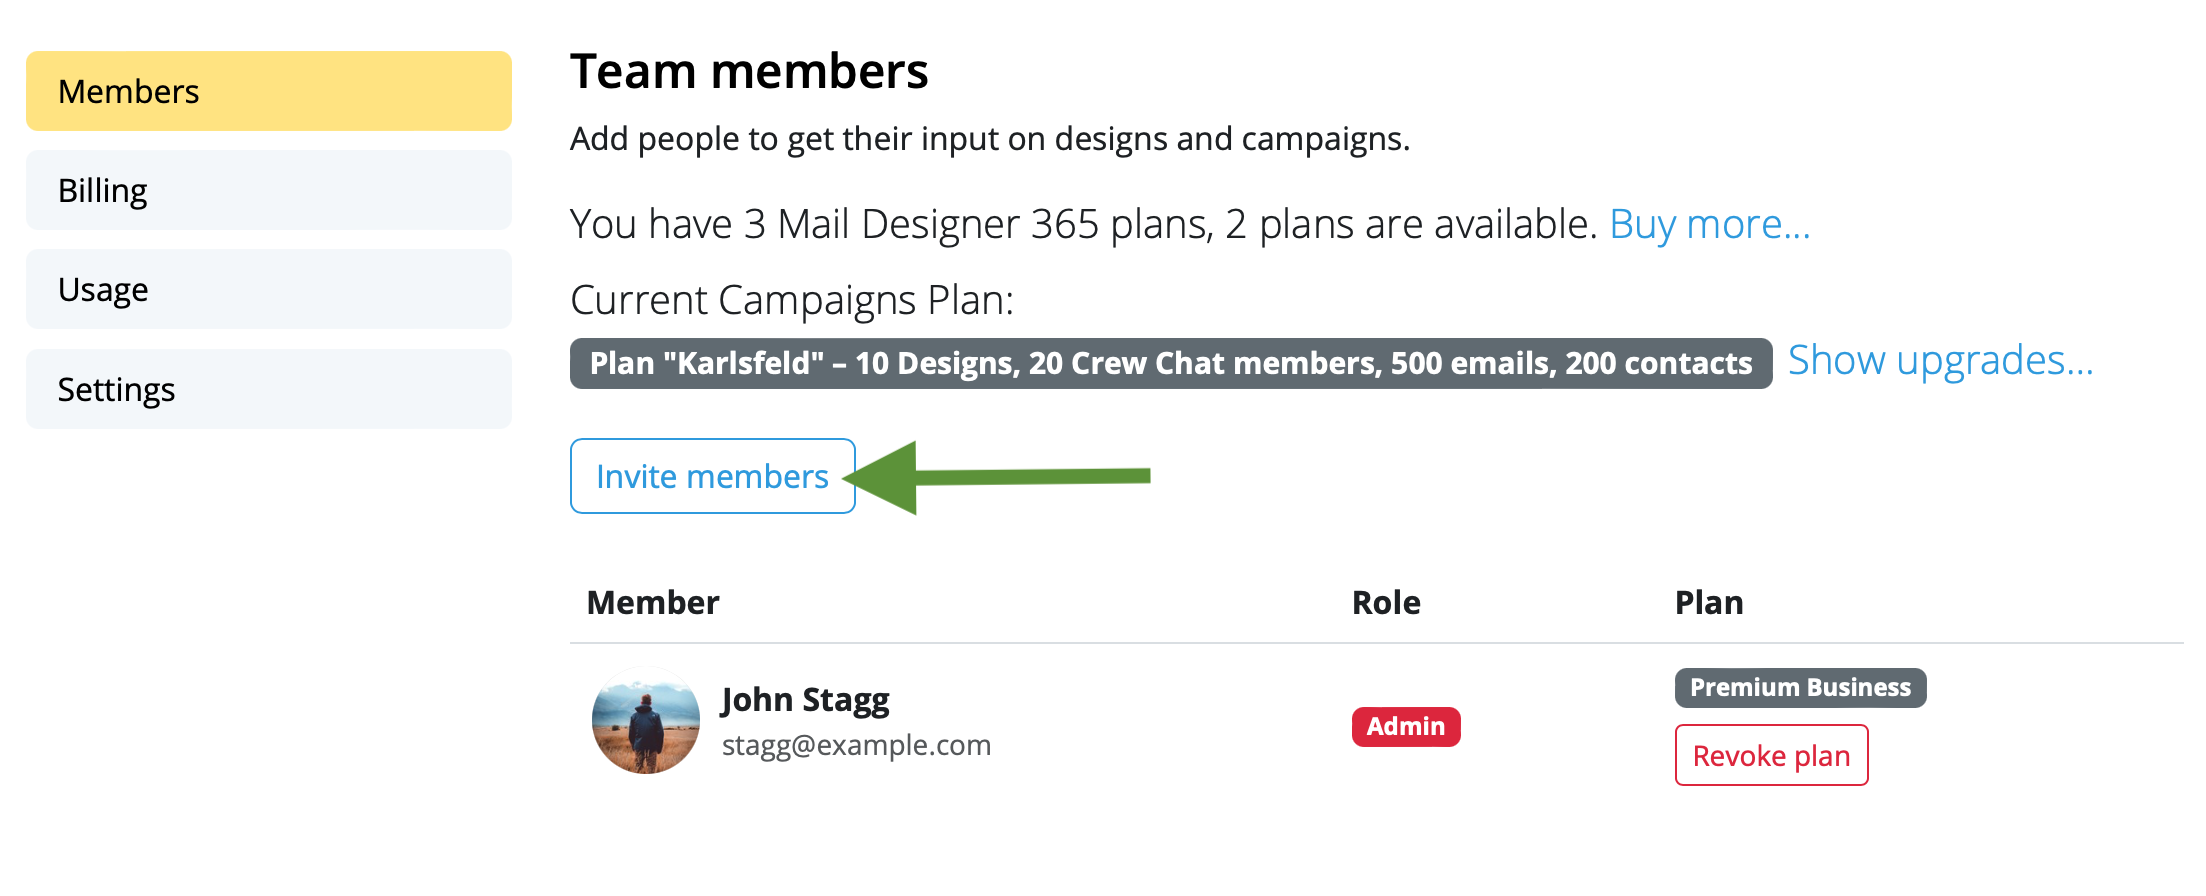
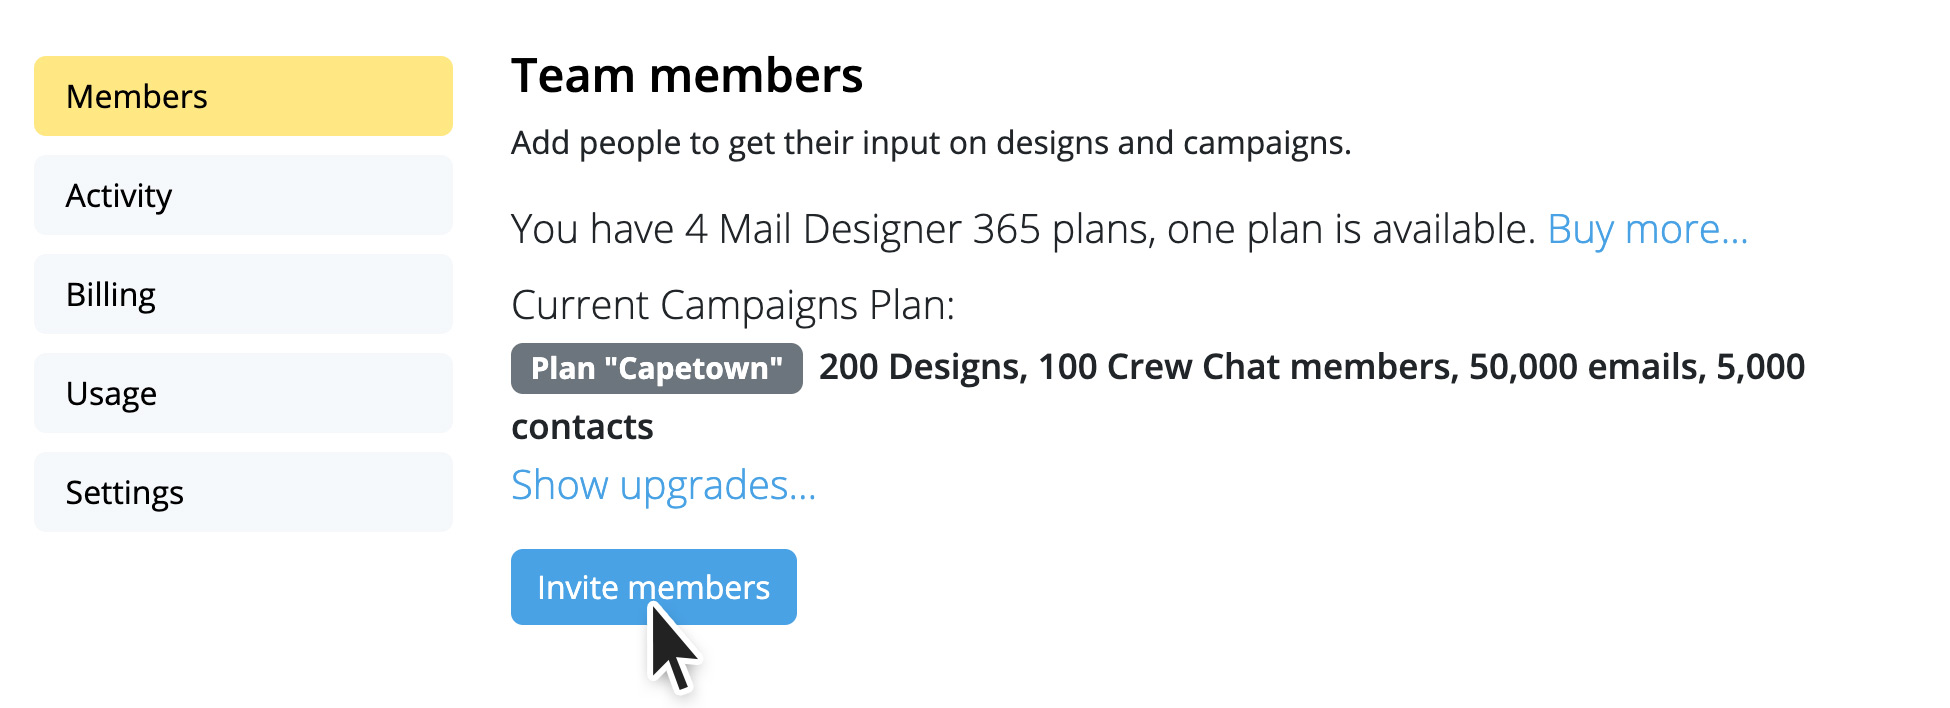
From here, go to the "Members" tab and click "Invite members."

{S_1347}

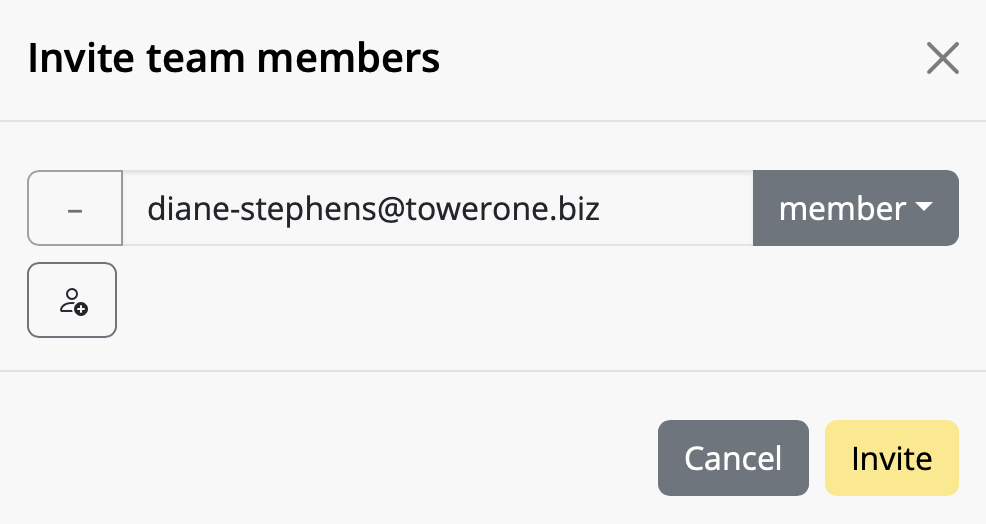
Enter the email address(es) of the colleague(s) you want to invite to your team and click "Invite". You can invite up to 10 team members free!

{S_1348}

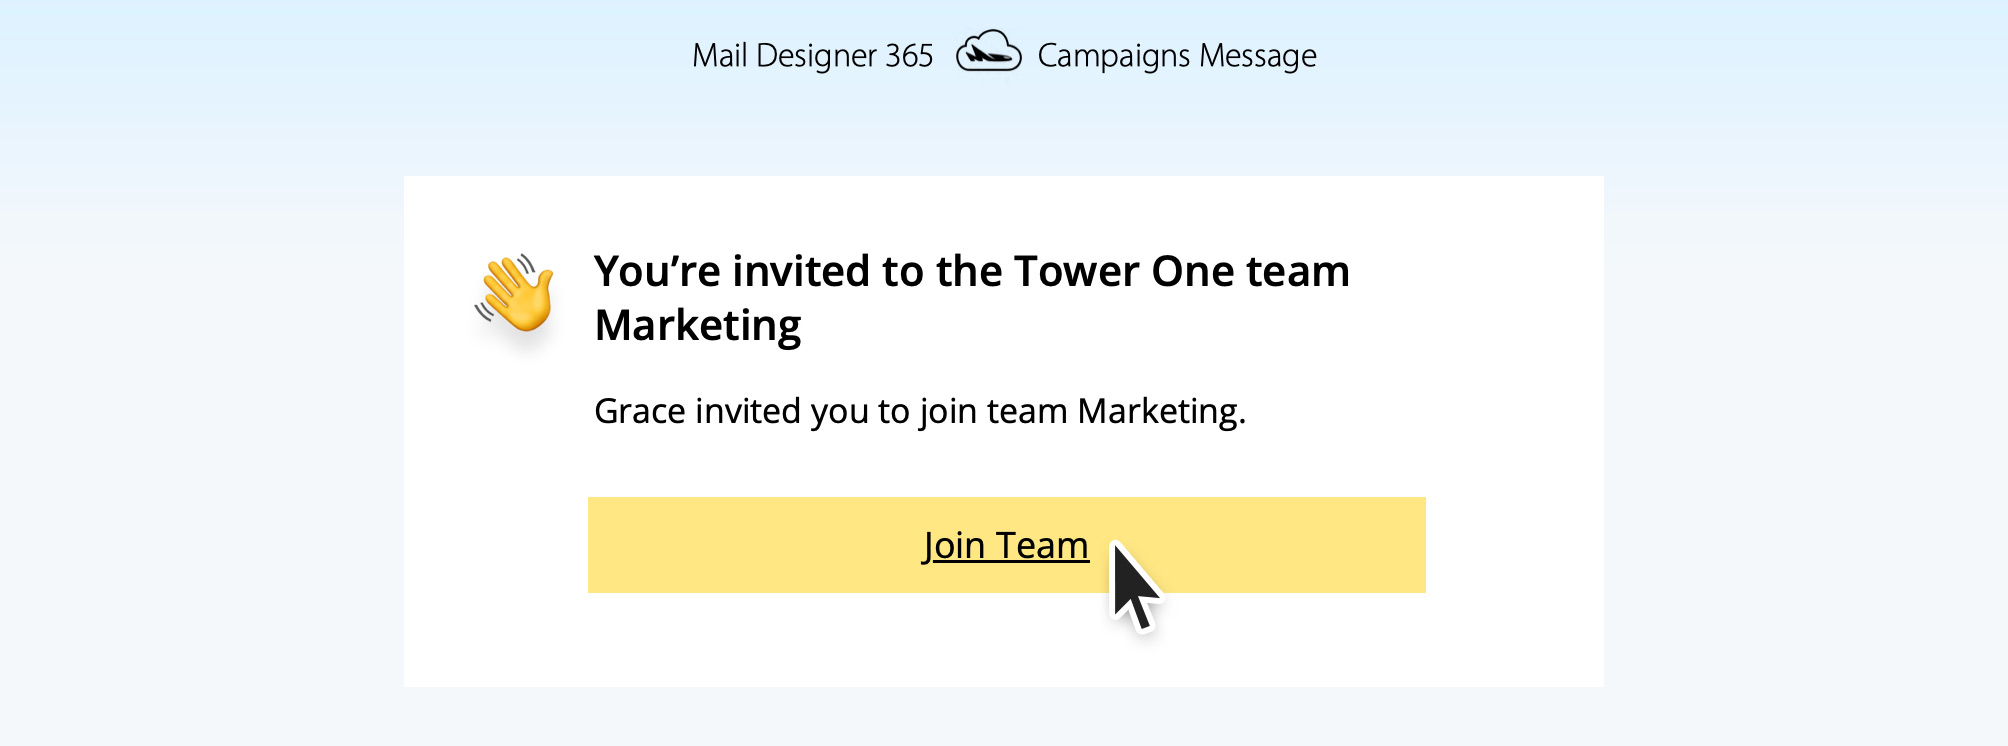
Team members can accept your invitation by clicking on the link in the email.

Once you've invited new team members, start using Mail Designer 365 Campaigns to discuss, approve and schedule email campaigns for your audience. Try it out free!
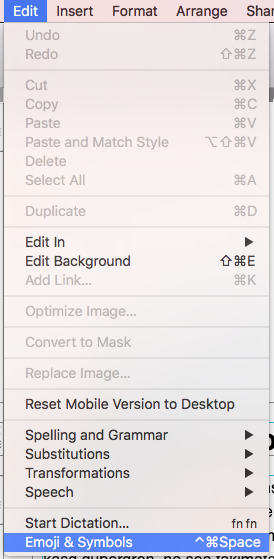
Mail Designer 365 supports special characters, which you can add to your text to create icons for call-to-action buttons or as a way to simplify your messages.

To add special characters:


‣ Open your email template if it is not already opened.
‣ Choose “Edit" > "Emoji & Symbols”
{S_794_50%}

You have different options from different categories like emojis, arrows, bullet points, stars, currency symbols, latin alphabet, trademark symbols, other letterlike symbols, math symbols, parentheses, pictographs, and punctuations.

Please refer to the following page for more information on how to add emojis and special characters in Mail Designer 365:

GIFs are supported in most modern email apps, however some Outlook versions will only display the first frame of the GIF.

Currently, Outlook 2007, 2010, and 2013 are known to have this issue but the very latest versions of Outlook 365 now finally offer GIF support.

This points to an error while authenticating your email account. Try checking the following:

  • The username is wrong/incomplete. For example, iCloud accounts sometimes work with "username" but most times need the whole email address as a log in.
  • The password is wrong.
  • If you're trying TLS, try STARTTLS instead.
  • Maybe your server is using a custom port - though this is unlikely.
If you have a Mail program you use (e.g. Apple Mail) try comparing the outgoing mail settings there and use the same settings in Mail Designer.

{S_257_50%}
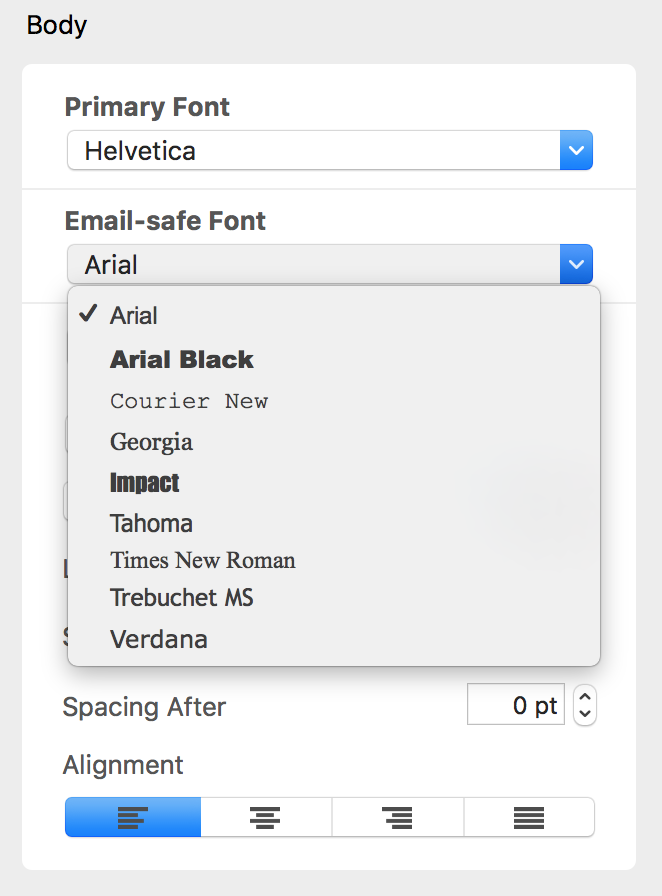
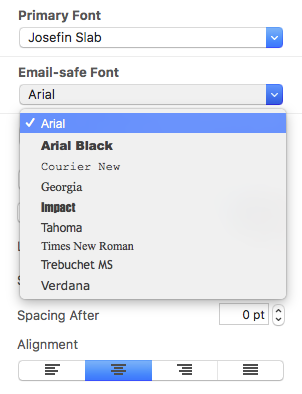
When you send an email template, not every font that you choose may be available at the recipient's side. This is why you can specify a fallback font list, and we recommend that you use an email-safe font.
{S_319_50%}
Email-safe fonts are the basic fonts installed on everyone's devices. If you have selected a font that is available on macOS but not on iOS, there will be a visible difference on the corresponding devices. If both devices have the font installed, then the email template will look the same on both platforms. You can use Web Fonts which the recipient's e-mail client can downloaded on demand. Most e-mail clients except Outlook support Web Fonts.
If you or other recipients are viewing your newsletter on a Retina Display (e.g. iPhone, Mac or iPad), it is possible that images which are not high-quality will appear blurred and out of focus.

For this reason, you may sometimes receive a warning message like this when inserting a low quality image into your design:

{S_876}


In order to ensure that your images are displayed properly on all devices, you should always try to use images with high resolution. An alternative would be to resize lower-resolution images to be smaller so they remain crisp.

Alt text and Apple WebKit


Email services using Apple's WebKit (Apple Mail & email clients accessed via Safari) only display image alt text when the alt text is short enough to fit in the first "line" of the image area:

{S_1214}

If the alt text is longer than this, Apple will display no alt text for the image area at all:

{S_1215}

Other issues to be aware of


When you are working with a design in Mail Designer 365 where image areas in the desktop and mobile versions are attached, your desktop alt text will also be used for the mobile version of your email.

As image blocks in the smartphone view aren't as wide, this means the cut-off point for your alt text will come sooner, so the alt text will need to be even shorter if the design versions are paired.

Ways to resolve this issue


We appreciate this is a difficult issue and unfortunately, there is no one-size-fits-all approach that can be applied to your alt text length. This is mainly due to the fact that the size of image areas can vary massively in different email designs, as well as the mobile issue mentioned above.

Ideally, the optimal solution would be for Apple to change things behind the scenes. However, until this happens, the best workaround is to keep your alt text as short as possible and TEST TEST TEST!

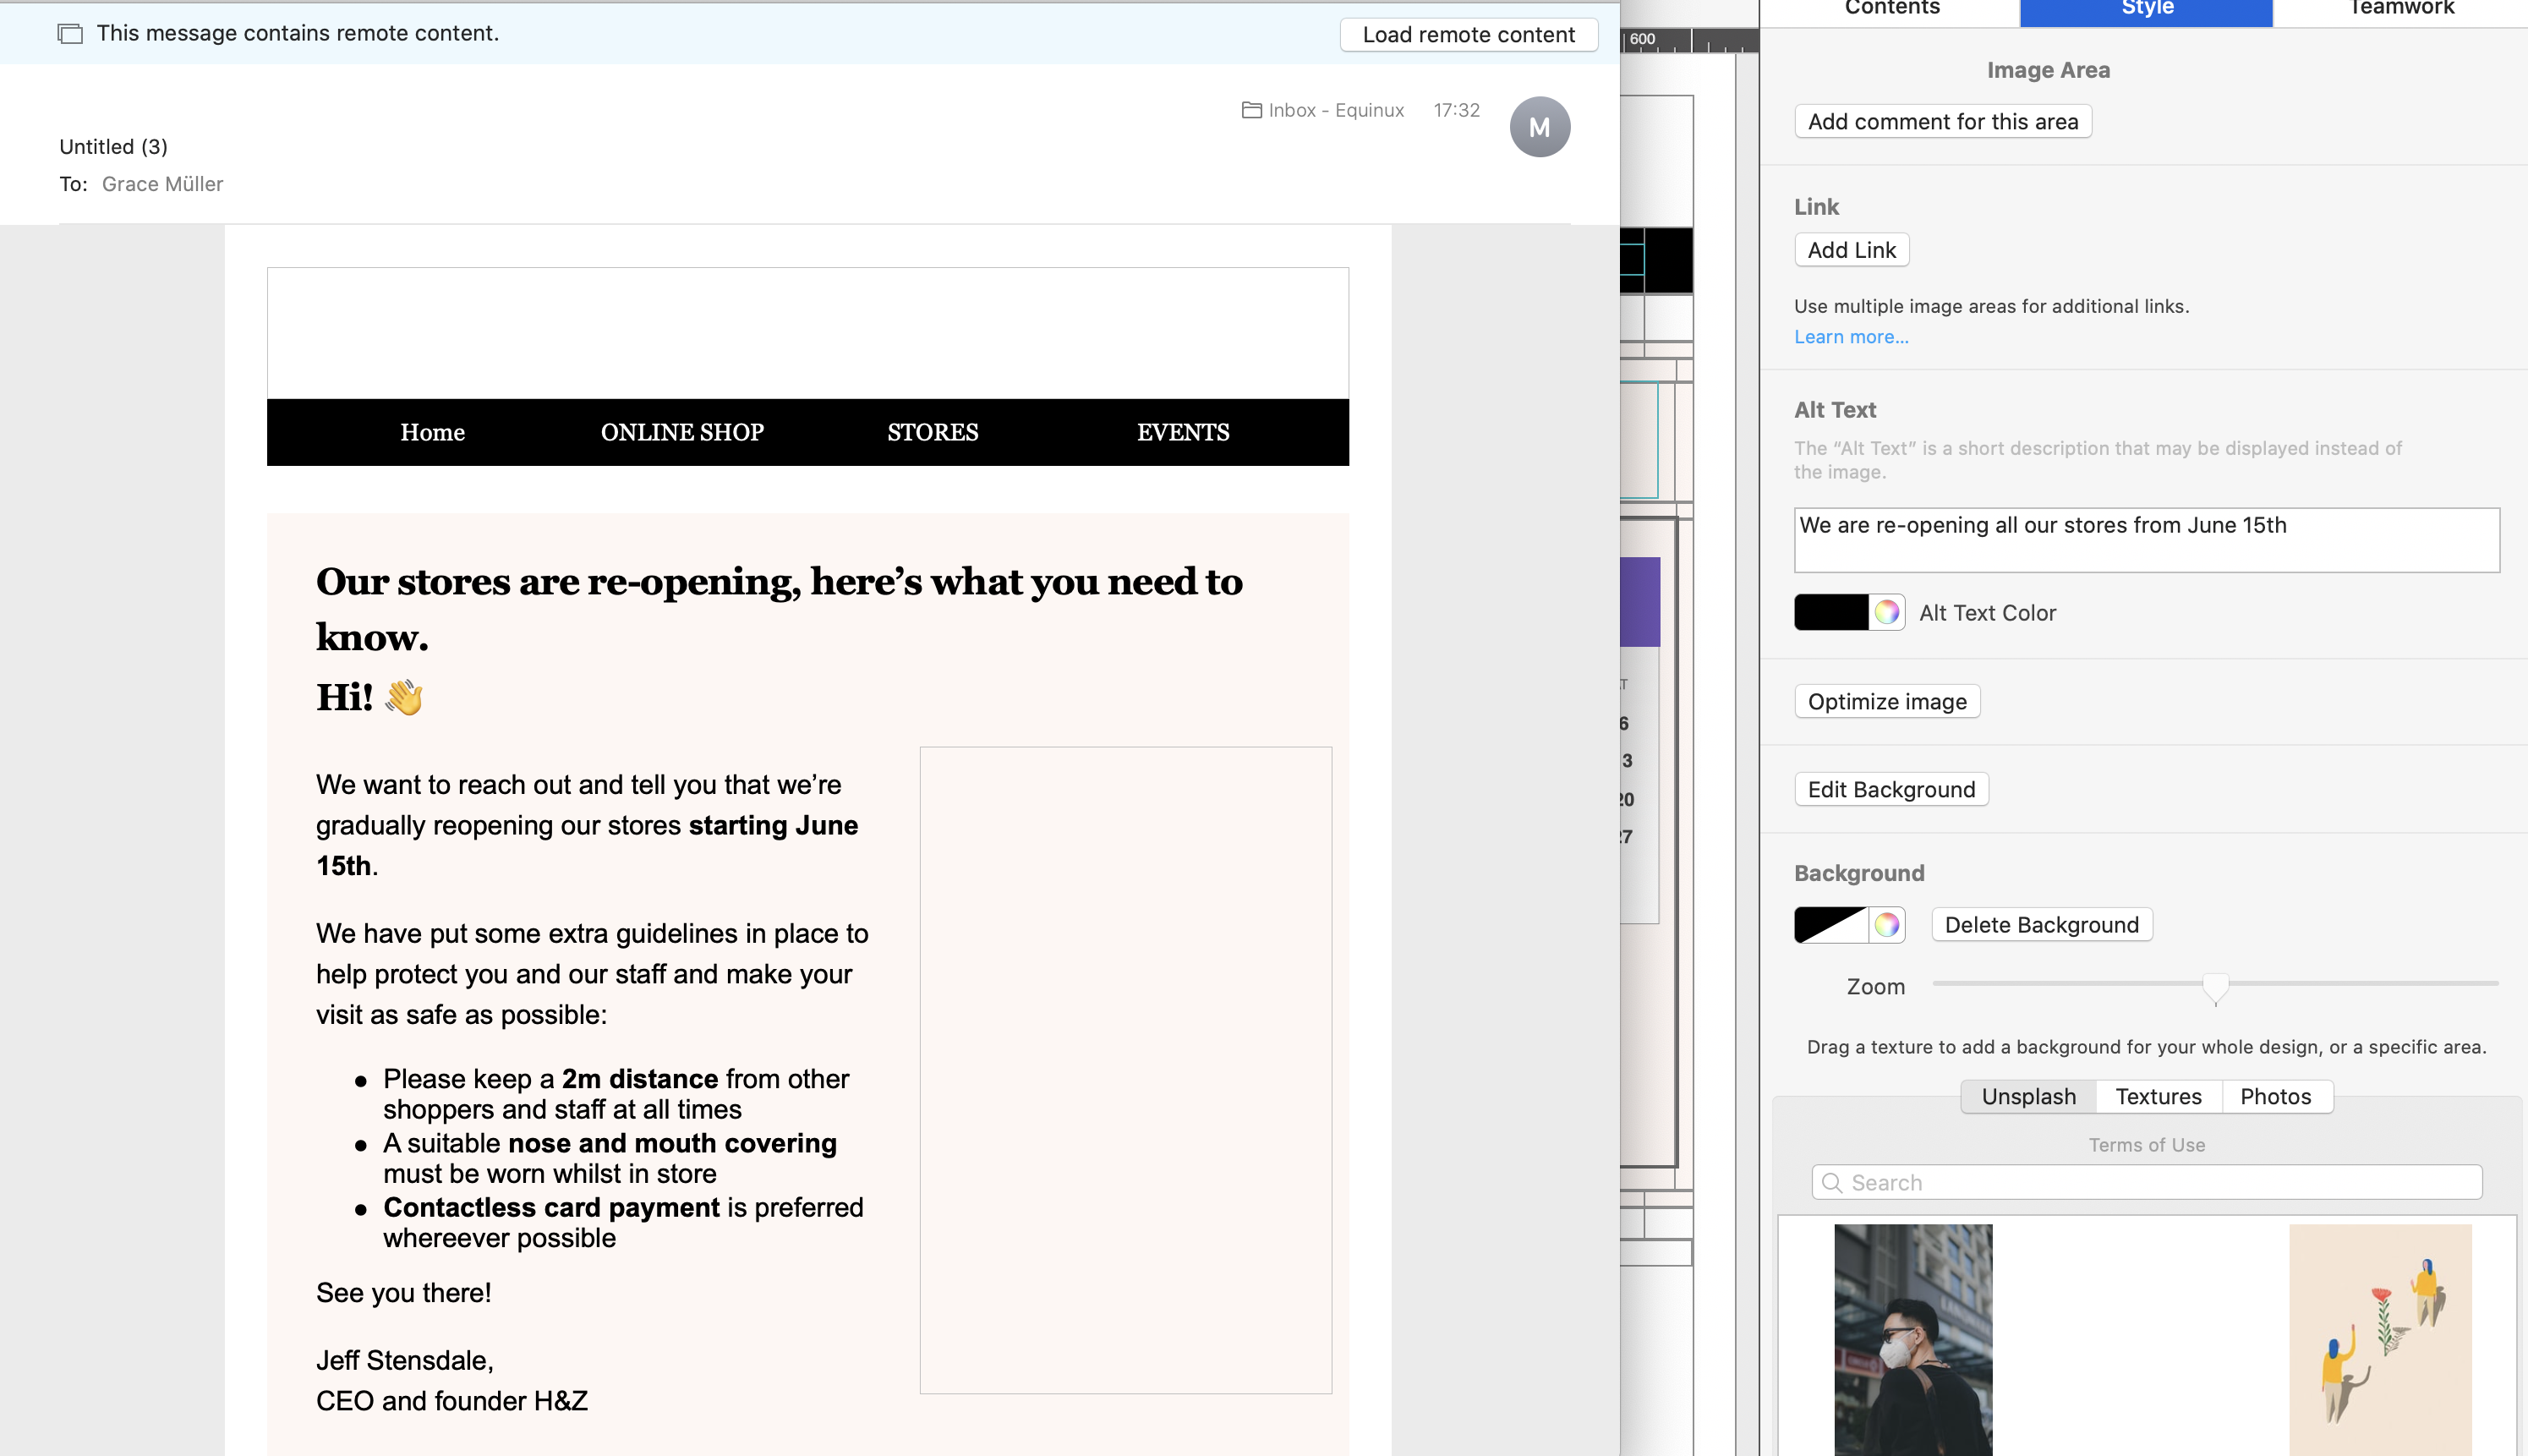
To test the length of your alt text is suitable before you send, carry out the following steps:
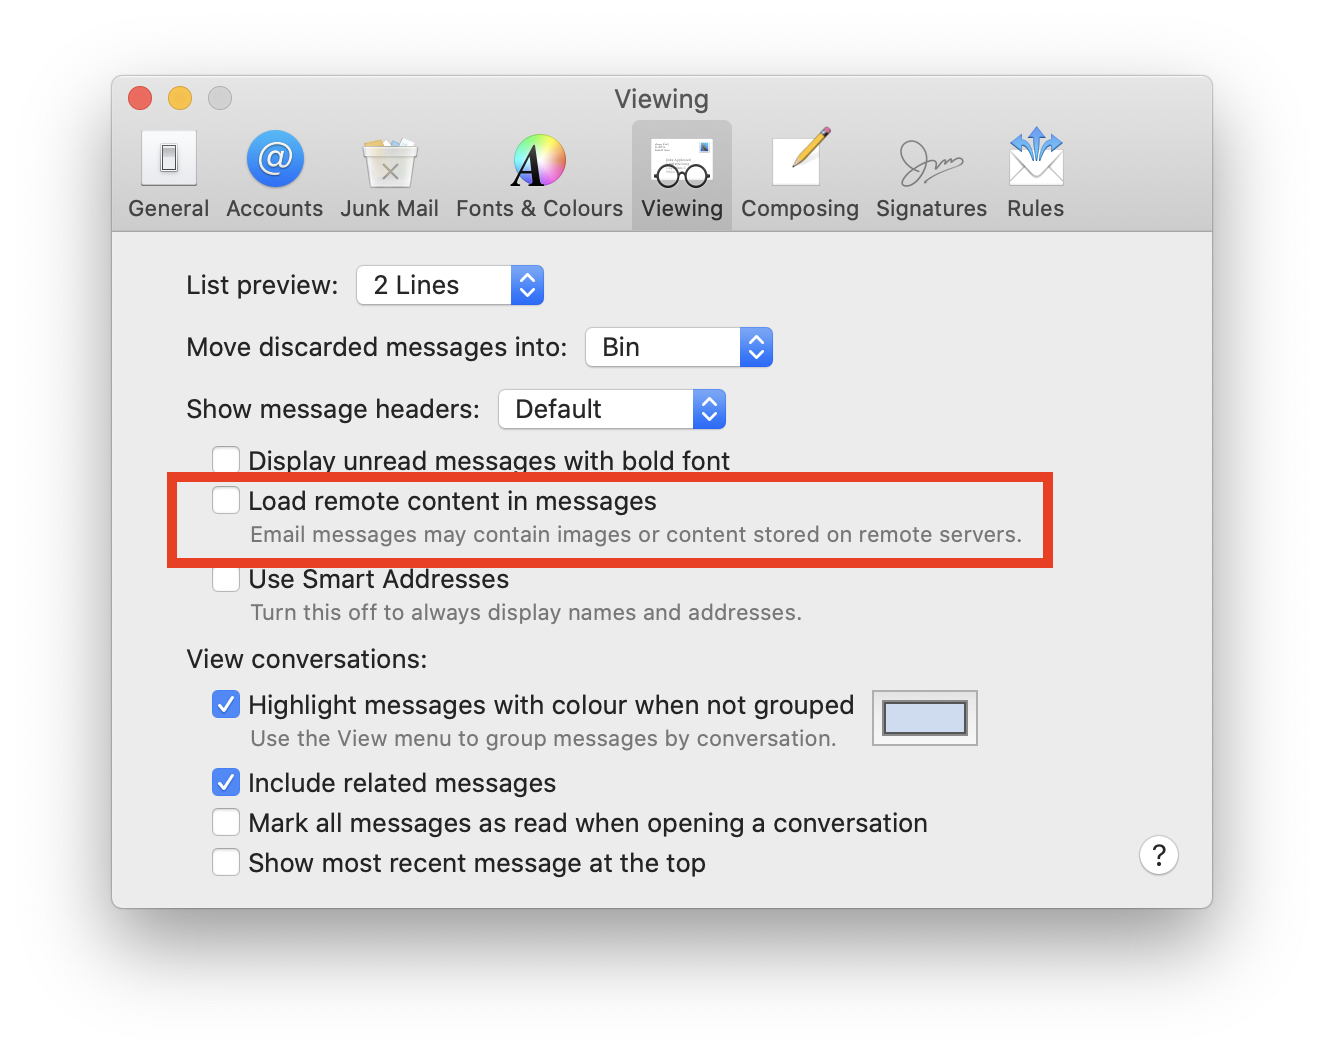
  • Go to Mail > Preferences > Viewing and uncheck the box by "Load remote content in messages."
  • In Mail Designer 365, use the Testmail service to send yourself a test version of your design.
  • Open the email in Mail and check through all the image areas to see if the alt texts appear. Then, do the same on an iPhone to check the mobile version.

{S_1216}

Sending test emails


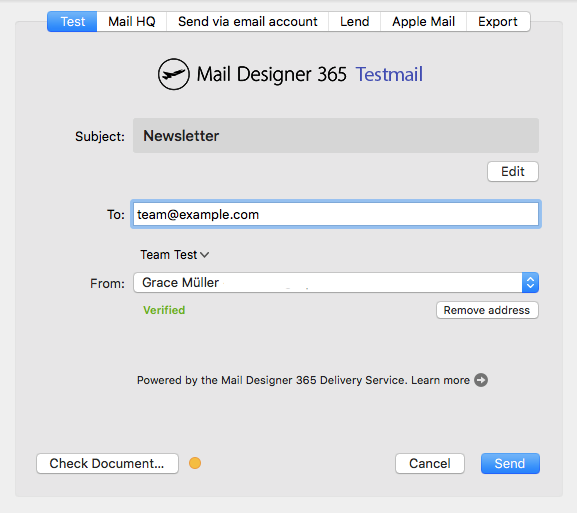
Mail Designer 365's Testmail service is designed for sending internal test emails to yourself or to your team – i.e. to preview how your finished email design will look in the inbox. Test emails will be sent from the Mail Designer 365 Testmail service via our secure servers.

How it works


To get started, click the Test icon in the Mail Designer 365 toolbar.


{S_1376_25%}

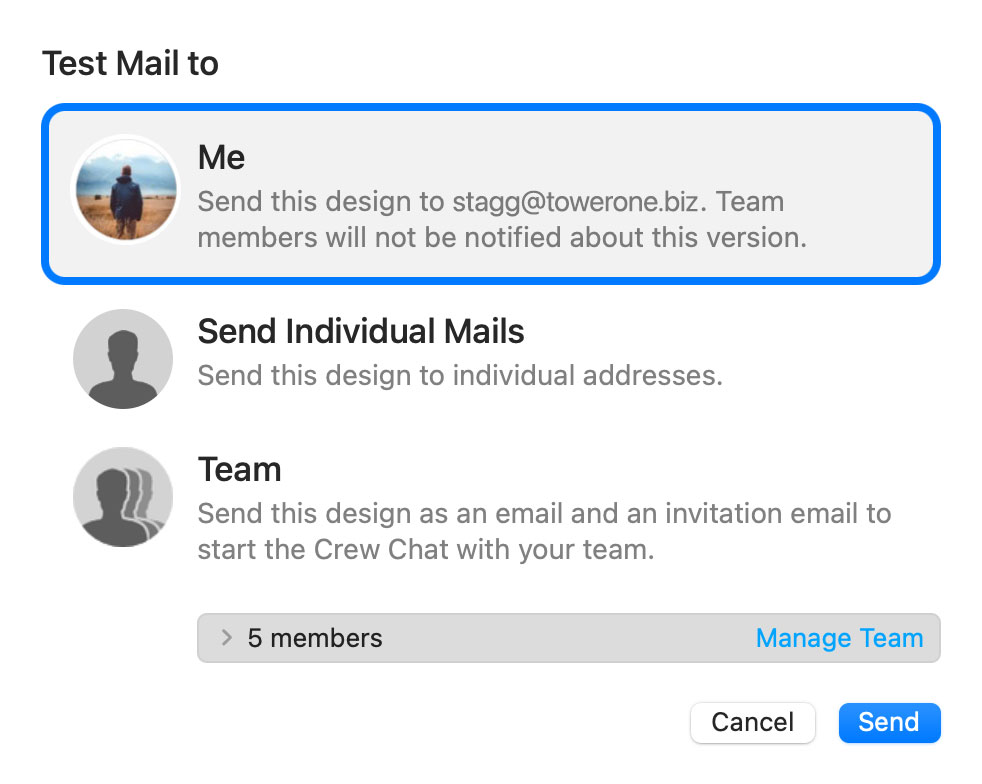
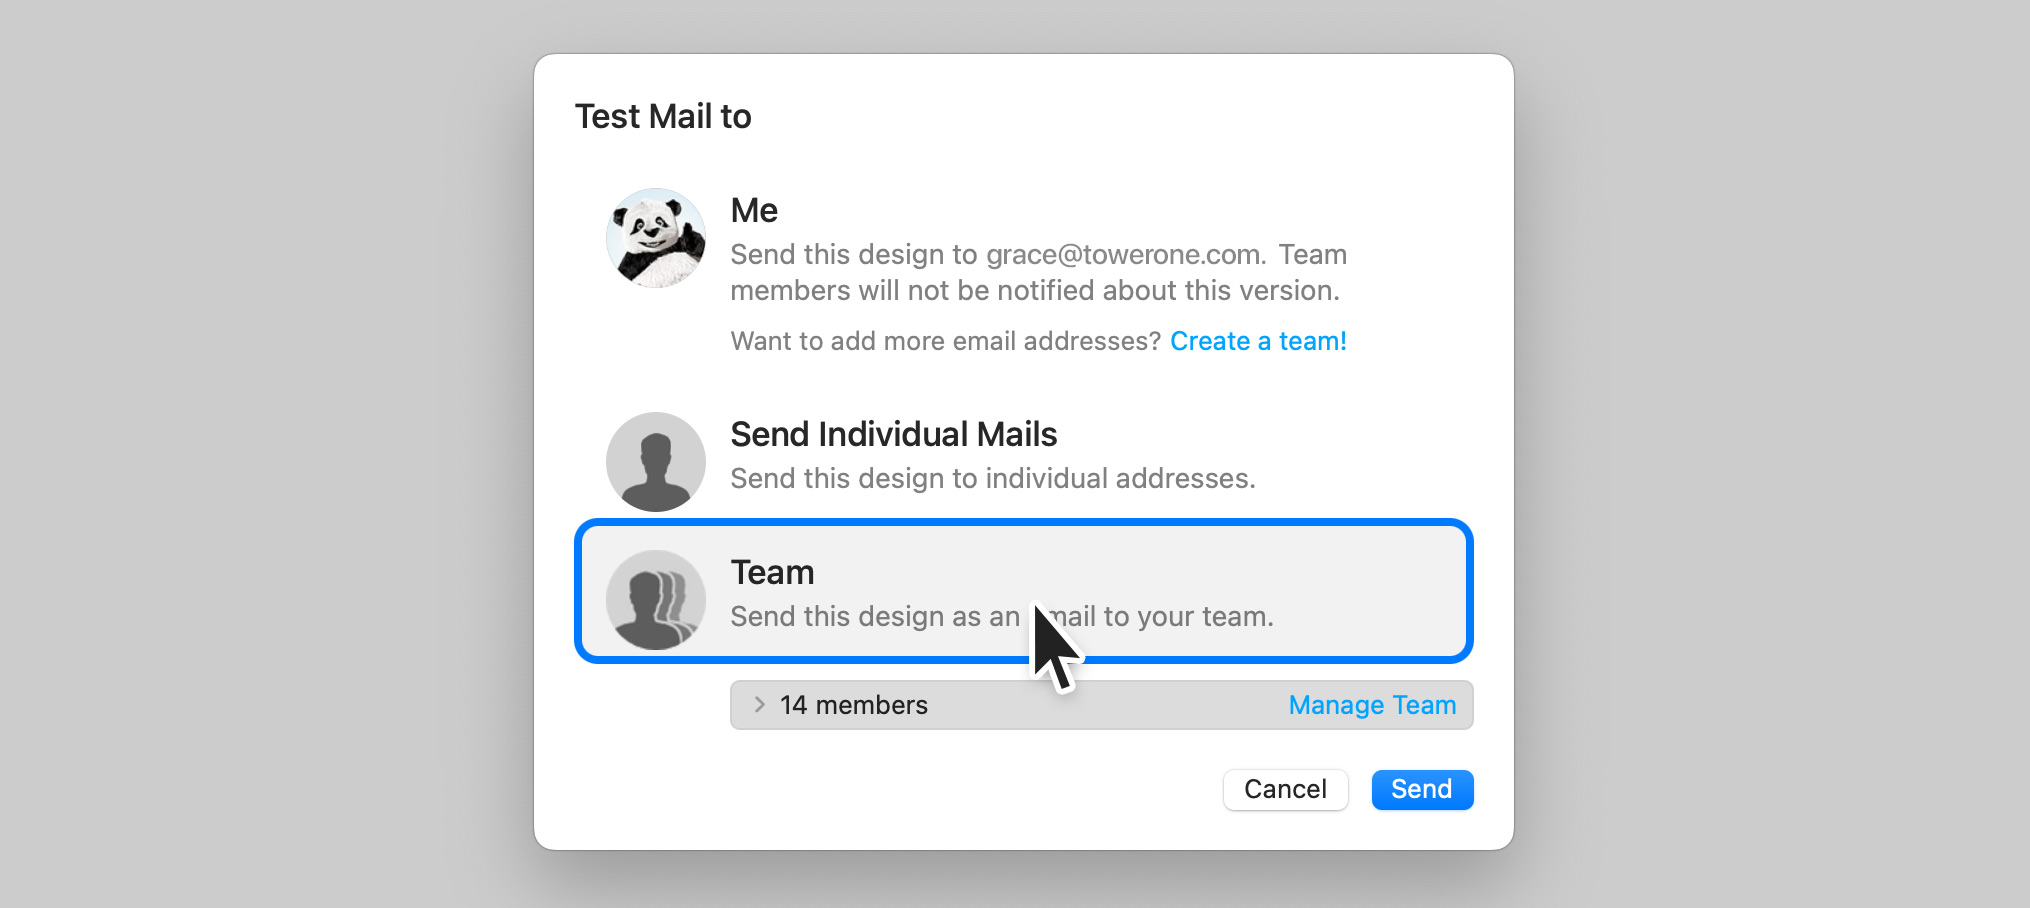
Now choose from the following test mail options:


{S_1374_75%}


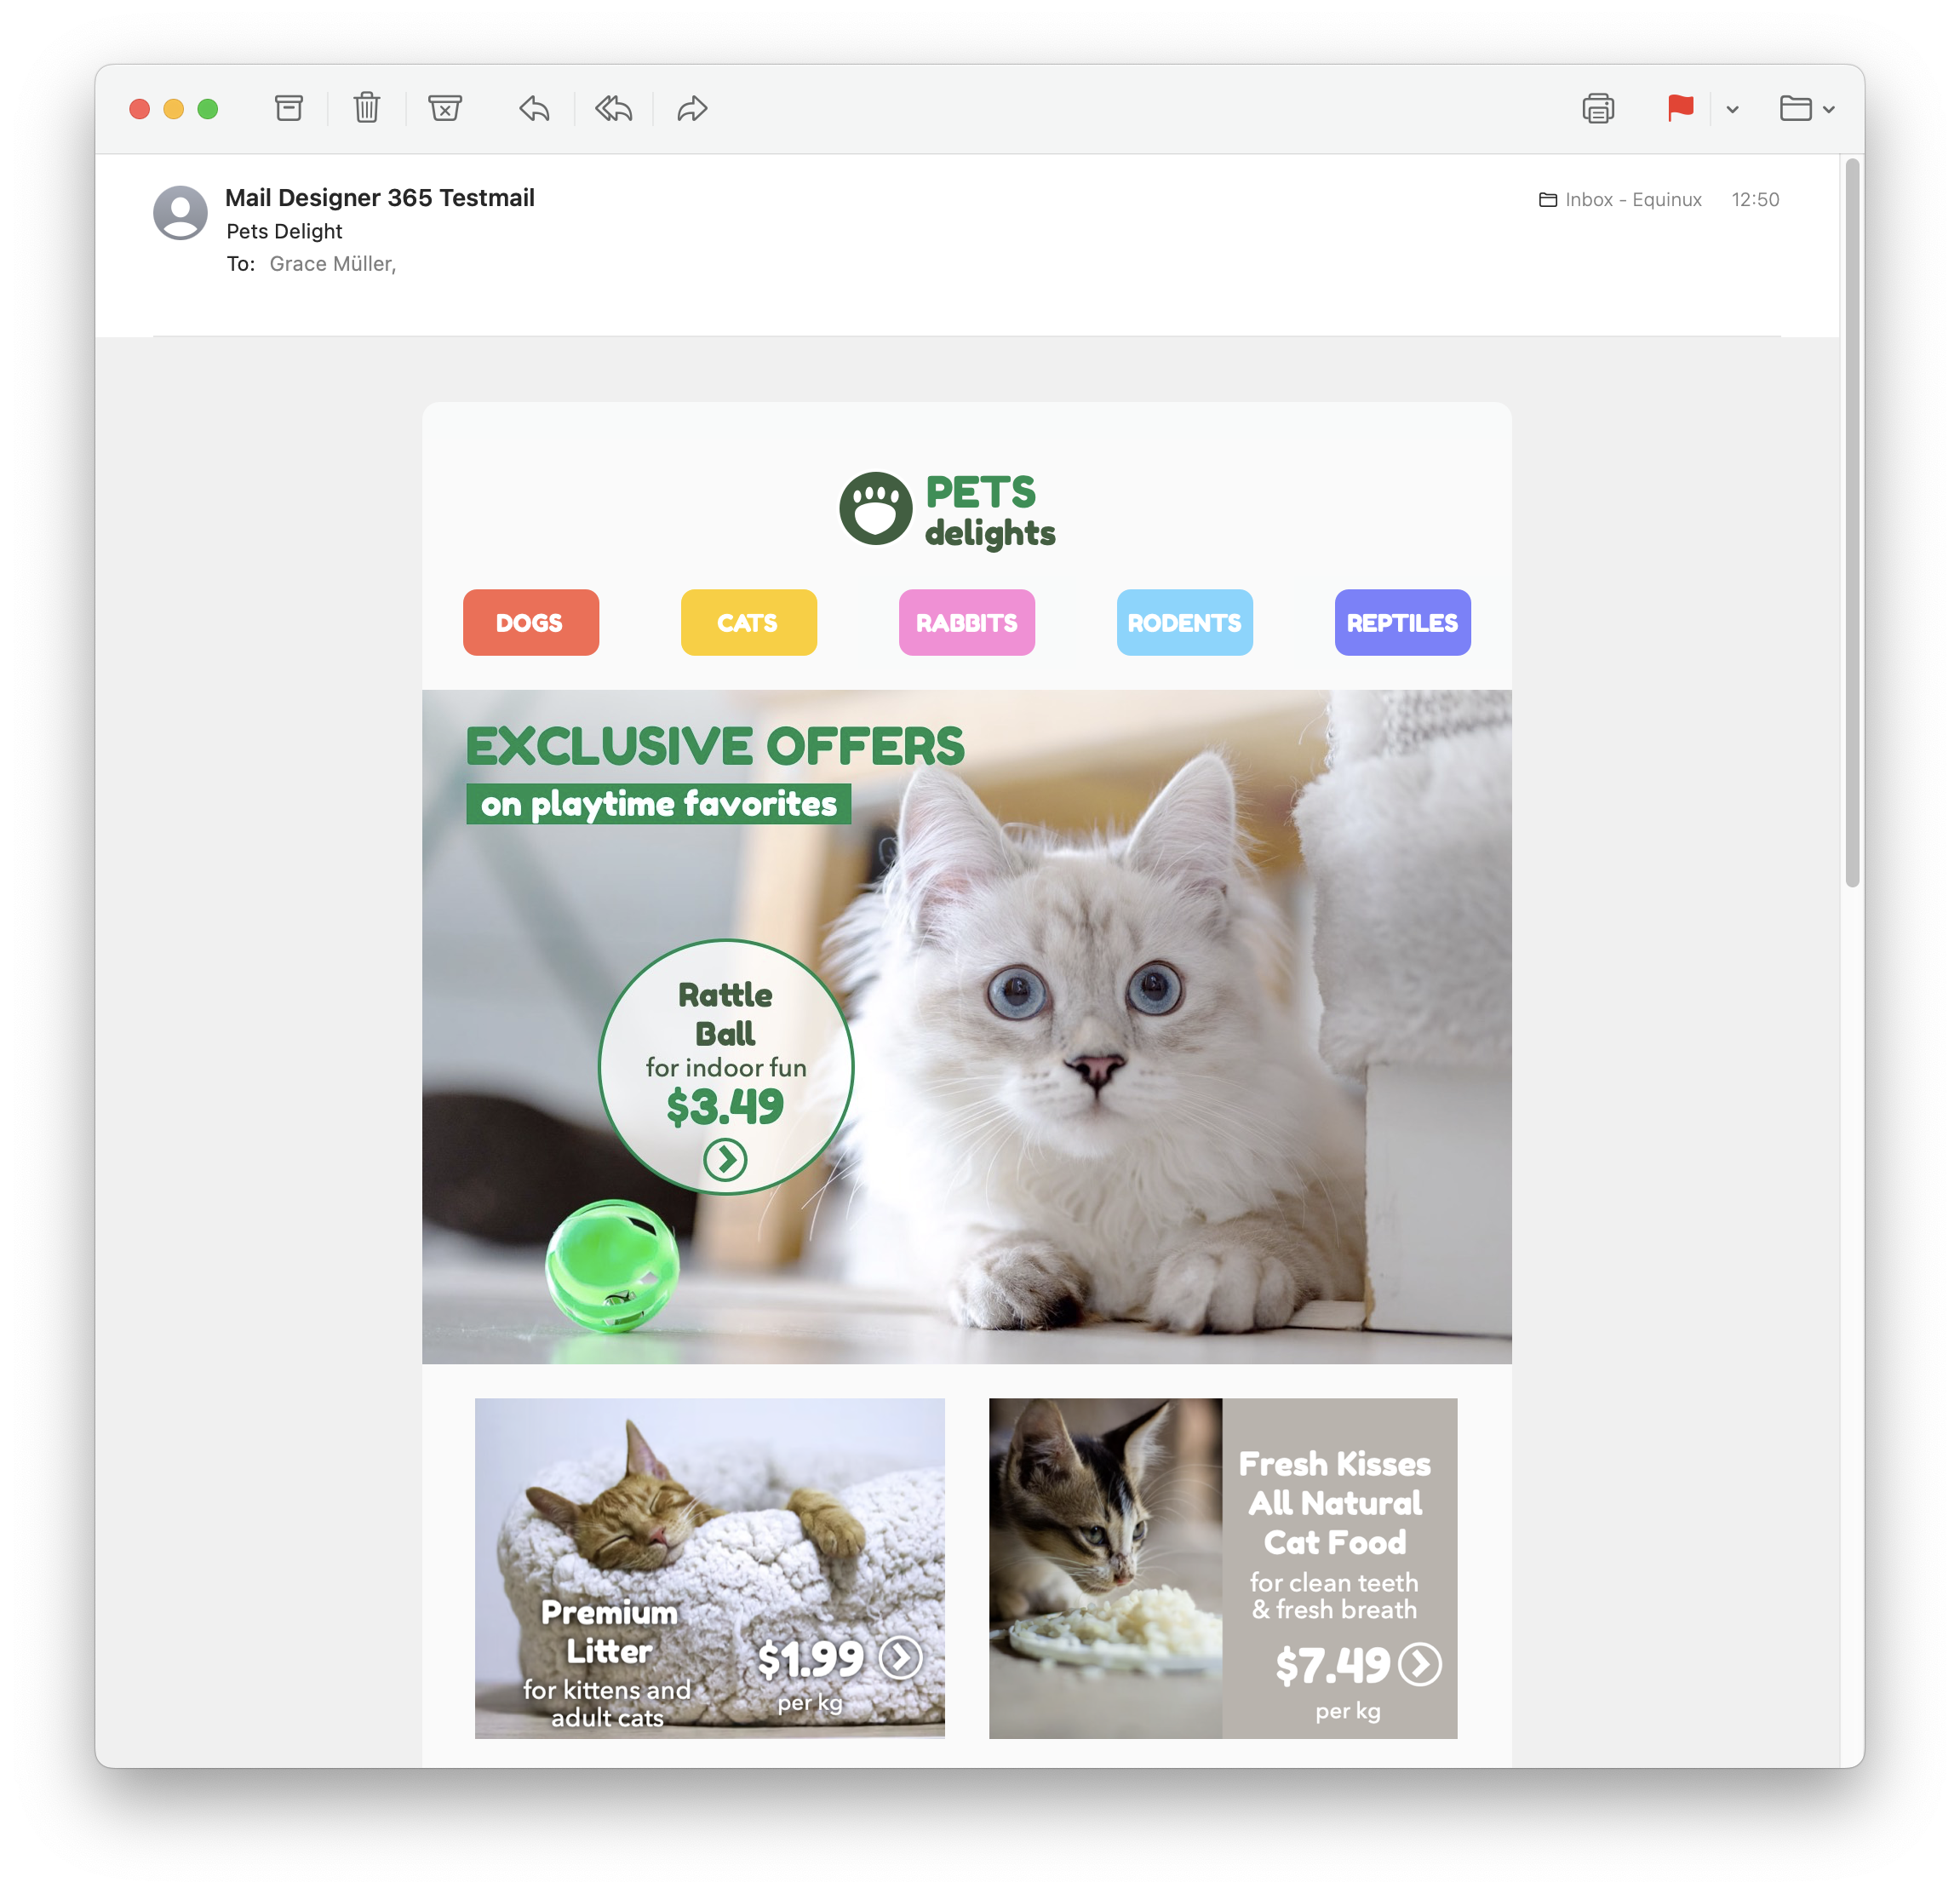
The latest version of your email design will be uploaded via TeamCloud and sent to the selected recipient(s):

{S_1377_75%}

Sending individual emails


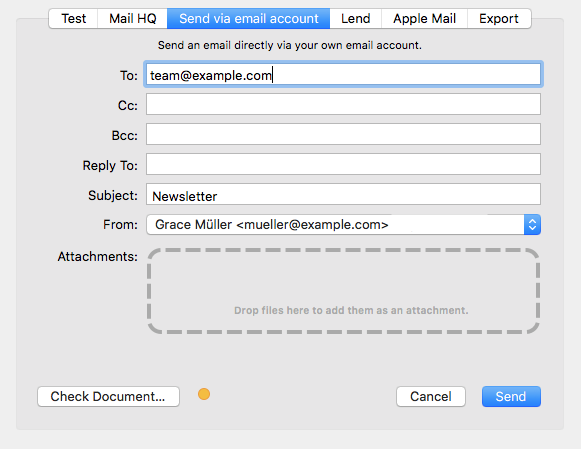
You also have the option to send your email design as a single email via Delivery Hub. This email will be sent from your own email address.

This option is designed for external emails (i.e. sending emails to contacts who are not part of your Mail Designer 365 team) and replaces the legacy "Send via your email account" option.

How it works


In this view you can add one or more recipients for your email (e.g. your client's email) and send them your design from your own email address.

{S_1375_75%}


On the left of the setup window, you can choose your from address:

{S_1378_75%}


Tip: If you have not done so already, follow this guide to set up your "from address" for sending.

Finally, send your email by clicking the green "Send" button. It will go directly to your recipient via your email server:
{S_1379_75%}


Good to know: Following send, you can easily check if your recipient has received and opened your email by clicking the analytics icon:

{S_1380_50%}


Email is the lifeblood of modern communication, but its ubiquity also makes it a prime target for cybercriminals seeking to deceive, defraud, or disrupt. To safeguard against these threats and ensure the integrity of your email communications, there's a powerful tool known as DMARC, or Domain-based Message Authentication, Reporting, and Conformance.

The Challenge of Email Impersonation

Before we dive into DMARC, it's essential to understand the challenges of email communication. Emails pass through multiple servers and networks on their way to the recipient, creating numerous opportunities for malicious actors to tamper with or impersonate senders.

DMARC: Your Email Security Guardian

DMARC, which stands for Domain-based Message Authentication, Reporting, and Conformance, is a comprehensive email authentication protocol designed to combat email impersonation, phishing attacks, and other email-based fraud.

How DMARC Works

DMARC builds on the foundations of SPF and DKIM but takes email authentication to a whole new level:

  1. Policy Declaration: The domain owner (the sender) publishes a DNS record that specifies how email from their domain should be handled if it fails SPF or DKIM checks. This DNS record contains DMARC policy settings.
  2. Email Reception: When an email is received by the recipient's email server, it performs SPF and DKIM checks as usual. If these checks fail, the server consults the sender's DMARC record.
  3. DMARC Verification: DMARC instructs the recipient's server on how to handle emails that fail SPF or DKIM checks. The sender can choose to monitor these failures, quarantine suspicious emails, or reject them outright.
  4. Reporting: DMARC provides valuable feedback by generating reports about email authentication activity. These reports help domain owners monitor and improve their email security.

The Significance of DMARC

  1. Protection from Impersonation: DMARC is a formidable defense against email impersonation. It ensures that emails claiming to be from your domain are indeed legitimate, making it exceedingly difficult for cybercriminals to impersonate you.
  2. Enhanced Email Trustworthiness: Implementing DMARC enhances the trustworthiness of your emails. Email providers are more likely to recognize your emails as safe and deliver them to the recipient's inbox.
  3. Reduced Phishing Risks: DMARC is a powerful deterrent against phishing attacks. By reducing the success rate of such attacks, it safeguards individuals and organizations from potential harm.
  4. Reputation Management: DMARC helps protect your domain's reputation. It ensures that your legitimate emails are not diluted by fraudulent ones, preserving trust in your brand or organization.

Conclusion

In an era where email threats are prevalent and sophisticated, DMARC emerges as the ultimate guardian angel of email authenticity. Although it operates discreetly in the background, DMARC is a potent tool in the fight against cyber threats. Its implementation is highly recommended for individuals, businesses, and email service providers, as it offers a robust defense against email impersonation and enhances the overall security of email communications. The next time you send or receive an email, know that DMARC is diligently working to protect you from email-based deception and fraud in the vast digital landscape.

Mail Designer 365 makes it easy to send emails from your own email address directly from the app. Thanks to Mail Designer’s automatic email account configuration, you will be up and running in no time.

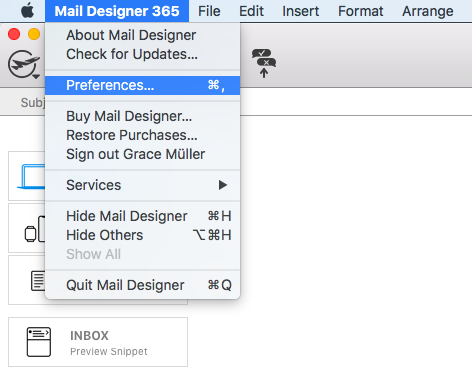
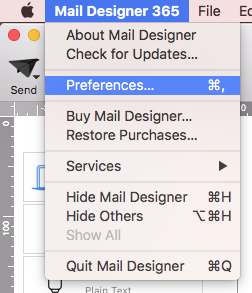
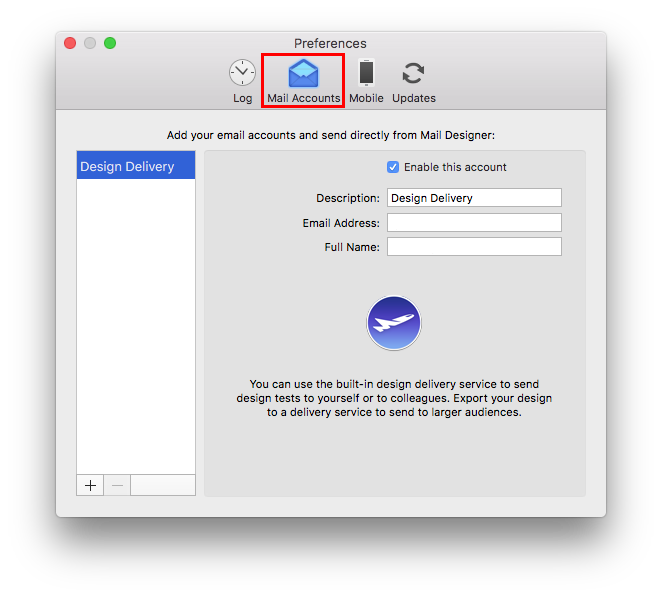
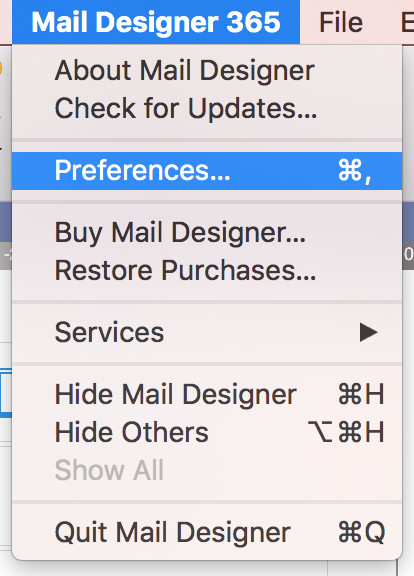
To get started, go to “Mail Designer 365” > “Preferences” > “Mail Accounts.”
{S_898}

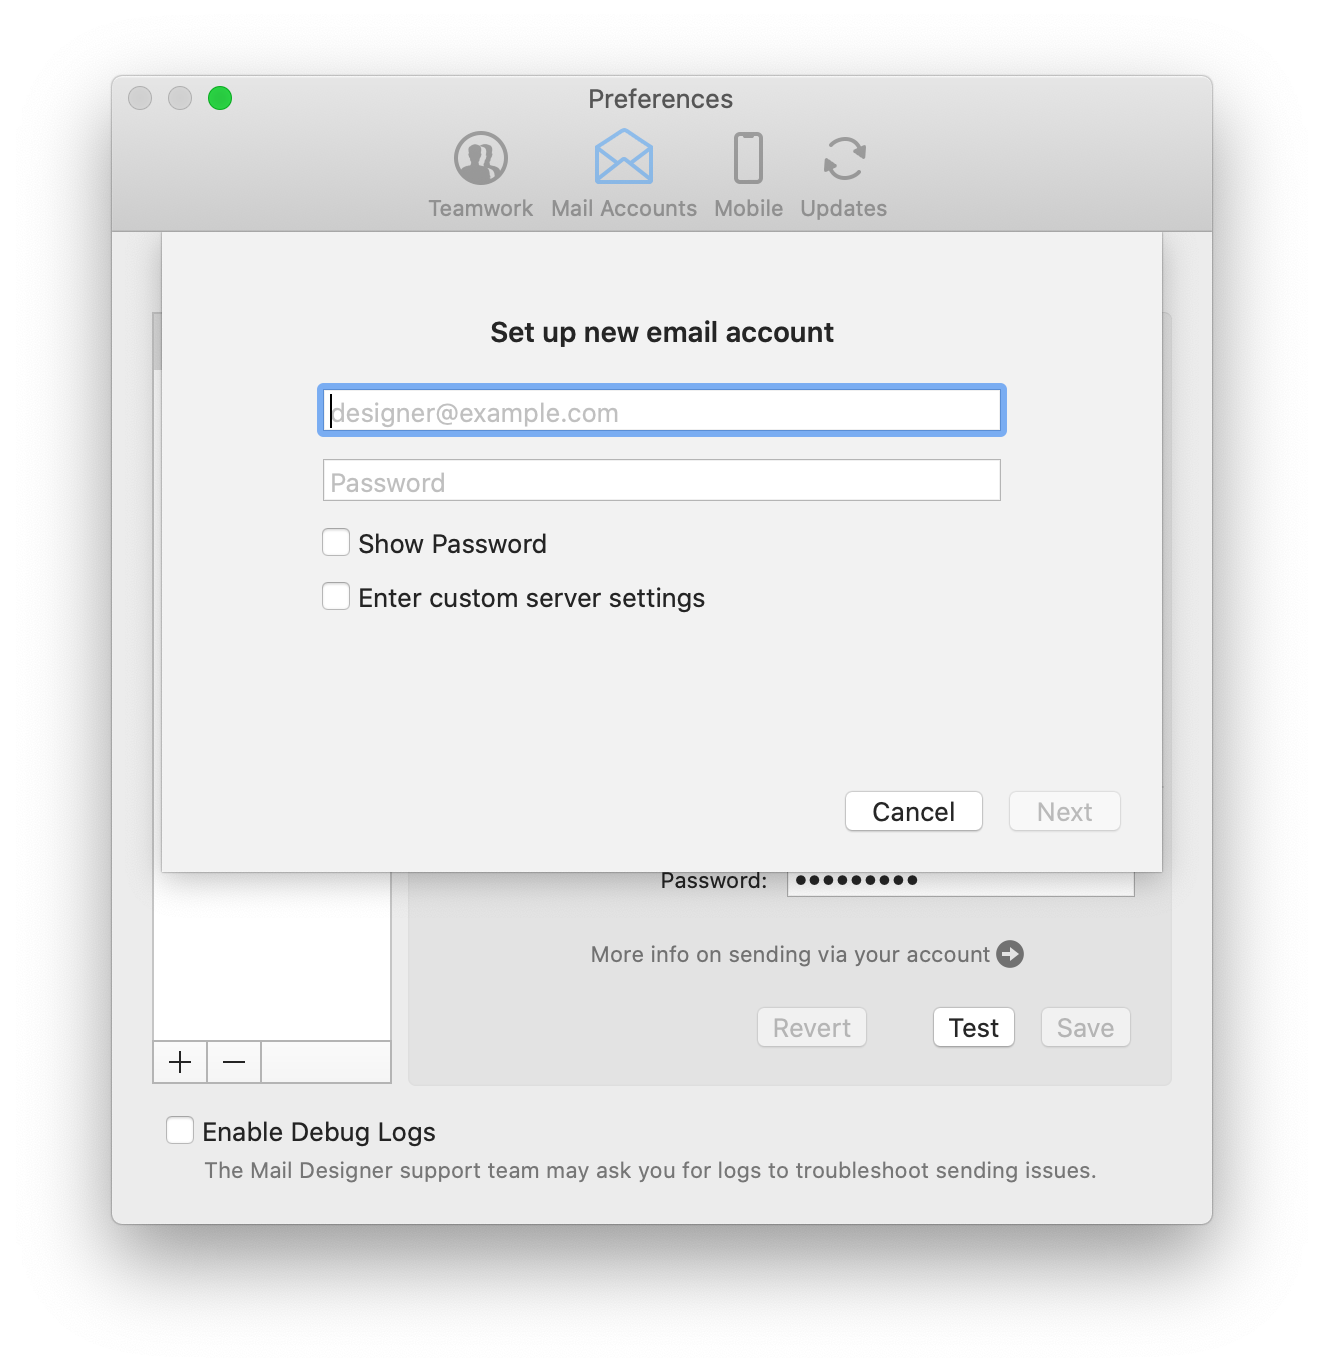
Then, click on the “+” in the bottom left corner to configure a new email account.
Enter your email address and password (not required for all email services e.g. Gmail) in the space provided:

{S_899}

Note: This will work for most generic email accounts (e.g. Outlook, Hotmail, Gmail, etc.) by taking you to the external login page for the respective email client. For custom/internal email accounts (i.e a work account), your network administrator may have to provide you with the information which you can enter by ticking “Enter custom server settings.”

Click “Next” to set up your account. You will now see that your email account’s settings have been automatically detected by Mail Designer 365:

{S_900}

You are now free to use your personal email address to send email designs from directly within the app.


Shopify offer a wide range of placeholder tags that you can use in your notification emails, which they refer to as liquid variables.

You can insert standard variables such as store name, customer email address, order number, etc. into a Mail Designer 365 text layout block to personalise your templates for Shopify.

Find a full list of Shopify's notification variables here.

Please note, for longer and more complex variables, such as discount properties which run over multiple lines, you may run into some difficulty with your layout.

For this reason, we advise avoiding these where possible. If you are confident with HTML, you can try to edit the exported code yourself, however, please be aware we cannot provide support for designs edited outside of Mail Designer 365.

{S_1292}

Depending on your plan, Mailchimp may automatically insert a "Monkey Rewards" badge into your newsletter design after you have exported it from Mail Designer 365.

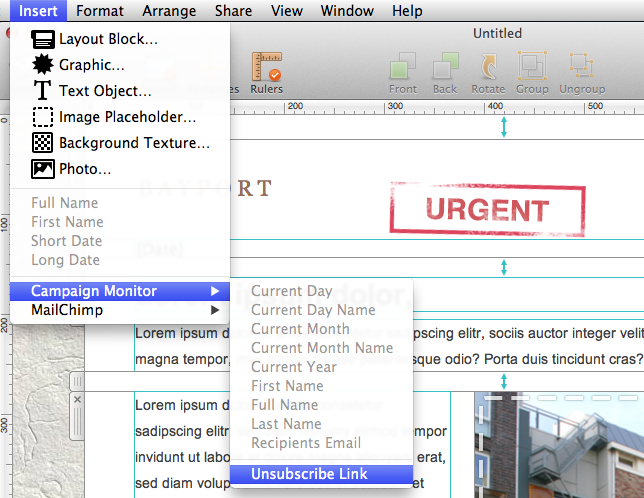
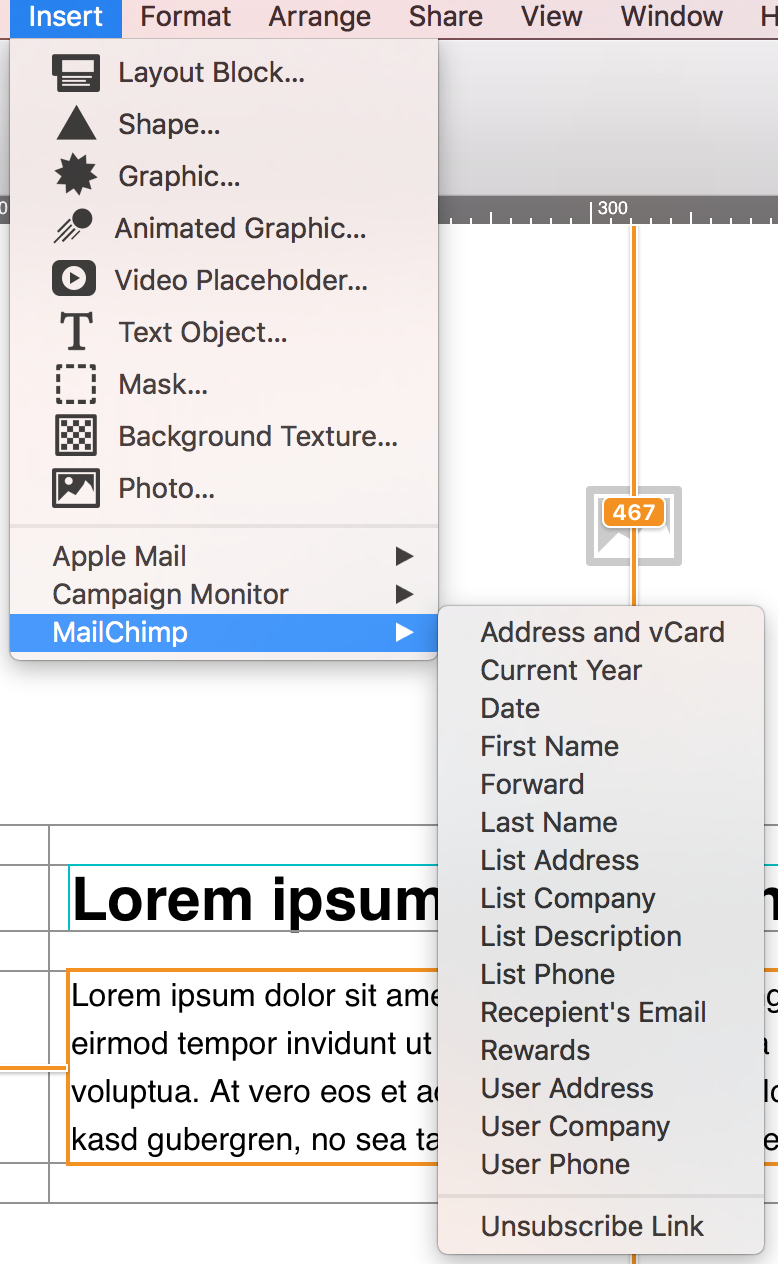
As this is determined by Mailchimp, there is no option to remove the badge within Mail Designer 365. However, you can control where the badge is inserted by clicking a text area and selecting "Insert > Mail Chimp > Rewards" to insert the Monkey Rewards placeholder.

For more information on how to remove the Monkey Rewards badge, visit their website.

In some circumstances, Mail Designer may not be able to store your account login credentials in your Keychain.

To fix this issue, please try the following:

  • The easiest way to fix this problem is to restart your Mac.

If the problem still pops up, try this:

  • Quit Mail Designer
  • Open Keychain Access from Applications > Utilities
  • Select your login keychain
  • Choose File > Lock Keychain “login”
  • Then choose File > Unlock Keychain “login”

Now re-open Mail Designer and try signing in again.

Email has become an integral part of our daily communication, from personal conversations to business dealings. However, with this convenience comes the constant threat of email-based fraud and phishing attacks. To combat these threats and ensure the authenticity of your emails, there's a simple yet crucial tool known as SPF or Sender Policy Framework.

The Vulnerabilities in Email Communication

Understanding SPF requires a brief insight into how email communication functions. When you send an email, it travels through multiple servers and networks before reaching its intended recipient. At each stop, malicious actors can potentially intercept, modify, or impersonate the email.

SPF: The Guardian of Email Authenticity

SPF, which stands for Sender Policy Framework, is a security protocol that acts as a guardian, protecting your email domain from being used by cybercriminals to impersonate you. SPF helps verify the legitimacy of incoming emails by checking if they originate from authorized servers associated with the sender's domain.

How SPF Works

SPF is relatively straightforward in its operation:

  1. Sender Declaration: The domain owner (you or your organization) publishes a DNS record specifying which servers are authorized to send emails on its behalf. This record is known as the SPF record.
  2. Email Reception: When an email is received by the recipient's email server, the server checks the SPF record of the sender's domain to see if the server that sent the email is authorized to do so.
  3. Validation: If the sending server's IP address matches one of the authorized IP addresses listed in the SPF record, the email is considered legitimate and is accepted for delivery. If not, it may be flagged as suspicious or rejected.

The Significance of SPF

  1. Protection Against Spoofing: SPF plays a crucial role in preventing email spoofing. It ensures that emails claiming to be from your domain indeed originate from authorized servers, making it harder for cybercriminals to impersonate you.
  2. Enhanced Email Deliverability: When you implement SPF, email providers are more likely to trust your emails, leading to better deliverability rates. Your legitimate emails are less likely to end up in spam folders.
  3. Reduction in Phishing: By making it more difficult for cybercriminals to impersonate trusted senders, SPF contributes to reducing phishing attacks, protecting individuals and organizations from potential harm.
  4. Branding and Reputation: SPF helps maintain your email domain's reputation. It assures recipients that your emails are legitimate, strengthening trust in your brand or organization.

Conclusion

In an age where email is a primary mode of communication and email-based threats are prevalent, SPF serves as a reliable shield against impersonation and fraud. Although it may work silently behind the scenes, SPF is a powerful tool in the fight against cyber threats. Its implementation is highly recommended for individuals, businesses, and email service providers alike to bolster the security of email communications. So, the next time you send or receive an email, remember that SPF is working diligently to protect you from potential email impersonation in the vast digital landscape.

In order to rotate the object, hold down the Command ⌘ key and then click one of the graphics resize controls of an object or graphic element. You will see that the cursor will turn into a rotate icon. 

{S_853_50%}

This will allow you to rotate the object freely. You can rotate shapes, graphic elements, and image masks. You will be able to tell how many degrees you have rotated the object by the label that pops up during rotation:

{S_854_50%}

If you want to rotate both the text and the object, hold the Command ⌘ key and click on both the shape and the text. You will see that the two things are now selected. Click “Group” on the right side.

{S_855_50%}

Once you have grouped the two things together, hold the command key and click on the resize controls. Again, you will see that the cursor will turn into a rotate icon. Then, feel free to rotate the selected items to your liking.

Please refer to the following page for further information on how to rotate objects:


The HTML code used in Mail Designer 365 is meticulously tested by our team of developers to make sure it is compatible with the majority of email clients. This is so we can do our best to ensure that your emails will always look good.

As we have no means of testing the custom code which customers edit themselves, we cannot guarantee that email designs with custom code will look as intended after they have been sent. For this reason, Mail Designer 365 does not support importing HTML code, as it needs to have full control of the code being used in the app.

However, if there are certain design elements (such as layout blocks) which you wish to edit, you can do so by saving them to your desktop and editing the Content.html file. Learn more.

Again, if you are not 100% confident in your understanding of HTML and CSS code, we would strongly advise against this, as we cannot guarantee your code will be compatible with our software and other email clients.
We just recently found out about an API change, which causes pictures to no longer appear when exporting emails to MailChimp or Campaign Monitor or when using the "Send email" function in Mail Designer. The most current versions of Mail Designer 365 and Mail Designer Pro 3 already include a fix for this.

If you already have Mail Designer 365 and you have purchased it in the equinux Store, please download the latest version at:
http://www.equinux.com/goto/HPdownload/maildesigner365
If you already have Mail Designer 365 and you purchased in the Mac App Store, the latest version is available as an Update in the Mac App Store. Please update install it from there.

If you have Mail Designer Pro 3, please log in under my.equinux.com to download the most current version.

In case you you have an older version of Mail Designer, now is a great time to make the switch to Mail Designer 365 and profit from all new features and optimisations.
Your mail account password may be wrong or empty (see Mail Accounts in Preferences).

If you are trying to send via your iCloud account with 2-factor authentication set up, you will need to set up an app-specific password for Mail Designer. The same may apply to other email providers with 2-factor authentication.

Apple's support page has more information on how to set up an app-specific password.
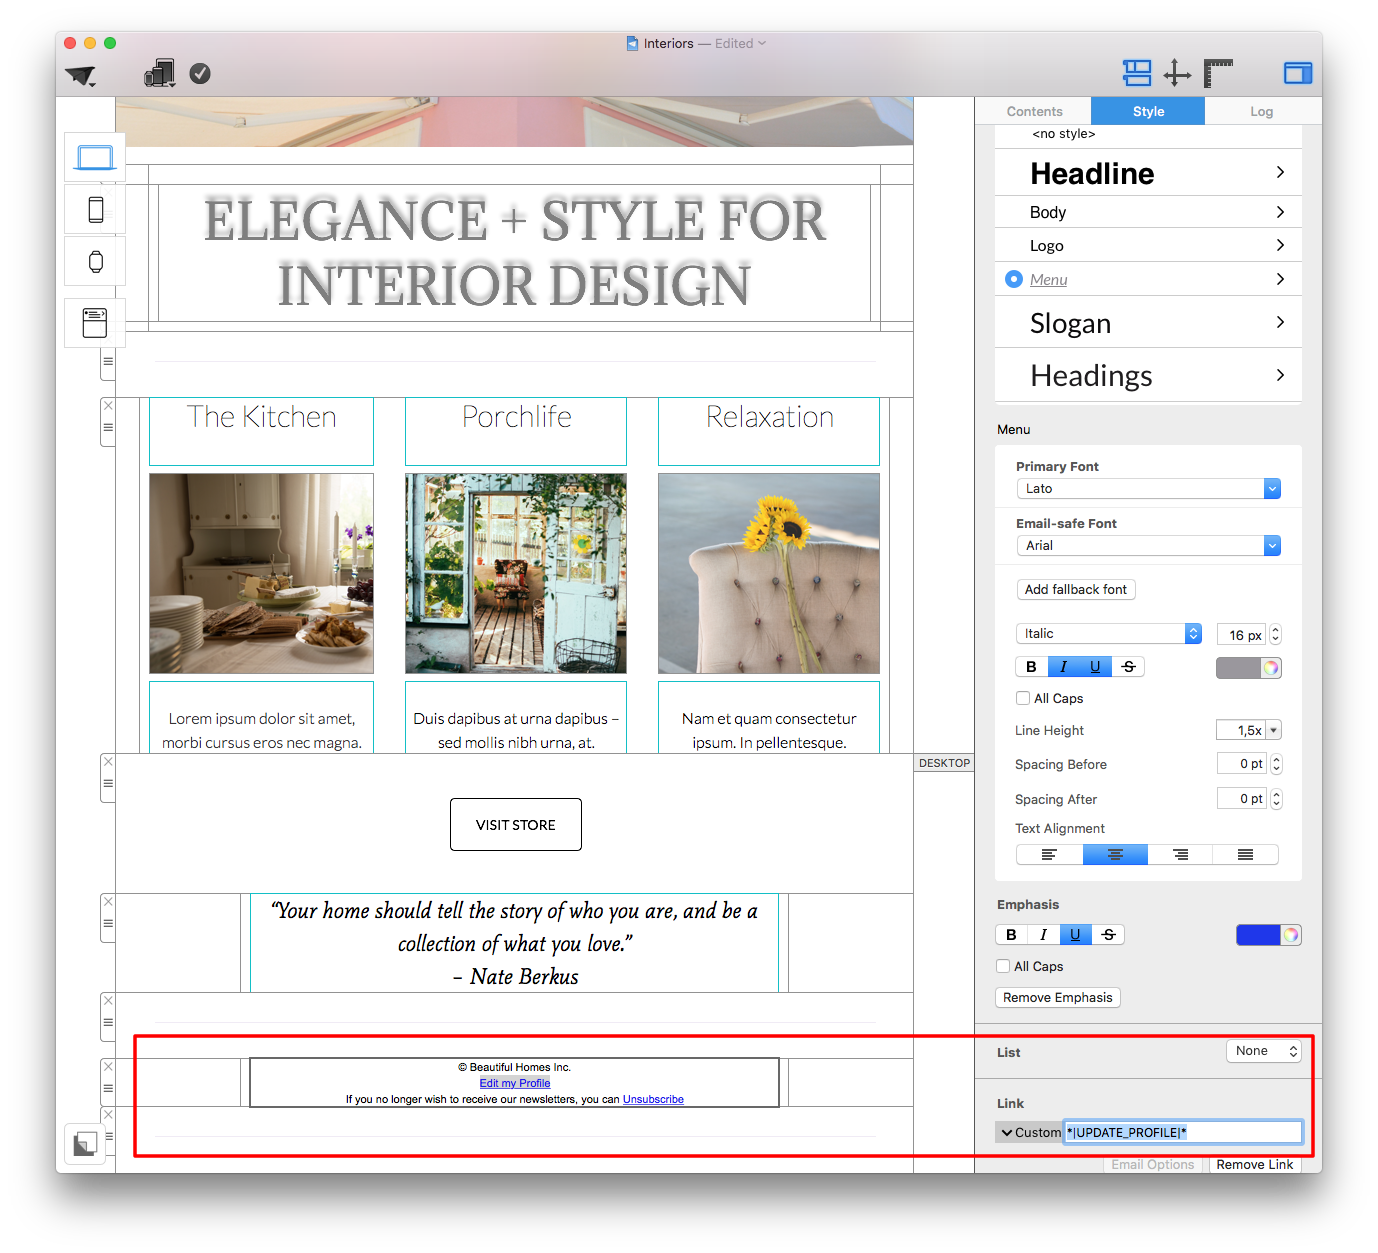
To add a Mailchimp placeholder to your design which doesn't appear on the list (e.g. "Edit my Profile" or "Show Newsletter in Browser") please carry out the following steps:

  • In a text layout block, type the text you want readers to see (i.e. "Edit my Profile.")
  • Highlight your selected text, then, in the sidebar, select "Add Link" from the "Style" tab.
  • Choose link type "Custom."
  • Enter your placeholder into the space provided (e.g. *|UPDATE_PROFILE|*)


{S_1088}

If you are unsure of how to label your placeholders, use Mailchimp's cheatsheet to find the correct label for any merge tag they support.

You can access the most important placeholders directly, as explained here, for other placeholders and custom merge tags.
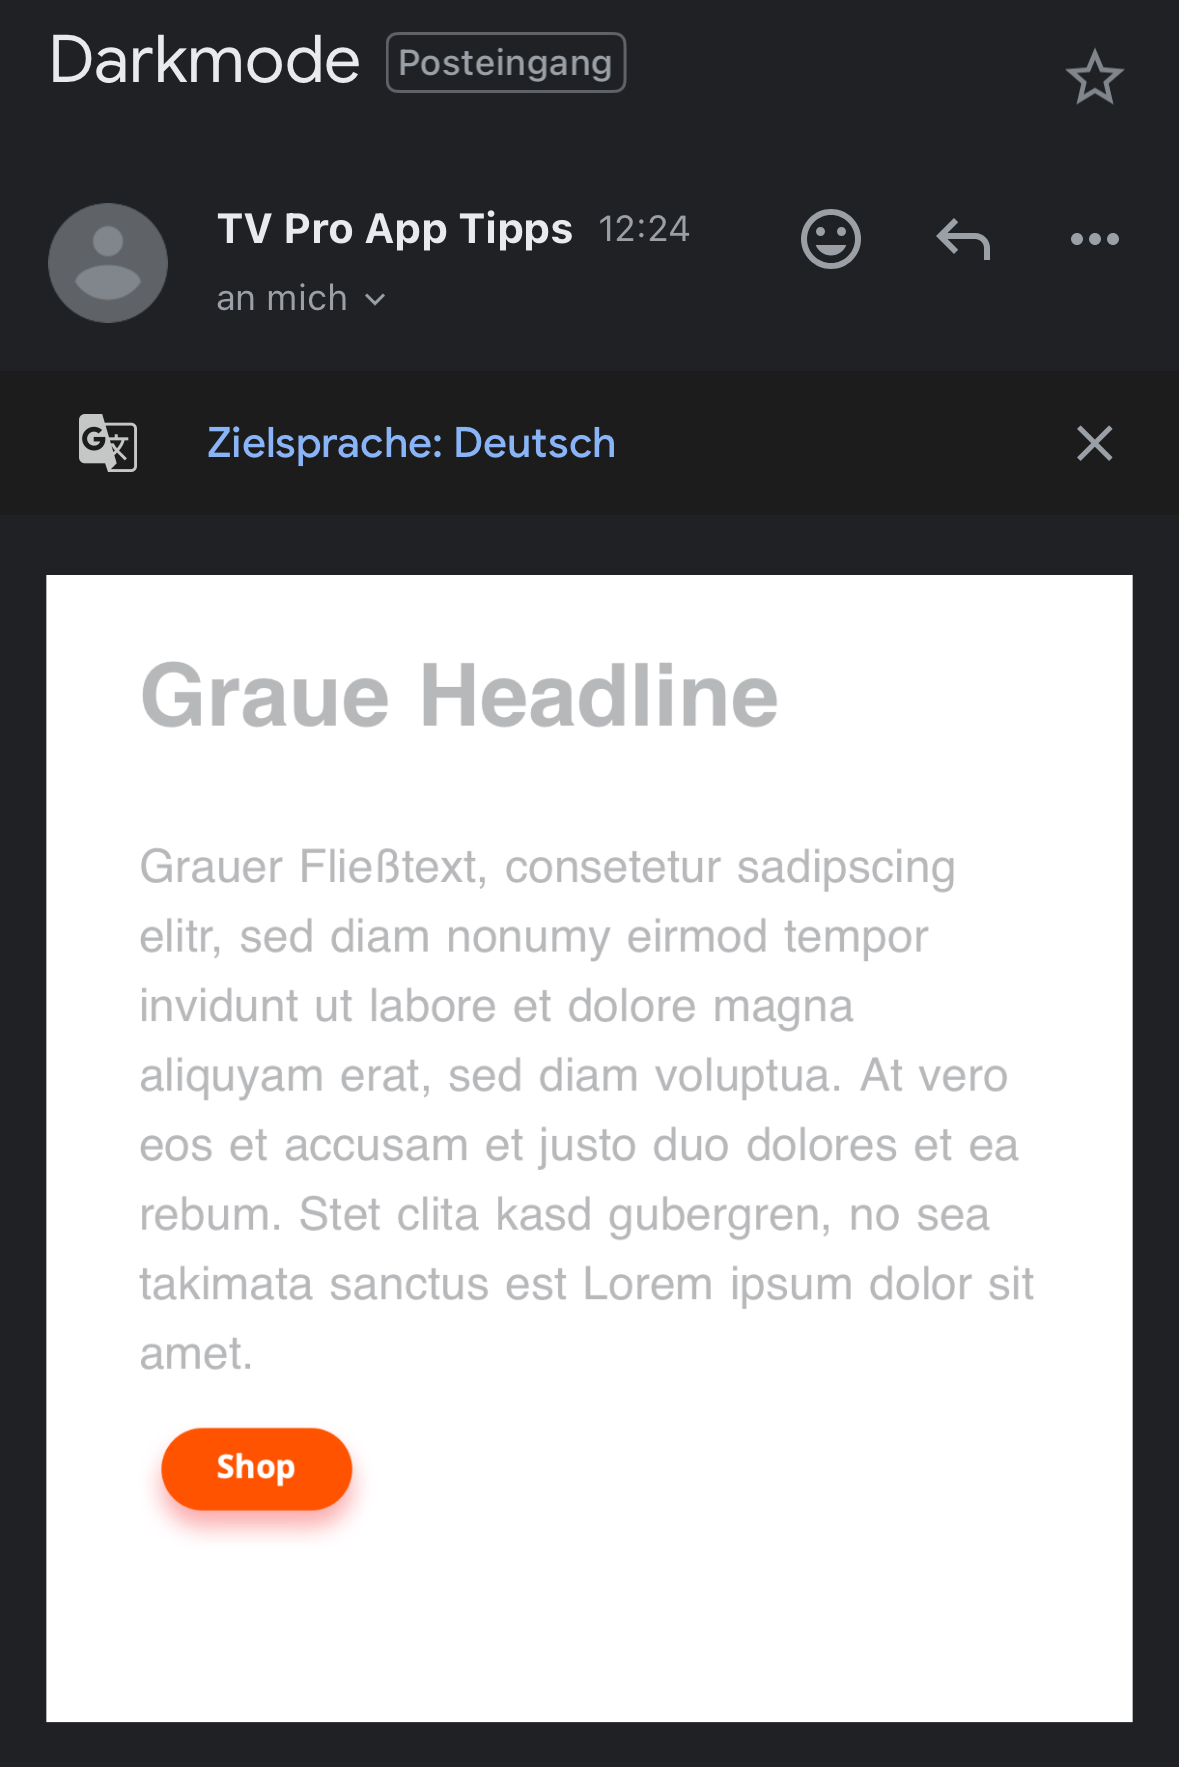
Unfortunately, some email clients try to automatically adapt newsletters for dark mode by inverting colors. This can cause the dark text to appear white, even if the background is also white, making it appear as though parts of your message are missing.

This can currently happen in Gmail and Outlook mobile apps.

We have filed bug reports with the app makers that do this and have requested a better way of coordinating when they auto-switch between light & dark mode.

One possible solution in terms of your design is to find a color combination that will remain readable in all situations.

Over the past few months, we've already seen some apps adjust their dark mode behaviour multiple times, so it looks like the email app people are also still figuring things out.

Further reading:
https://litmus.com/blog/the-ultimate-guide-to-dark-mode-for-email-marketers
You can access your invoice for Mail Designer 365 via the confirmation email we sent you after you purchased your plan. In this email you will find a link to download your invoice in PDF format.

You can also download your invoice under the "Billing" section of your my.maildesigner365 account.

Mac App Store purchases are processed by Apple, you should receive your invoice by email.

We do not support copy & pasting into Outlook. When you copy & paste, there is no way for us to ensure that Outlook will preserve all of the formatting from Mail Designer 365. Instead, we recommend adding your email account to Mail Designer 365 and sending your messages that way.
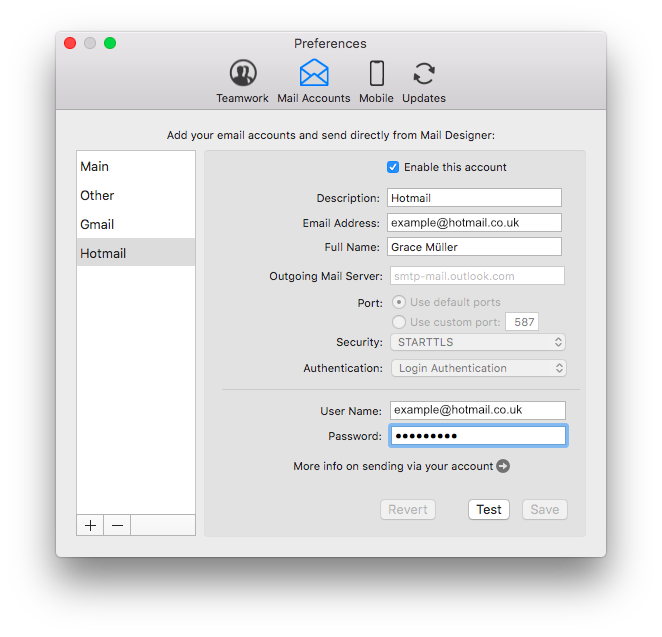
‣ Go to "Mail Designer 365" > "Preferences."
{S_974_50%}
‣ Then choose "Mail accounts"
{S_976_60%}

Please refer to the following pages for further information on configuration and sending emails via Mail Designer 365:


We understand that some educational customers and enterprises may not be able to purchase a subscription plan.

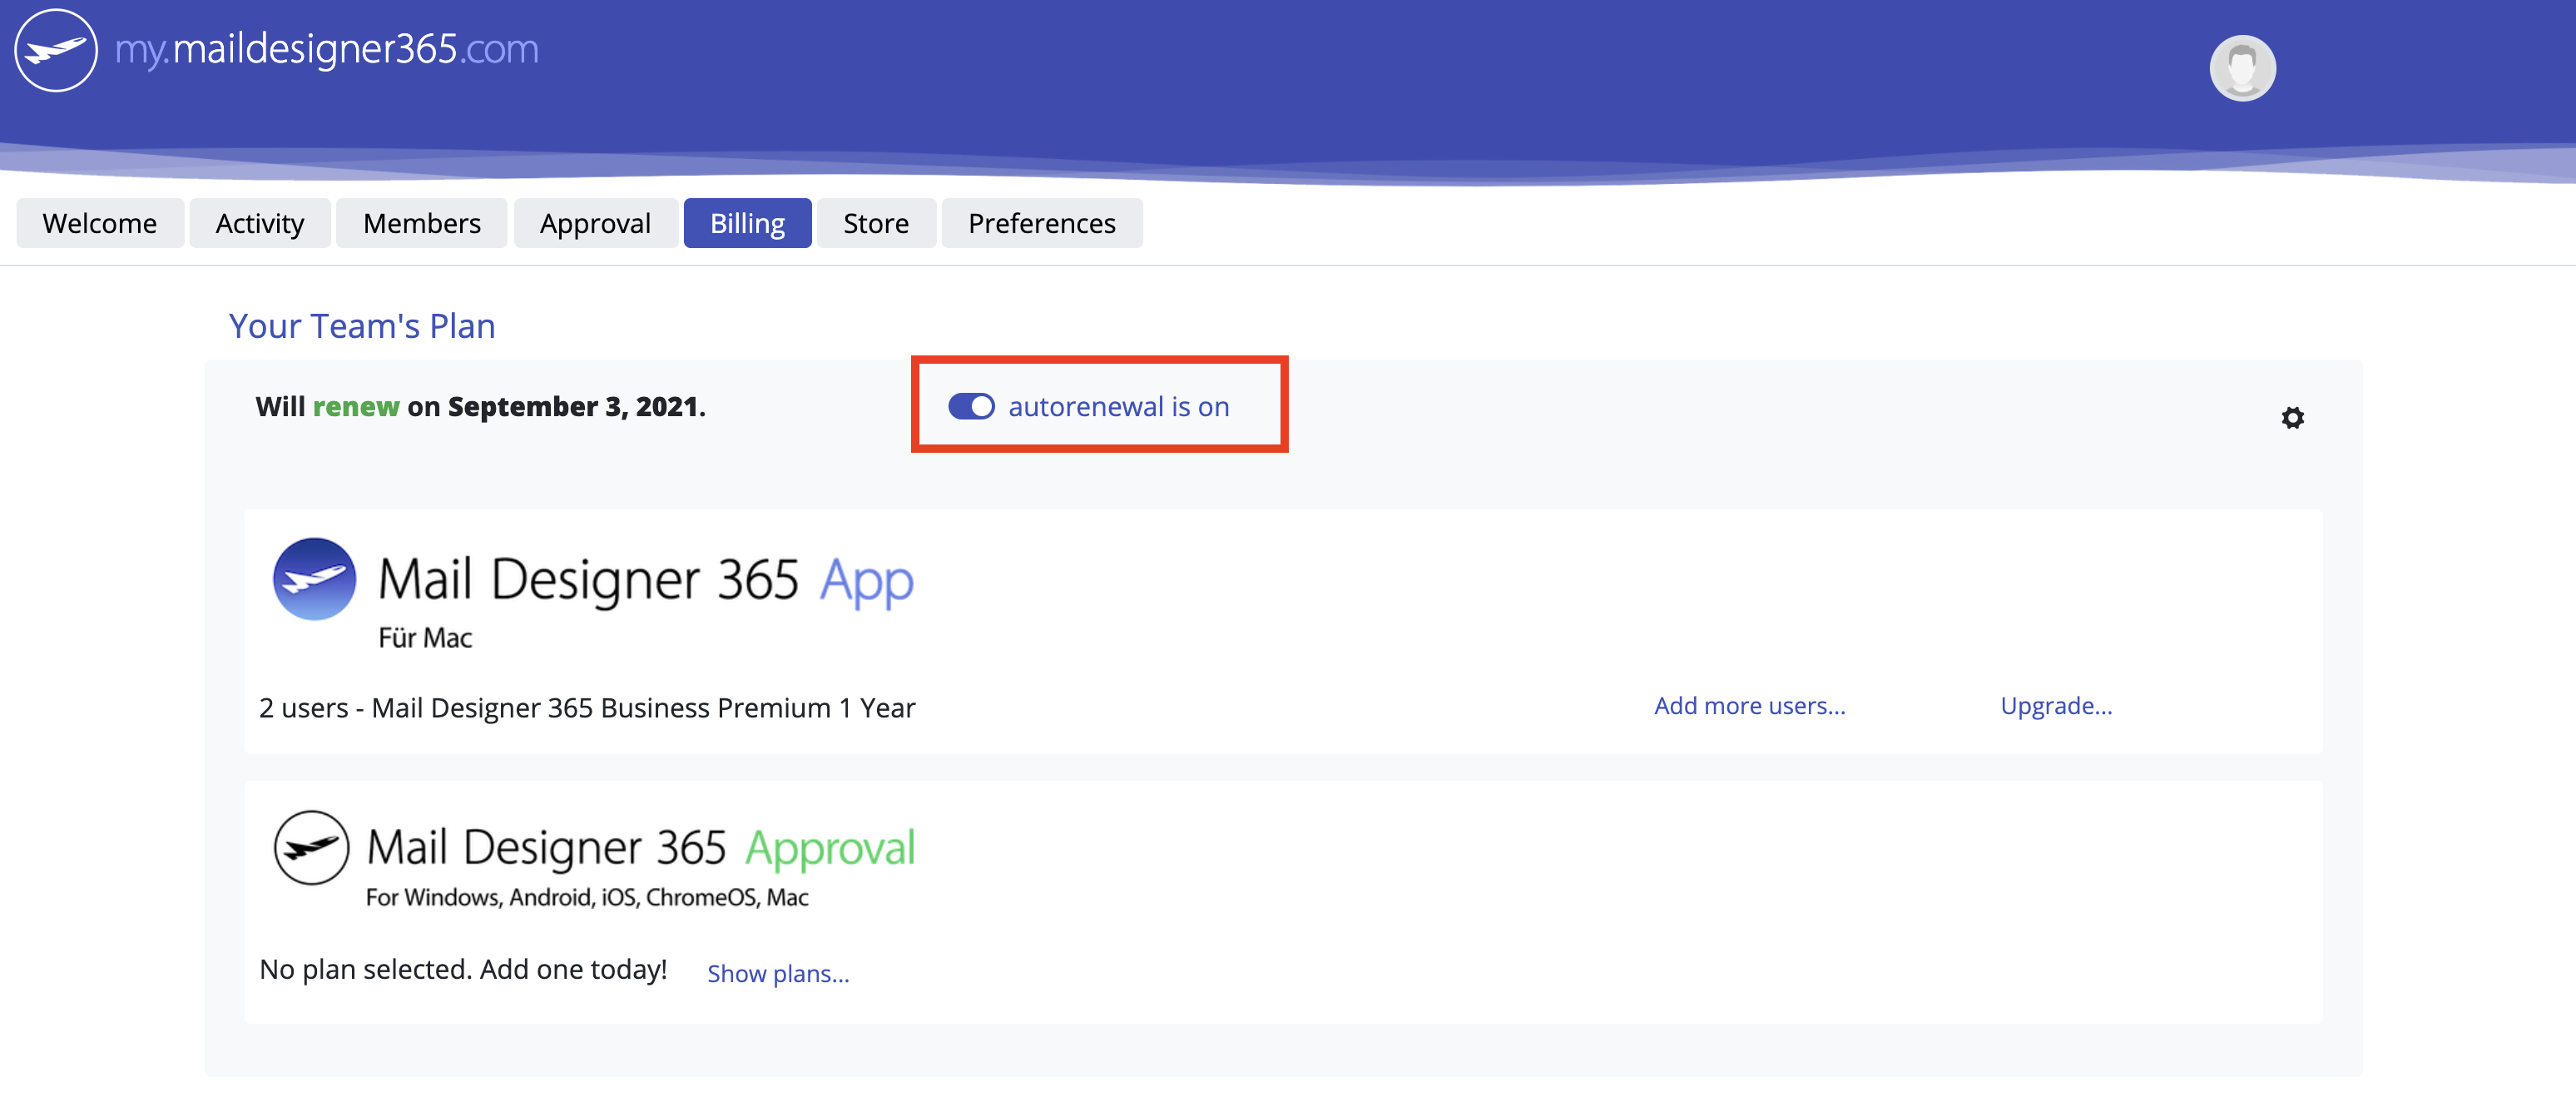
For those of you unable to purchase a subscription plan due to company guidelines/restrictions, you can purchase Mail Designer 365 with a 1-year term and immediately disable any renewals via my.maildesigner365.

From the point of view of the company, that shouldn't be any different that buying a license and purching upgrades on an annual schedule.
Email design features are exclusively available in the Mail Designer 365 app for Mac. However, if you have set up a Mail Designer 365 team, Windows and other non-Mac users can use Mail Designer 365 Campaigns on any device and in any browser to:
  • View, comment on and approve email design drafts
  • Receive test emails
  • Manage email contacts and audiences
  • Schedule and send email campaigns
  • Access post campaign analytics

Get your team started today with a free Campaigns plan for up to 10 team members!

Mail Designer stores all of its categories and designs on your Mac. For example, if you are using Time Machine Backup, and you want to access your Mail Designer templates please follow the following steps:

  • Navigate to the folder: Your username/Library/Group Containers
  • In this folder you will see a Folder ending in .Mail Designer
  • Navigate to Documents/MD365 within this folder
  • Restore the MD365 folder to your new Mac

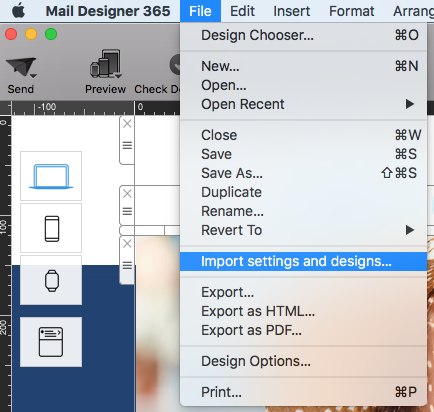
After you have restored the directory, simply open Mail Designer 365 and select "File" > "Import settings and designs" to import the documents to your new library.

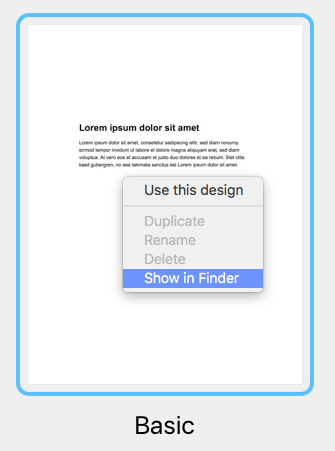
Tip: To quickly view the location of your designs, click your chosen template whilst holding "Ctrl" and then select "Show in Finder."
{"id":"196","content":"
\n\n
\n
\n
\n Version number *  \"IconInfo\"Which version do I have?<\/b>
\nOpen Mail Designer 365 and choose 'Mail Designer 365 > About Mail Designer' from the menu bar to find your version.\" width=\"16\" height=\"16\"\/>\n <\/div>\n <\/div>\n
\n
\n
\n
\n \n <\/div>\n <\/div>\n <\/div>\n <\/div>\n
<\/div>\n <\/div>\n\n
\n
\n
\n Attach a screenshot\n <\/div>\n <\/div>\n
\n
\n \n <\/div>\n <\/div>\n
<\/div>\n <\/div>\n\n
\n
\n
\n Design file  \"IconInfo\"How can I send you my design?<\/b>
\nOpen your design, choose 'File > Export' and attach your exported design to your support request.\" width=\"16\" height=\"16\"\/>\n <\/div>\n <\/div>\n
\n
\n \n <\/div>\n <\/div>\n
<\/div>\n <\/div>\n\n
\n
\n
\n Operating System  \"IconInfo\"Where can I find my macOS version?<\/b>
\nSelect ' > About This Mac' in the top left corner of your screen.

You'll find your macOS version in the new window.\" width=\"16\" height=\"16\"\/>\n <\/div>\n <\/div>\n
\n
\n
\n
\n \n <\/div>\n <\/div>\n <\/div>\n <\/div>\n
<\/div>\n <\/div>\n\n <\/div>"}
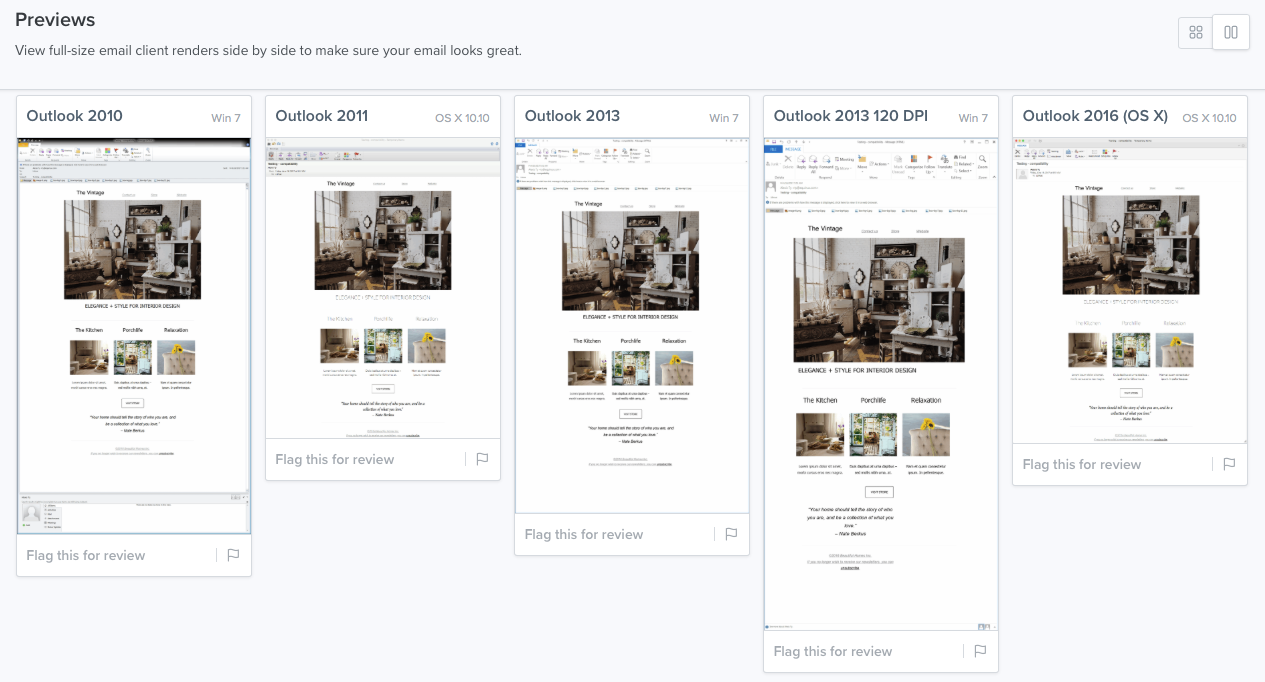
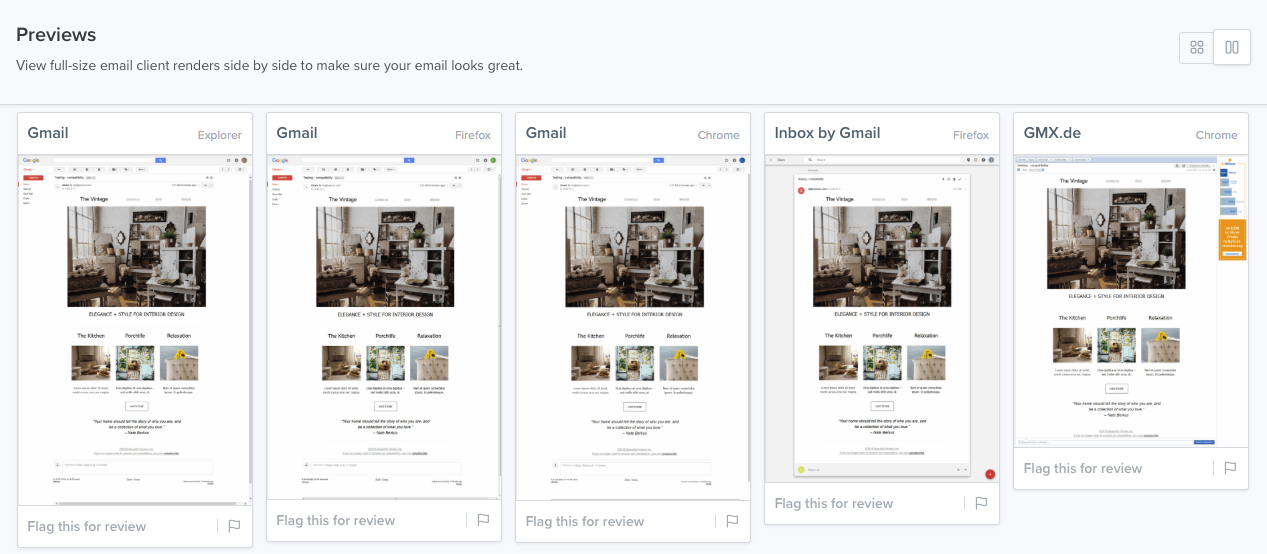
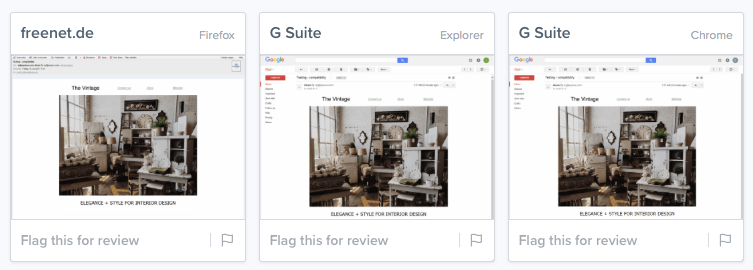
Currently, you will need to use outside services to render email previews for various email clients. We recommend trying litmus.com to check out the previews of your email newsletters for different clients. You can send a test mail to this service and it lets the mail render on various email clients, captures the output, and then displays the previews.
{S_948_50%}
{S_949_50%}
{S_950_50%}
{S_951_50%}
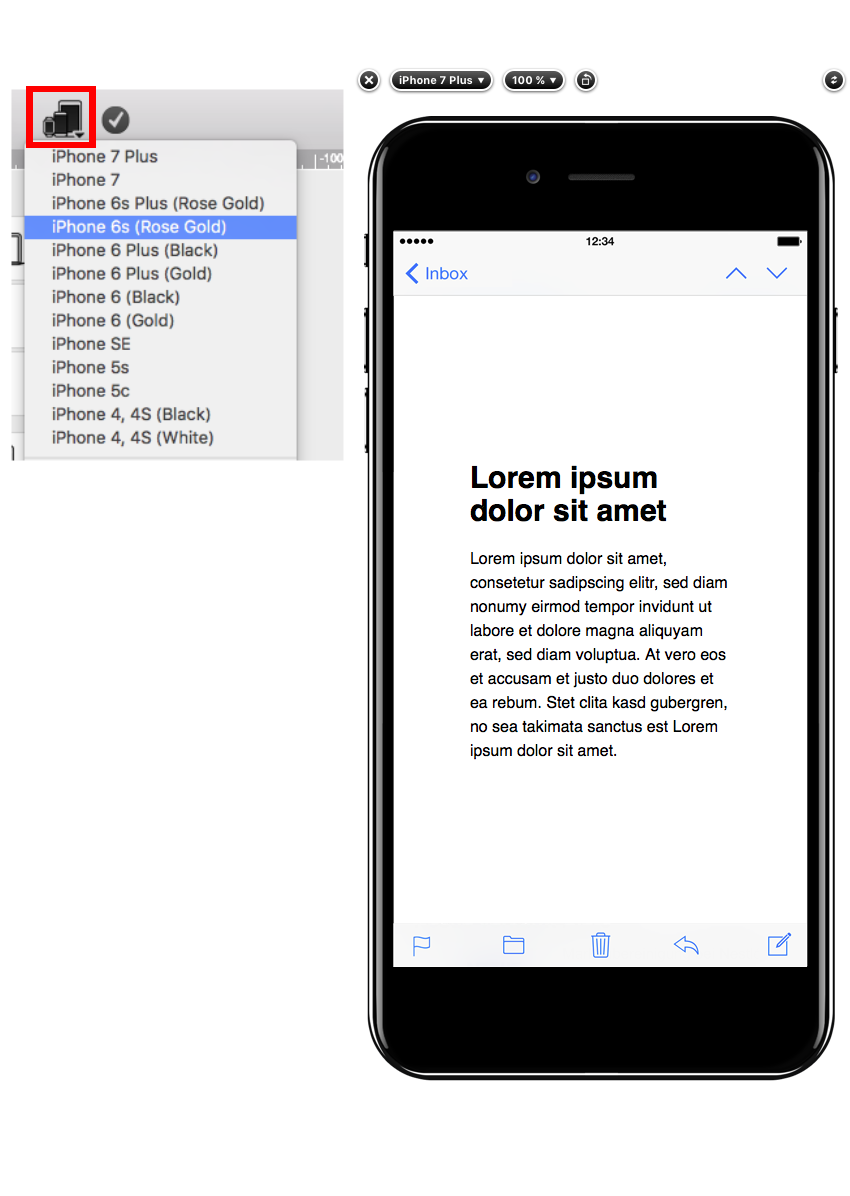
Mail Designer 365 does provide a preview for mobile devices. Keep in mind that this is only for the sole purpose of providing a rough idea of how the newsletter may look like on mobile devices. The actual rendering may be different, depending on the email client.
{S_952_50%}
Please visit this page for further information on how to preview your design for different email clients:


Want to test Mail Designer 365 code with another ESP, CRM platform, or similar? We've created a HTML sample of one of our most popular Design Ideas, so you can try before you buy!

Download HTML sample

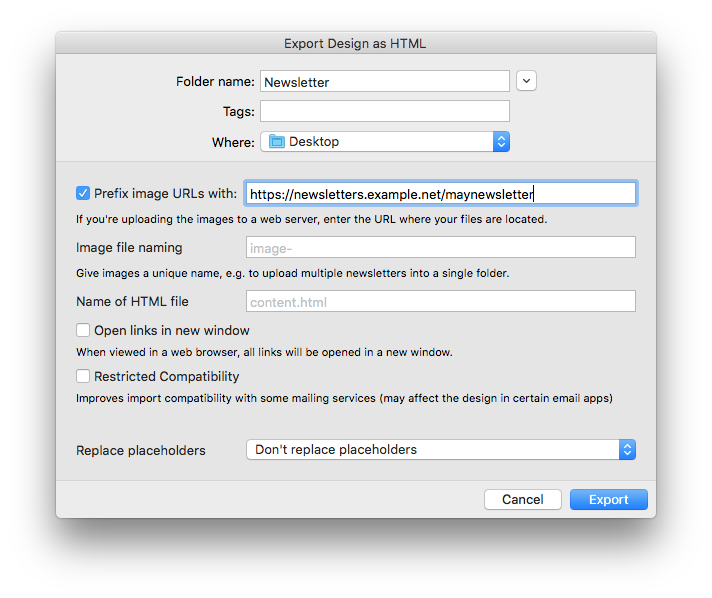
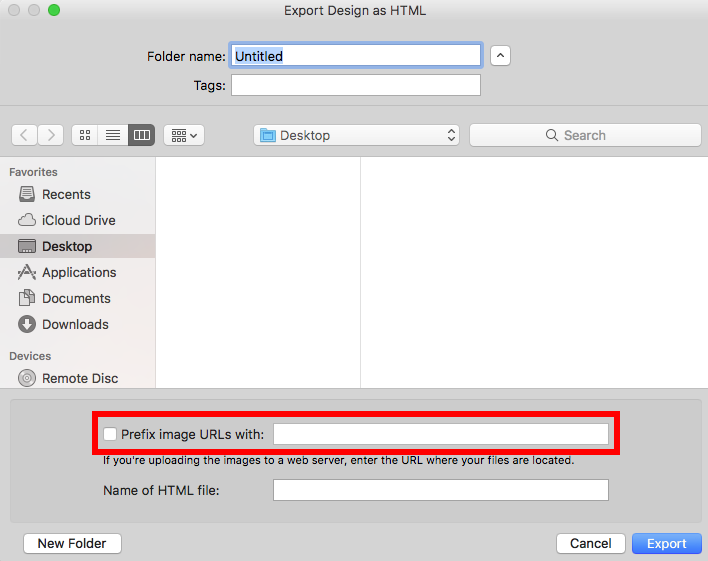
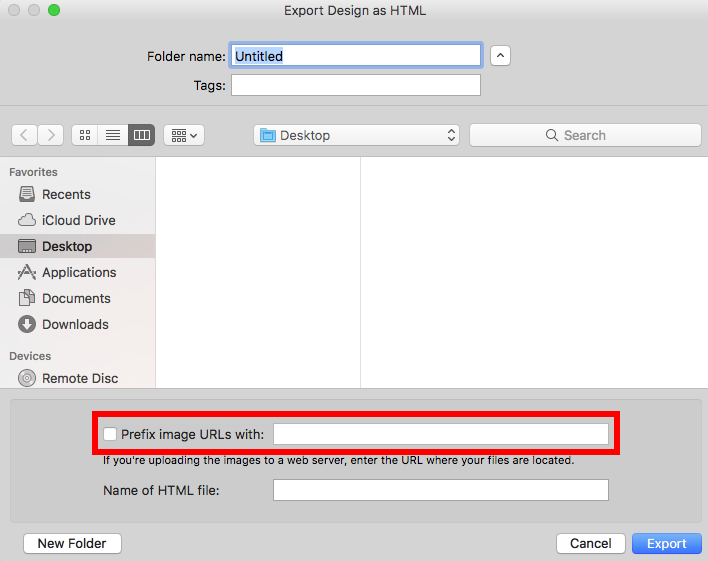
Please note, when you use the HTML export feature yourself, you'll also have the option of setting an image URL, and image prefix for where your images will be hosted, as well as a custom folder and HTML file name.
If you receive the following error message when trying to send from your Gmail account:
invalid_grant: Bad Request (-10)

Please carry out the following steps:
  1. Go to Mail Designer 365 > Preferences > Mail Accounts.
  2. Remove your Gmail address from the list using the "-" icon.
  3. Then, click the "+" icon to re-add your Gmail account. You will be prompted to sign in with your Gmail credentials again.

Once you have re-added your account, you should be fine to start sending emails again.
Mail Designer 365 includes layout blocks for almost every newsletter layout imaginable. But if you have specific requirements, you can even create completely customized, reusable layout blocks. All you'll need is Mail Designer 365 and HTML and CSS skills.

Please note: You'll need to have a fairly detailed understanding of HTML and CSS layouts to create your own layout blocks.

Mail Designer 365 uses advanced techniques to create highly compatible email layouts, so you'll need to be careful not to break email compatibility when creating your own.

We can't provide HTML support for your custom designs or any issues that are caused by custom layout blocks so proceed with caution. (Or as our support team likes to say: With great power comes great responsibility…)

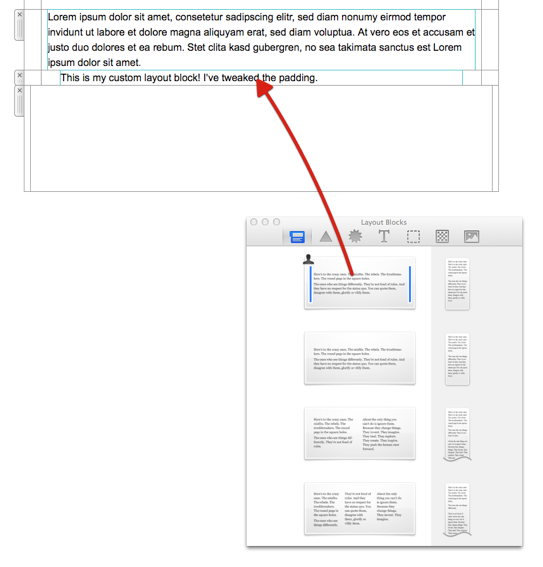
How to create a custom layout block


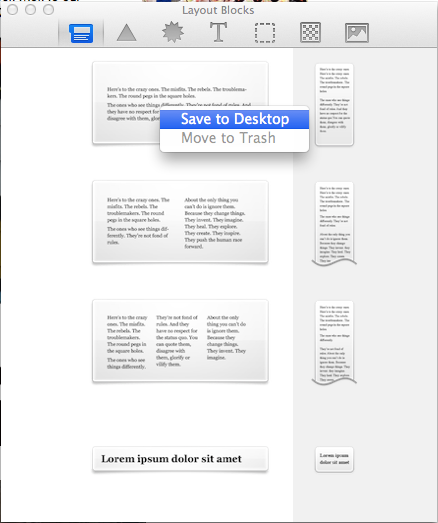
  • Right click an existing layout block and choose "Save to desktop"
  • Find the "..eqrmlayoutblock" on your desktop and edit the Content.html file
  • Customize the preview image to match your new layout block
  • Drag the entire folder with your custom layout block into the Mail Designer 365 Contents panel


Your new layout block will now show up in the app alongside the default layout blocks. Just drag it in to your design to use it.

Don't forget to thoroughly test both the desktop and mobile versions of a design with custom layout blocks before using it for production email campaigns

{S_1066}

{S_1067}

Mail Designer 365 allows you to send emails directly from within the application using the SMTP procotol.

In order to add your email account, please open the "Mail Accounts" tab in the preferences of Mail Designer, click "+" and enter the information for the account you want to configure. After you have entered all the required information, save the changes and choose this account in the send window.

Follow this step-by-step guide for more information.
Activating Mail Designer 365 is easy! Here's how to get started:

  • If you haven't already, you can download Mail Designer 365 using this link.
  • After the download has completed, launch the app and click the "Login" button in the top left-hand corner of the Design Chooser homepage.
  • Enter your equinux ID and password in the space provided. Hint: This is the login you first created when purchasing Mail Designer 365 (or any other equinux software products) in our online store.
Forgot your password? No problem!

You can reset your password for your equinux ID.

Mail Designer 365 Premium Business is our premium plan designed for businesses or individuals who use email newsletters as a critical part of their business (e.g. marketing agencies, promotional campaigns, customer service.) As part of this plan, users are entitled to exclusive priority support within 24 hours following a query (mon-fri.)

Mail Designer 365 Business is our alternative plan option, designed for everyday email newsletters which aren't time critical. This plan offers the basic support tier (email response within 72 hours.)

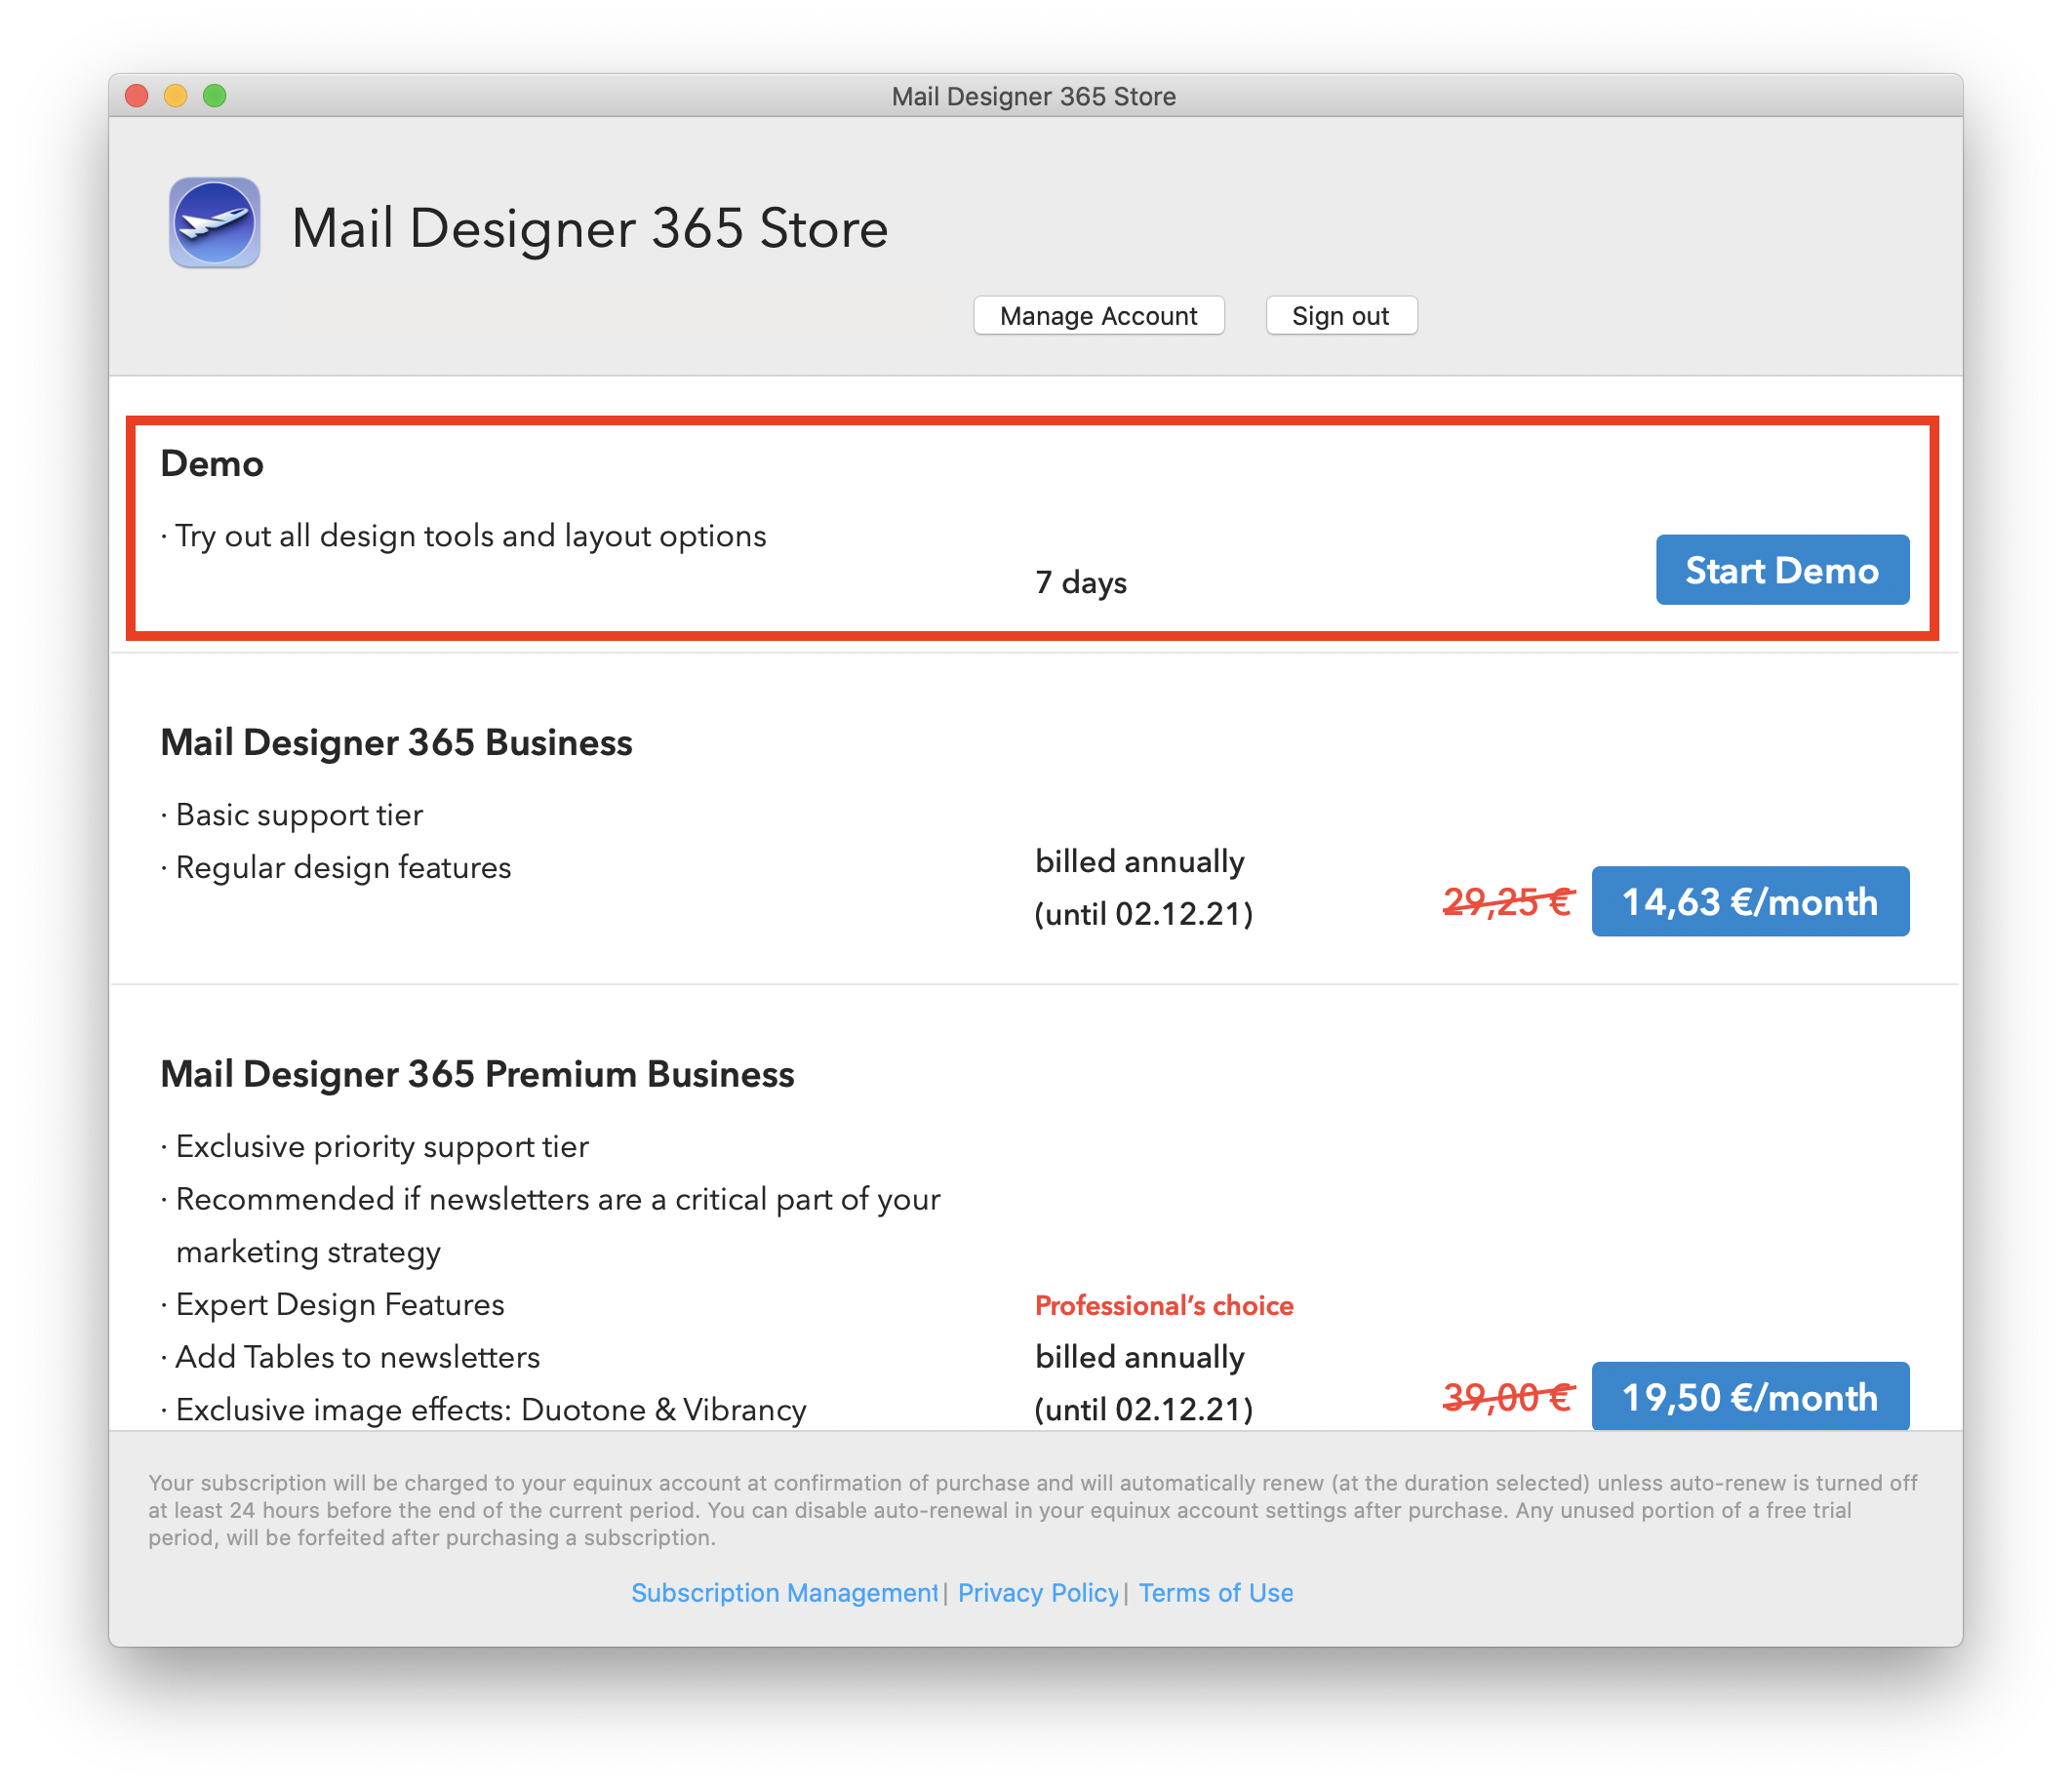
Interested in purchasing a plan or upgrading? Get your Mail Designer 365 plan here.
Mailchimp has discontinued supports for their older APIs. These APIs were previously used by Mail Designer in earlier versions. Please update to the latest version of Mail Designer 365 which provides support for Mailchimp's latest API.

If you are using an older version of Mail Designer, e.g. Mail Designer 1, Mail Designer 2 or Mail Designer Pro 1-3 or Mail Designer Pro HS, please upgrade to Mail Designer 365.

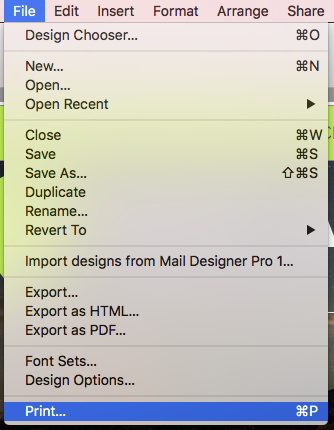
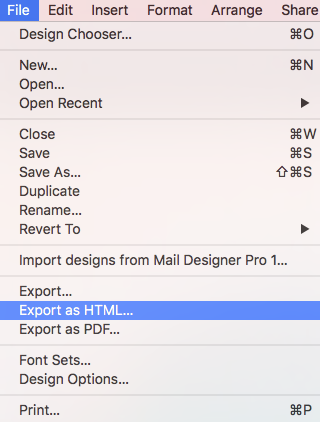
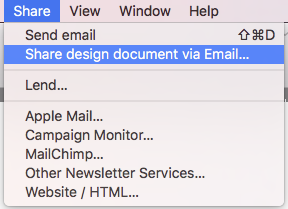
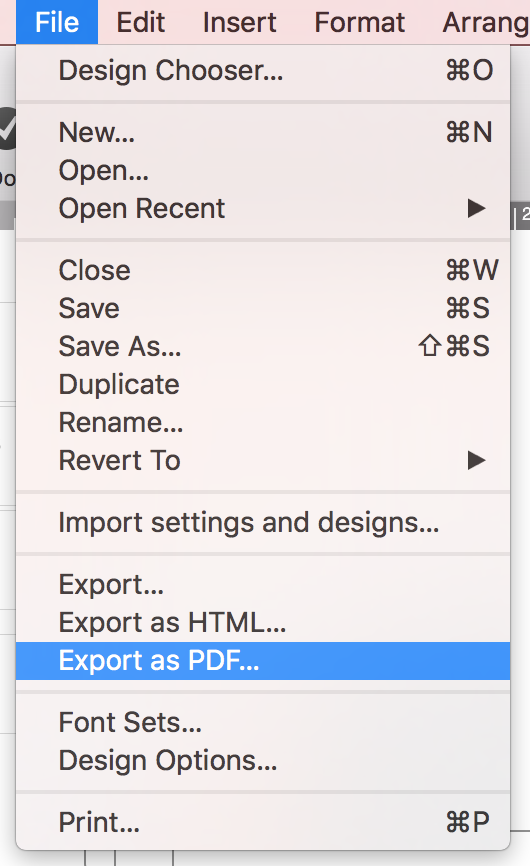
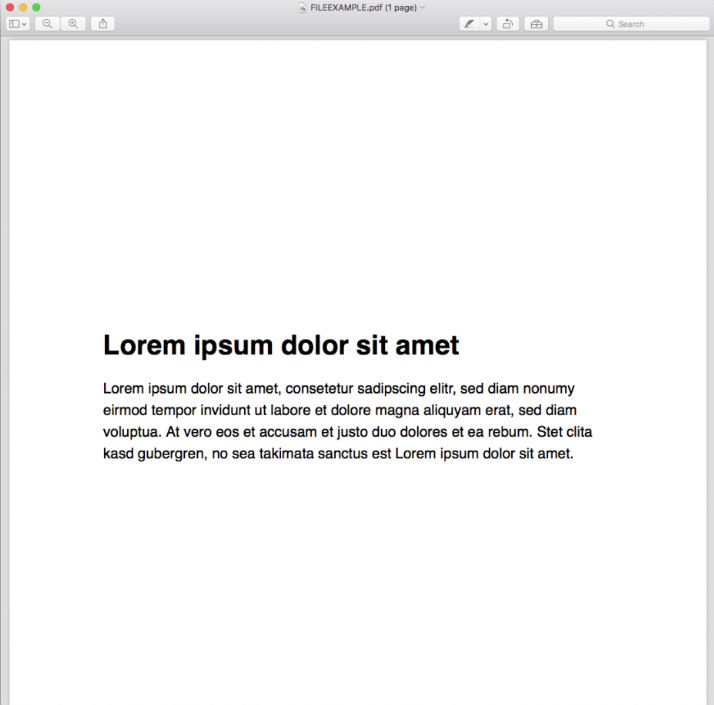
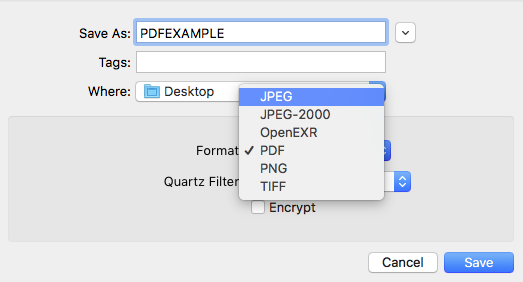
Yes, it's possible to print your template by going to "File > Print…" from within the Mail Designer 365 app. Exporting to PDF can either by done in the lower left corner of the "Print" window or by selecting "File > Export as PDF…".

Mail Designer 365 supports all the latest macOS versions from macOS 10.13 High Sierra, macOS 10.14 Mojave, macOS 10.15 Catalina, macOS 11 Big Sur, macOS 12 Monterey, and macOS 13 Ventura, macOS 14 Sonoma as well as the newly announced macOS 15 Sequoia.

Every Mail Designer plan offers a certain number of AI credits. These credits are automatically renewed every month as part of your subscription. During the beta, we have assigned all plans a number of credits for testing purposes, the number of credits in each plan may change in the future.

Every time you use TextScout AI features in Mail Designer, this is automatically reflected in your available AI credits.

How many credits are used?
How many credits a TextScout AI query will use depends on the complexity of the query itself and the number of results that TextScout was able to return. As the AI models are still being improved during the beta, the number of credits being consumed may vary.

Teams
If you are part of a Mail Designer 365 team with multiple plans, your credits are pooled so you can all use each others' credits.

I've run out of credits – what now?
Upgrade to Mail Designer 365 Business Premium to add additional credits to your account.

Already on Business Premium? Please reach out to our support team, we'd like to hear more about your experience using TextScout AI Beta.

When are credits refreshed?
AI Credits are automatically reset on the first of the month. Unused credits from the previous month do not roll over.

It sure does! And it does it brilliantly too!

Mail Designer can export an HTML file containing your entire design. This opens up a whole host of great options for you, as the user, to explore:

  • Upload your design to third-party newsletter services
  • Offer recipients, with email client programs that don’t support rich HTML content, the option to view your message as a webpage in their browser
  • Create a link to your newsletter directly from your website: A great option for people that would like to see a newsletter before they subscribe

The best thing is: It's so easy to export your design as an HTML document

  • Open your design
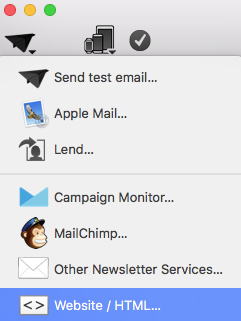
  • Choose “Share > HTML...” from the menu bar
  • Choose a location to save your design

By the way: If you plan on uploading your images to a separate web server, you can enter an absolute URL prefix for images.

Certificate issues which occur in certain browsers - for example, Google Chrome - can cause images to not be displayed due to security measures.

Previously, Mailchimp were serving the images exported from Mail Designer 365 over http and the "view in browser" webpage was being served over https. If your browser settings were set up to not allow mixed http and https content on web pages, this will explain why you were unable to see the images.

Mailchimp have recently resolved this issue for new images uploaded to their service. The latest Mail Designer 365 version supports these changes and is fully compatible with Mailchimp.

If you are still experiencing this with your older designs, please contact the Mailchimp team for support.
The version of Apple Mail from macOS Mojave (10.14) onwards, no longer supports email templates / stationery, so Mail Designer 365 is unable to send designs directly from Mail.

But not to worry: You can add your email account directly to Mail Designer 365 to send emails from your own address:

  • Open Mail Designer 365 > Preferences
  • Choose Mail Accounts…
  • Click + to add a new account
  • Enter your email account details


Tip: Find your email account settings in Apple Mail under Mail > Preferences > Accounts > Server Settings > Outgoing Mail Server.

Visit the Mail Designer 365 Manual for a step-by-step guide.

With Mail Designer 365 you can create responsive newsletters which look different depending on which device your recipient opens your email.

On an iPhone your recipient will see the mobile version of your newsletter.
As an iPad has a much bigger screen than an iPhone, an iPad will display the desktop version of your newsletter.

Mail Designer 365 offers you ultimate peace of mind when you're designing your email newsletters. Thanks to an array of fail-detection methods, you can be safe in the knowledge that your email will be sent error-free.

Some fail prevention measures include...
  • Image optimisation
  • Subject line preview
  • Built in spelling & grammar checker
  • Mobile optimisation tools

For a detailed overview of all our fail detection methods, check out this post.
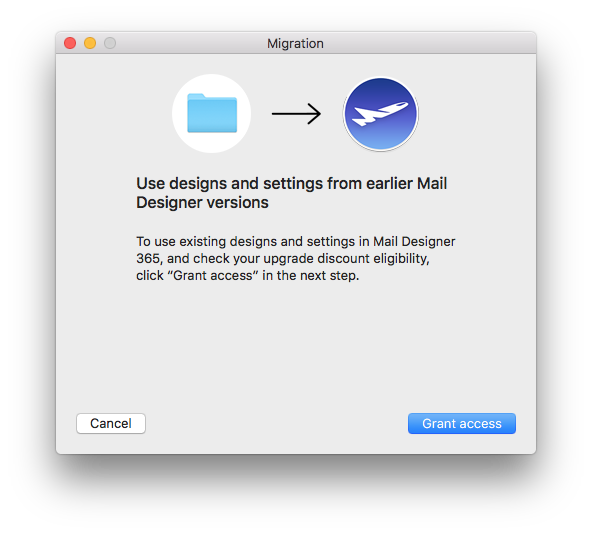
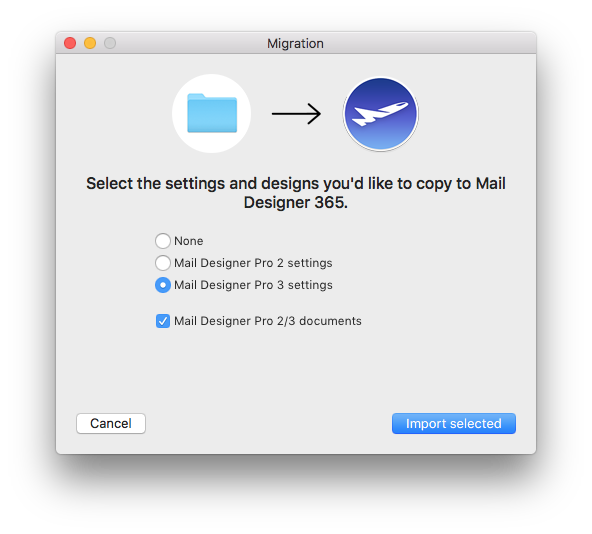
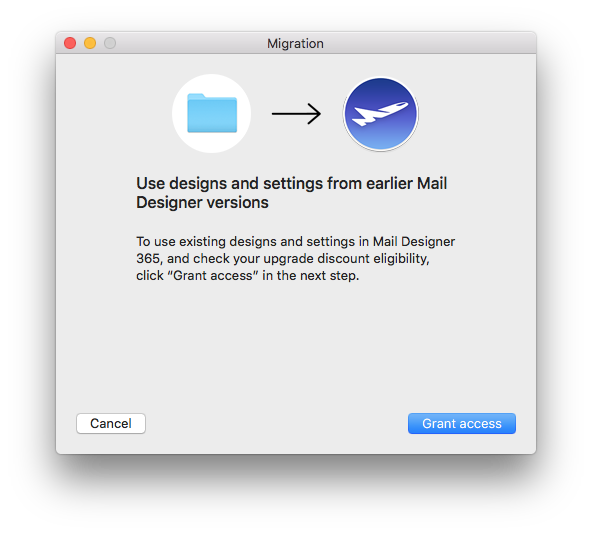
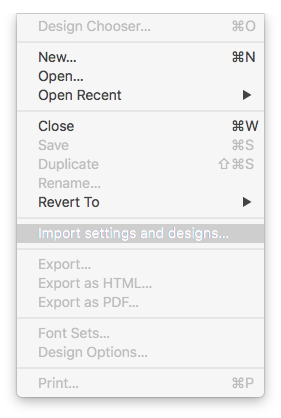
Mail Designer 365 needs your permission to access your previous designs and app preferences from earlier Mail Designer versions:


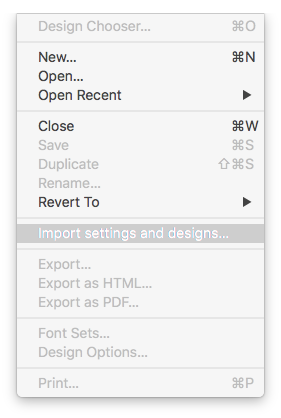
  1. Click on "File" > "Import settings and designs."
  2. {S_1032}
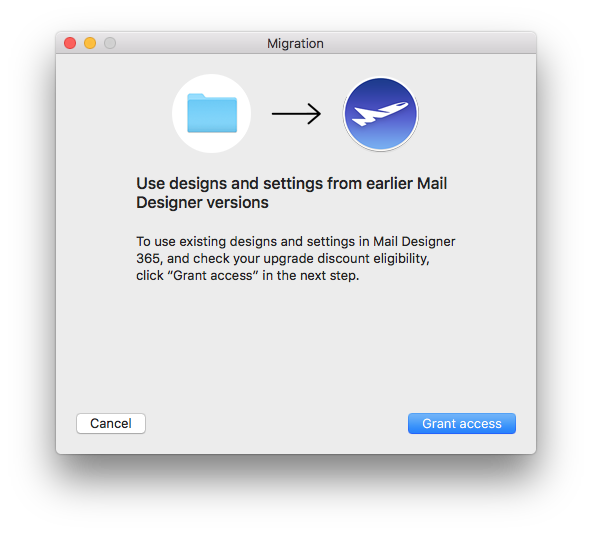
  3. When the migration window pops up, select "Grant access" to continue.
  4. {S_1033}
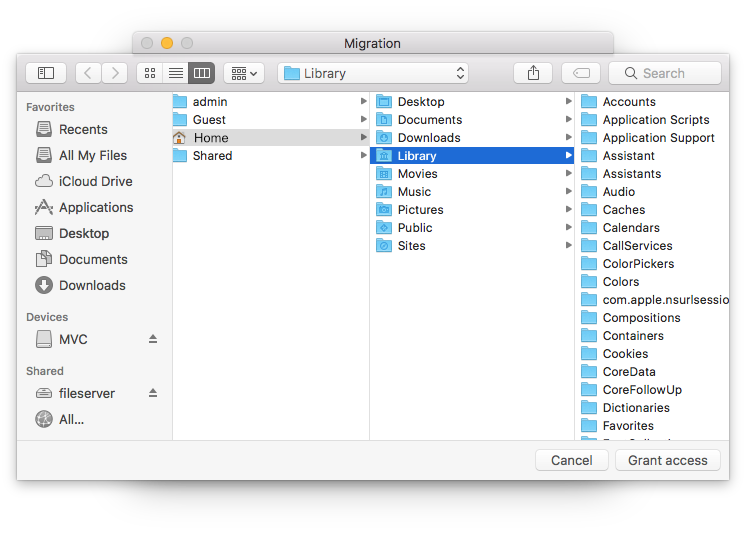
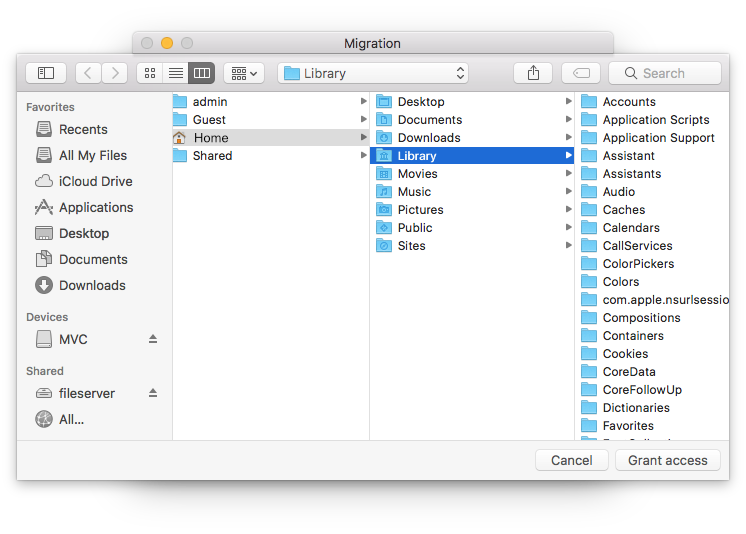
  5. In the next window, simply select "Grant access" again to allow Mail Designer 365 access to the design files in your Library. You do not need to select a different folder.
  6. {S_1035}
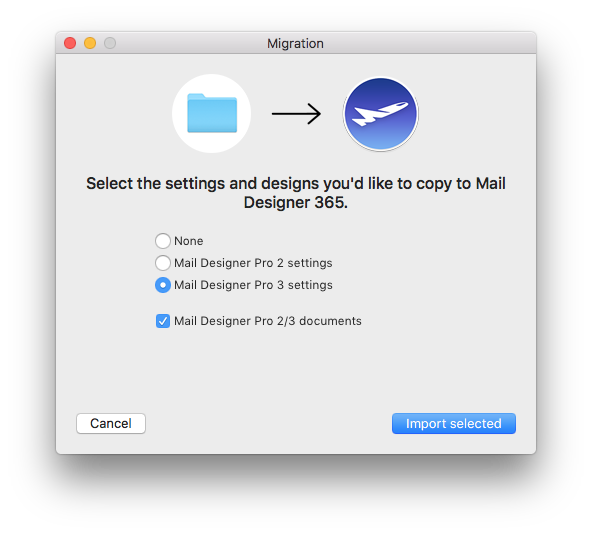
  7. Select from the list which settings you would like to copy over to Mail Designer 365 and then click "Import selected."
  8. {S_1034}
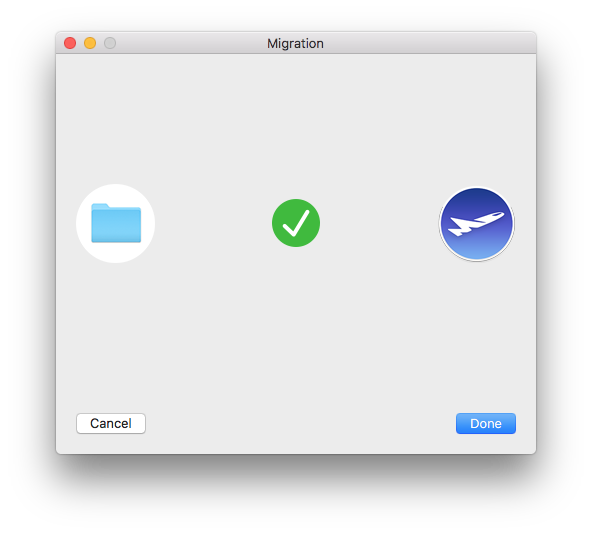
  9. Your designs and in-app preferences will then be quickly imported into Mail Designer 365.
  10. {S_1036}


Mail Designer 365 automatically generates a mobile version of your Newsletter from your Desktop version. This generated mobile version can then be optimized manually.

If you are using one of our email designs or one of your previously created templates, it's possible that the mobile version was changed. This means that changes to the desktop version of your newsletter don't automatically get transferred to the mobile version. To generate a new mobile template from your desktop version, please follow these steps:

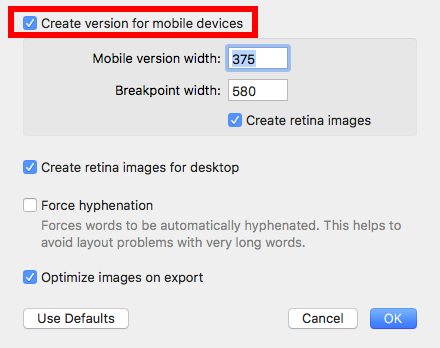
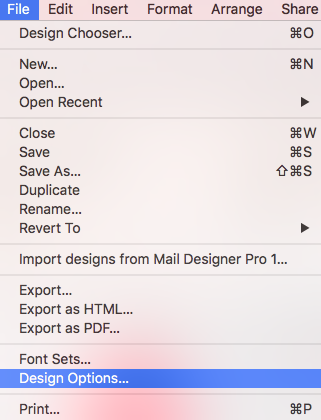
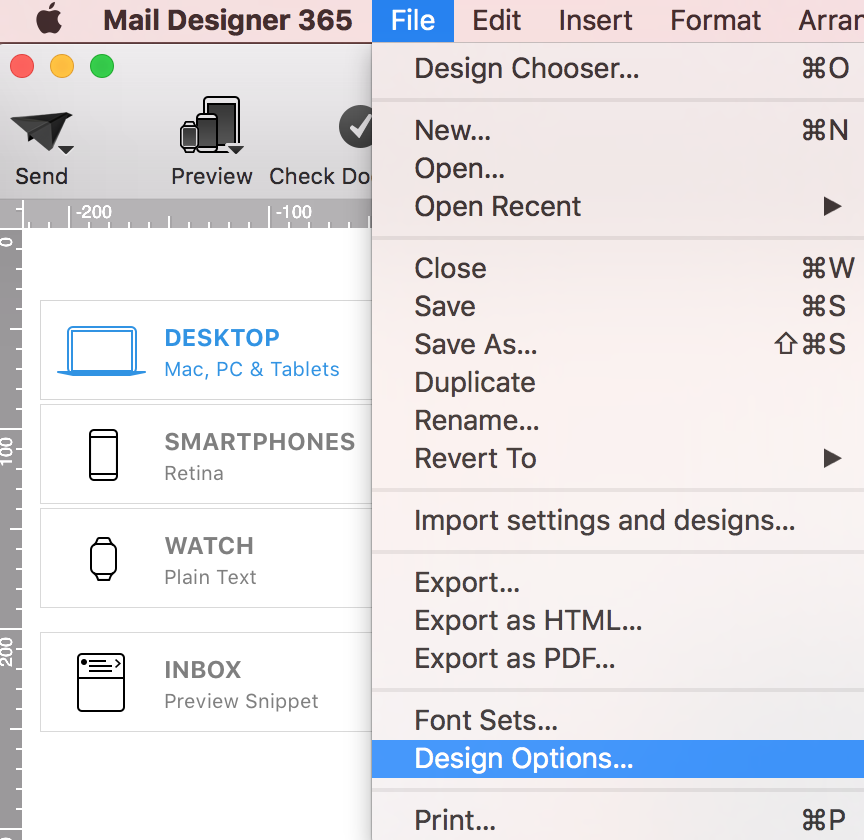
‣ In the Menu, please select "File" > "Design options." 
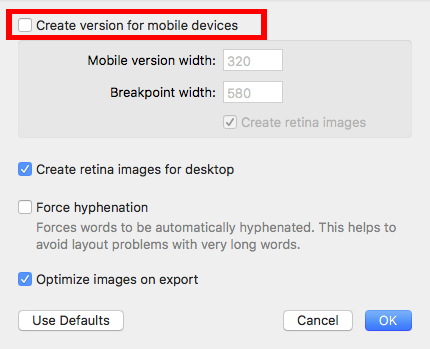
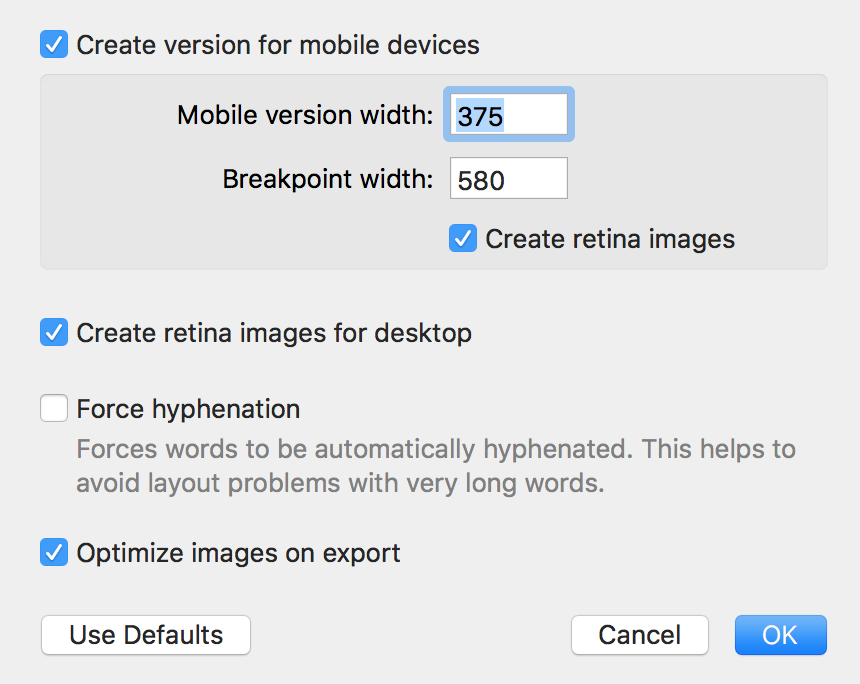
‣ Remove the checkmark next to "Create version for mobile devices" and press ok.
‣ In the Menu, please go to "File" > "Design options" again.
‣ Activate the checkmark next to "Create version for mobile devices" and press ok
{S_745_50%}

Once you have done this, you should be able to see the mobile modified Desktop version of your newsletter and you will be able to edit the layout blocks of the mobile view.

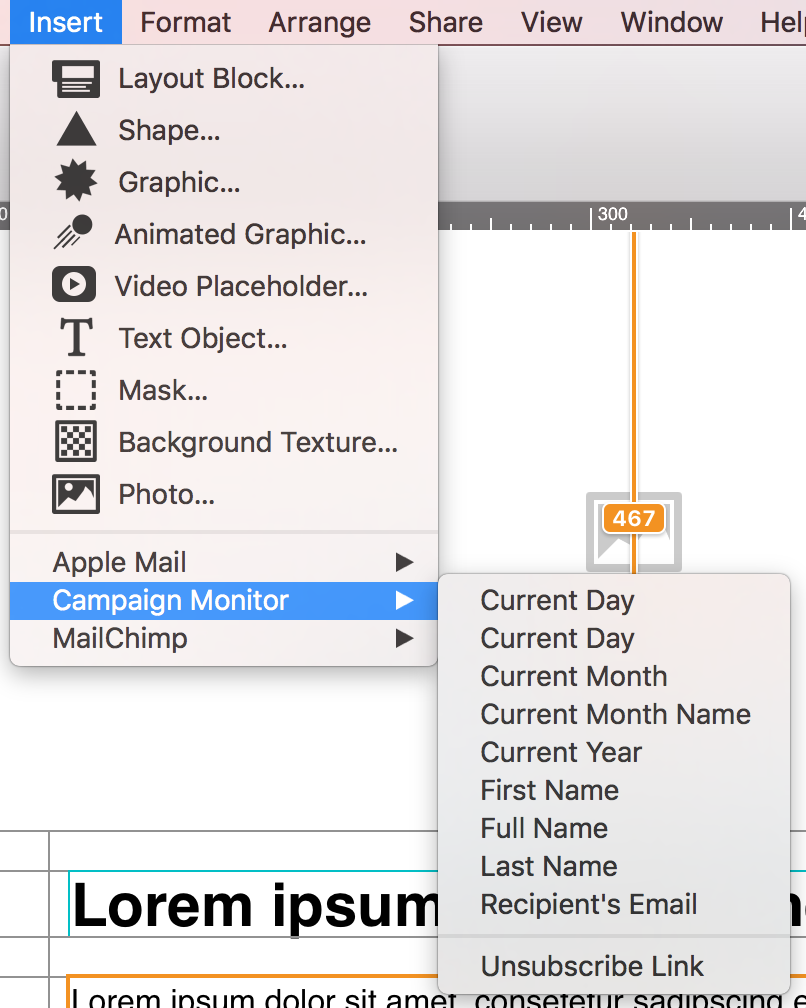
The formatting of the custom placeholders can differ depending on the email service provider (ESP) that you are using. For name placeholders, many ESPs will use [NAME] as the placeholder. [NAME] will then be replaced with the name of the recipient. However, this can vary. Some may require you to use [FULLNAME] or a completely different formatting. Please make sure to double-check with your email service provider.

For detailed information of how you can add placeholders for MailChimp, please visit the following page:

For detailed information of how you can add placeholders for Campaign Monitor, please visit the following page:


Designs which have no pre-configured text style set up can sometimes have font issues in the HTML version. For example, the HTML can override any font choices made by the user and change it back to a default font.

For this reason, we strongly suggest that you apply a pre-configured text style to all of the text layout blocks within your design. In doing this, you have more control over your design and how it appears after send/export.

Text styles allow you to choose a preferred font, as well as several fallback options, and an email-safe font, which is universally supported. You can also use them to determine the size, color, and alignment of text.

For more information on how to configure text styles, please refer to the Mail Designer 365 Manual, where you will find step-by-step guides under the header "Working with text."
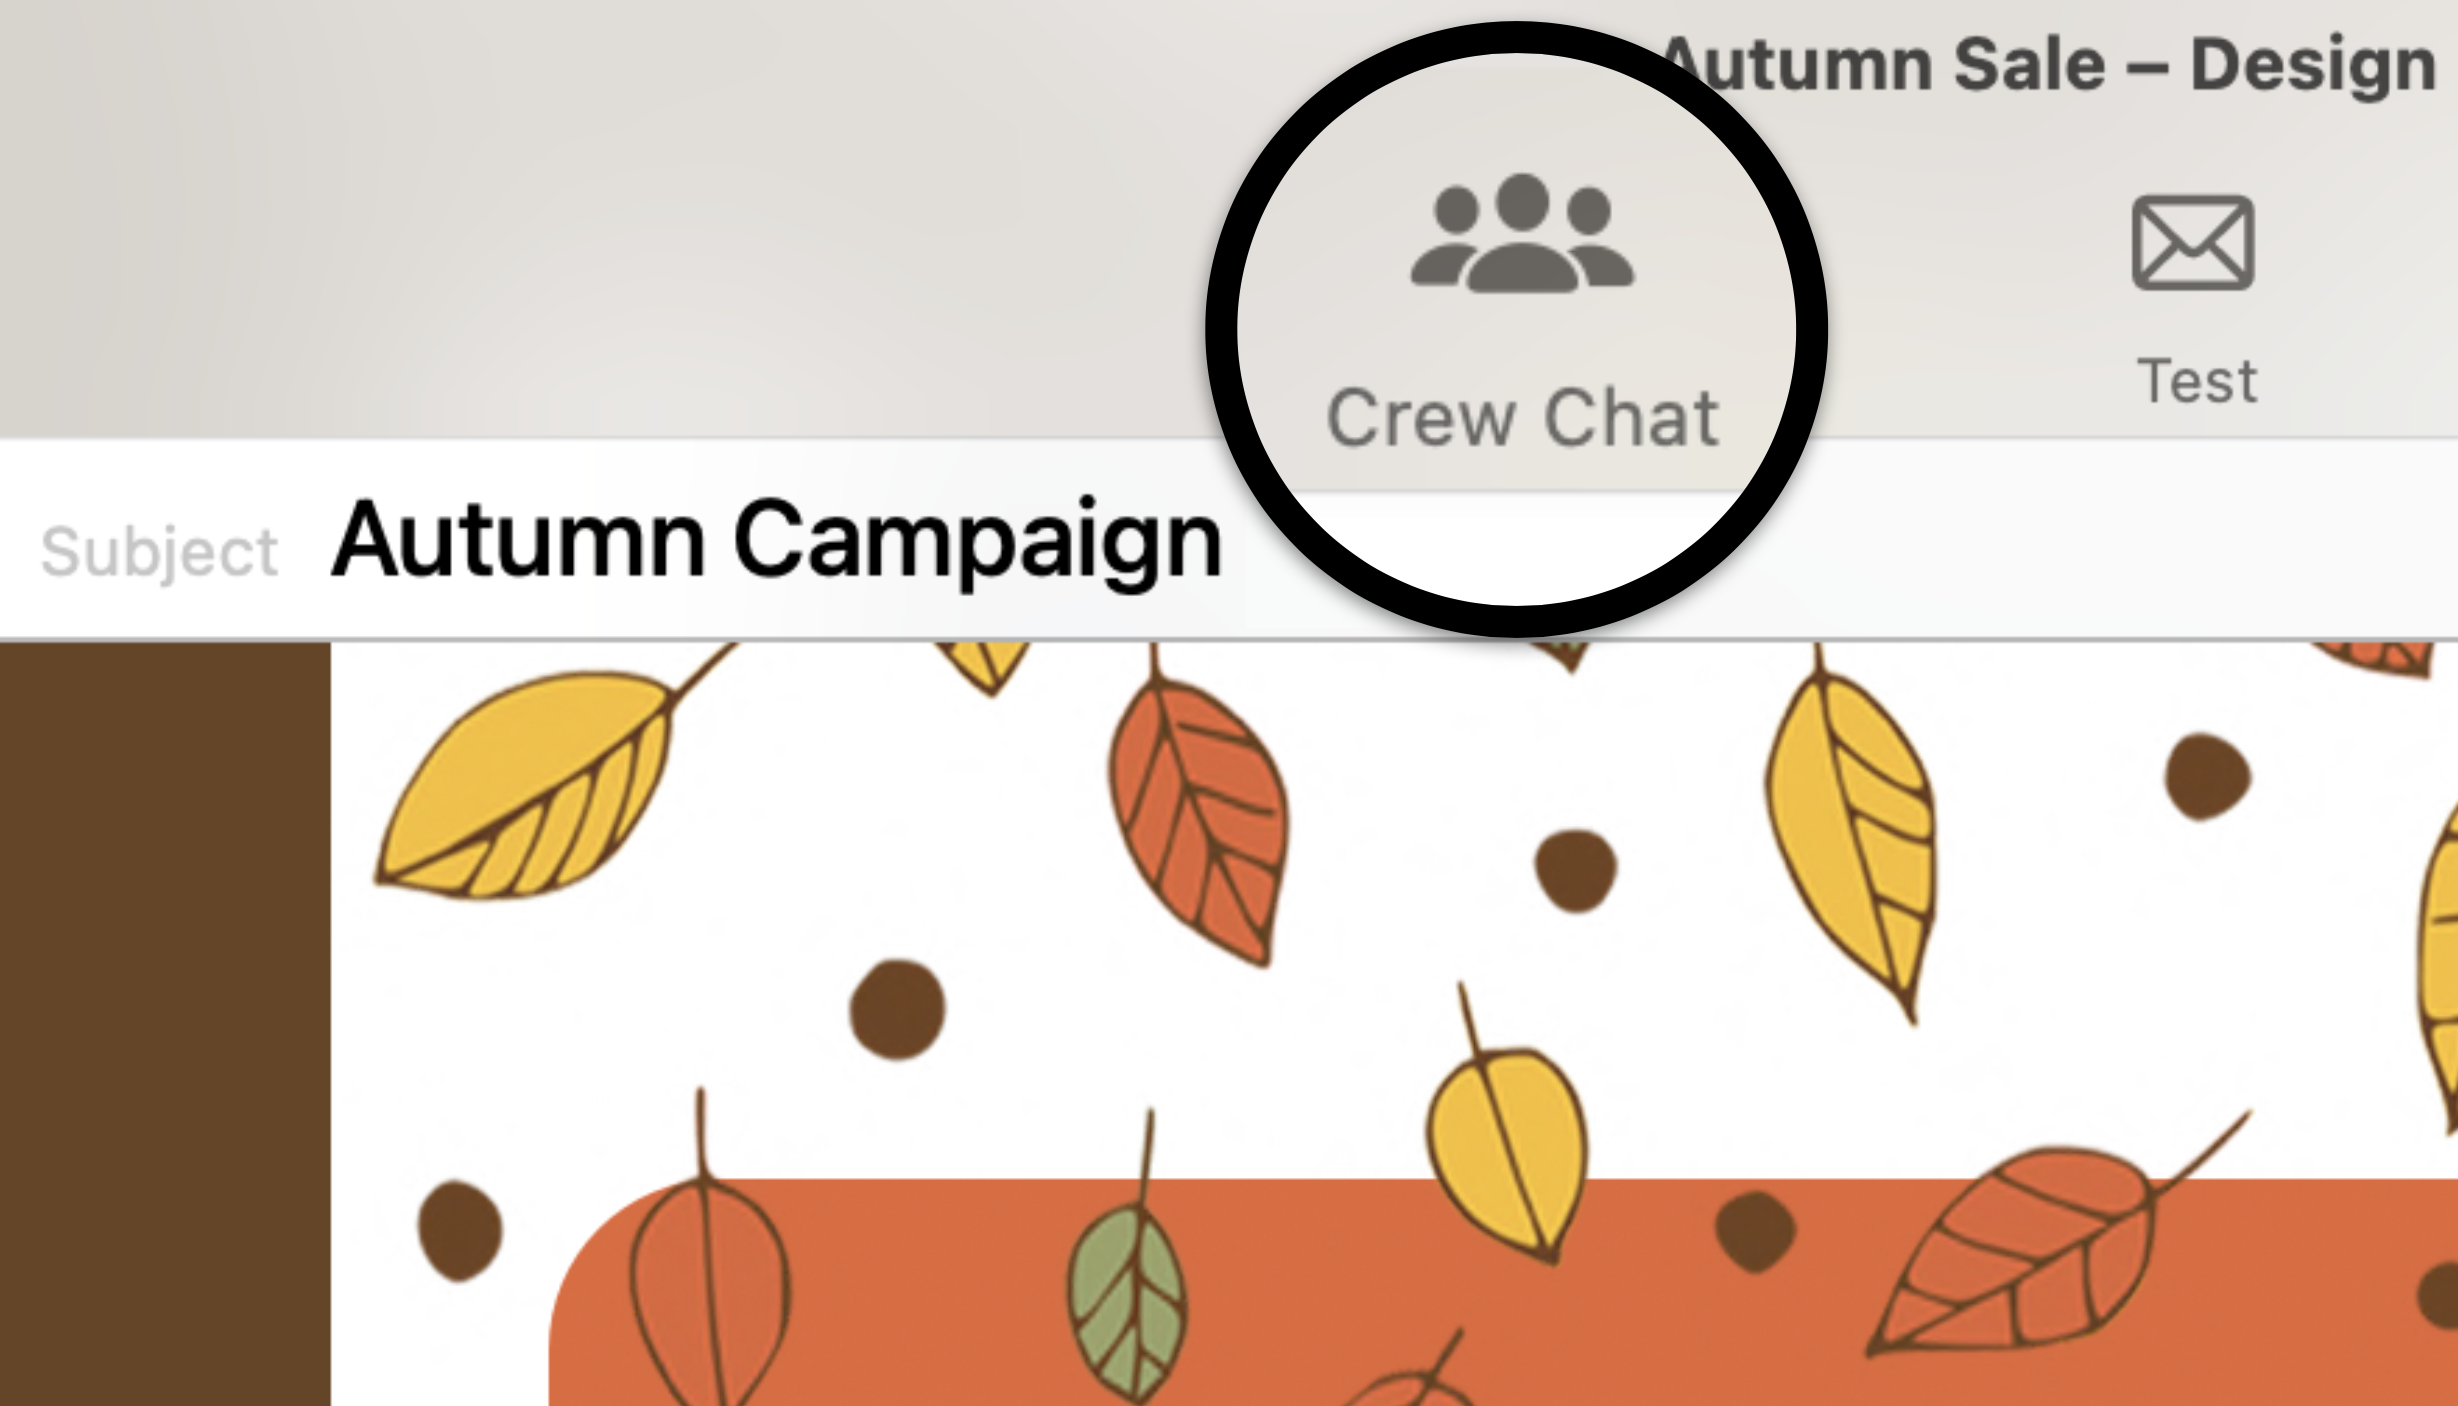
Mail Designer 365 Crew Chat is suitable for anyone in your team involved in the email campaign workflow and feedback process. Common examples include: Marketers, sales-team, branding, copywriters, managers, agency clients, etc.
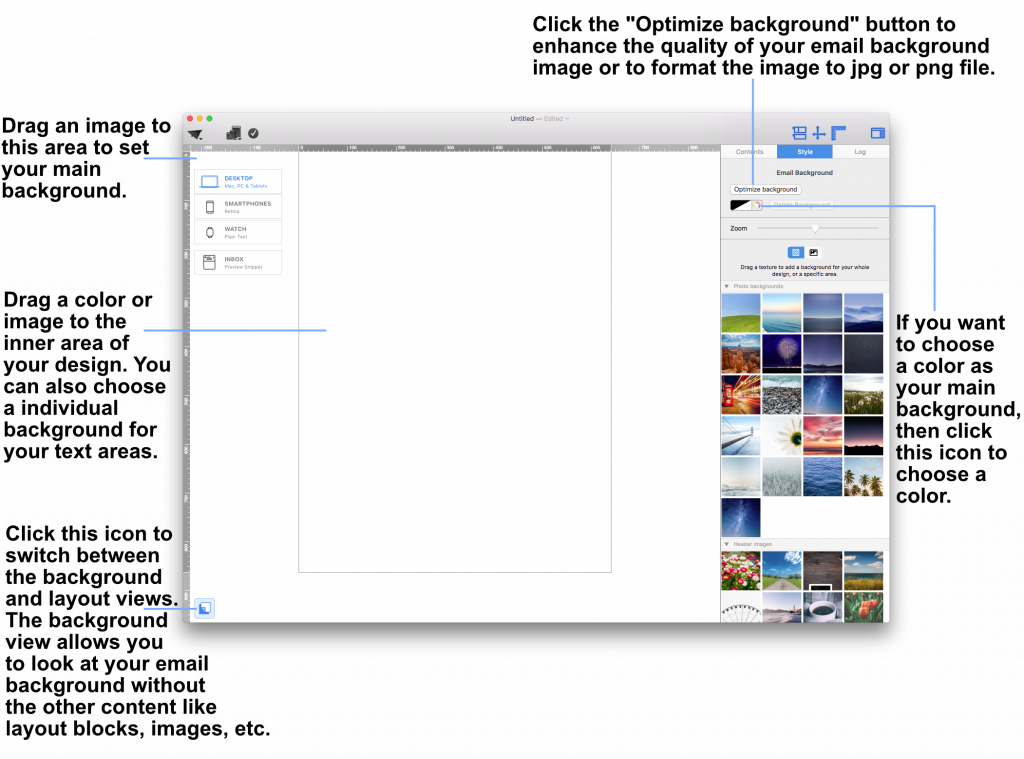
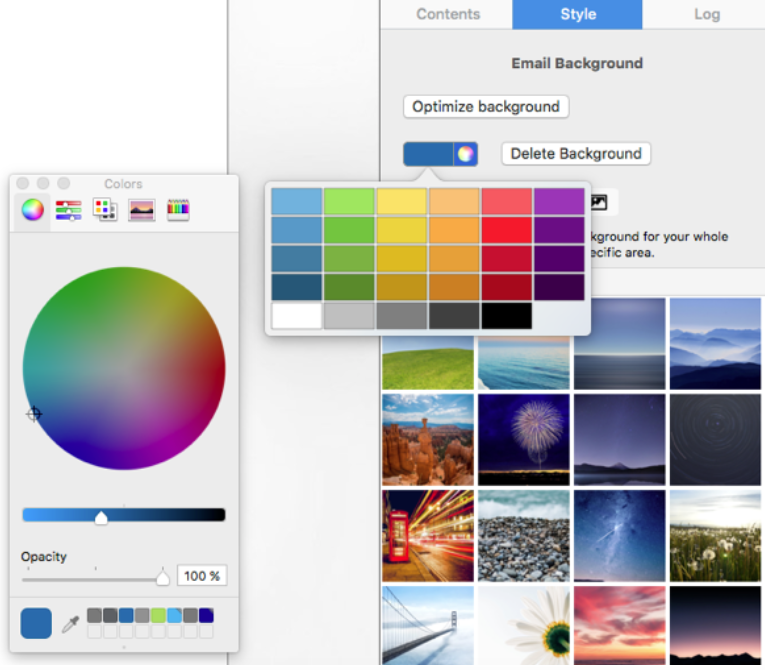
Click the background editing mode icon on the bottom left. It will make your other contents invisible, allowing you to focus on your main email background. When choosing a background, you can see 2 different areas. One area includes the background of your text areas, which is the middle of your email design. The second area is the surrounding background area.
{S_877_50%}

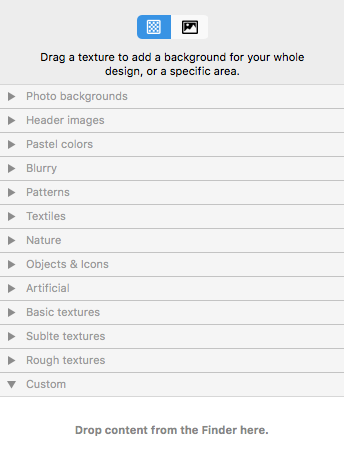
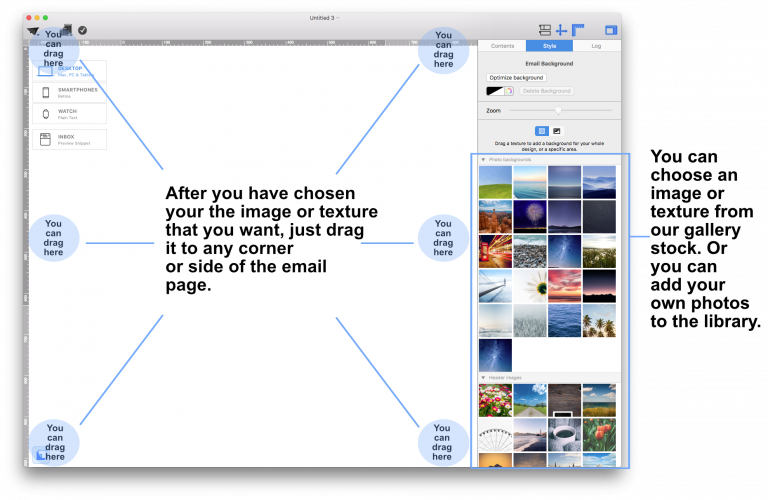
Drag a photo background, image, or texture into the surrounding background area to apply it.
{S_878_50%}

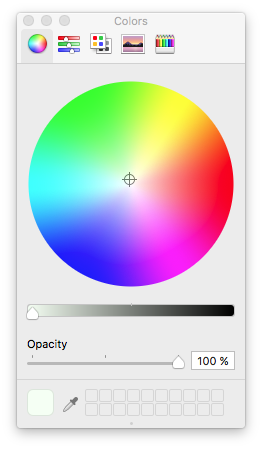
This will apply your choice of background to the mail email background. You can also open the colors window and choose a color as your design background.
{S_879_50%}

If you would like to set a background for your text areas, then drag an image to the middle area of your email design.

Please refer to the following page for further information on how to change the background of your email template with Mail Designer Pro:


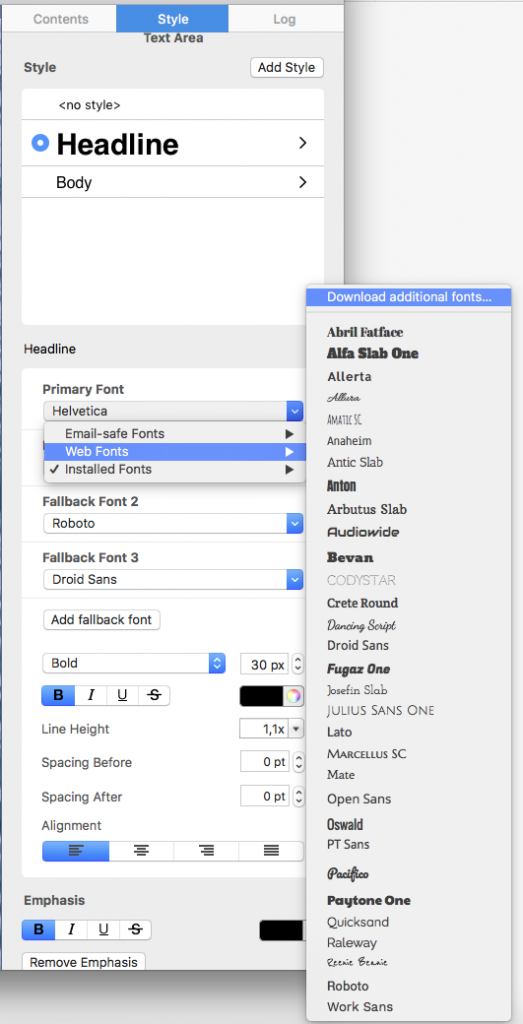
In order to download more web fonts, click on a text area. Mail Designer 365 will automatically open the "Style" tab on the right side of the screen.
‣ Choose “Web Fonts" > "Download additional fonts…” from the font menu.
{S_958_50%}


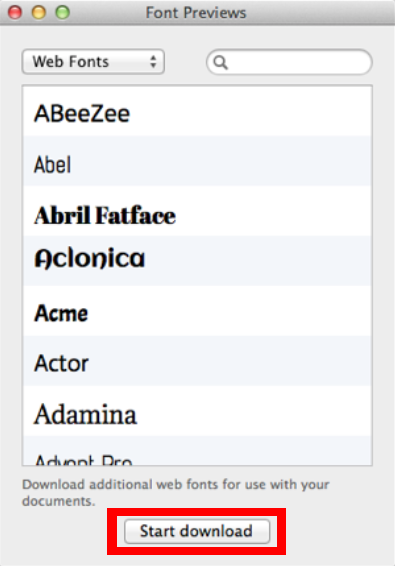
Then, you will be able to see a preview window where all available fonts will be displayed.
‣ Click ”Start Download“ to download additional Web Fonts you can then use in your template.
{S_959_50%}
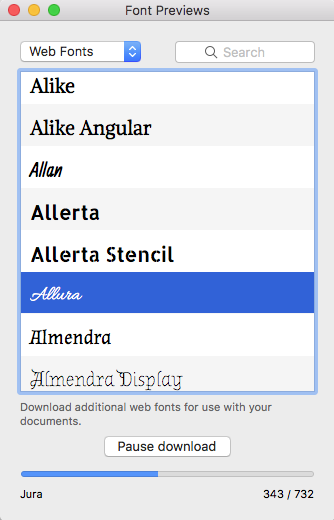
‣ After you click “Start download,” a popup window will open that shows the progress of the download:
{S_960_50%}

Things to understand when it comes to web fonts...


Although there are a wide range of fonts available when you download the additional fonts, we understand that some may still consider this as only a limited number of fonts. This is because the fonts are downloaded from Google’s directory of open source designer web fonts. We wanted to help ensure that our users are able to create designs with beautiful fonts in a legal manner. All the downloadable fonts are free and open source, which means that the fonts are accessible to everyone and are available to be used for both personal and commercial projects.

Please refer to the following page for further information:

To delete your custom content, try the following:
‣ Click on the appropriate icon within the "Contents" tab to identify the location of your custom content.
‣ Choose this icon if you added custom content to your graphics section:
{S_644_50%}
‣ Choose this icon if you added custom content to your GIF/animated graphics section:
{S_645_50%}
‣ Choose this icon if you added custom content to your backgrounds and photos section:
{S_646_50%}
‣ Choose this icon if you added a custom folder with images and graphics:
{S_647_50%}
‣ Once you have chosen, scroll down to the "Custom" section:
{S_648_50%}
‣ Right-click on the image or graphic that you want to delete.
‣ Choose "Move to Trash" from the drop-down menu.
{S_649_40%}
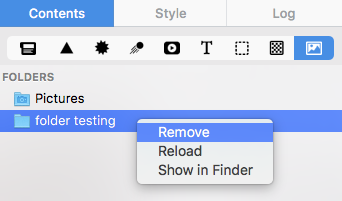
‣ To remove a folder, you will need to right-click on the folder and choose "Remove."
{S_650_50%}

When you send an email template, not every font that you choose may be available at the recipient's side. This is why you can specify a fallback font list, and we recommend that you use an email-safe font.
{S_865_50%}

Email-safe fonts are the basic fonts installed on everyone's devices. If you have selected a font that is available on macOS but not on iOS, there will be a visible difference on the corresponding devices. If both devices have the font installed, then the email template will look the same on both platforms. You can use Web Fonts which the recipient's e-mail client can downloaded on demand. Most e-mail clients except Outlook support Web Fonts.

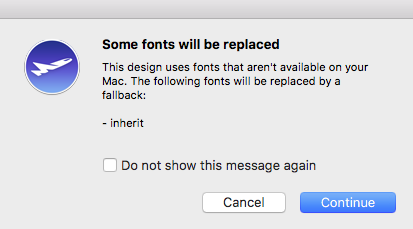
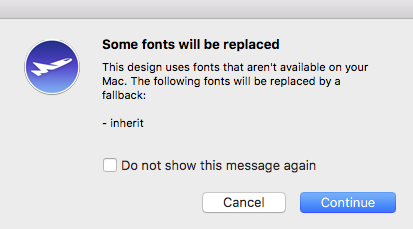
Important: Mail Designer 365 will warn the user about the missing font when the user opens the document.
{S_868}
We know the proof is in the pudding code-sample, so we've put together an HTML export example for you to explore.

It's an unmodified export of one of our Design Ideas. Note that when you use the HTML feature yourself, you'll also have the option of setting an image URL, and image prefix for where your images will be hosted, as well as a custom folder and HTML file name.

Download HTML sample
To create debug logs, please try the following:
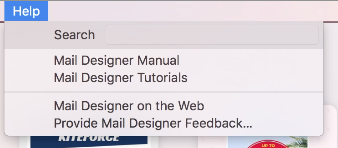
‣ Hold the alt ⌥ key or option key on your keyboard 
‣ Select "Help" > "Send Debug Logs..." from the menu
{S_1071_60%}
Note: If you do not hold the alt/option ⌥ key, the Help drop-down menu will say "Provide Mail Designer Feedback..." instead of "Send Debug Logs..."
{S_1072_60%}
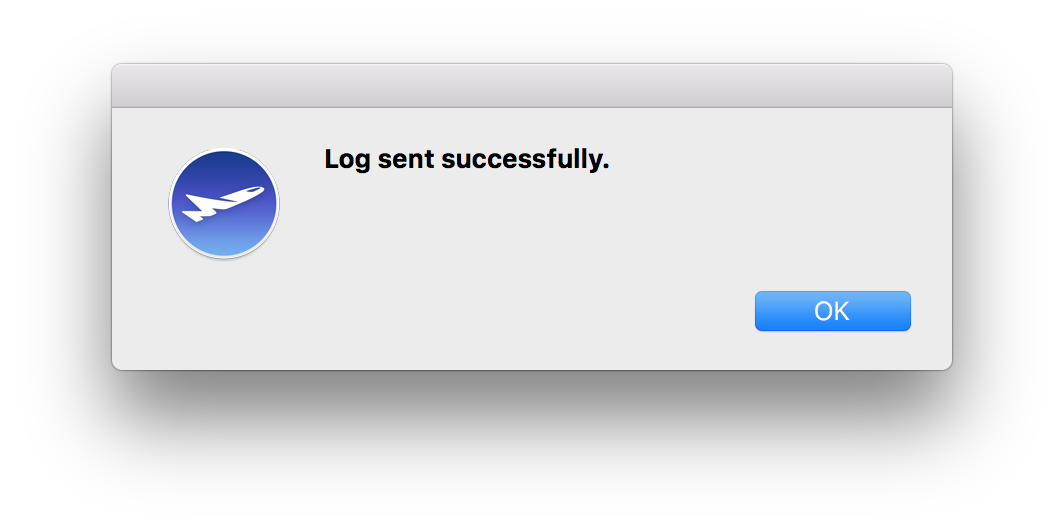
‣ Once you have sent your debug log, Mail Designer 365 will notify you that the log has been sent successfully
{S_1073_60%}

Mail Designer was not able to connect to the configured SMTP server. Please open Mail Designer 365 settings and check the configured values under SMTP settings.

Make sure the hostname and port are correct. Also check the “Security” setting.

Click the “Test” button to let Mail Designer verify that the server accepts a connection using your settings.
In rare cases, errors can occur when sending SMTP, even though Mail Designer was able to connect to the SMTP server and possibly also accepted the user name and password.

In this case, you can view the log of the last sending attempt in the error dialog using the “SMTP Log” button. Finder will then display a file that you can open with any text editor.

You can read the raw error reported by the SMTP server in that file. This could, for example, be information about maintenance or problems with your email account, such as exceeded sending limits.
Mail Designer 365 gives you many options to be creative when it comes to building your email designs. This includes the option to use text styles in image areas to create logos, call-to-actions buttons, and more.

While we strongly encourage you to be as creative as possible when it comes to exploring fonts and text styles for your email designs, we also recommend using a good balance of "real text" and image elements in every design.

When an email design has a large amount of images or image elements (such as shapes, text styles, graphics etc) the risks increase when you go to send it. Firstly, emails which are largely image-based are larger and generally take longer to load. If your recipient is viewing your email on a poor internet connection, it's highly likely they will not see any of the image elements. This is obviously not ideal if the majority of your design is images, as the reader will be greeted by a blank screen.

Secondly, the likelihood of your email getting caught in a spam filter increases with the amount of image elements you include. This is a safety precaution put in place by many email providers, as spam emails typically contain a high quantity of images.

To summarize, we would always recommend you to use real text where possible in order to reduce the amount of images in your email design. However, if you want to use text styles in an image area, do so with caution and only where necessary. If you can create the same effect using real text, this would always be the better option to reduce risks after sending.
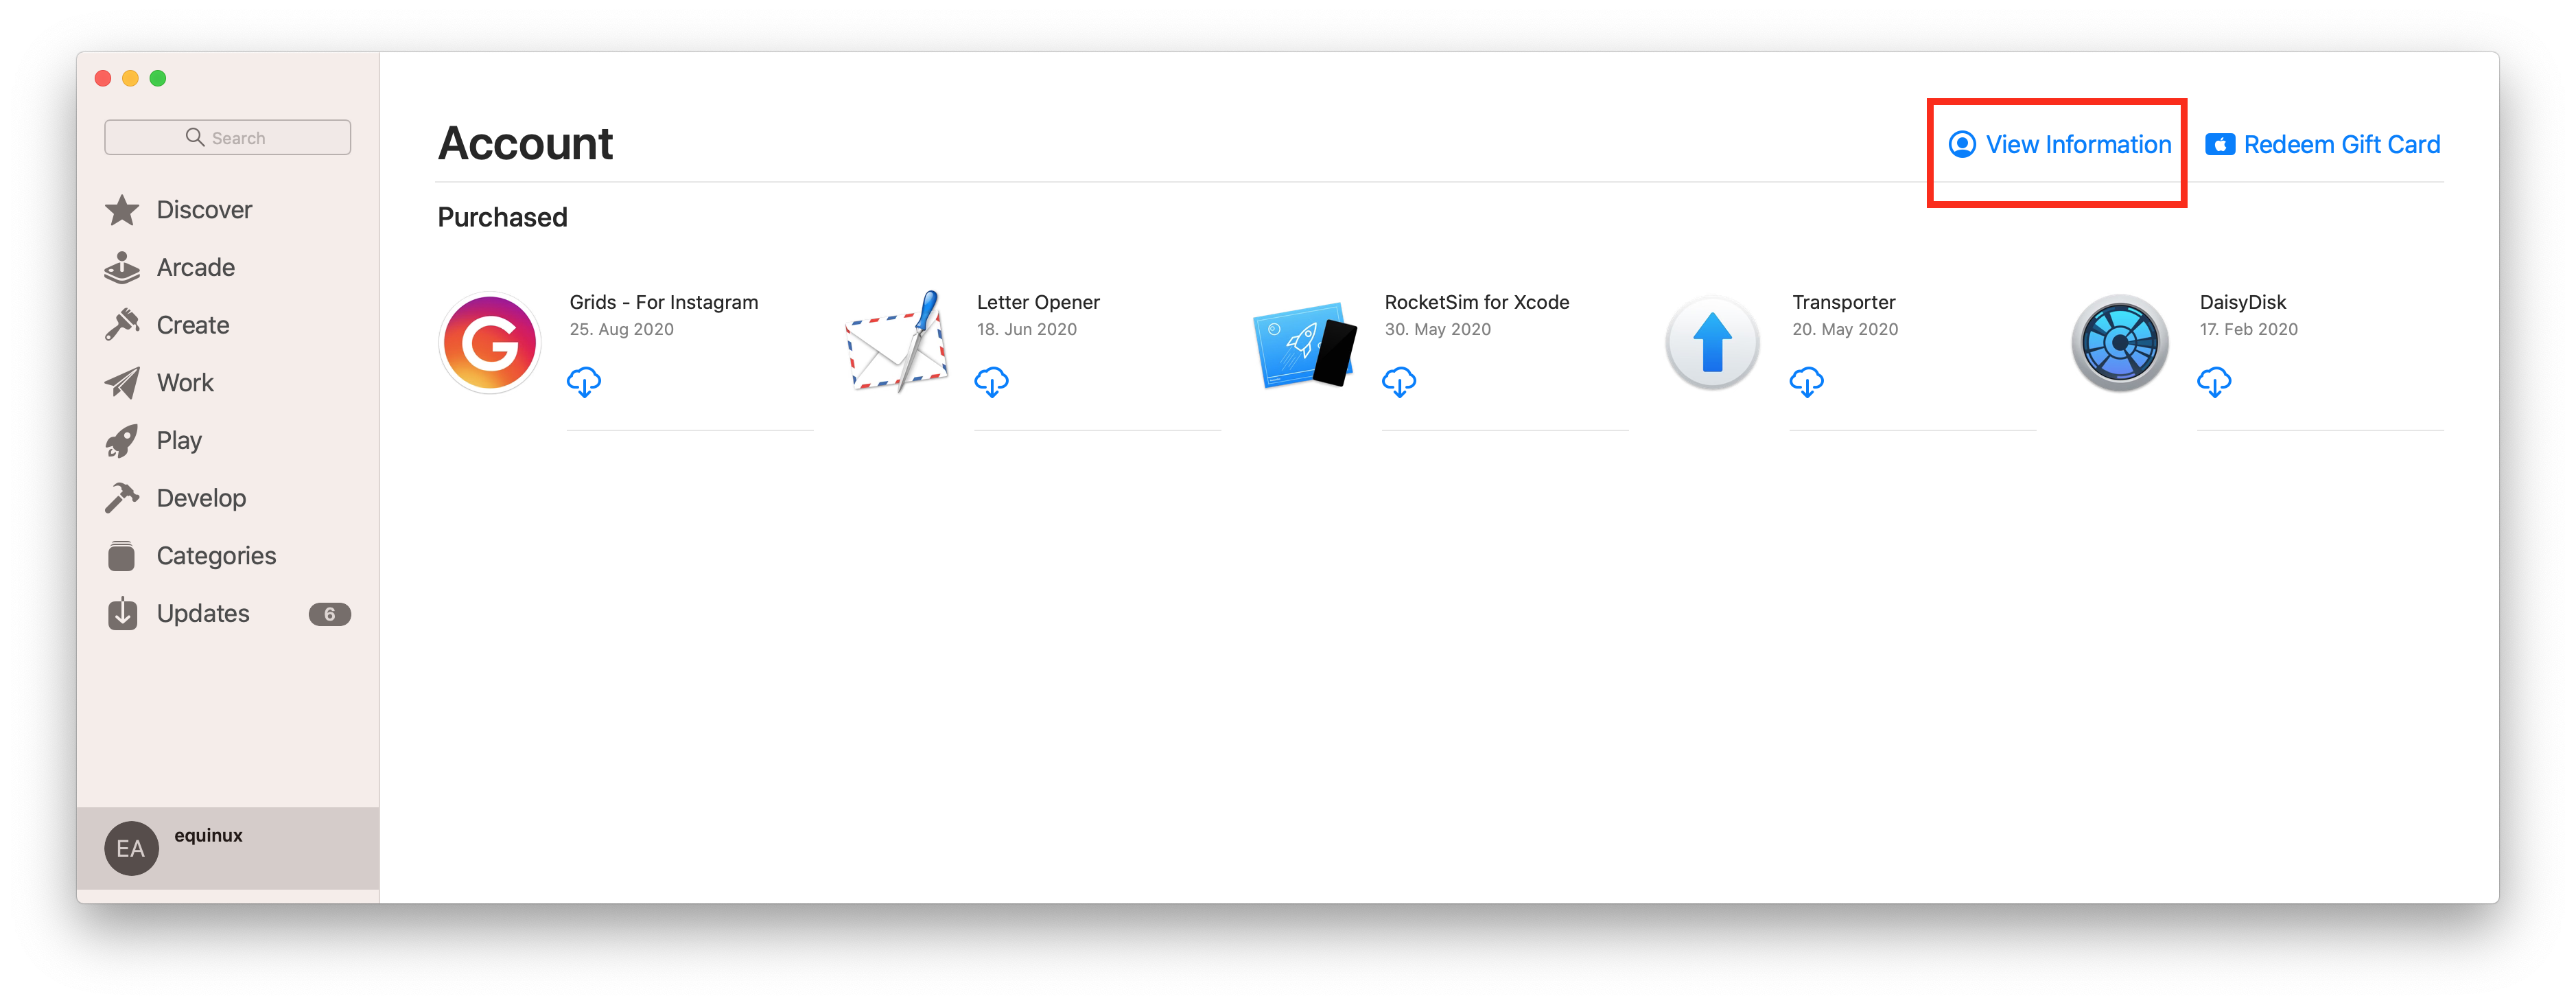
To cancel or manage a subscription in the App Store, open the App Store, sign in, and click on your account icon in the bottom left corner of the window.

Then, click "View information" in the top right of the window, enter your password if prompted and scroll down until you see the subheading "Manage". Here you will be able to see how many subscriptions you have associated with your account.

{S_1220}

Click on "Manage" to view and edit your subscriptions on your Mac.

You can find out more information from the Apple Support website.
Manually exporting your Mail Designer 365 design as a .zip file and re-uploading it to Mailchimp can cause the code to become altered, leading to designs appearing broken or different to how you intended.

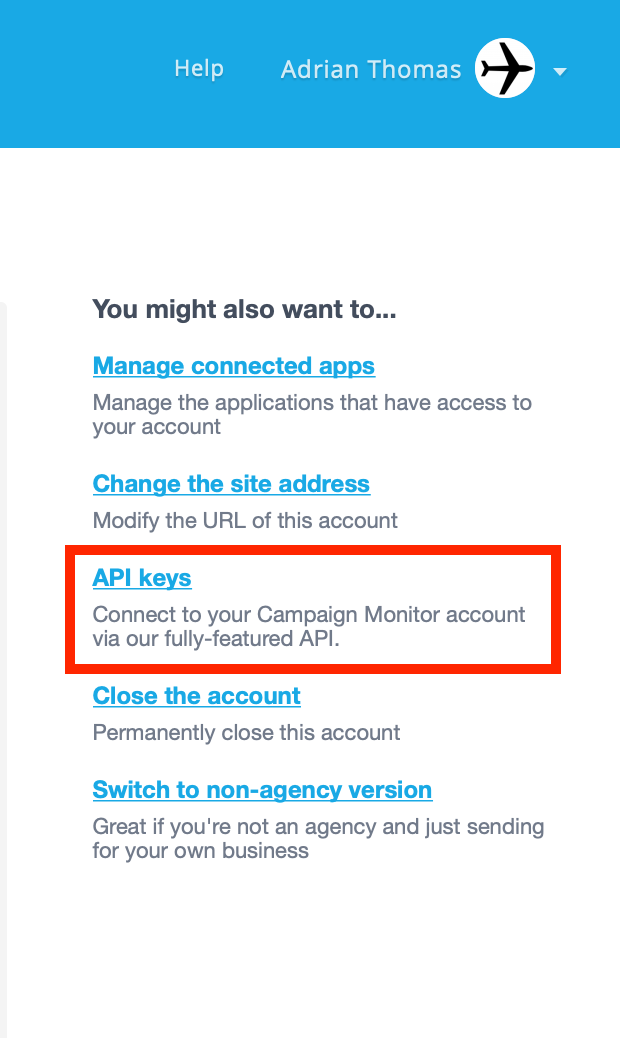
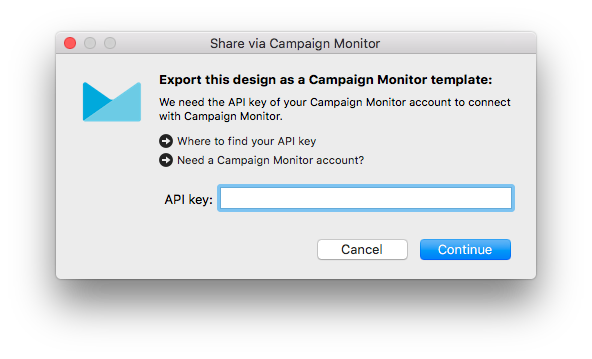
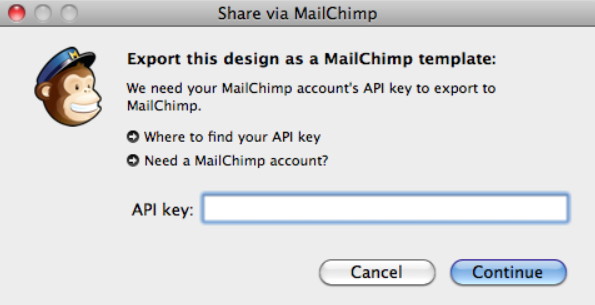
For this reason, we always recommend using our convenient direct export tool to share your email design to Mailchimp. All you need for this is the API key for your account. This step-by-step guide shows you how to retrieve this and get set up:
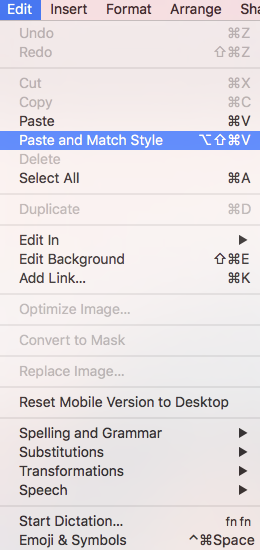
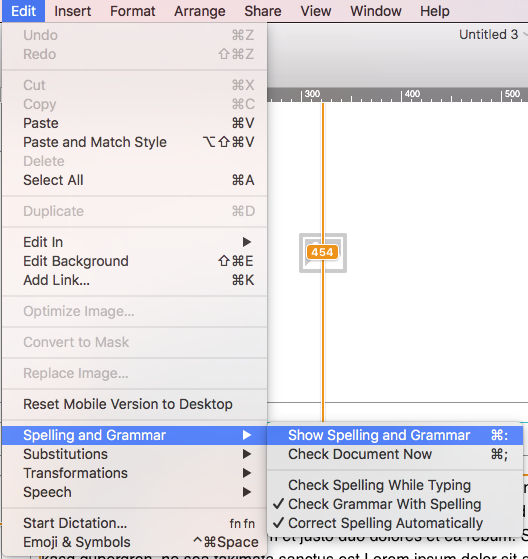
Any text that you copy and paste into Mail Designer 365 from another source other than a different Mail Designer 365 document will automatically receive the style of the text area that you’re pasting it to. However, if you would like to preserve your text style, you can use the “Paste and Match Style” command.

‣ Copy text that has formatting you want to preserve
‣ Choose “Edit" > "Paste and Match Style” from the menu bar
{S_883_30%}
This will preserve the style of the original text that you copied.


Please refer to the following page for further information on how to copy and paste text, while preserving its style:


Mail Designer 365 offers you an array of different options when it comes to editing your newsletter background.

You can set a color as your email background. With the help of the color picker, you can even choose a color inspired by a photo or graphic. Just use the pipette to grab the color.
{S_1052}

You are also welcome to use any photos, textures, or patterns from Mail Designer's stock library. We included many different categories. Simply drag and drop the thumbnails from the design sidebar into your background.
{S_1053}


You can even use your own photos, textures, and patterns. Just simply drag it to your template from your desktop or the Finder. If you are using a third party's photo, texture, or pattern, make sure that you have permission to use it for commercial projects. Also, don't forget to give credit to the designer/artist.

Currently, all email designs that you create with Mail Designer 365 are designed to be centered. This means that the entire email cannot be left justified or right justified. However, you can customize the text of individual text areas that you add within your email template to have left, center, or right alignment.
{S_905_50%}

Don't worry, you can still import your designs.

‣ Go to the "File" menu
‣ Choose “Import settings and designs…”
{S_1078}
‣ Click "Grant access" when you are ready
{S_1080}


This will let you import all your existing data from earlier Mail Designer versions.
You can change the language of all equinux Software products by changing the language settings of your device. For instance, on the Mac, you can do the following:
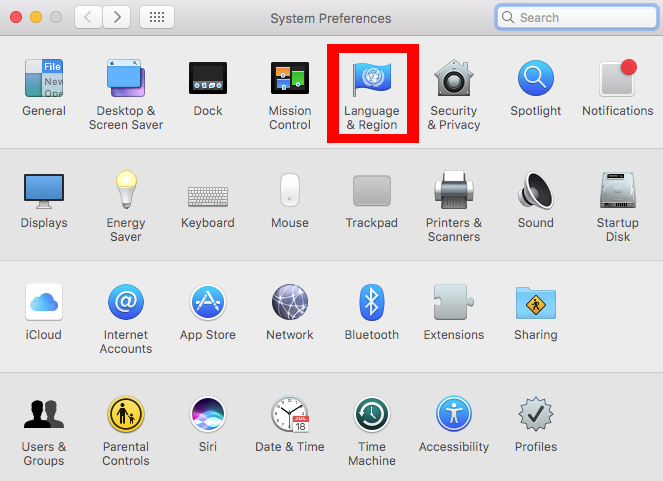
‣ Open "System Preferences."
‣ Click "Language & Region."
{S_519_50%}
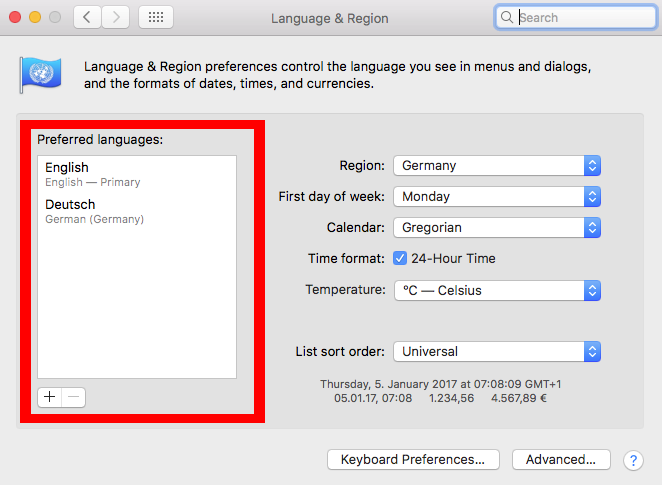
‣ Change to your preferred language by dragging your selected language to the top of the list.
{S_520_50%}
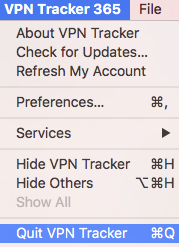
‣ Close your software. For example, with VPN Tracker, you can do so by choosing "VPN Tracker" > "Quit VPN Tracker."
{S_525_30%}
‣ Reopen the software.


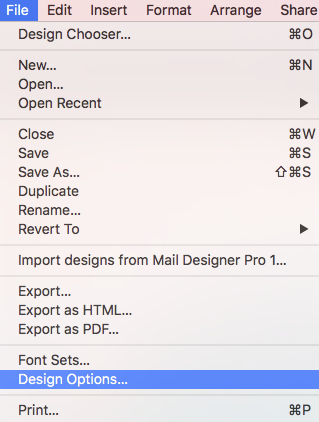
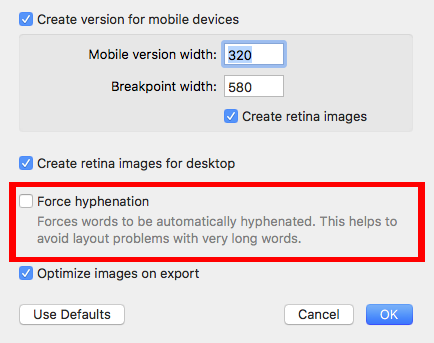
You can change whether your text is automatically hyphenated in your text areas. To turn off the hyphenation, try the following:
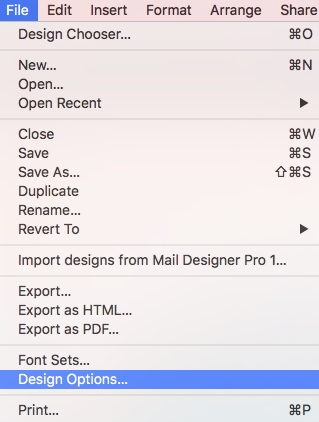
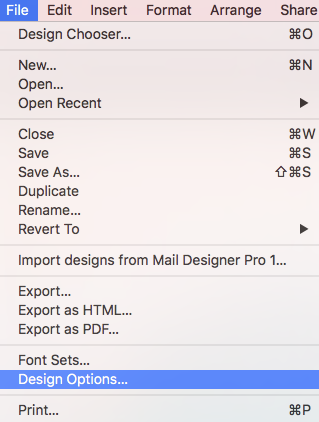
‣ Go to "File" > "Design Options."
{S_527_50%}
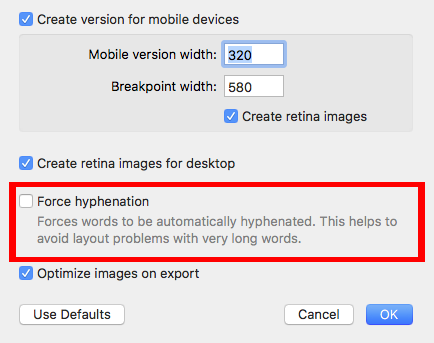
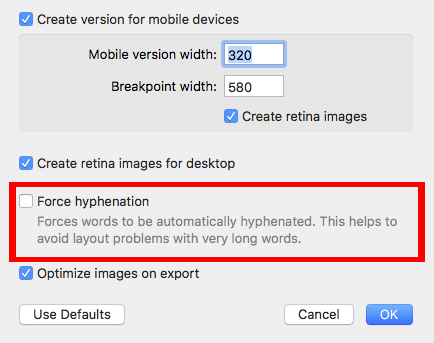
‣ Remove the check mark from the "Force hyphenation."
{S_528_50%}
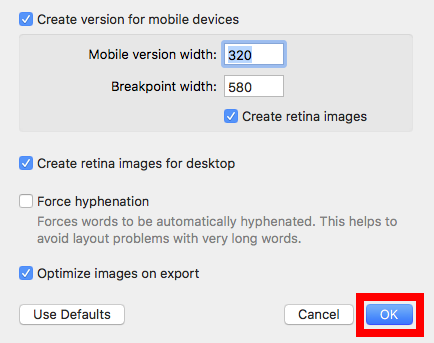
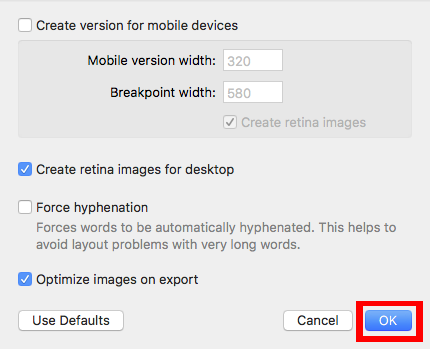
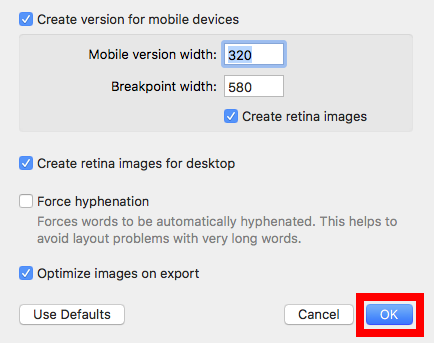
‣ Click "Ok."
{S_529_50%}


Please refer to the following page for further information on how to turn on and off text hyphenation:

Renewals can be canceled up until 10 days before their renewal date. The cancelation will take effect on the next possible renewal date. You can continue to use the software until the end of your term, at which point your subscription will end.


Currently, Mail Designer 365 is only available for Mac (macOS) computers.
{S_1058}

This error message appears when trying to send your design from an iCloud account with 2-factor authentication set up. In order to be able to send your design as normal, you will need to set up an app-specific password for Mail Designer.

Apple's support page has more information on how to set this up.

Anchor links do not work in most email clients and are not supported in iOS 14 and lower. For this reason, Mail Designer 365 doesn't currently offer support for this feature.

We try to ensure that a newsletter looks and works as expected on the widest range of readers possible and will revisit anchor links, if a majority of popular email apps add support for them.
Sometimes you may experience a delay when sending a test version of your design. This is a security feature from Amazon Web Services designed to prevent spam emails. Your test send email will be marked as delivered by our server, but it is possible that you can experience a short delay before the email appears in your inbox.

Please note, this only applies to the test send feature, as we are sending via our server using your name as an alias. When you send the final version of your design, you should not experience any delays as you are sending via your own email address/ESP.
We have multiple favorites that we are sure will keep your email newsletters in style. Raleway, Work Sans, and Montserrat are just a few of the font styles you can try in your next email design.

Check out our video tutorial for more font inspiration:


{YOUTUBE_QtbUHCMeRTs}

Also, please refer to the following page for a step-by-step guide on how to download more fonts in Mail Designer 365:


When you send using the test feature, Mail Designer 365 sends the email via our test servers but under the alias of your email address (so you can see how the sender etc. will appear in the inbox.) This can sometimes result in your email being detected as spam, as it is coming from our test server and not a “real” email address.

However, if your test mail lands in your spam folder, it doesn’t mean that your real email will. When you send for real, you are sending via your own address or via an ESP where you have entered your mail domain; meaning that it should show up fine in your recipient’s inbox.
Different email clients will read and do different things to your email designs when forwarding them. Some email clients will put the original email in quoted text and then add the sender information to the top. Others will forward it as is. Because Mail Designer 365 has no control over how email clients behave, the advanced HTML email that you create with Mail Designer 365 may not look the same once it has been forwarded by an email app.

Our recommendations:


‣ One solution is to use the "redirect" feature, which is built-in to some emails to send it to another recipient. "Redirect" is different from forwarding the email because the redirect feature usually tells the email app to leave the original email design alone.
‣ Or you could add a link to your email on the web within the email template. This way, people have the option of viewing the email as it is, even after the email has been forwarded.

Please refer to the following pages for further information:

If you are using an older, legacy version of Mail Designer which is no longer supported - i.e. Mail Designer 1, Mail Designer 2 or Mail Designer Pro - you can easily upgrade to Mail Designer 365 to continue creating and sending email newsletters.

How to buy from the Mail Designer 365 store
  1. Head to our website to view all plan options.
  2. Choose your preferred plan and click "Buy"
  3. Log in to my.maildesigner365 with your equinux ID to complete your purchase (this is the login you use for Mail Designer)
  4. Once you've purchased a plan, download the app and move it to your Applications folder.

How to buy from the Mac App Store
  1. Find Mail Designer 365 on the App Store
  2. Choose your plan and complete your purchase to download the Mail Designer 365 app to your Mac.
  3. Open the app and log in with your equinux ID

Now you can enjoy all the latest features and Design Ideas available in Mail Designer 365.

Tip: Once you have upgraded, Mail Designer 365 will automatically offer to import your designs from supported older Mail Designer versions. Find out more in this FAQ.
Yes you can! If you have purchased a Mail Designer 365 plan and are only part way through your subscription year, you can still cross-upgrade to a better plan via your my.maildesigner365 portal.

On the start page, simply click on your team name, navigate to the "Store" tab and select your plan from the list. Once you've purchased your plan, it will be available for you to use yourself or assign to another member of your team.


The Anatomy of an Email

Before diving into DKIM, let's briefly understand how emails work. When you send an email, it's like sending a digital letter. It travels through various servers and networks before reaching its intended recipient. Each server it passes through can potentially be a point of vulnerability where malicious actors might tamper with the email's content or disguise themselves as legitimate senders.

Enter DKIM: The Email's Digital Signature

DKIM, which stands for DomainKeys Identified Mail, is a security protocol designed to verify the authenticity and integrity of an email message. It does this by adding a digital signature to the email before it leaves the sender's server. This signature is like a seal of approval, assuring the recipient that the email has not been tampered with and genuinely comes from the claimed sender.

How DKIM Works

DKIM relies on a pair of cryptographic keys: a private key kept by the sender and a public key published in the sender's DNS (Domain Name System) records. Here's how it works:

  1. Email Signing: When an email is sent, the sending server uses the sender's private key to generate a unique digital signature based on the email's content. This signature is added to the email's header.
  2. Recipient Verification: Upon receiving the email, the recipient's email server retrieves the public key associated with the sender's domain from the DNS records.
  3. Signature Verification: The recipient's server uses this public key to verify the email's digital signature. If the signature matches the email's content and has not been altered in transit, the email is considered authentic.
  4. Filtering and Delivery: If the email passes DKIM verification, it's more likely to be delivered to the recipient's inbox. If not, it may be flagged as suspicious or sent to the spam folder.

The Importance of DKIM

  1. Protection Against Spoofing: One of the most significant benefits of DKIM is its ability to prevent email spoofing. Without DKIM, cybercriminals can easily forge email headers and pretend to be someone they're not. DKIM ensures that the email you receive from a trusted sender is indeed from that sender.
  2. Email Integrity: DKIM safeguards the integrity of your emails. It guarantees that your message hasn't been altered during transit, ensuring that the recipient receives the content exactly as you intended.
  3. Enhanced Deliverability: When your emails are DKIM-signed, email providers are more likely to trust them. This means your legitimate emails have a better chance of landing in your recipients' inboxes rather than getting lost in spam folders.
  4. Reduced Phishing: By reducing the effectiveness of phishing attacks, DKIM helps protect individuals and organizations from falling victim to scams that could result in data breaches or financial losses.

Conclusion

In an era where email fraud and phishing attacks are prevalent, DKIM serves as a crucial line of defense. It's like a digital fingerprint that assures the authenticity and integrity of your emails. While it may operate behind the scenes and go unnoticed by most email users, DKIM is a vital tool in the ongoing battle against cyber threats. Its use should be encouraged and embraced by individuals, businesses, and email service providers to create a safer digital communication environment for everyone. So, the next time you receive an email, remember that DKIM might be silently working to protect you from potential harm in the vast digital landscape.
In the world of email design, things are changing constantly. With this in mind, it's important to bear in mind that many features available in legacy versions of Mail Designer may no longer work and that designs created in older versions may not be in line with today's modern standards.

For this reason, we have exclusively dedicated our support and development efforts to maintaining the Mail Designer 365 service - the only Mail Designer version to offer you ongoing updates and compatibility with all future macOS versions.

For reference, below you can find the end of support dates for all legacy versions of Mail Designer:

Mail Designer- Support ended: September 2014

Mail Designer 2 - Support ended: February 2015

Mail Designer Pro - Support ended: May 2016

Mail Designer Pro 2 - Support ended: May 2017

Mail Designer Pro 3 - Support ended: October 2018

Mail Designer Pro HS - Support ended: January 2019

What this means:
While some of these versions of Mail Designer may still work on your current Mac, should you need to get a new Mac, or upgrade to a new macOS, they will no longer be supported.

What to do: If you are still using an older version, we strongly suggest you upgrade to a modern Mail Designer 365 plan to guarantee regular updates and consistent support throughout the lifetime of your plan.
Dropbox changed the way their public folder behaves and they have shut down hotlinking files, which means that you are no longer able to play videos directly within the email if the video is hosted by Dropbox. Also, keep in mind that directly embedded videos do not always work properly with certain email clients. This means that some of your recipients may not be able to view the video because of the email client they are using.

Our best practice recommendation when it comes to videos:


We recommend linking out to the videos on another site such as YouTube or Vimeo. These videos will then open in Safari or the relevant video app. For example, if it's a YouTube video and the YouTube app is installed on the device, then the video will play right in the YouTube app on the recipient's device.
Yes, you can add WeVideo videos into your email design using Mail Designer 365. Follow these simple steps:
‣ Add a layout block with an image area.
‣ In the "Contents" tab, click on the "Video Placeholder" icon. You can also press Command-5.
{S_908_50%}
‣ Drag a video placeholder into an image area.
{S_909_50%}
‣ Paste your WeVideo link into the "Link to Video" field.
{S_910_50%}

Keep in mind:


Unlike YouTube or Vimeo videos, generating preview images from WeVideo videos is not directly supported by Mail Designer365. You will have to provide your own preview image by taking a screenshot of the video frame you want to use as the preview image. Then drag that image onto the video placeholder. Or you can choose an image of your choice as the preview image.

In the email newsletter, the videos that you add are treated as images with a link to the video page. Direct inline playback is no longer supported by Mail Designer 365 because most email clients do not support it.

Note: Please remember that Mail Designer 365 does not support embedding videos directly within your email designs.

Currently, Mail Designer 365 does not offer any kind of spam testing service. However, if you are worried about your email being caught out by a spam filter, most ESPs do offer spam testing as part of their service.

One fairly popular service is this one from Litmus.

For tips on how to avoid getting caught in a spam filter, check out this blog post.
If you need inspiration, we have some fun tips for you to try.

You can also check out our video for tips on animated GIFs here:


{YOUTUBE_M9XEE2mHK1A}
Mail Designer 365 Small Business and Mail Designer 365 Non Profit are both older Mail Designer 365 plans which no longer exist.

Our current plans, Mail Designer 365 Business and Mail Designer 365 Premium Business both include regular updates, all of our newest design features, as well as compatibility with Mail Designer 365 for Teams - and even more exciting new developemts coming soon! Find out more.

Are you looking to buy a plan? You can purchase a Mail Designer 365 Business or Mail Designer 365 Premium Business plan here.
Mail Designer 365 is designed for teams. When you create a team, you can assign users a personalized role according to their needs. Members can discuss designs with you in Crew Chat, send campaigns, and use Direct Mail. Your team doesn’t have to consist solely of colleagues from your company. You can also include external collaborators such as copywriters, photographers, or the client themselves.

Here are the different team roles and their meanings:

  • External
    Ideal for: clients, external employees, and managers who want to contribute content and approve or launch campaigns. Can use TeamCloud, Crew Chat, Direct Mail, and campaigns. Cannot purchase plans or stamps for the team.
  • Member
    Ideal for: employees who work closely on emails. Can use TeamCloud, Crew Chat, Direct Mail, and campaigns. Can purchase plans or stamps for the team.
  • Project Manager
    Ideal for: administrators of your team, who don’t necessarily have to be involved in design. Can manage team members, purchase, and assign plans and licenses.
Your admin can change membership levels at any time. To start, you might build your team with just the "Member" level.

You can set up a new team at my.maildesigner365.com/teams/create
With Mail Designer 365, you can now easily add borders to your photos.

‣ Select the photo that you want to add a border to
‣ This will automatically prompt Mail Designer 365 to open the "Style" tab on the right side of the screen
‣ At the bottom, find the "Border" section
‣ Select the type of border that you want to use
‣ Click on the color wheel icon and choose the color of your border
‣ Change the pixel size to adjust the thickness of the border
{S_1082}


Note: You can also add borders to shapes.

Yes, you can use multiple text styles within a text area. However, you can only assign one text style per paragraph.
{S_986_50%}

You also have the freedom of choosing different fonts and font colors for your text within a given text area. This is not limited to one font per paragraph.
{S_987_50%}

In order to assign different fonts within a paragraph, you must first select "no style" on the right side of your screen. Then, you can select the text that you want to change and assign it with its own font, font size, font color, etc.
{S_988_50%}
Typically, the fonts only change on another person's device if you are using a font in your email template that the other person does not have installed on his/her computer. For example, if you are using the font "Chelsea Market" in your document, and the person you lent the document to does not have "Chelsea Market" installed on his/her computer, a fallback font will be displayed instead.
{S_859_20%}

Important: Mail Designer 365 will warn the user about the missing font when the user opens the document.
{S_863}

If you want to make sure that the font that you use will appear on a different person's device, then we suggest using one of the email-safe fonts in your email newsletter.
{S_860_50%}


Mail Designer 365 allows you to lend a design to someone else who also uses Mail Designer 365 on his or her Mac. He or she can make changes and return the file afterwards to you.
‣ Open the email template you wish to share.
‣ Choose "Share" > "Lend..."
{S_776_50%}
‣ Enter the recipient's email address and write him or her a short message.
‣ Click "Send."
{S_777_50%}


Remember: You cannot lend a document while on the demo version of Mail Designer 365.
{S_781_50%}

Please refer to the following page for more information on how to lend your email designs in Mail Designer 365:

Yes there is! Mail Designer 365 is our brand new and updated version of Mail Designer - only available on an annual subscription basis. Subscribers have access to our best new features and benefit from regular updates.


Most importantly, Mail Designer 365 will always be optimized for the latest mac OS version, so as long as you are subscribed, you will never have to worry about paying for an upgrade again!


Visit our website today to purchase Mail Designer 365.


Mail Designer 365 supports the export of the template including MailChimp placeholders. Once uploaded to MailChimp almost all features offered by the website can be used. To make sure the layout stays intact we recommend not to use the "Edit" view of MailChimp for layout editing. Use Mail Designer 365 to make the necessary changes and export the new version to MailChimp.

If you want to add multiple layout blocks that have similar layouts or formats, it may be easier to duplicate an existing layout block instead of choosing your font and color options once again.

There are 3 ways you can duplicate layout blocks:


Option 1: "Edit" > "Duplicate"


‣ Click the selection tab at the side of a layout block.
‣ Choose "Edit" > "Duplicate" from the menu bar.
{S_849_50%}


Option 2: Using the layout handle


‣ Click on the layout handle on the left side of the layout block. 
‣ Hold down the option key or the alt⌥ key on your keyboard.
‣ Drag the layout block that you want to duplicate.
{S_850_50%}

Now, you can drop it into position to create a copy. Afterwards, you can edit your text and choose other options accordingly.

Option 3: Command⌘ D


‣ Click on the layout handle on the left side of the layout block. 
‣ Press Command⌘-D on your keyboard


Please refer to the following page for a guide on how you can duplicate layout blocks:


To activate renewals for your account, go to your my.maildesigner365 account. On the top you will see whether your renewal is turned on or off. If you would like to change the status of your renewal, just flip the switch and you will get an email confirmation for your changed renewal state.

{S_1223}
You can create a link for an image area, so the image area will be clickable in your email. Choose a layout block with image areas.
{S_799_50%}

It’s important to note that an entire image area will be displayed as a single image in your email. It does not matter how many shapes or graphics you have within a single image area, the entire image area will be displayed as a single image. Also, you can only assign one link per image area. If you want to add multiple links for different social media accounts, you will need to choose a layout block with multiple image areas.

First, let's go over how to assign 1 link to 1 image area (Great for linking to only 1 social media account):


‣ To create an image area link, choose an image area in your design. 
{S_800_50%}
‣ Click the "Add Link" button from the Style section of the sidebar.
‣ Then, just enter your URL.
‣ The entire image area will be “hot” and can be clicked in your final message.
{S_801_50%}
‣ A little link icon will show you for which image areas links has been embedded.
‣ Note: It is not possible to add a link to individual components of a single image area.


Remember: 1 link to 1 image area. This means you can only assign 1 link to 1 social media outlet within 1 image area.

How to assign multiple links (Great for linking multiple social media accounts):


We’ve included several layout blocks that contain several image areas next to each other.
{S_802_50%}

You can use these blocks to create multiple image area links. For instance, if you use a layout block with 4 image areas, you can add 4 buttons with different links to 4 social media sites.
{S_803_50%}

Just make sure to add one icon per one image area. Assign one link per one icon.
{S_804_50%}

Correct vs. Incorrect


{S_805_50%}

Correct because: 4 different icons in 4 different image areas. You can add 1 link per 1 image area. Therefore, you can add 4 different links total.


{S_806_50%}

Incorrect because: 4 different icons in 1 image area. You can only add 1 link per 1 image area. Therefore, 4 icons will only lead to 1 landing page.

Please refer to the following page for more information on how to add different buttons with different links to your Mail Designer 365 email design:


For a video tutorial:
{YOUTUBE_zKnpE88y8Tc}

Due to compatibility issues with some very popular email clients (👋 Gmail and Outlook), animated gifs are always rendered at non-retina resolution, so they don’t break your email’s layout.

We hope that’ll change in the future, but for now your best shot is to choose a gif that’ll look good regardless of resolution.
If you're using the latest version of Mail Designer 365 and your Mailchimp upload fails with an "API key revoked" error, please create a new API key in your Mailchimp account.
Create a new Mailchimp API key
If you need to back up your Mail Designer 365 email templates (e.g. because you've bought a new Mac or need to format your computer), you have multiple options:

‣ If you use Time Machine on the Mac, the designs are also included in the backup by default.
‣ If you are manually backing up your Mac, you'll need to back up the following folder on your external hard drive:
~/Library/Group Containers/C3HCD5RMD7.net.tower-one.MailDesigner
You can access this folder by opening Finder, going to "Go" > "Go to folder" and copying and pasting in the above path.
‣ You can do a complete manual backup by going to "My Designs." Then, press ⌘ + a to select all the designs and then drag them to a folder on your desktop. You can then also save this folder on an external hard drive.
If you are currently using an older version of Mail Designer and you are concerned about losing your work if you upgrade to Mail Designer 365, don't worry! It is super easy to import all of your previous designs from an older version of Mail Designer.

Please carry out the following steps to access your templates:

  1. Click on "File" > "Import settings and designs."
  2. {S_1042}
  3. When the migration window pops up, select "Grant access" to continue.
  4. {S_1043}
  5. In the next window, simply select "Grant access" again to allow Mail Designer 365 access to the design files in your Library. You do not need to select a different folder.
  6. {S_1044}
  7. Select from the list which settings you would like to copy over to Mail Designer 365 (i.e. from which version) and then click "Import selected."
  8. {S_1045}
  9. Your designs and in-app preferences will then be quickly imported into Mail Designer 365 exactly as they were when you last used them.
  10. {S_1046}


First, please try signing out and back in again. This will tell Mail Designer 365 to re-fetch all of your account details, including your plan.

If that's not working, double-check that the email address you have signed in with matches the email address you used to purchase.

If this does not work and your Mail Designer 365 app does not seem to recognize this purchase, please contact support and send us some debug information:

‣ Hold the alt ⌥ key or option key on your keyboard 
‣ Select "Help" > "Send Debug Logs..." from the menu
{S_1004_60%}


MailChimp has free and paid plans. Please visit the MailChimp website for more details and exact pricing information.

Apple has created a two-factor authentication to add extra protection for your Apple ID. Two-factor authentication requires two pieces of information. So even if someone knows your password, two-factor authentication will require your password and a code from one of your trusted devices.

Apple's support page has more information on two-factor authentication and how to enable or disable it.
To only send the desktop version of your email design, try the following:

‣ Choose "File" > "Design Options..."
{S_1010}
‣ Uncheck "Create version for mobile devices."
{S_1011}
‣ Click "OK" when you are ready.
{S_1012}


Then, you will be able to export your email design or send via your method of choice (through Apple Mail, Campaign Monitor, MailChimp, etc).

Creating an email link in Mail Designer is really straightforward. Simply follow the instructions below to get started:

  1. Type your desired text in a text layout block e.g. "Email me."
  2. {S_680}
  3. From the sidebar select "Add link" and choose "Email mailto" as the type of link from the drop down menu.
  4. {S_681}
  5. Add your email address.
  6. {S_682}


Now your chosen text will appear as a link and when a customer clicks the link it will open a new email to you.


If you're struggling with email deliverability—especially with Gmail users—there are proven strategies to improve sender reputation and ensure your emails land in inboxes rather than spam folders. Follow these steps to get back on track:

Steps to Improve Email Deliverability:

  1. Warm Up Your Email Lists Gradually
    • Treat the process as if warming up a completely new account.
    • Divide your mailing into smaller batches and send them on different days. For example, start with 500 emails on Monday, 1,000 on Tuesday, 2,000 on Wednesday, and so on.
  2. Focus on Engaged Recipients First
    • Begin by sending emails only to contacts who have opened your emails recently (e.g., within the last 30 days for weekly senders).
    • Gradually increase this timeframe as your deliverability improves.
  3. Leverage Google Postmaster Tools
    • Set up Google Postmaster Tools to monitor spam rates, domain reputation, and other deliverability metrics.
  4. Create Test Gmail Accounts
    • Subscribe a test Gmail account to your email campaigns.
    • Monitor where emails land. If emails go to spam, interact with them (e.g., open, click, and reply) but do not move them out of the spam folder. This helps train Gmail’s algorithms.
  5. Adjust Based on Metrics
    • Use Google Postmaster Tools to track your spam rates. If spam rates are too high, reduce the timeframe of your engaged recipients or maintain the current level of sending until the rates stabilize.
  6. Monitor Progress
    • As Gmail deliverability improves and emails stop landing in spam, expand your email list incrementally to include less recently engaged recipients.

How Mail Designer Campaigns Can Help:

Mail Designer Campaigns provides several built-in features to optimize email deliverability and improve your sender reputation:

  • Professional Email Authentication: Ensure your emails are authenticated with SPF, DKIM, and DMARC, reducing the likelihood of being flagged as spam.
  • Engagement Tracking: Identify active and inactive recipients in your mailing list, allowing you focus on your most engaged contacts first.
  • Custom Domain Support: Addd your own domain to Mail Designer Campaigns to reinforce trust with email providers like Gmail.
  • Clean and Optimized Designs: Mail Designer 365 helps you to create email content that is visually appealing while avoiding spam-triggering elements, increasing inbox placement rates.
  • Advanced Segmentation: Mail Designer Campaigns allows for advanced segmentation, such as creating lists of only people who have opened the email in the past X days, and options for sending to only a portion of your subscriber list. This ensures that your emails reach the most engaged recipients first, improving overall deliverability.

By following these best practices and leveraging Mail Designer Campaigns' tools, you can rebuild your sender reputation, enhance Gmail deliverability, and achieve more successful email marketing campaigns.

TextScout AI (beta) utilises the latest AI technology and enables Mail Designer 365 users to craft sales-boosting subject lines from just a few campaign keywords. Enter specific words and phrases, choose your desired tone, and generate perfectly-formed subject lines in seconds.

How to access TextScout AI


TextScout AI is available to try out in all Mail Designer 365 plans in the latest Mail Designer 365 version. The number of AI credits available to you for generating subject lines varies depending on your plan tier. Check your status using the credits indicator within the TextScout AI window.

Newsletter campaigns as well as Direct Mails are billed using stamps.

Sending email consumes stamps per recipient, for attachments, placeholders, scheduling, and BCC functions. The exact usage is displayed for each. For direct mail, 25 stamps are required per recipient (plus additional options), while mass campaign mailing requires 1 stamp per recipient as a base.


Stamps are included in the following monthly plans:
Plan Karlsfeld (free, included with each Mac Design Plan): 500 Stamps
Plan Roma: 5.000 Stamps
Plan Paris: 15.000 Stamps
Plan London: 25.000 Stamps
Plan Capetown: 50.000 Stamps
Plan Seoul: 100.000 Stamps
▸ Learn more about all Campaign plans

Stamps are also available as standalone Stamps packages
▸ Learn more about all Stamps packages
Currently, Mail Designer 365 does not directly support forms or surveys embedded within your email design. To make sure that your recipients are getting the optimal design that you created, we decided to leave out the HTML forms feature. Most email clients do not support HTML forms or surveys, which is why Mail Designer 365 was designed to not support HTML forms. If you were to add surveys in your email design, there is no way that we could make sure that your recipients will get a functional survey that you created, since we have no control how email clients read and interpret your newsletter.

However, if you needed to add a form to get feedback from your recipients, then we suggest linking to an outside form maker like Google forms. You can use an image or a specific text and add a link to your form. 
If you've recently upgraded to Mail Designer 365 and want to continue using your previously purchased stationery items, you can do so easily via the import feature.
To import all of your previous settings and designs from older versions of Mail Designer, simply click on "File" > "Import settings and designs." This will restore all of your preferences as well as old design ideas, and your stationery packs.

You can find more information about importing settings in this FAQ.

The option to format text styles in your email design may not seem to be important, but it will massively help you when you're trying to make quick changes to the text in your email.

When you set up a text style (e.g. Body Text) any changes you make to that style will be automatically applied to any sections of text within your newsletter where that style has been applied; for example, in different layout blocks.

If you want to make a change to the text in your design (i.e. change the color or the font) it's quicker and easier to change the format of the text style than to manually go through each layout block of your newsletter and make sure the text has been updated.

In addition, having predefined text styles in place makes your design more reliable when it comes to sending and you are much less likely to run into display or compatibility issues.
During export, Mail Designer 365 automatically applies a GIF compression to ensure that the exported file won't be too large.

This can result in some empty or transparent frames being cut from your GIF in order to save space.

As a workaround, a pixel can be built into the GIF and invisibly placed at any point over the entire length of the animation. This way, Mail Designer 365 won't identify the frames as empty.
The files are stored internally in Mail Designer 365's structure. These files are not available to export.

You can find your original template files in the Finder by following these steps:

‣ Right click the template in the Design Chooser
‣ Choose "Show in Finder"
{S_554_40%}

How to find your designs in a Time Machine backup
If you've had a hardware failure and need to find your templates in a backup of your Mac, you can find your templates in this location:

/user/Library/Group Containers/C3HCD5RMD7.net.tower-one.MailDesigner

Note: there will be multiple "Library" folders on your harddrive, but you need the hidden one inside your Home folder.
Here is one way to get there:
  • Navigate to your user's home folder in the Time Machine backup (e.g. "John")
  • Right-click on your user's home folder ("John"), hold down the Alt/Option key (⌥) and select "Copy “john” as Pathname"
  • Select the menu item "Go > Go to Folder…" and a dialog will open
  • Press Cmd+V to paste the path you've just copied and add "/Library" to the end of the path and press enter
You should now be inside the Library folder of your user account.

Now here on, go to "Group Containers/C3HCD5RMD7.Mail Designer/Documents/MD365" to find your documents. You'll find folders corresponding to your categories and each will have subfolders "Contents/Resources" that have the actual documents.

You can drag & drop them onto your Mail Designer 365 icon in the dock to copy them to your Mail Designer 365 library.
Mail Designer 365 TextScout AI is compatible with the latest macOS versions from macOS 10.13 High Sierra. Learn more.
To view the statistics of your email campaign in Mail Designer 365, follow these steps:
1. Log in to my.maildesigner365.com
2. Navigate to Campaigns and select Delivered.
3. Select the desired campaign – the statistics will then be displayed.
You can change whether your text is automatically hyphenated in your text areas. To turn off the hyphenation, try the following:
‣ Go to "File" > "Design Options."
{S_980_50%}
‣ Remove the check mark from the "Force hyphenation."
{S_981_50%}
‣ Click "Ok."
{S_982_50%}


Please refer to the following page for further information on how to turn on and off text hyphenation:


Don't worry if you accidentally deleted Mail Designer 365! We understand that these things happen and we've got your back.

To reinstall Mail Designer 365, go to our website and click on the "Download" link. Once the app has downloaded onto your Mac, you can log in with your equinux ID and password and carry on designing.
If you have received the following error message when trying to export your design from Mail Designer 365, you will need to ask Campaign Monitor for a new API key.

{S_1111}

In order to generate a new API key and carry on exporting designs from the app as usual, log in to your Campaign Monitor account and head to "Account settings":

{S_1112}

Then, go to "API keys", where you can generate a new API key:

{S_1113}

Once you have done this, update your new API key in the app and try your export again.

{S_1114}

Visit my.maildesigner365.com, log in to your account, and go to the "Billing" tab to change your payment method.

Click on your current payment method in the top right corner and select "Choose another way to pay." You can now add a new credit card or alternatively, add a PayPal account. This will be used as your new default payment method for your Mail Designer 365 plan.

Of course! Mail Designer 365 has many keyboard shortcuts that you can use when working with different objects, using the control panel, and many more.

Please refer to the following pages for keyboard shortcuts that you can use in Mail Designer 365:

Yes, Mail Designer 365 knows many settings like SMTP server or port. You will need to configure an email account for sending to use this.

Follow this step-by-step guide for more information on how to do this.
In order to add different buttons with different links, you need to use a layout blocks with multiple image areas. If you need 4 links, choose a layout block with 4 image areas. If you need 5 links, choose a layout block with 5 image areas.
{S_841_50%}

Within Mail Designer 365, you have multiple choices of different layout blocks with multiple image areas. Remember, one image area only allows you to add one link. When you send your email templates, an image area with different elements will be rendered as a single image, meaning you can only add one link within one image area and the link will be applied to that entire image area.

For the layout block, you can choose which layout you want and how many image areas there are within the layout block. Here is a layout block with 4 image areas:


{S_844}

Within each image area, you can add different graphic elements and a single link. Using a layout block, you can add a button with a unique link inside each image area. The different image areas will be rendered as their own individual images, even though it is one layout block.
{S_845}

Please refer to the following page for more information on how to add different buttons with different links to your Mail Designer 365 email design:

When you export an email design from Mail Designer 365 as HTML, each image area within the design is exported as a new image.

Extra design features in Mail Designer 365, such as cropping, scaling, filters, effects, and additional graphic elements mean that images are very rarely identical to the original source image when you are ready to export your design. This also applies when compressing images and turning retina image support on and off.

For this reason, it is necessary for Mail Designer 365 to export each image area as a new image file so your design looks the way you intend it to when you come to send.
Mail Designer 365 lets you add backgrounds to several areas within your email template. When you have added a main background picture but want to have transparent backgrounds within your text blocks, then you must delete the background of different areas within the text block.
‣ Make sure to click on the padding area of a text block.
{S_815_50%}
‣ Click "Delete Background" on the right side.
{S_816_50%}
‣ Afterwards, click on the outer area of the same text block.
‣ Then, click "Delete Background."
{S_817_50%}
‣ Your text block should now have a transparent effect.


Please refer to the following page for more information on how to create transparent effects:

In our online store we accept a variety of payment methods:

  • Visa
  • Mastercard
  • American Express
  • PayPal*
  • Personal/Business Checks* (US Orders Only)
  • Bank Transfers* (European Union Only)

* License will be emailed to you once your payment has cleared.

When paying my check or bank transfer, you will receive an email with additional payment details once you have placed your order. Bank Transfer and Check orders are currently not available for Mail Designer Purchases

Of course! There is a Direct Mail plug-in available for Mail Designer 365. Direct Mail has been tested by our team for Mail Designer 365 compatibility. Use Mail Designer 365 to create HTML responsive emails for Direct Mail without breaking a sweat – no HTML and CSS knowledge necessary. Our email builder software for Mac makes it easy to create a custom email template design for your email marketing goals. Now, you can design a responsive email template for Direct Mail using Mail Designer 365's email design tools. Send a Direct Mail email with an email template that you curated with a little help from our Direct Mail integration guide.

Please refer to the following page for how to integrate Direct Mail with your Mail Designer 365 account:
There are numerous bugs that come with HTML 5 video tags. A large number of devices have severe issues with them. For example, in most iOS versions, iPhones and iPads will display just a black rectangle that recipients can't interact with. When you tap the area where the video is supposed to be, nothing happens. It doesn't even try to open the video in the browser or open the appropriate app. Due to these factors that are beyond our control, we decided that it is best to no longer support the HTML 5 video tags. However, you can easily add video links by dragging a video placeholder into an image area. Then, you can choose your own preview image for the video. If you are linking to a YouTube video, you can generate a preview image by clicking "Generate preview."
{S_978_50%}

Please note: Email clients are picky when it comes to the HTML they will support - things that you can safely use in almost any web-browser won't necessarily work for emails.
No. Currently, Mail Designer 365 is only available for Mac (macOS) computers.
Combining different shapes and graphic elements is easy with Mail Designer 365.
‣ First, choose a graphic element that you want to use from the "Contents" section. 
{S_753_50%}
‣ Then, drag the element into an image area.
‣ Repeat these steps with other graphic elements that you want to use for the combination.
‣ After you have dragged in all of the graphic elements you want to combine, then start arranging them to create the look that you want.
‣ You can move different elements forward or backward, depending on what kind of look you want.
‣ Just click on the graphic element that you want to move backwards or forwards.
‣ Click the appropriate button found on the left side of your screen.
{S_754_50%}


Please refer to the following page for how to combine different graphic elements:


Mailchimp no longer supports the old APIs used by previous Mail Designer versions.

Please update to Mail Designer 365 1.7 or later to use the latest Mailchimp 3.0 API.

Mail Designer 365 1.7 is included with all Mail Designer 365 plans, owners of previous Mail Designer versions can purchase an upgrade plan.

Mail Designer 365 offers multiple options for sending your email designs to your audience.

Testmail

Mail Designer 365's Testmail service is designed for sending internal test emails to yourself or to your team – i.e. to preview how your finished email design will look in the inbox.

Test emails will be sent from the Mail Designer 365 Testmail service via our secure servers.

Sending external emails

You also have the option to send your email design to external email addresses (i.e. contacts who are not part of your Mail Designer 365 team) via Delivery Hub. These emails will be sent from your own email address.

Choose between an email campaign: Send to a list of contacts or an individual mailing: Send to individual email contacts.

Check out this guide for more information on sending email campaigns via Delivery Hub.

In order to upload templates to your MailChimp account on your behalf, Mail Designer needs your MailChimp API key (a special kind of password).

You can find your API key on your MailChimp. The MailChimp support pages have more information.

{S_161_50%}
Not all email clients have all fonts that we offer in Mail Designer available for the display of your newsletter. In order to prevent your design from getting broken on various email clients, you have the option to define fallback fonts that will be used in case the actual font you chose for your newsletter is not available. You can choose several fallback fonts to ensure that the style as close as possible.

In our Mail Designer 365 Manual we have detailed instructions on how to set up a fallback font for your newsletter.

There are three main ways to take a screenshot on your Mac:
  • Press "Shift" (⇧) + "Cmd" (⌘) + "4" then click and drag the mouse cursor to capture a specific area of your screen.
  • Press "Shift" (⇧) + "Cmd" (⌘) + "4" and then the space bar to capture a specific window or element on your screen.
  • Alternatively, press "Shift" (⇧) + "Cmd" (⌘) + "3" to capture your full screen.
If you wish to uninstall Mail Designer from your Mac, you can start by removing any associated files.

To get started, go to Finder. In the menu bar, choose "Go" > "Go to Folder ..."

{S_1118}

Enter this path into the search box:
~/Library/Containers/net.tower-one.MailDesigner
to locate and then delete.

Following this, enter this path into the search box:
~/Library/Group Containers
and delete the Mail Designer folder.

Finally, to uninstall Mail Designer from your Mac, go to the Applications folder (or wherever you stored the app) and move it to the trash.

This will completely remove the app and all files from your Mac. To also remove its settings, open Terminal.app (from Applications > Utilities) and enter the following command:

defaults delete net.tower-one.MailDesigner

iOS recognizes phone numbers and other information like addresses and dates automatically, as these information can be used in different Apps.
You can for example tap a phone numer in order to call it or tap an address to add it to your address book.

Because of this, these information get highlighted in emails.

macOS offers an auto save feature that automatically saves the last state of a document when closing the window. With this feature activated, you will not get asked if you want to save the last changes you made when you are trying to close the window.

Your Mac allows you to activate the auto save feature directly via the System Preferences of your Mac:

‣ Open your Mac's System Preferences
‣ Open the "General" tab
‣ Untick the option "Ask to keep changes when closing documents"
‣ Afterwards, you need to restart your Mail Designer 365 app


There are currently no educational discounts available for Mail Designer 365.

For more information on pricing, please refer to our buyer's guide, where you can choose from a range of flexible plan options depending on your needs.
To send a test email to another email address of your own, use the teamwork capabilities of Mail Designer. To do this, invite your other email address to your Mail Designer team:
  1. Open team management and invite another member.{S_1449}
  2. Then log out of your current Mail Designer account (top right)
  3. Now open the invitation link from the email from your second email address.{S_1450}
  4. Create a new account with the second email address.{S_1451}
  5. When you start the test send now, select the bottom option “Team”. {S_1452}
    This will send the test email to all members of the team, including your second email address.
You can repeat these steps for other email addresses. Up to 10 team members or additional email addresses can be added.
Occasionally purchases in the Mac App Store version of Mail Designer 365 don't get recognized properly
Please try the following steps
  • 1. Please ensure that you are using the download version from the Mac App Store. The download version from the equinux website will not be able to recognize your license.
  • 2. In the Mail Designer 365 menu please select "Restore Purchases..."
  • 3. In case your license is still not being recognized, please delete the App and reinstall it from the Mac App Store. (Don't worry, your templates and settings won't be lost)

Afterwards your license should be recognized.
Since Mail Designer Standard templates are not responsive, it's not possible to open them through Mail Designer 365 and get the same results. You can manually import Mail Designer 2 Standard templates into Mail Designer 365 by dragging a template (or several templates) out onto your desktop. Then, drag them into the Design Chooser in Mail Designer 365. Unfortunately, we cannot guarantee that your design will remain intact because they are two completely different apps.
There are exisiting tools on the market which claim to be able to convert Photoshop designs into HTML emails but the end result is essentially just an email made up entirely of images.

In general, we recommend that customers avoid creating all-image designs, as this has a negative impact on the deliverability and loading speed of your email, as well as affecting your compatibility with various email clients. For example, some email clients do not automatically display images within emails and, if this is the case, your email will appear to readers as a blank page.

In order to get your design noticed by your recipients, we strongly recommend that you use real text and images in your emails, as these types of designs will load quicker and also look good in all email clients. Use your Photoshop design as a reference and re-create it using Mail Designer 365's built-in layout blocks and design features.

MailChimp offers visual "WYSIWYG" and code-based template editing.

However, as every HTML engine works a little bit differently, we recommend that you stick to Mail Designer for editing, as changes made with MailChimp may cause issues with the look or layout of your designs.

If you need to make any changes, simply re-upload a new version of your design and select it for your MailChimp campaign.

On the other hand if you are a HTML code pro, just edit the HTML code with the MailChimp editor untill it fits your needs. We ask for you understanding that we can't offer support for this.

Mail Designer 365 allows you to add lists within your text areas.
‣ Drag and drop a text area into your email template.
‣ Double-click on the text area.
‣ Type your list. Highlight the text where you want the list to appear.
{S_885_50%}
‣ On the right side of the screen, you will find a side bar in which you can choose the list style under "Lists."
‣ Choose the list style you want.
{S_886_50%}
‣ It will automatically transform your words into a list with your chosen bullet point.
{S_887_50%}


Please refer to the following page for further information on how to create a list:

Currently, Mail Designer 365 does not directly support forms embedded within your email design. To make sure that your recipients are getting the optimal design that you created, we decided to leave out the HTML forms feature. Most email clients do not support HTML forms, which is why Mail Designer 365 was designed to not support HTML forms. If you were to add forms in your email design, there is no way that we could make sure that your recipients will get a functional survey that you created, since we have no control how email clients read and interpret your newsletter.

However, if you needed to add a form to get feedback from your recipients, then we suggest linking to an outside form maker like Google forms. You can use an image or a specific text and add a link to your form.
Cross-upgrading your Small Business plan is the only way to guarantee you have access to the very best Mail Designer 365 features.

In addition to all the latest Design Ideas, a cross upgrade to Business or Business Premium also offers you some awesome new creative tools to make your email designs even better. Find out about your plan options here.

How to cross-upgrade:
Cross-upgrading your plan is simple. Head to my.maildesigner365.com. On the start page, you will see your current plan. Click on "Convert to team plan." Then, select the plan you would like to cross-upgrade to.

{S_1115}

Once you've completed your purchase, your plan will be available for you to use or to assign to a team member.
With the versions feature of macOS, you can access different versions of your Mail Designer 365 email designs.

To do so, please follow these steps:
‣ Open one of your Mail Designer 365 email design
‣ Choose "File" > "Revert To"
‣ Select a version or click "Browse all versions"

HTML/CSS newsletters cannot differentiate between Windows 10 Mail and Outlook, even though Windows 10 Mail and Outlook have different behavior and render the same content differently.

This means that it's only possible to have a newsletter render correctly in either Windows 10 Mail or Outlook 2013, not both. Due to Outlook 2013 being in more widespread use, we decided to provide correct rendering in Outlook 2013.
Mail Designer 365 has a handy checking button that you can find on the top left.

{S_774_50%}

While you are designing and creating your newsletter, Mail Designer 365 continuously scans your email template for any issues as they occur. You will notice a number appear on the checking button in cases when Mail Designer 365 has found issues or potential errors in your email design.

{S_775_50%}

You can also click on the checking button whenever you want to check for design issues.

Please refer to the following page for more information on the Checking feature in Mail Designer 365:


Yes, you can use keyboard shortcuts for your alignment needs with Mail Designer 365.
{S_734_50%}

Please refer to the following page for keyboard shortcuts for aligning different objects in Mail Designer 365:

When you insert a placeholder into your email design via the "Insert" menu, Mail Designer 365 automatically generates a default text for the link (e.g. Unsubscribe.)

If you want to change this text - i.e. for a different language, or different phrasing, there are two ways to do so:

  1. Enter a text of your choice, e.g. "Manage your preferences", highlight this text and go to "Add Link" in the Style menu. Here you can choose "Placeholder" from the dropdown menu and enter the relevant placeholder (i.e. "unsubscribe".)
  2. Alternatively, you can insert a placeholder via the "Insert" menu and manually overwrite the default text. With this option, make sure the placeholder link is still attached to the text (you can check this by clicking on the text and going to "Link" in the sidebar.)
You purchased VPN Tracker 365, VPN Tracker World Connect or Mail Designer 365? You can use the app on up to three personal devices per license.

To do so, simply sign in to your account to use your plan on your Macs (or your iOS device where applicable) using just your equinux ID and password.

You may use the software in parallel on one computer per license.

If you want to use the software on multiple devices in parallel, or other family members or colleagues also want to use the software on their computers, you will need a separate license for each person or each parallel use.

A VPN Tracker 10, VPN Tracker 9 or Spot Maps license can be active on one Mac at the same time. If you want to use the Software on multiple devices, you will need an separate license per device.


Please update your version of Mail Designer 365. The latest version can be found here

Older versions of Mail Designer 365 may not be compatible with Big Sur and can cause display errors. Don't worry, this update is included in with any Mail Designer 365 plan.

All templates you want to upload to Campaign Monitor have to contain an unsubscribe link.

To add an unsubscribe link to your template, please follow these steps:

‣ Choose the text area you want to insert the unsubscribe link to.
‣ Please choose "Insert" > "Campaign Monitor" > "Unsubscribe Link" from the top menu bar.
You can now upload your design to Campaign Monitor.


{S_213}
New Mac? No problem. The latest version of Mail Designer 365 offers full support for Macs with M1 and M2 chips, as well as compatibility with the latest macOS versions, including macOS 15 Sequoia.

Download the latest version here.
When your email templates are rendered, an entire image area will become one image. This means that when you send your Mail Designer 365 email designs, all of the graphic elements that you add within one image area will be combined and turn into one image. As a result, the link that you add will apply to the entire image area instead of a single element.

{S_822_50%}

If you want to add multiple buttons with different links, the use layout blocks with multiple image areas. That way, you can add one button with its own link per one image area.

{S_823_50%}

Please refer to the following page for more information on text areas why a link is being applied to the entire image area instead of a graphic element:


The "Edit" View on Mailchimp's website is not meant for a proper preview. Please click on "Preview and Test" on the top right corner of your screen. Then, choose "Enter preview mode."
{S_713_50%}

This should give you a better and more accurate view of how great your design will actually look!

Please refer to the following page for further information on how to accurately view your Mail Designer 365's email design once uploaded on MailChimp:

With Mail Designer 365, you are not able to embed MP3 files directly within the email designs. Most email clients do not support this, which can lead to problems when your subscribers open the email. To make sure that your recipients are getting the optimal design that you created, we decided to leave out the MP3 feature.

However, you will be able to link to your MP3 file within your email design, as long as you upload your MP3 onto a third party host. Create a CTA button or add a text link into your design. Under the "Style" section, you will be able to click "Add Link." Just type the link to your MP3.

Campaigns allow you to send newsletters to large audiences from any device, including mobile. Direct Mail is for sending emails to a few hand-picked contacts, like birthday greetings, personal offers, and transactional emails, directly from the Mail Designer app on your Mac.
To use the redirect function in Apple Mail, try the following:

‣ Choose "Message" > "Redirect"
{S_1064}
‣ Type the recipient's email address
‣ Click the "Send" button


For more information, please read Apple's support page here.

Note: We always recommend that you use the "redirect" feature rather than to forward your Mail Designer 365 email design.
Campaign Monitor supports a few placeholder links, such as “Unsubscribe Link”, ”View in Web Link” (also called “Web Version”), and “Forward Link” (also called “Forward to a Friend”). Unfortunately, Campaign Monitor does not support custom styling on these links. Mail Designer text buttons are links with custom styling, and as such cannot be used with one of the aforementioned link targets when exporting to Campaign Monitor.

Instead of text buttons that link to one of the aforementioned targets, please insert a normal placeholder link. For example, use the menu entry “Insert > Campaign Monitor > Unsubscribe Link” to add an unsubscribe link to your document.
When you export your design directly from Mail Designer 365 using the Mailchimp integration tool, your images will be exported together with your template and hosted by the Mailchimp platform.

Learn more about exporting designs to Mailchimp here.

The software we sell on our website and the version sold on the App Store offer the same design features and purchase options.

There are only two differences:

1. The equinux Online Store will always provide you with a proper purchase invoice, which can be useful for you if claiming the purchase against your taxes.

2. You can access the beta version when you purchase from the equinux Online Store. When you purchase through the Mac App store, you will not have access to the beta version.
This points to an error while authenticating your email account. Try checking the following:

  • The username is wrong/incomplete. For example, iCloud accounts sometimes work with "username" but most times need the whole email address as a log in.
  • The password is wrong.
  • If you're trying TLS, try STARTTLS instead.
  • Maybe your server is using a custom port - though this is unlikely.

If you have a Mail program you use (e.g. Apple Mail) try comparing the outgoing mail settings there and use the same settings in Mail Designer 365.
{S_732_50%}
In the world of email design, things are changing constantly. For this reason, it's important to bear in mind that many features available in legacy versions of Mail Designer may no longer work and that designs created in older versions may not be in line with today's modern standards.

This applies in particular if you decide to upgrade your Mac to a newer macOS.

When you upgrade to a Mail Designer 365 plan, you are paying for compatibility with the latest macOS versions, as well as compatibility with all the leading email clients and email service providers. Moreover, you also have ongoing access to new Design Ideas, creative tools and cutting edge features which our development team are working on all year round.
Most email clients do not support this feature, which results in many bugs. Recipients may end up not seeing the video at all or the video refuses to play. This why Mail Designer 365 only supports linking to videos.
{S_729_50%}
To activate the mobile version of your email designs, please do the following:
‣ In the Menu, please select "File" > "Design options." 
{S_724_50%}
‣ Remove the checkmark next to "Create version for mobile devices."
‣ Press "OK."
‣ Then please repeat the same steps and activate the Checkbox again.
{S_730_50%}
{S_731_50%}


Once you have done this, you should be able to see the mobile modified Desktop version and you will be able to edit the layout blocks of the mobile view.

Sometimes text you add for the desktop version of your newsletter will be too large or too small for your mobile version. In Mail Designer 365 it's easy to modify the text size for the mobile version of your newsletter to make it just the right size.

In our Mail Designer 365 Manual we have detailed instructions on how to modify the text size for the mobile version of your newsletter.
When you schedule a Newsletter campaign, it always gets sent with the exact version of the design you created it with. If you make changes to your design after creating your campaign, you will need to open the scheduled campaign and save it again for your changes to take effect.

Detailed instructions for changing the design on a scheduled campaign:
  1. Open up your template in Mail Designer 365 and make the changes in your design
  2. Go to Delivery Hub and open your scheduled campaign
  3. The new version of your template will be picked automatically.
  4. Press Save to save your campaign with the new design
  5. Repeat for other scheduled campaigns using the same design


Please remember, changing a template is only possible while a campaign is in the Scheduled State. If it has already been sent, the design cannot be changed.

Mail Designer Campaigns does offer a link change service in case you accidentally used the wrong link in your design: How to edit a link in an email after sending

There are a couple of things that you need to check.


‣ First, are you using MailChimp as your email service provider? If yes, make sure that you are not viewing your design on the "Edit" preview within MailChimp's website.
‣ Click "Preview and Test" on the top right corner of your screen. 
‣ Then, choose "Enter preview mode."

‣ If not, try changing the default line height of your text. The default is set at 1.5. Adjust the line height to fit your needs. Try to set the spacing to 1.0 height. Your text should no longer look jumbled up.
{S_907_40%}
When exporting your email design as HTML, selecting the option "Restricted Compatibility" omits the second HEAD tag in the HTML export.

{S_1296}

Mail Designer 365 uses the second HEAD tag to improve your design's compatibility with Yahoo Mail, however some email services think this is an error and are therefore unable to process the HTML.

For example, if you are using Constant Contact and experiencing compatibility issues, please try this option.

As part of the free Campaigns plan included with your Mail Designer 365 design plan, a Mail Designer 365 banner is displayed in the footer of emails sent via Delivery Hub:

{S_1385_75%}

These banners can be removed after switching to any paid Campaigns plan. Log in to your my.maildesigner365 account to explore the Mail Designer Campaigns plan options.

If you've bought Mail Designer 365 in our store, you can get beta versions of Mail Designer 365. This feature is not automatically available if you bought Mail Designer 365 from the Apple Mac App Store. However, if you still wish to access the beta version, you can download Mail Designer 365 free from our website and login to your account with your equinux ID and password.

To access the beta version, please follow these steps:
‣ Open Mail Designer 365 on your Mac. 
‣ Choose "Mail Designer 365" > "Preferences."
{S_964_50%}
‣ Make sure to click the "Updates" tab.
{S_966_60%}
‣ Check the "Get Early Access to beta versions" box.
{S_968_60%}
‣ Since Beta versions are meant to test features and compatibility, Mail Designer 365 will remind you to have a backup of your app and designs:
{S_969_60%}


For checking updates, Mail Designer 365 will check for new versions on app start or you can:


‣ Go to "Mail Designer 365" > "Check for Updates…"
{S_970_50%}


Please refer to the following page for further information:

‣ Download the app.
‣ Go to your downloads folder and find the app.
‣ Drag the app that you downloaded and drop it into the Applications folder.


Mail Designer 365 allows you to export your email templates as HTML files containing your design. You can reuse your design with other services or publish a copy as a webpage.
‣ Open your design
‣ Choose “Share" > "Website /HTML...” from the menu bar.
{S_756_50%}
‣ Choose a location to save your design.
‣ Optional: Enter a custom name for the exported .HTML file
‣ Optional: If you plan on uploading your images to a separate web server, you can enter an absolute URL prefix for the images.

Please refer to the following page for more information on how to export your email design as a webpage:


You can sign up for a MailChimp account here.

Please refer to the following page for a step-by-step guide on how to sign up for MailChimp:


You can use your own GIFs or use one of the animations found in Mail Designer 365's content library.

In order to add a GIF, please do the following:
‣ Drag a layout block with an image area into your newsletter
‣ Drag the GIF that you want to use into an image area
‣ Make sure to only add 1 GIF per 1 image area
‣ If you add multiple GIFs into 1 image area, only the last GIF added will work


In Mail Designer 365 it is technically possible to create an all image email design, BUT we would strongly advise against it.

Image based email designs are problematic for a number of reasons...

Firstly, emails which are largely image-based are larger and generally take longer to load. If your recipient is viewing your email on a poor internet connection, it's highly likely they will not see any of the image elements. This is obviously not ideal if the majority of your design is images, as the reader will be greeted by a blank screen.

Secondly, the likelihood of your email getting caught in a spam filter increases with the amount of image elements you include. This is a safety precaution put in place by many email providers, as spam emails typically contain a high quantity of images.

Lastly, there are some people who prefer not to receive html emails, and have set up their email provider to only show them the plain text version of an email. If your email design is all image, there will be no real text to display to your recipient if they have these preferences in place.

To summarize, we would always recommend you use a good mix of real text and images in your email designs to ensure that you will have no problems when it comes to sending. Feel free to get creative with graphic elements and images in your designs, but don't forget to insert text where possible to cover all bases. Happy designing!
Mail Designer 365 has been developed especially for creating responisve newsletters
Templates, which has been created with Mail Designer standard are perfect for custom layouts such as synopses and templates with your CI. Because of this, it is not possible to open Mail Designer standard documents in Mail Designer 365 and get the same results.

Since Mail Designer Standard templates are not responsive, it's not possible to open them through Mail Designer 365 and get the same results. You can manually import Mail Designer 2 templates into Mail Designer 365 by dragging a template (or several templates) out onto your desktop. Then, drag them into the Design Chooser in Mail Designer 365. Unfortunately, we cannot guarantee that your design will remain intact.
We currently only offer Mail Designer 365 as an annual plan. You can purchase a plan here.
In Mail Designer 365, if you add multiple GIFs into a single image area, then only the latest added GIF will animate. To solve this issue, make sure to drag a layout block with multiple image areas. Afterwards, drag only one GIF per one image area.
Crew Chat is directly integrated in the design window and the natural next step for your Mail Designer 365 Campaigns workflow. Click to upload to Crew Chat and view your design drafts, comments, and feedback all in one place, together with your team. Learn more.
{S_1351_50%}
The way Mail Designer 365 handles your images varies depending on how you choose to send your finished email design.

Sending via our Testmail service:

When you send a test email using our Testmail service, the images in your email are hosted on our secure servers.

{S_1204}

Sending via Delivery Hub:

When you send your email design via Delivery Hub, Mail Designer 365 behaves the same way as all other email clients and embeds your images in the email. In this case, your image will not need to be hosted elsewhere.

{S_1205}

Exporting to Mailchimp, Campaign Monitor or Direct Mail

When you use one of Mail Designer 365's direct integrations, your images will be exported together with the email design and hosted by the respective platform.

Sending via another external service:

The way images are handled by external services such as email service providers varies based on the provider. Some providers will host your images for you; however, many others will require you to host your images yourself.

Mail Designer 365 has an option to enter your web server's URL during HTML export that lets you reference images that way. Learn more.
{S_1206}

Refer to the documentation provided by your ESP for more information on what is required.

Yes, but not directly. You will need to add a mail account in Mail Designer 365 using your own server. It is not possible to do an HTML export and then send via Outlook because Outlook does not support this.

This guide shows you how to configure your own email address to send directly from Mail Designer 365.
If you downloaded the free demo version of Mail Designer 365 from the Mac App Store, your demo is not auto-renewing and will expire automatically at the end of your 7 day term.

Once your demo has expired, you will need to purchase a plan to continue using Mail Designer 365. See all plan options in our store.
Before purchasing, we strongly suggest all customers try our free, no-obligation demo. It includes nearly all major features.

If you need to do more in-depth testing, we recommend checking out our affordable Mail Designer 365 monthly plans. You can access all features for an entire month to make sure it's a good fit for your business.

Once you've tested all the features you need to, you can then get a pro-rated upgrade to a yearly plan if you decide to keep the app.
Every area of text in your Mail Designer 365 email design should have a dedicated text style applied. This ensures your text will be formatted correctly after you have exported your template.

If you add a text link to your email without also applying a text style, this could result in the link not being applied correctly after export.

If your links are not displaying correctly following export to Mailchimp or another service, please open your design in Mail Designer 365, check every text area has a text style applied, then re-export your design.

You can find out more about text styles in the Mail Designer 365 Manual.
Sending out an email blast via SMTP to a larger group of recipents will potentially cause problems with the new procedures put in place. This means that if you continue to use this process, your emails will most likely get blocked by the recipient email provider (Gmail, Yahoo, etc.). This will result in only a few of your recipients actually receiving the emails.

The thing triggering these blocks of email transmissions is not the nature of the email. Even personal Christmas Greetings will potentially get blocked if sent to a large enough audience. After all, how would the email provider know what nature the content of the email is? They block emails purely based on the number of emails being sent at the same time from the same origin.

Here is how Mail Designer Campaigns can help in this situation:
- When you don't have your own domain email address, we replace the From Address automatically with one of our verified Domains
- This address replacement would look as follows: Original Address - supercoolmails@yahoo.com New Address: supercoolmails.yahoo.com@sentwith.maildesigner365.com
- Since the Domain @sentwith.maildesigner365.com is fully DKIM certified, these emails would not be blocked due to DKIM issues.

Alternatively if you do have your own Domain, Mail Designer Campaigns allows you to DKIM verify your send address, so you can send from your own Domain without being blocked by the providers.

Are you new to Mail Designer? Why don't you try the Mail Designer Free Demo for Mac users.
Yes, Mail Designer 365 is a paid upgrade for everyone who is upgrading from Mail Designer 1, Mail Designer 2, or Mail Designer Pro. After you have purchased a Mail Designer 365 plan, all updates are covered without additional cost for the duration of your Mail Designer 365 plan.

Mail Designer Standard and Mail Designer Pro users can find out more about what's new in Mail Designer 365 on this page.

Blend Modes allow you to control the way image elements (e.g. images, shapes, patterns, etc.) behave when layered together.

If you use a normal Blend Mode when placing one image element on top of another, the bottom layer will be completely covered by the top layer:

{S_1116}

However, there are in fact multiple ways in which you can layer image elements. You can control this by applying various Blend Modes to modify the way two layers blend with each other.

Access Blend Modes under the "Style" menu after clicking on a design element. Here you can scroll through the different modes to find the effect which works best for your design.

{S_1117}

You can find more detailed information about the different Blend Modes available in Mail Designer 365 in this guide.
Open your design and go to "File > Export archive …" to export it.

Then, please create a new support ticket and attach your exported design file and screenshots of the areas you are having problems with. Please also be sure to include a description of the issue you are having.

This will allow us to take a look at your design and help you troubleshoot any issues.
As an email sending service, Mail Designer 365 Campaigns is required to enforce spam prevention measures, such as GDPR in the EU and CAN-SPAM in the US. By law, marketing emails must provide a way for recipients to opt out of future emails.

For this reason, all email campaigns sent via Delivery Hub must contain an unsubscribe link.

Further benefits of including a clear unsubscribe link:
  • Automatic unsubscribe handling (Delivery Hub will remove unsubscribed contacts for you)
  • Clean email list – your campaigns are only being sent to engaged subscribers
  • Fewer spam complaints
  • Campaign-based unsubscribe rate tracking

How to insert an unsubscribe placeholder in your email design
To add an unsubscribe link to your email, click inside a text area in your design (e.g. in the email footer), then go to the app menu and select Insert > Mail Designer 365 Campaigns > Unsubscribe Link:

{S_1388}

When you send your campaign via Delivery Hub, recipients will see the unsubscribe option in the footer of your email:

{S_1389}

Learn more about Delivery Hub →
There are two kinds of areas that can be found within layout blocks in Mail Designer 365: image areas and text areas. Here are the main difference between the two types of areas:

Image areas can contain both text and images:


{S_766_30%}

{S_760_50%}

{S_761_50%}

Text areas can only hold text:


{S_767_30%}

{S_762_50%}

Please refer to the following pages for more information on text areas:

Please refer to the following pages for more information on image areas:


Responsive newsletters are emails which change their layout and content depending on which device they are viewed. One newsletter opened in Mail on your Mac will look different if opened on an iPhone.

Text blocks, for example, which are arranged side by side in the desktop version will appear one below the other when viewed on an iPhone.
{S_399}

With Mail Designer 365, you can create responsive newsletters. By editing images, graphics and text objects for the mobile version you can optimize your template for mobile devices.

There are a couple of important things to keep in mind when testing Mail Designer 365 for the first time:
  • The Mail Designer 365 free download only allows you to view the app and open and edit email templates.
  • Without an active demo, you will be unable to save or send created templates.

Activating your Mail Designer 365 demo

To activate your free demo, please carry out the following steps:
  1. Start the Mail Designer 365 app on your Mac.
  2. Log in with your equinux ID and password or create an account.
  3. If you are starting the app for the first time, you will see a list of plan options. Here you can choose to activate your free trial.
  4. If you have previously logged in to the app, you can find the option to start your free trial in the top left corner under your name.

{S_1244_70%}
With Mail Designer 365, you can easily add a link into any text. You can also add multiple links within a text area.
‣ Mark the text that you would like to turn into a link. 
‣ Click "Add Link" from the left sidebar.
{S_788_50%}
‣ You can now choose what type of link you want to add:
{S_789_50%}
‣ Then enter your URL in the Link destination dialog box:
{S_790_50%}

Note: You can change the color and text options of your link using the regular font options.
Your plan and price are locked in as long as they keep autorenewing. But don't worry: Once a plan has lapsed, you can subscribe to one of our current plans and get all the latest features and benefits.
Responsive newsletters are emails which change their layout and content depending on which device they are viewed. One newsletter opened in Mail on your Mac will look different if opened on an iPhone.

Text blocks, for example, which are arranged side by side in the desktop version will appear one below the other when viewed on an iPhone.
{S_711}

With Mail Designer 365, you can create responsive newsletters. By editing images; graphics; and text objects for the mobile version, you can optimize your template for mobile devices.

You can change whether your text is automatically hyphenated in your text areas. To turn off the hyphenation, try the following:
‣ Go to "File" > "Design Options."
{S_1060_50%}
‣ Add a check mark from the "Force hyphenation."
{S_1061_50%}
‣ Click "Ok."


Please refer to the following page for further information on how to turn on and off text hyphenation:
Currently, Mail Designer 365 is only available for Mac (macOS) computers.
Yes you can! Mail Designer 365 recently launched a brand new table editing tool to allow you to integrate tables into your email design.

Currently, the Tables feature is only available in Mail Designer 365 Premium Business plans. To find out more about purchasing or upgrading to a Premium Business plan, visit this page.


First open your template in Mail Designer 365. You can then insert a placeholder using the menu “Insert > Mail Designer 365 Campaigns”. From there, select “Unsubscribe Link”.
You can use MailChimp placeholders in your Mail Designer 365 email designs. For example, you can use placeholders in order to personalize your mailings with the first or last name of the recipient. You can also preview the final result via the MailChimp website.

To do so...
‣ Please go to the MailChimp website and log in. When you are ready, upload your design to MailChimp by creating a new campaign.
‣ Select the email design you just uploaded and click "Preview and Test."
‣ Next, click "Enter preview mode."
‣ Click the button for "Enable live merge tag info". You will now see your information for the placeholder you have entered.

Please don't go! :-(

If you're sure that your time with us is at an end then we've made it nice and easy to remove all your info from our database so that you don't need to wait for us to do it.

Just log in at your License Manager, click 'Edit your Account' on the left hand navigation panel and, after a tearful farewell, click 'Delete Account'.

If you do leave then we'd like to say thank you, bye and come back soon!

Copying in pre-formatted text to your email design from another program such as Microsoft Word or Apple Pages can sometimes lead to difficulties in Mail Designer 365 - particularly if you don't have text styles set up. This is often due to how other programs copy text to the clipboard and can result in unwanted line breaks or other formatting issues.


For best results, typing your email copy directly into the text layout blocks in Mail Designer 365 is most effective. Where this is not possible and you need to copy in text from elsewhere, we would recommend first copying and pasting your text into a plain text editor (such as TextEdit on the Mac) to strip any formatting before entering it into Mail Designer 365.


If you have text styles set up already, you can use the "Paste and Match Style" option and you won't need to reformat anything.
We offer a free trial for the Mail Designer 365 App and a free plan for testing Mail Designer Campaings. These trials can be used to test all functionality of the app and the service, helping users identify the best fit for their needs. After this trial period, all sales are final upon subscription, in accordance with our Terms and conditions.
 
Please be aware that we cannot process refunds in the following scenarios:
  • Non-usage of the app or service
  • Failure to cancel your account within the cancelation period
  • Lack of features or functionality on your subscribed plan
  • Purchases made in error
  • Exceptional circumstances beyond our control
  • Violations to our Terms of Use
Email design features are exclusively available in the Mail Designer 365 app for Mac. However, if you have set up a Mail Designer 365 team, Windows and other non-Mac users can use Mail Designer 365 Campaigns on any device and in any browser to:
  • View, comment on and approve email design drafts
  • Receive test emails
  • Manage email contacts and audiences
  • Schedule and send email campaigns
  • Access post campaign analytics

Get your team started today with a free Campaigns plan for up to 10 team members!

Although there is currently no direct way to save your email template as a JPG or PNG file, we'll show you how you can still do that by following these simple steps:
‣ First, export your Mail Designer 365 template as a PDF file. 
‣ Choose “File" > "Export as PDF…”
{S_807_50%}
‣ Save your document as a PDF file.
‣ Now, open your PDF file.
{S_808_50%}
‣ Go to your menu bar at the top.
‣ Choose “File" > "Save As…”
{S_809_50%}
‣ A popup window will appears, and you can choose the format you want. You can decide if you want to convert the PDF into a JPG or PNG file.
{S_810_50%}

Please refer to the following page for more information on how to convert your email design as a JPG or PNG file:


Safari may ask for confirmation the first time you download a file from a website. So when you download an app from our website, choose "Allow" when prompted to start the download.

{S_1231}

Note: All of our apps are digitally signed and verified for security, so you can download with confidence.
You can import email addresses to Mail Designer 365 Campaigns using the CSV import tool. It is available at:
https://my.maildesigner365.com/team/deliveries/addContacts

The first three column names are Email,First Name,Last Name

You can also add additional keys/columns and their attributes/values per entry as you go. The importer will automatically add the attributes to your contact database. All you need to do is define the keys/columns you plan to import in the first line.

Example:

You want to add a favorite color and a location for each of your contacts. In order to do so, define the first row of the CSV file with the following key/column names:

Email,First Name,Last Name,Favorite Color,Location
miller@example.com,Peter,Miller,blue,New York
smith@example.com,Jody,Smith,red,San Francisco


New contacts will be automatically

Good to know: You can re-import the CSV at any time with additional columns to enhance your contacts. All new attributes will then be attached to your contacts.

Need help? Download an example CSV file here for reference:
Mail_Designer_365_Campaigns_Email_Import_Example.csv
Mail Designer 365 uses a lot of web technology under the hood which could be picked up by your security software. Some security software, for example such as Avast, may therefore come into conflict with Mail Designer 365 - potentially causing the app to stop responding.

To fix this, you could try white-listing Mail Designer 365 from the security software or exempting it from the checks. Otherwise, we recommend you get in touch with your security software's support team to find a possible solution.
Yes, absolutely! We offer a free seven-day demo for Mail Designer 365 where you can explore the benefits of the software for yourself. In the seven-day trial version you can create and save your own designs and campaigns and also send test emails to yourself.

Please bear in mind that the full subscription version of Mail Designer 365 is required to export your designs as HTML.

You can download the free trial version here.
Mail Designer 365 has pre-made buttons that you can use in your email designs.
‣ Within the "Contents" section of Mail Designer 365, you can click on the triangle icon or press Command⌘-2 to show shapes. 
‣ You will have many different button options under the "Buttons" subsection.
{S_736_50%}
‣ Drag your chosen button to an image area.
‣ You can edit the message by double-clicking the text of the button.


Adding a link to your button:


‣ Make sure to add a link to your desired landing page by double-click the button shape. 
‣ When you double-click the shape, the "Style" section will open on the left side.
‣ Click on "Edit Link & Background."
{S_737_50%}
‣ Under the "Link" subsection, you will be able to click "Add Link" to add the link to your landing page.
{S_738_50%}


Please refer to the following page for how to add CTA buttons:

Please refer to the following page for a brief overview of the Contents:

Please refer to the following page for tips on how to strategically position your call-to-action buttons:


Sometimes the VAT verification servers are temporarily not reachable, which can cause the error when trying to upgrade or purchase a Mail Designer 365 plan.

In order to upgrade to Mail Designer 365 with your VAT, please try the following:
‣ Visit our  upgrade page.
‣ Purchase your Mail Designer 365 plan.
‣ Log in to your account
‣ Click on the button "Buying for a business?"
‣ Add a VAT ID
‣ Enter your full VAT number
‣ Click on "Validate VAT ID"
Making the switch from Campaign Monitor to Mail Designer 365 Campaigns? Mail Designer 365 combines flawless HTML email design with easy to use sending tools and tailor-made audiences based on smart and adaptive attributes.

Mail Designer 365 Delivery Hub makes it super straightforward for you to import your existing email lists directly from Campaign Monitor so you can get started right away. All you need is your Campaign Monitor API key!

Check out our simple, step-by-step guide to get started →
To certify the domain for sending, a DNS record must be added to the domain. This can only be done by the administrator of your domain within your company. Follow these steps:

1. Find out who in your organization is responsible for managing domain entries. Keywords for such a role include: domain management / DNS management / DNS administration.
2. Invite the administrator to your Mail Designer project by adding them as a new participant ‘Admin’ to your project team: my.maildesigner.com > Settings > Participants > Invite Participants.
3. Contact your administrator and ask them to complete the domain verification using the information provided under my.maildesigner.com > Settings > From: Addresses.

Once they have completed everything correctly, a checkmark will appear under ‘Domain verified’.”
Mail Designer Campaigns offers a tool that easily lets you import your contact lists from MailChimp into Mail Designer Campaigns.

Here are the detailed instructions for how to import your MailChimp Contact list into Mail Designer Campaigns
If you need to force quit your software for any reason (e.g. your screen has frozen or the app is not responding) please do one of the following:
  • If the app you want to quit is in your dock, hold the "Option" (⌥) key and right-click on the app icon, then, select "Force Quit" from the menu.
  • You can also hold down "Option" (⌥) + "Cmd" (⌘) + "Esc" which will trigger a window with a list of apps you have running. To force quit one or more of these apps, simply select it from the list and click the "Force Quit" button.
Mail Designer 365 allows you to choose your own preferred language. You have several options of languages to choose from like American English, British English, etc.
‣ Select a text area. 
‣ Choose "Edit" > "Spelling and Grammar" > "Show Spelling and Grammar" from the menu bar.
{S_707_50%}
‣ A pop up will appear that will let you choose a language.
‣ Just click on the "Automatic by Language."
‣ You can choose your preferred language from the different options from the drop down menu.
{S_708_50%}


Please refer to the following page for more information on how to choose your spell check language:

Placeholders can be used to insert subscriber details or unsubscribe link into your newsletter automatically when you send it via MailChimp or Campaign Monitor.

To use a placeholder, please try the following:
‣ Select a text area
‣ Please choose "Insert" > "MailChimp" or "Campaign Monitor"
‣ Choose a placeholder
{S_720_50%}
{S_721_50%}


Note: A placeholder cannot be used on text within an image area, you'll need to place your cursor in a text area to use placeholders.
Yes, Mail Designer 365 allows you to save your customized layout blocks!

Please try the following:
‣ Make sure the "layout" is visible (Choose "View" > Show Layout") so you can see the drag handle on the layout blocks
‣ Then you select the "Contents" tab on the right side
‣ Select the "Layout blocks" section
‣ Click "Ready-Made"
{S_1070}
‣ Select the layout blocks that you want to save
‣ To select multiple layout blocks, you will need to click on a layout block, hold the shift key, and then select the other layout blocks
‣ Drag your layout blocks into the "My Instant Blocks" section"


Note: You have the ability to save multiple layout blocks together or to save only a single layout block.
When you use Mail Designer 365's HTML export feature, it exports separate HTML and image files. In order for the images to be displayed correctly to your recipients, they'll need to be hosted on a webserver.

Many newsletter services take care of image hosting for you. You just upload the HTML file and images and they manage the rest.

If you newsletter tool or service doesn't offer image hosting, you will want to upload images to your own web server. Mail Designer 365 has an option to enter your web server's URL during HTML export that lets you reference images that way.

Can I hotlink to images from my website?

No: Mail Designer 365 needs to adjust the dimensions of images precisely to work correctly with all email clients, so hotlinking to images on your website isn't supported. However you can export the images in your design and host them on your website's server as described above.
Mail Designer 365 Campaigns offers multiple ways to work together as a team:

Mail Designer 365 TeamCloud
Save your design to TeamCloud to give other designers in your Team access, so they can edit and make changes to your design. Designs saved in TeamCloud are also automatically made available to use with Crew Chat and Delivery Hub for the rest of your team.

Mail Designer 365 Crew Chat
Use Crew Chat to upload your Mail Designer 365 design as a web-based preview. Team members can preview your work and post comments and feedback from any device – including iPhone, iPad, Windows, Android. It's the fastest way to get everyone's input.

Mail Designer 365 Delivery Hub
Access your team's Mail Designer 365 designs in Delivery Hub to send as targeted email campaigns to your audience. Manage email contacts and lists, schedule and send campaigns, and benefit from detailled post campaign analytics.

Discover Mail Designer 365 Campaigns

We have a range of plan options available to suit all needs.

A Mail Designer 365 Business plan is intended for everyday email newsletters. This plan offers you access to all the latest Design Ideas, as well as the Borders tool and Teamwork features.

Mail Designer 365 Business Premium plans are intended for users who consider newsletters to be a critical part of their marketing strategy.
This plan offers you all the features available in a Business plan, plus:
  • 24h priority support
  • Tables tool
  • Blend Modes
  • Duotone Filters
  • Vibrancy effects

If you want to cross-upgrade your plan from Small Business (our legacy plan) to Business or Business Premium, you can do so by heading to my.maildesigner365.com.
If you have created a customized plain text version of your message, you'll need to add it to your MailChimp or Campaign Monitor newsletter separately.

Simply copy Mail Designer 365's plain text version and paste it into your newsletter service's plain text section.
{S_722_50%}

Please refer to the following page for further information on plain text:


Yes, you can easily adjust the opacity of any photo in your newsletter.

‣ Select the photo that you want to turn semi-transparent
‣ This will prompt Mail Designer 365 to open the "Style" section on the right side
‣ At the bottom, you will find the "Opacity" section
‣ Adjust the opacity slider to adjust the opacity of the photo you selected
{S_1084}

Mail Designer 365 usually starts within a few seconds. If the startup process takes longer, please check whether you have installed a virus scanner or other endpoint security software (e.g. from Sophos).

This software can severely affect the startup process. If possible, please add an exception for Mail Designer 365 or the following directory:

~/Library/Group Containers/C3HCD5RMD7.net.tower-one.MailDesigner/Documents

The tilde (~) represents your home directory. This exception is only necessary for read operations; write operations can still be monitored.
Mail Designer 365 allows you to create custom preview devices, so you can preview your email template on a display with certain resolutions.

‣ Open your email template if it is not already opened.
‣ From the menu bar, choose "Mail Designer 365" > "Preferences."
{S_782_50%}
‣ A popup window will appear.
‣ Click on the smartphone icon, labeled "Mobile."
{S_783_50%}
‣ Click on the "+" icon at the bottom left of the window.
‣ Enter the resolution you want to use.
{S_784_50%}
‣ Give this display option a name so you can easily find it in the preview options menu


Please refer to the following page for more information on how to create custom preview displays in Mail Designer 365:

Following send/export, all mobile responsive designs created in Mail Designer 365 will be rendered with some padding. The reason for this padding is to ensure optimal compatibility on all mobile devices and email clients.

Oftentimes, this padding will appear more noticeable if a background color has not been set. In order to create the illusion of a full-width design, you can set the outer background to a different shade to create a subtle contrast between your email content and design background.
No. We have found that SendX struggles with some HTML implementations, even with official HTML standards. Therefore, it is better to choose a delivery service that supports all common HTML standards. For example, you can use the integrated mailing service of Mail Designer 365.
You can adjust the width of individual columns, if you have multiple text areas within a single layout block. You can also adjust the width of individual columns, if you have multiple image areas within a single layout block.

However, when working with columns, you cannot adjust the number of columns within a layout block. You will need to select the appropriate layout block with the specific number of columns that you want (either 2 or 3 columns for text areas).
{S_1000_40%}

You cannot switch automatically from 2 columns to 3 columns or vice versa. However, you can just add another layout block with the correct number of columns. Afterwards, just copy the text from your original layout block and then paste the text onto the new layout block.

If you want more than 3 columns for text areas, you will need to work with a single text area and space your message accordingly. In this scenario, you will basically be simulating your own table with multiple columns.

Compared to layout blocks with text areas, you have more options when it comes to layout blocks with image areas. You can use a layout block with up to 6 image areas in a column style.
{S_1001_50%}

With this layout block, the image areas are displayed next to each other in the desktop view. However, please note that the image areas will be displayed on top of each other in the mobile view. This was designed so that recipients will easily be able to click on the images if they are linked to a landing page and so that the images are still clearly visible when the email is opened with a mobile device.

In case you want to include a "Subscribe" link in the newsletters but MailChimp only shows HTML code that you cannot embed, here's a quick way:

In Mail Designer 365, select "Custom" as link type. Then, insert the MailChimp subscribe tag. Remember, you must insert a link and not the login form for web pages. Forms can not be embedded in mails.


In order to stop your Mail Designer 365 plan from renewing each billing period, you must deactivate automatic renewals.

To do this, go to your my.maildesigner365 account and open the "Billing" tab. Here you can see your plan's renewal date and turn off automatic renewals for your plan, if you wish.

{S_1222}

Please note, by switching Auto-Renew off, the plan will stop at the given end date and possible pricing benefits will be lost. The renewal of an expired plan is not possible. After expiration you are then free to obtain a new plan, at any time you wish, for the then current price.

Emails that contain only images are often flagged as spam because spam filters rely on text to evaluate the content's legitimacy. Without text, the filters may assume the email is hiding suspicious or harmful content, a tactic commonly used by spammers. Additionally, image-only emails can load slowly, frustrating recipients and increasing the likelihood that they will mark your email as spam.

To improve your email's chances of landing in the inbox, follow these best practices:

  1. Avoid image-only layout blocks: Instead of using layout blocks that consist only of images, opt for blocks that combine text and images. This ensures your text gets displayed as actual text, not as part of a large image, which helps filters and recipients better understand your content.
  2. Include relevant text: Clearly explain the purpose of the email using text. This gives spam filters context to analyze and helps your audience engage with your message.
  3. Use alt text for images: Add descriptive alt text to each image. This ensures that even if the images don’t load, recipients (and spam filters) can still understand the email’s content.
  4. Maintain a good text-to-image ratio: A balanced approach, where there’s more text than images, can reduce the chances of your email being flagged as spam. The text gives spam filters more material to evaluate.
  5. Use a combination of image and text blocks: Combining both elements not only enhances readability and engagement but also prevents spam filters from interpreting your email as an attempt to hide important information in images.
  6. Use a reputable email service provider like Mail Designer 365 Campaigns: Many email service providers such as Mail Designer 365 Campaigns help optimize email structure and offer authentication protocols like SPF, DKIM, and DMARC to enhance deliverability.

By following these guidelines and ensuring your email contains a mix of well-placed text and images, you can improve its deliverability and reduce the risk of it being sent to the spam folder.

To save, please try the following:
‣ Choose "File" > "Save"
‣ A pop up will appear.
‣ Give your email design a name.
‣ Choose a category or create a new category by choosing "Custom" from the drop-down menu. Then, type in the name of your new category.
{S_699_50%}


Once you save your email design, it will be saved in Mail Designer app. You can access it from the Design Chooser. You can click on "My Designs" or search for it in "My Library."
{S_700_50%}

Note: In the demo version of Mail Designer Pro 3, saving of designs is only possible after your purchase.

Mail Designer 365 needs unfiltered and unmodified access to these servers to function:


  • id.equinux.com
  • my.maildesigner365.com
  • data.maildesigner365.com
  • my.featurenotes.com


If you are using a firewall or Endpoint Security Solution, please ensure access to these servers is granted and not modified.

Mail Designer 365 may contact additional servers for some features, for example:


  • polyfill.io
  • www.gravatar.com
  • wp.com
  • api.rudderlabs.com


To check whether links in your document are valid, Mail Designer 365 may try to contact these servers as well.
You can rest assured that we continue to offer full support to our customers and have taken the necessary steps to increase our support capacity for you during this difficult time.

Support Information
  • Our support team continues to be available for you during this time
  • We’ve updated all FAQs to cover your most common issues - checking our FAQs first might help you find the answer to your question faster.
  • The more information you include in your support request, the better. If you are experiencing a problem with a design, attaching the design file or screenshots of the issue can help us get to the bottom of this faster.
  • Support is only available for Mail Designer 365 customers. Users of earlier Mail Designer versions will need to purchase a Mail Designer 365 plan.
  • Priority is given to Mail Designer 365 Business Premium customers


You can contact the support team at support@maildesigner365.com.
If you want to view and manage your subscriptions on the Google Playstore, proceed as follows:
https://support.google.com/googleplay/answer/7018481

If you want to view and manage your subscriptions on the Apple AppStore, proceed as follows:
View or cancel subscriptions
Many of our users design personalized offers, exposés, or greetings with Mail Designer 365. Alternatively, they may want to test a direct mail to a colleague before a mass mailing. This is what 'Direct Mail' is intended for.

The Direct Mail feature is not designed for newsletters. For newsletters, please create a Mail Designer 365 campaign and send it directly to your target audience.

If you don’t have a warmed domain or custom email address, Mail Designer 365 offers a professional solution for sending email campaigns without the need for your own domain.

How does it work?

Mail Designer 365 uses its Mail Designer Delivery service, which ensures that your campaigns are sent reliably and securely from a trusted, pre-configured email domain. This avoids potential issues like deliverability problems caused by an unprepared domain or emails landing in spam folders.

Why choose Mail Designer Delivery?

  • No Setup Hassle: You don’t need to purchase, warm up, or configure your own domain.
  • Trusted Reputation: Mail Designer’s sending infrastructure is optimized to ensure high deliverability.
  • Professional Appearance: Your emails are sent with an authenticated domain, giving a polished and professional look to your campaigns.
  • GDPR-Compliant Sending: All data is handled in compliance with GDPR, ensuring the privacy of your recipients.

What’s the catch?

While using a shared domain is a quick solution, a custom email domain (e.g., yourname@yourbusiness.com) is always recommended in the long term. This gives you full control and enhances your brand image. Mail Designer 365 supports this setup with tools to configure SPF, DKIM, and DMARC authentication for maximum deliverability.

Ready to get started?

Mail Designer 365 is perfect for sending individual emails or thousands of recipients quickly and professionally. Start your campaign with our delivery service today and reach your audience without worrying about technical setup or deliverability!

Yes, Mail Designer 365 allows you to enter a text for the inbox preview of your email design. The inbox preview enables you to see the little text preview of your email whenever you open the inbox of the Mail application on your iPhone.
‣ Click the "Inbox" button to open the optimization window. 
{S_771}
‣ Then, you can enter the subject line for your email, as well as the preview text that your recipient will see.
‣ On the right side, Mail Designer 365 will show you a preview.
‣ This will display how your recipient will see the inbox preview snippet in their inbox before even opening your email.


Please refer to the following page for more information on the Inbox Optimization tool:


Additional stamps can be purchased at any time, either through a Mail Designer Campaigns plan, which provides new stamps monthly, or through a one-time purchase of stamps:
Monthly Stamps Plan
One-Time Stamp Purchase
Plans that are set to auto-renew may keep pricing benefits ("grandfathered pricing").

By deactivating the auto-renewal option, you will automatically lose any of your existing price benefits (i.e. promotions or introductory offers.) This action cannot be reversed. Should you then wish to renew your plan at a later point, you will be billed at the regular plan price.

Please be aware that your plan will also end if your payment method cannot be charged at the time of renewal (i.e. expired, lost or stolen). If you need to update your payment method, you can do so at any time in your my.maildesigner365 or my.vpntracker account.
With Mail Designer 365, you can choose from a variety of different video placeholders.
This allows you to link to online videos directly within your email design. Please note that Mail Designer 365 does not support embedding videos directly within your email designs.
{S_714_50%}

After you have added a video placeholder from the Contents panel, copy the link to the video into the link field.
{S_716_80%}

Mail Designer 365 allows you to use links from Youtube and Vimeo. In addition, you can upload your own MP4 files to your server or Dropbox account and copy the public link to this file into the video placeholder.

If you are using your own MP4 files, the video will be played directly in the email application. However, this is only true if this functionality is supported by the email client. Videos will not be played directly in the email. Instead, your subscribers will be led to the online video.

Please note that video clips you want to use in video placeholders must be uploaded to a third-party hosting website like YouTube or Vimeo. Video files that are only available on your Mac cannot be used in your email design.
We offer every customer a no-strings-attached trial period of Mail Designer 365 before purchase. The trial can be downloaded free of charge from our website. This allows users to test the vast range of features and tools included in a full plan before making any financial commitments to the software.

For this reason, we cannot offer refunds once a plan has been purchased. This information is also clearly stated in the terms & conditions which must be accepted before completing the checkout process.
If you need something changed on the invoice, please contact us via our support page.
You also have the option of sending us a direct message.

Note: We cannot guarantee that we will be able to make any changes after the invoice has been issued. This depends on a case-to-case basis. Thank you for your understanding.

Email marketing isn’t dead—it has simply evolved. While it’s true that inboxes are busier than ever, email marketing remains one of the most effective ways to connect with audiences when done right. Here’s why:


  1. People value quality over quantity: Subscribers are more selective about the emails they sign up for, so it’s crucial to offer valuable, engaging, and relevant content that stands out. Generic or repetitive emails won’t cut it anymore.
  2. It’s a personal choice: Unlike unsolicited messages on platforms like WhatsApp, email gives recipients control—they’ve opted in to hear from you. For many people this makes emails far more welcome than intrusive messages on other channels.
  3. Still an ROI powerhouse: Email marketing continues to deliver one of the highest returns on investment (ROI) in digital marketing. When you focus on personalization and value, email can drive conversions better than almost any other medium.


While automation and messaging apps like WhatsApp are growing, they serve different purposes. Instead of replacing email, they complement a well-rounded marketing strategy. So, no—email marketing isn’t dead. It’s just more competitive, and that’s a good thing because it pushes brands to be better.

Some kinds of software may cause issues with Mail Designer 365:

  1. Personal Firewalls
  2. Protection Software (e.g Virus Scanners, Malware Protection)

Personal Firewalls usually ask the user, if an app should be allowed to send network traffic. It’s important to grant Mail Designer full network access. If you have already added rules for Mail Desinger, please whitelist Mail Designer.

Protection Software often sees authentication traffic as a potential source of threat, as it isn’t able to analyze that traffic because of its very strong encryption. Please ensure Mail Designer is ignored by any protection software running on your Mac and allow this traffic to pass through.

Here are some common examples of the types of apps mentioned above. If you are uncertain whether any of these applications may be installed on your system, try the following:

  • Open the app “Terminal”
  • Copy and paste the following command: kextstat | grep -v com.apple

You’ll get a list of all kernel extensions that are not from Apple. Just compare that list with the identifiers in parenthesis below:

  • Little Snitch
    (at.obdev.nke.LittleSnitch)
     
  • Sophos Anti Virus
    (com.sophos.kext.oas, com.sophos.nke.swi)
     
  • Symantec Endpoint Protection / Norton AntiVirus
    (com.symantec.kext.SymAPComm, com.symantec.kext.internetSecurity, com.symantec.kext.ips, com.symantec.kext.ndcengine, com.symantec.SymXIPS)
     

If you have a charge from equinux on your credit card that you do not recognize, it may be for one of the following products offered through the equinux Online Store:

  • VPN Tracker (VPN software for Mac, iPhone and iPad)
  • Mail Designer 365 (email newsletter design software for Macs)
  • tizi (iPhone and iPad accessories)

Common scenarios

Auto-renewing products

VPN Tracker and Mail Designer 365 are offered as subscriptions. When a plan has been configured to auto-renew, the associated payment method will automatically be charged.

Additional team-members added

If multiple employees are using one of our products, they may have configured team billing. This means the associated credit card may have been charged, in order to add a new team member to an account.

Invoices and other questions

You can download your invoices from our website:

If you have checked with your team and still have additional questions regarding a charge, please contact our support team. Be sure to include the details from your credit card statement and the last 4 digits of your card.

Mail Designer 365 version 1.7 and onwards uses Mailchimp's API 3.0. Earlier versions of Mail Designer use API 1.3, which Mailchimp announced they would be switching off on 2nd April 2019 and thus may not be able to export to Mailchimp after that date.

You can view a copy of all your invoices in our Online Store:

You will find the invoices for your VPN Tracker 365 purchases in the section "Invoices", here:

http://my.vpntracker.com

You work in accounting and need access to the VPN Tracker invoices for your company? Please ask your VPN Tracker Team manager to invite you to you company's team with the role "Accounting". Afterwards you will receive emails as soon as a new invoice is available and you can dowload this from the web portal


You will find the invoices for your Mail Designer 365 purchases in the section "Orders", here:

https://my.maildesigner365.com

You will find the invoices for your tizi products in the section "Orders", here:

http://my.tizi.tv

Other invoices can be found at http://www.equinux.com/goto/invoice
‣ If you would like to save a PDF copy of your invoice, then do the following:
 Press "Command + P"  
 Choose "PDF" > "Save as PDF"

We don’t offer partial refunds. All of our 365 plans are valid for one year and you can cancel up to 10 days before the end of your term; however, if you do cancel, you will be able to continue using the software the expiration date of your plan.


During the export to Mailchimp, Mail Designer needs to create a temporary campaign which usually is deleted after the upload. However, in rare cases, it's possible that something went wrong and these temporary campaigns are left over. You can safely delete them without it impacting your actual campaign. They start with MailDesigner365-Temporary-.
If you use an FTP service like Filezilla, you will need to make sure that you export your email design to a specific folder on your FTP account.

‣ First, open your email design in Mail Designer 365.
‣ Choose "File" > "Export as HTML..."
{S_1016}
‣ Give your folder a specific name
‣ Connect to your server
{S_1017}
‣ Upload your folder on your FTP account. With Filezilla, you can type the location of your folder within your Mac under "Local site."
{S_1018}
‣ Or you can find the specific folder within the Filezilla window and then right click the folder. Choose upload from the drop down menu.
{S_1019}
‣ Make sure all of the files are added to the folder, including the images used for the email design.
‣ Find the specific location path of your folder. With Filezilla, you will need to click on where your folder is within the server. The specific location path of your folder will be found under "Remote site:"
{S_1020}
‣ Click the paper airplane icon on the top right of Mail Designer 365
{S_1021}
‣ Choose "Website / HTML..."
{S_1022}
‣ Check the box where it says "Prefix image URLS with:"
‣ Add the specific location path URL of your folder
{S_598}
‣ Click "Export"


Whether you are using Filezilla or another FTP service, it is important to make sure that the location path URL of the folder is correct. Mail Designer 365 will rewrite all image paths and insert this URL in front of the image URL. This happens automatically for each image.

With Mail Designer 365, you can choose any of the templates from the Design Ideas page as your email design starting point. Just click on any template and then click on the "Use this design" button to get started.

You can also access any of the templates you have purchased within the "In-App Purchase Designs" found on the bottom right.

When saving your design, you will have the option of creating different categories for your email designs. You will find them under your "My Library."

Please refer to the following page for a brief overview of Design Ideas:


Due to compatibility reasons, it is not possible to directly copy HTML code from other ESPs (email service providers) such as Mailchimp into Mail Designer 365.

However, due to the user friendly nature of Mail Designer, it is easy for you to copy elements of an external design into one of our templates and recreate your original design.
Yes, you can add video links into the mobile version of your Mail Designer 365 newsletter. Mail Designer 365 allows you to edit the mobile version of your email template independently from the desktop version, if you choose.
‣ Click on the smartphone icon on the left side to open the mobile version of your template.
{S_746_50%}
‣ Drag a border line of an image area or text area.
‣ Mail Designer 365 will then give you the option to detach your mobile and desktop versions from each other.
{S_748_50%}
‣ You can add a preview picture for your video adding a video placeholder within an image area by clicking "Contents."
‣ Then click the video placeholder icon:
{S_749_50%}
‣ You will be able to add preview images with our video icons or with your own player overlays.


Please refer to the following pages for further information on how to add video links into the mobile version:


The possibility of grandfathering pricing is exclusively available for customers using the automatic renewal option. In cases where your plan cannot be renewed due to a problem with the payment method (i.e. expired, lost or stolen), the plan will be canceled after a few tries. You are then free to re-obtain your plan at any time you wish for the then current price tier.

In order to profit from your existing price, please ensure you update your payment method prior to the renewal date.
Ideally, we recommend keeping your unsubscribe rate below 0.5% for optimal performance.

Rates above 1% can be a warning sign, as only a fraction of people who want to unsubscribe will actually click the unsubscribe link—many others will mark your emails as spam instead. This means a 1% unsubscribe rate could result in 2–3% of your emails being flagged as spam by providers like Google or Hotmail. Over time, this can harm your sender reputation and cause all your emails to land in spam folders.

To reduce your unsubscribe rate, focus on sending emails only to engaged subscribers. Start by targeting those who have opened your emails within the past 365 days, and adjust this timeframe based on your audience’s behavior. Additionally, segmenting your audience to deliver more tailored, relevant content can significantly improve engagement and reduce unsubscribes.
Currently, Mail Designer 365 does not offer an automatic snap alignment tool for design elements. However, guide lines are a great workaround that you can use to align text and images more precisely.

Using guide lines


Guide lines act as a visual guide to help you align different elements within your design.
To insert a guideline, go to "Insert" > "Horizontal/Vertical guideline":

{S_1119}

Drag guidelines across your design to position them where you want to align objects, then use the line as a guide to align images, shapes, text, graphics, etc. throughout your design or just in one layout block:

{S_1120}

To hide the guidelines once you are done aligning, click on the "Hide layout outline" icon at the top right of the page:

{S_1121}
You can easily print all of your email designs with Mail Designer Pro.
‣To print a document, choose ”File" > "Print…” from the top menu bar.
{S_742_50%}

Please refer to the following page for more information on how to print:

So you've already exported your email design to MailChimp, Campaign Monitor, Direct Mail etc, and you notice a mistake in your text or something you want to adjust. It may seem like the quick and convenient option to do this within the ESP in question's HTML editor, but in reality, it's not as straightforward.

Because HTML is so complex when it comes to emails, even the slightest change could have drastic consequences for your email design. This is why we meticulously test every line of code used in the Mail Designer 365 app, so we can ensure compatibility with practically all email clients.

Editing text, or any other element of your design, outside of Mail Designer 365 can have an impact on your newsletter's code and cause it not to be displayed as you intended it to once you've hit send. For this reason, we strongly advise all changes to be made within the Mail Designer 365 editor to ensure compatibility.
Since Beta versions are meant to test features and compatibility, Mail Designer 365 will remind you to have a backup of your app and designs.
Mail Designer is warning you that the images are low resolution because Apple Pages does not copy its images in retina quality.

To work around this, we recommend the following:
‣ In Apple Pages, double the size of your graphic. For example, if you had a shape that has the dimensions 100x100, please increase that to 200x200.
‣ Copy and paste it into an image area in Mail Designer.
‣ Then, select the image.
‣ Right-click (or Ctrl+click) on the image.
‣ Choose "Original Size (Retina)" from the drop-down menu. This automatically shrinks the image but becomes retina quality.
{S_658_30%}


Each campaign plan comes with monthly allocations of new Stamps. For instance, our basic plan 'Roma' includes 5,000 Stamps per month for your direct mail needs. In addition to this monthly option, you can also purchase Stamps as one-time buys, available in packages of 500, 1,500, or 4,000 Stamps.
Mail Designer 365 gives you the option of sharing your email design with others via email. This option will send an email to a recipient with your template attached as a Mail Designer 365 document.

‣ Open the template you want to export.
‣ Choose ”Share" > "Share design document via Email...“ from the top menu bar.
{S_758_50%}

Please refer to the following page for more information on how to share your email design as an attachment:


All templates you want to upload to MailChimp have to contain an unsubscribe link. By adding the Unsubscribe Link to your template you can ensure that your design will look correct on mobile devices and desktop clients and the MailChimp footer will be added at the end of your message.

Add a MailChimp unsubscribe link

To add an unsubscribe link to your template, please follow these steps:

  • Choose the text area you want to insert the unsubscribe link to.
  • Please choose "Insert" > "MailChimp" > "Unsubscribe Link" from the top menu bar.


  • Add a MailChimp Rewards badge

    You have a free MailChimp account and want to send a MailChimp campaign without the grey MailChimp Footer?
    Simply add the additional "Rewards" placeholder to your design together with the unsubscribe link and your campaign will be send without the MailChimp footer.
    You can add the "Rewards" placeholder by choosing "Insert" > "MailChimp" > "Rewards" from the top menu bar.

    Do you have a paid MailChimp account?
    In this case you don't have to add a MailChimp Rewards badge to your Mail Designer Pro document.

    An API key stands for an application programming interface key. The API key is similar to a password. Your email service provider may require you to enter an API Key before you can integrate it with Mail Designer. This is a way to add extra security. It requires you, the user, to enter additional authentication credential aside from your username and password.

    Luckily, this is an incorrect report.

    The XCSSET malware is a trojan that replicates project files via Xcode; it targets mostly developers. To get it, you would need to download an infected Xcode project and build it. It creates fake apps and also downloads and installs payload (adware and similar things). So it does not infect existing apps.

    An interesting property of XCSSET is that it's mostly implemented in AppleScript. The generated fake apps contain a folder "Contents/Resources/Scripts" in which those AppleScript files reside. You can right-click on VPN Tracker 365 or Mail Designer 365 in Finder, then click on "Show Package Contents" to check whether this Scripts folder or any AppleScript files (*.scpt) can be found; VPN Tracker 365 and Mail Designer 365 do not contain AppleScript files.

    The Mail Designer manual has information on how to create your design and export it to MailChimp. Once you have sent your design to the big monkey in the sky, you can create campaigns, manage subscribers, track clicks and more with MailChimp's tools.

    There are so many different MailChimp features, that we can't describe them all in the Mail Designer manual. But don't worry: the MailChimp team have created webinars, how-to manuals, guides and tips to help you get started.

    Your account details such as address and email can be edited in the account management using the following link:
    Edit equinux ID
    Some banks may have trouble processing credit card renewals which can cause your card to be denied.

    Generally, this can be resolved by a quick phone call to your bank. This should be your first port of call.

    Alternatively, you could also try the following:
    - Please try updating your card directly on our store page
    - Try a card issued by another bank (our store supports Mastercard, Visa and American Express)
    - Use PayPal (tip: often a problematic credit card will work when added to PayPal)

    You can manage your payment methods under http://store.equinux.com/storefront/subscriptions/.
    Our prices and the currency you purchase in vary depending on which country you are purchasing from. We are headquartered in Germany and our default billing is in Euros. In order to see your final price and currency including VAT where applicable, please go to our Online Store and select your country. We are unable to accept payments in a different currency than what is displayed in the Online Store.
    For the protection of our customers, all payments in our store are processed with 3D Secure technology. 3D Secure is an additional security mechanism that works with 2-factor authorization. After entering the card details, the transaction is passed on to the credit card company and must be explicitly approved by the customer. The approval is usually done via SMS, app or email. With the explicit approval before the transaction, we can help prevent credit card fraud.

    In order to use your card with 3D Secure, it needs to be actived for your card. Please contact your bank for this. Registration is often possible on the bank's website or via your banking app. Please see the links below for more details:

    With the 3D Secure procedure, authentication communication takes place directly between your computer and your bank. We have no influence on this. If you have any problems, please contact your bank or try to pay with another card or PayPal.
    When emailing a group of people, there have traditionally been several methods to do so. Examples of traditional "small group sending" include:
    • Regular email with several contacts in the To field
    • Regular email with several contacts in the BCC field
    • An email to a predefined group, such as an Outlook Group

    In recent years, email service providers have gradually increased email sending requirements. Once you approach 30 or more recipients for a single email, several problems can arise if you try to send that message using traditional email methods.
    • Your email service provider or the recipient's email service provider may raise suspicions of SPAM (unsolicited junk emails) sending, potentially leading to your account's suspension or temporary freeze.
    • Receiving an email with an extensive list of recipients often diminishes its perceived relevance to individual recipients, making it seem impersonal and more likely to be classified as junk mail.
    • Messages sent to a large number of recipients are often flagged by Junk Mail Filtering systems as Spam, increasing the risk of your message being blocked and not reaching its intended recipients.

    Especially with the latest Spam guidelines implemented by major email providers like Google and Hotmail, it's increasingly easy for your email address or domain to be blacklisted. This could result in your account being "Spam blocked," causing all your emails to be directed to recipients' spam folders. Removing this type of Spam block is a cumbersome process, so it's essential to avoid it.

    How can Mail Designer Campaigns assist you?
    • Mail Designer Campaigns enables you to fully verify your domain, ensuring optimal verification for your emails to reach recipients' inboxes.
    • If you don't have your own domain or prefer not to undergo the verification process, we can provide you with a custom address from a fully authenticated domain, significantly reducing the risk of your emails being marked as Spam.
    • We offer intelligent list management for your contact lists, allowing you to either send emails to all contacts or create targeted groups tailored to your audiences.

    In summary, recent Spam requirements have tightened regulations on small group sending. Therefore, if you regularly send emails to 10 or more people, we highly recommend using a mailing service like Mail Designer Campaigns.

    Begin your journey with Mail Designer Campaigns by uploading your contact list.
    Especially so-called "clean up tools" that also scan for malware can report false-positives. If you suspect VPN Tracker 365 or Mail Designer 365 to be infected, we recommend to upload your copy of the app to www.virustotal.com which is a free service that scans your uploaded files using several reputable virus scanners. If any of the virus scanners on this site flags the app, please contact us.

    How can I verify that my copy of VPN Tracker 365 or Mail Designer has not been modified?


    All our apps are properly code-signed by Apple, so macOS can verify that the app has not been tampered with. You can check the integrity by opening Terminal.app and entering the following command:
    spctl --assess "/Applications/VPN Tracker 365.app"

    Please note that double quotes around the path are required because the path contains spaces. If your copy is in a different location, please replace "/Applications/VPN Tracker 365.app" with the proper path to the app.
    The output may look like this:
    /Applications/VPN Tracker 365.app: accepted
    source=Notarized Developer ID

    If the app has been modified, an error message like this is printed:
    Mail Designer 365.app: invalid signature (code or signature have been modified)

    Please contact us if your copy of VPN Tracker 365 or Mail Designer 365 has an invalid signature.

    How can I verify that my copy of VPN Tracker 365 or Mail Designer 365 was signed by equinux?


    All our apps are properly code-signed by Apple, so macOS can verify that the app has not been tampered with. You can review this signature by opening Terminal.app and entering the following command:
      codesign -d -vv "/Applications/VPN Tracker 365.app" 

    Please note that double quotes around the path are required because the path contains spaces. If your copy is in a different location, please replace "/Applications/VPN Tracker 365.app" with the proper path to the app.
    The output may look like this:
    Executable=/Applications/VPN Tracker 365.app/Contents/MacOS/VPN Tracker 365
    Identifier=com.vpntracker.365mac
    Format=app bundle with Mach-O universal (x86_64 arm64)
    CodeDirectory v=20500 size=81953 flags=0x10000(runtime) hashes=2550+7 location=embedded
    Signature size=9071
    Authority=Developer ID Application: equinux AG (MJMRT6WJ8S)
    Authority=Developer ID Certification Authority
    Authority=Apple Root CA
    Timestamp=1. Jun 2021 at 17:22:51
    Info.plist entries=42
    TeamIdentifier=MJMRT6WJ8S
    Runtime Version=11.1.0
    Sealed Resources version=2 rules=13 files=684
    Internal requirements count=1 size=216

    The important parts to look out for here are the lines starting with "Authority": They list the chain of trust. The last entry must always be "Apple Root CA", the entry above must either be "Developer ID Certification Authority" or "Apple Worldwide Developer Relations Certification Authority" for App Store versions. The first entry must either be "Developer ID Application: equinux AG" (VPN Tracker 365), "Developer ID Application: Tower One GmbH" (Mail Designer 365 non-App Store), or "Apple Mac OS Application Signing" (Mail Designer 365 App Store).
    Again, if you see a different entry, please contact us.
    Viruses that infect existing applications are very rare on macOS, but they do exist. However, warnings that VPN Tracker 365 or Mail Designer 365 are infected are very likely false-positives, meaning the tool has incorrectly identified malware in these apps that is actually not there.
    Load more entries
    FAQ
    Download
    Send us a message
    Using your emails to link out to an upcoming calendar event is a great way to ensure that attendees don't forget to add the event to their calendar.

    Below, you will find easy-to-follow instructions on how to link out to events created with Google, Apple and Outlook calendars in your Mail Designer 365 email designs.

    Google Calendar


    If you've created a Google Calendar event which you want to share with your email subscribers, you will need to create an event link to include in your email.

    Here's how:
    1. Set up your event in your Google Calendar.
    2. Click on "Options" > "Publish Event"
    3. Copy the event link to include in your email template. Important: Make sure your calendar is set to public to ensure all recipients will be able to view the event.

    {S_1190}

    Now you can insert the link into your Mail Designer 365 template; either as a text link, or attached to a call to action button:

    {S_1191}

    Apple and Outlook Calendar


    For Apple and Outlook calendars, you will need to create an .ics file for the calendar event.

    Simply set up your event in the calendar, then drag it on to your desktop to create the file:

    {S_1192}

    Now, upload the file to an online file hosting service (in this example, we will use Google Drive.) Right click the file to create a shareable link which you can insert into your email design:

    {S_1193}

    Remember to set the file to public if you are sharing it:

    {S_1194}

    You can now send a link to the calendar event to your subscribers, who can simply download the .ics file to add to their own calendar.

    Tip: This tool is another great way of creating custom add to calendar links. Fill out your event's details and select the calendar service you wish to generate a link for (i.e. Google, Office 365, Outlook or Yahoo.) You can then copy the result to use in your Mail Designer 365 design.
    Adding rounded corners to the background of a text area is not supported directly. However, to create this effect, drag a quadrilateral into an image area. You can find this shape under the "Basic Shapes" category.
    {S_892_50%}

    Adjust the size of the image area as well as the size of the shape to fit your needs. You can also change the color of the shape. On right side, you can adjust the corners by moving the corner radius slide.
    {S_893_50%}

    Then, drag a text object into the image area to create a text box effect. You can find text objects under "T" icon within the "Contents" tab. Feel free to position the text box and change its font style, font weight, font size, font color, etc. to fit your needs.
    {S_894_40%}

    Please refer to the following page for further information on how to create the effect of having rounded text box corners:


    Quick summary of what to avoid when using Unsplash photos:


      people's faces are recognizable (unless you can get model release of those people)
      photos that show logos, trademarks, brands
      images that put people in a bad light
      photos of private property (e.g. private homes and buildings)


    Is the Unsplash license the same as the CC0 license?


    When it comes to using images that you did not take, create, or do not own, you should stay mindful of the laws and licensing types that guide images. Many image libraries are published under "CC0,” which means “no rights reserved." A CC0 license is also a way for photographers and artists to publish their work and give permission to the public to use their work for free.

    Curators who publish their works under CC0 and waive copyright of their works place them for public use. An image that has CC0 that carries this designation has “No Rights Reserved” and is free of copyright restrictions, and likely other restrictions (i.e., moral, publicity, and privacy rights). This is a very broad designation and it is clearly understood within the Creative Commons community that no work carries this designation unless it is explicitly marked as a CC0 work. As a result, anyone can use them, edit them, etc. without restriction of copyright law.

    Unsplash is similar to a CC0 license with one difference: the Unsplash license does not include the right to compile images from Unsplash and then use them to create a similar or competing service.

    While the Unsplash license give people a lot of freedom, keep these exceptions in mind before using an image:


      Are people’s faces identifiable? If they are, you will require their individual consent – and not just the consent of the artist or photographer who took the picture. Only use these photos if you are able to get model release from each person whose face is showing on the image.

      Does the photo show people in a negative way or can be interpreted in a negative way? If yes, then avoid using these photos. Otherwise, you will need to get model release from each person whose face is showing on the image.

      Does the picture show other products, trademarks, or logos? Refrain from using these types of photos because they may suggest that the other brand or product is endorsing your product or service.

      Do you see landmarks, buildings, homes, automobiles, etc. that are actually private property within the photos? If yes, avoid these pictures unless you can acquire the permission of the owner of the private property. Make sure that the photos you use do not show valuable information about other people's property like the address, license plate, etc.


    The Unsplash license and the CC0 license have these in common:


      ‣ They are both sub-licensable (so you can use them)
      ‣ They are non-revocable, which means that you are able to use them forever.
      ‣ They allow users to use the photos for free.
      ‣ They allow you to modify and/or distribute, perform the photos for free.
      ‣ They allow users to use the images for personal and commercial purposes.
      ‣ They do not require attribution, although it would be nice.


    Although you are not legally obligated to follow the list below, these are still good practice suggestions:


      ‣ You can use Unsplash photos for commercial use. However, try to edit or add to the photo creatively through image editing or other methods.
      ‣ Unsplash photos are non-revocable. However, if a photographer decides to remove his or her photo, it is good practice that you respect the photographer's wishes and refrain from using the photo.


    To get more detailed information, please make sure you read the terms and conditions of Unsplash here.
    Generally speaking, you should only have to log in to Mail Designer 365 when you first install the app (to ensure this is the case, we would always recommend that you have downloaded the latest version of Mail Designer.)

    However, despite this, it can sometimes be the case that your Mac doesn't store your login details in the Keychain. To manually fix this problem and stop the app prompting you to sign in every time you open it, please do the following:

    • Quit the Mail Designer 365 app.
    • Open the "Keychain Access.app"
    • Search for "Mail Designer" using the search field in the upper right corner of the window.
    • Here you should find the entry "Mail Designer account." Double click on this entry to get details.
    • Go to the "Access Control" tab and check to see if Mail Designer 365 is located under the "Always allow access to these applications" list.
    • If you cannot see Mail Designer 365 on the list, please press the "+" underneath the list, find Mail Designer 365, and add it.
    • Restart the app and login if prompted.

    {S_1093}

    Your login details for Mail Designer 365 should now be stored on your Mac. If you are still experiencing problems, please send us your debug logs and let us know via support@maildesigner365.com.

    If you're trying to set up your email account in Mail Designer 365 and your password is being rejected, you may need to set up an app-specific password.

    What is an app-specific password for? Many email providers now require a separate password to be used in 3rd party apps, in order to increase your overall account security. This may be required, even if you do not use 2-factor authentication to sign in to your email.

    This means that you may need to create a separate password and use that in Mail Designer 365 in order to send emails directly from Mail Designer 365.

    Please refer to your email provider's security or account settings, or visit your email provider's help pages on how to set up a 3rd party email app.

    Links for selected email providers

    iOS 15 introduced new privacy features, including one big change called 'Mail Privacy Protection'. When enabled, all images are loaded via Apple's proxy servers to mask the recipient's IP address.

    In our testing, this has occasionally caused certain mail images to not load correctly at all (you should see a hint at the top of the Mail app):

    {S_1285_50%}

    If you are unable to load the images in your email, try deactivating this feature and sending your email again.

    To deactivate Mail Privacy Protection, open the Settings app on your iPhone, and choose Mail > Privacy Protection > Protect Mail Activity

    {S_1286_50%}
    You are only allowed to add one link per image area.

    {S_847}

    However, if you want to create the effect of having one image with multiple links, then check out our video tutorial:

    Watch our video tutorial here:


    {YOUTUBE_zKnpE88y8Tc}

    Also, please refer to the following page for a step-by-step guide on how to create the effect of having one image with multiple links:

    To send your first email campaign, you first need to set up your email address and domain, so it's ok for Mail Designer 365 Delivery Hub to send emails on your behalf.

    There are a few technical steps involved during setup. These steps are crucial, as leading email service providers will check that DKIM, SPF and DMARC authentication are configured in order to prevent spam.

    Rest assured we've done all we can to make the setup process as simple and fuss free as possible for you. We recommend that you add all three methods to your domain so that your emails reach all recipients. If you require assistance at any point, reach out to your IT admin or get in touch with our support team.

    Ready? Let's get started!

    Step 1: Add and Verify your Email Address

    Before you start, make sure that you have already set up a Mail Designer team. (If you have not done so already, check out our easy team setup guide).

    • Go to Settings > "From: addresses"
    • Under "From: addresses for Campaigns", add a new sender by entering the "From Name" and email address your campaign will be sent from

    • {S_1363_75%}
    • You'll now receive a verification email. Click the link to confirm you own the email address:
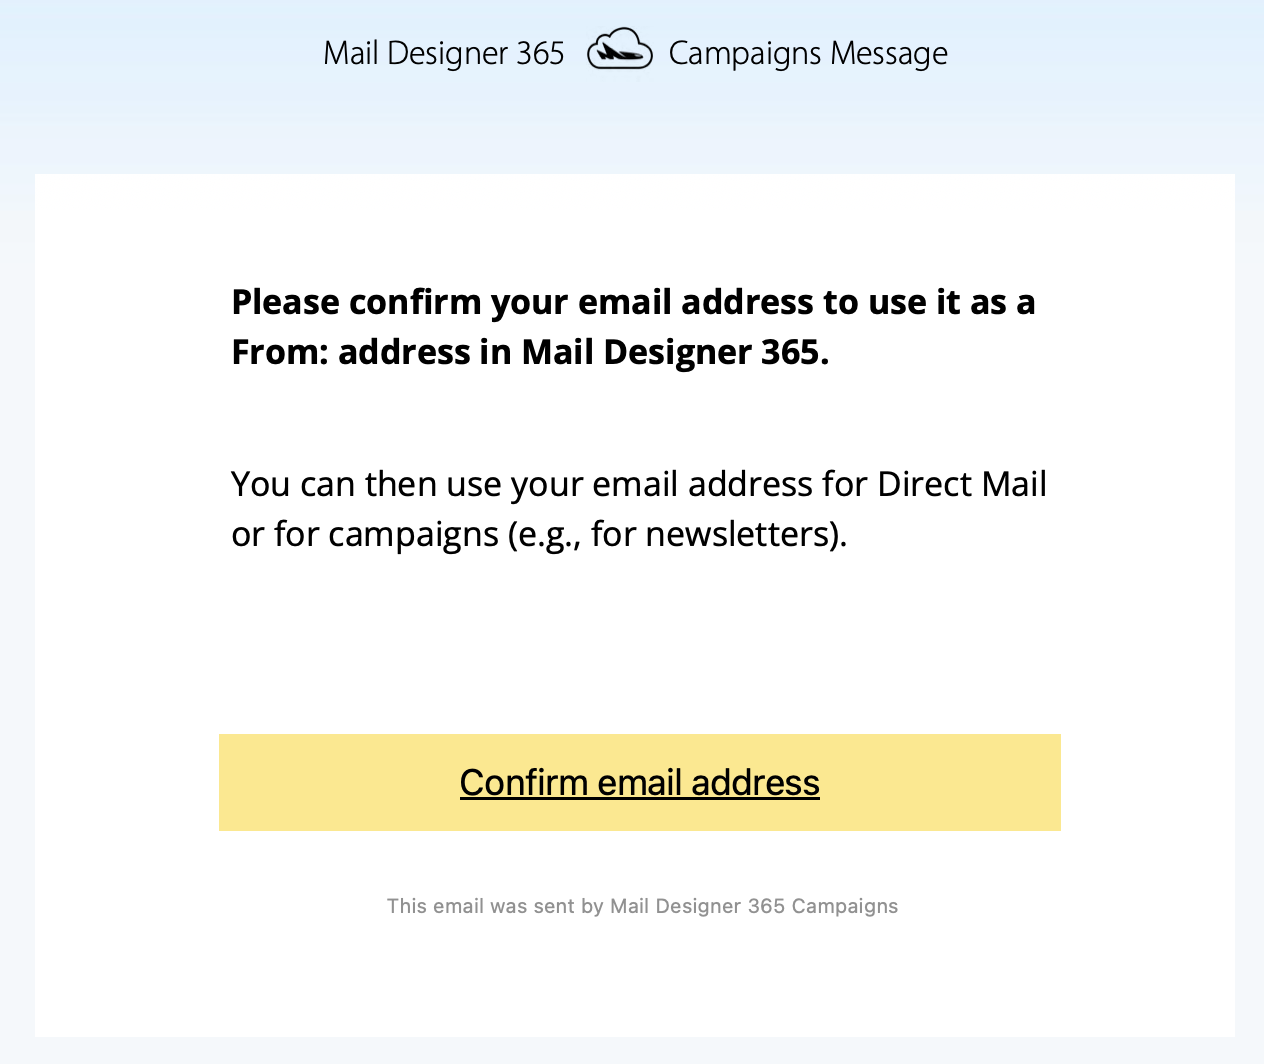
    • {S_1364_75%}

      {S_1365_75%}

    Step 2: To avoid to get marked as spam: Set up DKIM

    For this you'll need to create a DNS entry for DKIM (DomainKeys Identified Mail) (more details about DKIM and why it's essential. You should definitely set up DKIM if you want to avoid your mailings ending up in the spam folder.

    • Stay in "From: addresses" and scroll down to "Domain verification". You will now see the domain for the email address you just set up
    • Now it's time to determine the DNS provider for your domain. Most likely, our system has already identified the provider and displayed it as a "Potential Provider," along with a link to the provider's guide. Tip: We've also compiled a list of links to setup guides for common providers in this article.
    • Click on the "DKIM" icon in the "Domain verified" column:

    • {S_1366_75%}
    • A DKIM record will be generated for your domain, along with the necessary type, name, and value of the record. Please use the exact information shown to set up the DNS record (including any special characters such as " or . ).

    • {S_1367_75%}
    • Depending on your DNS provider, it may take up to 48 hours for the changes to propagate. Delivery Hub will periodically perform automatic checks. Alternatively, click the refresh icon to update results in real time:

    • {S_1368_75%}
    • Once you've completed the setup, and the verification is successful, you'll see a green checkmark next to the DKIM icon:

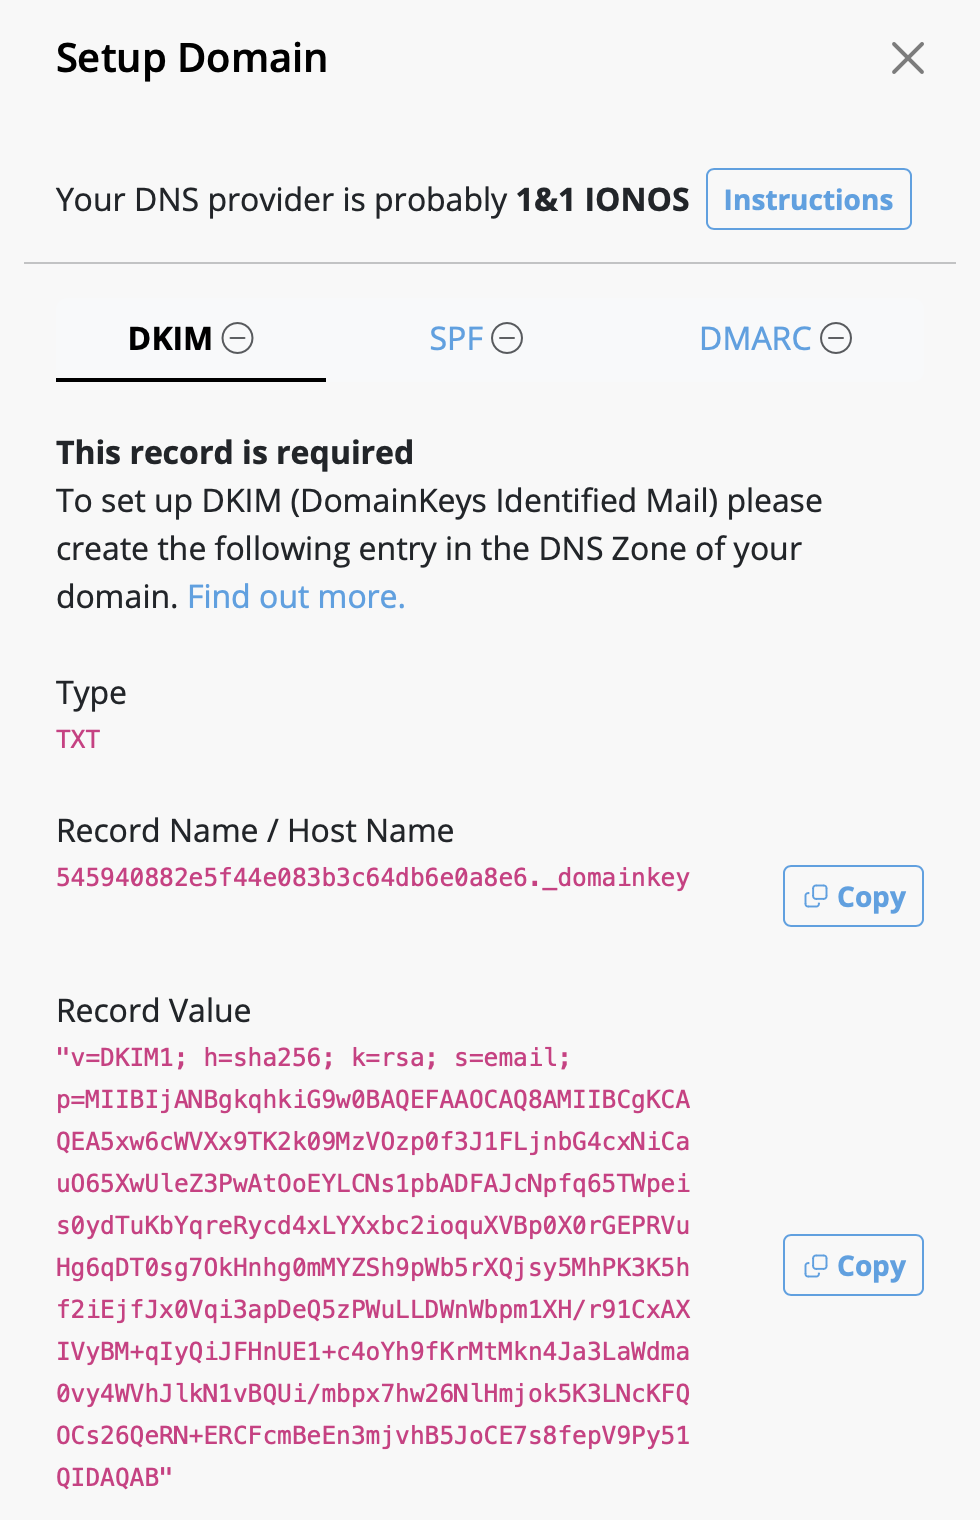
    • {S_1369_50%}

    Step 3: To avoid to get marked as spam: Set up SPF

    Now, let's ensure your emails are properly authenticated with SPF (Sender Policy Framework), which prevents email spoofing (more details on SPF).

    • Go back to your domain under "Domain Verification" and click "SPF":

    • {S_1370_75%}
    • Next, go to your DNS provider and create an SPF record for your domain. The exact steps vary depending on your provider, so follow their guidelines.
    • Note: If you or your company have already created an SPF record, our system will try to include the required part and display the full record value respecting your previous content. If you feel confident and know what you are doing, you can also manually edit your existing record and add the following part: include: spf.welovemails.com.
    • Once the verification has successfully completed, you'll see a green checkmark next to the SPF icon:

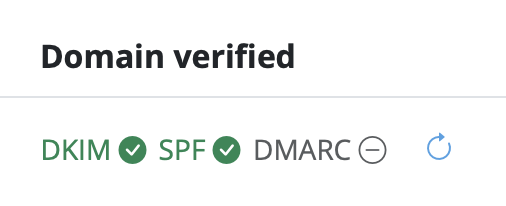
    • {S_1371_50%}

    Step 4: Set up DMARC

    Although not mandatory, setting up DMARC (Domain-based Message Authentication, Reporting, and Conformance) is recommended to add an extra layer of security to your emails (more details on DMARC).

    • Click on the "DMARC" icon under "Domain Verification":

    • {S_1372_75%}
    • Then, create a DMARC DNS record for your domain
    • Feel free to use the suggested record, or your own values. If you're unsure, check your organization's policies or ask your IT team
    • Just like with SPF and DKIM, once the DMARC verification has successfully completed, you'll see a green checkmark next to the DMARC icon:

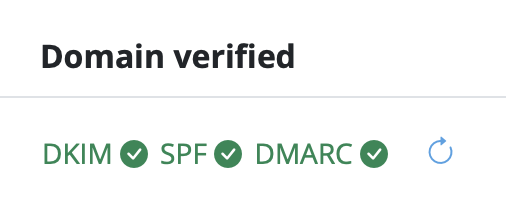
    • {S_1373_50%}

    Congratulations! You've now set up and verified your from address and can start sending email campaigns to your audience.
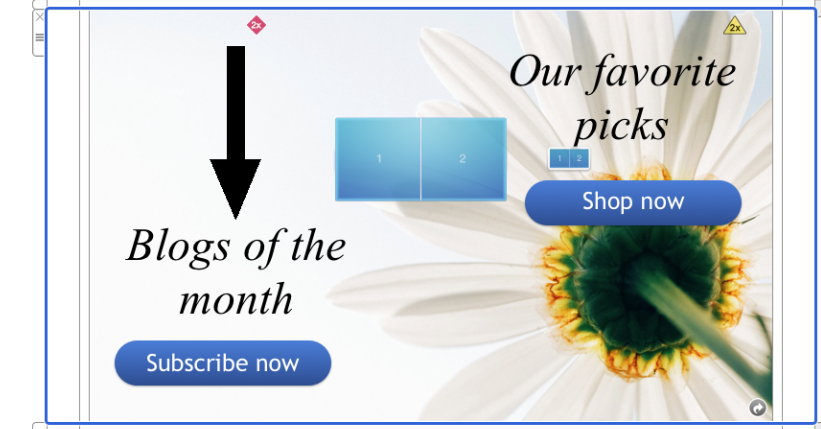
    In certain browsers - for example, Google Chrome - mixed http and https content is blocked by default. This can cause images to not be displayed.

    At the moment, Mailchimp are serving the images exported from Mail Designer 365 over http. If your browser blocks mixed http and https content on web pages, this will explain why you are unable to see the images when you preview your templates via the Preview Mode.

    We are aware of this issue and are currently working with the Mailchimp team to get it rectified.

    Workaround
    As a workaround, you can update your browser preferences to allow mixed content or switch to a different browser such as Safari, which by default allows mixed content.
    Whenever you want to forward your email newsletter, please make sure to use your mail client's "Forward as Attachment" or "Redirect" feature. This ensures that the email design is forwarded and not modified. Refrain from using the forward button that you typically use to forward emails. The normal forwarding can break the email template.

    What happens when you use the normal forwarding button is that the mail client will need to modify the email newsletter, so you, the user, will be able to add your own content. This typical whenever you forward a message - the forward action will prompt the mail client to give you space to write an additional message to the person you are forwarding the email to. Unfortunately, with this process, most mail clients can break the email layout and there is nothing we can do to prevent that from happening. So when you want to forward your email template to someone, our best email design practice is to use your mail client's "Forward as Attachment" or "Redirect" feature.
    Mailchimp have recently updated their image upload API, which has resulted in some compatibility issues when uploading email designs from third party services.

    What can I do?
    The latest Mail Designer 365 version includes support for the new image upload API. Templates uploaded using this version will not be affected.

    What about older email templates?
    If you need assistance with older designs that you've previously uploaded to Mailchimp and are now not working, please contact the Mailchimp team directly to report the problem. We generally suggest to re-upload the old template.

    Older Mail Designer versions
    Mailchimp no longer supports older versions of Mail Designer, such as Mail Designer 2 and Mail Designer Pro 2. For this reason, if you try exporting a design created using an older version of Mail Designer, you may notice that images are missing from your design.

    To ensure compatibility with Mailchimp and other leading email service providers, you should consider upgrading to Mail Designer 365.
    We're pleased to announce the latest Mail Designer 365 version offers support for macOS Sequoia, so you can upgrade your Mac to macOS 15 and continue using Mail Designer 365 as usual.

    Download the latest Mail Designer 365 version here.
    Like many other email clients today, AOL require app-specific passwords when setting up your AOL email address in another app or service.

    If you want to use your AOL email account to send email designs via Mail Designer 365, you will need to generate a special password. Here's how:

    1. Log in to your AOL account and go to your account settings
    2. Go to the "Account Security" tab and choose "Manage app passwords."
    3. From the dropdown menu, select "Other" and give the app a name (i.e. Mail Designer 365)
    4. Click "Generate" to create a new password. This will appear on your screen
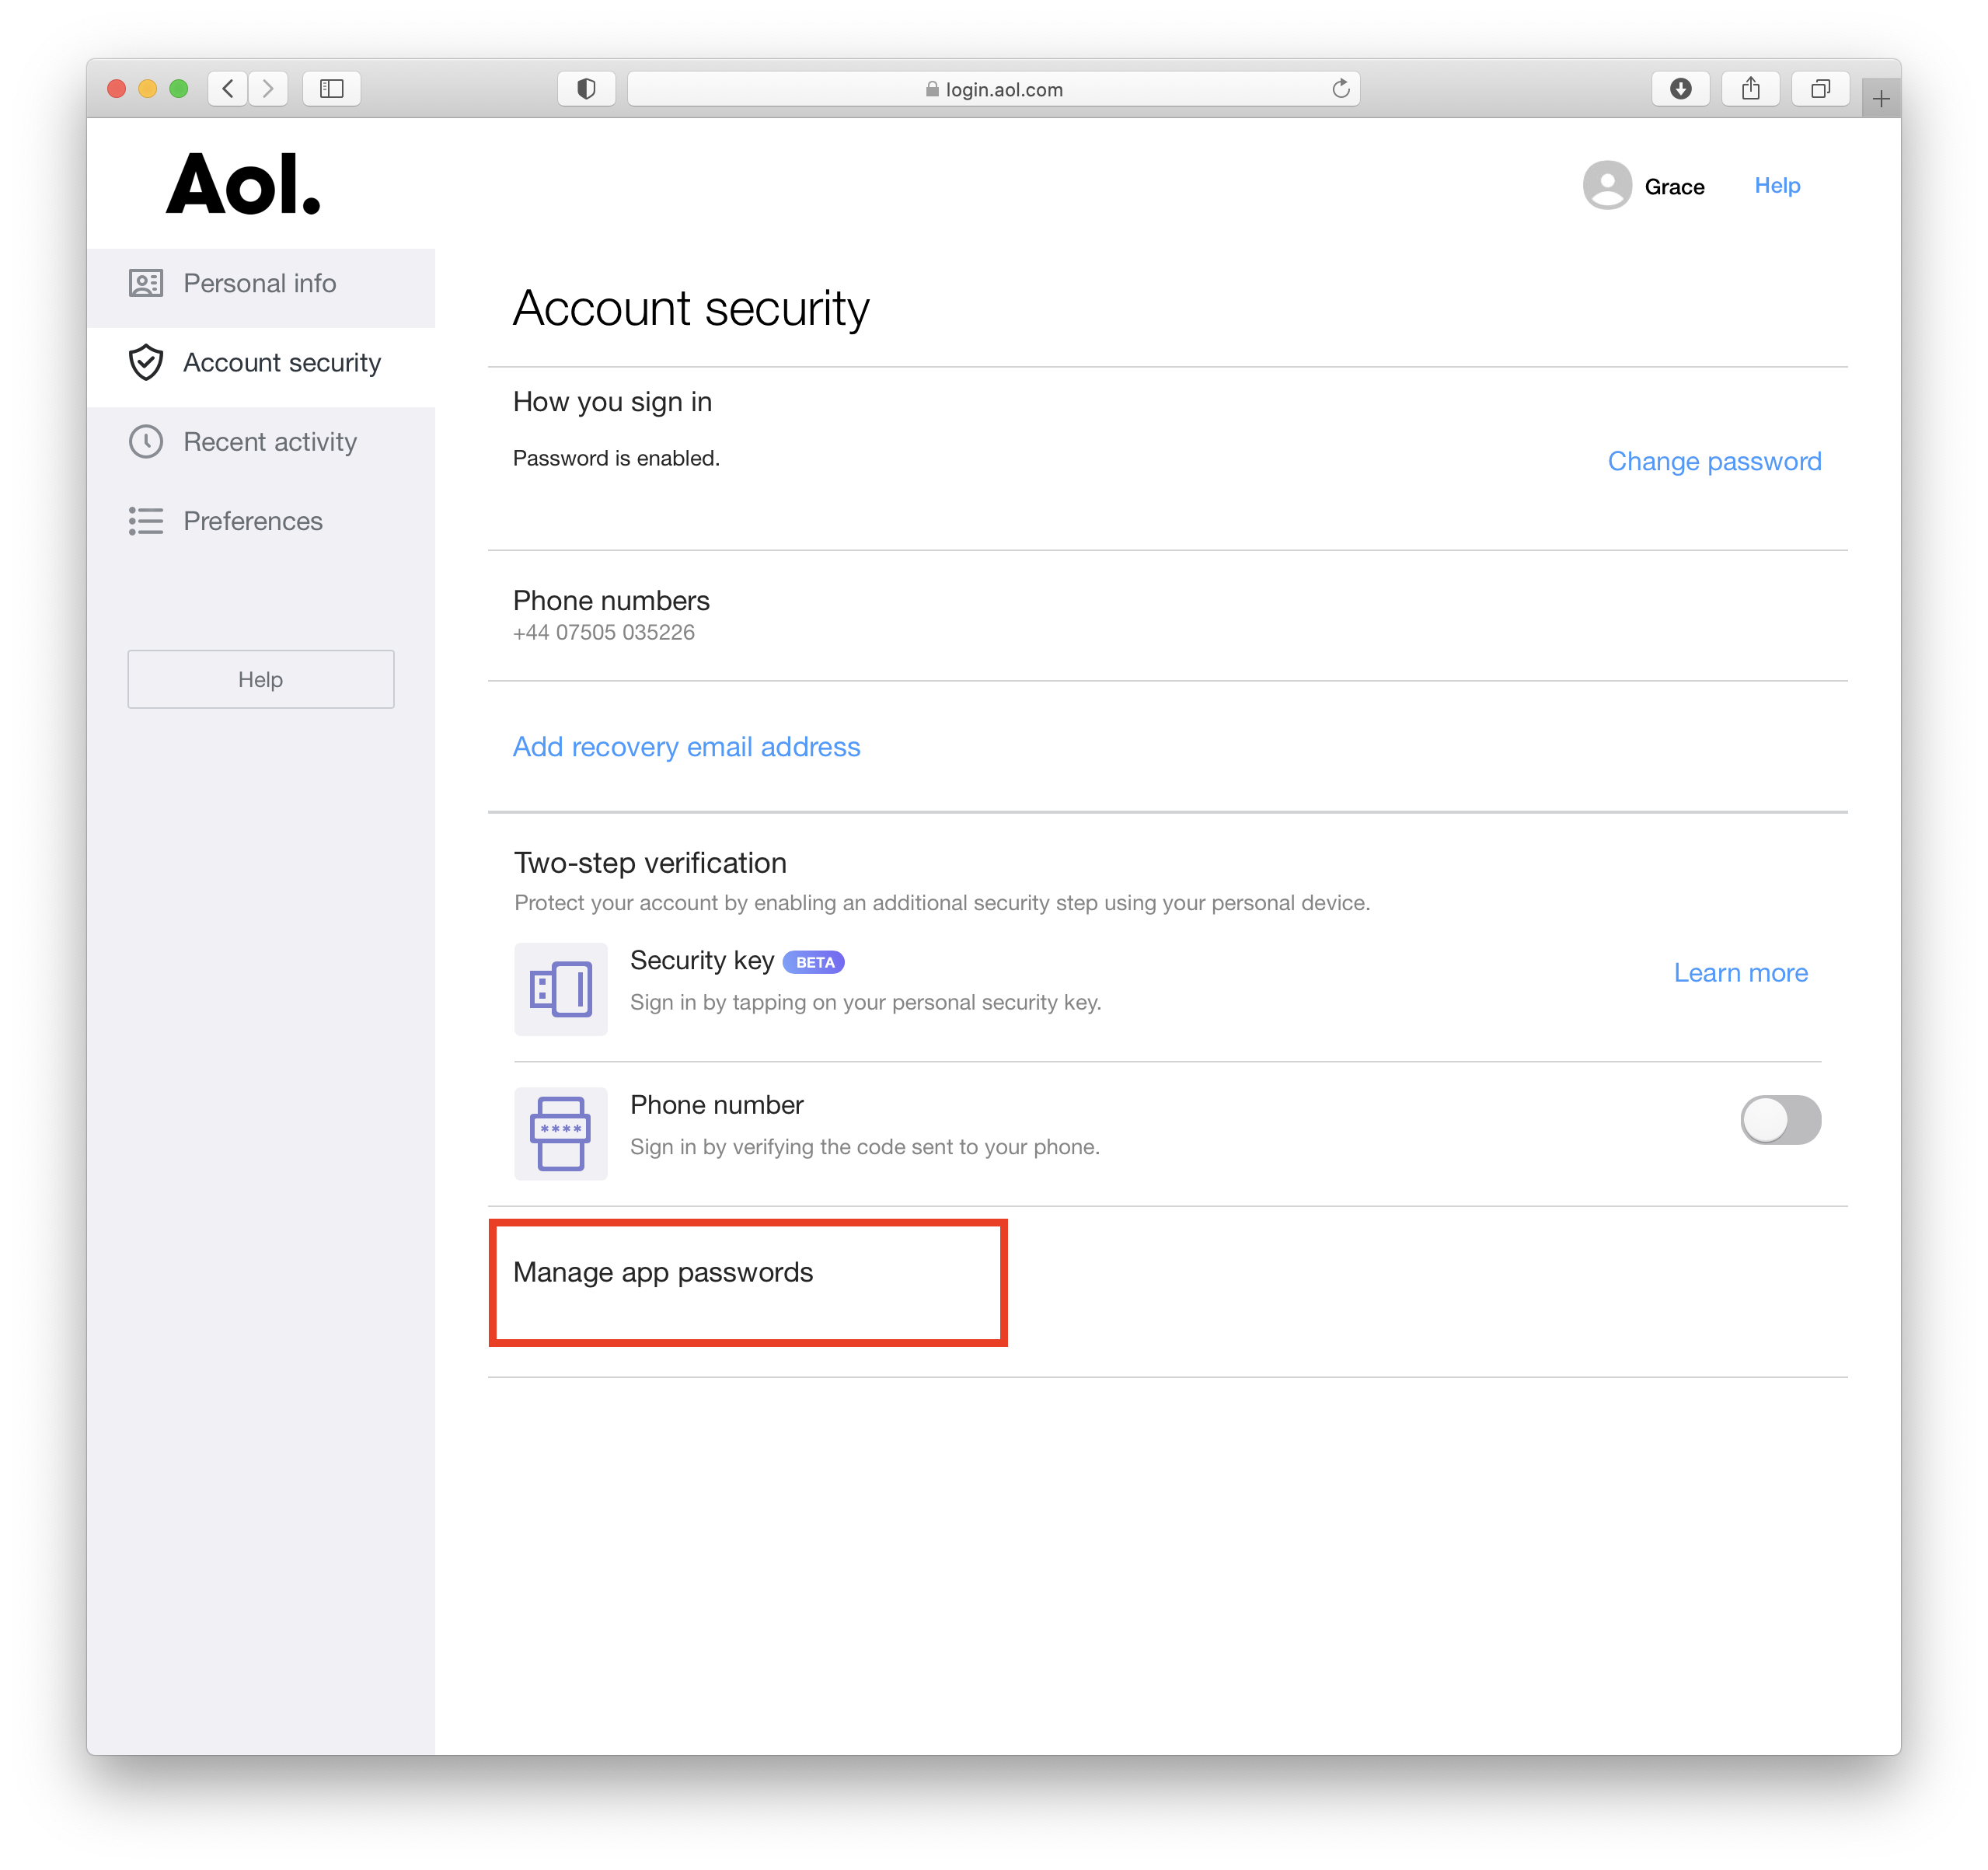
    {S_1240_70%}

    This password you have just created is the password you will need to use to set up your AOL account in Mail Designer 365.

    We have put together a list of the best known providers including a link to the corresponding DNS setup guide.

    If you cannot find your provider in the list please do not hesitate to contact our support team for assistance.

    Domain Name DNS Setup Guide
    1&1 IONOS https://www.ionos.de/hilfe/domains/txt-und-srv-records-konfigurieren/txt-records-hinzufuegen-aendern-oder-entfernen/ (de)
    123-reg (GoDaddy) https://www.123-reg.co.uk/support/domains/how-do-i-set-up-a-txt-record-on-my-domain-name/
    Amazon AWS Route53 https://docs.aws.amazon.com/Route53/latest/DeveloperGuide/resource-record-sets-creating.html
    Bluehost https://www.bluehost.com/help/article/dns-management-add-edit-or-delete-dns-entries
    Cloudflare https://www.cloudflare.com/learning/dns/dns-records/dns-dkim-record/
    Domain.com https://www.domain.com/help/article/dns-management-how-to-update-txt-spf-records
    Domaindiscount24 (Key-Systems GmbH) https://support.domaindiscount24.com/hc/de/articles/4409774008593-Wie-erstelle-ich-einen-TXT-Record-- (de)
    domainfactory GmbH https://www.df.eu/de/support/df-faq/domains/nameserver/#accordion-1384 (de)
    EuroDNS https://help.eurodns.com/s/article/how-do-i-add-a-txt-record
    Fasthosts https://help.fasthosts.co.uk/app/answers/detail/a_id/9
    Gandi.net https://docs.gandi.net/en/domain_names/common_operations/dns_records.html#editing-your-dns-records
    GoDaddy https://au.godaddy.com/help/add-a-txt-record-19232
    Google Workspace Admin https://support.google.com/a/answer/180504
    Hetzner Online GmbH https://docs.hetzner.com/dns-console/dns/manage-records/managing-txt-records/
    Host Europe GmbH https://www.hosteurope.de/faq/domains/verwaltung/nameserver-eintraege/ (de)
    Hostinger https://support.hostinger.com/en/articles/4469063-how-to-add-and-remove-txt-records-in-cpanel
    INWX GmbH & Co. KG https://kb.inwx.com/en-us/3-nameserver/107-wie-richte-ich-einen-txt-eintrag-ein
    Microsoft https://learn.microsoft.com/en-us/defender-office-365/email-authentication-dkim-configure?source=recommendations
    Name.com https://www.name.com/support/articles/115004972547-adding-a-txt-record
    Namecheap https://www.namecheap.com/support/knowledgebase/article.aspx/317/2237/how-do-i-add-txtspfdkimdmarc-records-for-my-domain/
    Netcup GmbH https://helpcenter.netcup.com/en/wiki/domain/dns-settings
    Network Solutions https://www.networksolutions.com/manage-it/dns.jsp
    OVH https://help.ovhcloud.com/csm/de-dns-edit-dns-zone?id=kb_article_view&sysparm_article=KB0051668 (de)
    Reg.eu (Openprovider) https://support.openprovider.eu/hc/en-us/articles/216648808-DNS-Records
    Strato AG https://www.strato.de/faq/domains/was-ist-der-txt-record-und-wie-kann-ich-ihn-verwenden/ (de)
    united-domains AG https://www.uniteddomains.com/faq/question/17
    Variomedia AG https://www.variomedia.de/faq/Was-sind-TXT-Eintraege-und-wie-funktionieren-sie/article/361
    World4You Internet Services GmbH https://www.world4you.com/faq/en/domains/faq.dns-records.html
    Key-Systems GmbH (now part of CentralNic Group) Not available
    InterNetworX Not available
    Schlund Technologies GmbH (now part of GoDaddy) Not available
    InternetX GmbH Not available
    All Apple subscriptions are managed in iTunes.

    This link will directly take you to your profile administration:

    https://apple.co/2Th4vqI


    You will find all running subscriptions under "Subscriptions." You can also disable the automatic extension of your subscriptions.
    If your newsletter is very long, Gmail may cut off part of your content. There are a few things you can do to make the HTML document shorter:
    • In general, try to reduce the number of layout blocks used. Each layout block has a HTML structure that adds to the total size of your newsletter and by reducing the number of blocks you reduce the amount of space needed for these structures.
    • Avoid repeating blocks and try to find solutions for “merging” blocks. For example, don't add two or more consecutive spacer blocks. Instead, use just one spacer block and change its height accordingly.
    • Sometimes you can avoid using spacer blocks altogether, for example by adding the space to a nearby image block instead, using the “spacing before/after” feature in “Styles” or simply adding blank lines.
    • Instead of using several consecutive text blocks, use just one and style the paragraphs using the “Styles” feature.
    • Avoid detaching blocks (that is, avoid doing modifications that only affect the mobile or desktop version). A detached block results in two blocks in the document: one for desktop and another one for mobile, which uses more space than if the same block can be used for both mobile and desktop.
    Creating a Mail Designer 365 Team is the first step towards achieving effective collaboration on email campaigns. All Mail Designer 365 teams benefit from exclusive features to help improve your campaign workflow.

    To set up a team, head to your my.maildesigner365 account and sign in with your equinux ID and password.

    New users are automatically created a team which you can start adding members to straight away.

    The Settings icon takes you to your team's overview page:

    {S_1346}

    From here, go to the "Members" tab and click "Invite members."

    {S_1347}

    Enter the email address(es) of the colleague(s) you want to invite to your team and click "Invite". You can invite up to 10 team members free!

    {S_1348}

    Team members can accept your invitation by clicking on the link in the email.

    Once you've invited new team members, start using Mail Designer 365 Campaigns to discuss, approve and schedule email campaigns for your audience. Try it out free!
    Mail Designer 365 supports special characters, which you can add to your text to create icons for call-to-action buttons or as a way to simplify your messages.

    To add special characters:


    ‣ Open your email template if it is not already opened.
    ‣ Choose “Edit" > "Emoji & Symbols”
    {S_794_50%}

    You have different options from different categories like emojis, arrows, bullet points, stars, currency symbols, latin alphabet, trademark symbols, other letterlike symbols, math symbols, parentheses, pictographs, and punctuations.

    Please refer to the following page for more information on how to add emojis and special characters in Mail Designer 365:

    GIFs are supported in most modern email apps, however some Outlook versions will only display the first frame of the GIF.

    Currently, Outlook 2007, 2010, and 2013 are known to have this issue but the very latest versions of Outlook 365 now finally offer GIF support.

    This points to an error while authenticating your email account. Try checking the following:

    • The username is wrong/incomplete. For example, iCloud accounts sometimes work with "username" but most times need the whole email address as a log in.
    • The password is wrong.
    • If you're trying TLS, try STARTTLS instead.
    • Maybe your server is using a custom port - though this is unlikely.
    If you have a Mail program you use (e.g. Apple Mail) try comparing the outgoing mail settings there and use the same settings in Mail Designer.

    {S_257_50%}
    When you send an email template, not every font that you choose may be available at the recipient's side. This is why you can specify a fallback font list, and we recommend that you use an email-safe font.
    {S_319_50%}
    Email-safe fonts are the basic fonts installed on everyone's devices. If you have selected a font that is available on macOS but not on iOS, there will be a visible difference on the corresponding devices. If both devices have the font installed, then the email template will look the same on both platforms. You can use Web Fonts which the recipient's e-mail client can downloaded on demand. Most e-mail clients except Outlook support Web Fonts.
    If you or other recipients are viewing your newsletter on a Retina Display (e.g. iPhone, Mac or iPad), it is possible that images which are not high-quality will appear blurred and out of focus.

    For this reason, you may sometimes receive a warning message like this when inserting a low quality image into your design:

    {S_876}


    In order to ensure that your images are displayed properly on all devices, you should always try to use images with high resolution. An alternative would be to resize lower-resolution images to be smaller so they remain crisp.

    Alt text and Apple WebKit


    Email services using Apple's WebKit (Apple Mail & email clients accessed via Safari) only display image alt text when the alt text is short enough to fit in the first "line" of the image area:

    {S_1214}

    If the alt text is longer than this, Apple will display no alt text for the image area at all:

    {S_1215}

    Other issues to be aware of


    When you are working with a design in Mail Designer 365 where image areas in the desktop and mobile versions are attached, your desktop alt text will also be used for the mobile version of your email.

    As image blocks in the smartphone view aren't as wide, this means the cut-off point for your alt text will come sooner, so the alt text will need to be even shorter if the design versions are paired.

    Ways to resolve this issue


    We appreciate this is a difficult issue and unfortunately, there is no one-size-fits-all approach that can be applied to your alt text length. This is mainly due to the fact that the size of image areas can vary massively in different email designs, as well as the mobile issue mentioned above.

    Ideally, the optimal solution would be for Apple to change things behind the scenes. However, until this happens, the best workaround is to keep your alt text as short as possible and TEST TEST TEST!

    To test the length of your alt text is suitable before you send, carry out the following steps:
    • Go to Mail > Preferences > Viewing and uncheck the box by "Load remote content in messages."
    • In Mail Designer 365, use the Testmail service to send yourself a test version of your design.
    • Open the email in Mail and check through all the image areas to see if the alt texts appear. Then, do the same on an iPhone to check the mobile version.

    {S_1216}

    Sending test emails


    Mail Designer 365's Testmail service is designed for sending internal test emails to yourself or to your team – i.e. to preview how your finished email design will look in the inbox. Test emails will be sent from the Mail Designer 365 Testmail service via our secure servers.

    How it works


    To get started, click the Test icon in the Mail Designer 365 toolbar.


    {S_1376_25%}

    Now choose from the following test mail options:


    {S_1374_75%}


    The latest version of your email design will be uploaded via TeamCloud and sent to the selected recipient(s):

    {S_1377_75%}

    Sending individual emails


    You also have the option to send your email design as a single email via Delivery Hub. This email will be sent from your own email address.

    This option is designed for external emails (i.e. sending emails to contacts who are not part of your Mail Designer 365 team) and replaces the legacy "Send via your email account" option.

    How it works


    In this view you can add one or more recipients for your email (e.g. your client's email) and send them your design from your own email address.

    {S_1375_75%}


    On the left of the setup window, you can choose your from address:

    {S_1378_75%}


    Tip: If you have not done so already, follow this guide to set up your "from address" for sending.

    Finally, send your email by clicking the green "Send" button. It will go directly to your recipient via your email server:
    {S_1379_75%}


    Good to know: Following send, you can easily check if your recipient has received and opened your email by clicking the analytics icon:

    {S_1380_50%}


    Email is the lifeblood of modern communication, but its ubiquity also makes it a prime target for cybercriminals seeking to deceive, defraud, or disrupt. To safeguard against these threats and ensure the integrity of your email communications, there's a powerful tool known as DMARC, or Domain-based Message Authentication, Reporting, and Conformance.

    The Challenge of Email Impersonation

    Before we dive into DMARC, it's essential to understand the challenges of email communication. Emails pass through multiple servers and networks on their way to the recipient, creating numerous opportunities for malicious actors to tamper with or impersonate senders.

    DMARC: Your Email Security Guardian

    DMARC, which stands for Domain-based Message Authentication, Reporting, and Conformance, is a comprehensive email authentication protocol designed to combat email impersonation, phishing attacks, and other email-based fraud.

    How DMARC Works

    DMARC builds on the foundations of SPF and DKIM but takes email authentication to a whole new level:

    1. Policy Declaration: The domain owner (the sender) publishes a DNS record that specifies how email from their domain should be handled if it fails SPF or DKIM checks. This DNS record contains DMARC policy settings.
    2. Email Reception: When an email is received by the recipient's email server, it performs SPF and DKIM checks as usual. If these checks fail, the server consults the sender's DMARC record.
    3. DMARC Verification: DMARC instructs the recipient's server on how to handle emails that fail SPF or DKIM checks. The sender can choose to monitor these failures, quarantine suspicious emails, or reject them outright.
    4. Reporting: DMARC provides valuable feedback by generating reports about email authentication activity. These reports help domain owners monitor and improve their email security.

    The Significance of DMARC

    1. Protection from Impersonation: DMARC is a formidable defense against email impersonation. It ensures that emails claiming to be from your domain are indeed legitimate, making it exceedingly difficult for cybercriminals to impersonate you.
    2. Enhanced Email Trustworthiness: Implementing DMARC enhances the trustworthiness of your emails. Email providers are more likely to recognize your emails as safe and deliver them to the recipient's inbox.
    3. Reduced Phishing Risks: DMARC is a powerful deterrent against phishing attacks. By reducing the success rate of such attacks, it safeguards individuals and organizations from potential harm.
    4. Reputation Management: DMARC helps protect your domain's reputation. It ensures that your legitimate emails are not diluted by fraudulent ones, preserving trust in your brand or organization.

    Conclusion

    In an era where email threats are prevalent and sophisticated, DMARC emerges as the ultimate guardian angel of email authenticity. Although it operates discreetly in the background, DMARC is a potent tool in the fight against cyber threats. Its implementation is highly recommended for individuals, businesses, and email service providers, as it offers a robust defense against email impersonation and enhances the overall security of email communications. The next time you send or receive an email, know that DMARC is diligently working to protect you from email-based deception and fraud in the vast digital landscape.

    Mail Designer 365 makes it easy to send emails from your own email address directly from the app. Thanks to Mail Designer’s automatic email account configuration, you will be up and running in no time.

    To get started, go to “Mail Designer 365” > “Preferences” > “Mail Accounts.”
    {S_898}

    Then, click on the “+” in the bottom left corner to configure a new email account.
    Enter your email address and password (not required for all email services e.g. Gmail) in the space provided:

    {S_899}

    Note: This will work for most generic email accounts (e.g. Outlook, Hotmail, Gmail, etc.) by taking you to the external login page for the respective email client. For custom/internal email accounts (i.e a work account), your network administrator may have to provide you with the information which you can enter by ticking “Enter custom server settings.”

    Click “Next” to set up your account. You will now see that your email account’s settings have been automatically detected by Mail Designer 365:

    {S_900}

    You are now free to use your personal email address to send email designs from directly within the app.


    Shopify offer a wide range of placeholder tags that you can use in your notification emails, which they refer to as liquid variables.

    You can insert standard variables such as store name, customer email address, order number, etc. into a Mail Designer 365 text layout block to personalise your templates for Shopify.

    Find a full list of Shopify's notification variables here.

    Please note, for longer and more complex variables, such as discount properties which run over multiple lines, you may run into some difficulty with your layout.

    For this reason, we advise avoiding these where possible. If you are confident with HTML, you can try to edit the exported code yourself, however, please be aware we cannot provide support for designs edited outside of Mail Designer 365.
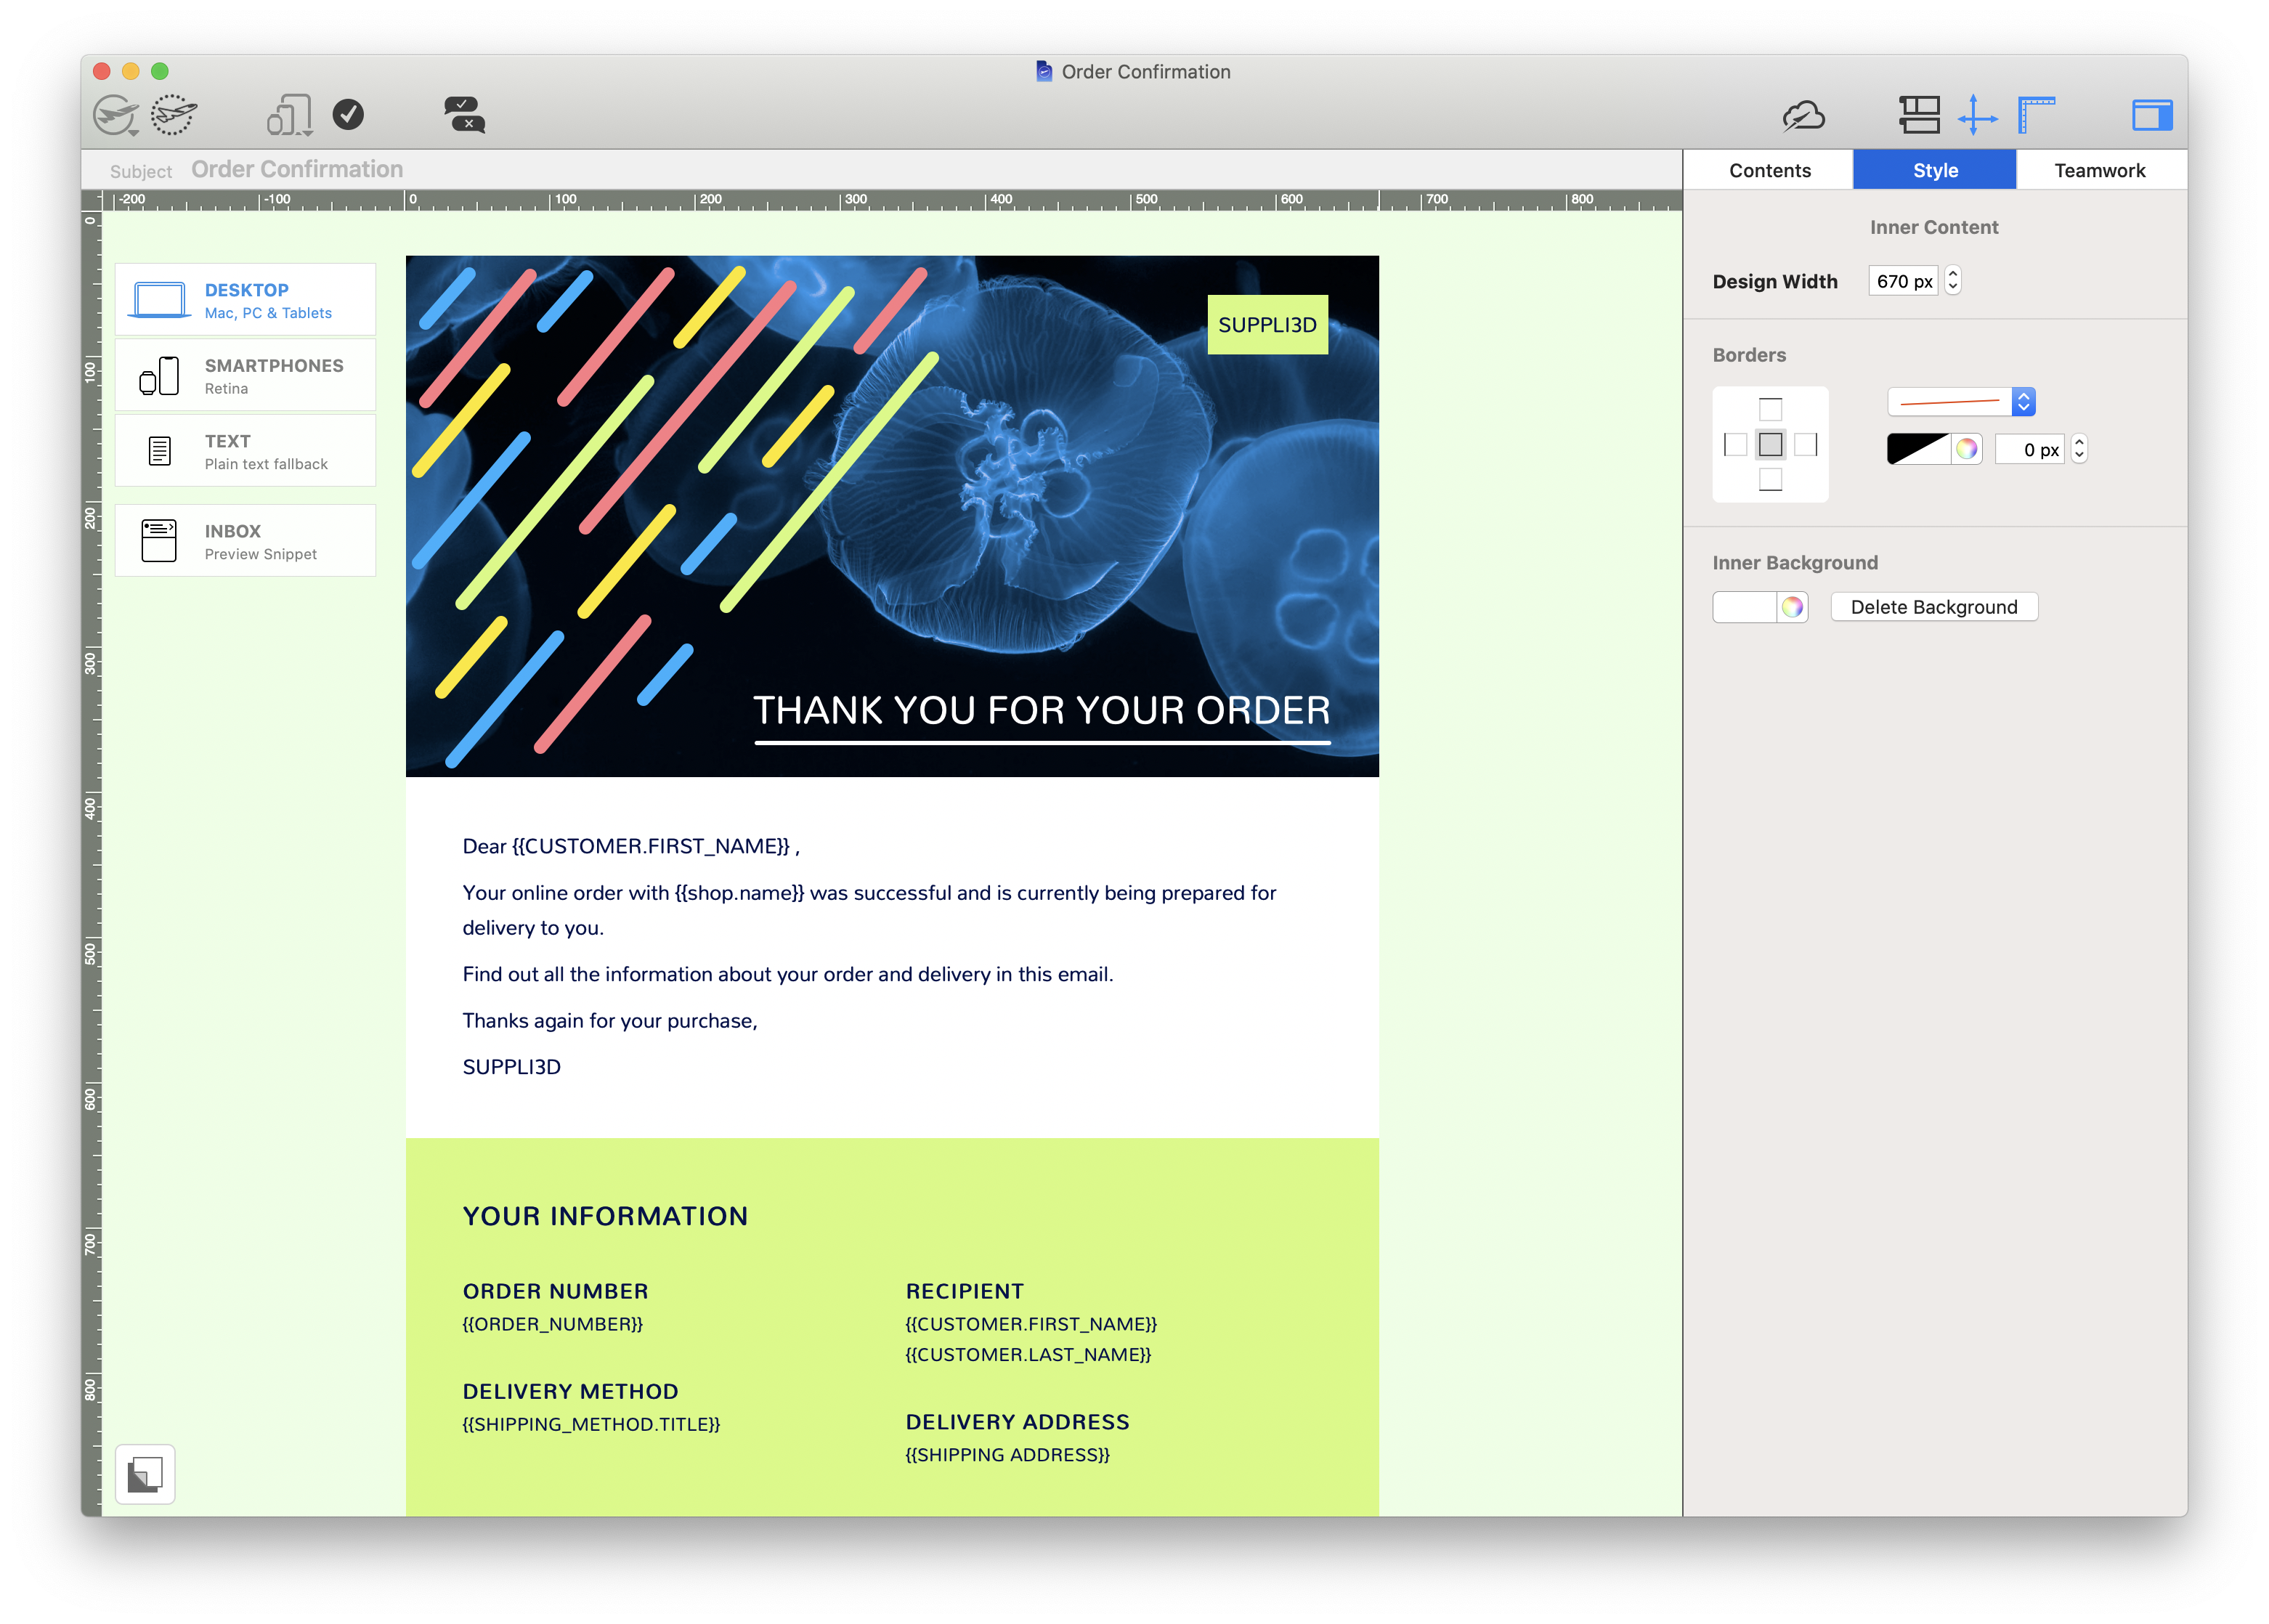
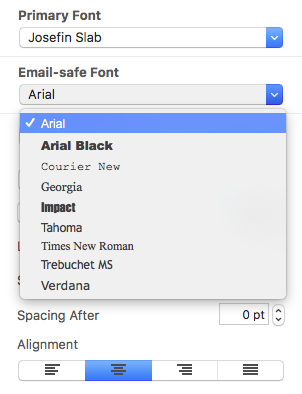
    {S_1292}

    Depending on your plan, Mailchimp may automatically insert a "Monkey Rewards" badge into your newsletter design after you have exported it from Mail Designer 365.

    As this is determined by Mailchimp, there is no option to remove the badge within Mail Designer 365. However, you can control where the badge is inserted by clicking a text area and selecting "Insert > Mail Chimp > Rewards" to insert the Monkey Rewards placeholder.

    For more information on how to remove the Monkey Rewards badge, visit their website.

    In some circumstances, Mail Designer may not be able to store your account login credentials in your Keychain.

    To fix this issue, please try the following:

    • The easiest way to fix this problem is to restart your Mac.

    If the problem still pops up, try this:

    • Quit Mail Designer
    • Open Keychain Access from Applications > Utilities
    • Select your login keychain
    • Choose File > Lock Keychain “login”
    • Then choose File > Unlock Keychain “login”

    Now re-open Mail Designer and try signing in again.

    Email has become an integral part of our daily communication, from personal conversations to business dealings. However, with this convenience comes the constant threat of email-based fraud and phishing attacks. To combat these threats and ensure the authenticity of your emails, there's a simple yet crucial tool known as SPF or Sender Policy Framework.

    The Vulnerabilities in Email Communication

    Understanding SPF requires a brief insight into how email communication functions. When you send an email, it travels through multiple servers and networks before reaching its intended recipient. At each stop, malicious actors can potentially intercept, modify, or impersonate the email.

    SPF: The Guardian of Email Authenticity

    SPF, which stands for Sender Policy Framework, is a security protocol that acts as a guardian, protecting your email domain from being used by cybercriminals to impersonate you. SPF helps verify the legitimacy of incoming emails by checking if they originate from authorized servers associated with the sender's domain.

    How SPF Works

    SPF is relatively straightforward in its operation:

    1. Sender Declaration: The domain owner (you or your organization) publishes a DNS record specifying which servers are authorized to send emails on its behalf. This record is known as the SPF record.
    2. Email Reception: When an email is received by the recipient's email server, the server checks the SPF record of the sender's domain to see if the server that sent the email is authorized to do so.
    3. Validation: If the sending server's IP address matches one of the authorized IP addresses listed in the SPF record, the email is considered legitimate and is accepted for delivery. If not, it may be flagged as suspicious or rejected.

    The Significance of SPF

    1. Protection Against Spoofing: SPF plays a crucial role in preventing email spoofing. It ensures that emails claiming to be from your domain indeed originate from authorized servers, making it harder for cybercriminals to impersonate you.
    2. Enhanced Email Deliverability: When you implement SPF, email providers are more likely to trust your emails, leading to better deliverability rates. Your legitimate emails are less likely to end up in spam folders.
    3. Reduction in Phishing: By making it more difficult for cybercriminals to impersonate trusted senders, SPF contributes to reducing phishing attacks, protecting individuals and organizations from potential harm.
    4. Branding and Reputation: SPF helps maintain your email domain's reputation. It assures recipients that your emails are legitimate, strengthening trust in your brand or organization.

    Conclusion

    In an age where email is a primary mode of communication and email-based threats are prevalent, SPF serves as a reliable shield against impersonation and fraud. Although it may work silently behind the scenes, SPF is a powerful tool in the fight against cyber threats. Its implementation is highly recommended for individuals, businesses, and email service providers alike to bolster the security of email communications. So, the next time you send or receive an email, remember that SPF is working diligently to protect you from potential email impersonation in the vast digital landscape.

    In order to rotate the object, hold down the Command ⌘ key and then click one of the graphics resize controls of an object or graphic element. You will see that the cursor will turn into a rotate icon. 

    {S_853_50%}

    This will allow you to rotate the object freely. You can rotate shapes, graphic elements, and image masks. You will be able to tell how many degrees you have rotated the object by the label that pops up during rotation:

    {S_854_50%}

    If you want to rotate both the text and the object, hold the Command ⌘ key and click on both the shape and the text. You will see that the two things are now selected. Click “Group” on the right side.

    {S_855_50%}

    Once you have grouped the two things together, hold the command key and click on the resize controls. Again, you will see that the cursor will turn into a rotate icon. Then, feel free to rotate the selected items to your liking.

    Please refer to the following page for further information on how to rotate objects:


    The HTML code used in Mail Designer 365 is meticulously tested by our team of developers to make sure it is compatible with the majority of email clients. This is so we can do our best to ensure that your emails will always look good.

    As we have no means of testing the custom code which customers edit themselves, we cannot guarantee that email designs with custom code will look as intended after they have been sent. For this reason, Mail Designer 365 does not support importing HTML code, as it needs to have full control of the code being used in the app.

    However, if there are certain design elements (such as layout blocks) which you wish to edit, you can do so by saving them to your desktop and editing the Content.html file. Learn more.

    Again, if you are not 100% confident in your understanding of HTML and CSS code, we would strongly advise against this, as we cannot guarantee your code will be compatible with our software and other email clients.
    We just recently found out about an API change, which causes pictures to no longer appear when exporting emails to MailChimp or Campaign Monitor or when using the "Send email" function in Mail Designer. The most current versions of Mail Designer 365 and Mail Designer Pro 3 already include a fix for this.

    If you already have Mail Designer 365 and you have purchased it in the equinux Store, please download the latest version at:
    http://www.equinux.com/goto/HPdownload/maildesigner365
    If you already have Mail Designer 365 and you purchased in the Mac App Store, the latest version is available as an Update in the Mac App Store. Please update install it from there.

    If you have Mail Designer Pro 3, please log in under my.equinux.com to download the most current version.

    In case you you have an older version of Mail Designer, now is a great time to make the switch to Mail Designer 365 and profit from all new features and optimisations.
    Your mail account password may be wrong or empty (see Mail Accounts in Preferences).

    If you are trying to send via your iCloud account with 2-factor authentication set up, you will need to set up an app-specific password for Mail Designer. The same may apply to other email providers with 2-factor authentication.

    Apple's support page has more information on how to set up an app-specific password.
    To add a Mailchimp placeholder to your design which doesn't appear on the list (e.g. "Edit my Profile" or "Show Newsletter in Browser") please carry out the following steps:

    • In a text layout block, type the text you want readers to see (i.e. "Edit my Profile.")
    • Highlight your selected text, then, in the sidebar, select "Add Link" from the "Style" tab.
    • Choose link type "Custom."
    • Enter your placeholder into the space provided (e.g. *|UPDATE_PROFILE|*)


    {S_1088}

    If you are unsure of how to label your placeholders, use Mailchimp's cheatsheet to find the correct label for any merge tag they support.

    You can access the most important placeholders directly, as explained here, for other placeholders and custom merge tags.
    Unfortunately, some email clients try to automatically adapt newsletters for dark mode by inverting colors. This can cause the dark text to appear white, even if the background is also white, making it appear as though parts of your message are missing.

    This can currently happen in Gmail and Outlook mobile apps.

    We have filed bug reports with the app makers that do this and have requested a better way of coordinating when they auto-switch between light & dark mode.

    One possible solution in terms of your design is to find a color combination that will remain readable in all situations.

    Over the past few months, we've already seen some apps adjust their dark mode behaviour multiple times, so it looks like the email app people are also still figuring things out.

    Further reading:
    https://litmus.com/blog/the-ultimate-guide-to-dark-mode-for-email-marketers
    You can access your invoice for Mail Designer 365 via the confirmation email we sent you after you purchased your plan. In this email you will find a link to download your invoice in PDF format.

    You can also download your invoice under the "Billing" section of your my.maildesigner365 account.

    Mac App Store purchases are processed by Apple, you should receive your invoice by email.

    We do not support copy & pasting into Outlook. When you copy & paste, there is no way for us to ensure that Outlook will preserve all of the formatting from Mail Designer 365. Instead, we recommend adding your email account to Mail Designer 365 and sending your messages that way.
    ‣ Go to "Mail Designer 365" > "Preferences."
    {S_974_50%}
    ‣ Then choose "Mail accounts"
    {S_976_60%}

    Please refer to the following pages for further information on configuration and sending emails via Mail Designer 365:


    We understand that some educational customers and enterprises may not be able to purchase a subscription plan.

    For those of you unable to purchase a subscription plan due to company guidelines/restrictions, you can purchase Mail Designer 365 with a 1-year term and immediately disable any renewals via my.maildesigner365.

    From the point of view of the company, that shouldn't be any different that buying a license and purching upgrades on an annual schedule.
    Email design features are exclusively available in the Mail Designer 365 app for Mac. However, if you have set up a Mail Designer 365 team, Windows and other non-Mac users can use Mail Designer 365 Campaigns on any device and in any browser to:
    • View, comment on and approve email design drafts
    • Receive test emails
    • Manage email contacts and audiences
    • Schedule and send email campaigns
    • Access post campaign analytics

    Get your team started today with a free Campaigns plan for up to 10 team members!

    Mail Designer stores all of its categories and designs on your Mac. For example, if you are using Time Machine Backup, and you want to access your Mail Designer templates please follow the following steps:

    • Navigate to the folder: Your username/Library/Group Containers
    • In this folder you will see a Folder ending in .Mail Designer
    • Navigate to Documents/MD365 within this folder
    • Restore the MD365 folder to your new Mac

    After you have restored the directory, simply open Mail Designer 365 and select "File" > "Import settings and designs" to import the documents to your new library.

    Tip: To quickly view the location of your designs, click your chosen template whilst holding "Ctrl" and then select "Show in Finder."
    ‣ Choose “File" > "Export…” 
    {S_938_50%}
    ‣ Save your file.
    ‣ Then, find your saved file in the location that you saved it to.
    ‣ Right-click the file and choose "Compress “YOUR FILE NAME”" in the menu bar:
    {S_939_50%}
    ‣ This will create a .zip file:
    {S_940_50%}

    Please refer to the following page for further information on how to export your email design as a .zip file:


    Currently, you will need to use outside services to render email previews for various email clients. We recommend trying litmus.com to check out the previews of your email newsletters for different clients. You can send a test mail to this service and it lets the mail render on various email clients, captures the output, and then displays the previews.
    {S_948_50%}
    {S_949_50%}
    {S_950_50%}
    {S_951_50%}
    Mail Designer 365 does provide a preview for mobile devices. Keep in mind that this is only for the sole purpose of providing a rough idea of how the newsletter may look like on mobile devices. The actual rendering may be different, depending on the email client.
    {S_952_50%}
    Please visit this page for further information on how to preview your design for different email clients:


    Want to test Mail Designer 365 code with another ESP, CRM platform, or similar? We've created a HTML sample of one of our most popular Design Ideas, so you can try before you buy!

    Download HTML sample

    Please note, when you use the HTML export feature yourself, you'll also have the option of setting an image URL, and image prefix for where your images will be hosted, as well as a custom folder and HTML file name.
    If you receive the following error message when trying to send from your Gmail account:
    invalid_grant: Bad Request (-10)

    Please carry out the following steps:
    1. Go to Mail Designer 365 > Preferences > Mail Accounts.
    2. Remove your Gmail address from the list using the "-" icon.
    3. Then, click the "+" icon to re-add your Gmail account. You will be prompted to sign in with your Gmail credentials again.

    Once you have re-added your account, you should be fine to start sending emails again.
    Mail Designer 365 includes layout blocks for almost every newsletter layout imaginable. But if you have specific requirements, you can even create completely customized, reusable layout blocks. All you'll need is Mail Designer 365 and HTML and CSS skills.

    Please note: You'll need to have a fairly detailed understanding of HTML and CSS layouts to create your own layout blocks.

    Mail Designer 365 uses advanced techniques to create highly compatible email layouts, so you'll need to be careful not to break email compatibility when creating your own.

    We can't provide HTML support for your custom designs or any issues that are caused by custom layout blocks so proceed with caution. (Or as our support team likes to say: With great power comes great responsibility…)

    How to create a custom layout block


    • Right click an existing layout block and choose "Save to desktop"
    • Find the "..eqrmlayoutblock" on your desktop and edit the Content.html file
    • Customize the preview image to match your new layout block
    • Drag the entire folder with your custom layout block into the Mail Designer 365 Contents panel


    Your new layout block will now show up in the app alongside the default layout blocks. Just drag it in to your design to use it.

    Don't forget to thoroughly test both the desktop and mobile versions of a design with custom layout blocks before using it for production email campaigns

    {S_1066}

    {S_1067}

    Mail Designer 365 allows you to send emails directly from within the application using the SMTP procotol.

    In order to add your email account, please open the "Mail Accounts" tab in the preferences of Mail Designer, click "+" and enter the information for the account you want to configure. After you have entered all the required information, save the changes and choose this account in the send window.

    Follow this step-by-step guide for more information.
    Activating Mail Designer 365 is easy! Here's how to get started:

    • If you haven't already, you can download Mail Designer 365 using this link.
    • After the download has completed, launch the app and click the "Login" button in the top left-hand corner of the Design Chooser homepage.
    • Enter your equinux ID and password in the space provided. Hint: This is the login you first created when purchasing Mail Designer 365 (or any other equinux software products) in our online store.
    Forgot your password? No problem!

    You can reset your password for your equinux ID.

    Mail Designer 365 Premium Business is our premium plan designed for businesses or individuals who use email newsletters as a critical part of their business (e.g. marketing agencies, promotional campaigns, customer service.) As part of this plan, users are entitled to exclusive priority support within 24 hours following a query (mon-fri.)

    Mail Designer 365 Business is our alternative plan option, designed for everyday email newsletters which aren't time critical. This plan offers the basic support tier (email response within 72 hours.)

    Interested in purchasing a plan or upgrading? Get your Mail Designer 365 plan here.
    Mailchimp has discontinued supports for their older APIs. These APIs were previously used by Mail Designer in earlier versions. Please update to the latest version of Mail Designer 365 which provides support for Mailchimp's latest API.

    If you are using an older version of Mail Designer, e.g. Mail Designer 1, Mail Designer 2 or Mail Designer Pro 1-3 or Mail Designer Pro HS, please upgrade to Mail Designer 365.

    Yes, it's possible to print your template by going to "File > Print…" from within the Mail Designer 365 app. Exporting to PDF can either by done in the lower left corner of the "Print" window or by selecting "File > Export as PDF…".

    Mail Designer 365 supports all the latest macOS versions from macOS 10.13 High Sierra, macOS 10.14 Mojave, macOS 10.15 Catalina, macOS 11 Big Sur, macOS 12 Monterey, and macOS 13 Ventura, macOS 14 Sonoma as well as the newly announced macOS 15 Sequoia.

    Every Mail Designer plan offers a certain number of AI credits. These credits are automatically renewed every month as part of your subscription. During the beta, we have assigned all plans a number of credits for testing purposes, the number of credits in each plan may change in the future.

    Every time you use TextScout AI features in Mail Designer, this is automatically reflected in your available AI credits.

    How many credits are used?
    How many credits a TextScout AI query will use depends on the complexity of the query itself and the number of results that TextScout was able to return. As the AI models are still being improved during the beta, the number of credits being consumed may vary.

    Teams
    If you are part of a Mail Designer 365 team with multiple plans, your credits are pooled so you can all use each others' credits.

    I've run out of credits – what now?
    Upgrade to Mail Designer 365 Business Premium to add additional credits to your account.

    Already on Business Premium? Please reach out to our support team, we'd like to hear more about your experience using TextScout AI Beta.

    When are credits refreshed?
    AI Credits are automatically reset on the first of the month. Unused credits from the previous month do not roll over.

    It sure does! And it does it brilliantly too!

    Mail Designer can export an HTML file containing your entire design. This opens up a whole host of great options for you, as the user, to explore:

    • Upload your design to third-party newsletter services
    • Offer recipients, with email client programs that don’t support rich HTML content, the option to view your message as a webpage in their browser
    • Create a link to your newsletter directly from your website: A great option for people that would like to see a newsletter before they subscribe

    The best thing is: It's so easy to export your design as an HTML document

    • Open your design
    • Choose “Share > HTML...” from the menu bar
    • Choose a location to save your design

    By the way: If you plan on uploading your images to a separate web server, you can enter an absolute URL prefix for images.

    Certificate issues which occur in certain browsers - for example, Google Chrome - can cause images to not be displayed due to security measures.

    Previously, Mailchimp were serving the images exported from Mail Designer 365 over http and the "view in browser" webpage was being served over https. If your browser settings were set up to not allow mixed http and https content on web pages, this will explain why you were unable to see the images.

    Mailchimp have recently resolved this issue for new images uploaded to their service. The latest Mail Designer 365 version supports these changes and is fully compatible with Mailchimp.

    If you are still experiencing this with your older designs, please contact the Mailchimp team for support.
    The version of Apple Mail from macOS Mojave (10.14) onwards, no longer supports email templates / stationery, so Mail Designer 365 is unable to send designs directly from Mail.

    But not to worry: You can add your email account directly to Mail Designer 365 to send emails from your own address:

    • Open Mail Designer 365 > Preferences
    • Choose Mail Accounts…
    • Click + to add a new account
    • Enter your email account details


    Tip: Find your email account settings in Apple Mail under Mail > Preferences > Accounts > Server Settings > Outgoing Mail Server.

    Visit the Mail Designer 365 Manual for a step-by-step guide.

    With Mail Designer 365 you can create responsive newsletters which look different depending on which device your recipient opens your email.

    On an iPhone your recipient will see the mobile version of your newsletter.
    As an iPad has a much bigger screen than an iPhone, an iPad will display the desktop version of your newsletter.

    Mail Designer 365 offers you ultimate peace of mind when you're designing your email newsletters. Thanks to an array of fail-detection methods, you can be safe in the knowledge that your email will be sent error-free.

    Some fail prevention measures include...
    • Image optimisation
    • Subject line preview
    • Built in spelling & grammar checker
    • Mobile optimisation tools

    For a detailed overview of all our fail detection methods, check out this post.
    Mail Designer 365 needs your permission to access your previous designs and app preferences from earlier Mail Designer versions:


    1. Click on "File" > "Import settings and designs."
    2. {S_1032}
    3. When the migration window pops up, select "Grant access" to continue.
    4. {S_1033}
    5. In the next window, simply select "Grant access" again to allow Mail Designer 365 access to the design files in your Library. You do not need to select a different folder.
    6. {S_1035}
    7. Select from the list which settings you would like to copy over to Mail Designer 365 and then click "Import selected."
    8. {S_1034}
    9. Your designs and in-app preferences will then be quickly imported into Mail Designer 365.
    10. {S_1036}


    Mail Designer 365 automatically generates a mobile version of your Newsletter from your Desktop version. This generated mobile version can then be optimized manually.

    If you are using one of our email designs or one of your previously created templates, it's possible that the mobile version was changed. This means that changes to the desktop version of your newsletter don't automatically get transferred to the mobile version. To generate a new mobile template from your desktop version, please follow these steps:

    ‣ In the Menu, please select "File" > "Design options." 
    ‣ Remove the checkmark next to "Create version for mobile devices" and press ok.
    ‣ In the Menu, please go to "File" > "Design options" again.
    ‣ Activate the checkmark next to "Create version for mobile devices" and press ok
    {S_745_50%}

    Once you have done this, you should be able to see the mobile modified Desktop version of your newsletter and you will be able to edit the layout blocks of the mobile view.

    The formatting of the custom placeholders can differ depending on the email service provider (ESP) that you are using. For name placeholders, many ESPs will use [NAME] as the placeholder. [NAME] will then be replaced with the name of the recipient. However, this can vary. Some may require you to use [FULLNAME] or a completely different formatting. Please make sure to double-check with your email service provider.

    For detailed information of how you can add placeholders for MailChimp, please visit the following page:

    For detailed information of how you can add placeholders for Campaign Monitor, please visit the following page:


    Designs which have no pre-configured text style set up can sometimes have font issues in the HTML version. For example, the HTML can override any font choices made by the user and change it back to a default font.

    For this reason, we strongly suggest that you apply a pre-configured text style to all of the text layout blocks within your design. In doing this, you have more control over your design and how it appears after send/export.

    Text styles allow you to choose a preferred font, as well as several fallback options, and an email-safe font, which is universally supported. You can also use them to determine the size, color, and alignment of text.

    For more information on how to configure text styles, please refer to the Mail Designer 365 Manual, where you will find step-by-step guides under the header "Working with text."
    Mail Designer 365 Crew Chat is suitable for anyone in your team involved in the email campaign workflow and feedback process. Common examples include: Marketers, sales-team, branding, copywriters, managers, agency clients, etc.
    Click the background editing mode icon on the bottom left. It will make your other contents invisible, allowing you to focus on your main email background. When choosing a background, you can see 2 different areas. One area includes the background of your text areas, which is the middle of your email design. The second area is the surrounding background area.
    {S_877_50%}

    Drag a photo background, image, or texture into the surrounding background area to apply it.
    {S_878_50%}

    This will apply your choice of background to the mail email background. You can also open the colors window and choose a color as your design background.
    {S_879_50%}

    If you would like to set a background for your text areas, then drag an image to the middle area of your email design.

    Please refer to the following page for further information on how to change the background of your email template with Mail Designer Pro:


    In order to download more web fonts, click on a text area. Mail Designer 365 will automatically open the "Style" tab on the right side of the screen.
    ‣ Choose “Web Fonts" > "Download additional fonts…” from the font menu.
    {S_958_50%}


    Then, you will be able to see a preview window where all available fonts will be displayed.
    ‣ Click ”Start Download“ to download additional Web Fonts you can then use in your template.
    {S_959_50%}
    ‣ After you click “Start download,” a popup window will open that shows the progress of the download:
    {S_960_50%}

    Things to understand when it comes to web fonts...


    Although there are a wide range of fonts available when you download the additional fonts, we understand that some may still consider this as only a limited number of fonts. This is because the fonts are downloaded from Google’s directory of open source designer web fonts. We wanted to help ensure that our users are able to create designs with beautiful fonts in a legal manner. All the downloadable fonts are free and open source, which means that the fonts are accessible to everyone and are available to be used for both personal and commercial projects.

    Please refer to the following page for further information:

    To delete your custom content, try the following:
    ‣ Click on the appropriate icon within the "Contents" tab to identify the location of your custom content.
    ‣ Choose this icon if you added custom content to your graphics section:
    {S_644_50%}
    ‣ Choose this icon if you added custom content to your GIF/animated graphics section:
    {S_645_50%}
    ‣ Choose this icon if you added custom content to your backgrounds and photos section:
    {S_646_50%}
    ‣ Choose this icon if you added a custom folder with images and graphics:
    {S_647_50%}
    ‣ Once you have chosen, scroll down to the "Custom" section:
    {S_648_50%}
    ‣ Right-click on the image or graphic that you want to delete.
    ‣ Choose "Move to Trash" from the drop-down menu.
    {S_649_40%}
    ‣ To remove a folder, you will need to right-click on the folder and choose "Remove."
    {S_650_50%}

    When you send an email template, not every font that you choose may be available at the recipient's side. This is why you can specify a fallback font list, and we recommend that you use an email-safe font.
    {S_865_50%}

    Email-safe fonts are the basic fonts installed on everyone's devices. If you have selected a font that is available on macOS but not on iOS, there will be a visible difference on the corresponding devices. If both devices have the font installed, then the email template will look the same on both platforms. You can use Web Fonts which the recipient's e-mail client can downloaded on demand. Most e-mail clients except Outlook support Web Fonts.

    Important: Mail Designer 365 will warn the user about the missing font when the user opens the document.
    {S_868}
    We know the proof is in the pudding code-sample, so we've put together an HTML export example for you to explore.

    It's an unmodified export of one of our Design Ideas. Note that when you use the HTML feature yourself, you'll also have the option of setting an image URL, and image prefix for where your images will be hosted, as well as a custom folder and HTML file name.

    Download HTML sample
    To create debug logs, please try the following:
    ‣ Hold the alt ⌥ key or option key on your keyboard 
    ‣ Select "Help" > "Send Debug Logs..." from the menu
    {S_1071_60%}
    Note: If you do not hold the alt/option ⌥ key, the Help drop-down menu will say "Provide Mail Designer Feedback..." instead of "Send Debug Logs..."
    {S_1072_60%}
    ‣ Once you have sent your debug log, Mail Designer 365 will notify you that the log has been sent successfully
    {S_1073_60%}

    Mail Designer was not able to connect to the configured SMTP server. Please open Mail Designer 365 settings and check the configured values under SMTP settings.

    Make sure the hostname and port are correct. Also check the “Security” setting.

    Click the “Test” button to let Mail Designer verify that the server accepts a connection using your settings.
    In rare cases, errors can occur when sending SMTP, even though Mail Designer was able to connect to the SMTP server and possibly also accepted the user name and password.

    In this case, you can view the log of the last sending attempt in the error dialog using the “SMTP Log” button. Finder will then display a file that you can open with any text editor.

    You can read the raw error reported by the SMTP server in that file. This could, for example, be information about maintenance or problems with your email account, such as exceeded sending limits.
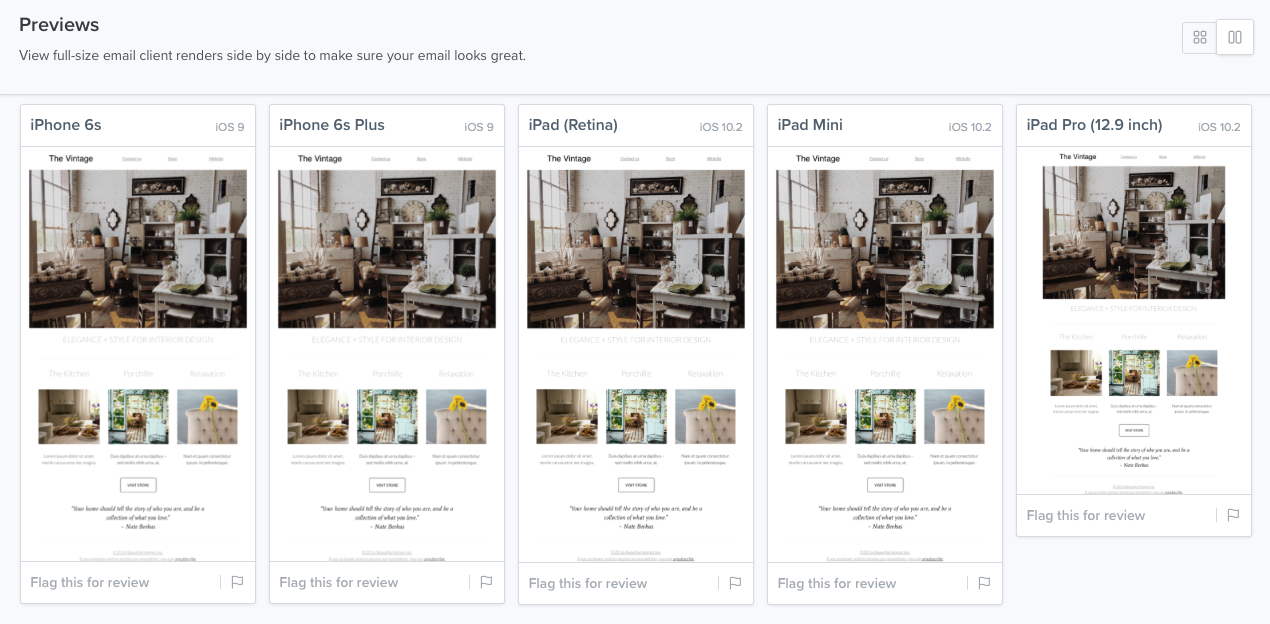
    Mail Designer 365 gives you many options to be creative when it comes to building your email designs. This includes the option to use text styles in image areas to create logos, call-to-actions buttons, and more.

    While we strongly encourage you to be as creative as possible when it comes to exploring fonts and text styles for your email designs, we also recommend using a good balance of "real text" and image elements in every design.

    When an email design has a large amount of images or image elements (such as shapes, text styles, graphics etc) the risks increase when you go to send it. Firstly, emails which are largely image-based are larger and generally take longer to load. If your recipient is viewing your email on a poor internet connection, it's highly likely they will not see any of the image elements. This is obviously not ideal if the majority of your design is images, as the reader will be greeted by a blank screen.

    Secondly, the likelihood of your email getting caught in a spam filter increases with the amount of image elements you include. This is a safety precaution put in place by many email providers, as spam emails typically contain a high quantity of images.

    To summarize, we would always recommend you to use real text where possible in order to reduce the amount of images in your email design. However, if you want to use text styles in an image area, do so with caution and only where necessary. If you can create the same effect using real text, this would always be the better option to reduce risks after sending.
    To cancel or manage a subscription in the App Store, open the App Store, sign in, and click on your account icon in the bottom left corner of the window.

    Then, click "View information" in the top right of the window, enter your password if prompted and scroll down until you see the subheading "Manage". Here you will be able to see how many subscriptions you have associated with your account.

    {S_1220}

    Click on "Manage" to view and edit your subscriptions on your Mac.

    You can find out more information from the Apple Support website.
    Manually exporting your Mail Designer 365 design as a .zip file and re-uploading it to Mailchimp can cause the code to become altered, leading to designs appearing broken or different to how you intended.

    For this reason, we always recommend using our convenient direct export tool to share your email design to Mailchimp. All you need for this is the API key for your account. This step-by-step guide shows you how to retrieve this and get set up:
    Any text that you copy and paste into Mail Designer 365 from another source other than a different Mail Designer 365 document will automatically receive the style of the text area that you’re pasting it to. However, if you would like to preserve your text style, you can use the “Paste and Match Style” command.

    ‣ Copy text that has formatting you want to preserve
    ‣ Choose “Edit" > "Paste and Match Style” from the menu bar
    {S_883_30%}
    This will preserve the style of the original text that you copied.


    Please refer to the following page for further information on how to copy and paste text, while preserving its style:


    Mail Designer 365 offers you an array of different options when it comes to editing your newsletter background.

    You can set a color as your email background. With the help of the color picker, you can even choose a color inspired by a photo or graphic. Just use the pipette to grab the color.
    {S_1052}

    You are also welcome to use any photos, textures, or patterns from Mail Designer's stock library. We included many different categories. Simply drag and drop the thumbnails from the design sidebar into your background.
    {S_1053}


    You can even use your own photos, textures, and patterns. Just simply drag it to your template from your desktop or the Finder. If you are using a third party's photo, texture, or pattern, make sure that you have permission to use it for commercial projects. Also, don't forget to give credit to the designer/artist.

    Currently, all email designs that you create with Mail Designer 365 are designed to be centered. This means that the entire email cannot be left justified or right justified. However, you can customize the text of individual text areas that you add within your email template to have left, center, or right alignment.
    {S_905_50%}

    Don't worry, you can still import your designs.

    ‣ Go to the "File" menu
    ‣ Choose “Import settings and designs…”
    {S_1078}
    ‣ Click "Grant access" when you are ready
    {S_1080}


    This will let you import all your existing data from earlier Mail Designer versions.
    You can change the language of all equinux Software products by changing the language settings of your device. For instance, on the Mac, you can do the following:
    ‣ Open "System Preferences."
    ‣ Click "Language & Region."
    {S_519_50%}
    ‣ Change to your preferred language by dragging your selected language to the top of the list.
    {S_520_50%}
    ‣ Close your software. For example, with VPN Tracker, you can do so by choosing "VPN Tracker" > "Quit VPN Tracker."
    {S_525_30%}
    ‣ Reopen the software.


    You can change whether your text is automatically hyphenated in your text areas. To turn off the hyphenation, try the following:
    ‣ Go to "File" > "Design Options."
    {S_527_50%}
    ‣ Remove the check mark from the "Force hyphenation."
    {S_528_50%}
    ‣ Click "Ok."
    {S_529_50%}


    Please refer to the following page for further information on how to turn on and off text hyphenation:

    Renewals can be canceled up until 10 days before their renewal date. The cancelation will take effect on the next possible renewal date. You can continue to use the software until the end of your term, at which point your subscription will end.


    Currently, Mail Designer 365 is only available for Mac (macOS) computers.
    {S_1058}

    This error message appears when trying to send your design from an iCloud account with 2-factor authentication set up. In order to be able to send your design as normal, you will need to set up an app-specific password for Mail Designer.

    Apple's support page has more information on how to set this up.

    Anchor links do not work in most email clients and are not supported in iOS 14 and lower. For this reason, Mail Designer 365 doesn't currently offer support for this feature.

    We try to ensure that a newsletter looks and works as expected on the widest range of readers possible and will revisit anchor links, if a majority of popular email apps add support for them.
    Sometimes you may experience a delay when sending a test version of your design. This is a security feature from Amazon Web Services designed to prevent spam emails. Your test send email will be marked as delivered by our server, but it is possible that you can experience a short delay before the email appears in your inbox.

    Please note, this only applies to the test send feature, as we are sending via our server using your name as an alias. When you send the final version of your design, you should not experience any delays as you are sending via your own email address/ESP.
    We have multiple favorites that we are sure will keep your email newsletters in style. Raleway, Work Sans, and Montserrat are just a few of the font styles you can try in your next email design.

    Check out our video tutorial for more font inspiration:


    {YOUTUBE_QtbUHCMeRTs}

    Also, please refer to the following page for a step-by-step guide on how to download more fonts in Mail Designer 365:


    When you send using the test feature, Mail Designer 365 sends the email via our test servers but under the alias of your email address (so you can see how the sender etc. will appear in the inbox.) This can sometimes result in your email being detected as spam, as it is coming from our test server and not a “real” email address.

    However, if your test mail lands in your spam folder, it doesn’t mean that your real email will. When you send for real, you are sending via your own address or via an ESP where you have entered your mail domain; meaning that it should show up fine in your recipient’s inbox.
    Different email clients will read and do different things to your email designs when forwarding them. Some email clients will put the original email in quoted text and then add the sender information to the top. Others will forward it as is. Because Mail Designer 365 has no control over how email clients behave, the advanced HTML email that you create with Mail Designer 365 may not look the same once it has been forwarded by an email app.

    Our recommendations:


    ‣ One solution is to use the "redirect" feature, which is built-in to some emails to send it to another recipient. "Redirect" is different from forwarding the email because the redirect feature usually tells the email app to leave the original email design alone.
    ‣ Or you could add a link to your email on the web within the email template. This way, people have the option of viewing the email as it is, even after the email has been forwarded.

    Please refer to the following pages for further information:

    If you are using an older, legacy version of Mail Designer which is no longer supported - i.e. Mail Designer 1, Mail Designer 2 or Mail Designer Pro - you can easily upgrade to Mail Designer 365 to continue creating and sending email newsletters.

    How to buy from the Mail Designer 365 store
    1. Head to our website to view all plan options.
    2. Choose your preferred plan and click "Buy"
    3. Log in to my.maildesigner365 with your equinux ID to complete your purchase (this is the login you use for Mail Designer)
    4. Once you've purchased a plan, download the app and move it to your Applications folder.

    How to buy from the Mac App Store
    1. Find Mail Designer 365 on the App Store
    2. Choose your plan and complete your purchase to download the Mail Designer 365 app to your Mac.
    3. Open the app and log in with your equinux ID

    Now you can enjoy all the latest features and Design Ideas available in Mail Designer 365.

    Tip: Once you have upgraded, Mail Designer 365 will automatically offer to import your designs from supported older Mail Designer versions. Find out more in this FAQ.
    Yes you can! If you have purchased a Mail Designer 365 plan and are only part way through your subscription year, you can still cross-upgrade to a better plan via your my.maildesigner365 portal.

    On the start page, simply click on your team name, navigate to the "Store" tab and select your plan from the list. Once you've purchased your plan, it will be available for you to use yourself or assign to another member of your team.


    The Anatomy of an Email

    Before diving into DKIM, let's briefly understand how emails work. When you send an email, it's like sending a digital letter. It travels through various servers and networks before reaching its intended recipient. Each server it passes through can potentially be a point of vulnerability where malicious actors might tamper with the email's content or disguise themselves as legitimate senders.

    Enter DKIM: The Email's Digital Signature

    DKIM, which stands for DomainKeys Identified Mail, is a security protocol designed to verify the authenticity and integrity of an email message. It does this by adding a digital signature to the email before it leaves the sender's server. This signature is like a seal of approval, assuring the recipient that the email has not been tampered with and genuinely comes from the claimed sender.

    How DKIM Works

    DKIM relies on a pair of cryptographic keys: a private key kept by the sender and a public key published in the sender's DNS (Domain Name System) records. Here's how it works:

    1. Email Signing: When an email is sent, the sending server uses the sender's private key to generate a unique digital signature based on the email's content. This signature is added to the email's header.
    2. Recipient Verification: Upon receiving the email, the recipient's email server retrieves the public key associated with the sender's domain from the DNS records.
    3. Signature Verification: The recipient's server uses this public key to verify the email's digital signature. If the signature matches the email's content and has not been altered in transit, the email is considered authentic.
    4. Filtering and Delivery: If the email passes DKIM verification, it's more likely to be delivered to the recipient's inbox. If not, it may be flagged as suspicious or sent to the spam folder.

    The Importance of DKIM

    1. Protection Against Spoofing: One of the most significant benefits of DKIM is its ability to prevent email spoofing. Without DKIM, cybercriminals can easily forge email headers and pretend to be someone they're not. DKIM ensures that the email you receive from a trusted sender is indeed from that sender.
    2. Email Integrity: DKIM safeguards the integrity of your emails. It guarantees that your message hasn't been altered during transit, ensuring that the recipient receives the content exactly as you intended.
    3. Enhanced Deliverability: When your emails are DKIM-signed, email providers are more likely to trust them. This means your legitimate emails have a better chance of landing in your recipients' inboxes rather than getting lost in spam folders.
    4. Reduced Phishing: By reducing the effectiveness of phishing attacks, DKIM helps protect individuals and organizations from falling victim to scams that could result in data breaches or financial losses.

    Conclusion

    In an era where email fraud and phishing attacks are prevalent, DKIM serves as a crucial line of defense. It's like a digital fingerprint that assures the authenticity and integrity of your emails. While it may operate behind the scenes and go unnoticed by most email users, DKIM is a vital tool in the ongoing battle against cyber threats. Its use should be encouraged and embraced by individuals, businesses, and email service providers to create a safer digital communication environment for everyone. So, the next time you receive an email, remember that DKIM might be silently working to protect you from potential harm in the vast digital landscape.
    In the world of email design, things are changing constantly. With this in mind, it's important to bear in mind that many features available in legacy versions of Mail Designer may no longer work and that designs created in older versions may not be in line with today's modern standards.

    For this reason, we have exclusively dedicated our support and development efforts to maintaining the Mail Designer 365 service - the only Mail Designer version to offer you ongoing updates and compatibility with all future macOS versions.

    For reference, below you can find the end of support dates for all legacy versions of Mail Designer:

    Mail Designer- Support ended: September 2014

    Mail Designer 2 - Support ended: February 2015

    Mail Designer Pro - Support ended: May 2016

    Mail Designer Pro 2 - Support ended: May 2017

    Mail Designer Pro 3 - Support ended: October 2018

    Mail Designer Pro HS - Support ended: January 2019

    What this means:
    While some of these versions of Mail Designer may still work on your current Mac, should you need to get a new Mac, or upgrade to a new macOS, they will no longer be supported.

    What to do: If you are still using an older version, we strongly suggest you upgrade to a modern Mail Designer 365 plan to guarantee regular updates and consistent support throughout the lifetime of your plan.
    Dropbox changed the way their public folder behaves and they have shut down hotlinking files, which means that you are no longer able to play videos directly within the email if the video is hosted by Dropbox. Also, keep in mind that directly embedded videos do not always work properly with certain email clients. This means that some of your recipients may not be able to view the video because of the email client they are using.

    Our best practice recommendation when it comes to videos:


    We recommend linking out to the videos on another site such as YouTube or Vimeo. These videos will then open in Safari or the relevant video app. For example, if it's a YouTube video and the YouTube app is installed on the device, then the video will play right in the YouTube app on the recipient's device.
    Yes, you can add WeVideo videos into your email design using Mail Designer 365. Follow these simple steps:
    ‣ Add a layout block with an image area.
    ‣ In the "Contents" tab, click on the "Video Placeholder" icon. You can also press Command-5.
    {S_908_50%}
    ‣ Drag a video placeholder into an image area.
    {S_909_50%}
    ‣ Paste your WeVideo link into the "Link to Video" field.
    {S_910_50%}

    Keep in mind:


    Unlike YouTube or Vimeo videos, generating preview images from WeVideo videos is not directly supported by Mail Designer365. You will have to provide your own preview image by taking a screenshot of the video frame you want to use as the preview image. Then drag that image onto the video placeholder. Or you can choose an image of your choice as the preview image.

    In the email newsletter, the videos that you add are treated as images with a link to the video page. Direct inline playback is no longer supported by Mail Designer 365 because most email clients do not support it.

    Note: Please remember that Mail Designer 365 does not support embedding videos directly within your email designs.

    Currently, Mail Designer 365 does not offer any kind of spam testing service. However, if you are worried about your email being caught out by a spam filter, most ESPs do offer spam testing as part of their service.

    One fairly popular service is this one from Litmus.

    For tips on how to avoid getting caught in a spam filter, check out this blog post.
    If you need inspiration, we have some fun tips for you to try.

    You can also check out our video for tips on animated GIFs here:


    {YOUTUBE_M9XEE2mHK1A}
    Mail Designer 365 Small Business and Mail Designer 365 Non Profit are both older Mail Designer 365 plans which no longer exist.

    Our current plans, Mail Designer 365 Business and Mail Designer 365 Premium Business both include regular updates, all of our newest design features, as well as compatibility with Mail Designer 365 for Teams - and even more exciting new developemts coming soon! Find out more.

    Are you looking to buy a plan? You can purchase a Mail Designer 365 Business or Mail Designer 365 Premium Business plan here.
    Mail Designer 365 is designed for teams. When you create a team, you can assign users a personalized role according to their needs. Members can discuss designs with you in Crew Chat, send campaigns, and use Direct Mail. Your team doesn’t have to consist solely of colleagues from your company. You can also include external collaborators such as copywriters, photographers, or the client themselves.

    Here are the different team roles and their meanings:

    • External
      Ideal for: clients, external employees, and managers who want to contribute content and approve or launch campaigns. Can use TeamCloud, Crew Chat, Direct Mail, and campaigns. Cannot purchase plans or stamps for the team.
    • Member
      Ideal for: employees who work closely on emails. Can use TeamCloud, Crew Chat, Direct Mail, and campaigns. Can purchase plans or stamps for the team.
    • Project Manager
      Ideal for: administrators of your team, who don’t necessarily have to be involved in design. Can manage team members, purchase, and assign plans and licenses.
    Your admin can change membership levels at any time. To start, you might build your team with just the "Member" level.

    You can set up a new team at my.maildesigner365.com/teams/create
    With Mail Designer 365, you can now easily add borders to your photos.

    ‣ Select the photo that you want to add a border to
    ‣ This will automatically prompt Mail Designer 365 to open the "Style" tab on the right side of the screen
    ‣ At the bottom, find the "Border" section
    ‣ Select the type of border that you want to use
    ‣ Click on the color wheel icon and choose the color of your border
    ‣ Change the pixel size to adjust the thickness of the border
    {S_1082}


    Note: You can also add borders to shapes.

    Yes, you can use multiple text styles within a text area. However, you can only assign one text style per paragraph.
    {S_986_50%}

    You also have the freedom of choosing different fonts and font colors for your text within a given text area. This is not limited to one font per paragraph.
    {S_987_50%}

    In order to assign different fonts within a paragraph, you must first select "no style" on the right side of your screen. Then, you can select the text that you want to change and assign it with its own font, font size, font color, etc.
    {S_988_50%}
    Typically, the fonts only change on another person's device if you are using a font in your email template that the other person does not have installed on his/her computer. For example, if you are using the font "Chelsea Market" in your document, and the person you lent the document to does not have "Chelsea Market" installed on his/her computer, a fallback font will be displayed instead.
    {S_859_20%}

    Important: Mail Designer 365 will warn the user about the missing font when the user opens the document.
    {S_863}

    If you want to make sure that the font that you use will appear on a different person's device, then we suggest using one of the email-safe fonts in your email newsletter.
    {S_860_50%}


    Mail Designer 365 allows you to lend a design to someone else who also uses Mail Designer 365 on his or her Mac. He or she can make changes and return the file afterwards to you.
    ‣ Open the email template you wish to share.
    ‣ Choose "Share" > "Lend..."
    {S_776_50%}
    ‣ Enter the recipient's email address and write him or her a short message.
    ‣ Click "Send."
    {S_777_50%}


    Remember: You cannot lend a document while on the demo version of Mail Designer 365.
    {S_781_50%}

    Please refer to the following page for more information on how to lend your email designs in Mail Designer 365:

    Yes there is! Mail Designer 365 is our brand new and updated version of Mail Designer - only available on an annual subscription basis. Subscribers have access to our best new features and benefit from regular updates.


    Most importantly, Mail Designer 365 will always be optimized for the latest mac OS version, so as long as you are subscribed, you will never have to worry about paying for an upgrade again!


    Visit our website today to purchase Mail Designer 365.


    Mail Designer 365 supports the export of the template including MailChimp placeholders. Once uploaded to MailChimp almost all features offered by the website can be used. To make sure the layout stays intact we recommend not to use the "Edit" view of MailChimp for layout editing. Use Mail Designer 365 to make the necessary changes and export the new version to MailChimp.

    If you want to add multiple layout blocks that have similar layouts or formats, it may be easier to duplicate an existing layout block instead of choosing your font and color options once again.

    There are 3 ways you can duplicate layout blocks:


    Option 1: "Edit" > "Duplicate"


    ‣ Click the selection tab at the side of a layout block.
    ‣ Choose "Edit" > "Duplicate" from the menu bar.
    {S_849_50%}


    Option 2: Using the layout handle


    ‣ Click on the layout handle on the left side of the layout block. 
    ‣ Hold down the option key or the alt⌥ key on your keyboard.
    ‣ Drag the layout block that you want to duplicate.
    {S_850_50%}

    Now, you can drop it into position to create a copy. Afterwards, you can edit your text and choose other options accordingly.

    Option 3: Command⌘ D


    ‣ Click on the layout handle on the left side of the layout block. 
    ‣ Press Command⌘-D on your keyboard


    Please refer to the following page for a guide on how you can duplicate layout blocks:


    To activate renewals for your account, go to your my.maildesigner365 account. On the top you will see whether your renewal is turned on or off. If you would like to change the status of your renewal, just flip the switch and you will get an email confirmation for your changed renewal state.

    {S_1223}
    You can create a link for an image area, so the image area will be clickable in your email. Choose a layout block with image areas.
    {S_799_50%}

    It’s important to note that an entire image area will be displayed as a single image in your email. It does not matter how many shapes or graphics you have within a single image area, the entire image area will be displayed as a single image. Also, you can only assign one link per image area. If you want to add multiple links for different social media accounts, you will need to choose a layout block with multiple image areas.

    First, let's go over how to assign 1 link to 1 image area (Great for linking to only 1 social media account):


    ‣ To create an image area link, choose an image area in your design. 
    {S_800_50%}
    ‣ Click the "Add Link" button from the Style section of the sidebar.
    ‣ Then, just enter your URL.
    ‣ The entire image area will be “hot” and can be clicked in your final message.
    {S_801_50%}
    ‣ A little link icon will show you for which image areas links has been embedded.
    ‣ Note: It is not possible to add a link to individual components of a single image area.


    Remember: 1 link to 1 image area. This means you can only assign 1 link to 1 social media outlet within 1 image area.

    How to assign multiple links (Great for linking multiple social media accounts):


    We’ve included several layout blocks that contain several image areas next to each other.
    {S_802_50%}

    You can use these blocks to create multiple image area links. For instance, if you use a layout block with 4 image areas, you can add 4 buttons with different links to 4 social media sites.
    {S_803_50%}

    Just make sure to add one icon per one image area. Assign one link per one icon.
    {S_804_50%}

    Correct vs. Incorrect


    {S_805_50%}

    Correct because: 4 different icons in 4 different image areas. You can add 1 link per 1 image area. Therefore, you can add 4 different links total.


    {S_806_50%}

    Incorrect because: 4 different icons in 1 image area. You can only add 1 link per 1 image area. Therefore, 4 icons will only lead to 1 landing page.

    Please refer to the following page for more information on how to add different buttons with different links to your Mail Designer 365 email design:


    For a video tutorial:
    {YOUTUBE_zKnpE88y8Tc}

    Due to compatibility issues with some very popular email clients (👋 Gmail and Outlook), animated gifs are always rendered at non-retina resolution, so they don’t break your email’s layout.

    We hope that’ll change in the future, but for now your best shot is to choose a gif that’ll look good regardless of resolution.
    If you're using the latest version of Mail Designer 365 and your Mailchimp upload fails with an "API key revoked" error, please create a new API key in your Mailchimp account.
    Create a new Mailchimp API key
    If you need to back up your Mail Designer 365 email templates (e.g. because you've bought a new Mac or need to format your computer), you have multiple options:

    ‣ If you use Time Machine on the Mac, the designs are also included in the backup by default.
    ‣ If you are manually backing up your Mac, you'll need to back up the following folder on your external hard drive:
    ~/Library/Group Containers/C3HCD5RMD7.net.tower-one.MailDesigner
    You can access this folder by opening Finder, going to "Go" > "Go to folder" and copying and pasting in the above path.
    ‣ You can do a complete manual backup by going to "My Designs." Then, press ⌘ + a to select all the designs and then drag them to a folder on your desktop. You can then also save this folder on an external hard drive.
    If you are currently using an older version of Mail Designer and you are concerned about losing your work if you upgrade to Mail Designer 365, don't worry! It is super easy to import all of your previous designs from an older version of Mail Designer.

    Please carry out the following steps to access your templates:

    1. Click on "File" > "Import settings and designs."
    2. {S_1042}
    3. When the migration window pops up, select "Grant access" to continue.
    4. {S_1043}
    5. In the next window, simply select "Grant access" again to allow Mail Designer 365 access to the design files in your Library. You do not need to select a different folder.
    6. {S_1044}
    7. Select from the list which settings you would like to copy over to Mail Designer 365 (i.e. from which version) and then click "Import selected."
    8. {S_1045}
    9. Your designs and in-app preferences will then be quickly imported into Mail Designer 365 exactly as they were when you last used them.
    10. {S_1046}


    First, please try signing out and back in again. This will tell Mail Designer 365 to re-fetch all of your account details, including your plan.

    If that's not working, double-check that the email address you have signed in with matches the email address you used to purchase.

    If this does not work and your Mail Designer 365 app does not seem to recognize this purchase, please contact support and send us some debug information:

    ‣ Hold the alt ⌥ key or option key on your keyboard 
    ‣ Select "Help" > "Send Debug Logs..." from the menu
    {S_1004_60%}


    MailChimp has free and paid plans. Please visit the MailChimp website for more details and exact pricing information.

    Apple has created a two-factor authentication to add extra protection for your Apple ID. Two-factor authentication requires two pieces of information. So even if someone knows your password, two-factor authentication will require your password and a code from one of your trusted devices.

    Apple's support page has more information on two-factor authentication and how to enable or disable it.
    To only send the desktop version of your email design, try the following:

    ‣ Choose "File" > "Design Options..."
    {S_1010}
    ‣ Uncheck "Create version for mobile devices."
    {S_1011}
    ‣ Click "OK" when you are ready.
    {S_1012}


    Then, you will be able to export your email design or send via your method of choice (through Apple Mail, Campaign Monitor, MailChimp, etc).

    Creating an email link in Mail Designer is really straightforward. Simply follow the instructions below to get started:

    1. Type your desired text in a text layout block e.g. "Email me."
    2. {S_680}
    3. From the sidebar select "Add link" and choose "Email mailto" as the type of link from the drop down menu.
    4. {S_681}
    5. Add your email address.
    6. {S_682}


    Now your chosen text will appear as a link and when a customer clicks the link it will open a new email to you.


    If you're struggling with email deliverability—especially with Gmail users—there are proven strategies to improve sender reputation and ensure your emails land in inboxes rather than spam folders. Follow these steps to get back on track:

    Steps to Improve Email Deliverability:

    1. Warm Up Your Email Lists Gradually
      • Treat the process as if warming up a completely new account.
      • Divide your mailing into smaller batches and send them on different days. For example, start with 500 emails on Monday, 1,000 on Tuesday, 2,000 on Wednesday, and so on.
    2. Focus on Engaged Recipients First
      • Begin by sending emails only to contacts who have opened your emails recently (e.g., within the last 30 days for weekly senders).
      • Gradually increase this timeframe as your deliverability improves.
    3. Leverage Google Postmaster Tools
      • Set up Google Postmaster Tools to monitor spam rates, domain reputation, and other deliverability metrics.
    4. Create Test Gmail Accounts
      • Subscribe a test Gmail account to your email campaigns.
      • Monitor where emails land. If emails go to spam, interact with them (e.g., open, click, and reply) but do not move them out of the spam folder. This helps train Gmail’s algorithms.
    5. Adjust Based on Metrics
      • Use Google Postmaster Tools to track your spam rates. If spam rates are too high, reduce the timeframe of your engaged recipients or maintain the current level of sending until the rates stabilize.
    6. Monitor Progress
      • As Gmail deliverability improves and emails stop landing in spam, expand your email list incrementally to include less recently engaged recipients.

    How Mail Designer Campaigns Can Help:

    Mail Designer Campaigns provides several built-in features to optimize email deliverability and improve your sender reputation:

    • Professional Email Authentication: Ensure your emails are authenticated with SPF, DKIM, and DMARC, reducing the likelihood of being flagged as spam.
    • Engagement Tracking: Identify active and inactive recipients in your mailing list, allowing you focus on your most engaged contacts first.
    • Custom Domain Support: Addd your own domain to Mail Designer Campaigns to reinforce trust with email providers like Gmail.
    • Clean and Optimized Designs: Mail Designer 365 helps you to create email content that is visually appealing while avoiding spam-triggering elements, increasing inbox placement rates.
    • Advanced Segmentation: Mail Designer Campaigns allows for advanced segmentation, such as creating lists of only people who have opened the email in the past X days, and options for sending to only a portion of your subscriber list. This ensures that your emails reach the most engaged recipients first, improving overall deliverability.

    By following these best practices and leveraging Mail Designer Campaigns' tools, you can rebuild your sender reputation, enhance Gmail deliverability, and achieve more successful email marketing campaigns.

    TextScout AI (beta) utilises the latest AI technology and enables Mail Designer 365 users to craft sales-boosting subject lines from just a few campaign keywords. Enter specific words and phrases, choose your desired tone, and generate perfectly-formed subject lines in seconds.

    How to access TextScout AI


    TextScout AI is available to try out in all Mail Designer 365 plans in the latest Mail Designer 365 version. The number of AI credits available to you for generating subject lines varies depending on your plan tier. Check your status using the credits indicator within the TextScout AI window.

    Newsletter campaigns as well as Direct Mails are billed using stamps.

    Sending email consumes stamps per recipient, for attachments, placeholders, scheduling, and BCC functions. The exact usage is displayed for each. For direct mail, 25 stamps are required per recipient (plus additional options), while mass campaign mailing requires 1 stamp per recipient as a base.


    Stamps are included in the following monthly plans:
    Plan Karlsfeld (free, included with each Mac Design Plan): 500 Stamps
    Plan Roma: 5.000 Stamps
    Plan Paris: 15.000 Stamps
    Plan London: 25.000 Stamps
    Plan Capetown: 50.000 Stamps
    Plan Seoul: 100.000 Stamps
    ▸ Learn more about all Campaign plans

    Stamps are also available as standalone Stamps packages
    ▸ Learn more about all Stamps packages
    Currently, Mail Designer 365 does not directly support forms or surveys embedded within your email design. To make sure that your recipients are getting the optimal design that you created, we decided to leave out the HTML forms feature. Most email clients do not support HTML forms or surveys, which is why Mail Designer 365 was designed to not support HTML forms. If you were to add surveys in your email design, there is no way that we could make sure that your recipients will get a functional survey that you created, since we have no control how email clients read and interpret your newsletter.

    However, if you needed to add a form to get feedback from your recipients, then we suggest linking to an outside form maker like Google forms. You can use an image or a specific text and add a link to your form. 
    If you've recently upgraded to Mail Designer 365 and want to continue using your previously purchased stationery items, you can do so easily via the import feature.
    To import all of your previous settings and designs from older versions of Mail Designer, simply click on "File" > "Import settings and designs." This will restore all of your preferences as well as old design ideas, and your stationery packs.

    You can find more information about importing settings in this FAQ.

    The option to format text styles in your email design may not seem to be important, but it will massively help you when you're trying to make quick changes to the text in your email.

    When you set up a text style (e.g. Body Text) any changes you make to that style will be automatically applied to any sections of text within your newsletter where that style has been applied; for example, in different layout blocks.

    If you want to make a change to the text in your design (i.e. change the color or the font) it's quicker and easier to change the format of the text style than to manually go through each layout block of your newsletter and make sure the text has been updated.

    In addition, having predefined text styles in place makes your design more reliable when it comes to sending and you are much less likely to run into display or compatibility issues.
    During export, Mail Designer 365 automatically applies a GIF compression to ensure that the exported file won't be too large.

    This can result in some empty or transparent frames being cut from your GIF in order to save space.

    As a workaround, a pixel can be built into the GIF and invisibly placed at any point over the entire length of the animation. This way, Mail Designer 365 won't identify the frames as empty.
    The files are stored internally in Mail Designer 365's structure. These files are not available to export.

    You can find your original template files in the Finder by following these steps:

    ‣ Right click the template in the Design Chooser
    ‣ Choose "Show in Finder"
    {S_554_40%}

    How to find your designs in a Time Machine backup
    If you've had a hardware failure and need to find your templates in a backup of your Mac, you can find your templates in this location:

    /user/Library/Group Containers/C3HCD5RMD7.net.tower-one.MailDesigner

    Note: there will be multiple "Library" folders on your harddrive, but you need the hidden one inside your Home folder.
    Here is one way to get there:
    • Navigate to your user's home folder in the Time Machine backup (e.g. "John")
    • Right-click on your user's home folder ("John"), hold down the Alt/Option key (⌥) and select "Copy “john” as Pathname"
    • Select the menu item "Go > Go to Folder…" and a dialog will open
    • Press Cmd+V to paste the path you've just copied and add "/Library" to the end of the path and press enter
    You should now be inside the Library folder of your user account.

    Now here on, go to "Group Containers/C3HCD5RMD7.Mail Designer/Documents/MD365" to find your documents. You'll find folders corresponding to your categories and each will have subfolders "Contents/Resources" that have the actual documents.

    You can drag & drop them onto your Mail Designer 365 icon in the dock to copy them to your Mail Designer 365 library.
    Mail Designer 365 TextScout AI is compatible with the latest macOS versions from macOS 10.13 High Sierra. Learn more.
    To view the statistics of your email campaign in Mail Designer 365, follow these steps:
    1. Log in to my.maildesigner365.com
    2. Navigate to Campaigns and select Delivered.
    3. Select the desired campaign – the statistics will then be displayed.
    You can change whether your text is automatically hyphenated in your text areas. To turn off the hyphenation, try the following:
    ‣ Go to "File" > "Design Options."
    {S_980_50%}
    ‣ Remove the check mark from the "Force hyphenation."
    {S_981_50%}
    ‣ Click "Ok."
    {S_982_50%}


    Please refer to the following page for further information on how to turn on and off text hyphenation:


    Don't worry if you accidentally deleted Mail Designer 365! We understand that these things happen and we've got your back.

    To reinstall Mail Designer 365, go to our website and click on the "Download" link. Once the app has downloaded onto your Mac, you can log in with your equinux ID and password and carry on designing.
    If you have received the following error message when trying to export your design from Mail Designer 365, you will need to ask Campaign Monitor for a new API key.

    {S_1111}

    In order to generate a new API key and carry on exporting designs from the app as usual, log in to your Campaign Monitor account and head to "Account settings":

    {S_1112}

    Then, go to "API keys", where you can generate a new API key:

    {S_1113}

    Once you have done this, update your new API key in the app and try your export again.

    {S_1114}

    Visit my.maildesigner365.com, log in to your account, and go to the "Billing" tab to change your payment method.

    Click on your current payment method in the top right corner and select "Choose another way to pay." You can now add a new credit card or alternatively, add a PayPal account. This will be used as your new default payment method for your Mail Designer 365 plan.

    Of course! Mail Designer 365 has many keyboard shortcuts that you can use when working with different objects, using the control panel, and many more.

    Please refer to the following pages for keyboard shortcuts that you can use in Mail Designer 365:

    Yes, Mail Designer 365 knows many settings like SMTP server or port. You will need to configure an email account for sending to use this.

    Follow this step-by-step guide for more information on how to do this.
    In order to add different buttons with different links, you need to use a layout blocks with multiple image areas. If you need 4 links, choose a layout block with 4 image areas. If you need 5 links, choose a layout block with 5 image areas.
    {S_841_50%}

    Within Mail Designer 365, you have multiple choices of different layout blocks with multiple image areas. Remember, one image area only allows you to add one link. When you send your email templates, an image area with different elements will be rendered as a single image, meaning you can only add one link within one image area and the link will be applied to that entire image area.

    For the layout block, you can choose which layout you want and how many image areas there are within the layout block. Here is a layout block with 4 image areas:


    {S_844}

    Within each image area, you can add different graphic elements and a single link. Using a layout block, you can add a button with a unique link inside each image area. The different image areas will be rendered as their own individual images, even though it is one layout block.
    {S_845}

    Please refer to the following page for more information on how to add different buttons with different links to your Mail Designer 365 email design:

    When you export an email design from Mail Designer 365 as HTML, each image area within the design is exported as a new image.

    Extra design features in Mail Designer 365, such as cropping, scaling, filters, effects, and additional graphic elements mean that images are very rarely identical to the original source image when you are ready to export your design. This also applies when compressing images and turning retina image support on and off.

    For this reason, it is necessary for Mail Designer 365 to export each image area as a new image file so your design looks the way you intend it to when you come to send.
    Mail Designer 365 lets you add backgrounds to several areas within your email template. When you have added a main background picture but want to have transparent backgrounds within your text blocks, then you must delete the background of different areas within the text block.
    ‣ Make sure to click on the padding area of a text block.
    {S_815_50%}
    ‣ Click "Delete Background" on the right side.
    {S_816_50%}
    ‣ Afterwards, click on the outer area of the same text block.
    ‣ Then, click "Delete Background."
    {S_817_50%}
    ‣ Your text block should now have a transparent effect.


    Please refer to the following page for more information on how to create transparent effects:

    In our online store we accept a variety of payment methods:

    • Visa
    • Mastercard
    • American Express
    • PayPal*
    • Personal/Business Checks* (US Orders Only)
    • Bank Transfers* (European Union Only)

    * License will be emailed to you once your payment has cleared.

    When paying my check or bank transfer, you will receive an email with additional payment details once you have placed your order. Bank Transfer and Check orders are currently not available for Mail Designer Purchases

    Of course! There is a Direct Mail plug-in available for Mail Designer 365. Direct Mail has been tested by our team for Mail Designer 365 compatibility. Use Mail Designer 365 to create HTML responsive emails for Direct Mail without breaking a sweat – no HTML and CSS knowledge necessary. Our email builder software for Mac makes it easy to create a custom email template design for your email marketing goals. Now, you can design a responsive email template for Direct Mail using Mail Designer 365's email design tools. Send a Direct Mail email with an email template that you curated with a little help from our Direct Mail integration guide.

    Please refer to the following page for how to integrate Direct Mail with your Mail Designer 365 account:
    There are numerous bugs that come with HTML 5 video tags. A large number of devices have severe issues with them. For example, in most iOS versions, iPhones and iPads will display just a black rectangle that recipients can't interact with. When you tap the area where the video is supposed to be, nothing happens. It doesn't even try to open the video in the browser or open the appropriate app. Due to these factors that are beyond our control, we decided that it is best to no longer support the HTML 5 video tags. However, you can easily add video links by dragging a video placeholder into an image area. Then, you can choose your own preview image for the video. If you are linking to a YouTube video, you can generate a preview image by clicking "Generate preview."
    {S_978_50%}

    Please note: Email clients are picky when it comes to the HTML they will support - things that you can safely use in almost any web-browser won't necessarily work for emails.
    No. Currently, Mail Designer 365 is only available for Mac (macOS) computers.
    Combining different shapes and graphic elements is easy with Mail Designer 365.
    ‣ First, choose a graphic element that you want to use from the "Contents" section. 
    {S_753_50%}
    ‣ Then, drag the element into an image area.
    ‣ Repeat these steps with other graphic elements that you want to use for the combination.
    ‣ After you have dragged in all of the graphic elements you want to combine, then start arranging them to create the look that you want.
    ‣ You can move different elements forward or backward, depending on what kind of look you want.
    ‣ Just click on the graphic element that you want to move backwards or forwards.
    ‣ Click the appropriate button found on the left side of your screen.
    {S_754_50%}


    Please refer to the following page for how to combine different graphic elements:


    Mailchimp no longer supports the old APIs used by previous Mail Designer versions.

    Please update to Mail Designer 365 1.7 or later to use the latest Mailchimp 3.0 API.

    Mail Designer 365 1.7 is included with all Mail Designer 365 plans, owners of previous Mail Designer versions can purchase an upgrade plan.

    Mail Designer 365 offers multiple options for sending your email designs to your audience.

    Testmail

    Mail Designer 365's Testmail service is designed for sending internal test emails to yourself or to your team – i.e. to preview how your finished email design will look in the inbox.

    Test emails will be sent from the Mail Designer 365 Testmail service via our secure servers.

    Sending external emails

    You also have the option to send your email design to external email addresses (i.e. contacts who are not part of your Mail Designer 365 team) via Delivery Hub. These emails will be sent from your own email address.

    Choose between an email campaign: Send to a list of contacts or an individual mailing: Send to individual email contacts.

    Check out this guide for more information on sending email campaigns via Delivery Hub.

    In order to upload templates to your MailChimp account on your behalf, Mail Designer needs your MailChimp API key (a special kind of password).

    You can find your API key on your MailChimp. The MailChimp support pages have more information.

    {S_161_50%}
    Not all email clients have all fonts that we offer in Mail Designer available for the display of your newsletter. In order to prevent your design from getting broken on various email clients, you have the option to define fallback fonts that will be used in case the actual font you chose for your newsletter is not available. You can choose several fallback fonts to ensure that the style as close as possible.

    In our Mail Designer 365 Manual we have detailed instructions on how to set up a fallback font for your newsletter.

    There are three main ways to take a screenshot on your Mac:
    • Press "Shift" (⇧) + "Cmd" (⌘) + "4" then click and drag the mouse cursor to capture a specific area of your screen.
    • Press "Shift" (⇧) + "Cmd" (⌘) + "4" and then the space bar to capture a specific window or element on your screen.
    • Alternatively, press "Shift" (⇧) + "Cmd" (⌘) + "3" to capture your full screen.
    If you wish to uninstall Mail Designer from your Mac, you can start by removing any associated files.

    To get started, go to Finder. In the menu bar, choose "Go" > "Go to Folder ..."

    {S_1118}

    Enter this path into the search box:
    ~/Library/Containers/net.tower-one.MailDesigner
    to locate and then delete.

    Following this, enter this path into the search box:
    ~/Library/Group Containers
    and delete the Mail Designer folder.

    Finally, to uninstall Mail Designer from your Mac, go to the Applications folder (or wherever you stored the app) and move it to the trash.

    This will completely remove the app and all files from your Mac. To also remove its settings, open Terminal.app (from Applications > Utilities) and enter the following command:

    defaults delete net.tower-one.MailDesigner

    iOS recognizes phone numbers and other information like addresses and dates automatically, as these information can be used in different Apps.
    You can for example tap a phone numer in order to call it or tap an address to add it to your address book.

    Because of this, these information get highlighted in emails.

    macOS offers an auto save feature that automatically saves the last state of a document when closing the window. With this feature activated, you will not get asked if you want to save the last changes you made when you are trying to close the window.

    Your Mac allows you to activate the auto save feature directly via the System Preferences of your Mac:

    ‣ Open your Mac's System Preferences
    ‣ Open the "General" tab
    ‣ Untick the option "Ask to keep changes when closing documents"
    ‣ Afterwards, you need to restart your Mail Designer 365 app


    There are currently no educational discounts available for Mail Designer 365.

    For more information on pricing, please refer to our buyer's guide, where you can choose from a range of flexible plan options depending on your needs.
    To send a test email to another email address of your own, use the teamwork capabilities of Mail Designer. To do this, invite your other email address to your Mail Designer team:
    1. Open team management and invite another member.{S_1449}
    2. Then log out of your current Mail Designer account (top right)
    3. Now open the invitation link from the email from your second email address.{S_1450}
    4. Create a new account with the second email address.{S_1451}
    5. When you start the test send now, select the bottom option “Team”. {S_1452}
      This will send the test email to all members of the team, including your second email address.
    You can repeat these steps for other email addresses. Up to 10 team members or additional email addresses can be added.
    Occasionally purchases in the Mac App Store version of Mail Designer 365 don't get recognized properly
    Please try the following steps
    • 1. Please ensure that you are using the download version from the Mac App Store. The download version from the equinux website will not be able to recognize your license.
    • 2. In the Mail Designer 365 menu please select "Restore Purchases..."
    • 3. In case your license is still not being recognized, please delete the App and reinstall it from the Mac App Store. (Don't worry, your templates and settings won't be lost)

    Afterwards your license should be recognized.
    Since Mail Designer Standard templates are not responsive, it's not possible to open them through Mail Designer 365 and get the same results. You can manually import Mail Designer 2 Standard templates into Mail Designer 365 by dragging a template (or several templates) out onto your desktop. Then, drag them into the Design Chooser in Mail Designer 365. Unfortunately, we cannot guarantee that your design will remain intact because they are two completely different apps.
    There are exisiting tools on the market which claim to be able to convert Photoshop designs into HTML emails but the end result is essentially just an email made up entirely of images.

    In general, we recommend that customers avoid creating all-image designs, as this has a negative impact on the deliverability and loading speed of your email, as well as affecting your compatibility with various email clients. For example, some email clients do not automatically display images within emails and, if this is the case, your email will appear to readers as a blank page.

    In order to get your design noticed by your recipients, we strongly recommend that you use real text and images in your emails, as these types of designs will load quicker and also look good in all email clients. Use your Photoshop design as a reference and re-create it using Mail Designer 365's built-in layout blocks and design features.

    MailChimp offers visual "WYSIWYG" and code-based template editing.

    However, as every HTML engine works a little bit differently, we recommend that you stick to Mail Designer for editing, as changes made with MailChimp may cause issues with the look or layout of your designs.

    If you need to make any changes, simply re-upload a new version of your design and select it for your MailChimp campaign.

    On the other hand if you are a HTML code pro, just edit the HTML code with the MailChimp editor untill it fits your needs. We ask for you understanding that we can't offer support for this.

    Mail Designer 365 allows you to add lists within your text areas.
    ‣ Drag and drop a text area into your email template.
    ‣ Double-click on the text area.
    ‣ Type your list. Highlight the text where you want the list to appear.
    {S_885_50%}
    ‣ On the right side of the screen, you will find a side bar in which you can choose the list style under "Lists."
    ‣ Choose the list style you want.
    {S_886_50%}
    ‣ It will automatically transform your words into a list with your chosen bullet point.
    {S_887_50%}


    Please refer to the following page for further information on how to create a list:

    Currently, Mail Designer 365 does not directly support forms embedded within your email design. To make sure that your recipients are getting the optimal design that you created, we decided to leave out the HTML forms feature. Most email clients do not support HTML forms, which is why Mail Designer 365 was designed to not support HTML forms. If you were to add forms in your email design, there is no way that we could make sure that your recipients will get a functional survey that you created, since we have no control how email clients read and interpret your newsletter.

    However, if you needed to add a form to get feedback from your recipients, then we suggest linking to an outside form maker like Google forms. You can use an image or a specific text and add a link to your form.
    Cross-upgrading your Small Business plan is the only way to guarantee you have access to the very best Mail Designer 365 features.

    In addition to all the latest Design Ideas, a cross upgrade to Business or Business Premium also offers you some awesome new creative tools to make your email designs even better. Find out about your plan options here.

    How to cross-upgrade:
    Cross-upgrading your plan is simple. Head to my.maildesigner365.com. On the start page, you will see your current plan. Click on "Convert to team plan." Then, select the plan you would like to cross-upgrade to.

    {S_1115}

    Once you've completed your purchase, your plan will be available for you to use or to assign to a team member.
    With the versions feature of macOS, you can access different versions of your Mail Designer 365 email designs.

    To do so, please follow these steps:
    ‣ Open one of your Mail Designer 365 email design
    ‣ Choose "File" > "Revert To"
    ‣ Select a version or click "Browse all versions"

    HTML/CSS newsletters cannot differentiate between Windows 10 Mail and Outlook, even though Windows 10 Mail and Outlook have different behavior and render the same content differently.

    This means that it's only possible to have a newsletter render correctly in either Windows 10 Mail or Outlook 2013, not both. Due to Outlook 2013 being in more widespread use, we decided to provide correct rendering in Outlook 2013.
    Mail Designer 365 has a handy checking button that you can find on the top left.

    {S_774_50%}

    While you are designing and creating your newsletter, Mail Designer 365 continuously scans your email template for any issues as they occur. You will notice a number appear on the checking button in cases when Mail Designer 365 has found issues or potential errors in your email design.

    {S_775_50%}

    You can also click on the checking button whenever you want to check for design issues.

    Please refer to the following page for more information on the Checking feature in Mail Designer 365:


    Yes, you can use keyboard shortcuts for your alignment needs with Mail Designer 365.
    {S_734_50%}

    Please refer to the following page for keyboard shortcuts for aligning different objects in Mail Designer 365:

    When you insert a placeholder into your email design via the "Insert" menu, Mail Designer 365 automatically generates a default text for the link (e.g. Unsubscribe.)

    If you want to change this text - i.e. for a different language, or different phrasing, there are two ways to do so:

    1. Enter a text of your choice, e.g. "Manage your preferences", highlight this text and go to "Add Link" in the Style menu. Here you can choose "Placeholder" from the dropdown menu and enter the relevant placeholder (i.e. "unsubscribe".)
    2. Alternatively, you can insert a placeholder via the "Insert" menu and manually overwrite the default text. With this option, make sure the placeholder link is still attached to the text (you can check this by clicking on the text and going to "Link" in the sidebar.)
    You purchased VPN Tracker 365, VPN Tracker World Connect or Mail Designer 365? You can use the app on up to three personal devices per license.

    To do so, simply sign in to your account to use your plan on your Macs (or your iOS device where applicable) using just your equinux ID and password.

    You may use the software in parallel on one computer per license.

    If you want to use the software on multiple devices in parallel, or other family members or colleagues also want to use the software on their computers, you will need a separate license for each person or each parallel use.

    A VPN Tracker 10, VPN Tracker 9 or Spot Maps license can be active on one Mac at the same time. If you want to use the Software on multiple devices, you will need an separate license per device.


    Please update your version of Mail Designer 365. The latest version can be found here

    Older versions of Mail Designer 365 may not be compatible with Big Sur and can cause display errors. Don't worry, this update is included in with any Mail Designer 365 plan.

    All templates you want to upload to Campaign Monitor have to contain an unsubscribe link.

    To add an unsubscribe link to your template, please follow these steps:

    ‣ Choose the text area you want to insert the unsubscribe link to.
    ‣ Please choose "Insert" > "Campaign Monitor" > "Unsubscribe Link" from the top menu bar.
    You can now upload your design to Campaign Monitor.


    {S_213}
    New Mac? No problem. The latest version of Mail Designer 365 offers full support for Macs with M1 and M2 chips, as well as compatibility with the latest macOS versions, including macOS 15 Sequoia.

    Download the latest version here.
    When your email templates are rendered, an entire image area will become one image. This means that when you send your Mail Designer 365 email designs, all of the graphic elements that you add within one image area will be combined and turn into one image. As a result, the link that you add will apply to the entire image area instead of a single element.

    {S_822_50%}

    If you want to add multiple buttons with different links, the use layout blocks with multiple image areas. That way, you can add one button with its own link per one image area.

    {S_823_50%}

    Please refer to the following page for more information on text areas why a link is being applied to the entire image area instead of a graphic element:


    The "Edit" View on Mailchimp's website is not meant for a proper preview. Please click on "Preview and Test" on the top right corner of your screen. Then, choose "Enter preview mode."
    {S_713_50%}

    This should give you a better and more accurate view of how great your design will actually look!

    Please refer to the following page for further information on how to accurately view your Mail Designer 365's email design once uploaded on MailChimp:

    With Mail Designer 365, you are not able to embed MP3 files directly within the email designs. Most email clients do not support this, which can lead to problems when your subscribers open the email. To make sure that your recipients are getting the optimal design that you created, we decided to leave out the MP3 feature.

    However, you will be able to link to your MP3 file within your email design, as long as you upload your MP3 onto a third party host. Create a CTA button or add a text link into your design. Under the "Style" section, you will be able to click "Add Link." Just type the link to your MP3.

    Campaigns allow you to send newsletters to large audiences from any device, including mobile. Direct Mail is for sending emails to a few hand-picked contacts, like birthday greetings, personal offers, and transactional emails, directly from the Mail Designer app on your Mac.
    To use the redirect function in Apple Mail, try the following:

    ‣ Choose "Message" > "Redirect"
    {S_1064}
    ‣ Type the recipient's email address
    ‣ Click the "Send" button


    For more information, please read Apple's support page here.

    Note: We always recommend that you use the "redirect" feature rather than to forward your Mail Designer 365 email design.
    Campaign Monitor supports a few placeholder links, such as “Unsubscribe Link”, ”View in Web Link” (also called “Web Version”), and “Forward Link” (also called “Forward to a Friend”). Unfortunately, Campaign Monitor does not support custom styling on these links. Mail Designer text buttons are links with custom styling, and as such cannot be used with one of the aforementioned link targets when exporting to Campaign Monitor.

    Instead of text buttons that link to one of the aforementioned targets, please insert a normal placeholder link. For example, use the menu entry “Insert > Campaign Monitor > Unsubscribe Link” to add an unsubscribe link to your document.
    When you export your design directly from Mail Designer 365 using the Mailchimp integration tool, your images will be exported together with your template and hosted by the Mailchimp platform.

    Learn more about exporting designs to Mailchimp here.

    The software we sell on our website and the version sold on the App Store offer the same design features and purchase options.

    There are only two differences:

    1. The equinux Online Store will always provide you with a proper purchase invoice, which can be useful for you if claiming the purchase against your taxes.

    2. You can access the beta version when you purchase from the equinux Online Store. When you purchase through the Mac App store, you will not have access to the beta version.
    This points to an error while authenticating your email account. Try checking the following:

    • The username is wrong/incomplete. For example, iCloud accounts sometimes work with "username" but most times need the whole email address as a log in.
    • The password is wrong.
    • If you're trying TLS, try STARTTLS instead.
    • Maybe your server is using a custom port - though this is unlikely.

    If you have a Mail program you use (e.g. Apple Mail) try comparing the outgoing mail settings there and use the same settings in Mail Designer 365.
    {S_732_50%}
    In the world of email design, things are changing constantly. For this reason, it's important to bear in mind that many features available in legacy versions of Mail Designer may no longer work and that designs created in older versions may not be in line with today's modern standards.

    This applies in particular if you decide to upgrade your Mac to a newer macOS.

    When you upgrade to a Mail Designer 365 plan, you are paying for compatibility with the latest macOS versions, as well as compatibility with all the leading email clients and email service providers. Moreover, you also have ongoing access to new Design Ideas, creative tools and cutting edge features which our development team are working on all year round.
    Most email clients do not support this feature, which results in many bugs. Recipients may end up not seeing the video at all or the video refuses to play. This why Mail Designer 365 only supports linking to videos.
    {S_729_50%}
    To activate the mobile version of your email designs, please do the following:
    ‣ In the Menu, please select "File" > "Design options." 
    {S_724_50%}
    ‣ Remove the checkmark next to "Create version for mobile devices."
    ‣ Press "OK."
    ‣ Then please repeat the same steps and activate the Checkbox again.
    {S_730_50%}
    {S_731_50%}


    Once you have done this, you should be able to see the mobile modified Desktop version and you will be able to edit the layout blocks of the mobile view.

    Sometimes text you add for the desktop version of your newsletter will be too large or too small for your mobile version. In Mail Designer 365 it's easy to modify the text size for the mobile version of your newsletter to make it just the right size.

    In our Mail Designer 365 Manual we have detailed instructions on how to modify the text size for the mobile version of your newsletter.
    When you schedule a Newsletter campaign, it always gets sent with the exact version of the design you created it with. If you make changes to your design after creating your campaign, you will need to open the scheduled campaign and save it again for your changes to take effect.

    Detailed instructions for changing the design on a scheduled campaign:
    1. Open up your template in Mail Designer 365 and make the changes in your design
    2. Go to Delivery Hub and open your scheduled campaign
    3. The new version of your template will be picked automatically.
    4. Press Save to save your campaign with the new design
    5. Repeat for other scheduled campaigns using the same design


    Please remember, changing a template is only possible while a campaign is in the Scheduled State. If it has already been sent, the design cannot be changed.

    Mail Designer Campaigns does offer a link change service in case you accidentally used the wrong link in your design: How to edit a link in an email after sending

    There are a couple of things that you need to check.


    ‣ First, are you using MailChimp as your email service provider? If yes, make sure that you are not viewing your design on the "Edit" preview within MailChimp's website.
    ‣ Click "Preview and Test" on the top right corner of your screen. 
    ‣ Then, choose "Enter preview mode."

    ‣ If not, try changing the default line height of your text. The default is set at 1.5. Adjust the line height to fit your needs. Try to set the spacing to 1.0 height. Your text should no longer look jumbled up.
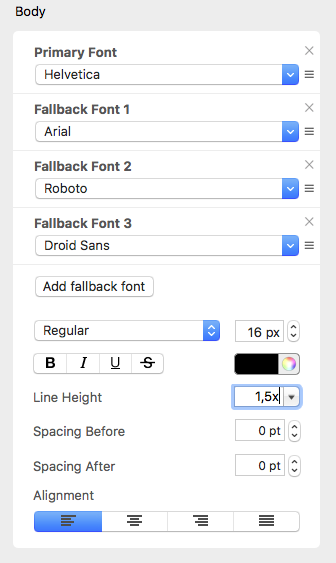
    {S_907_40%}
    When exporting your email design as HTML, selecting the option "Restricted Compatibility" omits the second HEAD tag in the HTML export.

    {S_1296}

    Mail Designer 365 uses the second HEAD tag to improve your design's compatibility with Yahoo Mail, however some email services think this is an error and are therefore unable to process the HTML.

    For example, if you are using Constant Contact and experiencing compatibility issues, please try this option.

    As part of the free Campaigns plan included with your Mail Designer 365 design plan, a Mail Designer 365 banner is displayed in the footer of emails sent via Delivery Hub:
    {S_1385_75%}

    These banners can be removed after switching to any paid Campaigns plan. Log in to your my.maildesigner365 account to explore the Mail Designer Campaigns plan options.

    If you've bought Mail Designer 365 in our store, you can get beta versions of Mail Designer 365. This feature is not automatically available if you bought Mail Designer 365 from the Apple Mac App Store. However, if you still wish to access the beta version, you can download Mail Designer 365 free from our website and login to your account with your equinux ID and password.

    To access the beta version, please follow these steps:
    ‣ Open Mail Designer 365 on your Mac. 
    ‣ Choose "Mail Designer 365" > "Preferences."
    {S_964_50%}
    ‣ Make sure to click the "Updates" tab.
    {S_966_60%}
    ‣ Check the "Get Early Access to beta versions" box.
    {S_968_60%}
    ‣ Since Beta versions are meant to test features and compatibility, Mail Designer 365 will remind you to have a backup of your app and designs:
    {S_969_60%}


    For checking updates, Mail Designer 365 will check for new versions on app start or you can:


    ‣ Go to "Mail Designer 365" > "Check for Updates…"
    {S_970_50%}


    Please refer to the following page for further information:

    ‣ Download the app.
    ‣ Go to your downloads folder and find the app.
    ‣ Drag the app that you downloaded and drop it into the Applications folder.


    Mail Designer 365 allows you to export your email templates as HTML files containing your design. You can reuse your design with other services or publish a copy as a webpage.
    ‣ Open your design
    ‣ Choose “Share" > "Website /HTML...” from the menu bar.
    {S_756_50%}
    ‣ Choose a location to save your design.
    ‣ Optional: Enter a custom name for the exported .HTML file
    ‣ Optional: If you plan on uploading your images to a separate web server, you can enter an absolute URL prefix for the images.

    Please refer to the following page for more information on how to export your email design as a webpage:


    You can sign up for a MailChimp account here.

    Please refer to the following page for a step-by-step guide on how to sign up for MailChimp:


    You can use your own GIFs or use one of the animations found in Mail Designer 365's content library.

    In order to add a GIF, please do the following:
    ‣ Drag a layout block with an image area into your newsletter
    ‣ Drag the GIF that you want to use into an image area
    ‣ Make sure to only add 1 GIF per 1 image area
    ‣ If you add multiple GIFs into 1 image area, only the last GIF added will work


    In Mail Designer 365 it is technically possible to create an all image email design, BUT we would strongly advise against it.

    Image based email designs are problematic for a number of reasons...

    Firstly, emails which are largely image-based are larger and generally take longer to load. If your recipient is viewing your email on a poor internet connection, it's highly likely they will not see any of the image elements. This is obviously not ideal if the majority of your design is images, as the reader will be greeted by a blank screen.

    Secondly, the likelihood of your email getting caught in a spam filter increases with the amount of image elements you include. This is a safety precaution put in place by many email providers, as spam emails typically contain a high quantity of images.

    Lastly, there are some people who prefer not to receive html emails, and have set up their email provider to only show them the plain text version of an email. If your email design is all image, there will be no real text to display to your recipient if they have these preferences in place.

    To summarize, we would always recommend you use a good mix of real text and images in your email designs to ensure that you will have no problems when it comes to sending. Feel free to get creative with graphic elements and images in your designs, but don't forget to insert text where possible to cover all bases. Happy designing!
    Mail Designer 365 has been developed especially for creating responisve newsletters
    Templates, which has been created with Mail Designer standard are perfect for custom layouts such as synopses and templates with your CI. Because of this, it is not possible to open Mail Designer standard documents in Mail Designer 365 and get the same results.

    Since Mail Designer Standard templates are not responsive, it's not possible to open them through Mail Designer 365 and get the same results. You can manually import Mail Designer 2 templates into Mail Designer 365 by dragging a template (or several templates) out onto your desktop. Then, drag them into the Design Chooser in Mail Designer 365. Unfortunately, we cannot guarantee that your design will remain intact.
    We currently only offer Mail Designer 365 as an annual plan. You can purchase a plan here.
    In Mail Designer 365, if you add multiple GIFs into a single image area, then only the latest added GIF will animate. To solve this issue, make sure to drag a layout block with multiple image areas. Afterwards, drag only one GIF per one image area.
    Crew Chat is directly integrated in the design window and the natural next step for your Mail Designer 365 Campaigns workflow. Click to upload to Crew Chat and view your design drafts, comments, and feedback all in one place, together with your team. Learn more.
    {S_1351_50%}
    The way Mail Designer 365 handles your images varies depending on how you choose to send your finished email design.

    Sending via our Testmail service:

    When you send a test email using our Testmail service, the images in your email are hosted on our secure servers.

    {S_1204}

    Sending via Delivery Hub:

    When you send your email design via Delivery Hub, Mail Designer 365 behaves the same way as all other email clients and embeds your images in the email. In this case, your image will not need to be hosted elsewhere.

    {S_1205}

    Exporting to Mailchimp, Campaign Monitor or Direct Mail

    When you use one of Mail Designer 365's direct integrations, your images will be exported together with the email design and hosted by the respective platform.

    Sending via another external service:

    The way images are handled by external services such as email service providers varies based on the provider. Some providers will host your images for you; however, many others will require you to host your images yourself.

    Mail Designer 365 has an option to enter your web server's URL during HTML export that lets you reference images that way. Learn more.
    {S_1206}

    Refer to the documentation provided by your ESP for more information on what is required.

    Yes, but not directly. You will need to add a mail account in Mail Designer 365 using your own server. It is not possible to do an HTML export and then send via Outlook because Outlook does not support this.

    This guide shows you how to configure your own email address to send directly from Mail Designer 365.
    If you downloaded the free demo version of Mail Designer 365 from the Mac App Store, your demo is not auto-renewing and will expire automatically at the end of your 7 day term.

    Once your demo has expired, you will need to purchase a plan to continue using Mail Designer 365. See all plan options in our store.
    Before purchasing, we strongly suggest all customers try our free, no-obligation demo. It includes nearly all major features.

    If you need to do more in-depth testing, we recommend checking out our affordable Mail Designer 365 monthly plans. You can access all features for an entire month to make sure it's a good fit for your business.

    Once you've tested all the features you need to, you can then get a pro-rated upgrade to a yearly plan if you decide to keep the app.
    Every area of text in your Mail Designer 365 email design should have a dedicated text style applied. This ensures your text will be formatted correctly after you have exported your template.

    If you add a text link to your email without also applying a text style, this could result in the link not being applied correctly after export.

    If your links are not displaying correctly following export to Mailchimp or another service, please open your design in Mail Designer 365, check every text area has a text style applied, then re-export your design.

    You can find out more about text styles in the Mail Designer 365 Manual.
    Sending out an email blast via SMTP to a larger group of recipents will potentially cause problems with the new procedures put in place. This means that if you continue to use this process, your emails will most likely get blocked by the recipient email provider (Gmail, Yahoo, etc.). This will result in only a few of your recipients actually receiving the emails.

    The thing triggering these blocks of email transmissions is not the nature of the email. Even personal Christmas Greetings will potentially get blocked if sent to a large enough audience. After all, how would the email provider know what nature the content of the email is? They block emails purely based on the number of emails being sent at the same time from the same origin.

    Here is how Mail Designer Campaigns can help in this situation:
    - When you don't have your own domain email address, we replace the From Address automatically with one of our verified Domains
    - This address replacement would look as follows: Original Address - supercoolmails@yahoo.com New Address: supercoolmails.yahoo.com@sentwith.maildesigner365.com
    - Since the Domain @sentwith.maildesigner365.com is fully DKIM certified, these emails would not be blocked due to DKIM issues.

    Alternatively if you do have your own Domain, Mail Designer Campaigns allows you to DKIM verify your send address, so you can send from your own Domain without being blocked by the providers.

    Are you new to Mail Designer? Why don't you try the Mail Designer Free Demo for Mac users.
    Yes, Mail Designer 365 is a paid upgrade for everyone who is upgrading from Mail Designer 1, Mail Designer 2, or Mail Designer Pro. After you have purchased a Mail Designer 365 plan, all updates are covered without additional cost for the duration of your Mail Designer 365 plan.

    Mail Designer Standard and Mail Designer Pro users can find out more about what's new in Mail Designer 365 on this page.

    Blend Modes allow you to control the way image elements (e.g. images, shapes, patterns, etc.) behave when layered together.

    If you use a normal Blend Mode when placing one image element on top of another, the bottom layer will be completely covered by the top layer:

    {S_1116}

    However, there are in fact multiple ways in which you can layer image elements. You can control this by applying various Blend Modes to modify the way two layers blend with each other.

    Access Blend Modes under the "Style" menu after clicking on a design element. Here you can scroll through the different modes to find the effect which works best for your design.

    {S_1117}

    You can find more detailed information about the different Blend Modes available in Mail Designer 365 in this guide.
    Open your design and go to "File > Export archive …" to export it.

    Then, please create a new support ticket and attach your exported design file and screenshots of the areas you are having problems with. Please also be sure to include a description of the issue you are having.

    This will allow us to take a look at your design and help you troubleshoot any issues.
    As an email sending service, Mail Designer 365 Campaigns is required to enforce spam prevention measures, such as GDPR in the EU and CAN-SPAM in the US. By law, marketing emails must provide a way for recipients to opt out of future emails.

    For this reason, all email campaigns sent via Delivery Hub must contain an unsubscribe link.

    Further benefits of including a clear unsubscribe link:
    • Automatic unsubscribe handling (Delivery Hub will remove unsubscribed contacts for you)
    • Clean email list – your campaigns are only being sent to engaged subscribers
    • Fewer spam complaints
    • Campaign-based unsubscribe rate tracking

    How to insert an unsubscribe placeholder in your email design
    To add an unsubscribe link to your email, click inside a text area in your design (e.g. in the email footer), then go to the app menu and select Insert > Mail Designer 365 Campaigns > Unsubscribe Link:
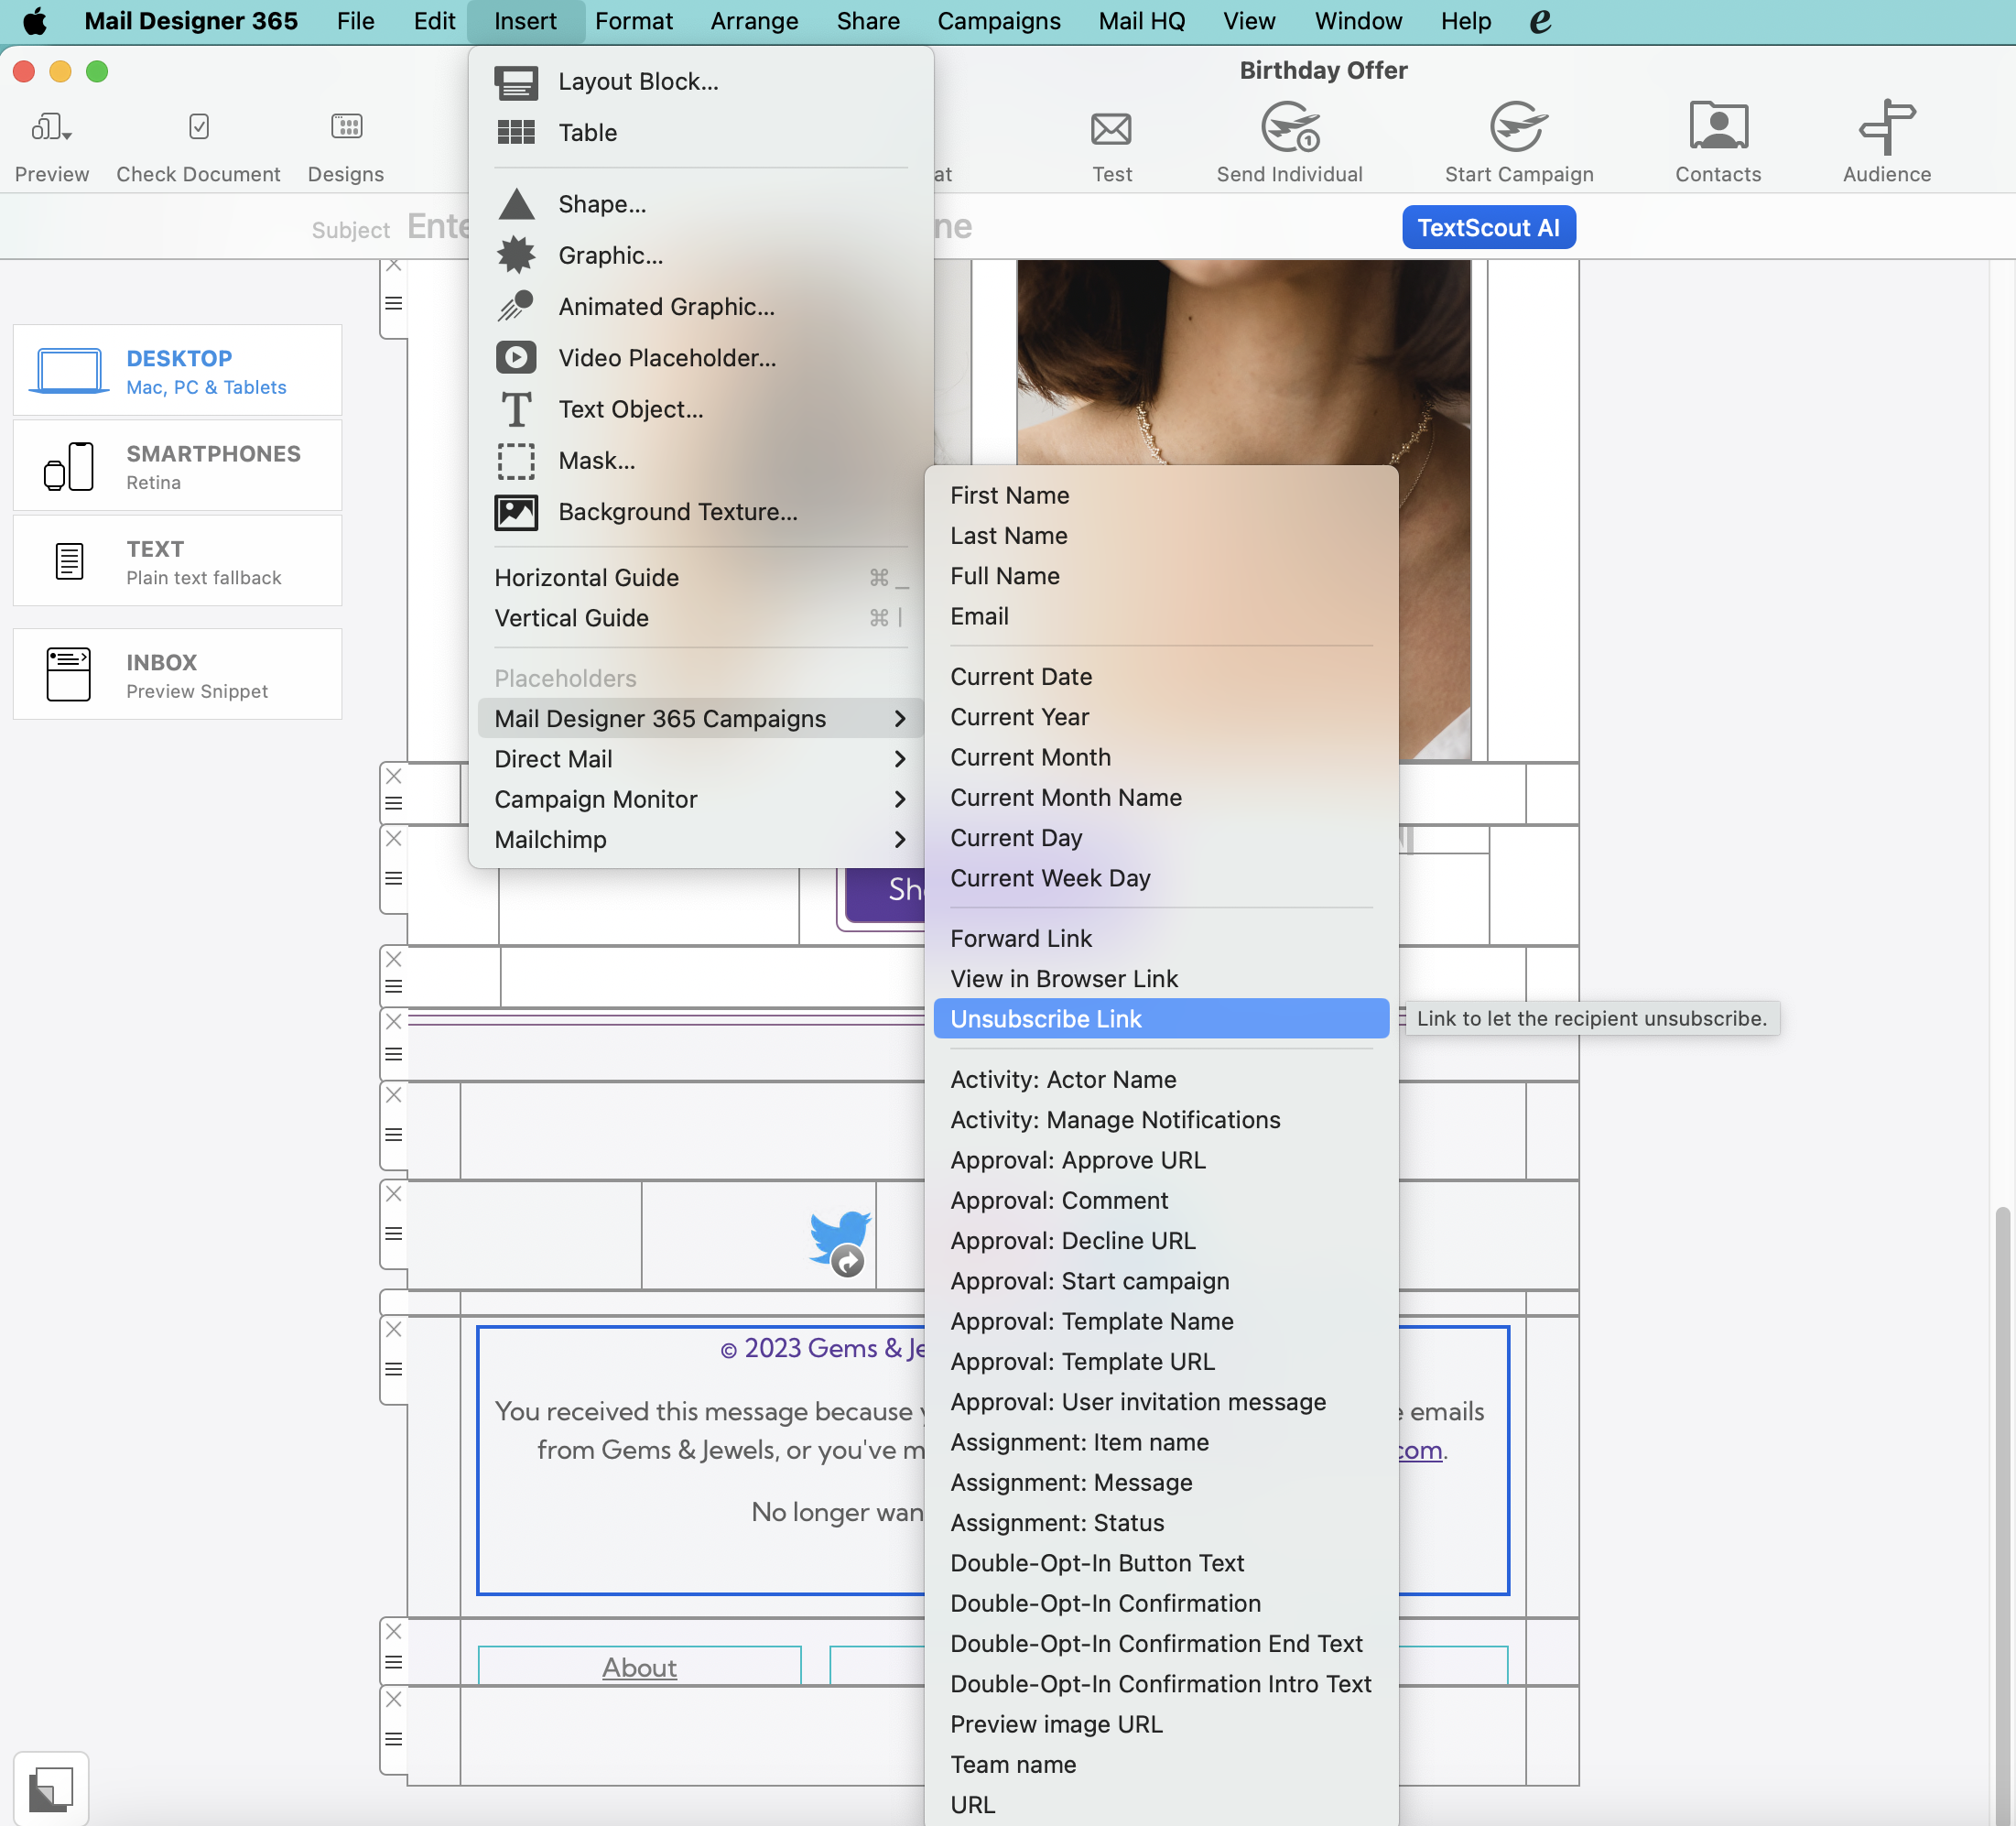
    {S_1388}

    When you send your campaign via Delivery Hub, recipients will see the unsubscribe option in the footer of your email:
    {S_1389}

    Learn more about Delivery Hub →
    There are two kinds of areas that can be found within layout blocks in Mail Designer 365: image areas and text areas. Here are the main difference between the two types of areas:

    Image areas can contain both text and images:


    {S_766_30%}

    {S_760_50%}

    {S_761_50%}

    Text areas can only hold text:


    {S_767_30%}

    {S_762_50%}

    Please refer to the following pages for more information on text areas:

    Please refer to the following pages for more information on image areas:


    Responsive newsletters are emails which change their layout and content depending on which device they are viewed. One newsletter opened in Mail on your Mac will look different if opened on an iPhone.

    Text blocks, for example, which are arranged side by side in the desktop version will appear one below the other when viewed on an iPhone.
    {S_399}

    With Mail Designer 365, you can create responsive newsletters. By editing images, graphics and text objects for the mobile version you can optimize your template for mobile devices.

    There are a couple of important things to keep in mind when testing Mail Designer 365 for the first time:
    • The Mail Designer 365 free download only allows you to view the app and open and edit email templates.
    • Without an active demo, you will be unable to save or send created templates.

    Activating your Mail Designer 365 demo

    To activate your free demo, please carry out the following steps:
    1. Start the Mail Designer 365 app on your Mac.
    2. Log in with your equinux ID and password or create an account.
    3. If you are starting the app for the first time, you will see a list of plan options. Here you can choose to activate your free trial.
    4. If you have previously logged in to the app, you can find the option to start your free trial in the top left corner under your name.

    {S_1244_70%}
    With Mail Designer 365, you can easily add a link into any text. You can also add multiple links within a text area.
    ‣ Mark the text that you would like to turn into a link. 
    ‣ Click "Add Link" from the left sidebar.
    {S_788_50%}
    ‣ You can now choose what type of link you want to add:
    {S_789_50%}
    ‣ Then enter your URL in the Link destination dialog box:
    {S_790_50%}

    Note: You can change the color and text options of your link using the regular font options.
    Your plan and price are locked in as long as they keep autorenewing. But don't worry: Once a plan has lapsed, you can subscribe to one of our current plans and get all the latest features and benefits.
    Responsive newsletters are emails which change their layout and content depending on which device they are viewed. One newsletter opened in Mail on your Mac will look different if opened on an iPhone.

    Text blocks, for example, which are arranged side by side in the desktop version will appear one below the other when viewed on an iPhone.
    {S_711}

    With Mail Designer 365, you can create responsive newsletters. By editing images; graphics; and text objects for the mobile version, you can optimize your template for mobile devices.

    You can change whether your text is automatically hyphenated in your text areas. To turn off the hyphenation, try the following:
    ‣ Go to "File" > "Design Options."
    {S_1060_50%}
    ‣ Add a check mark from the "Force hyphenation."
    {S_1061_50%}
    ‣ Click "Ok."


    Please refer to the following page for further information on how to turn on and off text hyphenation:
    Currently, Mail Designer 365 is only available for Mac (macOS) computers.
    Yes you can! Mail Designer 365 recently launched a brand new table editing tool to allow you to integrate tables into your email design.

    Currently, the Tables feature is only available in Mail Designer 365 Premium Business plans. To find out more about purchasing or upgrading to a Premium Business plan, visit this page.


    First open your template in Mail Designer 365. You can then insert a placeholder using the menu “Insert > Mail Designer 365 Campaigns”. From there, select “Unsubscribe Link”.
    You can use MailChimp placeholders in your Mail Designer 365 email designs. For example, you can use placeholders in order to personalize your mailings with the first or last name of the recipient. You can also preview the final result via the MailChimp website.

    To do so...
    ‣ Please go to the MailChimp website and log in. When you are ready, upload your design to MailChimp by creating a new campaign.
    ‣ Select the email design you just uploaded and click "Preview and Test."
    ‣ Next, click "Enter preview mode."
    ‣ Click the button for "Enable live merge tag info". You will now see your information for the placeholder you have entered.

    Please don't go! :-(

    If you're sure that your time with us is at an end then we've made it nice and easy to remove all your info from our database so that you don't need to wait for us to do it.

    Just log in at your License Manager, click 'Edit your Account' on the left hand navigation panel and, after a tearful farewell, click 'Delete Account'.

    If you do leave then we'd like to say thank you, bye and come back soon!

    Copying in pre-formatted text to your email design from another program such as Microsoft Word or Apple Pages can sometimes lead to difficulties in Mail Designer 365 - particularly if you don't have text styles set up. This is often due to how other programs copy text to the clipboard and can result in unwanted line breaks or other formatting issues.


    For best results, typing your email copy directly into the text layout blocks in Mail Designer 365 is most effective. Where this is not possible and you need to copy in text from elsewhere, we would recommend first copying and pasting your text into a plain text editor (such as TextEdit on the Mac) to strip any formatting before entering it into Mail Designer 365.


    If you have text styles set up already, you can use the "Paste and Match Style" option and you won't need to reformat anything.
    We offer a free trial for the Mail Designer 365 App and a free plan for testing Mail Designer Campaings. These trials can be used to test all functionality of the app and the service, helping users identify the best fit for their needs. After this trial period, all sales are final upon subscription, in accordance with our Terms and conditions.
     
    Please be aware that we cannot process refunds in the following scenarios:
    • Non-usage of the app or service
    • Failure to cancel your account within the cancelation period
    • Lack of features or functionality on your subscribed plan
    • Purchases made in error
    • Exceptional circumstances beyond our control
    • Violations to our Terms of Use
    Email design features are exclusively available in the Mail Designer 365 app for Mac. However, if you have set up a Mail Designer 365 team, Windows and other non-Mac users can use Mail Designer 365 Campaigns on any device and in any browser to:
    • View, comment on and approve email design drafts
    • Receive test emails
    • Manage email contacts and audiences
    • Schedule and send email campaigns
    • Access post campaign analytics

    Get your team started today with a free Campaigns plan for up to 10 team members!

    Although there is currently no direct way to save your email template as a JPG or PNG file, we'll show you how you can still do that by following these simple steps:
    ‣ First, export your Mail Designer 365 template as a PDF file. 
    ‣ Choose “File" > "Export as PDF…”
    {S_807_50%}
    ‣ Save your document as a PDF file.
    ‣ Now, open your PDF file.
    {S_808_50%}
    ‣ Go to your menu bar at the top.
    ‣ Choose “File" > "Save As…”
    {S_809_50%}
    ‣ A popup window will appears, and you can choose the format you want. You can decide if you want to convert the PDF into a JPG or PNG file.
    {S_810_50%}

    Please refer to the following page for more information on how to convert your email design as a JPG or PNG file:


    Safari may ask for confirmation the first time you download a file from a website. So when you download an app from our website, choose "Allow" when prompted to start the download.

    {S_1231}

    Note: All of our apps are digitally signed and verified for security, so you can download with confidence.
    You can import email addresses to Mail Designer 365 Campaigns using the CSV import tool. It is available at:
    https://my.maildesigner365.com/team/deliveries/addContacts

    The first three column names are Email,First Name,Last Name

    You can also add additional keys/columns and their attributes/values per entry as you go. The importer will automatically add the attributes to your contact database. All you need to do is define the keys/columns you plan to import in the first line.

    Example:

    You want to add a favorite color and a location for each of your contacts. In order to do so, define the first row of the CSV file with the following key/column names:

    Email,First Name,Last Name,Favorite Color,Location
    miller@example.com,Peter,Miller,blue,New York
    smith@example.com,Jody,Smith,red,San Francisco


    New contacts will be automatically

    Good to know: You can re-import the CSV at any time with additional columns to enhance your contacts. All new attributes will then be attached to your contacts.

    Need help? Download an example CSV file here for reference:
    Mail_Designer_365_Campaigns_Email_Import_Example.csv
    Mail Designer 365 uses a lot of web technology under the hood which could be picked up by your security software. Some security software, for example such as Avast, may therefore come into conflict with Mail Designer 365 - potentially causing the app to stop responding.

    To fix this, you could try white-listing Mail Designer 365 from the security software or exempting it from the checks. Otherwise, we recommend you get in touch with your security software's support team to find a possible solution.
    Yes, absolutely! We offer a free seven-day demo for Mail Designer 365 where you can explore the benefits of the software for yourself. In the seven-day trial version you can create and save your own designs and campaigns and also send test emails to yourself.

    Please bear in mind that the full subscription version of Mail Designer 365 is required to export your designs as HTML.

    You can download the free trial version here.
    Mail Designer 365 has pre-made buttons that you can use in your email designs.
    ‣ Within the "Contents" section of Mail Designer 365, you can click on the triangle icon or press Command⌘-2 to show shapes. 
    ‣ You will have many different button options under the "Buttons" subsection.
    {S_736_50%}
    ‣ Drag your chosen button to an image area.
    ‣ You can edit the message by double-clicking the text of the button.


    Adding a link to your button:


    ‣ Make sure to add a link to your desired landing page by double-click the button shape. 
    ‣ When you double-click the shape, the "Style" section will open on the left side.
    ‣ Click on "Edit Link & Background."
    {S_737_50%}
    ‣ Under the "Link" subsection, you will be able to click "Add Link" to add the link to your landing page.
    {S_738_50%}


    Please refer to the following page for how to add CTA buttons:

    Please refer to the following page for a brief overview of the Contents:

    Please refer to the following page for tips on how to strategically position your call-to-action buttons:


    Sometimes the VAT verification servers are temporarily not reachable, which can cause the error when trying to upgrade or purchase a Mail Designer 365 plan.

    In order to upgrade to Mail Designer 365 with your VAT, please try the following:
    ‣ Visit our  upgrade page.
    ‣ Purchase your Mail Designer 365 plan.
    ‣ Log in to your account
    ‣ Click on the button "Buying for a business?"
    ‣ Add a VAT ID
    ‣ Enter your full VAT number
    ‣ Click on "Validate VAT ID"
    Making the switch from Campaign Monitor to Mail Designer 365 Campaigns? Mail Designer 365 combines flawless HTML email design with easy to use sending tools and tailor-made audiences based on smart and adaptive attributes.

    Mail Designer 365 Delivery Hub makes it super straightforward for you to import your existing email lists directly from Campaign Monitor so you can get started right away. All you need is your Campaign Monitor API key!

    Check out our simple, step-by-step guide to get started →
    To certify the domain for sending, a DNS record must be added to the domain. This can only be done by the administrator of your domain within your company. Follow these steps:

    1. Find out who in your organization is responsible for managing domain entries. Keywords for such a role include: domain management / DNS management / DNS administration.
    2. Invite the administrator to your Mail Designer project by adding them as a new participant ‘Admin’ to your project team: my.maildesigner.com > Settings > Participants > Invite Participants.
    3. Contact your administrator and ask them to complete the domain verification using the information provided under my.maildesigner.com > Settings > From: Addresses.

    Once they have completed everything correctly, a checkmark will appear under ‘Domain verified’.”
    Mail Designer Campaigns offers a tool that easily lets you import your contact lists from MailChimp into Mail Designer Campaigns.

    Here are the detailed instructions for how to import your MailChimp Contact list into Mail Designer Campaigns
    If you need to force quit your software for any reason (e.g. your screen has frozen or the app is not responding) please do one of the following:
    • If the app you want to quit is in your dock, hold the "Option" (⌥) key and right-click on the app icon, then, select "Force Quit" from the menu.
    • You can also hold down "Option" (⌥) + "Cmd" (⌘) + "Esc" which will trigger a window with a list of apps you have running. To force quit one or more of these apps, simply select it from the list and click the "Force Quit" button.
    Mail Designer 365 allows you to choose your own preferred language. You have several options of languages to choose from like American English, British English, etc.
    ‣ Select a text area. 
    ‣ Choose "Edit" > "Spelling and Grammar" > "Show Spelling and Grammar" from the menu bar.
    {S_707_50%}
    ‣ A pop up will appear that will let you choose a language.
    ‣ Just click on the "Automatic by Language."
    ‣ You can choose your preferred language from the different options from the drop down menu.
    {S_708_50%}


    Please refer to the following page for more information on how to choose your spell check language:

    Placeholders can be used to insert subscriber details or unsubscribe link into your newsletter automatically when you send it via MailChimp or Campaign Monitor.

    To use a placeholder, please try the following:
    ‣ Select a text area
    ‣ Please choose "Insert" > "MailChimp" or "Campaign Monitor"
    ‣ Choose a placeholder
    {S_720_50%}
    {S_721_50%}


    Note: A placeholder cannot be used on text within an image area, you'll need to place your cursor in a text area to use placeholders.
    Yes, Mail Designer 365 allows you to save your customized layout blocks!

    Please try the following:
    ‣ Make sure the "layout" is visible (Choose "View" > Show Layout") so you can see the drag handle on the layout blocks
    ‣ Then you select the "Contents" tab on the right side
    ‣ Select the "Layout blocks" section
    ‣ Click "Ready-Made"
    {S_1070}
    ‣ Select the layout blocks that you want to save
    ‣ To select multiple layout blocks, you will need to click on a layout block, hold the shift key, and then select the other layout blocks
    ‣ Drag your layout blocks into the "My Instant Blocks" section"


    Note: You have the ability to save multiple layout blocks together or to save only a single layout block.
    When you use Mail Designer 365's HTML export feature, it exports separate HTML and image files. In order for the images to be displayed correctly to your recipients, they'll need to be hosted on a webserver.

    Many newsletter services take care of image hosting for you. You just upload the HTML file and images and they manage the rest.

    If you newsletter tool or service doesn't offer image hosting, you will want to upload images to your own web server. Mail Designer 365 has an option to enter your web server's URL during HTML export that lets you reference images that way.

    Can I hotlink to images from my website?

    No: Mail Designer 365 needs to adjust the dimensions of images precisely to work correctly with all email clients, so hotlinking to images on your website isn't supported. However you can export the images in your design and host them on your website's server as described above.
    Mail Designer 365 Campaigns offers multiple ways to work together as a team:

    Mail Designer 365 TeamCloud
    Save your design to TeamCloud to give other designers in your Team access, so they can edit and make changes to your design. Designs saved in TeamCloud are also automatically made available to use with Crew Chat and Delivery Hub for the rest of your team.

    Mail Designer 365 Crew Chat
    Use Crew Chat to upload your Mail Designer 365 design as a web-based preview. Team members can preview your work and post comments and feedback from any device – including iPhone, iPad, Windows, Android. It's the fastest way to get everyone's input.

    Mail Designer 365 Delivery Hub
    Access your team's Mail Designer 365 designs in Delivery Hub to send as targeted email campaigns to your audience. Manage email contacts and lists, schedule and send campaigns, and benefit from detailled post campaign analytics.

    Discover Mail Designer 365 Campaigns

    We have a range of plan options available to suit all needs.

    A Mail Designer 365 Business plan is intended for everyday email newsletters. This plan offers you access to all the latest Design Ideas, as well as the Borders tool and Teamwork features.

    Mail Designer 365 Business Premium plans are intended for users who consider newsletters to be a critical part of their marketing strategy.
    This plan offers you all the features available in a Business plan, plus:
    • 24h priority support
    • Tables tool
    • Blend Modes
    • Duotone Filters
    • Vibrancy effects

    If you want to cross-upgrade your plan from Small Business (our legacy plan) to Business or Business Premium, you can do so by heading to my.maildesigner365.com.
    If you have created a customized plain text version of your message, you'll need to add it to your MailChimp or Campaign Monitor newsletter separately.

    Simply copy Mail Designer 365's plain text version and paste it into your newsletter service's plain text section.
    {S_722_50%}

    Please refer to the following page for further information on plain text:


    Yes, you can easily adjust the opacity of any photo in your newsletter.

    ‣ Select the photo that you want to turn semi-transparent
    ‣ This will prompt Mail Designer 365 to open the "Style" section on the right side
    ‣ At the bottom, you will find the "Opacity" section
    ‣ Adjust the opacity slider to adjust the opacity of the photo you selected
    {S_1084}

    Mail Designer 365 usually starts within a few seconds. If the startup process takes longer, please check whether you have installed a virus scanner or other endpoint security software (e.g. from Sophos).

    This software can severely affect the startup process. If possible, please add an exception for Mail Designer 365 or the following directory:

    ~/Library/Group Containers/C3HCD5RMD7.net.tower-one.MailDesigner/Documents

    The tilde (~) represents your home directory. This exception is only necessary for read operations; write operations can still be monitored.
    Mail Designer 365 allows you to create custom preview devices, so you can preview your email template on a display with certain resolutions.

    ‣ Open your email template if it is not already opened.
    ‣ From the menu bar, choose "Mail Designer 365" > "Preferences."
    {S_782_50%}
    ‣ A popup window will appear.
    ‣ Click on the smartphone icon, labeled "Mobile."
    {S_783_50%}
    ‣ Click on the "+" icon at the bottom left of the window.
    ‣ Enter the resolution you want to use.
    {S_784_50%}
    ‣ Give this display option a name so you can easily find it in the preview options menu


    Please refer to the following page for more information on how to create custom preview displays in Mail Designer 365:

    Following send/export, all mobile responsive designs created in Mail Designer 365 will be rendered with some padding. The reason for this padding is to ensure optimal compatibility on all mobile devices and email clients.

    Oftentimes, this padding will appear more noticeable if a background color has not been set. In order to create the illusion of a full-width design, you can set the outer background to a different shade to create a subtle contrast between your email content and design background.
    No. We have found that SendX struggles with some HTML implementations, even with official HTML standards. Therefore, it is better to choose a delivery service that supports all common HTML standards. For example, you can use the integrated mailing service of Mail Designer 365.
    You can adjust the width of individual columns, if you have multiple text areas within a single layout block. You can also adjust the width of individual columns, if you have multiple image areas within a single layout block.

    However, when working with columns, you cannot adjust the number of columns within a layout block. You will need to select the appropriate layout block with the specific number of columns that you want (either 2 or 3 columns for text areas).
    {S_1000_40%}

    You cannot switch automatically from 2 columns to 3 columns or vice versa. However, you can just add another layout block with the correct number of columns. Afterwards, just copy the text from your original layout block and then paste the text onto the new layout block.

    If you want more than 3 columns for text areas, you will need to work with a single text area and space your message accordingly. In this scenario, you will basically be simulating your own table with multiple columns.

    Compared to layout blocks with text areas, you have more options when it comes to layout blocks with image areas. You can use a layout block with up to 6 image areas in a column style.
    {S_1001_50%}

    With this layout block, the image areas are displayed next to each other in the desktop view. However, please note that the image areas will be displayed on top of each other in the mobile view. This was designed so that recipients will easily be able to click on the images if they are linked to a landing page and so that the images are still clearly visible when the email is opened with a mobile device.

    In case you want to include a "Subscribe" link in the newsletters but MailChimp only shows HTML code that you cannot embed, here's a quick way:

    In Mail Designer 365, select "Custom" as link type. Then, insert the MailChimp subscribe tag. Remember, you must insert a link and not the login form for web pages. Forms can not be embedded in mails.


    In order to stop your Mail Designer 365 plan from renewing each billing period, you must deactivate automatic renewals.

    To do this, go to your my.maildesigner365 account and open the "Billing" tab. Here you can see your plan's renewal date and turn off automatic renewals for your plan, if you wish.

    {S_1222}

    Please note, by switching Auto-Renew off, the plan will stop at the given end date and possible pricing benefits will be lost. The renewal of an expired plan is not possible. After expiration you are then free to obtain a new plan, at any time you wish, for the then current price.

    Emails that contain only images are often flagged as spam because spam filters rely on text to evaluate the content's legitimacy. Without text, the filters may assume the email is hiding suspicious or harmful content, a tactic commonly used by spammers. Additionally, image-only emails can load slowly, frustrating recipients and increasing the likelihood that they will mark your email as spam.

    To improve your email's chances of landing in the inbox, follow these best practices:

    1. Avoid image-only layout blocks: Instead of using layout blocks that consist only of images, opt for blocks that combine text and images. This ensures your text gets displayed as actual text, not as part of a large image, which helps filters and recipients better understand your content.
    2. Include relevant text: Clearly explain the purpose of the email using text. This gives spam filters context to analyze and helps your audience engage with your message.
    3. Use alt text for images: Add descriptive alt text to each image. This ensures that even if the images don’t load, recipients (and spam filters) can still understand the email’s content.
    4. Maintain a good text-to-image ratio: A balanced approach, where there’s more text than images, can reduce the chances of your email being flagged as spam. The text gives spam filters more material to evaluate.
    5. Use a combination of image and text blocks: Combining both elements not only enhances readability and engagement but also prevents spam filters from interpreting your email as an attempt to hide important information in images.
    6. Use a reputable email service provider like Mail Designer 365 Campaigns: Many email service providers such as Mail Designer 365 Campaigns help optimize email structure and offer authentication protocols like SPF, DKIM, and DMARC to enhance deliverability.

    By following these guidelines and ensuring your email contains a mix of well-placed text and images, you can improve its deliverability and reduce the risk of it being sent to the spam folder.

    To save, please try the following:
    ‣ Choose "File" > "Save"
    ‣ A pop up will appear.
    ‣ Give your email design a name.
    ‣ Choose a category or create a new category by choosing "Custom" from the drop-down menu. Then, type in the name of your new category.
    {S_699_50%}


    Once you save your email design, it will be saved in Mail Designer app. You can access it from the Design Chooser. You can click on "My Designs" or search for it in "My Library."
    {S_700_50%}

    Note: In the demo version of Mail Designer Pro 3, saving of designs is only possible after your purchase.

    Mail Designer 365 needs unfiltered and unmodified access to these servers to function:


    • id.equinux.com
    • my.maildesigner365.com
    • data.maildesigner365.com
    • my.featurenotes.com


    If you are using a firewall or Endpoint Security Solution, please ensure access to these servers is granted and not modified.

    Mail Designer 365 may contact additional servers for some features, for example:


    • polyfill.io
    • www.gravatar.com
    • wp.com
    • api.rudderlabs.com


    To check whether links in your document are valid, Mail Designer 365 may try to contact these servers as well.
    You can rest assured that we continue to offer full support to our customers and have taken the necessary steps to increase our support capacity for you during this difficult time.

    Support Information
    • Our support team continues to be available for you during this time
    • We’ve updated all FAQs to cover your most common issues - checking our FAQs first might help you find the answer to your question faster.
    • The more information you include in your support request, the better. If you are experiencing a problem with a design, attaching the design file or screenshots of the issue can help us get to the bottom of this faster.
    • Support is only available for Mail Designer 365 customers. Users of earlier Mail Designer versions will need to purchase a Mail Designer 365 plan.
    • Priority is given to Mail Designer 365 Business Premium customers


    You can contact the support team at support@maildesigner365.com.
    If you want to view and manage your subscriptions on the Google Playstore, proceed as follows:
    https://support.google.com/googleplay/answer/7018481

    If you want to view and manage your subscriptions on the Apple AppStore, proceed as follows:
    View or cancel subscriptions
    Many of our users design personalized offers, exposés, or greetings with Mail Designer 365. Alternatively, they may want to test a direct mail to a colleague before a mass mailing. This is what 'Direct Mail' is intended for.

    The Direct Mail feature is not designed for newsletters. For newsletters, please create a Mail Designer 365 campaign and send it directly to your target audience.

    If you don’t have a warmed domain or custom email address, Mail Designer 365 offers a professional solution for sending email campaigns without the need for your own domain.

    How does it work?

    Mail Designer 365 uses its Mail Designer Delivery service, which ensures that your campaigns are sent reliably and securely from a trusted, pre-configured email domain. This avoids potential issues like deliverability problems caused by an unprepared domain or emails landing in spam folders.

    Why choose Mail Designer Delivery?

    • No Setup Hassle: You don’t need to purchase, warm up, or configure your own domain.
    • Trusted Reputation: Mail Designer’s sending infrastructure is optimized to ensure high deliverability.
    • Professional Appearance: Your emails are sent with an authenticated domain, giving a polished and professional look to your campaigns.
    • GDPR-Compliant Sending: All data is handled in compliance with GDPR, ensuring the privacy of your recipients.

    What’s the catch?

    While using a shared domain is a quick solution, a custom email domain (e.g., yourname@yourbusiness.com) is always recommended in the long term. This gives you full control and enhances your brand image. Mail Designer 365 supports this setup with tools to configure SPF, DKIM, and DMARC authentication for maximum deliverability.

    Ready to get started?

    Mail Designer 365 is perfect for sending individual emails or thousands of recipients quickly and professionally. Start your campaign with our delivery service today and reach your audience without worrying about technical setup or deliverability!

    Yes, Mail Designer 365 allows you to enter a text for the inbox preview of your email design. The inbox preview enables you to see the little text preview of your email whenever you open the inbox of the Mail application on your iPhone.
    ‣ Click the "Inbox" button to open the optimization window. 
    {S_771}
    ‣ Then, you can enter the subject line for your email, as well as the preview text that your recipient will see.
    ‣ On the right side, Mail Designer 365 will show you a preview.
    ‣ This will display how your recipient will see the inbox preview snippet in their inbox before even opening your email.


    Please refer to the following page for more information on the Inbox Optimization tool:


    Additional stamps can be purchased at any time, either through a Mail Designer Campaigns plan, which provides new stamps monthly, or through a one-time purchase of stamps:
    Monthly Stamps Plan
    One-Time Stamp Purchase
    Plans that are set to auto-renew may keep pricing benefits ("grandfathered pricing").

    By deactivating the auto-renewal option, you will automatically lose any of your existing price benefits (i.e. promotions or introductory offers.) This action cannot be reversed. Should you then wish to renew your plan at a later point, you will be billed at the regular plan price.

    Please be aware that your plan will also end if your payment method cannot be charged at the time of renewal (i.e. expired, lost or stolen). If you need to update your payment method, you can do so at any time in your my.maildesigner365 or my.vpntracker account.
    With Mail Designer 365, you can choose from a variety of different video placeholders.
    This allows you to link to online videos directly within your email design. Please note that Mail Designer 365 does not support embedding videos directly within your email designs.
    {S_714_50%}

    After you have added a video placeholder from the Contents panel, copy the link to the video into the link field.
    {S_716_80%}

    Mail Designer 365 allows you to use links from Youtube and Vimeo. In addition, you can upload your own MP4 files to your server or Dropbox account and copy the public link to this file into the video placeholder.

    If you are using your own MP4 files, the video will be played directly in the email application. However, this is only true if this functionality is supported by the email client. Videos will not be played directly in the email. Instead, your subscribers will be led to the online video.

    Please note that video clips you want to use in video placeholders must be uploaded to a third-party hosting website like YouTube or Vimeo. Video files that are only available on your Mac cannot be used in your email design.
    We offer every customer a no-strings-attached trial period of Mail Designer 365 before purchase. The trial can be downloaded free of charge from our website. This allows users to test the vast range of features and tools included in a full plan before making any financial commitments to the software.

    For this reason, we cannot offer refunds once a plan has been purchased. This information is also clearly stated in the terms & conditions which must be accepted before completing the checkout process.
    If you need something changed on the invoice, please contact us via our support page.
    You also have the option of sending us a direct message.

    Note: We cannot guarantee that we will be able to make any changes after the invoice has been issued. This depends on a case-to-case basis. Thank you for your understanding.

    Email marketing isn’t dead—it has simply evolved. While it’s true that inboxes are busier than ever, email marketing remains one of the most effective ways to connect with audiences when done right. Here’s why:


    1. People value quality over quantity: Subscribers are more selective about the emails they sign up for, so it’s crucial to offer valuable, engaging, and relevant content that stands out. Generic or repetitive emails won’t cut it anymore.
    2. It’s a personal choice: Unlike unsolicited messages on platforms like WhatsApp, email gives recipients control—they’ve opted in to hear from you. For many people this makes emails far more welcome than intrusive messages on other channels.
    3. Still an ROI powerhouse: Email marketing continues to deliver one of the highest returns on investment (ROI) in digital marketing. When you focus on personalization and value, email can drive conversions better than almost any other medium.


    While automation and messaging apps like WhatsApp are growing, they serve different purposes. Instead of replacing email, they complement a well-rounded marketing strategy. So, no—email marketing isn’t dead. It’s just more competitive, and that’s a good thing because it pushes brands to be better.

    Some kinds of software may cause issues with Mail Designer 365:

    1. Personal Firewalls
    2. Protection Software (e.g Virus Scanners, Malware Protection)

    Personal Firewalls usually ask the user, if an app should be allowed to send network traffic. It’s important to grant Mail Designer full network access. If you have already added rules for Mail Desinger, please whitelist Mail Designer.

    Protection Software often sees authentication traffic as a potential source of threat, as it isn’t able to analyze that traffic because of its very strong encryption. Please ensure Mail Designer is ignored by any protection software running on your Mac and allow this traffic to pass through.

    Here are some common examples of the types of apps mentioned above. If you are uncertain whether any of these applications may be installed on your system, try the following:

    • Open the app “Terminal”
    • Copy and paste the following command: kextstat | grep -v com.apple

    You’ll get a list of all kernel extensions that are not from Apple. Just compare that list with the identifiers in parenthesis below:

    • Little Snitch
      (at.obdev.nke.LittleSnitch)
       
    • Sophos Anti Virus
      (com.sophos.kext.oas, com.sophos.nke.swi)
       
    • Symantec Endpoint Protection / Norton AntiVirus
      (com.symantec.kext.SymAPComm, com.symantec.kext.internetSecurity, com.symantec.kext.ips, com.symantec.kext.ndcengine, com.symantec.SymXIPS)
       

    If you have a charge from equinux on your credit card that you do not recognize, it may be for one of the following products offered through the equinux Online Store:

    • VPN Tracker (VPN software for Mac, iPhone and iPad)
    • Mail Designer 365 (email newsletter design software for Macs)
    • tizi (iPhone and iPad accessories)

    Common scenarios

    Auto-renewing products

    VPN Tracker and Mail Designer 365 are offered as subscriptions. When a plan has been configured to auto-renew, the associated payment method will automatically be charged.

    Additional team-members added

    If multiple employees are using one of our products, they may have configured team billing. This means the associated credit card may have been charged, in order to add a new team member to an account.

    Invoices and other questions

    You can download your invoices from our website:

    If you have checked with your team and still have additional questions regarding a charge, please contact our support team. Be sure to include the details from your credit card statement and the last 4 digits of your card.

    Mail Designer 365 version 1.7 and onwards uses Mailchimp's API 3.0. Earlier versions of Mail Designer use API 1.3, which Mailchimp announced they would be switching off on 2nd April 2019 and thus may not be able to export to Mailchimp after that date.

    You can view a copy of all your invoices in our Online Store:

    You will find the invoices for your VPN Tracker 365 purchases in the section "Invoices", here:

    http://my.vpntracker.com

    You work in accounting and need access to the VPN Tracker invoices for your company? Please ask your VPN Tracker Team manager to invite you to you company's team with the role "Accounting". Afterwards you will receive emails as soon as a new invoice is available and you can dowload this from the web portal


    You will find the invoices for your Mail Designer 365 purchases in the section "Orders", here:

    https://my.maildesigner365.com

    You will find the invoices for your tizi products in the section "Orders", here:

    http://my.tizi.tv

    Other invoices can be found at http://www.equinux.com/goto/invoice
    ‣ If you would like to save a PDF copy of your invoice, then do the following:
     Press "Command + P"  
     Choose "PDF" > "Save as PDF"

    We don’t offer partial refunds. All of our 365 plans are valid for one year and you can cancel up to 10 days before the end of your term; however, if you do cancel, you will be able to continue using the software the expiration date of your plan.


    During the export to Mailchimp, Mail Designer needs to create a temporary campaign which usually is deleted after the upload. However, in rare cases, it's possible that something went wrong and these temporary campaigns are left over. You can safely delete them without it impacting your actual campaign. They start with MailDesigner365-Temporary-.
    If you use an FTP service like Filezilla, you will need to make sure that you export your email design to a specific folder on your FTP account.

    ‣ First, open your email design in Mail Designer 365.
    ‣ Choose "File" > "Export as HTML..."
    {S_1016}
    ‣ Give your folder a specific name
    ‣ Connect to your server
    {S_1017}
    ‣ Upload your folder on your FTP account. With Filezilla, you can type the location of your folder within your Mac under "Local site."
    {S_1018}
    ‣ Or you can find the specific folder within the Filezilla window and then right click the folder. Choose upload from the drop down menu.
    {S_1019}
    ‣ Make sure all of the files are added to the folder, including the images used for the email design.
    ‣ Find the specific location path of your folder. With Filezilla, you will need to click on where your folder is within the server. The specific location path of your folder will be found under "Remote site:"
    {S_1020}
    ‣ Click the paper airplane icon on the top right of Mail Designer 365
    {S_1021}
    ‣ Choose "Website / HTML..."
    {S_1022}
    ‣ Check the box where it says "Prefix image URLS with:"
    ‣ Add the specific location path URL of your folder
    {S_598}
    ‣ Click "Export"


    Whether you are using Filezilla or another FTP service, it is important to make sure that the location path URL of the folder is correct. Mail Designer 365 will rewrite all image paths and insert this URL in front of the image URL. This happens automatically for each image.

    With Mail Designer 365, you can choose any of the templates from the Design Ideas page as your email design starting point. Just click on any template and then click on the "Use this design" button to get started.

    You can also access any of the templates you have purchased within the "In-App Purchase Designs" found on the bottom right.

    When saving your design, you will have the option of creating different categories for your email designs. You will find them under your "My Library."

    Please refer to the following page for a brief overview of Design Ideas:


    Due to compatibility reasons, it is not possible to directly copy HTML code from other ESPs (email service providers) such as Mailchimp into Mail Designer 365.

    However, due to the user friendly nature of Mail Designer, it is easy for you to copy elements of an external design into one of our templates and recreate your original design.
    Yes, you can add video links into the mobile version of your Mail Designer 365 newsletter. Mail Designer 365 allows you to edit the mobile version of your email template independently from the desktop version, if you choose.
    ‣ Click on the smartphone icon on the left side to open the mobile version of your template.
    {S_746_50%}
    ‣ Drag a border line of an image area or text area.
    ‣ Mail Designer 365 will then give you the option to detach your mobile and desktop versions from each other.
    {S_748_50%}
    ‣ You can add a preview picture for your video adding a video placeholder within an image area by clicking "Contents."
    ‣ Then click the video placeholder icon:
    {S_749_50%}
    ‣ You will be able to add preview images with our video icons or with your own player overlays.


    Please refer to the following pages for further information on how to add video links into the mobile version:


    The possibility of grandfathering pricing is exclusively available for customers using the automatic renewal option. In cases where your plan cannot be renewed due to a problem with the payment method (i.e. expired, lost or stolen), the plan will be canceled after a few tries. You are then free to re-obtain your plan at any time you wish for the then current price tier.

    In order to profit from your existing price, please ensure you update your payment method prior to the renewal date.
    Ideally, we recommend keeping your unsubscribe rate below 0.5% for optimal performance.

    Rates above 1% can be a warning sign, as only a fraction of people who want to unsubscribe will actually click the unsubscribe link—many others will mark your emails as spam instead. This means a 1% unsubscribe rate could result in 2–3% of your emails being flagged as spam by providers like Google or Hotmail. Over time, this can harm your sender reputation and cause all your emails to land in spam folders.

    To reduce your unsubscribe rate, focus on sending emails only to engaged subscribers. Start by targeting those who have opened your emails within the past 365 days, and adjust this timeframe based on your audience’s behavior. Additionally, segmenting your audience to deliver more tailored, relevant content can significantly improve engagement and reduce unsubscribes.
    Currently, Mail Designer 365 does not offer an automatic snap alignment tool for design elements. However, guide lines are a great workaround that you can use to align text and images more precisely.

    Using guide lines


    Guide lines act as a visual guide to help you align different elements within your design.
    To insert a guideline, go to "Insert" > "Horizontal/Vertical guideline":

    {S_1119}

    Drag guidelines across your design to position them where you want to align objects, then use the line as a guide to align images, shapes, text, graphics, etc. throughout your design or just in one layout block:

    {S_1120}

    To hide the guidelines once you are done aligning, click on the "Hide layout outline" icon at the top right of the page:

    {S_1121}
    You can easily print all of your email designs with Mail Designer Pro.
    ‣To print a document, choose ”File" > "Print…” from the top menu bar.
    {S_742_50%}

    Please refer to the following page for more information on how to print:

    So you've already exported your email design to MailChimp, Campaign Monitor, Direct Mail etc, and you notice a mistake in your text or something you want to adjust. It may seem like the quick and convenient option to do this within the ESP in question's HTML editor, but in reality, it's not as straightforward.

    Because HTML is so complex when it comes to emails, even the slightest change could have drastic consequences for your email design. This is why we meticulously test every line of code used in the Mail Designer 365 app, so we can ensure compatibility with practically all email clients.

    Editing text, or any other element of your design, outside of Mail Designer 365 can have an impact on your newsletter's code and cause it not to be displayed as you intended it to once you've hit send. For this reason, we strongly advise all changes to be made within the Mail Designer 365 editor to ensure compatibility.
    Since Beta versions are meant to test features and compatibility, Mail Designer 365 will remind you to have a backup of your app and designs.
    Mail Designer is warning you that the images are low resolution because Apple Pages does not copy its images in retina quality.

    To work around this, we recommend the following:
    ‣ In Apple Pages, double the size of your graphic. For example, if you had a shape that has the dimensions 100x100, please increase that to 200x200.
    ‣ Copy and paste it into an image area in Mail Designer.
    ‣ Then, select the image.
    ‣ Right-click (or Ctrl+click) on the image.
    ‣ Choose "Original Size (Retina)" from the drop-down menu. This automatically shrinks the image but becomes retina quality.
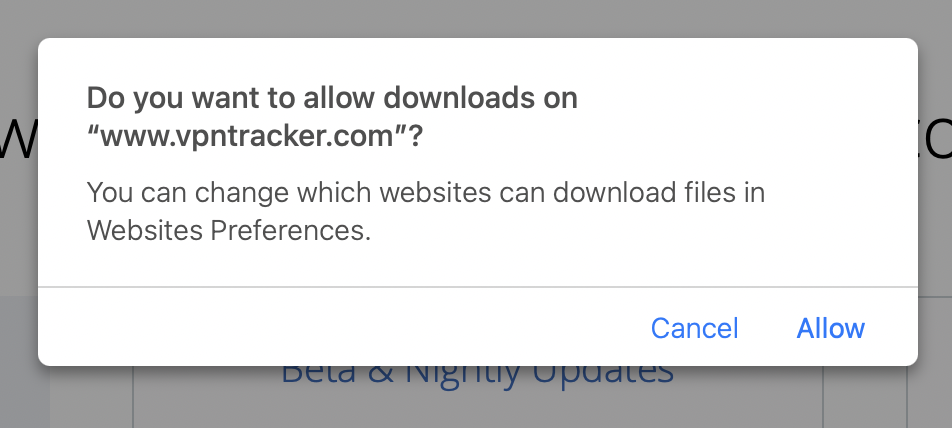
    {S_658_30%}


    Each campaign plan comes with monthly allocations of new Stamps. For instance, our basic plan 'Roma' includes 5,000 Stamps per month for your direct mail needs. In addition to this monthly option, you can also purchase Stamps as one-time buys, available in packages of 500, 1,500, or 4,000 Stamps.
    Mail Designer 365 gives you the option of sharing your email design with others via email. This option will send an email to a recipient with your template attached as a Mail Designer 365 document.

    ‣ Open the template you want to export.
    ‣ Choose ”Share" > "Share design document via Email...“ from the top menu bar.
    {S_758_50%}

    Please refer to the following page for more information on how to share your email design as an attachment:


    All templates you want to upload to MailChimp have to contain an unsubscribe link. By adding the Unsubscribe Link to your template you can ensure that your design will look correct on mobile devices and desktop clients and the MailChimp footer will be added at the end of your message.

    Add a MailChimp unsubscribe link

    To add an unsubscribe link to your template, please follow these steps:

  • Choose the text area you want to insert the unsubscribe link to.
  • Please choose "Insert" > "MailChimp" > "Unsubscribe Link" from the top menu bar.


  • Add a MailChimp Rewards badge

    You have a free MailChimp account and want to send a MailChimp campaign without the grey MailChimp Footer?
    Simply add the additional "Rewards" placeholder to your design together with the unsubscribe link and your campaign will be send without the MailChimp footer.
    You can add the "Rewards" placeholder by choosing "Insert" > "MailChimp" > "Rewards" from the top menu bar.

    Do you have a paid MailChimp account?
    In this case you don't have to add a MailChimp Rewards badge to your Mail Designer Pro document.

    An API key stands for an application programming interface key. The API key is similar to a password. Your email service provider may require you to enter an API Key before you can integrate it with Mail Designer. This is a way to add extra security. It requires you, the user, to enter additional authentication credential aside from your username and password.

    Luckily, this is an incorrect report.

    The XCSSET malware is a trojan that replicates project files via Xcode; it targets mostly developers. To get it, you would need to download an infected Xcode project and build it. It creates fake apps and also downloads and installs payload (adware and similar things). So it does not infect existing apps.

    An interesting property of XCSSET is that it's mostly implemented in AppleScript. The generated fake apps contain a folder "Contents/Resources/Scripts" in which those AppleScript files reside. You can right-click on VPN Tracker 365 or Mail Designer 365 in Finder, then click on "Show Package Contents" to check whether this Scripts folder or any AppleScript files (*.scpt) can be found; VPN Tracker 365 and Mail Designer 365 do not contain AppleScript files.

    The Mail Designer manual has information on how to create your design and export it to MailChimp. Once you have sent your design to the big monkey in the sky, you can create campaigns, manage subscribers, track clicks and more with MailChimp's tools.

    There are so many different MailChimp features, that we can't describe them all in the Mail Designer manual. But don't worry: the MailChimp team have created webinars, how-to manuals, guides and tips to help you get started.

    Your account details such as address and email can be edited in the account management using the following link:
    Edit equinux ID
    Some banks may have trouble processing credit card renewals which can cause your card to be denied.

    Generally, this can be resolved by a quick phone call to your bank. This should be your first port of call.

    Alternatively, you could also try the following:
    - Please try updating your card directly on our store page
    - Try a card issued by another bank (our store supports Mastercard, Visa and American Express)
    - Use PayPal (tip: often a problematic credit card will work when added to PayPal)

    You can manage your payment methods under http://store.equinux.com/storefront/subscriptions/.
    Our prices and the currency you purchase in vary depending on which country you are purchasing from. We are headquartered in Germany and our default billing is in Euros. In order to see your final price and currency including VAT where applicable, please go to our Online Store and select your country. We are unable to accept payments in a different currency than what is displayed in the Online Store.
    For the protection of our customers, all payments in our store are processed with 3D Secure technology. 3D Secure is an additional security mechanism that works with 2-factor authorization. After entering the card details, the transaction is passed on to the credit card company and must be explicitly approved by the customer. The approval is usually done via SMS, app or email. With the explicit approval before the transaction, we can help prevent credit card fraud.
    In order to use your card with 3D Secure, it needs to be actived for your card. Please contact your bank for this. Registration is often possible on the bank's website or via your banking app. Please see the links below for more details:

    With the 3D Secure procedure, authentication communication takes place directly between your computer and your bank. We have no influence on this. If you have any problems, please contact your bank or try to pay with another card or PayPal.
    When emailing a group of people, there have traditionally been several methods to do so. Examples of traditional "small group sending" include:
    • Regular email with several contacts in the To field
    • Regular email with several contacts in the BCC field
    • An email to a predefined group, such as an Outlook Group

    In recent years, email service providers have gradually increased email sending requirements. Once you approach 30 or more recipients for a single email, several problems can arise if you try to send that message using traditional email methods.
    • Your email service provider or the recipient's email service provider may raise suspicions of SPAM (unsolicited junk emails) sending, potentially leading to your account's suspension or temporary freeze.
    • Receiving an email with an extensive list of recipients often diminishes its perceived relevance to individual recipients, making it seem impersonal and more likely to be classified as junk mail.
    • Messages sent to a large number of recipients are often flagged by Junk Mail Filtering systems as Spam, increasing the risk of your message being blocked and not reaching its intended recipients.

    Especially with the latest Spam guidelines implemented by major email providers like Google and Hotmail, it's increasingly easy for your email address or domain to be blacklisted. This could result in your account being "Spam blocked," causing all your emails to be directed to recipients' spam folders. Removing this type of Spam block is a cumbersome process, so it's essential to avoid it.

    How can Mail Designer Campaigns assist you?
    • Mail Designer Campaigns enables you to fully verify your domain, ensuring optimal verification for your emails to reach recipients' inboxes.
    • If you don't have your own domain or prefer not to undergo the verification process, we can provide you with a custom address from a fully authenticated domain, significantly reducing the risk of your emails being marked as Spam.
    • We offer intelligent list management for your contact lists, allowing you to either send emails to all contacts or create targeted groups tailored to your audiences.

    In summary, recent Spam requirements have tightened regulations on small group sending. Therefore, if you regularly send emails to 10 or more people, we highly recommend using a mailing service like Mail Designer Campaigns.

    Begin your journey with Mail Designer Campaigns by uploading your contact list.
    Especially so-called "clean up tools" that also scan for malware can report false-positives. If you suspect VPN Tracker 365 or Mail Designer 365 to be infected, we recommend to upload your copy of the app to www.virustotal.com which is a free service that scans your uploaded files using several reputable virus scanners. If any of the virus scanners on this site flags the app, please contact us.

    How can I verify that my copy of VPN Tracker 365 or Mail Designer has not been modified?


    All our apps are properly code-signed by Apple, so macOS can verify that the app has not been tampered with. You can check the integrity by opening Terminal.app and entering the following command:
    spctl --assess "/Applications/VPN Tracker 365.app"

    Please note that double quotes around the path are required because the path contains spaces. If your copy is in a different location, please replace "/Applications/VPN Tracker 365.app" with the proper path to the app.
    The output may look like this:
    /Applications/VPN Tracker 365.app: accepted
    source=Notarized Developer ID

    If the app has been modified, an error message like this is printed:
    Mail Designer 365.app: invalid signature (code or signature have been modified)

    Please contact us if your copy of VPN Tracker 365 or Mail Designer 365 has an invalid signature.

    How can I verify that my copy of VPN Tracker 365 or Mail Designer 365 was signed by equinux?


    All our apps are properly code-signed by Apple, so macOS can verify that the app has not been tampered with. You can review this signature by opening Terminal.app and entering the following command:
      codesign -d -vv "/Applications/VPN Tracker 365.app" 

    Please note that double quotes around the path are required because the path contains spaces. If your copy is in a different location, please replace "/Applications/VPN Tracker 365.app" with the proper path to the app.
    The output may look like this:
    Executable=/Applications/VPN Tracker 365.app/Contents/MacOS/VPN Tracker 365
    Identifier=com.vpntracker.365mac
    Format=app bundle with Mach-O universal (x86_64 arm64)
    CodeDirectory v=20500 size=81953 flags=0x10000(runtime) hashes=2550+7 location=embedded
    Signature size=9071
    Authority=Developer ID Application: equinux AG (MJMRT6WJ8S)
    Authority=Developer ID Certification Authority
    Authority=Apple Root CA
    Timestamp=1. Jun 2021 at 17:22:51
    Info.plist entries=42
    TeamIdentifier=MJMRT6WJ8S
    Runtime Version=11.1.0
    Sealed Resources version=2 rules=13 files=684
    Internal requirements count=1 size=216

    The important parts to look out for here are the lines starting with "Authority": They list the chain of trust. The last entry must always be "Apple Root CA", the entry above must either be "Developer ID Certification Authority" or "Apple Worldwide Developer Relations Certification Authority" for App Store versions. The first entry must either be "Developer ID Application: equinux AG" (VPN Tracker 365), "Developer ID Application: Tower One GmbH" (Mail Designer 365 non-App Store), or "Apple Mac OS Application Signing" (Mail Designer 365 App Store).
    Again, if you see a different entry, please contact us.
    Viruses that infect existing applications are very rare on macOS, but they do exist. However, warnings that VPN Tracker 365 or Mail Designer 365 are infected are very likely false-positives, meaning the tool has incorrectly identified malware in these apps that is actually not there.
    Load more entries