
Frequently Asked Questions
If you have entered information or have started to apply settings in your application demo, those changes will remain unchanged - even after activating the software.
Once you have decided which product to purchase, the next step is to proceed to our Online Store and place your order. We accept all major credit cards, PayPal and bank transfers or checks, depending on your country.
After your order has been processed you will receive a confirmation for your purchase. This will confirm the items purchased, and additional payment instructions if you're paying via bank transfer or check (in those cases you will also receive an additonal email confirming your payment when it has been processed.)
In the purchase confirmation email you will also receive additional information like the download links for your purchased apps.
Purchasing through our online store is perfectly safe. All transferred information is encrypted via HTTPS - so it is secured against any potential threats.
- macOS 26 Tahoe
- macOS 15 Sequoia
- macOS 14 Sonoma
- macOS 13 Ventura
- macOS 12 Monterey
- macOS 11 Big Sur
- macOS 10.15 Catalina
- macOS 10.14 Mojave
- macOS 10.13 High Sierra
This depends on your settings. The most common setup is “Host to Network“, in which case only traffic to the specified remote network(s) will go through the VPN tunnel.
With a “Host to Everywhere” setup, all traffic – except traffic to the local network(s) – goes through the VPN. A Host to Everywhere connection requires a suitable setup on the VPN gateway.
Yes, this is possible. If you set up shared networking for the guest operating system it shares the network connection of your Mac and you can access all network resources that are accessible from OS X.
Note that if you are using remote DNS for your VPN connection, you will need to manually enter the DNS server in your guest operating system in order for it to work – there is no way for VPN Tracker to “transmit” this setting to the guest operating system
For information on how to set up VPN Tracker with Parallels, check out our VPN Tracker with Parallels Configuration Guide.
Yes, as long as your VPN gateway uses Extended Authentication (XAUTH) to request the passcode, you can use any third party token with VPN Tracker.
VPN Tracker Pro is a great asset if you are a consultant, a system or network administrator, or are working with multiple VPN connections:
- Export VPN connections for yourself and other users.
- Scan the remote network for services or to assist users.
- Connect to multiple VPNs at the same time.
- Manage a large number of VPNs using search, a condensed layout, and connection groups.
- Configure your Mac as a router to provide the entire network with a VPN tunnel using Network to Network connections.
By itself, the IPsec protocol does not support usernames. If you were given a username from your network administrator for connecting to your corporate VPN solution, there are generally two possibilities:
- Your corporate VPN solution uses the term "username" for "identifiers". Please try to use your username as the "Local Identifier" in VPN Tracker.
- Your corporate VPN solution is using Extended Authentication (XAUTH). You can enable XAUTH in VPN Tracker. The software will then prompt for your username and password when the connection is being established.
Unfortunately, we cannot guarantee this. Secure networking is a complex subject. VPN Tracker is extremely reliable and is used by customers around the world. But there are some rare scenarios in which VPN connections cannot be established (e.g. when a firewall is set up to actively block VPN connections).
We recommend using the free trial version to test VPN Tracker with your particular network and usage scenario.
If you require any assistance setting up your VPN connection with VPN Tracker, you can contact equinux support at any time.
Yes, NAT-Traversal is supported by VPN Tracker. VPN Tracker supports the current version of NAT-Traversal that uses UDP encapsulated packets on port 4500 (RFC 3947), as well as previous draft versions that send UDP encapsulated packets on port 500. In addition, Cisco's UDP encapsulation is also supported.
NAT-Traversal helps to establish VPNs from networks behind routers that perform Network Address Translation (NAT). Such routers can be found in many places: home DSL routers, wireless hotspots, Internet cafes, hotels, airports, etc. Many mobile ISPs (3G modems) also require NAT-Traversal to be used.
VPN Tracker automatically recognizes if NAT-Traversal is needed, and turns it on and off accordingly. It can even test your local router to see what NAT-Traversal method works best with it.
You can retrieve your equinux ID or password using this form.
If you don’t receive the email* containing your information, please note that the email may have mistakenly been marked as spam or junk mail, so be sure to check your email filters.
If you are unable to retrieve your username and password using the retrieval form, please contact the support team for assistance. When contacting us, please provide your old and new email adresses.
* Please note that the email will be sent to the address active on account. If your email address has since changed and you no longer have access to the previous account, you will need to contact the support team for assistance.
We ask for your email address in order to track the flow of our downloads and, if selected, send you news and updates about the product you've downloaded.
All information collected by equinux is used internally and will never be shared with any third parties without your permission. For more information about equinux's stance on privacy and security, please refer to the equinux Privacy Policy.
If you do not want to receive our newsletter, just unsubscribe using the link at the bottom of every newsletter you receive.
In our online store we accept a variety of payment methods:
- Visa
- Mastercard
- American Express
- PayPal*
- Personal/Business Checks* (US Orders Only)
- Bank Transfers* (European Union Only)
* License will be emailed to you once your payment has cleared.
When paying my check or bank transfer, you will receive an email with additional payment details once you have placed your order. Bank Transfer and Check orders are currently not available for Mail Designer Purchases
If you are an existing VPN Tracker customer and want to upgrade to VPN Tracker 365, you can simply install VPN Tracker 365 and your connections will automatically be imported:
Download VPN Tracker 365
Once you have VPN Tracker 365, you can purchase a VPN Tracker 365 plan.
VPN Tracker supports industry standard OpenVPN, IPsec (IKEv1 + IKEv2), L2TP, PPTP, SSL, SSTP, and WireGuard® protocols. This means that it will work with almost all devices supporting these types of VPN connections.
A list of tested devices is available on our website
What if my device is not on this list?
There are hundreds of VPN devices available on the market, and we'd love to offer device profiles for all of them. Unfortunately, it is impossible to test all devices. If your gateway is not in the list, it will probably still work with VPN Tracker.
Tip: Try out one of our custom protocol profiles to test your VPN connection free in VPN Tracker on Mac, iPhone or iPad.
To establish a VPN connection to a certain location (such as your office), you will need a VPN gateway at that location. This gateway could be a hardware VPN gateway device (see our compatibility page for compatible devices and setup guides).
The VPN gateway needs to be connected to the Internet (e.g. to a DSL modem or similar), preferably with a static IP address or it should be capable of using a service like DynDNS.org to map its dynamic IP to a hostname. Configuration is easiest if the VPN gateway is also the router (default gateway) of its network. If the VPN gateway is not the router of its network, a suitable routing setup may be necessary for traffic over the VPN to be routed correctly.
Configuration details can be found in the configuration guides for specific devices.
- If you haven't already, you can download VPN Tracker using this link.
- After the download has completed, launch the app and click the "Login" button in the top left-hand corner of the app home page.
- Enter your equinux ID and password in the space provided. Hint: This is the login you first created when purchasing VPN Tracker in our online store.
Are you a World Connect User?
You will need to download VPN tracker World Connect. You can do so using this link. VPN Tracker World Connect must be installed using the App Store. Once you've installed the app on your device, sign in with your equinux ID and password.
By default, traffic to the remote network cannot be sent through the VPN tunnel if it is using the same network as the local network.
Resolving a Network Conflict using Traffic Control
You can use Traffic Control and VPN Tracker will send non-essential local network traffic over the VPN.
Activate Traffic Control: > Go to Advanced > Traffic Control > Check "Force traffic over the VPN if remote networks conflict with local networks"
Note that you will never be able to reach the following addresses over VPN: The IP address of your local router, your DHCP server, and your DNS server(s). If you need to reach those IPs over VPN, you will have to resolve the network conflict instead of using Traffic Control. The same applies for any IPs that you need to reach locally and over VPN.
Resolving a Network Conflict Manually
You have two basic options for resolving a conflict:
- Change the local network to use a different network address. In most situations, this will entail changing the LAN settings on the local router (including DHCP settings if DHCP is used).
- Change the remote network to use a different network address. With most setups, this entails changing the LAN on the VPN gateway (including DHCP settings if DHCP is used), and changing the IPs used by devices on the VPN gateway's LAN (or triggering a DHCP refresh, if DHCP is used). If the LAN is used in the VPN settings (such as for policies or firewall rules), these will need to be changed as well. Finally, change the remote network in VPN Tracker to match the new settings
If you decide to change the remote network, it makes sense to choose a private network that less commonly used. According to our informal statistics, conflicts are least likely using these networks:
- Subnets of 172.16.0.0/12
- Subnets of 192.168.0.0/16, excluding 192.168.0.0/24, 192.168.1.0/24 and 192.168.168.0/24
If these are not an option, use a subnet of 10.0.0.0/8, excluding 10.0.0.0/24, 10.0.1.0/24, 10.1.0.0/24, 10.1.1.0/24. However, since wireless network operators sometimes choose to use the entire 10.0.0.0/8 network, the first two options are preferred.
If you have a more sophisticated VPN gateway, in particular a SonicWALL, you may be able to set up an alternative remote network on the VPN gateway that is mapped 1:1 through Network Address Translation (NAT) onto the actual network. Users can then connect to this network instead if they have a conflict of networks. We have a guide available that describes this approach for SonicWALL devices.
If the conflict is caused by virtual network interfaces (e.g. Parallels, VMware), see here for more information.
http://www.vpntracker.com/interop
For a general introduction to computer networking, VPNs and IPsec, there are several excellent introductions available online or as books, see for example here.
If you experience specific configuration problems, our technical engineers are happy to provide support for setting up VPN connections with VPN Tracker. In many cases, connection problems are related to misconfiguration of either VPN Tracker or the VPN gateway.
If you provide
- A problem description and information on what you've already tried
- A Technical Support Report from VPN Tracker ("Help" > "Generate Technical Support Report")
- Screenshots of the VPN gateway configuration
- A log from the VPN gateway
we can usually quickly spot the cause for a problem and provide advice on how to resolve it.
As there are several factors unrelated to VPN Tracker or the VPN gateway that can influence connectivity (e.g. firewalls/routers in between VPN Tracker and the VPN gateway), we cannot guarantee that a connection can be established under any circumstances.
While we try our best, our support options may be limited if
- you use a device which we did not test ourselves (most devices work just fine with VPN Tracker, though, and we're happy to take a look even at issues with untested VPN gateways)
- you do not provide the information we need in order to assist you (see above)
- your network administrator does not cooperate
- you change connection parameters while we're trying to debug the settings
There is a known bug in the Watchguard firmware that is causing a lot of trouble. Currently, we still do not know why VPN Tracker is triggering this bug, as the Windows client seems to not trigger it. We talked with Watchguard, but even they could not tell us what we are doing wrong. Basically the tunnel dies internally in the Watchguard (it's still shown as open and established, but traffic arriving over this tunnel is rejected as if the tunnel was closed).
If you are using a Branch Office VPN at the moment, try switching to a MUVPN if possible. MUVPN works with VPN Tracker as well and usually yields for better results.
Please refer to the following description.
If your credit card is being refused, please check the following information, for possible mistakes or mismatches :
- Please check the credit card number you have entered carefully for possible typos
- Make sure the expiration date entered is correct
- Check whether the security code you entered matches the code on your card: American Express cardholders can find the 4-digit code on the front of their card, other cardholders can usually find a 3-digit code on the back.
- Try another credit card, if you have access to one
- If you are certain your information is correct and your card is still not being accepted, it might be due to a technical issue with our credit card gateway. Please try again later.
You can view a copy of all your invoices in our Online Store:
You will find the invoices for your VPN Tracker 365 purchases in the section "Invoices", here:
http://my.vpntracker.com
You work in accounting and need access to the VPN Tracker invoices for your company? Please ask your VPN Tracker Team manager to invite you to you company's team with the role "Accounting". Afterwards you will receive emails as soon as a new invoice is available and you can dowload this from the web portal
You will find the invoices for your Mail Designer 365 purchases in the section "Orders", here:
https://my.maildesigner365.com
You will find the invoices for your tizi products in the section "Orders", here:
http://my.tizi.tv
Other invoices can be found at http://www.equinux.com/goto/invoice
‣ If you would like to save a PDF copy of your invoice, then do the following:
Press "Command + P"
Choose "PDF" > "Save as PDF"
Your equinux ID is your personal account at equinux. You can use it to purchase and activate products & licenses.
The first time you shop in our online store, you'll be asked to create an equinux ID. After your purchase, software licenses are automatically linked to your equinux ID and can be activated by simply entering the same equinux ID and password you used during purchase.
You can usually find the password for your equinux ID in the Keychain or your password app, listed under "id.equinux.com".
If you have forgotten your equinux ID and/or password, use our login & password retrieval form.
Our activation process requires that your Mac accepts cookies.
‣ To check this, please open up Safari. ‣ Click on "Safari" in the main menu at the very top of the screen. ‣ Choose "Preferences." ‣ Select the "Privacy" tab and verify that cookies are always accepted. ‣ Make sure JavaScript at "Security" is also activated. ‣ Please close Safari. ‣ Restart the application and retry the activation.
If you need to transfer a license to another equinux ID, you can easily do this yourself at my equinux.
‣ First log in with your equinux ID and password: http://my.equinux.com ‣ Click the checkboxes for each product that you want to transfer ‣ Click the "Transfer" button below and enter the equinux ID or email address of the new license owner and click next. ‣ Finally click "Confirm" to complete the transfer. The system will transfer the license, display a message and email both the old and new license owner that the license has been transferred.
VPN Tracker 365 Plans cannot be transfered to another equinux ID. However, under https://my.vpntracker.com you can assign a plan to a colleague so they can use one of the VPN Tracker 365 plans that are connected to your account.
This is especially useful if you are the admin of all VPN Tracker licenses in your company and want to manage who can use one of the purchased plans.
Don't worry – it happens to all of us!
Just head on over to our login retrieval page, enter your equinux ID or email address and we'll send you your details.
Recently changed your e-mail address? Send us a message!
Configuration guides for configuring VPN Tracker with Cisco devices are available here.
Configuration guides for Cisco Small Business (Linksys) devices are available here.
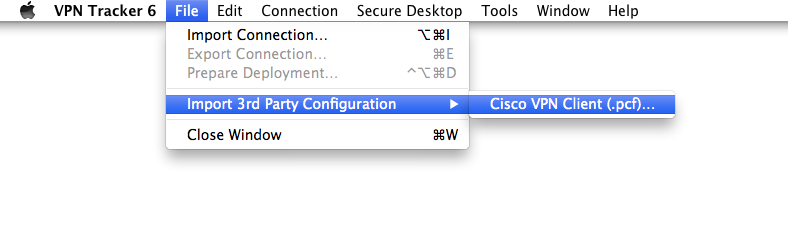
Import of Cisco IPsec VPN Client Configuration Files (.pcf)
Cisco VPN Client configuration files that use group password authentication can be imported into VPN Tracker:
‣ "File" > "Import 3rd Party Configuration" > "Cisco .pcf"
With one of the more recent firmware updates Secure Computing changed their implementation of the VPN related standards. These changes break VPN Tracker's ability to successfully establish a phase 2.
The problem has been resolved by Secure Computing in firmware 7.0.0.07. (epatch 7.0.0.06.E35)
For a certificate to be available in the "Local Certificate" list, it must be present in the Mac OS X Keychain with its corresponding private key.
You can easily check this in the Keychain Access application: If a certificate is listed under "My Certificates" (and not just "Certificates"), its private key is available and you will be able to select it in VPN Tracker as the "Local Certificate".
Important note for CheckPoint VPN users:
The Mac OS X Keychain Access application currently does not understand how to read private keys from some CheckPoint generated certificates.
To properly import the certificate into the Mac OS X Keychain, first convert it using the openssl command line tool:
- Open a Terminal ("Applications" > "Utilities" > "Terminal")
- Convert the certificate to PEM format:
openssl pkcs12 -in /Users/joe/Desktop/MyCheckPointCert.p12 -out /tmp/out.pem
Replace /Users/joe/Desktop/MyCheckPointCert.p12 with the path to the actual certificate that you want to convert.
You will first be asked for the password that the certificate is encrypted with. If you do not know it, please ask the administrator who has created your certificate for you. You will then be asked twice for the password that will be used to protect the exported PEM file. You can use the same password that the original certificte was encrypted with. Note that no characters will appear on screen while you type in your passwords. Simply type the password and press the return key.
- Convert the PEM file back to PKCS#12 (.p12) format:
openssl pkcs12 -in /tmp/out.pem -export -out ~/Desktop/MyFixedCheckPointCert.p12
Replace /Users/joe/Desktop/MyFixedCheckPointCert.p12 with the path where you want the fixed certificate to be stored.
You will first be asked for the password that you have just used for exporting to the PEM file, and then for a password to protect the fixed .p12 file with. You can again use the same password for everything.
Now double-click your fixed certificate file to import it into the Mac OS X keychain.
The following article describes where VPN Tracker stores its data in case you need to make manual backups instead of using Time Machine.
VPN Tracker stores all its data files in the standard system locations as
recommended by Apple. Depending on the fact if these are system-wide or
per-user files, they are either found in /Library (system-wide)
or ~/Library (per-user), where ~ is a placeholder
meaning "home of the current active user".
To access the system-wide library folder:
- In Finder Choose "Go" > "Go to Folder ..."
- Enter
/Library
To access the user library folder:
- In Finder Choose "Go" > "Go to Folder ..."
- Enter
~/Library
VPN shortcuts, all information related to your equinux ID, accounting data, scanner results, and window positions are per-user settings.
For a full backup of all your settings, you need to backup the following files and folders:
/Library/Application Support/VPN Tracker 365/Library/Preferences/com.vpntracker.365mac.plist~/Library/Application Support/VPN Tracker 365~/Library/Preferences/com.vpntracker.365mac.plist
Backup your keychain
Please note that passwords in VPN Tracker are usually not stored in any of the locations named above but in your keychain. If you have no external backup of all your passwords, be sure to also backup your keychains which can be found in ~/Library/Keychains
Current Firmware (Fireware XTM)
WatchGuard Firebox X Edge e-Series devices with Fireware XTM (Fireware 11) are fully supported in current versions of VPN Tracker. For details please see our configuration guide.
Older Firmware
Devices running an older firmware may often work using the following setup. Please note however that we can't guarantee that this setup will work in all cases.
Start by creating a new user on the Firebox Edge and then configure MUVPN support for this user.
In VPN Tracker, use a "Custom Connection" device profile as the basis for your new connection.
Map the WatchGuard settings to your VPN Tracker configuration as shown in the table below:
| Watchguard | VPN Tracker |
|---|---|
| Account Name | Local Identifier |
| Shared Key | Preshared Key |
| Virtual IP Address | Local Address |
| Authentication Algorithm | Phase 1 and Phase 2 Hash/Authentication Algorithms |
| Encryption Algorithm | Phase 1 and Phase 2 Encryption Algorithms |
| Key expiration in hours | Phase 1 and Phase 2 Lifetime |
The following settings are independent of your specific MUVPN configuration:
- Local Identifier Type: Email (even if it is a name and not an email address)
- Exchange Mode: Aggressive
- Phase 1 Diffie-Hellman Group: Group 2 (1024 bit)
- Perfect Forward Secrecy (PFS): off
Finally make sure the that VPN Tracker's "Network" setting is set to "Host to Network", and the correct Remote Network (i.e. the network that you want connect to through the VPN) is used (e.g. 192.168.1.0/255.255.255.0).
If you're running FortiOS 3, please make sure you are running at least MR6 patch 2. Previous firmware releases have an issue that will cause the device to respond incorrectly to VPN Tracker's attempts to use XAUTH in combination with an Aggressive Mode based connection.
SonicWALL Simple Client Provisioning with VPN Tracker is available with all SonicWALLs running SonicOS 4.0 or newer and all editions of VPN Tracker.
If you are still using VPN Tracker 6 or earlier, Professional or Player Edition is required.
SonicWALL Simple Client Provisioning requires VPN Tracker to send an initial data packet to the VPN gateway that is so large that it may be split ("fragmented") into two IP packets. Some routers are known to not let these packets pass.
If a router between VPN Tracker and the SonicWALL is affected by this problem, you (or your SonicWALL's admin) will notice no connection attempt arriving at the SonicWALL when Simple Client Provisioning is turned on (i.e. there will be nothing in the SonicWALL's log, and a packet trace will show no packets from VPN Tracker), but everything will work fine with DHCP over IPsec.
Routers known to have these problems:
- AirPort Extreme with firmware versions prior to 7.3.1, works when upgraded to 7.3.1
SonicWALL Simple Client Provisioning enables VPN Tracker to automatically retrieve the settings for the VPN connection from supported SonicWALL VPN gateways. For most users, it is only necessary to configure the SonicWALL's WAN IP address in VPN Tracker – everything else happens automatically.
For a list of supported SonicWALL devices, please refer to this FAQ.
Guides for this router can be found in our Configuration Guides.
Here is a list of products that are compatible with VPN Tracker:
For a list of compatible devices, please refer to this page.
If you router is not in the list please refer to this FAQ and the VPN Tracker manual for help determining compatibility.
Please note that the local router (i.e. the router at the location where your Mac with VPN Tracker is) in most cases does not have to be specifically compatible with VPN or VPN Tracker. Almost all routers work fine with VPN Tracker.
One of our customers has kindly provided instructions on how to integrate Cisco EasyVPN and VPN Tracker with a DMVPN setup:
When connecting via SonicWall SCP or SonicWall IKEv1 with DHCP, VPN Tracker 365 for Mac requests an IP address from the SonicWall gateway using the DHCP protocol. For this request, VPN Tracker 365 modifies the MAC address slightly, making it different from the actual MAC address of your device. This allows administrators to assign a fixed IP address when your Mac is connected via LAN or WiFi and a different IP when it’s connected through VPN.
This modification sets a specific bit in the MAC address, marking it as a self-assigned address rather than a factory-assigned one.
Example:
Original MAC address: 00:1B:63:B7:42:23
VPN Tracker MAC address: 02:1B:63:B7:42:23
Starting with macOS 15 Sequoia, Apple defaults to using a rotating MAC address for WiFi connections, labeled as a “Private Wi-Fi Address” in System Settings. To prevent connectivity issues related to this feature, VPN Tracker 365 reports the actual hardware address (with the minor modification described above) instead of the one used in “Rotating” or “Fixed” modes.
On iOS, VPN Tracker cannot retrieve a MAC address directly. Instead, it generates a random value once and stores it for future use. VPN Tracker for iOS then uses this stored value as the MAC address.
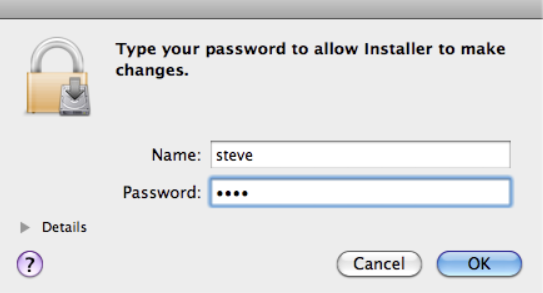
You need to enter your equinux ID and password to activate most equinux applications. However sometimes applications will also require you to enter your Mac OS X user password in order to access certain required system components.
So if you see a window like the one below, you'll need to enter the username and password of an Administrator account on your Mac to proceed, not your equinux ID and password.
Parallels
Go to "Preferences" > "Network" in Parallels and change the DHCP ranges for Shared and/or Host-Only Networking so they no longer conflict with your VPN's remote network.
VMware Fusion
A PDF with instructions can be downloaded from the VMware community forums:
IPsec VPN uses a different protocol (ESP) for the actual data transfer than for establishing the connection (IKE). Since the ESP protocol does not use network ports, NAT (Network Address Translation) routers may have difficulties handling it correctly. Only NAT routers that support "IPSec Passthrough" (sometimes also named "VPN Passthrough" or "ESP Passtrhough") and where this option is also enabled, can handle ESP data packets.
To work around this problem, two alternative tunneling methods exist:
- NAT-Traversal (old, RFC draft version)
- NAT-Traversal (new, RFC standard version)
Which of these methods will work with your connection depends on two properties:
- Which of these methods allows traffic to pass through your local Internet router.
- Which of these methods are supported by your VPN remote gateway.
To test for the first property, VPN Tracker will automatically establish three VPN test connections to a VPN gateway hosted by us whenever it detects a new router that has not been tested before. One connection uses plain ESP, the other two either NAT-T method mentioned above. It will remember the test results for this router and take them into account whenever you start a connection from the network location. The reason we are testing with our own gateway is simply that the test requires a gateway supporting all three methods, with a known configuration and a simply way to verify if traffic did arrive at that gateway.
The second property is not tested in advance, VPN Tracker will become aware of that information when it actually tries to connect to your VPN gateway. VPN Tracker will compare the methods your gateway supports with the stored test results. If there is a match, a method that your gateway supports and that was also working during the test, this method will be used. If there is no match, VPN Tracker will immediately stop and show an appropriate error in the log, explaining the situation.
If you suspect a NAT-Traversal issue or you think the previous test results may be wrong or outdated, simply re-run the test:
‣ Make sure NAT-Traversal (Advanced tab) is set to Automatic ‣ Go to "Tools" > "Test VPN Availability" ‣ Click "Test Again" ‣ Wait until the test has completed, then connect to your VPN
The test dialog also allows you to tell VPN Tracker to not test the current location and forget any previously created test results. This is rarely needed and also not recommended but there might be situation where the test results are wrong because access to our VPN gateway is not possible (e.g. it is blocked) and thus the test result are just bogus and say nothing about the true capabilities of your VPN gateway.
VPN Tracker supports X.509 certificates (RSA Signatures) and smart cards using X.509 certificates (PKI tokens) for authentication.
For more information, see the VPN Tracker manual.
Are you seeing a 'Server certificate' error message whilst activating your equinux software?
One likely cause is your system's date & time: Make sure your system clock is set correctly by checking 'Set date & time automatically' under System Preferences > Date & Time.
We also use a fairly new security certificate to protect your data. However, older versions of OS X might not immediately recognize the certificate.
To make sure OS X will recognize the certificate, you could try one of the following two fixes:
Run Software Update
‣ Go to the System Preferences and select "Software Update" ‣ Install any available system updates ‣ Afterwards, restart and try activating again
Disable your firewall
Please make sure you are not running any firewalls which may block access to our activations server. Applications you may wish to disable temporarily include:
- Mac OS X Firewall
- LittleSnitch (Litte Snitch Configuration - Preferences … - General - Stop)
- Intego NetBarrier
Disable your proxy
In some cases the use of proxies may interfere with certain certificates stored in your Keychain.
‣ Open System Preferences ‣ Go to the "Network" section ‣ Choose your network connection and click "Advanced…" ‣ Uncheck any proxies you may have configured and click "Ok"
Check your Keychain
‣ Open: "Application" > "Utilities" > "Keychain Access" ‣ Select "Keychain Access" > "Keychain First Aid" ‣ Enter your OS X account password, select Repair on the right and hit Start
Install the root certificate manually
- Download the latest Let's Encrypt root certificates
- Double-click to add the certificate to your Mac's keychain
Tip: If you have multiple users on the Mac, add it to the 'System' keychain to fix this problem for all users - Double-click the new entry "ISRG Root X1" to open the trust settings
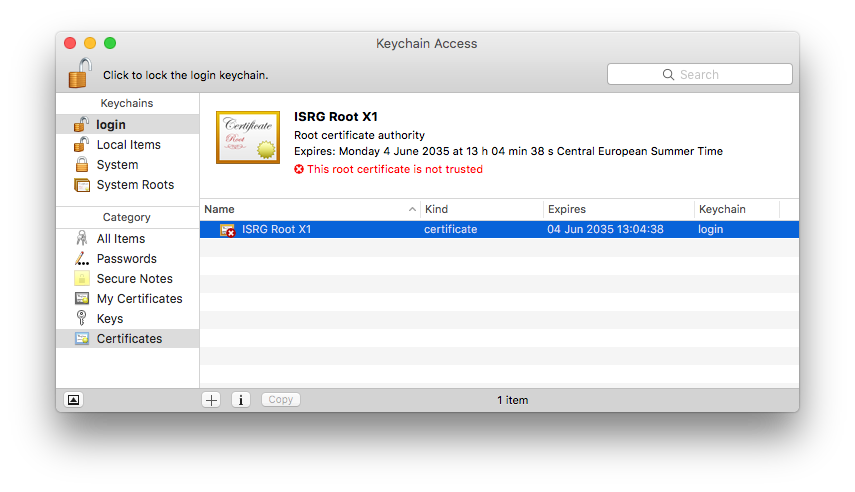
- Under "Trust", choose "Always trust"
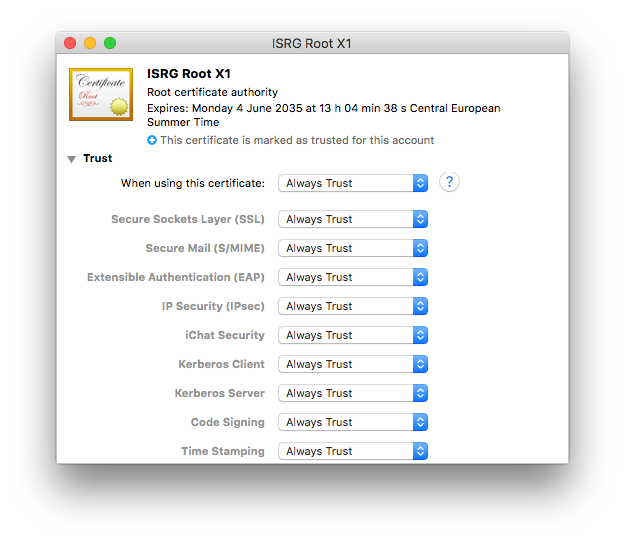
- Close the window and confirm with your Mac user password
You should now be able to activate your software using your equinux ID and password.
VPN Tracker 9 & VPN Tracker 10
Older VPN Tracker versions may also have issues due to certifcates as described above. As these versions are end-of-life, we can no longer offer support for them. The steps above should also apply to these versions. For support and to use VPN Tracker on the latest macOS versions, please switch to a new VPN Tracker plan.VPN Tracker is a 100% 64 bit application and runs great on 64 bit systems.
Yes, VPN Tracker supports IPsec (IKEv1 + IKEv2), L2TP (Mac only), PPTP (Mac only), OpenVPN, SonicWALL SSL VPN, Cisco AnyConnect SSL VPN, Fortinet SSL VPN, SSTP VPN, and WireGuard® VPN (Beta - learn more). Additional protocols are on our roadmap.
WireGuard is a registered trademark of Jason A. Donenfeld.
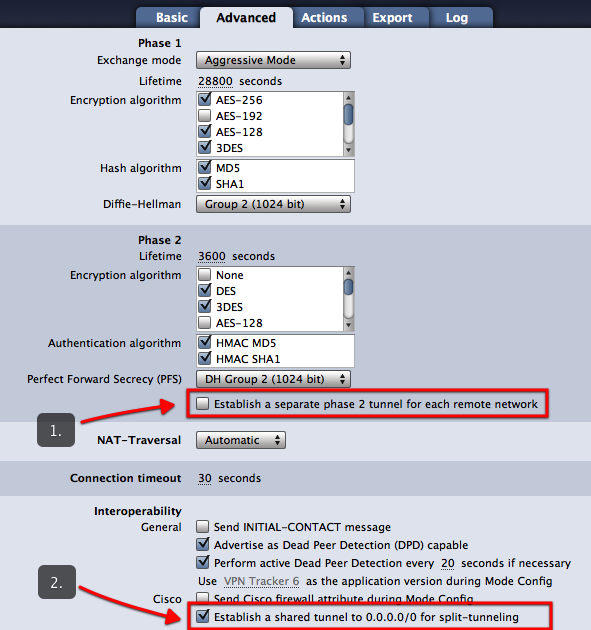
VPN Tracker has three settings that can speed up connecting to Cisco devices and improve compatibility.
- Establish a shared tunnel to 0.0.0.0/0 for split-tunneling
- Send Cisco firewall attribute
- Use ... as the application version during Mode Config
Note: All settings described on this page require VPN Tracker 6.2 or newer.
Establish a shared tunnel to 0.0.0.0/0 for split-tunneling
What does this setting do?
In a split-tunneling setup using EasyVPN, VPN Tracker will no longer establish an IPsec Security Association (SA) to each remote network, but establish a single SA to 0.0.0.0/0. Split-tunneling is achieved only through an appropriate routing setup. This can speed up the connection processes significantly for connections with multiple remote networks.
When should I use this setting?
The setting works with most Cisco devices that use EasyVPN and a split-tunneling setup.
How can I try it?
- On the Advanced tab, uncheck the box “Establish a separate tunnel for each remote network” (see screenshot)
- Make sure the box “Establish a shared tunnel to 0.0.0.0/0 for split tunneling” is checked (see screenshot)
If your connection does not work with this new setting, simply revert back to your previous setup by checking the box “Establish a separate tunnel for each remote network”.
Send Cisco firewall attribute
What does this setting do?
This setting causes VPN Tracker to send a special attribute during EasyVPN indicating the presence of a firewall.
When should I use this setting?
You can try enabling this setting if your current EasyVPN-based connection to a Cisco device gets dropped at phase 2 (“The VPN gateway asked VPN Tracker to disconnect...” error).
Use ... as the application version during Mode Config
What does this setting do?
This setting causes VPN Tracker to send a different application version than the default “VPN Tracker 6” during EasyVPN and Mode Config.
When should I use this setting?
You can try setting a different application version, e.g. “Cisco Systems VPN Client 4.8.0:Linux” if your current EasyVPN-based connection to a Cisco device gets dropped at phase 2 (“The VPN gateway asked VPN Tracker to disconnect...” error).
- Multiprotocol VPN support
- High speed connections
- Zero-config VPN - thanks to TeamCloud & Personal Safe technology
With both SMB (Windows File Sharing) and AFP (Apple File Sharing), low latency connections are key to achieving good performance. This is of course assuming that you already have a connection with reasonable bandwidth in between the two VPN endpoints (this can be easily verified by transferring a larger file through HTTP or FTP).
Using SSL VPN? Switch to IPSec
In comparison to SSL VPN, IPSec is able to offer much faster connection speeds as it runs on the network layer – level 3 of the OSI – meaning it’s much closer to the physical hardware. This will give you a faster VPN performance.
Learn more in this blog post.
Finder Settings
If you are using the Finder and the issue is mostly with listing folders (but not so much when actually copying files), try turning off icons/icon previews in the Finder's View Options (Cmd-J).
Reducing Latency
If you experience performance issues both when listing folders and when transferring files, your aim should be to reduce latency. Some ways to reduce latency include:
- Avoid high-latency Internet uplinks (e.g. satellite, some types of wireless providers, line aggregation, ...).
- When using a DSL line, see with your ISP if you can get "fast path" enabled (= interleaving turned off). ISPs sometimes market this as an option for online gaming, but it's also very helpful for AFP/SMB or connecting to some types of database backends.
- Make sure VPN traffic is appropriately prioritized in order not to be slowed down by someone else using the same Internet connection.
To measure latency between the two endpoints of the VPN, use ping to a host on the other end of the connection (or, when pinging from the client end, ping the VPN gateway). For your convenience, VPN Tracker has a ping utility built right in, it can be found in the Tools menu.
To measure latency of each endpoint's individual uplink, it's often helpful to do a ping the local router (to make sure there are no unnecessary latencies introduced in the local network) and the ISP's first router (to get an idea if enabling fast path or switching ISPs may be a suitable measure to decrease latency).
If you cannot reduce latency any further:
If you are in a situation where you cannot reduce latency any further (or where the base latency from the distance between the two endpoints itself is so large local measures won't make much difference), consider switching to a file transfer protocol that is less vulnerable to latency, e.g. WebDAV or FTP, or use measures such as reducing the number of files and folders in a hierarchy to increase performance.
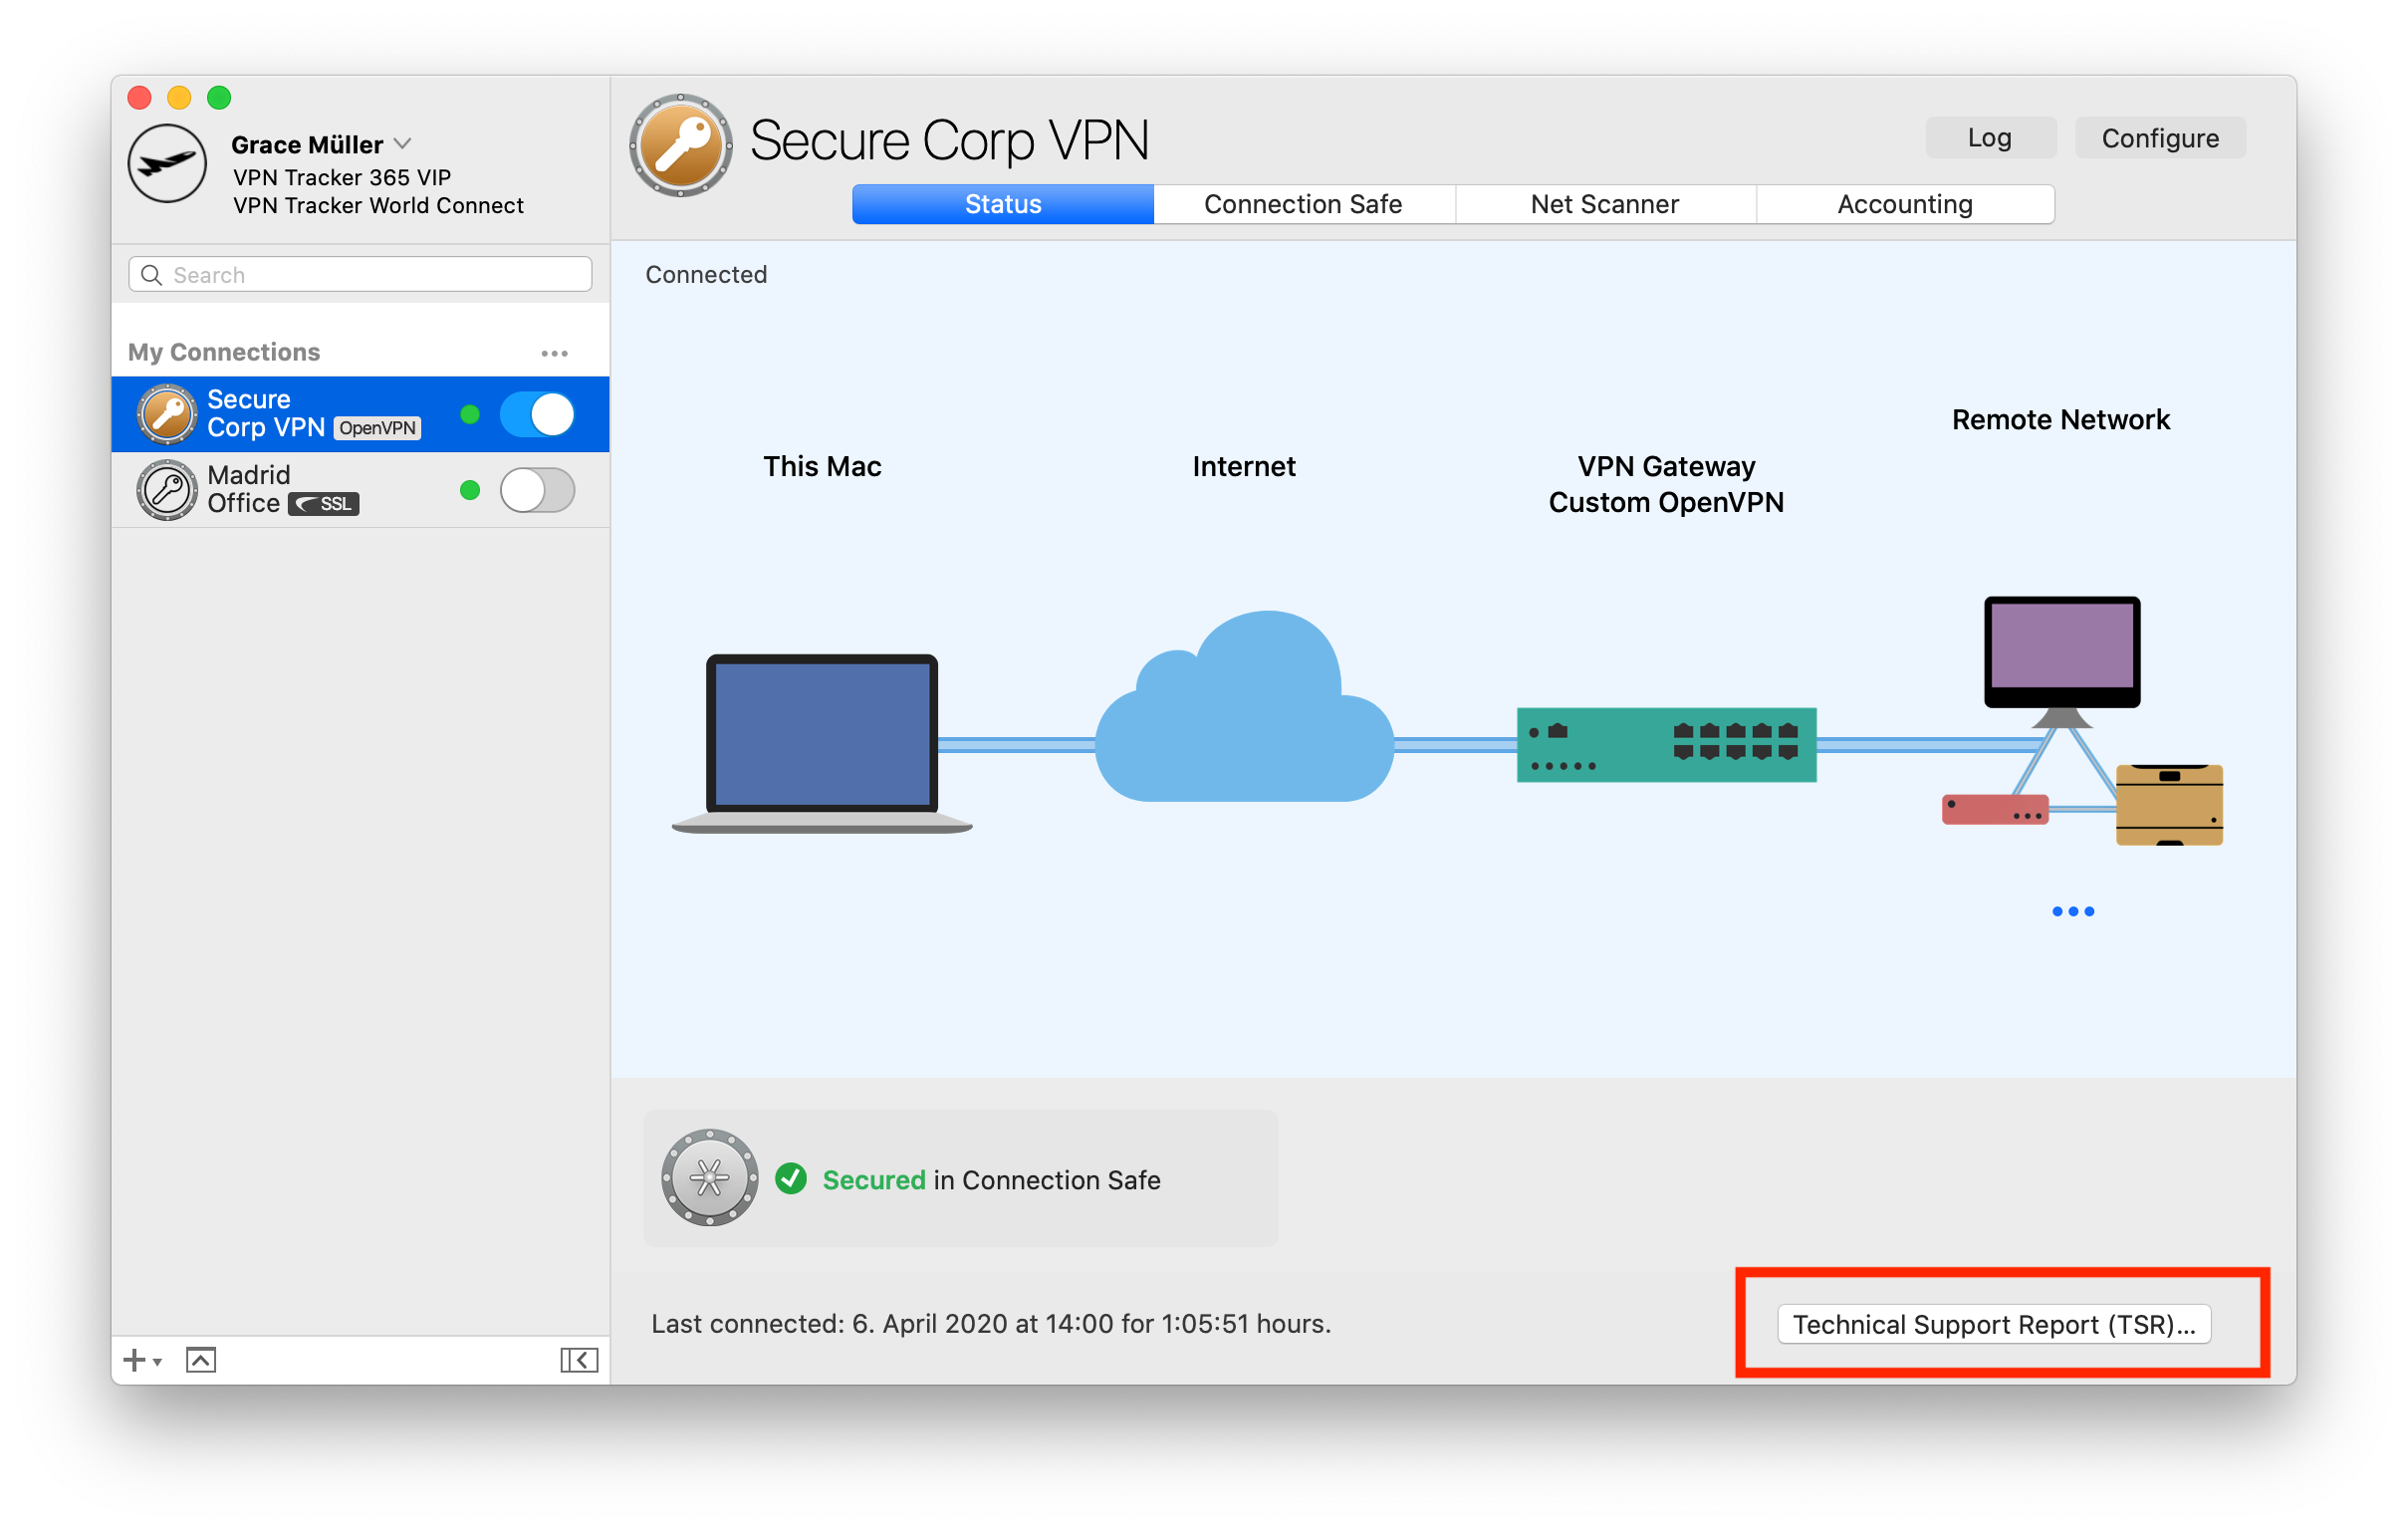
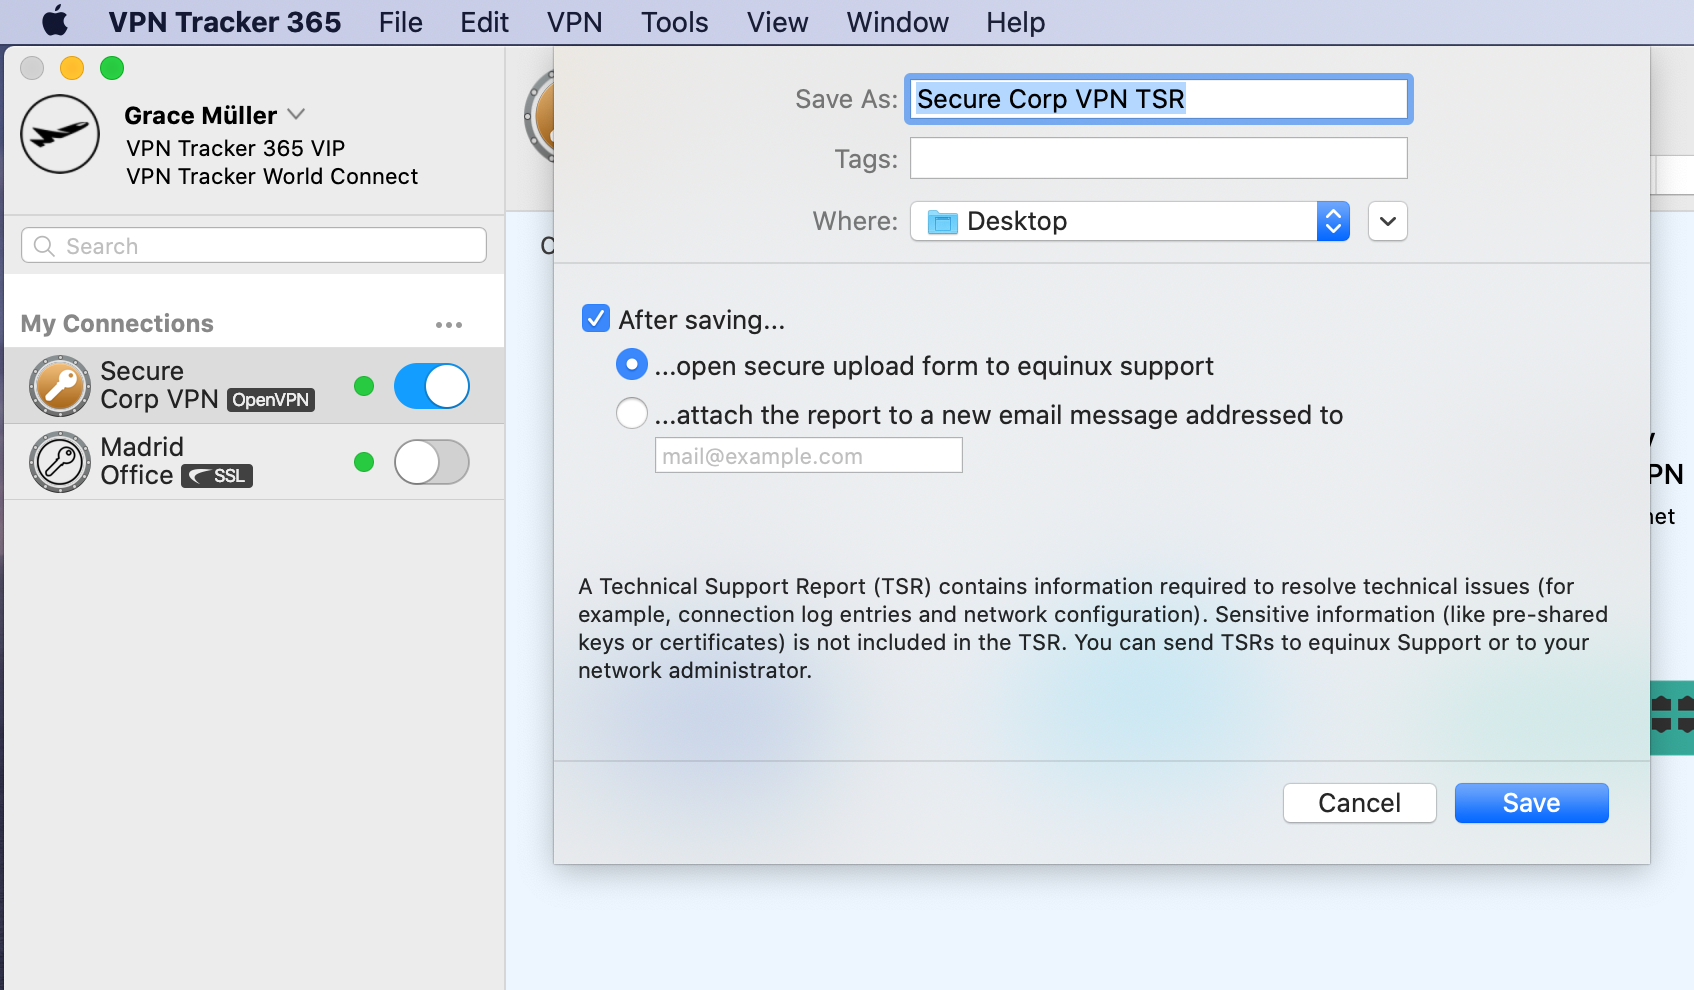
A Technical Support Report contains your VPN Tracker settings and relevant network and system settings that our technical support team needs to be able to assist you quickly. Confidential data (e.g passwords, pre-shared keys, private keys) are not included in a Technical Support Report (TSR).
How to create a Technical Support Report on a Mac:
‣ Click on your VPN connection in VPN Tracker 365. ‣ In the bottom right corner under the "Status" tab, you will see the TSR button. ‣ Click the button to generate the report and follow the instructions to send to our support team.
 How to create a Technical Support Report on an iPhone/iPad:
‣ Tap on the connection. The connection card appears. ‣ Tap on “Feedback” ‣ Provide a short description of the connection problem ‣ Tap on Send
If you have an issue connecting to the VPN in the first place, please make a connection attempt right before creating the Technical Support Report, then create the Technical Support Report as soon as the connection attempt has failed.
If you can connect to the VPN, but something is not working right after the connection has been established, please establish the VPN connection, then create the Technical Support Report while the VPN is connected.
You can either email the report directly to our support team from VPN Tracker 365, or save it to email later or from a different computer, or to upload it using the contact form on our website:
Whenever possible, also include screenshots of the VPN setup on your VPN gateway.
There are a number of possible causes for such a behavior. This FAQ will help you to find out what is causing the problem in your specific situation. In this FAQ we will be using destination device as a generic term for the device you are trying to connect to. The destination device can be anything from a normal computer, to a server, to a network printer.
1. Are you trying to connect to the destination device using a host name?
If you are using a host name, please try once using its IP address instead. If that works, the problem has to do with DNS resolution. Please make sure DNS is enabled for the VPN connection and correctly configured. Note that using Bonjour or NETBIOS hostnames is generally not possible over VPN.
2. Is the IP address you are connecting to really part of the remote network?
For example, if your remote network is 192.168.13.0/24, you should be able to connect to IPs starting with 192.168.13.x, but connections to IPs starting with 192.168.14.x will not work as they are outside the address range of traffic tunneled through the VPN.
3. Is the local address in VPN Tracker part of the remote network?
Using a local address in VPN Tracker (Basic > Local Address) that is part of the remote network is not possible with most VPN gateways. Please use a local address that is outside all remote networks. For example, if your remote network is 192.168.13.0/24, do not use an address starting with 192.168.13. If you are using an automatic configuration method (e.g. Mode Config, EasyVPN, DHCP over VPN) you may be able to assign a local address to VPN Tracker that is part of the remote network. Refer to the configuration guide for your VPN gateway for more information.
4. Could multiple VPN users use the same local address?
If multiple VPN users exist, pleas make sure no two users are using the same local address (Basic > Local Address), otherwise one of them will not be able to use the tunnel anymore whenever both of them are connected. If that field is empty in your configuration, VPN Tracker will just use the IP address of your primary network interface as local address, and of course, this can also cause an address conflict with another user, that’s why we do not recommend to leave that field empty if there are multiple VPN users.
5. Can you ping the LAN address of the VPN gateway?
You can find a ping tool directly in VPN Tracker under Tools > Ping Host. The LAN address of the VPN gateway is special in the regard that this address doesn’t need to be routed at all. So if you can ping that address but no other remote address, it is most likely a routing issue at the remote end.
6. If you can't ping anything, try re-running the VPN Availability Test
The VPN Availability Test can be found in the menu: Tools > VPN Availability Test. Then try connecting the VPN again. The results of this test depend on the capabilities of your local Internet router/modem or the Internet connection itself and they influence how the VPN tunnel is established. VPN Tracker automatically runs the test for every new Internet connection it is able to detect but even if a connection has been tested before, there are various reasons why the behavior of that connection may have changed in the meantime.
7. Is your VPN gateway the default gateway (router) of its network?
If the VPN gateway is not the default gateway, you will in many cases need a suitable routing setup in order for responses to reach you. Whenever a device doesn’t know how to reach an IP address directly, it forwards its reply to its default gateway and if that isn’t the VPN gateway, it won’t know what to do with that reply data. In that case its important to configure the default gateway to forward replies to VPN users to the VPN gateway.
8. Is your VPN gateway the default gateway (router) of its network?
For more details, we would like to direct you to the following FAQ entry.
Are you using virtualization software, such as VMware, Parallels or VirtualBox? These software products create network interfaces for their internal networking needs, and sometimes the network addresses they choose happen to conflict with the remote network of a VPN connection. Even if you are not currently using this software (but have it installed or not completely uninstalled) their network interfaces exist and can cause conflicts.
To find out which network interface is causing the conflict:
- Attempt to connect to your VPN (so the error message appears in the VPN Tracker log)
- Set the log level in VPN Tracker to “verbose”
- Look for a line that says
Remote network ... conflicts with local network ... of interface ...
This is the network interface that is causing the problem. On most Macs, “en0” will correspond to the Ethernet interface and “en1” to the AirPort interface. Any other enX interfaces are either from virtualization software, or from additional network hardware (e.g. USB network adapters/modems). Network interfaces whose names start with “vboxnet” generally belong to VirtualBox and network interfaces starting with “vmnet” to VMware.
Such a setup is called “Host to Everywhere” in VPN Tracker. All non-local traffic will be sent through the VPN. For this setup to work, it must be properly configured in VPN Tracker and on the VPN gateway:
- The Network Topology must be set to “Host to Everywhere” in VPN Tracker
- The VPN gateway must accept an incoming VPN connection with a 0.0.0.0/0 (= everywhere) endpoint
Once these are configured, it should already be possible to establish the VPN connection. However, it is very likely that Internet access will not yet work. For Internet access to work, several more things need to be configured on the VPN gateway:
- The VPN gateway must route VPN traffic not destined for its local networks out on the Internet
- This traffic must be subject to Network Address Translation (NAT) in order for replies to reach the VPN gateway
- In many cases, a suitable remote DNS setup is necessary for DNS resolution to continue to work
Note that not alll VPN gateways can be configured for Host to Everywhere connections. Most devices designed for small office or home networks (e.g. devices by NETGEAR or Linksys) are not capable of dealing with Host to Everywhere connections.
VPN Tracker may prompt you for different passwords depending on the action you're performing. This guide explains what each prompt means and which password you should enter.
1. Your Mac Password
When is it needed?
– Installing VPN Tracker
– Approving system extensions
Why?
macOS requires your administrator password to authorize changes on your system.
Where do I find it?
This is your local Mac password – the one you use to log in when your Mac starts up.
2. Your equinux ID (VPN Tracker Account)
When is it needed?
– Logging into the VPN Tracker app (Mac or iOS)
– Accessing your account at my.vpntracker.com
Why?
This is your personal VPN Tracker account, giving you access to your plan, team, connections, and device settings.
Where do I find it?
This password is usually saved in your Keychain or Passwords app under “id.equinux.com”.
3. Pre-Shared Key (PSK) / Shared Secret
When is it needed?
– When setting up or connecting to a VPN connection
Why?
Some VPNs use a PSK to authenticate users. This key must match what’s configured on the VPN gateway.
Tip for Teams: Admins can share pre-configured VPN connections via TeamCloud to avoid PSK confusion.
Where do I find it?
This is usually set by your company’s VPN admin and stored in the connection. You typically don’t need to know it yourself.
4. Your Company Login (XAUTH Credentials)
When is it needed?
– When connecting to a company VPN
Why?
You may need to enter your company login (often the same credentials you use at work) to authenticate with the VPN.
Where do I find it?
You should have received it from your IT team — and hopefully not written it on a Post-it under your keyboard.
It sure does! And it does it brilliantly too!
Mail Designer can export an HTML file containing your entire design. This opens up a whole host of great options for you, as the user, to explore:
- Upload your design to third-party newsletter services
- Offer recipients, with email client programs that don’t support rich HTML content, the option to view your message as a webpage in their browser
- Create a link to your newsletter directly from your website: A great option for people that would like to see a newsletter before they subscribe
The best thing is: It's so easy to export your design as an HTML document
- Open your design
- Choose “Share > HTML...” from the menu bar
- Choose a location to save your design
By the way: If you plan on uploading your images to a separate web server, you can enter an absolute URL prefix for images.
MailChimp has free and paid plans. Please visit the MailChimp website for more details and exact pricing information.
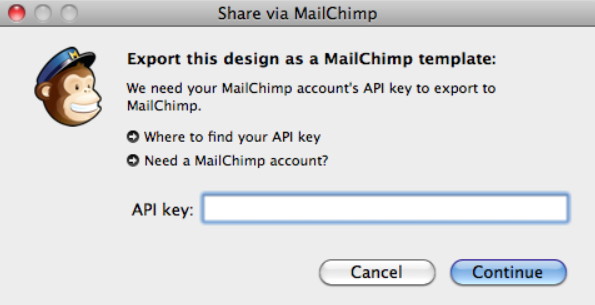
In order to upload templates to your MailChimp account on your behalf, Mail Designer needs your MailChimp API key (a special kind of password).
You can find your API key on your MailChimp. The MailChimp support pages have more information.
MailChimp offers visual "WYSIWYG" and code-based template editing.
However, as every HTML engine works a little bit differently, we recommend that you stick to Mail Designer for editing, as changes made with MailChimp may cause issues with the look or layout of your designs.
If you need to make any changes, simply re-upload a new version of your design and select it for your MailChimp campaign.
On the other hand if you are a HTML code pro, just edit the HTML code with the MailChimp editor untill it fits your needs. We ask for you understanding that we can't offer support for this.
The Mail Designer manual has information on how to create your design and export it to MailChimp. Once you have sent your design to the big monkey in the sky, you can create campaigns, manage subscribers, track clicks and more with MailChimp's tools.
There are so many different MailChimp features, that we can't describe them all in the Mail Designer manual. But don't worry: the MailChimp team have created webinars, how-to manuals, guides and tips to help you get started.
Mail Designer 365 supports the export of the template including MailChimp placeholders. Once uploaded to MailChimp almost all features offered by the website can be used. To make sure the layout stays intact we recommend not to use the "Edit" view of MailChimp for layout editing. Use Mail Designer 365 to make the necessary changes and export the new version to MailChimp.
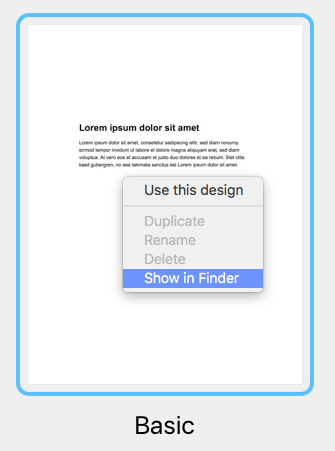
You can find your original template files in the Finder by following these steps:
‣ Right click the template in the Design Chooser ‣ Choose "Show in Finder"
How to find your designs in a Time Machine backup
If you've had a hardware failure and need to find your templates in a backup of your Mac, you can find your templates in this location:
/user/Library/Group Containers/C3HCD5RMD7.net.tower-one.MailDesigner
Note: there will be multiple "Library" folders on your harddrive, but you need the hidden one inside your Home folder.
Here is one way to get there:
- Navigate to your user's home folder in the Time Machine backup (e.g. "John")
- Right-click on your user's home folder ("John"), hold down the Alt/Option key (⌥) and select "Copy “john” as Pathname"
- Select the menu item "Go > Go to Folder…" and a dialog will open
- Press Cmd+V to paste the path you've just copied and add "/Library" to the end of the path and press enter
Now here on, go to "Group Containers/C3HCD5RMD7.Mail Designer/Documents/MD365" to find your documents. You'll find folders corresponding to your categories and each will have subfolders "Contents/Resources" that have the actual documents.
You can drag & drop them onto your Mail Designer 365 icon in the dock to copy them to your Mail Designer 365 library.
If you're sure that your time with us is at an end then we've made it nice and easy to remove all your info from our database so that you don't need to wait for us to do it.
Just log in at your Privacy Manager, click 'Delete your Account' near the bottom of the page.
Please note that this action is irreversible and you will loose access to any previously bought products and service!
The Blowfish and CAST-128 encryption algorithms have been removed in OS X 10.8 Mountain Lion. They continue to be available when VPN Tracker is running on OS X 10.7 Lion and earlier.
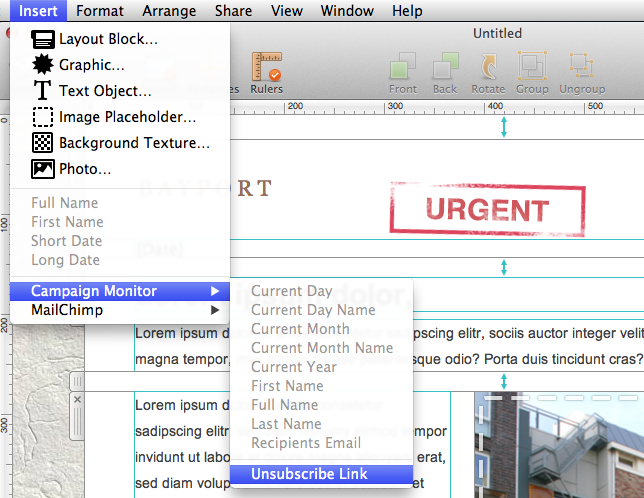
All templates you want to upload to Campaign Monitor have to contain an unsubscribe link.
To add an unsubscribe link to your template, please follow these steps:‣ Choose the text area you want to insert the unsubscribe link to. ‣ Please choose "Insert" > "Campaign Monitor" > "Unsubscribe Link" from the top menu bar.
You can now upload your design to Campaign Monitor.
 With Mail Designer 365, you can create responsive newsletters. By editing images, graphics and text objects for the mobile version you can optimize your template for mobile devices.
With Mail Designer 365 you can create responsive newsletters which look different depending on which device your recipient opens your email.
On an iPhone your recipient will see the mobile version of your newsletter.
As an iPad has a much bigger screen than an iPhone, an iPad will display the desktop version of your newsletter.
iOS recognizes phone numbers and other information like addresses and dates automatically, as these information can be used in different Apps.
You can for example tap a phone numer in order to call it or tap an address to add it to your address book.
Because of this, these information get highlighted in emails.
Mail Designer 365 allows you to send emails directly from within the application using the SMTP procotol.
In order to add your email account, please open the "Mail Accounts" tab in the preferences of Mail Designer, click "+" and enter the information for the account you want to configure. After you have entered all the required information, save the changes and choose this account in the send window.
Follow this step-by-step guide for more information.Add a MailChimp unsubscribe link
To add an unsubscribe link to your template, please follow these steps:
Add a MailChimp Rewards badge
You have a free MailChimp account and want to send a MailChimp campaign without the grey MailChimp Footer?
Simply add the additional "Rewards" placeholder to your design together with the unsubscribe link and your campaign will be send without the MailChimp footer.
You can add the "Rewards" placeholder by choosing "Insert" > "MailChimp" > "Rewards" from the top menu bar.
Do you have a paid MailChimp account?
In this case you don't have to add a MailChimp Rewards badge to your Mail Designer Pro document.
Yes, it's possible to print your template by going to "File > Print…" from within the Mail Designer 365 app. Exporting to PDF can either by done in the lower left corner of the "Print" window or by selecting "File > Export as PDF…".
We use analytics in VPN Tracker 365 to help us improve the app and your overall VPN experience. All measurements are completely anonymous and we never evaluate any personal information or any data going through your connection.
What is measured
- Generic connection settings (e.g. what type of connection it is, which options are being used etc.)
- Which features are used (e.g. is auto-connect enabled, are any actions configured etc.)
- How many connections you have
Your data, your privacy
- Your authentication details and credentials are never read, captured or transmitted
- Your VPN traffic is never analyzed, captured or accessible
You’re in control
If you’d prefer not to share any anonymous usage information with equinux, you can deactivate this option at any time in VPN Tracker’s preferences by unchecking 'Share diagnostics data'.
You can manage all of your VPN Tracker plans after logging in to our website https://my.vpntracker.com using your existing equinux ID and password.
Here you will find all information about your subscriptions and payments and can manage your colleagues' VPN Tracker plans.
You can assign a plan to a new member and also revoke a plan if a colleague leaves your team.
To do so visit my.vpntracker.com and log in using your equinux ID and password.
In the "Team Management" section you can create a team, invite new team members and change VPN Tracker plans for each colleague.
Get step-by-step instructions for this in our Team Management Guide.
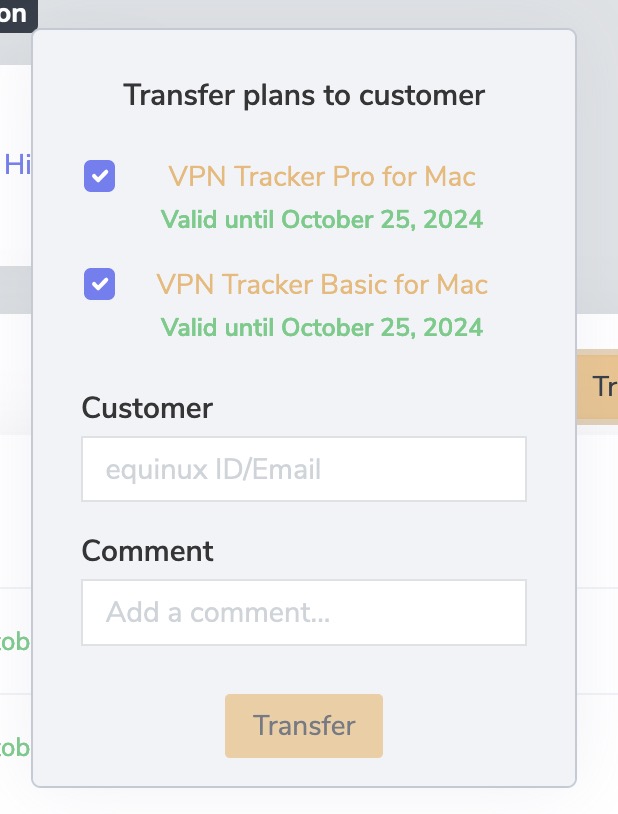
- Go to my.vpntracker.com and log in with your reseller ID
- Navigate to the Reseller section in the left hand menu, here you will see all of your orders and the plans you purchased with each order.
- Next to the license(s) you want to Transfer to a customer select "Transfer all..."
Please note, this button will only appear if the license is available for transfer.
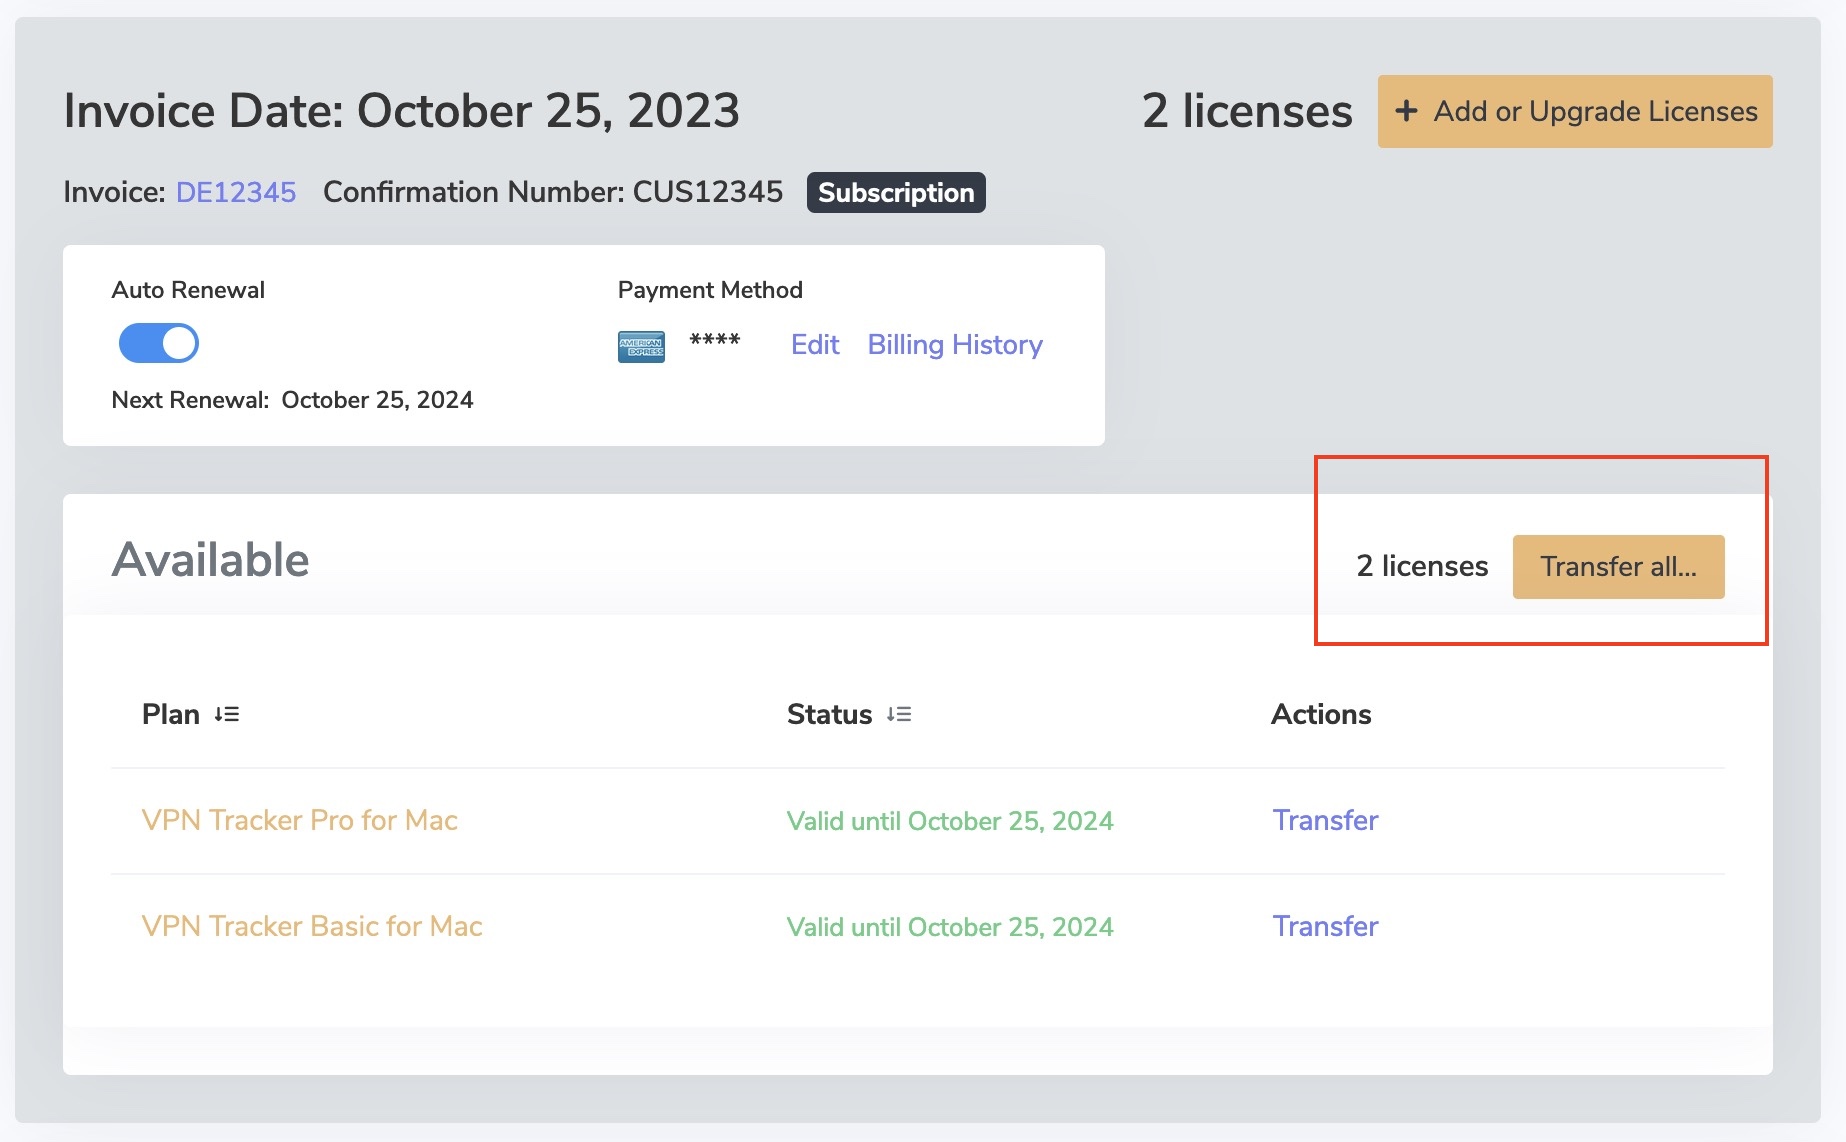
- Enter the email address of the customer you are transferring the licenses to and press "Transfer".
As a reseller you can purchase VPN Tracker 365 plans and resell them to your customers.
With VPN Tracker 365 you can create a team under https://my.vpntracker.com and assign each team member a VPN Tracker 365 Plan.
This will not give each team member access to your equinux ID. The team members will only see their assigned plan in their own equinux ID after logging in to https://my.vpntracker.com. You will stay the only admin of your equinux ID.
The Remote Connection Wipe functionality is available for all VPN Tracker 365 plans.
Please note that you will need a VPN Tracker 365 Pro plan to export a VPN connection.
In our white paper you will find all information to set up Remote Connection Wipe:
http://equinux.com/goto/vpnt365/whitepaper
No, you currently cannot undo remote connection wipe. However, you can reinstate a team member. Remember, you will need to redistribute your team’s VPN connections to the new user before they will be able to connect.
Remote Connection Wipe offers additional security by removing information about your VPN infrastructure. You may also want to use Remote Connection Wipe for compliance purposes or when working with external contractors.
Remote Connection Wipe also has the added benefit of working with any VPN connection, even those that don’t offer user authentication. This lets you to block VPN access for an individual user without having to distribute a new connection to your entire team.
The majority of VPN users use their Mac out and about on the go. If a MacBook ever gets lost or stolen, there’s a risk that remote access to your network could fall into the wrong hands. With VPN Tracker, you can prevent unauthorized VPN access by remotely revoking access to the connection.
We use analytics to help us improve the app and your overall VPN experience. All measurements are completely anonymous and we never evaluate any personal information or any data going through your connection.
What is measured
- Generic connection settings (e.g. what type of connection it is, which options are being used etc.)
- Which features are used (e.g. is auto-connect enabled, are any actions configured etc.)
- How many connections you have
Your data, your privacy
- Your specific network settings or credentials are never read, captured or transmitted
- Your VPN traffic is never analyzed, captured or accessible
You’re in control
If you’d prefer not to share any anonymous usage information with equinux, you can deactivate this option at any time in VPN Tracker’s preferences by unchecking 'Share diagnostics data'.
To safeguard your accounting data against accidental deletion, VPN Tracker keeps rolling backups.
You can find them under:
Macintosh HD/Users/YourUser/Library/Application Support/VPN Tracker/Accounting/
(Note that the Library folder may be hidden: Choose "Finder" > "Go" from the menu bar and hold down the option key to open the Library folder).
Your current Account files are stored in “Accounting.sqlite”. You'll also see all your Accounting backups in the same folder. They will be have a date in the file name.
To revert to an earlier backup:
‣ Rename the “Accounting.sqlite” file to “Accounting-backup.sqlite” ‣ Delete the Accounting.sqlite-wal and Accounting.sqlite-shm files ‣ Rename the backup you want to restore to “Accounting.sqlite”
You can purchase your World Connect Pass independently of an active VPN Tracker 365 plan.
Haven’t tried the demo yet? Download the VPN Tracker 365 app for free from our website and start your trial.
For your Mac:
Visit our website https://my.vpntracker.com and log in using your equinux ID and password.
Open the section "Products & Subscriptions" to find all purchased plans and the term of your subscription.
Click "Payment methods" in the sidebar to manage your subscription.
For iOS:
All Apple subscriptions are managed in iTunes on your computer. This link will bring you directly to the management area for your profile:
https://apple.co/2Th4vqI
When you are using your mobile device:
‣ Go to the App store app. ‣ Tap on your Apple ID. ‣ Click on "Subscriptions." ‣ Choose VPN Tracker World Connect.
Data security and data protection are very important topics for us. Because of this we developed VPN Tracker World Connect.
We don't keep any logs about your usage. We don't save any user information about your usage, the duration of your connection or which connections you are using.
As #1 VPN client for Mac, we have many years of experience in data security and VPN.
VPN Tracker automatically stores a backup of all your VPN connections on your Mac. If you have inadvertently deleted a connection, or wish to revert to an earlier copy of a connection, you can manually restore the backup copy.
Restore from your Backup
- Open Finder and choose "Go" > "Go to Folder…" from the menu bar
- Enter this path and press Return:
/Library/Application Support/VPN Tracker 365 - Rename your "etc" folder to "etc-backup" – for safekeeping
- Go into the "backup" folder
Here you'll see a number of backup folders, all organized and named by date.
- Move the "etc-date" folder you want to restore up one level into the main "VPN Tracker 365" folder
- Rename the folder your just moved to just "etc" (deleting the date)
- Open VPN Tracker 365
All of your connections will now be restored to their backed-up state.
No, there are no data limits or restrictions for VPN Tracker World Connect.
Visit my.vpntracker.com, log in to your account, and go to "Subscriptions" to update your payment method.
Go to your current subscription and click on "Edit" to change the payment method. Click "Choose another way to pay" to add a new credit card or alternatively, add a PayPal account. This will be used as your new default payment method for your plan.
This points to an error while authenticating your email account. Try checking the following:
- The username is wrong/incomplete. For example, iCloud accounts sometimes work with "username" but most times need the whole email address as a log in.
- The password is wrong.
- If you're trying TLS, try STARTTLS instead.
- Maybe your server is using a custom port - though this is unlikely.
If you have a Mail program you use (e.g. Apple Mail) try comparing the outgoing mail settings there and use the same settings in Mail Designer.
As VPN Tracker has low-level access to your system, it is digitally signed and checks that the app has not been altered in any way every time you launch it. If VPN Tracker it looks as though changes have been made to the VPN Tracker app, you'll see that message.
What can cause this issue?Unfortunately other applications (e.g. Uninstaller/Deinstaller, Clean-Up Tools, and so on), that can cause this problem.
Should you repeatedly run into that issue, please send us a copy of your VPN Tracker app. Locate VPN Tracker on your harddrive, copy it to your Desktop and create a zip file (CTRL-/right click VPN Tracker, then choose "Compress VPN Tracker"). By comparing the broken copy we can find out what has been changed and offer advice how to prevent it from happening again.
Some kinds of software may cause issues with VPN Tracker:
- Personal Firewalls / Desktop Firewalls
- Protection Software (e.g Virus Scanners, Malware Protection)
- Other VPN Clients / VPN Software (for example NCP Client)
Personal Firewalls usually ask the user, if an app should be allowed to send network traffic. It’s important to grant VPN Tracker full network access. If you have already added rules for VPN Tracker, please whitelist VPN Tracker.
Protection Software often sees VPN traffic as a potential source of threat, as it isn’t able to analyze that traffic because of its very strong encryption. Please ensure VPN Tracker is ignored by any protection software running on your Mac and allow VPN traffic to pass through.
Other VPN clients should not be a problem, if they are designed to co-exist with othe VPN apps. Unfortunately, not all other clients are and some capture all VPN traffic as soon as they are installed, even if the app is not running.
In these situations, you may need to uninstall the VPN client - we also suggest asking the vendor to improve its “cooperation” with other VPN apps.
Here are some common examples of the types of apps mentioned above. If you are uncertain whether any of these applications may be installed on your system, try the following:
- Open the app “Terminal”
- Copy and paste the following command:
systemextensionsctl list
You’ll get a list of all system extensions installed on your system. Just compare that list with the identifiers in parenthesis below:
- Little Snitch
(at.obdev.littlesnitch.networkextension)
- TripMode
(ch.tripmode.TripMode.FilterExtension, com.alix-sarl.TripMode.FilterExtension)
- Sophos Anti Virus
(com.sophos.endpoint.networkextension, com.sophos.endpoint.scanextension)
- Symantec Endpoint Protection / Norton AntiVirus
(com.symantec.mes.systemextension)
- Kaspersky Internet/Total Security
(com.kaspersky.kav.systemextension, com.kaspersky.kav.networkextension)
- Intego Mac Internet Security
(com.intego.netbarrier.extension, com.intego.virusbarrier.extension)
- Fortinet FortiClient
(com.fortinet.forticlient.macos.systemextension, com.fortinet.forticlient.macos.networkextension)
- Cisco Advanced Malware Protection (AMP) / Cisco Secure Endpoint
(com.cisco.amp.endpointsecurity.extension, com.cisco.amp.networkextension)
- eset Security Products
(com.eset.endpointsecurity.systemextension, com.eset.networkextension)
Testing VPN throughput using a remote file share is usually not a good idea for two reasons:
The first reason is the file sharing protocol itself. File sharing protocols like SMB, AFP, or NFS have been designed for local networks that are fast, reliable, and have a very low latency. The Internet on the other hand is slow (at least the connection to it), unreliable and has a very high latency. For realistic results, you need to use a protocol that was optimized for such a situation, like HTTP or FTP.
The second reason is the implementation of the file sharing protocol. Today most file shares use SMB, the Windows file sharing protocol. Apple has its own implementation of that protocol but this implementation is anything but good. While the SMB 3.x implementation is already poor, the SMB 1.x/2.x implementation (compatibility mode) is horrible, and for several reasons macOS will often fall back into that compatibility mode. When testing with a local NAS file share, we got 28 MBps using SMB 3 and only 18 MBps using SMB 1, compared to 50 MBps using AFP.
If you have a Mac at the remote side, it’s pretty easy to setup a benchmark HTTP server. All you need is to open the standard application “Terminal” (use spotlight to find it) and then run the following set of commands (every command is confirmed by Return/Enter):
mkdir /tmp/www-bench
cd /tmp/www-bench
dd count=1048576 bs=1024 if=/dev/random of=1GiB.dat
php -S 0.0.0.0:8080The First command creates a new directory, the second one enters that directory, the third one creates a 1 GiB data file filled with random data, the last one starts a primitive HTTP server that serves the content of the current directory at port 8080. Now your VPN users can just open this address in Safari (or any other browser):
http://a.b.c.d:8080/1GiB.datWhere “a.b.c.d” is the IP address of the Mac where you just typed the commands above. By watching the transfer speed in browser, you get a good idea of how capable your VPN is. Of course, this is limited by many factors, like the speed of your local Internet connection, the speed of the remote Internet connection, and the CPU power of the VPN gateway (which is usually far less than the CPU power of a Mac).
To clean up after the test, activate the terminal window again and hit CTRL+C to stop the HTTP server, and finally run the following two commands:
cd
rm -r /tmp/www-benchVPN Tracker Personal Safe is secure encrypted cloud storage for your personal VPN connections and shortcuts.
How to save a connection in Personal Safe
Not sure if your VPN connection is backed up? The safe icon in the connection list indicates whether a connection has been stored in your Personal Safe:
To add a connection to your Personal Safe, simply right click the connection and select 'Add to Personal Safe' for access across all your devices.

Why should I use Personal Safe?
VPN Tracker Personal Safe makes using VPN more reliable and secure:
Security
Personal Safe adds an additional level of security to your connections: all your connection details are encrypted using a highly-secure key (Argon3 + PKTNY) that only you can unlock.
Backup
Lost iPhone? Broken Mac? Personal Safe keeps your connections safe, so you can instantly get them on your replacement device. Sign in with your secure key and they are instantly downloaded and ready to go.
Use your connections on all your devices
iMac at home and iPad for the road? Your Personal Safe keeps your connections synced across all your devices – securely and effortlessly.
How are connections stored?
When you add a connection to your Personal Safe, it is encrypted using your personal encryption keys and then uploaded to a secure cloud storage location. It can only be accessed with your user credentials and encryption key.
Is Personal Safe secure?
Personal Safe has been designed from scratch for VPN connections. Unlike other storage systems that rely on passwords and leave files unencrypted, Personal Safe encrypts all your connections with keys that only you can use.
That means connections are
• Encrypted on your device and
• Stored on encrypted storage at my.vpntracker.com that only you can access
Even if someone could get access to your Personal Safe, the key-based security means they can't access the encrypted connection information without your password.
We've designed the system so no-one (including the VPN Tracker team) can access or unlock your connections.
SonicWalls distribute IP addresses using the DHCP protocol. Once the VPN tunnel itself has already been established, the VPN client must perform a DHCP exchange to obtain an IP address and use this IP address for all traffic sent over the VPN tunnel. There are two reasons why this can fail:
- The SonicWall never received your DHCP request (DHCP-Discover). That would be the case if there is an issue with the VPN tunnel itself not working properly.
Try these:- Re-run the VPN Tracker Connection Checker from the "Tools" menu. Then try connecting the VPN again. This will let VPN Tracker automatically detect the best settings for your internet connection.
- Make sure that you have no software installed that blocks VPN traffic in general. Please see this FAQ entry for more details.
- Re-run the VPN Tracker Connection Checker from the "Tools" menu. Then try connecting the VPN again. This will let VPN Tracker automatically detect the best settings for your internet connection.
- The SonicWall doesn’t want to reply to your DHCP request. The DHCP protocol is designed in such a way that there can be multiple DHCP servers per network and only those who think they can fulfill a request will also respond to it, all others will stay silent (there is no “negative” response for discover requests).
Try these:- Try rebooting the SonicWall. SonicWalls are pretty stable but we’ve seen it a couple of times that the DHCP server is acting strange, as if all IP addresses are reserved, yet that’s not what you will see in the web interface. Rebooting will fix that behavior at once.
- Make sure you have sufficient addresses left in the address pool. If the pool is too small and all addresses are in use or reserved, it is expected behavior that the SonicWall doesn’t respond.
- Try rebooting the SonicWall. SonicWalls are pretty stable but we’ve seen it a couple of times that the DHCP server is acting strange, as if all IP addresses are reserved, yet that’s not what you will see in the web interface. Rebooting will fix that behavior at once.
Please go to"Configure" > "Advanced" > "Additional Settings"and make sure
Always prompt for XAUTH credentialsis not checked.
If this option is checked, VPN Tracker will in fact always prompt you, whether it finds credentials in your keychain or not.
Use stored XAUTH password as passcodeis not checked.
If this option is checked, VPN Tracker assumes that the password stored in keychain is in fact a passcode and it will only hand it out to the gateway if the gateway asks for a passcode. If it asks for a password instead, VPN Tracker doesn’t have any such info and thus asks you to please provide one.
We offer a free trial version of all available VPN Tracker plans so you can test your VPN connections with VPN Tracker before purchasing. VPN Tracker Mac Trial licenses are valid for 7 days and offer the exact feature set of the appropriate plan so you can fully test all features of the plan. You're able to test all connections and protocols to ensure your connections works before purchasing. If you are happy with VPN Tracker, you won't need to do anything to continue using it. All your created connections and settings will remain in the app and the trial license will convert to a paid license after the trial period. Otherwise you can cancel your trial license up to 24 hours before the end of the trial period.
VPN Tracker strictly follows Apple’s recommendation regarding where to place its files, so you will find VPN Tracker files only in standard system locations where they belong. Depending on the fact if these are system-wide or per-user files, they are either found in /Library (system-wide) or ~/Library (per-user), where ~ is a placeholder meaning "home of the current active user".
To access the system-wide library folder:
‣ In Finder Choose "Go" > "Go to Folder ..."
‣ Enter /Library
To access the user library folder:
‣ In Finder Choose "Go" > "Go to Folder ..."
‣ Enter ~/Library
To Remove VPN Tracker, remove the following files and folders:/Library/Application Support/VPN Tracker 365~/Library/Application Support/VPN Tracker 365/Library/Preferences/com.vpntracker.365mac.plist~/Library/Preferences/com.vpntracker.365mac.plist/Library/PrivilegedHelperTools/com.vpntracker.365mac.agent /Library/PrivilegedHelperTools/com.vpntracker.365mac.connectiond /Library/LaunchDaemons/com.vpntracker.365mac.plist/Library/Extensions/com.vpntracker.365mac.*/Library/SystemExtensions/*/com.vpntracker.365mac.*Tip: Also remember to check your Keychain for VPN Tracker items (search for "VPN Tracker")
Note: Some of these files may be currently loaded by the system, and some may be cached. To make your system as clean as if VPN Tracker had never been installed on it, you will also need to uninstall the application itself and then reboot your system. After the reboot, the system will automatically remove any remaining VPN Tracker components not mentioned above, as those reference the application itself and will vanish as soon as the application is gone (some of those can otherwise not be deleted).
VPN Tracker is licensed per user. That means each person using VPN Tracker needs their own license.
If colleagues or other team-members also need to use VPN Tracker, you can upgrade your subscription with additional licenses and assign these using Team Management.
There are three possible causes for this:
- equinux is constantly improving VPN Tracker 365 and as a result VPN Tracker has a high update frequency. Especially if you don’t use VPN Tracker on a daily basis, it’s not unlikely that we already released an update since the last time you were using VPN Tracker. Sometimes there are less than 24 hours between updates, especially with security fixes where it's critical they are released as soon as possible.
-
If you were using an older VPN Tracker version, it may be required to install an intermediate update first before you are be able to install the most up-to-date version. In that case you may install an update and directly on next launch VPN Tracker may offer another update.
-
You might have multiple copies of VPN Tracker installed on your system. For technical reasons updates to VPN Tracker 36517.0.6 and below have to be installed using the system installer and if multiple copies of VPN Tracker exist on your system, the installer may choose to update the wrong copy. To solve that problem:
‣ Place a copy of VPN Tracker into a dedicated folder (we recommend the
Applicationsfolder).
‣ Use Spotlight to find copies in other folders.
(Hold down the CMD key in Spotlight to quickly see the location of a hit)
‣ Delete all copies that are not in the dedicated folder.
‣ Finally start VPN Tracker from the dedicated folder and re-apply the update.
If you are an existing VPN Tracker customer and want to upgrade to VPN Tracker 365, you can simply install VPN Tracker 365 and your connections will automatically be imported:
Download VPN Tracker 365
Once you have VPN Tracker 365, you can purchase a VPN Tracker 365 plan.
- Go to my.vpntracker.com and sign in with your equinux ID and password.
- Under "My Subscriptions" in the sidebar menu, you'll see a list of your current VPN Tracker 365 plans.
- Activate automatic renewals to ensure your license is renewed at your current rate.
- Alternatively, you can let your current license expire and then purchase a new plan at the new customers rate from our online store.
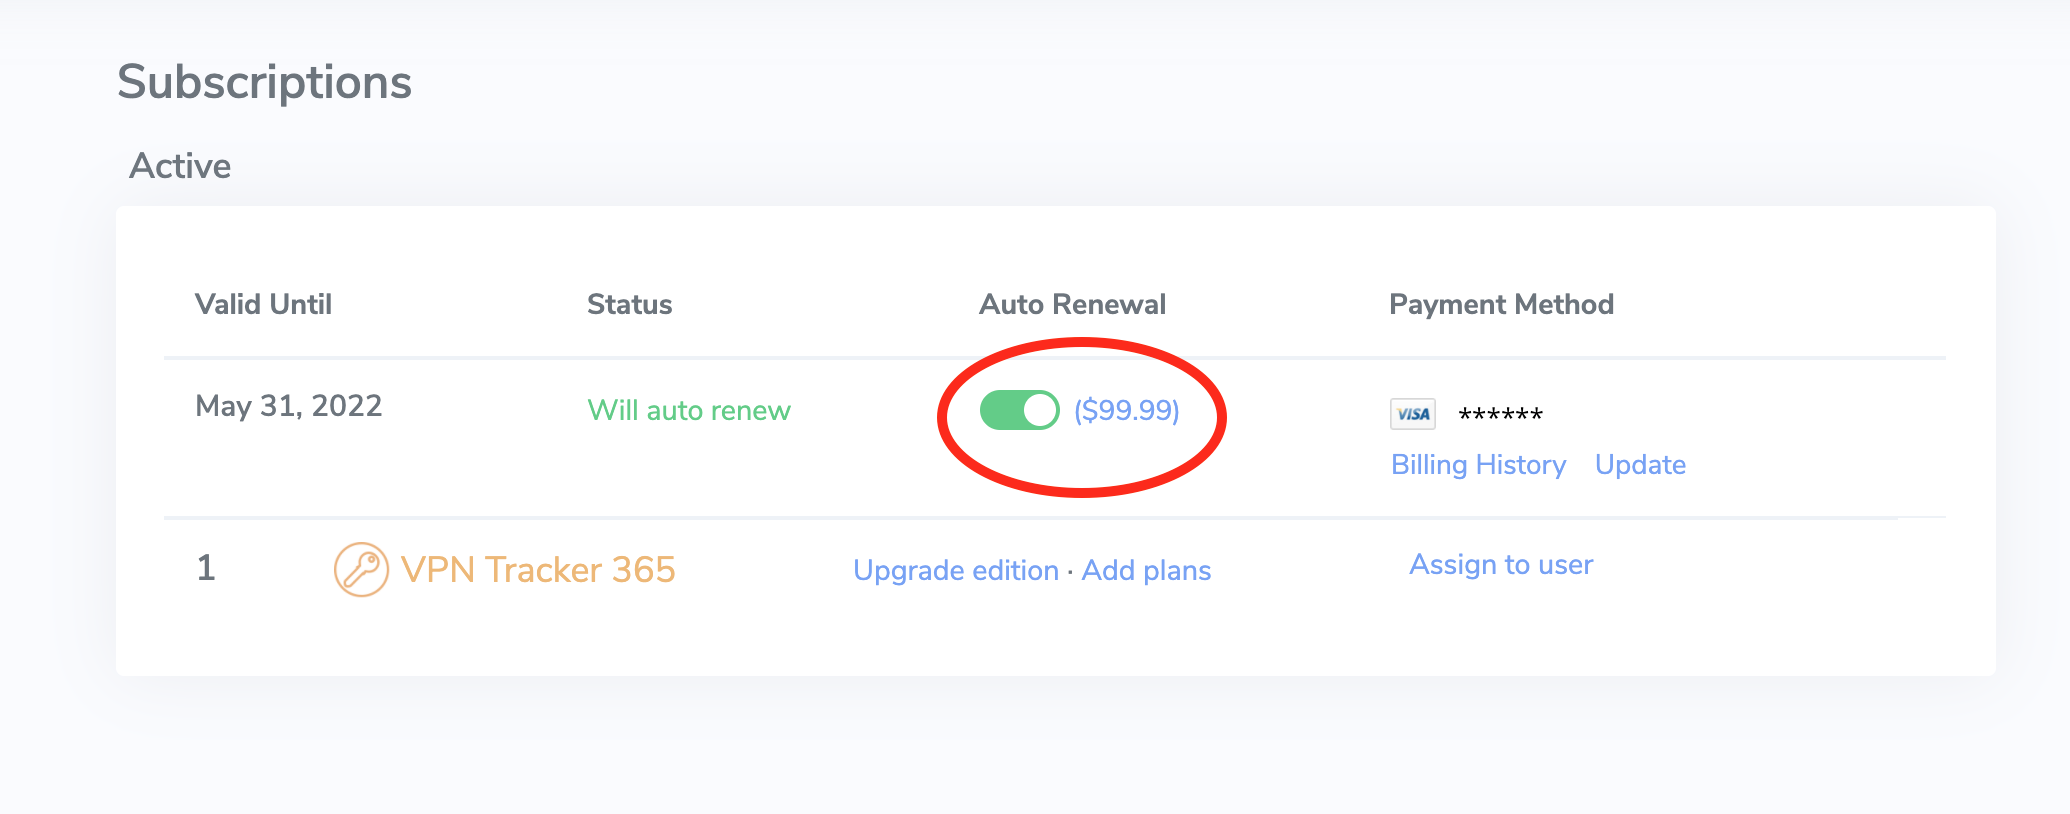 We generally recommend leaving auto-renewal enabled to prevent any disruption to your VPN service: Our system always sends a reminder before your plan will auto-renew to give you plenty of time to deactivate auto-renewal if it's no longer required.
Your VPN Tracker 365 app will just continue working as before and any plans that are assigned to team-members will remain assigned as well. Simple, automatic, secure.
- In general, try to reduce the number of layout blocks used. Each layout block has a HTML structure that adds to the total size of your newsletter and by reducing the number of blocks you reduce the amount of space needed for these structures.
- Avoid repeating blocks and try to find solutions for “merging” blocks. For example, don't add two or more consecutive spacer blocks. Instead, use just one spacer block and change its height accordingly.
- Sometimes you can avoid using spacer blocks altogether, for example by adding the space to a nearby image block instead, using the “spacing before/after” feature in “Styles” or simply adding blank lines.
- Instead of using several consecutive text blocks, use just one and style the paragraphs using the “Styles” feature.
- Avoid detaching blocks (that is, avoid doing modifications that only affect the mobile or desktop version). A detached block results in two blocks in the document: one for desktop and another one for mobile, which uses more space than if the same block can be used for both mobile and desktop.
- IPsec
- IKEv2 (Beta)
- L2TP (only macOS)
- PPTP (only macOS)
- OpenVPN
- SSTP VPN
- Cisco AnyConnect SSL VPN
- SonicWall SSL VPN
- Fortinet SSL VPN
- WireGuard® VPN
- VPN Tracker 365: Download here
- An internet connection
- A VPN Router/Gateway
Create a new connection
In VPN Tracker 365, try the following:‣ Click on the plus symbol in the bottom left corner:‣ Choose: "New Company Connection"
Choose your VPN Router
‣ In the list of VPN Gateway vendors, choose the manufacturer and model of your VPN router. In case your VPN router does not appear in the list, try the following: ‣ Choose "Use custom device profile." ‣ Click on "Create" to add your VPN connection.
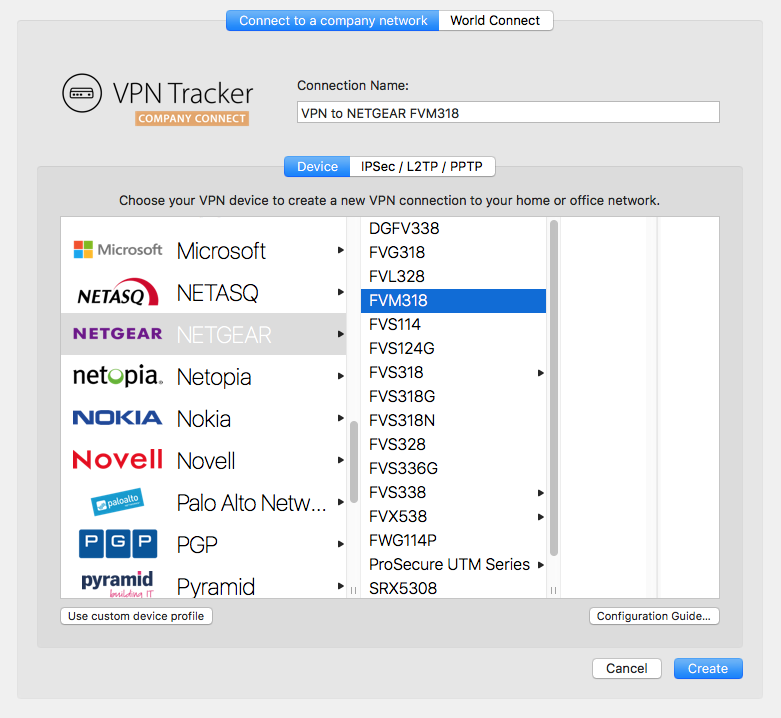
Your configuration guide
Our engineers have tested a large number of VPN gateways with VPN Tracker. For many of these, detailed configuration guides are available. In the newly created connection, you will be able to find the router specific configuration guide:
Alternatively you will be able to find the configuration guides on our website at http://vpntracker.com/interop
Further details for creating your VPN connection on Mac OS X can be found in the configuration guide or in the VPN Tracker handbook.
The VPN Tracker Software is a VPN tool, which can be used to create a VPN connection on Apple Mac computers.
What's the point of a VPN?
When you are travelling away from home or your office, for example the coffee shop around the corner or you're working from home, a VPN gives you the option to create a secure connection to a private or company network. This gives you access to Servers, Cameras or other services which are usually only accessible in your local network. We call this VPN Tracker Company Connect. With VPN Tracker Company Connect you can move about your company's network as if you are sitting at the desk in your office, no matter if you are in a different country, or visiting a customer a few miles away.Secure data
VPN connections can also be used to generally secure a data connection (for example in a public WIFI) or to simulate a connection from a different country. We call this VPN Tracker World Connect.How do you establish a VPN connection?
In order to establish a VPN connection, you need a VPN software, also called VPN tool or VPN client. VPN Tracker is the leading VPN software for Apple computers. The VPN Software allows you to configure and establish a VPN connection to the remote network.
Email-safe fonts are the basic fonts installed on everyone's devices. If you have selected a font that is available on macOS but not on iOS, there will be a visible difference on the corresponding devices. If both devices have the font installed, then the email template will look the same on both platforms. You can use Web Fonts which the recipient's e-mail client can downloaded on demand. Most e-mail clients except Outlook support Web Fonts.
Symptom
As soon as you connect your VPN tunnel, Skype is not able to make calls any longer, however calls started prior to connecting the VPN continue to work.
Solution
Make sure the field Local Address is not empty. If it is, fill in a private IP address. A private IP address has the following form:
192.168.x.x10.x.x.x172.y.x.x
x: A number of the range 0 to 255.
y: A number of the range 16 to 31.
Only rule: It must not be an IP address from a remote network on the other side of the VPN tunnel (must not partially match an entry of the field "Remote Networks"), as choosing such an address will make the tunnel stop working (it will connect, but you cannot really reach anything over it).
Alternate Solutions
If the solution above does not fix your issues, make sure that
- DNS resolution still works once the VPN tunnel is up.
- Public Internet servers are still reachable once the VPN tunnel is up.
- In case of a Host to Everywhere connection, make sure the VPN gateway does not block any network traffic that is crucial for Skype to work.
Explanation
VPN Tracker creates a virtual tunnel interface for every VPN tunnel. Like any network interface, this virtual tunnel interface requires an IP address to be functional as an IP network interface. If your VPN gateway assigns you an IP address, the assigned address is applied to the tunnel interface. If not, the address you put into Local Address will be used. If you leave local address empty, the IP address of your primary network interface will be used.
In the last case, your system ends up with two interfaces with identical IP addresses. This is allowed and usually not a problem, unless a software does “stupid things”, like querying the network interface for a given IP address and then ignoring the order of precedence of the returned results.
The VPN Tracker Software is a VPN tool, which can be used to create a VPN connection on Apple Mac computers.
What's the point of a VPN?
When you are travelling away from home or your office, for example the coffee shop around the corner or you're working from home, a VPN gives you the option to create a secure connection to a private or company network. This gives you access to Servers, Cameras or other services which are usually only accessible in your local network. We call this VPN Tracker Company Connect. With VPN Tracker Company Connect you can move about your company's network as if you are sitting at the desk in your office, no matter if you are in a different country, or visiting a customer a few miles away.Secure data
VPN connections can also be used to generally secure a data connection (for example in a public WIFI network) or to simulate a connection from a different country. We call this VPN Tracker World Connect.How do you establish a VPN connection?
In order to establish a VPN connection, you need a VPN software, also called VPN tool or VPN client. VPN Tracker is the leading VPN software for Apple computers. The VPN Software allows you to configure and establish a VPN connection to the remote network.1. In the VPN Tracker for Mac App
In order to delete connections or Shortcuts from your Personal Safe, please follow the following steps:‣ Go to "VPN Tracker" > "Preferences" ‣ Select "Personal Safe" ‣ Uncheck the connections and/or shortcuts you would like to delete from the list ‣ Press update ‣ This will delete all connection info from our servers.
2. In a browser at my.vpntracker.com
In order to delete connections from your Personal Safe, please follow the following steps:‣ Open my.vpntracker.com and log in with your equinux ID and password ‣ Select "Personal Safe" in the sidebar ‣ Here you will see all connections and Shortcuts which are saved in your Personal Safe. ‣ When you press the delete button next to any connection, this will instantly be deleted from your Personal Safe
Please note that your equinux password is not directly used as your VPN Tracker password. Instead, VPN Tracker automatically creates a strong password using key derivation for your added security.
Please refer to the following pages for further information on VPN Tracker Personal Safe (formerly known as Connection Safe):
- A demo license is only valid for 30 days.
- A demo license allows you to use all the Pro Edition features except the export feature.
- A demo license restricts tunnel traffic up to 500 kb in either direction.
- Once the 500 kb limit has been reached, a demo license allows you to stay connected for another 3 minutes.
‣ Go to "VPN Tracker" > "Refresh My Account"Then, try to activate your VPN Tracker again.
Symptom
When using Personal Safe, a data conflict may arise. E.g. if a connection is altered on machine A and also updated in the safe, and then the same connection is altered on machine B before it had a chance to update the connection from the safe, VPN Tracker has a problem: The connection now exists in two different versions, the version in the safe and the local one.Solution
We decided that at all times, there can only be one “truth”, and as VPN Tracker is not able to tell who’s speaking the truth, it will show a conflict state and ask the user to please resolve it. Three options are available.- Do nothing; the conflict will persist until resolved.
- The safe is right; the version from the safe is downloaded.
- VPN Tracker is right; the version of VPN Tracker is written to the safe.
Reasoning
The reasoning behind that is in fact very simple. You can change option A of a connection without breaking it and that change may also be meaningful. You can also change option A of a connection without breaking it and that change may be meaningful, too. However, changing both of these option may not be meaningful at all, these options may now even contradict with each other and that can easily break the connection. That’s why we decided to never merge individual changes into a single one.It is of course also possible to use World Connect with the VPN Tracker 365 App.
Newer licenses starting with VPN Tracker 365 will be managed here.
- Germany
- Austria
- United States
- Australia
- Brazil
- Canada
- France
- Japan
- Luxembourg
- Netherlands
- New Zealand
- Singapore
- Spain
- Sweden
- Switzerland
- United Kingdom
‣ Choose "File" > "New" > "World Connect Destination"‣ Then, choose "World Connect" and "Countries"
‣ Check your country of choice:
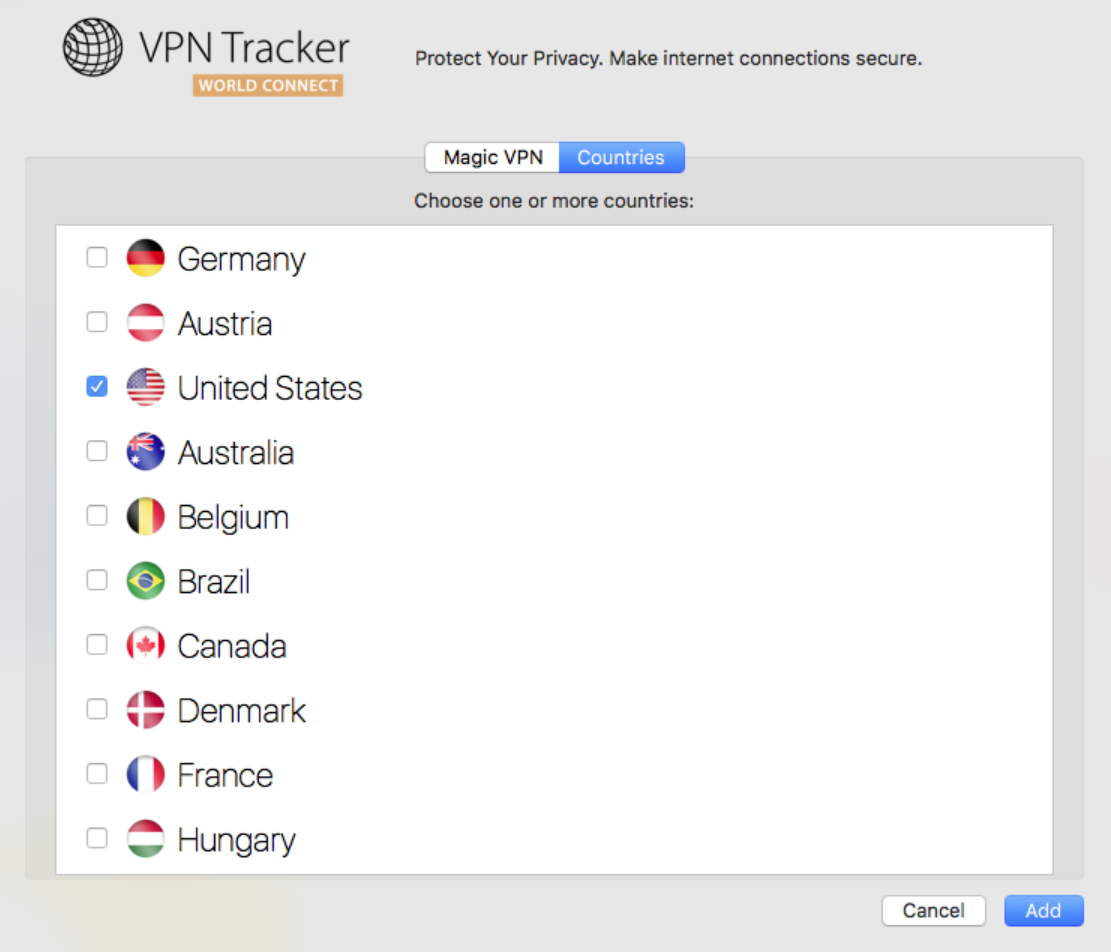
Additionally, please re-run the VPN Tracker Connection Checker and see if this solves the issue. If this does not solve the issue, please send us a technical support report:
‣ Open "System Preferences." ‣ Click "Language & Region."‣ Change to your preferred language by dragging your selected language to the top of the list.
‣ Close your software. For example, with VPN Tracker, you can do so by choosing "VPN Tracker" > "Quit VPN Tracker."
‣ Reopen the software.
‣ Go to "File" > "Design Options."Please refer to the following page for further information on how to turn on and off text hyphenation:‣ Remove the check mark from the "Force hyphenation."
‣ Click "Ok."

‣ Click on the appropriate icon within the "Contents" tab to identify the location of your custom content. ‣ Choose this icon if you added custom content to your graphics section:‣ Choose this icon if you added custom content to your GIF/animated graphics section:
‣ Choose this icon if you added custom content to your backgrounds and photos section:
‣ Choose this icon if you added a custom folder with images and graphics:
‣ Once you have chosen, scroll down to the "Custom" section:
‣ Right-click on the image or graphic that you want to delete. ‣ Choose "Move to Trash" from the drop-down menu.
‣ To remove a folder, you will need to right-click on the folder and choose "Remove."
‣ In Apple Pages, double the size of your graphic. For example, if you had a shape that has the dimensions 100x100, please increase that to 200x200. ‣ Copy and paste it into an image area in Mail Designer. ‣ Then, select the image. ‣ Right-click (or Ctrl+click) on the image. ‣ Choose "Original Size (Retina)" from the drop-down menu. This automatically shrinks the image but becomes retina quality.
~/Library/Group Containers/C3HCD5RMD7.net.tower-one.MailDesigner
You can access this folder by opening Finder, going to "Go" > "Go to folder" and copying and pasting in the above path.
‣ You can do a complete manual backup by going to "My Designs." Then, press ⌘ + a to select all the designs and then drag them to a folder on your desktop. You can then also save this folder on an external hard drive.
After connecting to a country, VPN Tracker World Connect is automatically given an IP address from that location. By clicking on the link below, you will be able to check your location at any time: https://www.whatismyip.com
Underneath "Country" you will see which country your IP address from VPN Tracker World Connect is registered in.
- VPN Tracker 365: Download here
- An internet connection
- A VPN Router/Gateway
Create a new connection
In VPN Tracker 365, try the following:‣ Click on the plus symbol in the bottom left corner:‣ Choose: "New Company Connection"
Choose your VPN Router
‣ In the list of VPN Gateway vendors, choose the manufacturer and model of your VPN router. In case your VPN router does not appear in the list, try the following: ‣ Choose "Use custom device profile." ‣ Click on "Create" to add your VPN connection.

Your configuration guide
Our engineers have tested a large number of VPN gateways with VPN Tracker. For many of these, detailed configuration guides are available. In the newly created connection, you will be able to find the router specific configuration guide:
Alternatively you will be able to find the configuration guides on our website at http://vpntracker.com/interop
Further details for creating your VPN connection on Mac OS X can be found in the configuration guide or in the VPN Tracker handbook.
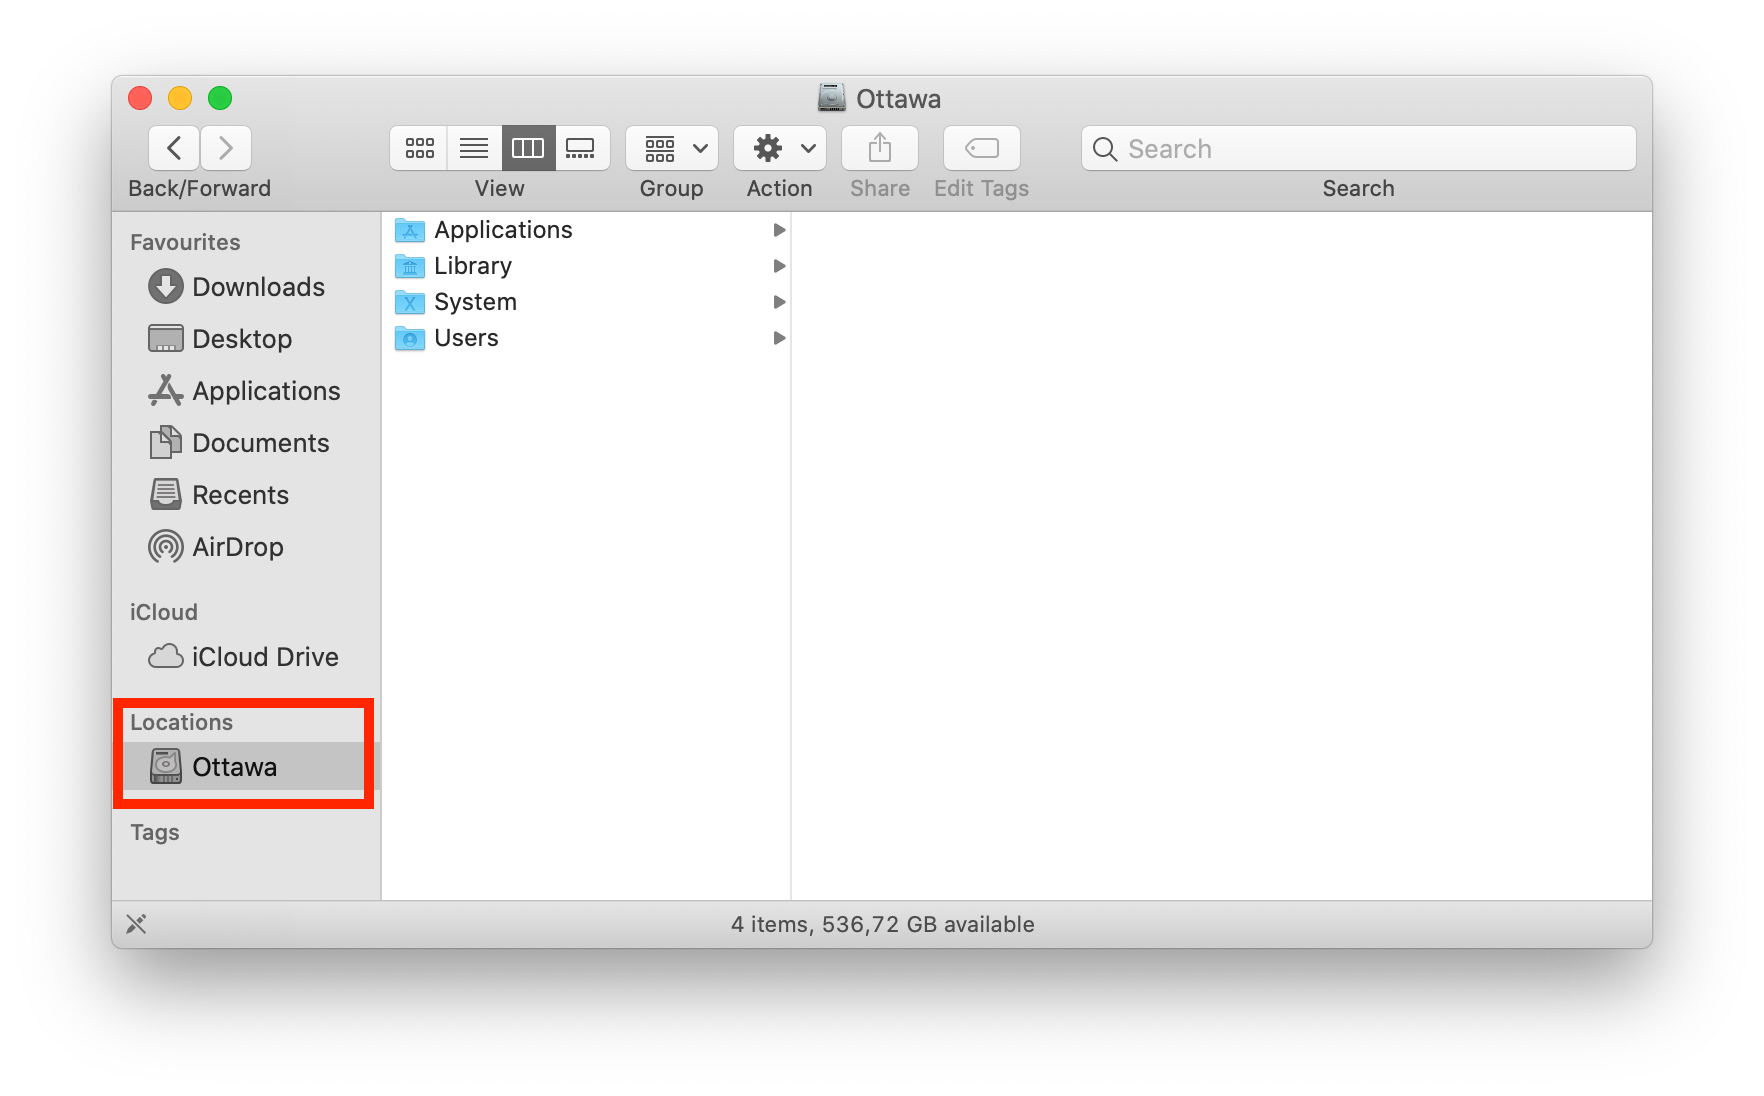 To access your file server via VPN, you have two options...
Option 1: Manual Access:
- Open Finder.
- Open the "Go" menu.
- Choose "Connect to Server..."
- Enter the IP address (e.g."192.168...")
- Click "Connect".
That's it! Now you have access to your files in Finder for this session. Please note, you will have to carry out these steps each time you need to connect.
Option 2: Creating a Shortcut:
You can also create a shortcut to your server within the VPN Tracker app, meaning it will be saved for whenever you need to access the server.
- Go to "VPN Shortcuts" in the app menu.
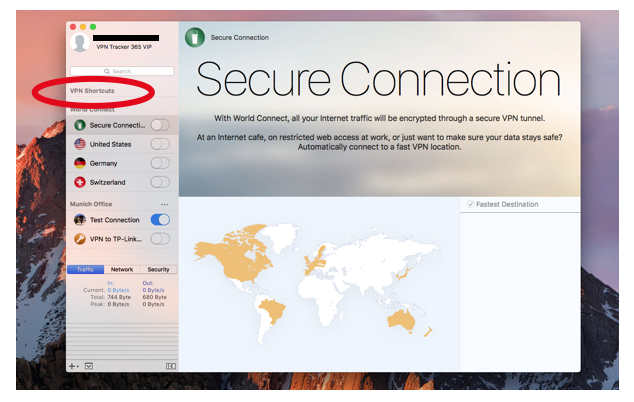
- In the shortcuts section, click on the bottom menu and drag out the File Server icon.
- Choose a VPN connection and a server to create your shortcut. If your chosen server does not appear on the list you can also enter it manually.
After you have completed these steps your connection will be saved in the shortcuts section for whenever you need to use it.
This video tutorial shows you how to quickly create a VPN Shortcut to a file server...
If you’re setting up a VPN connection, you’ll often come across the term “pre shared key” or “VPN shared secret.” This guide explains what it means, how to set it up, and what to do if you lose it — so you can get your VPN running smoothly on your Mac.
What is a pre shared key VPN, or what is a pre-shared key for VPN?
A VPN pre shared key (also called VPN shared secret, VPN PSK, shared key, or preshared key) is like a password that secures your VPN connection. This IPsec pre shared key is configured on your VPN gateway — such as a firewall or router — and must match on your device to establish a secure VPN tunnel.
Without the correct key, your device cannot connect, ensuring that your VPN connection stays protected from unauthorized access.
Note: Some VPN gateways require the shared secret key to contain up to 512 alphanumeric characters. Check your device’s manual or use a pre shared key generator tool if needed.
How to Set Up a Pre Shared Key
VPN Tracker makes setting up your VPN simple and secure. It provides step-by-step setup guides for all major VPN gateway manufacturers, showing you exactly how to:
- Create and configure a pre shared key or shared secret key on your firewall or router
- Enter the VPN PSK on your Mac in VPN Tracker
- Check that your VPN connection is working securely
To get started, download VPN Tracker here: Download VPN Tracker
How to Recover a Lost Pre Shared Key
If you’ve lost your pre shared key or VPN shared secret, here’s how you can recover it:
- Check VPN Tracker Personal Safe: If you saved the connection in your Personal Safe, you can redownload it with the key.
- Search Your Mac Keychain: Go to Applications > Utilities > Keychain Access, search for “Shared Secret,” and find your saved VPN PSKs.
- Restore from Backup: If you use Time Machine Backup, you can try restoring an older connection version that contains the pre shared key.
- Check Your Firewall or Contact Your VPN Administrator: Refer to your device manual or ask your network administrator to retrieve the shared key from your VPN gateway or firewall.
Need help with your VPN setup?
Visit VPN Tracker — the #1 VPN client for Mac for expert tools and guides to get your VPN running smoothly.
Creating an email link in Mail Designer is really straightforward. Simply follow the instructions below to get started:
- Type your desired text in a text layout block e.g. "Email me."
- From the sidebar select "Add link" and choose "Email mailto" as the type of link from the drop down menu.
- Add your email address.


Now your chosen text will appear as a link and when a customer clicks the link it will open a new email to you.
Yes there is! Mail Designer 365 is our brand new and updated version of Mail Designer - only available on an annual subscription basis. Subscribers have access to our best new features and benefit from regular updates.
Most importantly, Mail Designer 365 will always be optimized for the latest mac OS version, so as long as you are subscribed, you will never have to worry about paying for an upgrade again!
Visit our website today to purchase Mail Designer 365.
We don’t offer partial refunds. All of our 365 plans are valid for one year and you can cancel up to 10 days before the end of your term; however, if you do cancel, you will be able to continue using the software the expiration date of your plan.
Renewals can be canceled up until 10 days before their renewal date. The cancelation will take effect on the next possible renewal date. You can continue to use the software until the end of your term, at which point your subscription will end.
Setting up VPN on your Mac
VPN Tracker is the leading VPN client for macOS and works seamlessly on all the latest macOS operating systems.You can download and test VPN Tracker here free.
Launching VPN Tracker for Mac
The first time you launch VPN Tracker on your Mac, you may need to grant it permission to create VPN connections for you. First please make sure VPN Tracker is in your Applications folder and complete these steps locally on the Mac (e.g. not over Screen Sharing, Remote Desktop or other remote access tool).IMPORTANT: macOS notices when you run remote desktop systems like TeamViewer, Apple Remote Desktop, VNC or similar. and hides these buttons. You MUST be local to the Mac.
Then do this:
‣Open System Preferences ‣Go to Security ‣Click "Allow"Now you'll be able to set up VPN Tracker.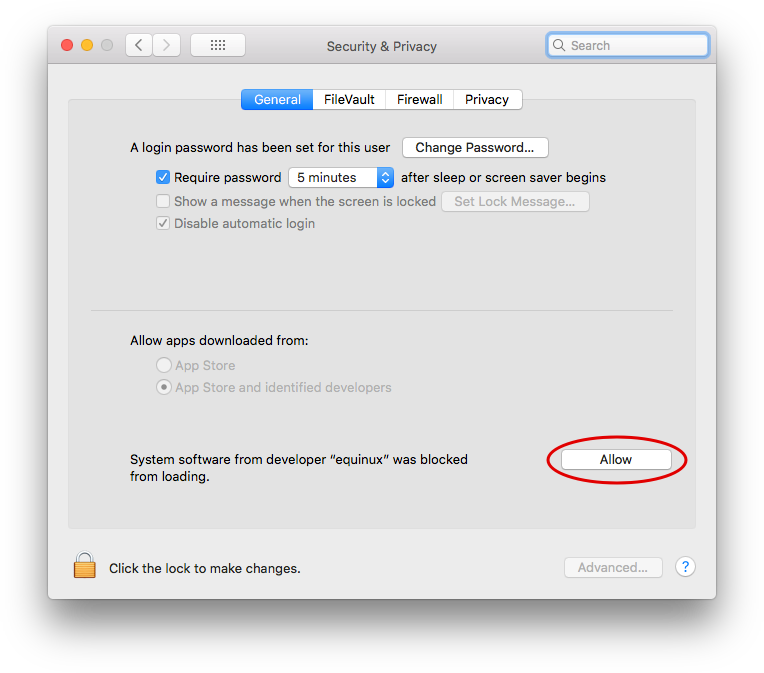
Troubleshooting VPN Setup on macOS
If the "Allow" button can not be clicked, please make sure you are not using a 3rd party mouse or tablet input device, as these can look like remote desktop software to your Mac. If you are using e.g. a Wacom input tablet or mouse utility tool, try disabling those, reboot your Mac and then try clicking the button again. In case the button doesn't even appear in the dialog, please note that if your Mac has a MDM profile installed, the MDM profile can forbid users to approve their own System Extensions. In that case the profile itself has to approve our extension. Please see technical notes below. Technical note for Enterprise Rollouts: VPN Tracker for Mac uses a System Extension to create a secure VPN tunnel and manage network traffic. macOS High Sierra and newer macOS versions now require users to manually approve all System Extensions. For Enterprise rollouts via MDM, you can also pre-approve the VPN Tracker Kernel Extension using a special profile. Our Team IDs are CPXNXN488S and MJMRT6WJ8S.Please see Apple's Support Document for more details. Not using an MDM managed Mac? If your Mac is not MDM managed, please try rebooting, as macOS occasionally can get tripped up with System Extensions. After the reboot, VPN Tracker should work fine.
This link will directly take you to your profile administration:
https://apple.co/2Th4vqI
You will find all running subscriptions under "Subscriptions." You can also disable the automatic extension of your subscriptions.
If you have received this error message, please carry out the following steps to fix the problem:
You should now be able to access your files again.
- Log out of VPN Tracker
- Quit and restart the app
- Ensure you have an internet connection
- Log into VPN Tracker again
- Retry downloading the connection
‣ Choose "File" > "Save" ‣ A pop up will appear. ‣ Give your email design a name. ‣ Choose a category or create a new category by choosing "Custom" from the drop-down menu. Then, type in the name of your new category.Once you save your email design, it will be saved in Mail Designer app. You can access it from the Design Chooser. You can click on "My Designs" or search for it in "My Library."

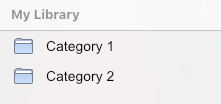 Note: In the demo version of Mail Designer Pro 3, saving of designs is only possible after your purchase.
‣ Select a text area. ‣ Choose "Edit" > "Spelling and Grammar" > "Show Spelling and Grammar" from the menu bar.Please refer to the following page for more information on how to choose your spell check language:‣ A pop up will appear that will let you choose a language. ‣ Just click on the "Automatic by Language." ‣ You can choose your preferred language from the different options from the drop down menu.
‣ Open your Mac's System Preferences ‣ Open the "General" tab ‣ Untick the option "Ask to keep changes when closing documents" ‣ Afterwards, you need to restart your Mail Designer 365 app
 With Mail Designer 365, you can create responsive newsletters. By editing images; graphics; and text objects for the mobile version, you can optimize your template for mobile devices.
 This should give you a better and more accurate view of how great your design will actually look!
Please refer to the following page for further information on how to accurately view your Mail Designer 365's email design once uploaded on MailChimp:
This should give you a better and more accurate view of how great your design will actually look!
Please refer to the following page for further information on how to accurately view your Mail Designer 365's email design once uploaded on MailChimp:
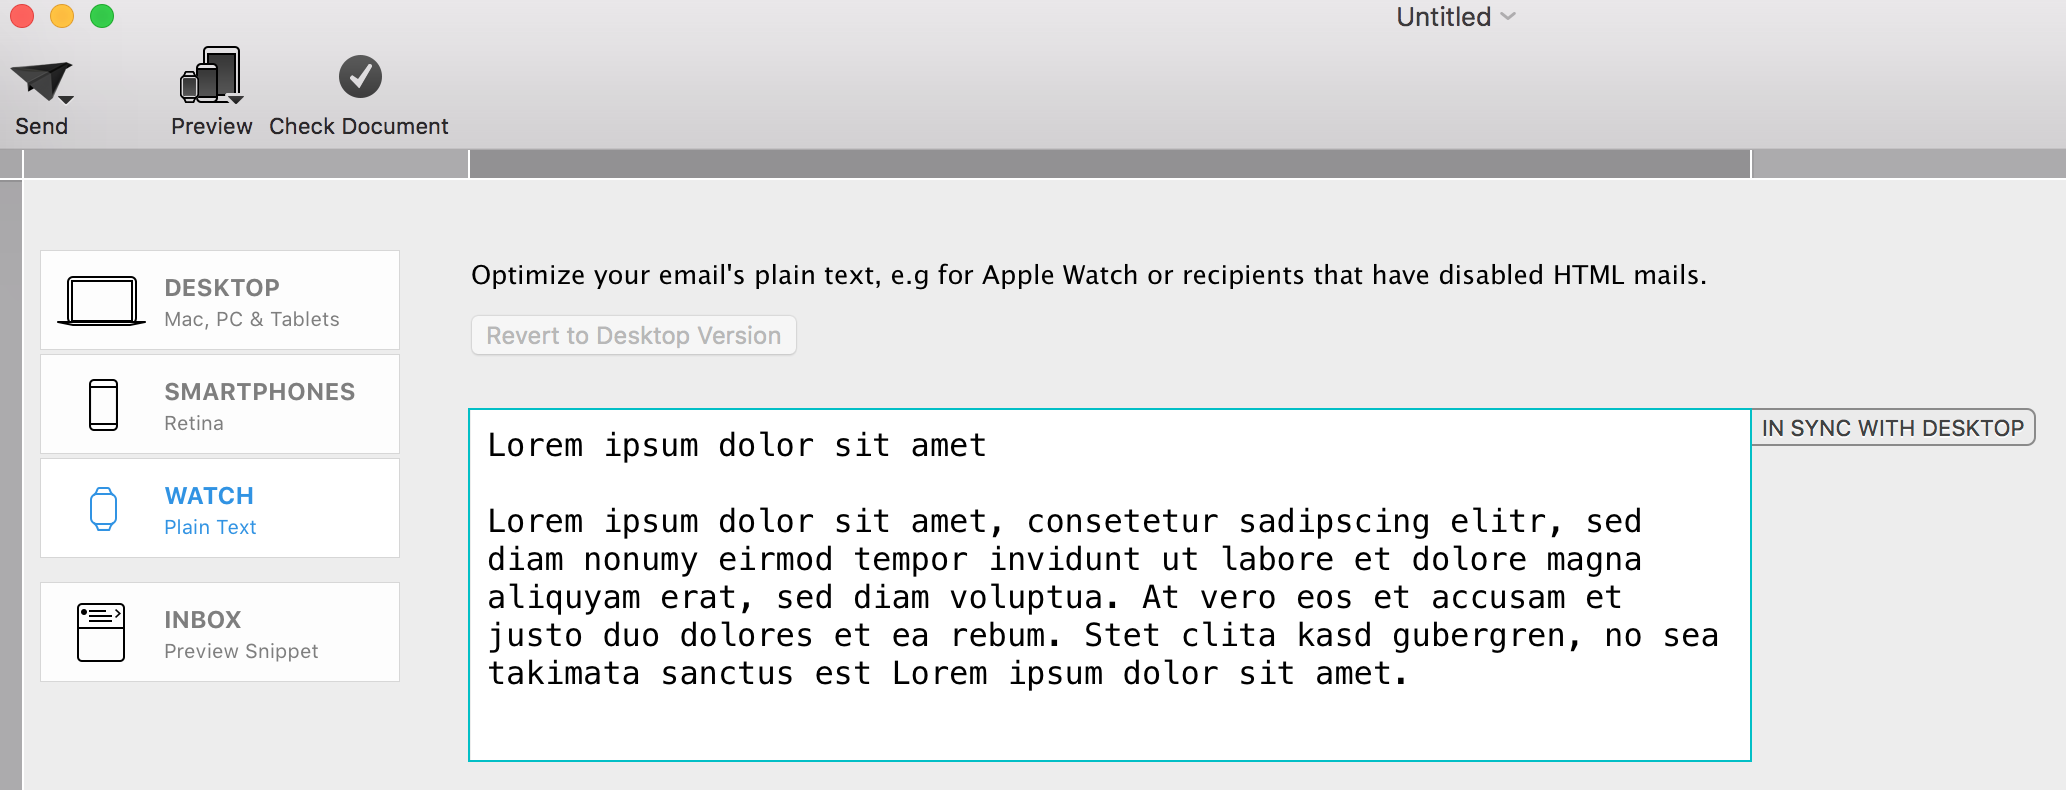 Please refer to the following page for further information on plain text:
‣ Please go to the MailChimp website and log in. When you are ready, upload your design to MailChimp by creating a new campaign. ‣ Select the email design you just uploaded and click "Preview and Test." ‣ Next, click "Enter preview mode." ‣ Click the button for "Enable live merge tag info". You will now see your information for the placeholder you have entered.
‣ Open one of your Mail Designer 365 email design ‣ Choose "File" > "Revert To" ‣ Select a version or click "Browse all versions"
‣ Select a text area ‣ Please choose "Insert" > "MailChimp" or "Campaign Monitor" ‣ Choose a placeholderNote: A placeholder cannot be used on text within an image area, you'll need to place your cursor in a text area to use placeholders.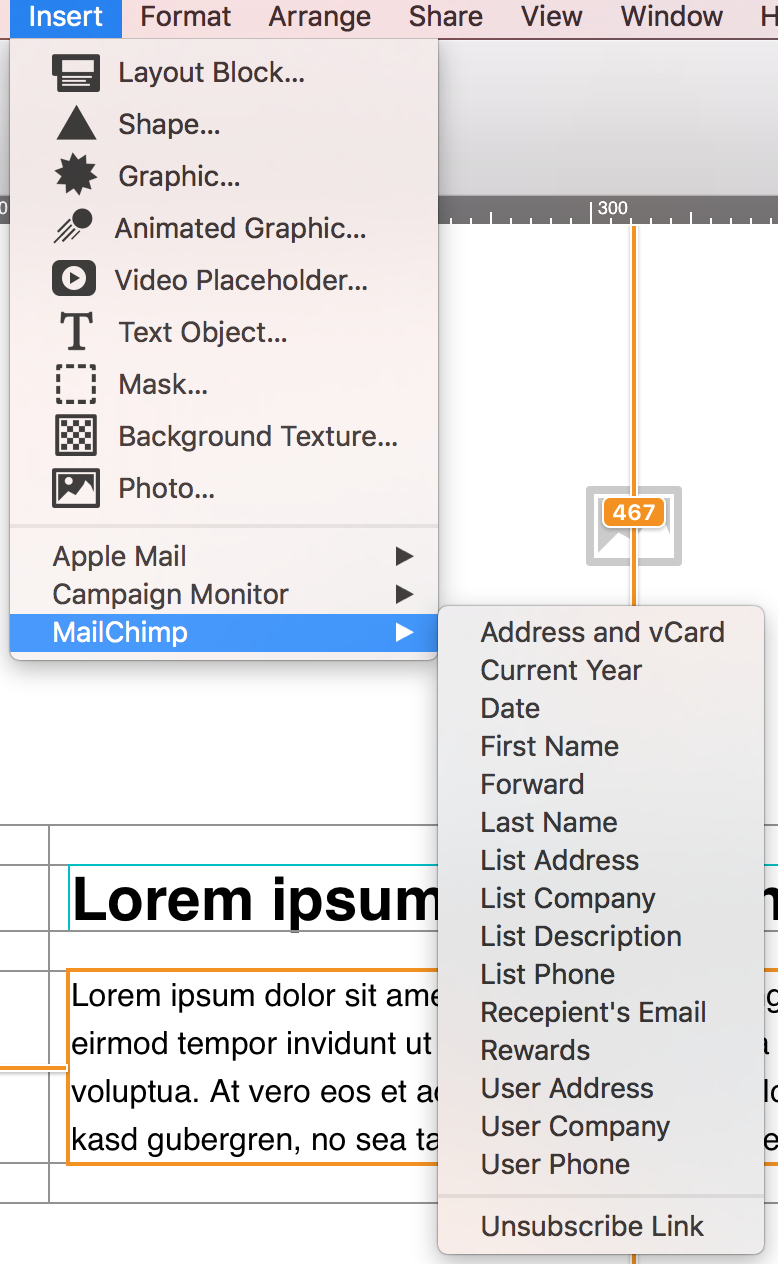
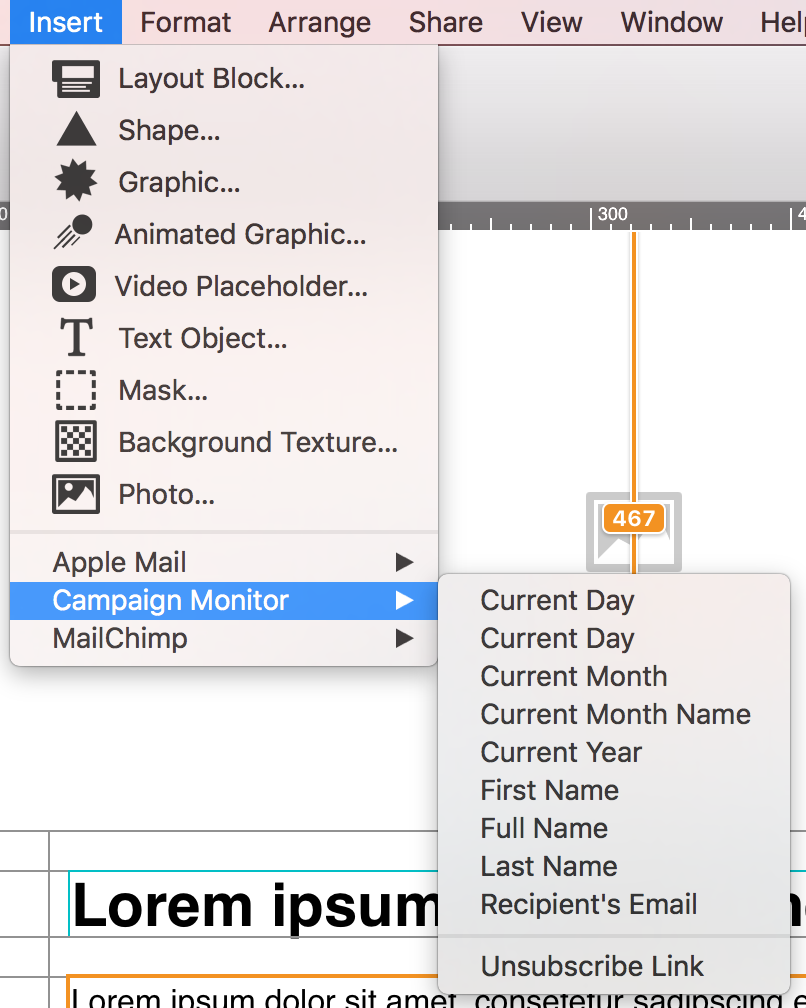
 After you have added a video placeholder from the Contents panel, copy the link to the video into the link field.
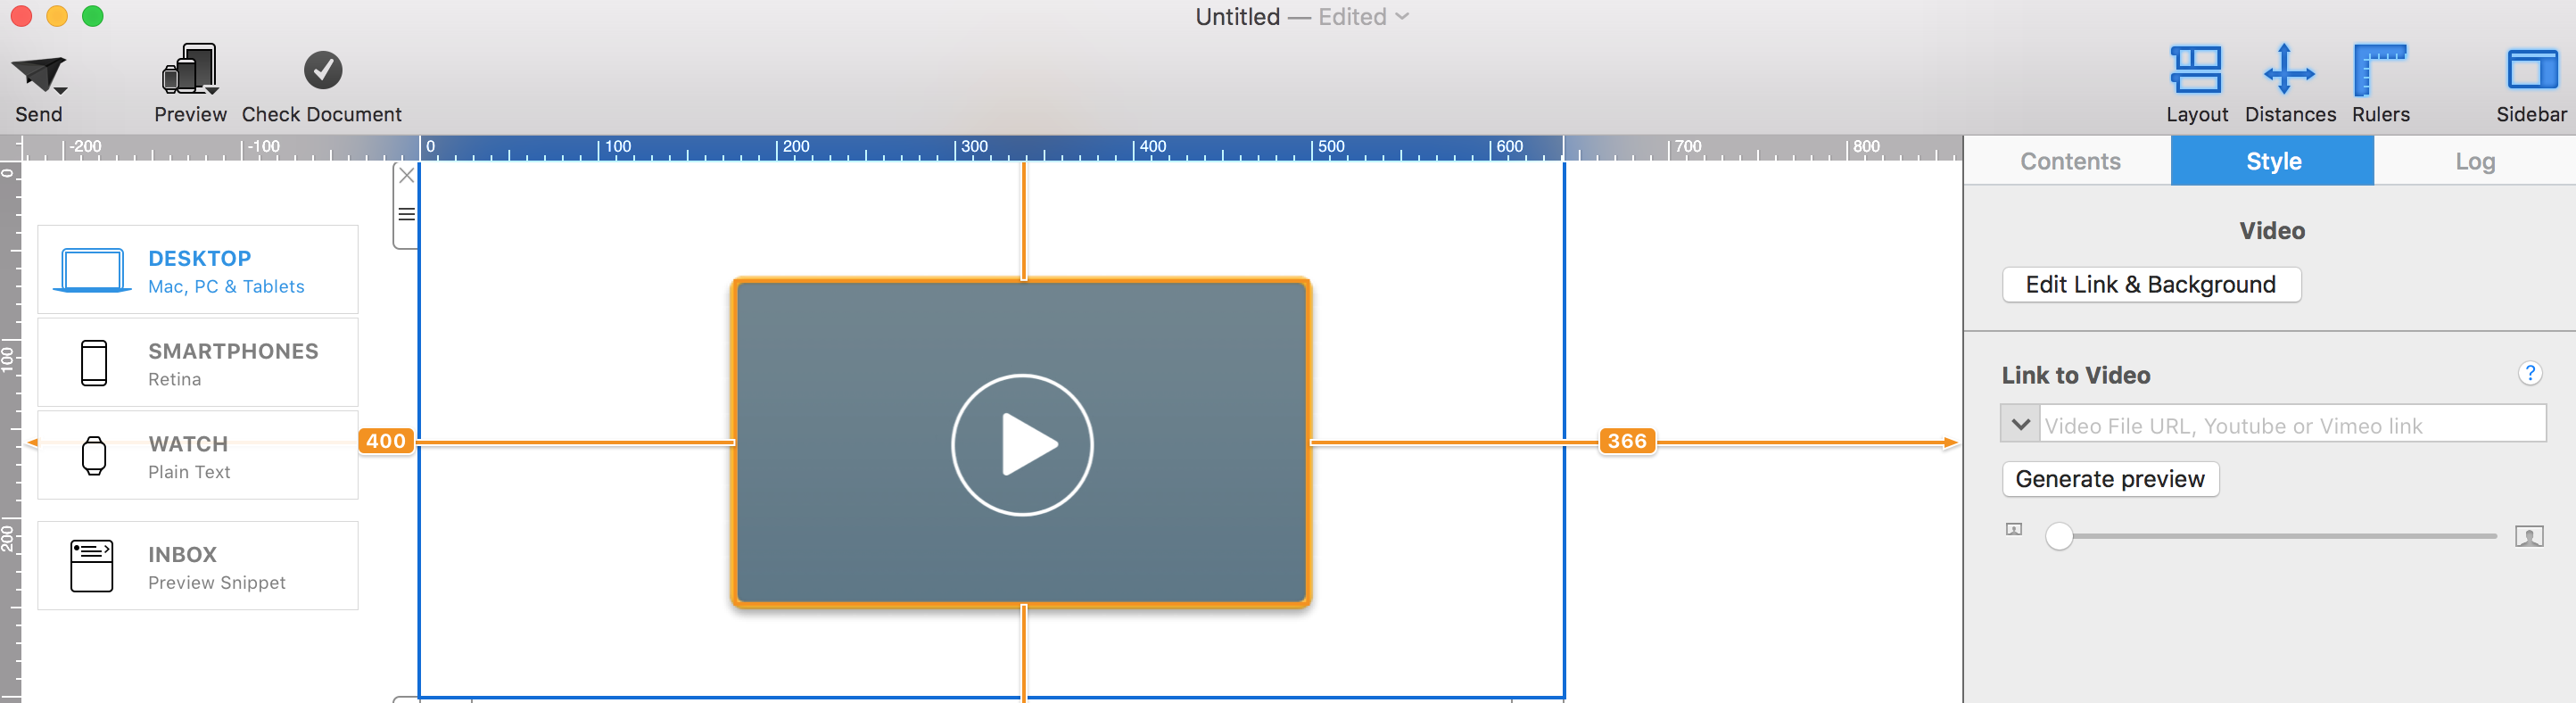 Mail Designer 365 allows you to use links from Youtube and Vimeo. In addition, you can upload your own MP4 files to your server or Dropbox account and copy the public link to this file into the video placeholder.
If you are using your own MP4 files, the video will be played directly in the email application. However, this is only true if this functionality is supported by the email client. Videos will not be played directly in the email. Instead, your subscribers will be led to the online video.
Please note that video clips you want to use in video placeholders must be uploaded to a third-party hosting website like YouTube or Vimeo. Video files that are only available on your Mac cannot be used in your email design.
Mail Designer 365 allows you to use links from Youtube and Vimeo. In addition, you can upload your own MP4 files to your server or Dropbox account and copy the public link to this file into the video placeholder.
If you are using your own MP4 files, the video will be played directly in the email application. However, this is only true if this functionality is supported by the email client. Videos will not be played directly in the email. Instead, your subscribers will be led to the online video.
Please note that video clips you want to use in video placeholders must be uploaded to a third-party hosting website like YouTube or Vimeo. Video files that are only available on your Mac cannot be used in your email design.
 To activate the mobile version of your email designs, please do the following:
‣ In the Menu, please select "File" > "Design options."Once you have done this, you should be able to see the mobile modified Desktop version and you will be able to edit the layout blocks of the mobile view.‣ Remove the checkmark next to "Create version for mobile devices." ‣ Press "OK." ‣ Then please repeat the same steps and activate the Checkbox again.
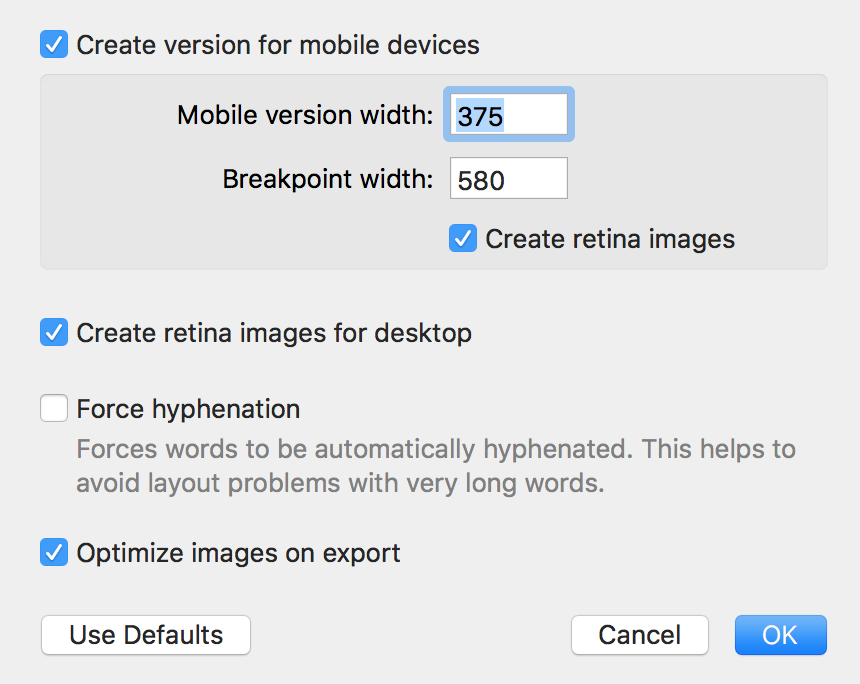
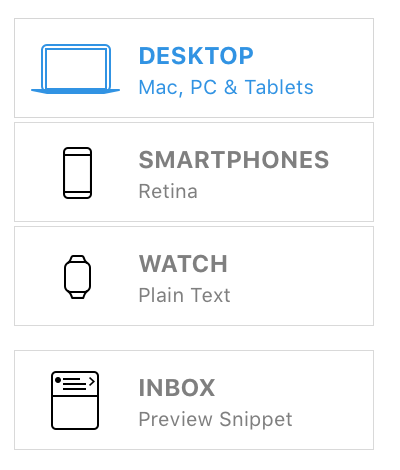
- View, comment on and approve email design drafts
- Receive test emails
- Manage email contacts and audiences
- Schedule and send email campaigns
- Access post campaign analytics
- The username is wrong/incomplete. For example, iCloud accounts sometimes work with "username" but most times need the whole email address as a log in.
- The password is wrong.
- If you're trying TLS, try STARTTLS instead.
- Maybe your server is using a custom port - though this is unlikely.
 Please refer to the following page for keyboard shortcuts for aligning different objects in Mail Designer 365:
‣ Within the "Contents" section of Mail Designer 365, you can click on the triangle icon or press Command⌘-2 to show shapes. ‣ You will have many different button options under the "Buttons" subsection.‣ Drag your chosen button to an image area. ‣ You can edit the message by double-clicking the text of the button.
Adding a link to your button:
‣ Make sure to add a link to your desired landing page by double-click the button shape. ‣ When you double-click the shape, the "Style" section will open on the left side. ‣ Click on "Edit Link & Background."Please refer to the following page for how to add CTA buttons: Please refer to the following page for a brief overview of the Contents: Please refer to the following page for tips on how to strategically position your call-to-action buttons:‣ Under the "Link" subsection, you will be able to click "Add Link" to add the link to your landing page.
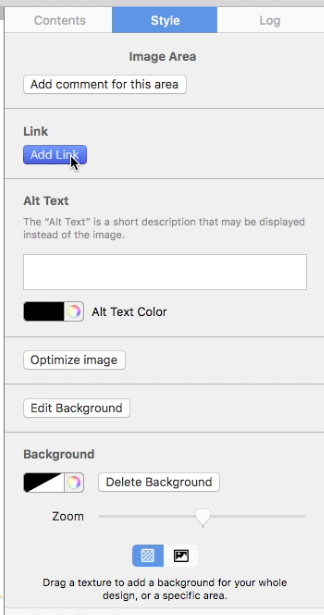
‣To print a document, choose ”File" > "Print…” from the top menu bar.Please refer to the following page for more information on how to print:
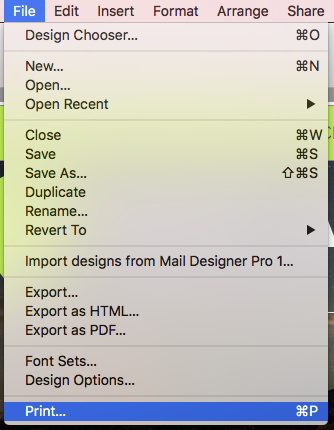
‣ In the Menu, please select "File" > "Design options." ‣ Remove the checkmark next to "Create version for mobile devices" and press ok. ‣ In the Menu, please go to "File" > "Design options" again. ‣ Activate the checkmark next to "Create version for mobile devices" and press okOnce you have done this, you should be able to see the mobile modified Desktop version of your newsletter and you will be able to edit the layout blocks of the mobile view.
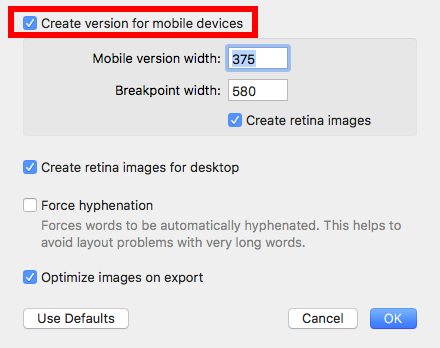
‣ Click on the smartphone icon on the left side to open the mobile version of your template.Please refer to the following pages for further information on how to add video links into the mobile version:‣ Drag a border line of an image area or text area. ‣ Mail Designer 365 will then give you the option to detach your mobile and desktop versions from each other.
‣ You can add a preview picture for your video adding a video placeholder within an image area by clicking "Contents." ‣ Then click the video placeholder icon:
‣ You will be able to add preview images with our video icons or with your own player overlays.
‣ First, choose a graphic element that you want to use from the "Contents" section.Please refer to the following page for how to combine different graphic elements:‣ Then, drag the element into an image area. ‣ Repeat these steps with other graphic elements that you want to use for the combination. ‣ After you have dragged in all of the graphic elements you want to combine, then start arranging them to create the look that you want. ‣ You can move different elements forward or backward, depending on what kind of look you want. ‣ Just click on the graphic element that you want to move backwards or forwards. ‣ Click the appropriate button found on the left side of your screen.

‣ Open your design ‣ Choose “Share" > "Website /HTML...” from the menu bar.Please refer to the following page for more information on how to export your email design as a webpage:‣ Choose a location to save your design. ‣ Optional: Enter a custom name for the exported .HTML file ‣ Optional: If you plan on uploading your images to a separate web server, you can enter an absolute URL prefix for the images.
‣ Open the template you want to export. ‣ Choose ”Share" > "Share design document via Email...“ from the top menu bar.Please refer to the following page for more information on how to share your email design as an attachment:
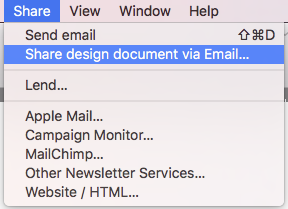
Image areas can contain both text and images:

Text areas can only hold text:
 Please refer to the following pages for more information on text areas:
Please refer to the following pages for more information on image areas:
Please refer to the following pages for more information on text areas:
Please refer to the following pages for more information on image areas:
‣ Click the "Inbox" button to open the optimization window.Please refer to the following page for more information on the Inbox Optimization tool:‣ Then, you can enter the subject line for your email, as well as the preview text that your recipient will see. ‣ On the right side, Mail Designer 365 will show you a preview. ‣ This will display how your recipient will see the inbox preview snippet in their inbox before even opening your email.
 While you are designing and creating your newsletter, Mail Designer 365 continuously scans your email template for any issues as they occur. You will notice a number appear on the checking button in cases when Mail Designer 365 has found issues or potential errors in your email design.
 You can also click on the checking button whenever you want to check for design issues.
Please refer to the following page for more information on the Checking feature in Mail Designer 365:
You can also click on the checking button whenever you want to check for design issues.
Please refer to the following page for more information on the Checking feature in Mail Designer 365:
‣ Open the email template you wish to share. ‣ Choose "Share" > "Lend..."Remember: You cannot lend a document while on the demo version of Mail Designer 365.‣ Enter the recipient's email address and write him or her a short message. ‣ Click "Send."
 Please refer to the following page for more information on how to lend your email designs in Mail Designer 365:
‣ Open your email template if it is not already opened. ‣ From the menu bar, choose "Mail Designer 365" > "Preferences."Please refer to the following page for more information on how to create custom preview displays in Mail Designer 365:‣ A popup window will appear. ‣ Click on the smartphone icon, labeled "Mobile."
‣ Click on the "+" icon at the bottom left of the window. ‣ Enter the resolution you want to use.
‣ Give this display option a name so you can easily find it in the preview options menu
‣ Mark the text that you would like to turn into a link. ‣ Click "Add Link" from the left sidebar.Note: You can change the color and text options of your link using the regular font options.‣ You can now choose what type of link you want to add:
‣ Then enter your URL in the Link destination dialog box:
To add special characters:
‣ Open your email template if it is not already opened. ‣ Choose “Edit" > "Emoji & Symbols”You have different options from different categories like emojis, arrows, bullet points, stars, currency symbols, latin alphabet, trademark symbols, other letterlike symbols, math symbols, parentheses, pictographs, and punctuations. Please refer to the following page for more information on how to add emojis and special characters in Mail Designer 365:
 It’s important to note that an entire image area will be displayed as a single image in your email. It does not matter how many shapes or graphics you have within a single image area, the entire image area will be displayed as a single image. Also, you can only assign one link per image area. If you want to add multiple links for different social media accounts, you will need to choose a layout block with multiple image areas.
First, let's go over how to assign 1 link to 1 image area (Great for linking to only 1 social media account):
‣ To create an image area link, choose an image area in your design.Remember: 1 link to 1 image area. This means you can only assign 1 link to 1 social media outlet within 1 image area.‣ Click the "Add Link" button from the Style section of the sidebar. ‣ Then, just enter your URL. ‣ The entire image area will be “hot” and can be clicked in your final message.
‣ A little link icon will show you for which image areas links has been embedded. ‣ Note: It is not possible to add a link to individual components of a single image area.
How to assign multiple links (Great for linking multiple social media accounts):
We’ve included several layout blocks that contain several image areas next to each other. You can use these blocks to create multiple image area links. For instance, if you use a layout block with 4 image areas, you can add 4 buttons with different links to 4 social media sites.
 Just make sure to add one icon per one image area. Assign one link per one icon.
Correct vs. Incorrect
Correct because: 4 different icons in 4 different image areas. You can add 1 link per 1 image area. Therefore, you can add 4 different links total.
 Incorrect because: 4 different icons in 1 image area. You can only add 1 link per 1 image area. Therefore, 4 icons will only lead to 1 landing page.
Please refer to the following page for more information on how to add different buttons with different links to your Mail Designer 365 email design:
Incorrect because: 4 different icons in 1 image area. You can only add 1 link per 1 image area. Therefore, 4 icons will only lead to 1 landing page.
Please refer to the following page for more information on how to add different buttons with different links to your Mail Designer 365 email design:For a video tutorial:
‣ First, export your Mail Designer 365 template as a PDF file. ‣ Choose “File" > "Export as PDF…”Please refer to the following page for more information on how to convert your email design as a JPG or PNG file:‣ Save your document as a PDF file. ‣ Now, open your PDF file.
‣ Go to your menu bar at the top. ‣ Choose “File" > "Save As…”
‣ A popup window will appears, and you can choose the format you want. You can decide if you want to convert the PDF into a JPG or PNG file.
‣ Make sure to click on the padding area of a text block.Please refer to the following page for more information on how to create transparent effects:‣ Click "Delete Background" on the right side.
‣ Afterwards, click on the outer area of the same text block. ‣ Then, click "Delete Background."
‣ Your text block should now have a transparent effect.
 If you want to add multiple buttons with different links, the use layout blocks with multiple image areas. That way, you can add one button with its own link per one image area.
 Please refer to the following page for more information on text areas why a link is being applied to the entire image area instead of a graphic element:
 Within Mail Designer 365, you have multiple choices of different layout blocks with multiple image areas. Remember, one image area only allows you to add one link. When you send your email templates, an image area with different elements will be rendered as a single image, meaning you can only add one link within one image area and the link will be applied to that entire image area.
For the layout block, you can choose which layout you want and how many image areas there are within the layout block. Here is a layout block with 4 image areas:
Within Mail Designer 365, you have multiple choices of different layout blocks with multiple image areas. Remember, one image area only allows you to add one link. When you send your email templates, an image area with different elements will be rendered as a single image, meaning you can only add one link within one image area and the link will be applied to that entire image area.
For the layout block, you can choose which layout you want and how many image areas there are within the layout block. Here is a layout block with 4 image areas: Within each image area, you can add different graphic elements and a single link. Using a layout block, you can add a button with a unique link inside each image area. The different image areas will be rendered as their own individual images, even though it is one layout block.
 Please refer to the following page for more information on how to add different buttons with different links to your Mail Designer 365 email design:
 However, if you want to create the effect of having one image with multiple links, then check out our video tutorial:
Watch our video tutorial here:
Also, please refer to the following page for a step-by-step guide on how to create the effect of having one image with multiple links:
Check out our video tutorial for more font inspiration:
Also, please refer to the following page for a step-by-step guide on how to download more fonts in Mail Designer 365:
There are 3 ways you can duplicate layout blocks:
Option 1: "Edit" > "Duplicate"
‣ Click the selection tab at the side of a layout block. ‣ Choose "Edit" > "Duplicate" from the menu bar.

Option 2: Using the layout handle
‣ Click on the layout handle on the left side of the layout block. ‣ Hold down the option key or the alt⌥ key on your keyboard. ‣ Drag the layout block that you want to duplicate.Now, you can drop it into position to create a copy. Afterwards, you can edit your text and choose other options accordingly.

Option 3: Command⌘ D
‣ Click on the layout handle on the left side of the layout block. ‣ Press Command⌘-D on your keyboardPlease refer to the following page for a guide on how you can duplicate layout blocks:
 This will allow you to rotate the object freely. You can rotate shapes, graphic elements, and image masks. You will be able to tell how many degrees you have rotated the object by the label that pops up during rotation:
 If you want to rotate both the text and the object, hold the Command ⌘ key and click on both the shape and the text. You will see that the two things are now selected. Click “Group” on the right side.
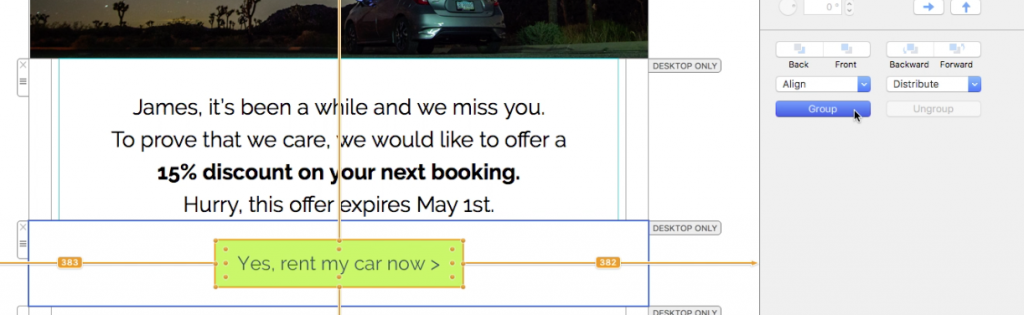 Once you have grouped the two things together, hold the command key and click on the resize controls. Again, you will see that the cursor will turn into a rotate icon. Then, feel free to rotate the selected items to your liking.
Please refer to the following page for further information on how to rotate objects:
Once you have grouped the two things together, hold the command key and click on the resize controls. Again, you will see that the cursor will turn into a rotate icon. Then, feel free to rotate the selected items to your liking.
Please refer to the following page for further information on how to rotate objects:
 Important: Mail Designer 365 will warn the user about the missing font when the user opens the document.
 If you want to make sure that the font that you use will appear on a different person's device, then we suggest using one of the email-safe fonts in your email newsletter.

 Email-safe fonts are the basic fonts installed on everyone's devices. If you have selected a font that is available on macOS but not on iOS, there will be a visible difference on the corresponding devices. If both devices have the font installed, then the email template will look the same on both platforms. You can use Web Fonts which the recipient's e-mail client can downloaded on demand. Most e-mail clients except Outlook support Web Fonts.
Important: Mail Designer 365 will warn the user about the missing font when the user opens the document.
Email-safe fonts are the basic fonts installed on everyone's devices. If you have selected a font that is available on macOS but not on iOS, there will be a visible difference on the corresponding devices. If both devices have the font installed, then the email template will look the same on both platforms. You can use Web Fonts which the recipient's e-mail client can downloaded on demand. Most e-mail clients except Outlook support Web Fonts.
Important: Mail Designer 365 will warn the user about the missing font when the user opens the document.

In order to ensure that your images are displayed properly on all devices, you should always try to use images with high resolution. An alternative would be to resize lower-resolution images to be smaller so they remain crisp.
- The Mail Designer 365 free download only allows you to view the app and open and edit email templates.
- Without an active demo, you will be unable to save or send created templates.
- The free trial version is valid for 7 days.
- You can save templates for a period of 7 days.
- You can send yourself test emails using the integrated Mail Designer 365 Testmail service
- You can explore all Campaigns features, including TeamCloud, Crew Chat and Delivery Hub, with the free Campaigns plan included in your demo
- Export HTML templates
- Send/export templates using an external email marketing service
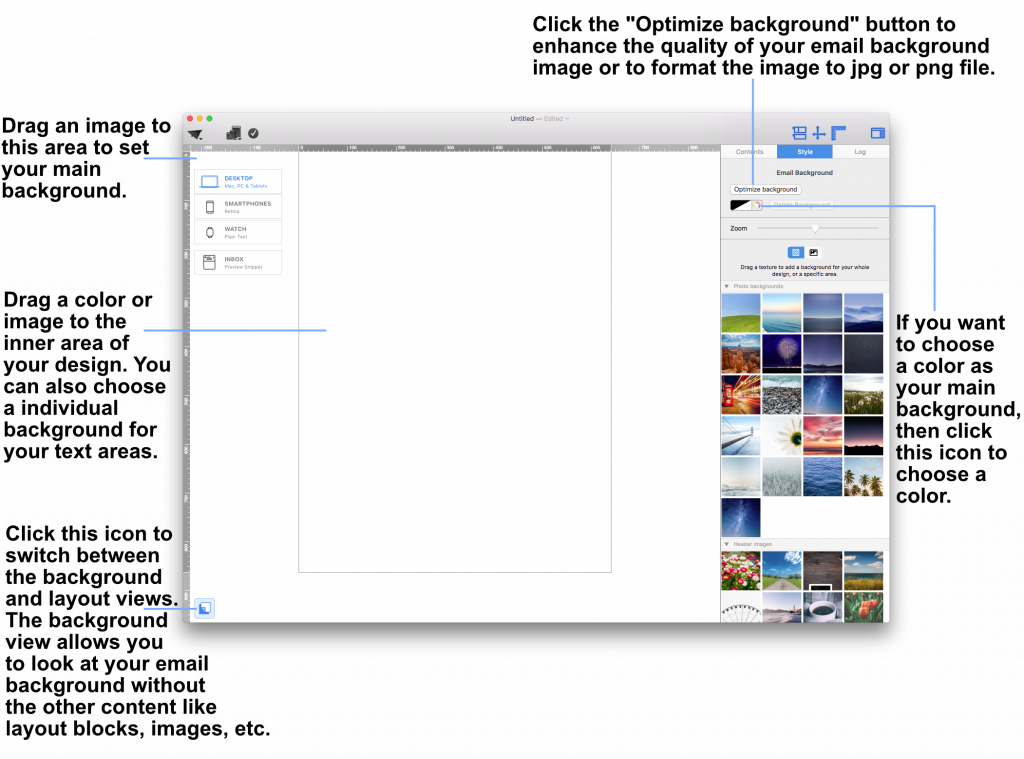 Drag a photo background, image, or texture into the surrounding background area to apply it.
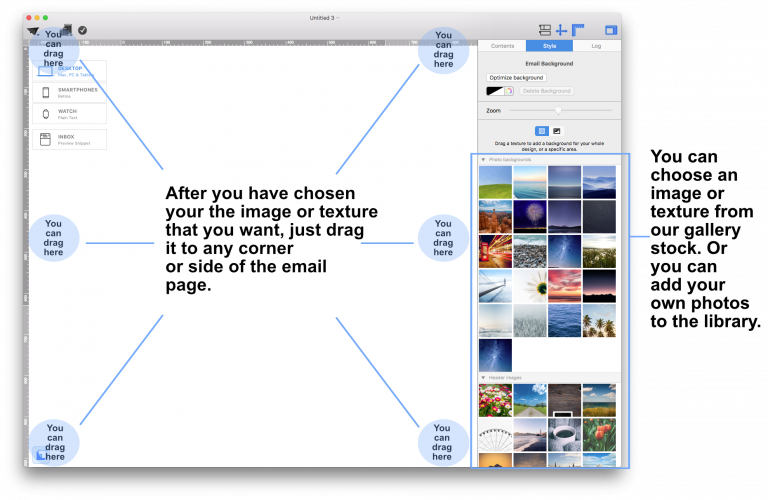 This will apply your choice of background to the mail email background. You can also open the colors window and choose a color as your design background.
 If you would like to set a background for your text areas, then drag an image to the middle area of your email design.
Please refer to the following page for further information on how to change the background of your email template with Mail Designer Pro:
If you would like to set a background for your text areas, then drag an image to the middle area of your email design.
Please refer to the following page for further information on how to change the background of your email template with Mail Designer Pro:
‣ Copy text that has formatting you want to preserve ‣ Choose “Edit" > "Paste and Match Style” from the menu barPlease refer to the following page for further information on how to copy and paste text, while preserving its style:This will preserve the style of the original text that you copied.
‣ Drag and drop a text area into your email template. ‣ Double-click on the text area. ‣ Type your list. Highlight the text where you want the list to appear.Please refer to the following page for further information on how to create a list:‣ On the right side of the screen, you will find a side bar in which you can choose the list style under "Lists." ‣ Choose the list style you want.
‣ It will automatically transform your words into a list with your chosen bullet point.
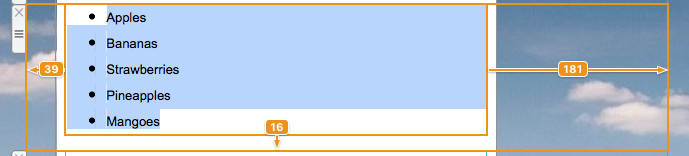
 Adjust the size of the image area as well as the size of the shape to fit your needs. You can also change the color of the shape. On right side, you can adjust the corners by moving the corner radius slide.
 Then, drag a text object into the image area to create a text box effect. You can find text objects under "T" icon within the "Contents" tab. Feel free to position the text box and change its font style, font weight, font size, font color, etc. to fit your needs.
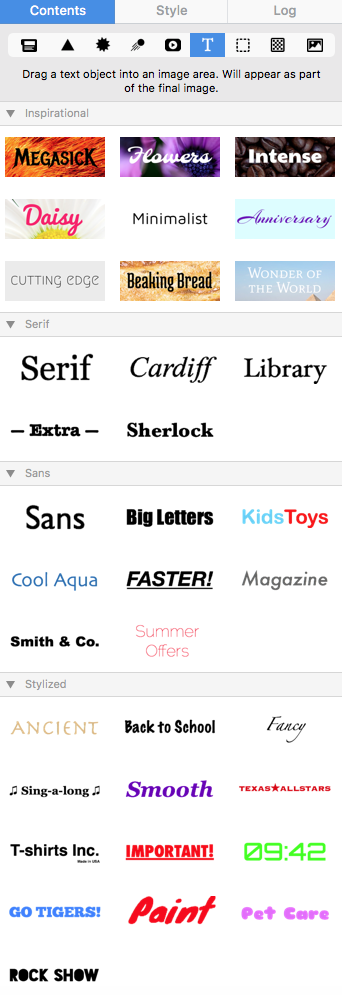 Please refer to the following page for further information on how to create the effect of having rounded text box corners:
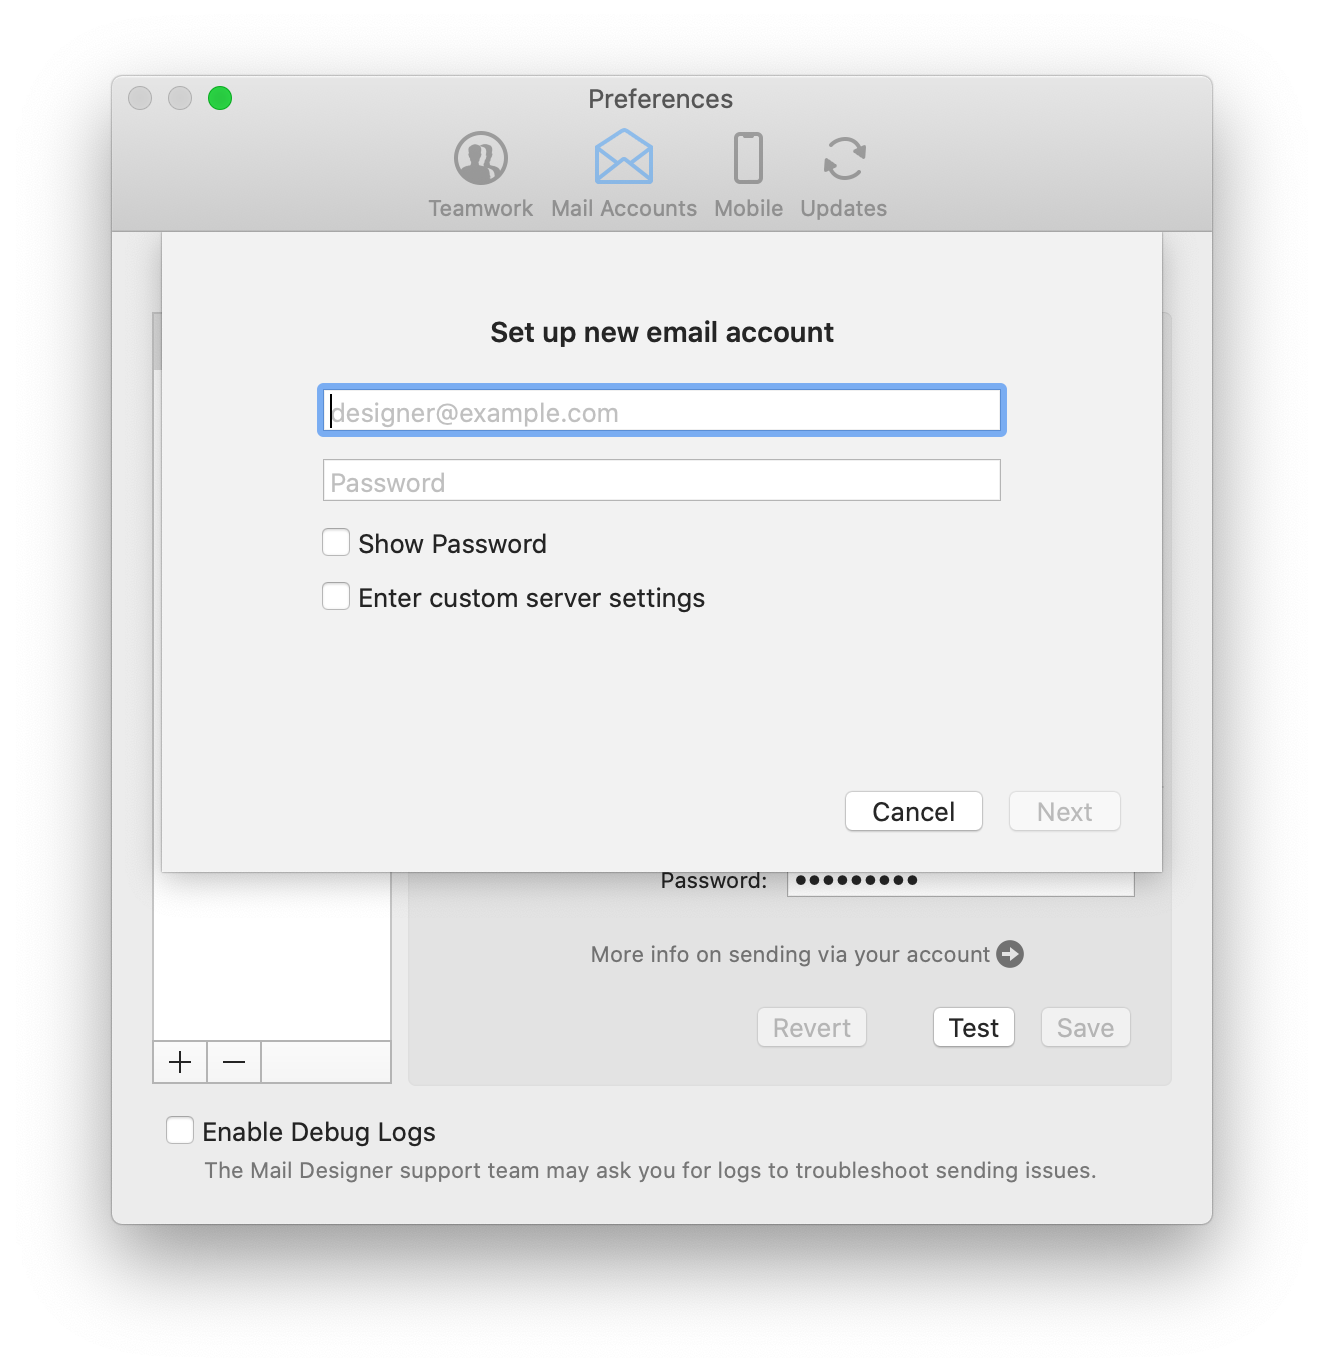 Note: This will work for most generic email accounts (e.g. Outlook, Hotmail, Gmail, etc.) by taking you to the external login page for the respective email client. For custom/internal email accounts (i.e a work account), your network administrator may have to provide you with the information which you can enter by ticking “Enter custom server settings.”
Click “Next” to set up your account. You will now see that your email account’s settings have been automatically detected by Mail Designer 365:
Note: This will work for most generic email accounts (e.g. Outlook, Hotmail, Gmail, etc.) by taking you to the external login page for the respective email client. For custom/internal email accounts (i.e a work account), your network administrator may have to provide you with the information which you can enter by ticking “Enter custom server settings.”
Click “Next” to set up your account. You will now see that your email account’s settings have been automatically detected by Mail Designer 365:
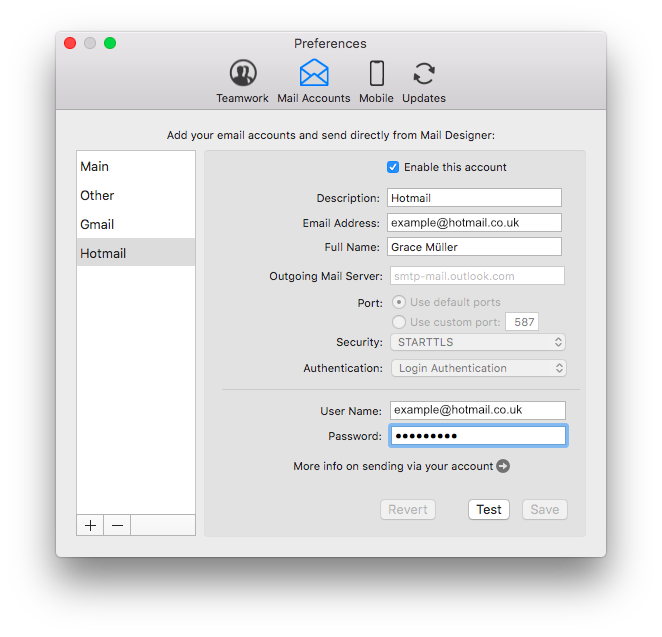 You are now free to use your personal email address to send email designs from directly within the app.
Our best practice recommendation when it comes to videos:
We recommend linking out to the videos on another site such as YouTube or Vimeo. These videos will then open in Safari or the relevant video app. For example, if it's a YouTube video and the YouTube app is installed on the device, then the video will play right in the YouTube app on the recipient's device.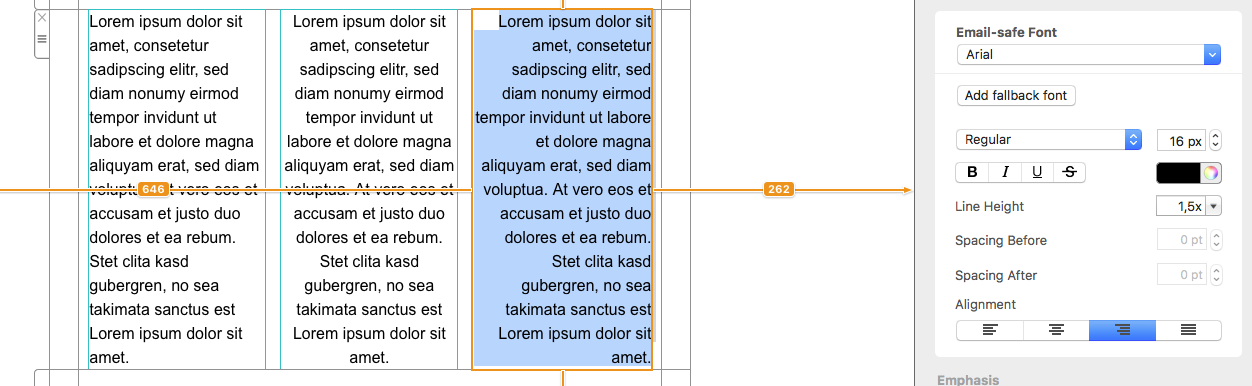
There are a couple of things that you need to check.
‣ First, are you using MailChimp as your email service provider? If yes, make sure that you are not viewing your design on the "Edit" preview within MailChimp's website.‣ Click "Preview and Test" on the top right corner of your screen.‣ If not, try changing the default line height of your text. The default is set at 1.5. Adjust the line height to fit your needs. Try to set the spacing to 1.0 height. Your text should no longer look jumbled up.
‣ Then, choose "Enter preview mode."
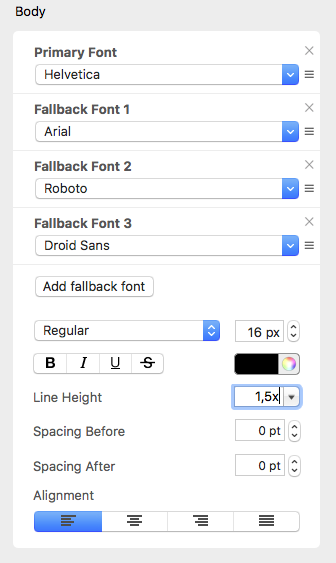
‣ Add a layout block with an image area. ‣ In the "Contents" tab, click on the "Video Placeholder" icon. You can also press Command-5.‣ Drag a video placeholder into an image area.
‣ Paste your WeVideo link into the "Link to Video" field.
Keep in mind:
Unlike YouTube or Vimeo videos, generating preview images from WeVideo videos is not directly supported by Mail Designer365. You will have to provide your own preview image by taking a screenshot of the video frame you want to use as the preview image. Then drag that image onto the video placeholder. Or you can choose an image of your choice as the preview image. In the email newsletter, the videos that you add are treated as images with a link to the video page. Direct inline playback is no longer supported by Mail Designer 365 because most email clients do not support it. Note: Please remember that Mail Designer 365 does not support embedding videos directly within your email designs.‣ You can drag and drop the image of your choice to the outer border of your contents. This will set the image as the background of the container of all of your layout blocks.‣ Click the Layout button to hide the layout block outlines in order to get a better view of your background.
Let's say you want a main email background and a border:
‣ First, choose an image that you want to set as your main email background. ‣ Drag and drop this image into the outskirts of your email design. To show you the area where you can drag and drop your choice of image to set the main background of your email template, we colored the appropriate area in light red:‣ Then, choose an image that you want to set as your background for your border. ‣ Drag and drop the image of your choice into the outline of the container of all of your layout blocks, similar to this:

Did you want to add the same background image in your text areas and your main email background but want a different background effect in between the two? (Kind of like sandwich.)
‣ Set the background of your text areas by dragging and dropping an image of your choice to the middle area of your layout blocks.‣ Make sure to repeat the process to all of your layout blocks:
‣ Set your main email background by dragging and dropping an image to the outskirts of your entire email design:
‣ Then, set a background for the border that is a different image/color/texture as the other two previous backgrounds you used. Make sure you drag and drop the new image within the bounds of the appropriate area (In this case, you want to drag it to the outline of the container of all of your layout blocks):
There you have it! A sandwich-like border effect:
 Please refer to the following page for further information on how to create a border for my email design:
‣ Choose “File" > "Export…”Please refer to the following page for further information on how to export your email design as a .zip file:‣ Save your file. ‣ Then, find your saved file in the location that you saved it to. ‣ Right-click the file and choose "Compress “YOUR FILE NAME”" in the menu bar:
‣ This will create a .zip file:
 Mail Designer 365 does provide a preview for mobile devices. Keep in mind that this is only for the sole purpose of providing a rough idea of how the newsletter may look like on mobile devices. The actual rendering may be different, depending on the email client.
 Please visit this page for further information on how to preview your design for different email clients:
Our recommendations:
‣ One solution is to use the "redirect" feature, which is built-in to some emails to send it to another recipient. "Redirect" is different from forwarding the email because the redirect feature usually tells the email app to leave the original email design alone. ‣ Or you could add a link to your email on the web within the email template. This way, people have the option of viewing the email as it is, even after the email has been forwarded. Please refer to the following pages for further information:‣ Choose “Web Fonts" > "Download additional fonts…” from the font menu.
 Then, you will be able to see a preview window where all available fonts will be displayed.
‣ Click ”Start Download“ to download additional Web Fonts you can then use in your template.
‣ After you click “Start download,” a popup window will open that shows the progress of the download:
Things to understand when it comes to web fonts...
Although there are a wide range of fonts available when you download the additional fonts, we understand that some may still consider this as only a limited number of fonts. This is because the fonts are downloaded from Google’s directory of open source designer web fonts. We wanted to help ensure that our users are able to create designs with beautiful fonts in a legal manner. All the downloadable fonts are free and open source, which means that the fonts are accessible to everyone and are available to be used for both personal and commercial projects. Please refer to the following page for further information:‣ Open Mail Designer 365 on your Mac. ‣ Choose "Mail Designer 365" > "Preferences."‣ Make sure to click the "Updates" tab.
‣ Check the "Get Early Access to beta versions" box.
‣ Since Beta versions are meant to test features and compatibility, Mail Designer 365 will remind you to have a backup of your app and designs:
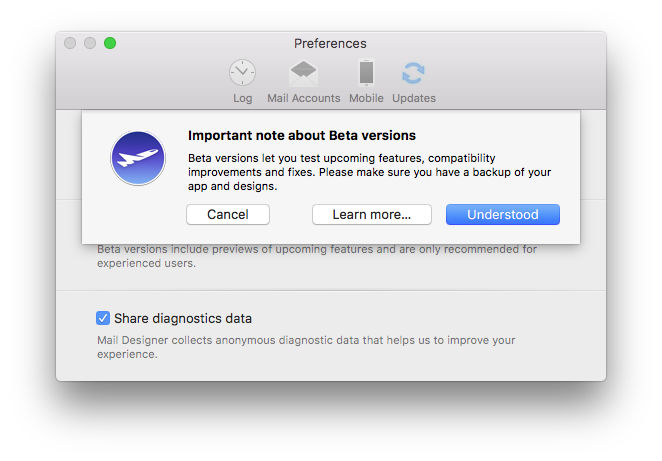
For checking updates, Mail Designer 365 will check for new versions on app start or you can:
‣ Go to "Mail Designer 365" > "Check for Updates…"Please refer to the following page for further information:
You can also check out our video for tips on animated GIFs here:
‣ Go to "Mail Designer 365" > "Preferences."Please refer to the following pages for further information on configuration and sending emails via Mail Designer 365:‣ Then choose "Mail accounts"
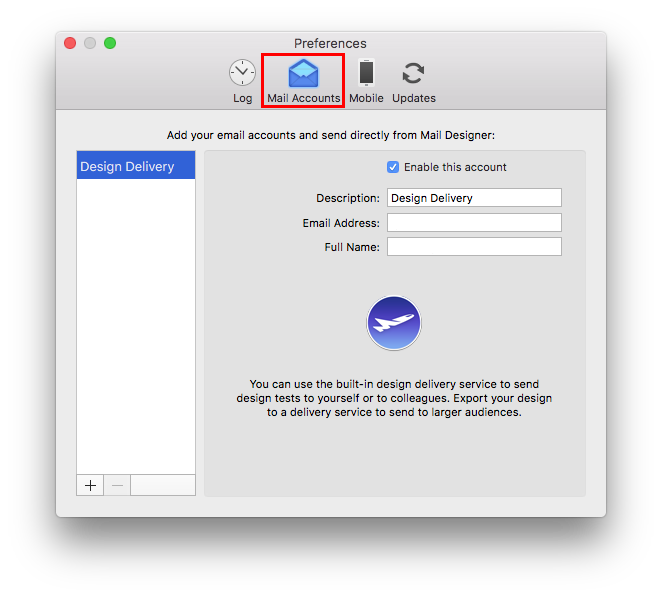
 Please note: Email clients are picky when it comes to the HTML they will support - things that you can safely use in almost any web-browser won't necessarily work for emails.
‣ Go to "File" > "Design Options."Please refer to the following page for further information on how to turn on and off text hyphenation:‣ Remove the check mark from the "Force hyphenation."
‣ Click "Ok."
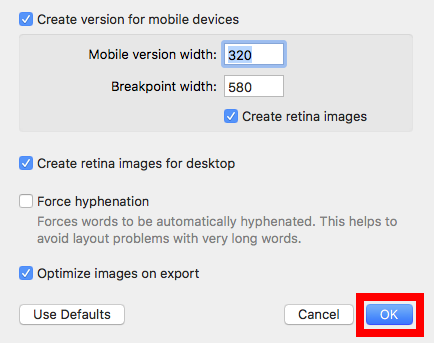
 You also have the freedom of choosing different fonts and font colors for your text within a given text area. This is not limited to one font per paragraph.
 In order to assign different fonts within a paragraph, you must first select "no style" on the right side of your screen. Then, you can select the text that you want to change and assign it with its own font, font size, font color, etc.
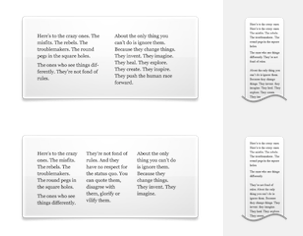 You cannot switch automatically from 2 columns to 3 columns or vice versa. However, you can just add another layout block with the correct number of columns. Afterwards, just copy the text from your original layout block and then paste the text onto the new layout block.
If you want more than 3 columns for text areas, you will need to work with a single text area and space your message accordingly. In this scenario, you will basically be simulating your own table with multiple columns.
Compared to layout blocks with text areas, you have more options when it comes to layout blocks with image areas. You can use a layout block with up to 6 image areas in a column style.
You cannot switch automatically from 2 columns to 3 columns or vice versa. However, you can just add another layout block with the correct number of columns. Afterwards, just copy the text from your original layout block and then paste the text onto the new layout block.
If you want more than 3 columns for text areas, you will need to work with a single text area and space your message accordingly. In this scenario, you will basically be simulating your own table with multiple columns.
Compared to layout blocks with text areas, you have more options when it comes to layout blocks with image areas. You can use a layout block with up to 6 image areas in a column style.
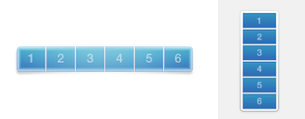 With this layout block, the image areas are displayed next to each other in the desktop view. However, please note that the image areas will be displayed on top of each other in the mobile view. This was designed so that recipients will easily be able to click on the images if they are linked to a landing page and so that the images are still clearly visible when the email is opened with a mobile device.
‣ Hold the alt ⌥ key or option key on your keyboard ‣ Select "Help" > "Send Debug Logs..." from the menu
‣ Choose "File" > "Design Options..."Then, you will be able to export your email design or send via your method of choice (through Apple Mail, Campaign Monitor, MailChimp, etc).‣ Uncheck "Create version for mobile devices."
‣ Click "OK" when you are ready.
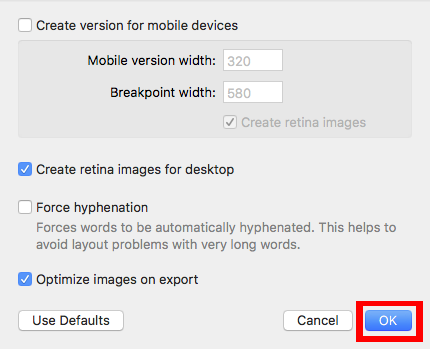
‣ First, open your email design in Mail Designer 365. ‣ Choose "File" > "Export as HTML..."Whether you are using Filezilla or another FTP service, it is important to make sure that the location path URL of the folder is correct. Mail Designer 365 will rewrite all image paths and insert this URL in front of the image URL. This happens automatically for each image.‣ Give your folder a specific name ‣ Connect to your server
‣ Upload your folder on your FTP account. With Filezilla, you can type the location of your folder within your Mac under "Local site."
‣ Or you can find the specific folder within the Filezilla window and then right click the folder. Choose upload from the drop down menu.
‣ Make sure all of the files are added to the folder, including the images used for the email design. ‣ Find the specific location path of your folder. With Filezilla, you will need to click on where your folder is within the server. The specific location path of your folder will be found under "Remote site:"
‣ Click the paper airplane icon on the top right of Mail Designer 365
‣ Choose "Website / HTML..."
‣ Check the box where it says "Prefix image URLS with:" ‣ Add the specific location path URL of your folder
‣ Click "Export"
How to proceed
Please verify that the remote side doesn't have any speed issues and then try to reboot your VPN gateway. If rebooting didn't help and someone at the remote side can confirm that their internet speed is working as normal, please consider the following two questions: 1. Are you the only VPN user? 2. What kind of service/protocol are you using over the VPN? (web, mail, file access, etc.) Both of these factors could also be affecting your connection speed.
- Click on "File" > "Import settings and designs."

- When the migration window pops up, select "Grant access" to continue.
- In the next window, simply select "Grant access" again to allow Mail Designer 365 access to the design files in your Library. You do not need to select a different folder.

- Select from the list which settings you would like to copy over to Mail Designer 365 and then click "Import selected."
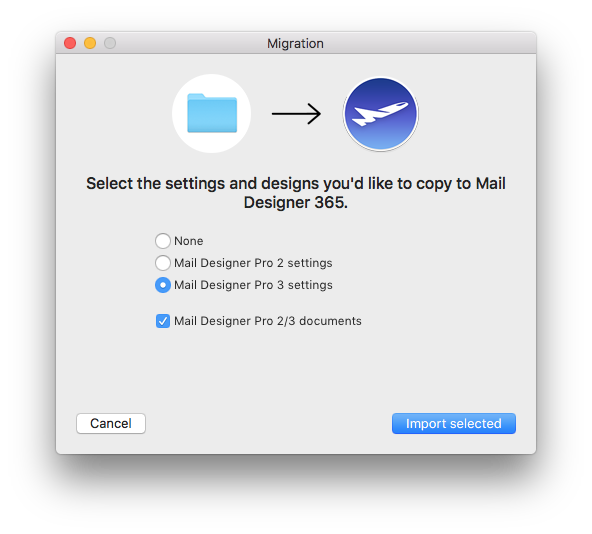
- Your designs and in-app preferences will then be quickly imported into Mail Designer 365.
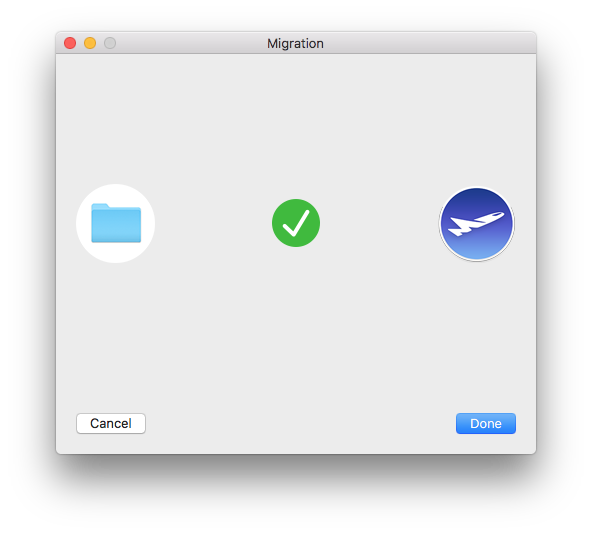
- Click on "File" > "Import settings and designs."

- When the migration window pops up, select "Grant access" to continue.

- In the next window, simply select "Grant access" again to allow Mail Designer 365 access to the design files in your Library. You do not need to select a different folder.
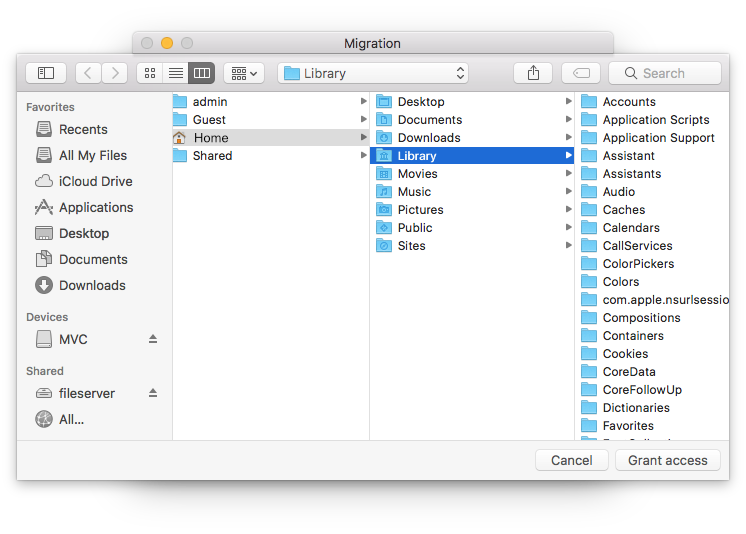
- Select from the list which settings you would like to copy over to Mail Designer 365 (i.e. from which version) and then click "Import selected."

- Your designs and in-app preferences will then be quickly imported into Mail Designer 365 exactly as they were when you last used them.

 You are also welcome to use any photos, textures, or patterns from Mail Designer's stock library. We included many different categories. Simply drag and drop the thumbnails from the design sidebar into your background.
 You can even use your own photos, textures, and patterns. Just simply drag it to your template from your desktop or the Finder. If you are using a third party's photo, texture, or pattern, make sure that you have permission to use it for commercial projects. Also, don't forget to give credit to the designer/artist.
- Navigate to the folder:
Your username/Library/Group Containers - In this folder you will see a Folder ending in
.Mail Designer - Navigate to
Documents/MD365within this folder - Restore the
MD365folder to your new Mac
- Download the VPN Tracker.zip file
- Open Terminal and run the following command:
shasum -a 256 ~/Downloads/VPN\ Tracker \ 365.zip(note the exact path may differ, depending on which version of VPN Tracker you’ve downloaded- Compare the calculated checksum to the checksum published on the Version History page.
- If you have connections or Shortcuts on your Mac that are stored in your Personal Safe, deactivate Personal Safe in preferences and create a local copy of your connections
- Go to your Personal Safe webpage and delete your user keys: https://my.vpntracker.com/user/sync/keys
- Sign out from your VPN Tracker account on your Mac, open Keychain Access, and delete the entry "Connection Safe Master Key."
- Then sign back in and add a connection to your safe.
- Don't forget to write down the new recovery key and keep it in a safe place. This will enable you to log in if you ever lose your login details.
‣ Go to "File" > "Design Options."Please refer to the following page for further information on how to turn on and off text hyphenation:‣ Add a check mark from the "Force hyphenation."
‣ Click "Ok."
‣ Drag a layout block with an image area into your newsletter ‣ Drag the GIF that you want to use into an image area ‣ Make sure to only add 1 GIF per 1 image area ‣ If you add multiple GIFs into 1 image area, only the last GIF added will work
‣ Choose "Message" > "Redirect"For more information, please read Apple's support page here. Note: We always recommend that you use the "redirect" feature rather than to forward your Mail Designer 365 email design.‣ Type the recipient's email address ‣ Click the "Send" button
Please note: You'll need to have a fairly detailed understanding of HTML and CSS layouts to create your own layout blocks. Mail Designer 365 uses advanced techniques to create highly compatible email layouts, so you'll need to be careful not to break email compatibility when creating your own. We can't provide HTML support for your custom designs or any issues that are caused by custom layout blocks so proceed with caution. (Or as our support team likes to say: With great power comes great responsibility…)
How to create a custom layout block
- Right click an existing layout block and choose "Save to desktop"
- Find the "..eqrmlayoutblock" on your desktop and edit the Content.html file
- Customize the preview image to match your new layout block
- Drag the entire folder with your custom layout block into the Mail Designer 365 Contents panel
‣ Visit our upgrade page. ‣ Purchase your Mail Designer 365 plan. ‣ Log in to your account ‣ Click on the button "Buying for a business?" ‣ Add a VAT ID ‣ Enter your full VAT number ‣ Click on "Validate VAT ID"
‣ Make sure the "layout" is visible (Choose "View" > Show Layout") so you can see the drag handle on the layout blocks ‣ Then you select the "Contents" tab on the right side ‣ Select the "Layout blocks" section ‣ Click "Ready-Made"Note: You have the ability to save multiple layout blocks together or to save only a single layout block.‣ Select the layout blocks that you want to save ‣ To select multiple layout blocks, you will need to click on a layout block, hold the shift key, and then select the other layout blocks ‣ Drag your layout blocks into the "My Instant Blocks" section"
‣ Hold the alt ⌥ key or option key on your keyboard ‣ Select "Help" > "Send Debug Logs..." from the menu‣ Note: If you do not hold the alt/option ⌥ key, the Help drop-down menu will say "Provide Mail Designer Feedback..." instead of "Send Debug Logs..."
‣ Once you have sent your debug log, Mail Designer 365 will notify you that the log has been sent successfully
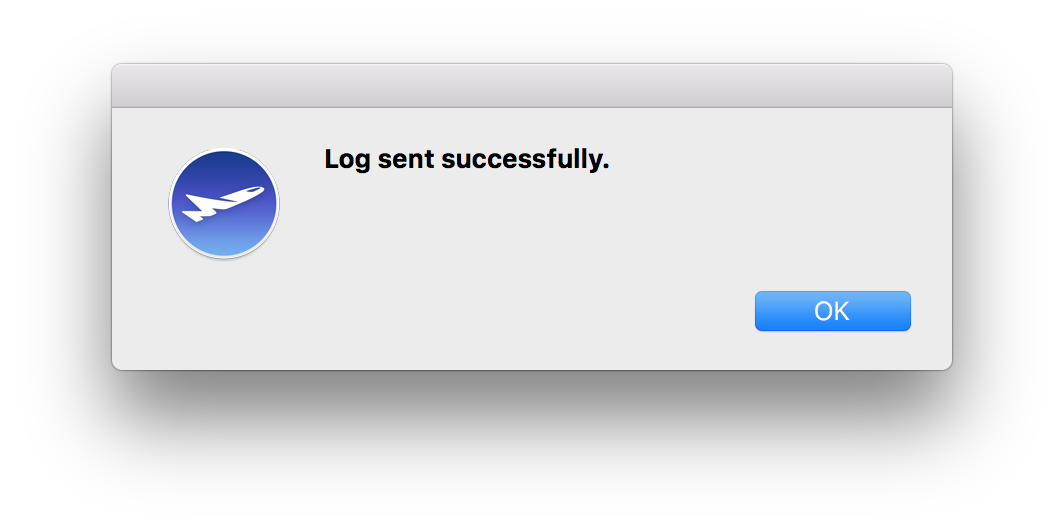
‣ Go to the "File" menu ‣ Choose “Import settings and designs…”This will let you import all your existing data from earlier Mail Designer versions.‣ Click "Grant access" when you are ready

‣ Select the photo that you want to add a border to ‣ This will automatically prompt Mail Designer 365 to open the "Style" tab on the right side of the screen ‣ At the bottom, find the "Border" section ‣ Select the type of border that you want to use ‣ Click on the color wheel icon and choose the color of your border ‣ Change the pixel size to adjust the thickness of the borderNote: You can also add borders to shapes.
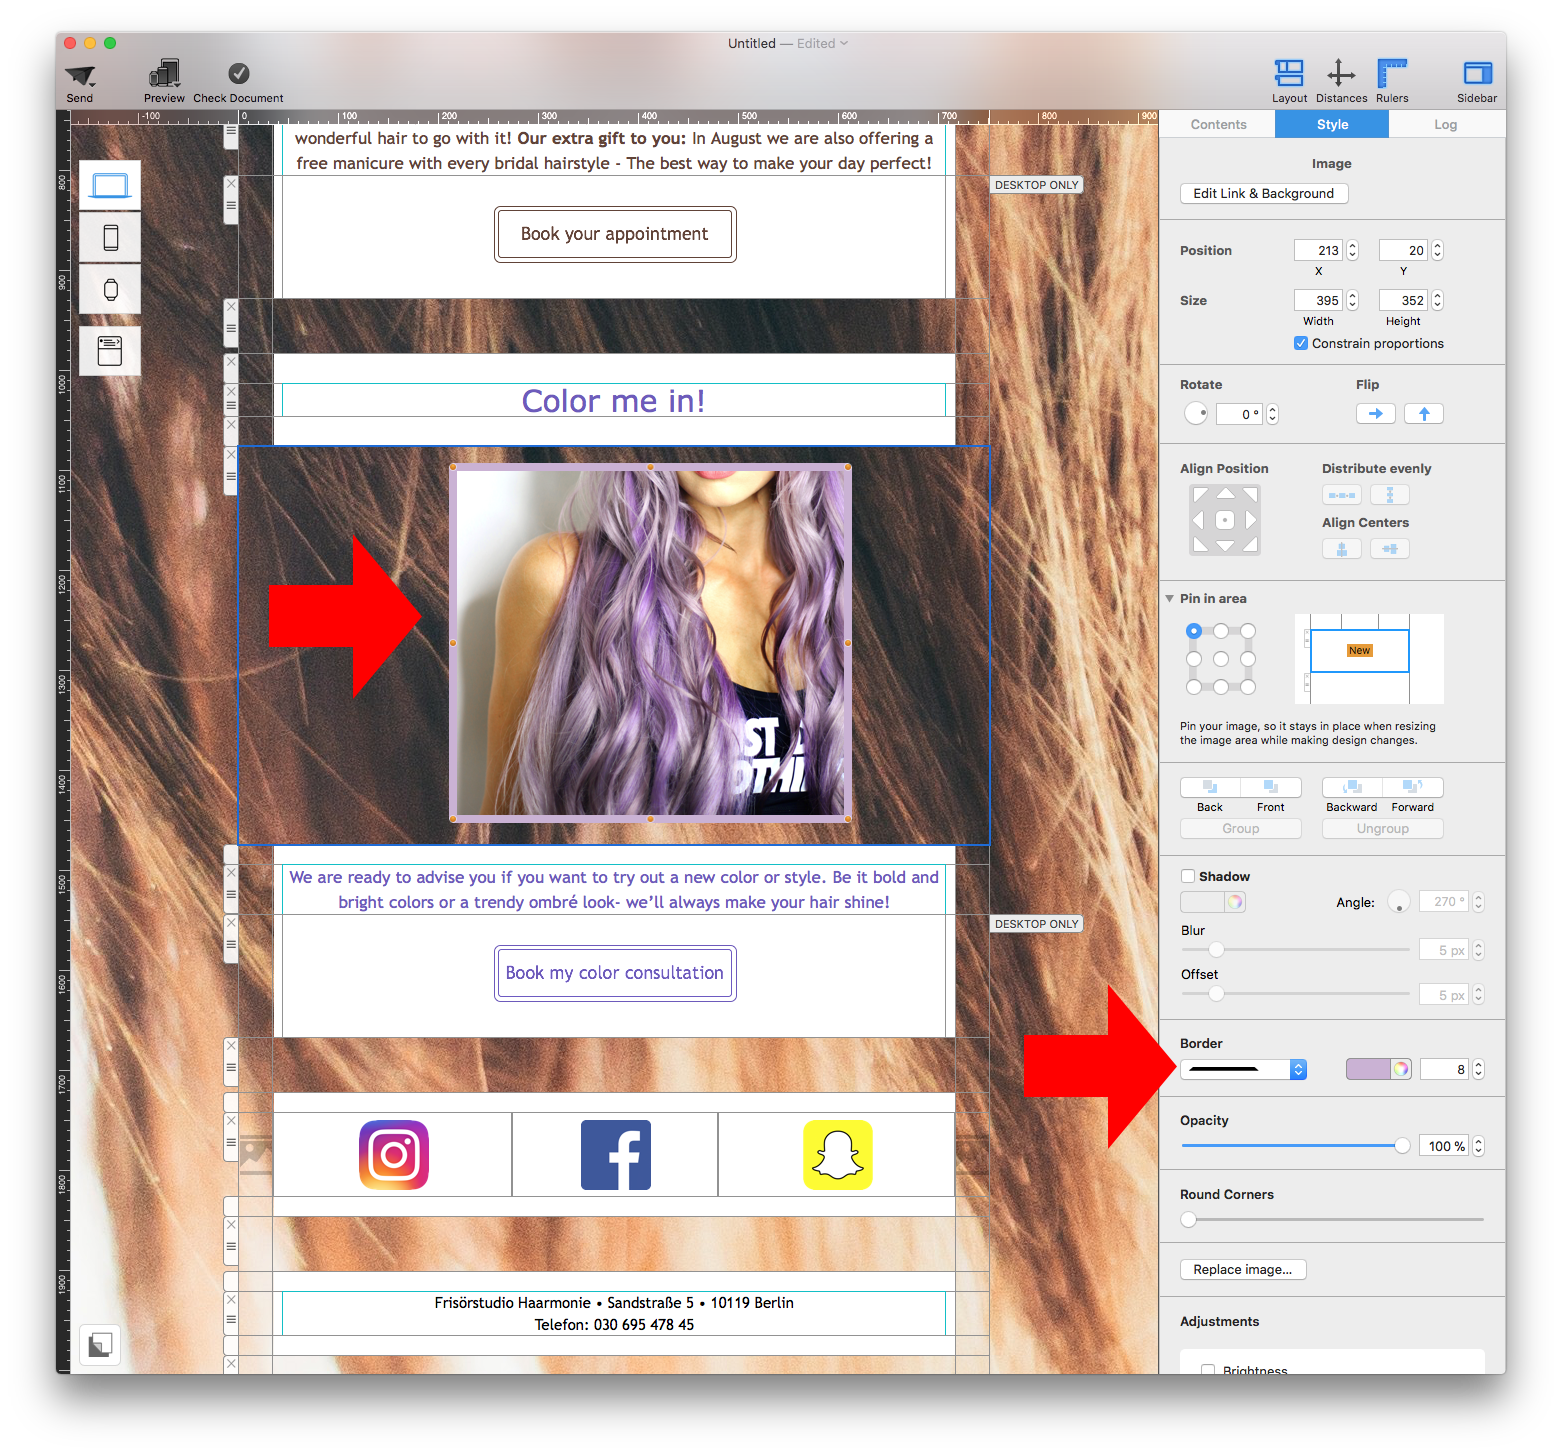
‣ Select the photo that you want to turn semi-transparent ‣ This will prompt Mail Designer 365 to open the "Style" section on the right side ‣ At the bottom, you will find the "Opacity" section ‣ Adjust the opacity slider to adjust the opacity of the photo you selected

Quick summary of what to avoid when using Unsplash photos:
- ✘ people's faces are recognizable (unless you can get model release of those people)
✘ photos that show logos, trademarks, brands
✘ images that put people in a bad light
✘ photos of private property (e.g. private homes and buildings)
Is the Unsplash license the same as the CC0 license?
When it comes to using images that you did not take, create, or do not own, you should stay mindful of the laws and licensing types that guide images. Many image libraries are published under "CC0,” which means “no rights reserved." A CC0 license is also a way for photographers and artists to publish their work and give permission to the public to use their work for free. Curators who publish their works under CC0 and waive copyright of their works place them for public use. An image that has CC0 that carries this designation has “No Rights Reserved” and is free of copyright restrictions, and likely other restrictions (i.e., moral, publicity, and privacy rights). This is a very broad designation and it is clearly understood within the Creative Commons community that no work carries this designation unless it is explicitly marked as a CC0 work. As a result, anyone can use them, edit them, etc. without restriction of copyright law. Unsplash is similar to a CC0 license with one difference: the Unsplash license does not include the right to compile images from Unsplash and then use them to create a similar or competing service.While the Unsplash license give people a lot of freedom, keep these exceptions in mind before using an image:
- ‣ Are people’s faces identifiable? If they are, you will require their individual consent – and not just the consent of the artist or photographer who took the picture. Only use these photos if you are able to get model release from each person whose face is showing on the image.
‣ Does the photo show people in a negative way or can be interpreted in a negative way? If yes, then avoid using these photos. Otherwise, you will need to get model release from each person whose face is showing on the image.
‣ Does the picture show other products, trademarks, or logos? Refrain from using these types of photos because they may suggest that the other brand or product is endorsing your product or service.
‣ Do you see landmarks, buildings, homes, automobiles, etc. that are actually private property within the photos? If yes, avoid these pictures unless you can acquire the permission of the owner of the private property. Make sure that the photos you use do not show valuable information about other people's property like the address, license plate, etc.
The Unsplash license and the CC0 license have these in common:
- ‣ They are both sub-licensable (so you can use them)
‣ They are non-revocable, which means that you are able to use them forever.
‣ They allow users to use the photos for free.
‣ They allow you to modify and/or distribute, perform the photos for free.
‣ They allow users to use the images for personal and commercial purposes.
‣ They do not require attribution, although it would be nice.
Although you are not legally obligated to follow the list below, these are still good practice suggestions:
- ‣ You can use Unsplash photos for commercial use. However, try to edit or add to the photo creatively through image editing or other methods.
‣ Unsplash photos are non-revocable. However, if a photographer decides to remove his or her photo, it is good practice that you respect the photographer's wishes and refrain from using the photo.
In some circumstances, VPN Tracker may not be able to store your account login credentials in your Keychain.
To fix this issue, please try the following:
- Quit VPN Tracker
- Open Keychain Access from Applications > Utilities
- Select your login keychain
- Choose File > Lock Keychain “login”
- Then choose File > Unlock Keychain “login”
On newer macOS releases, you may not see the option to lock/unlock your Keychain. In that case, please enter the following command via the Terminal:
security lock-keychain ~/Library/Keychains/login.keychain
Once it has been locked, you can then unlock your Keychain again:
security lock-keychain ~/Library/Keychains/login.keychain
(You will need to enter your macOS login password to confirm).
Now re-open VPN Tracker and try signing in again.
If the problem still pops up, try this:
- Quit VPN Tracker
- Go back to Keychain Access
- In the search box enter “VPN Tracker User Auth”
- Delete the VPN Tracker User Auth Token entry
Now re-open VPN Tracker and try signing in again.
Last resort: Reset your keychainIf none of the tips above work, macOS has an option to reset your Keychain. Note that this should only be tried as a last resort, as it completely resets your login Keychain:
- Open Keychain Access
- Go to Keychain > Preferences
- Choose "Reset Default Keychains…"
If there are any further issues, please contact our support team and include the application logs from this location:
/Library/Application Support/VPN Tracker 365/var/log.
A couple of years ago, a team of security experts released a paper describing an attack that can break an IKEv1 Aggressive Mode Pre-Shared Key connection using an attack that would not equally have been possible with an IKEv1 Main Mode Pre-Shared Key connection, leading to the incorrect assumption that Aggressive Mode is inherently insecure. This claim, however, is not backed up by objective facts. What most people don't know, part of that attack was the ability to guess the Pre-Shared Key (PSK) using a brute force attack and such a brute force attack can only be successful if the PSK is weak. A PSK is also just a password and as with every password, choosing a weak password always leads to poor security. As long as your PSK is at least 14 characters long (the longer the better), consists out of lower case letters, upper case letters and digits, and was randomly generated, so it's impossible to somehow guess it, and as long as your Phase 1 hash algorithm is at least SHA1 (or better, we recommend SHA-256 if possible), there's absolutely no reason to consider IKEv1 Aggressive Mode with Pre-Shared Key as less secure than IKEv1 Main Mode with Pre-Shared Key. If you want to be even more secure, switch to certificate based authentication instead of PSK if possible as then the attack is not possible at all.
Technical background:
The Pre-Shared Key (PSK) is not a password used for encryption of any data, it's used for authentication, just when you log in to a website using a username and a password. During Phase 1, both sides must prove to each other to know the PSK. This cannot be done by just sending it to the other side, as if the other side didn't know it before, it will know it after receiving it. Instead both sides calculate a number (a hash digest) out of data they exchanged so far (data that will be different every time you start a new connection, which ensures the calculated value will be as well) and the PSK. Only this digest is send to other side. The other side can now verify that digest by performing the same calculations and comparing the result with the digest received. If both are equal, the sender must have used the same PSK in the calculation, which proves knowledge of the PSK. Then the receiver also calculates such a digest, using a slightly different formula as before, leading to an entirely different result, and sends it back in reply to also prove its knowledge.
The differences between Main Mode and Aggressive Mode is simply that in Main Mode the digest is exchanged encrypted because the session key exchange already negotiated a session encryption key when the digest is exchanged, whereas in Aggressive Mode it is exchanged unencrypted as part of the key exchange that will lead to a session key. By snooping the connection establishment of an Aggressive Mode connection, the attackers were able to get the digest as well as all values required to calculate that digest, except for the PSK itself. Please note that this alone doesn't mean the connection is broken already, it only means that the attackers now have enough data to start guessing the PSK using a brute force or dictionary attack. Only if the PSK is too weak to withstand those attacks and the attackers are able to correctly guess it, the connection will be broken. That's why a good, secure PSK is essential.
The same attack is in fact also possible with a Main Mode PSK connection, it just requires some extra work. For a Main Mode connection it's not enough to just snoop the traffic, the attackers would need to perform a so called Man-in-the-Middle (MitM) attack, allowing them to capture and manipulate all traffic exchanged. By performing a MitM attack, attackers can break the key exchange and thus will be able to decrypt all the exchanged packets. Doing so will not make it possible to break into your VPN, they still need to know the PSK for that, otherwise they cannot successfully authenticate to the other side and then Phase 1 will never complete, but that way they can get all the information required to start guessing on the PSK, just as in case of a an Aggressive Mode connection. And if an attacker is already able to snoop on your VPN traffic (which is required to attack Aggressive Mode), it's very likely that attacker is equally possible to perform a MitM attack and in that case using Main Mode will not offer you any additional protection.
A PSK out of 11 random alphanumeric characters offers an entropy of approx. 64 bits, that's 2^64 possible values. Modern high end graphics adapter (as of 2015) can calculate in the order of 1 billion SHA-256 hashes a second. On average one has to try 50% of all possible values to find a match, wich would be about 292 years. Yet if the attackers have an array of 100 such graphics adapters, it would "only" be around 3 years. If the PSK is 14 characters, the entropy is about 80 bits and you are already at 19,154,798 years. Now even having 10,000 graphics adapters would help a lot. Also one must consider the costs of such an attack, which is not so much the cost of buying all these graphics adapters, rather their power consumption when all these graphics adapters run at maximum current 24 hours a day and that for years, decades, or even centuries. The power costs will be billions of dollar and all that to just break one single PSK connection in the entire world. And whenever you change the PSK, an attacker must start all over, so if you change the PSK regularly, let's say once a year, an attacker has at most one year to find it; that's very ambitious, even for a weak PSK.
- In a text layout block, type the text you want readers to see (i.e. "Edit my Profile.")
- Highlight your selected text, then, in the sidebar, select "Add Link" from the "Style" tab.
- Choose link type "Custom."
- Enter your placeholder into the space provided (e.g. *|UPDATE_PROFILE|*)
 If you are unsure of how to label your placeholders, use Mailchimp's cheatsheet to find the correct label for any merge tag they support.
You can access the most important placeholders directly, as explained here, for other placeholders and custom merge tags.
If you are unsure of how to label your placeholders, use Mailchimp's cheatsheet to find the correct label for any merge tag they support.
You can access the most important placeholders directly, as explained here, for other placeholders and custom merge tags.
- If you haven't already, you can download Mail Designer 365 using this link.
- After the download has completed, launch the app and click the "Login" button in the top left-hand corner of the Design Chooser homepage.
- Enter your equinux ID and password in the space provided. Hint: This is the login you first created when purchasing Mail Designer 365 (or any other equinux software products) in our online store.
In some circumstances, Mail Designer may not be able to store your account login credentials in your Keychain.
To fix this issue, please try the following:
- The easiest way to fix this problem is to restart your Mac.
If the problem still pops up, try this:
- Quit Mail Designer
- Open Keychain Access from Applications > Utilities
- Select your login keychain
- Choose File > Lock Keychain “login”
- Then choose File > Unlock Keychain “login”
Now re-open Mail Designer and try signing in again.
- Open the VPN Tracker Connection Creator for PPTP VPN
- Enter the IP address or Host Name of the PPTP server you want to connect to, then follow the remaining steps in the setup wizard
- Save your new VPN connection in your account using secue end-to-end encryption to start using on your Mac
- Press "Shift" (⇧) + "Cmd" (⌘) + "4" then click and drag the mouse cursor to capture a specific area of your screen.
- Press "Shift" (⇧) + "Cmd" (⌘) + "4" and then the space bar to capture a specific window or element on your screen.
- Alternatively, press "Shift" (⇧) + "Cmd" (⌘) + "3" to capture your full screen.
- If the app you want to quit is in your dock, hold the "Option" (⌥) key and right-click on the app icon, then, select "Force Quit" from the menu.
- You can also hold down "Option" (⌥) + "Cmd" (⌘) + "Esc" which will trigger a window with a list of apps you have running. To force quit one or more of these apps, simply select it from the list and click the "Force Quit" button.
 Click on "Manage" to view and edit your subscriptions on your Mac.
You can find out more information from the Apple Support website.
Click on "Manage" to view and edit your subscriptions on your Mac.
You can find out more information from the Apple Support website.
Some kinds of software may cause issues with Mail Designer 365:
- Personal Firewalls
- Protection Software (e.g Virus Scanners, Malware Protection)
Personal Firewalls usually ask the user, if an app should be allowed to send network traffic. It’s important to grant Mail Designer full network access. If you have already added rules for Mail Desinger, please whitelist Mail Designer.
Protection Software often sees authentication traffic as a potential source of threat, as it isn’t able to analyze that traffic because of its very strong encryption. Please ensure Mail Designer is ignored by any protection software running on your Mac and allow this traffic to pass through.
Here are some common examples of the types of apps mentioned above. If you are uncertain whether any of these applications may be installed on your system, try the following:
- Open the app “Terminal”
- Copy and paste the following command:
kextstat | grep -v com.apple
You’ll get a list of all kernel extensions that are not from Apple. Just compare that list with the identifiers in parenthesis below:
- Little Snitch
(at.obdev.nke.LittleSnitch)
- Sophos Anti Virus
(com.sophos.kext.oas, com.sophos.nke.swi)
- Symantec Endpoint Protection / Norton AntiVirus
(com.symantec.kext.SymAPComm, com.symantec.kext.internetSecurity, com.symantec.kext.ips, com.symantec.kext.ndcengine, com.symantec.SymXIPS)
If you have a charge from equinux on your credit card that you do not recognize, it may be for one of the following products offered through the equinux Online Store:
- VPN Tracker (VPN software for Mac, iPhone and iPad)
- Mail Designer 365 (email newsletter design software for Macs)
- tizi (iPhone and iPad accessories)
Common scenarios
Auto-renewing products
VPN Tracker and Mail Designer 365 are offered as subscriptions. When a plan has been configured to auto-renew, the associated payment method will automatically be charged.
Additional team-members added
If multiple employees are using one of our products, they may have configured team billing. This means the associated credit card may have been charged, in order to add a new team member to an account.
Invoices and other questions
You can download your invoices from our website:
If you have checked with your team and still have additional questions regarding a charge, please contact our support team. Be sure to include the details from your credit card statement and the last 4 digits of your card.
- 1. Please ensure that you are using the download version from the Mac App Store. The download version from the equinux website will not be able to recognize your license.
- 2. In the Mail Designer 365 menu please select "Restore Purchases..."
- 3. In case your license is still not being recognized, please delete the App and reinstall it from the Mac App Store. (Don't worry, your templates and settings won't be lost)
 From here, go to the "Members" tab and click "Invite members."
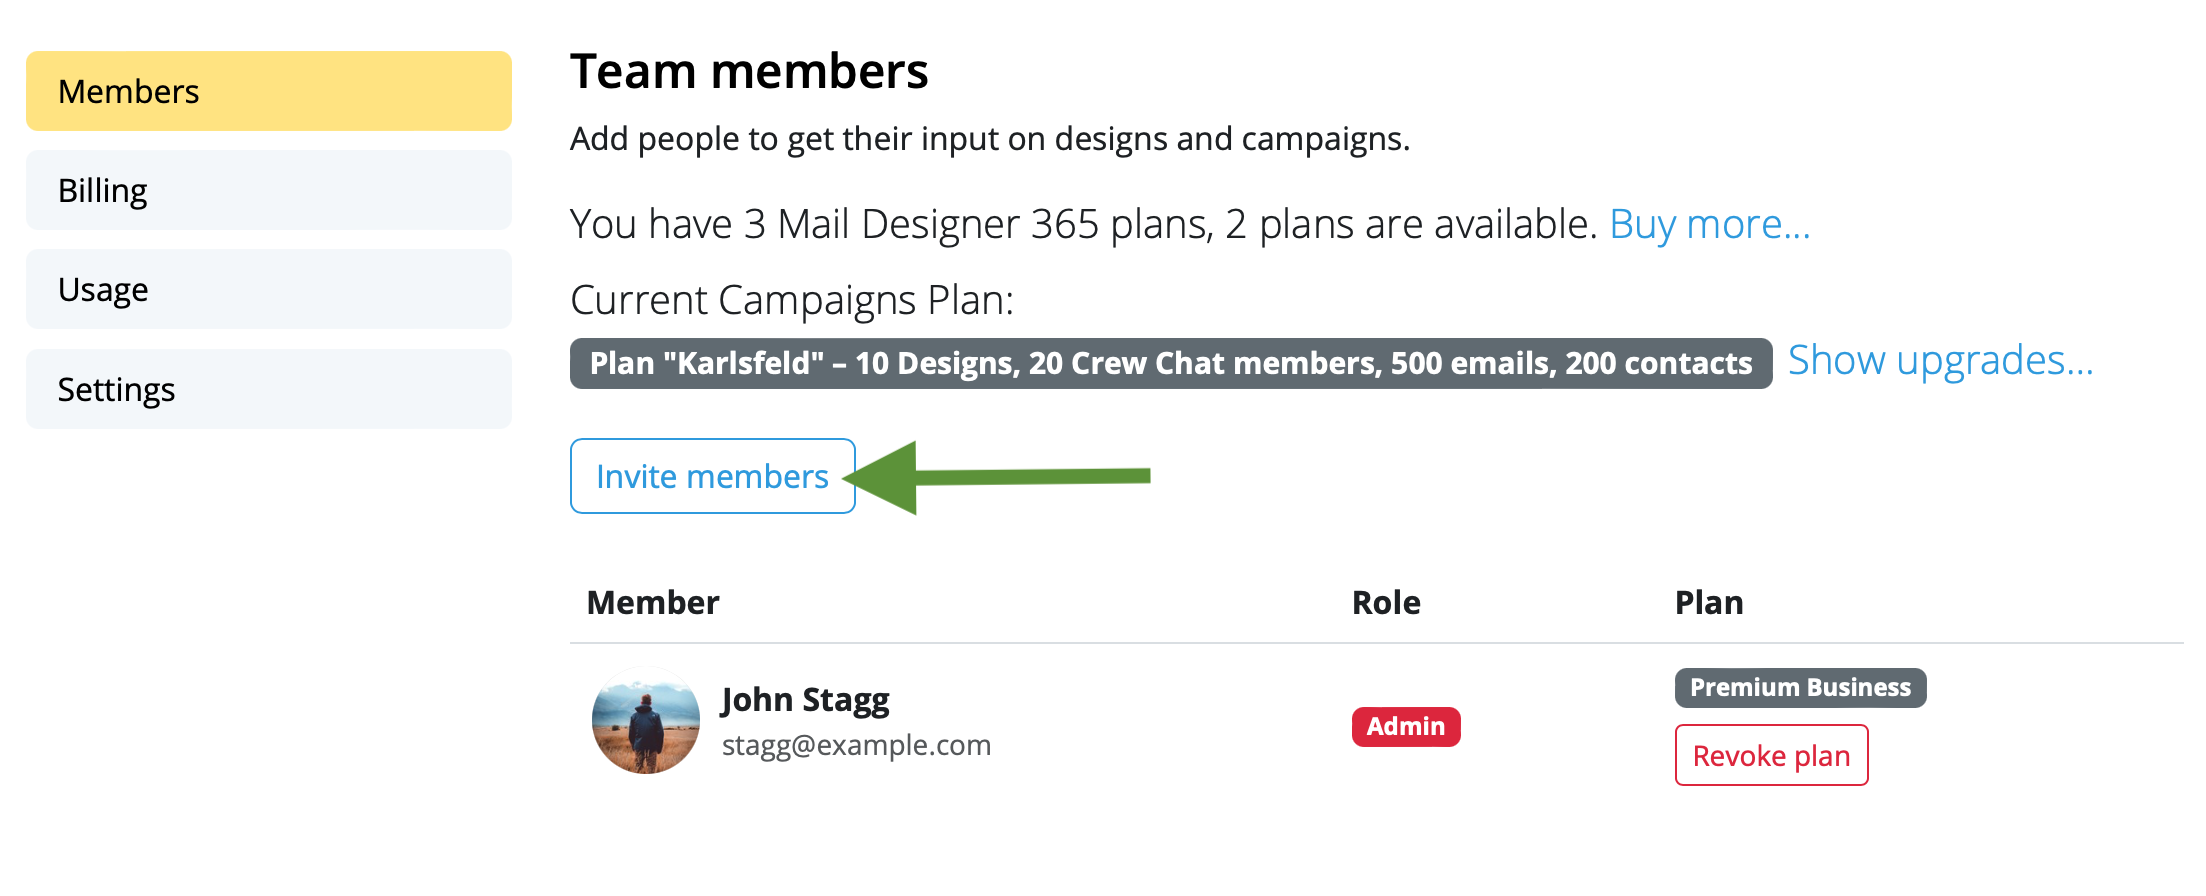 Enter the email address(es) of the colleague(s) you want to invite to your team and click "Invite". You can invite up to 10 team members free!
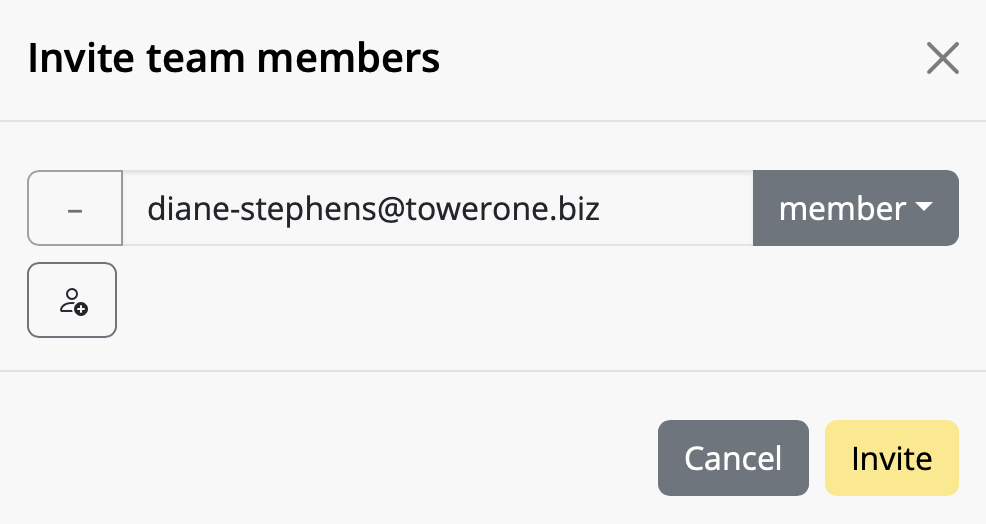 Team members can accept your invitation by clicking on the link in the email.
Once you've invited new team members, start using Mail Designer 365 Campaigns to discuss, approve and schedule email campaigns for your audience. Try it out free!
Team members can accept your invitation by clicking on the link in the email.
Once you've invited new team members, start using Mail Designer 365 Campaigns to discuss, approve and schedule email campaigns for your audience. Try it out free!
A company counts as a group of users. Each user of the VPN Tracker software needs their own personal VPN Tracker user account as well as their own user license. The information about the VPN Tracker account, may only be used by the owner of the account. A sharing of login and password (for example between members of an organization or others) is not permitted.
Managing multiple users in an organization via team management
Employees or users in an organization are managed using VPN Tracker Team Management. With this, an administrator can assign VPN Tracker user licenses to individual VPN Tracker user accounts and also withdraw them. Usage of the team management is mandatory for the use of VPN Tracker in organizations. It is designed to meet the security demands in organizations.
Team Management Guide →
Accounts with suspicious behavior
VPN systems are security systems which regulate confidential access on a personal level. The sharing of logins and passwords will inadvertently lead to an insecurity in the entire system, for example when an employee leaves the company. An ex-employee would still be able to gain full access to the VPN Tracker main account. Accounts which display suspicious behavior may be automatically blocked by our system. This is to safeguard the security of your account.
- 24h priority support
- Tables tool
- Blend Modes
- Duotone Filters
- Vibrancy effects
Sending test emails
Mail Designer 365's Testmail service is designed for sending internal test emails to yourself or to your team – i.e. to preview how your finished email design will look in the inbox. Test emails will be sent from the Mail Designer 365 Testmail service via our secure servers.How it works
To get started, click the Test icon in the Mail Designer 365 toolbar. Now choose from the following test mail options:
The latest version of your email design will be uploaded via TeamCloud and sent to the selected recipient(s):
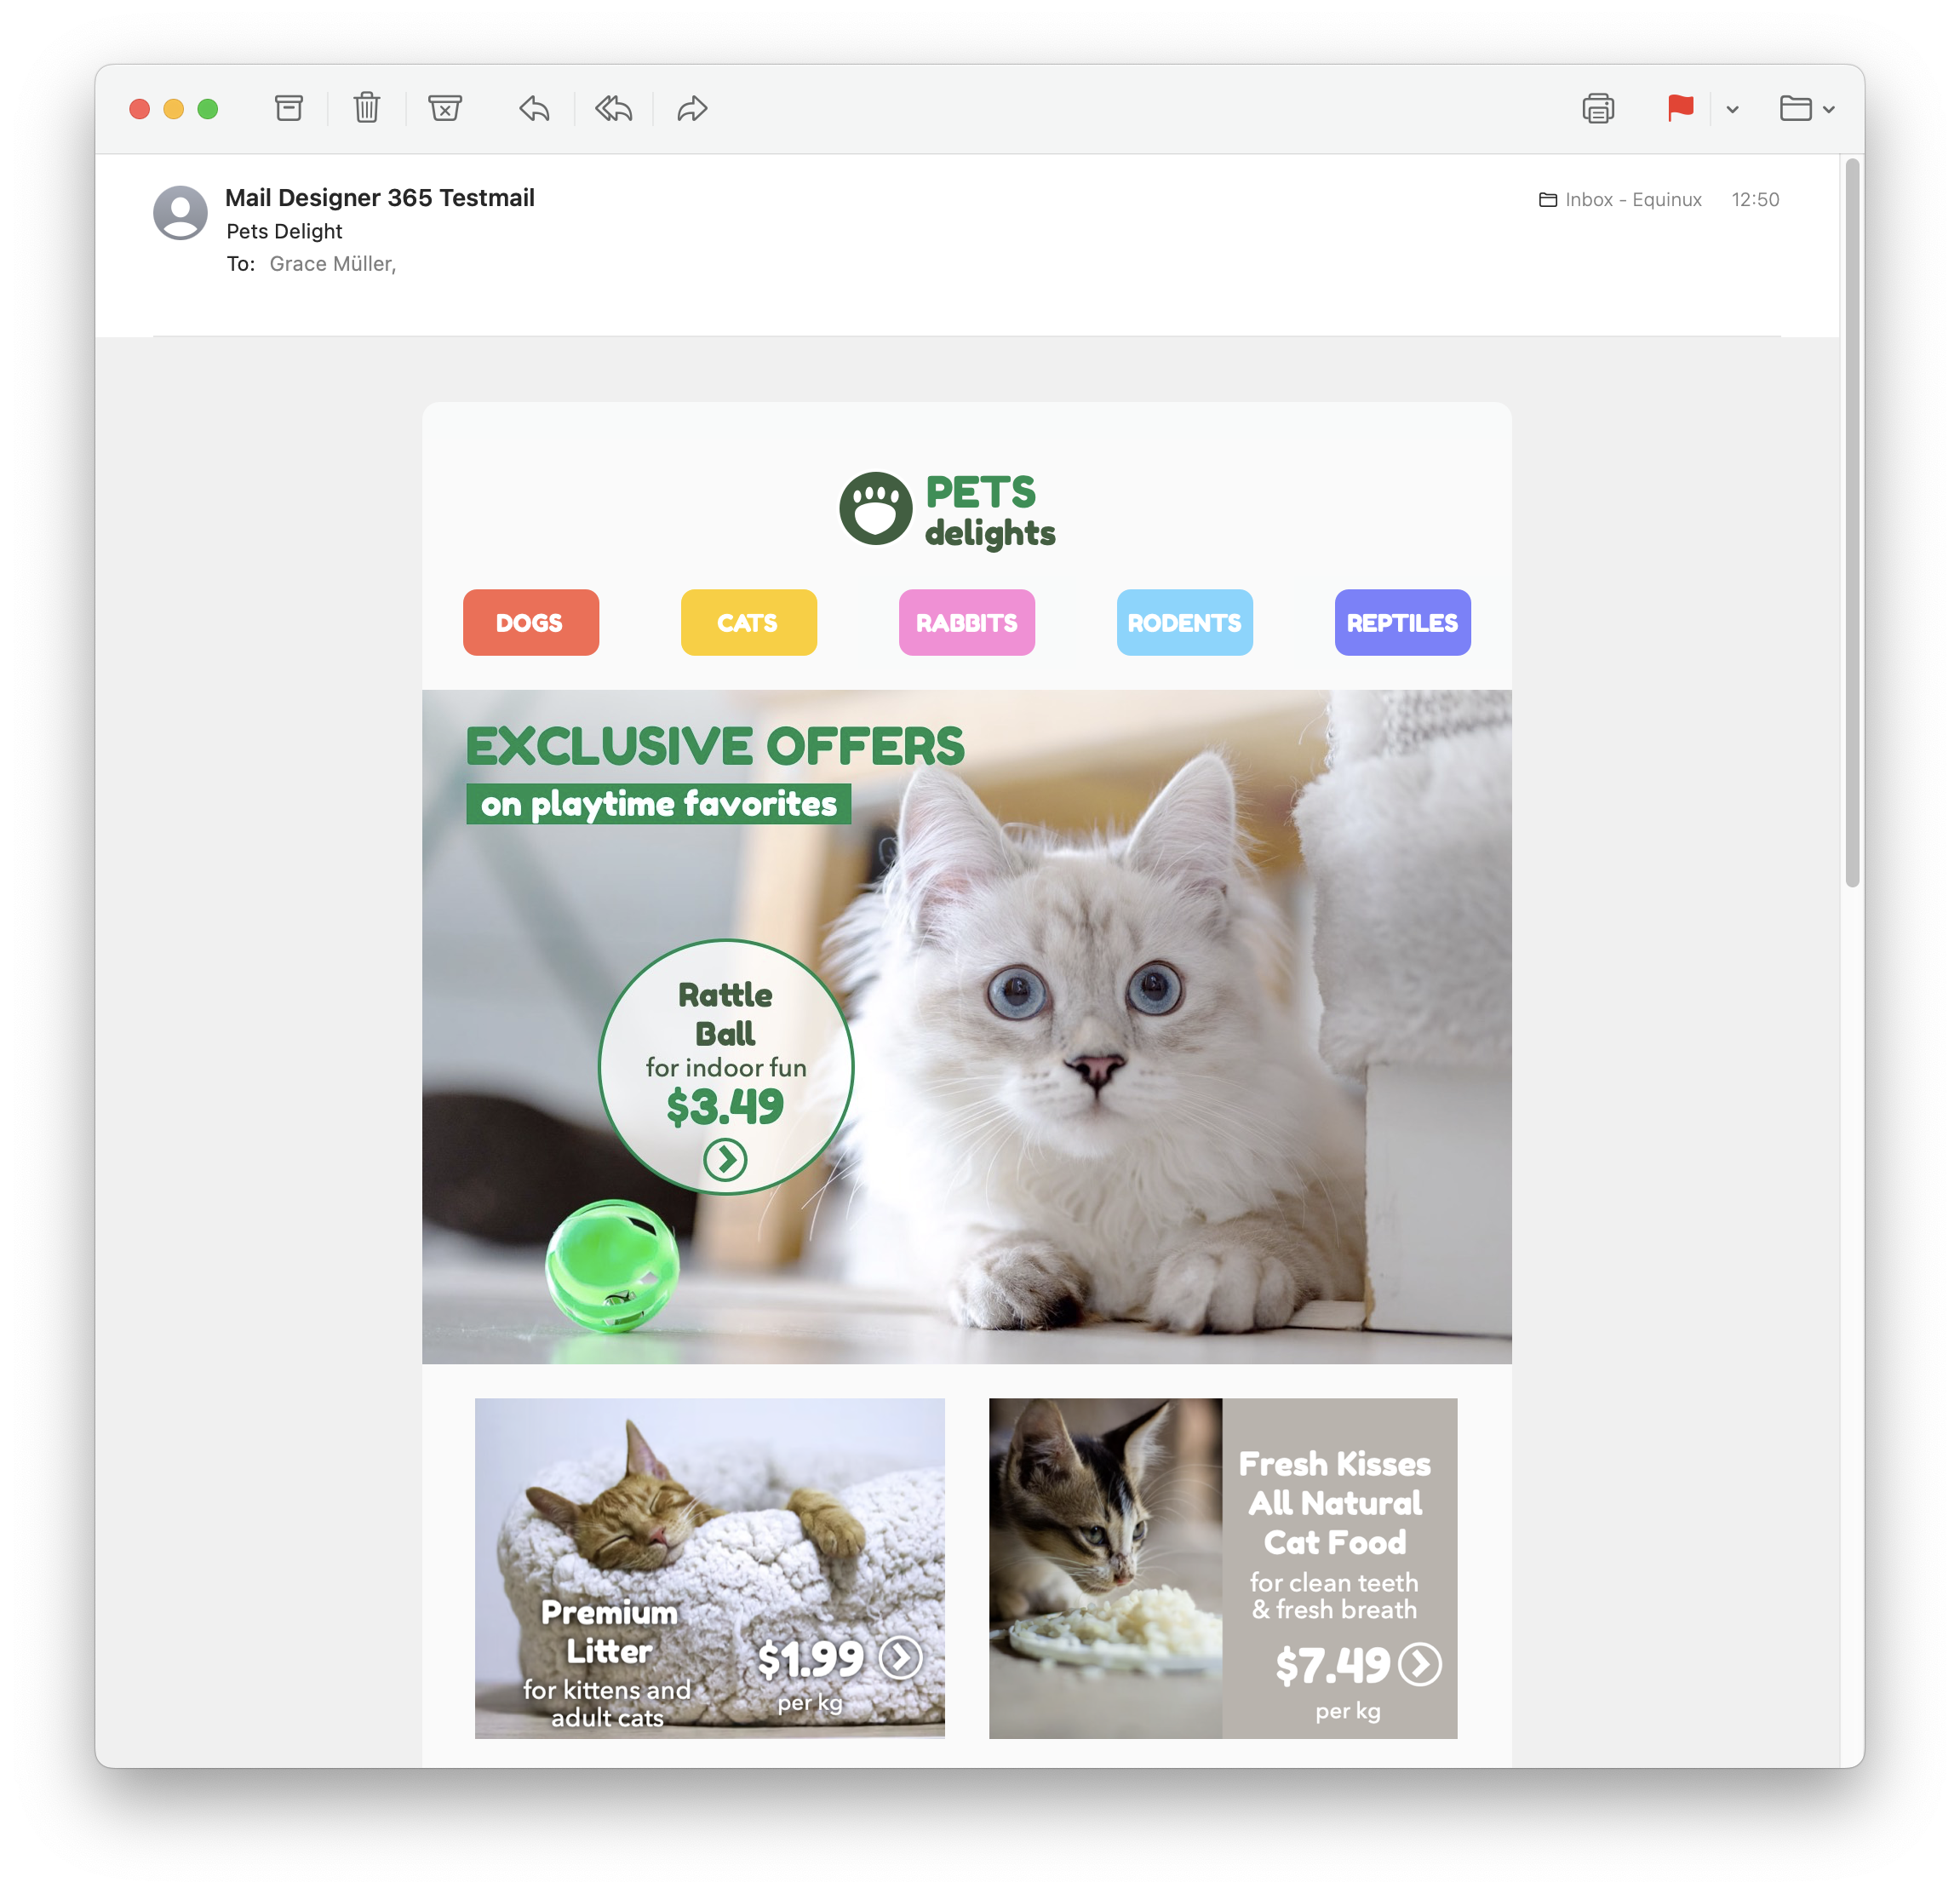
Sending individual emails
You also have the option to send your email design as a single email via Delivery Hub. This email will be sent from your own email address. This option is designed for external emails (i.e. sending emails to contacts who are not part of your Mail Designer 365 team) and replaces the legacy "Send via your email account" option.How it works
In this view you can add one or more recipients for your email (e.g. your client's email) and send them your design from your own email address.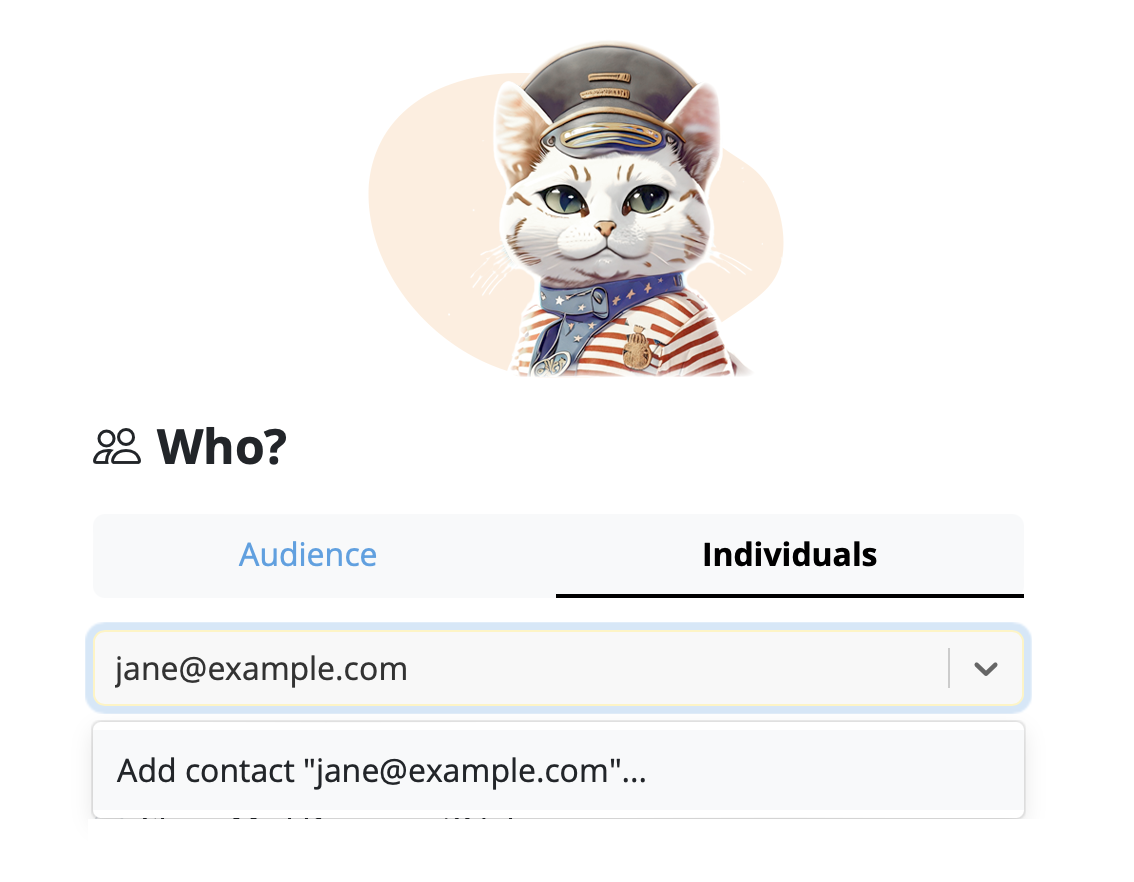
On the left of the setup window, you can choose your from address:
Tip: If you have not done so already, follow this guide to set up your "from address" for sending. Finally, send your email by clicking the green "Send" button. It will go directly to your recipient via your email server:
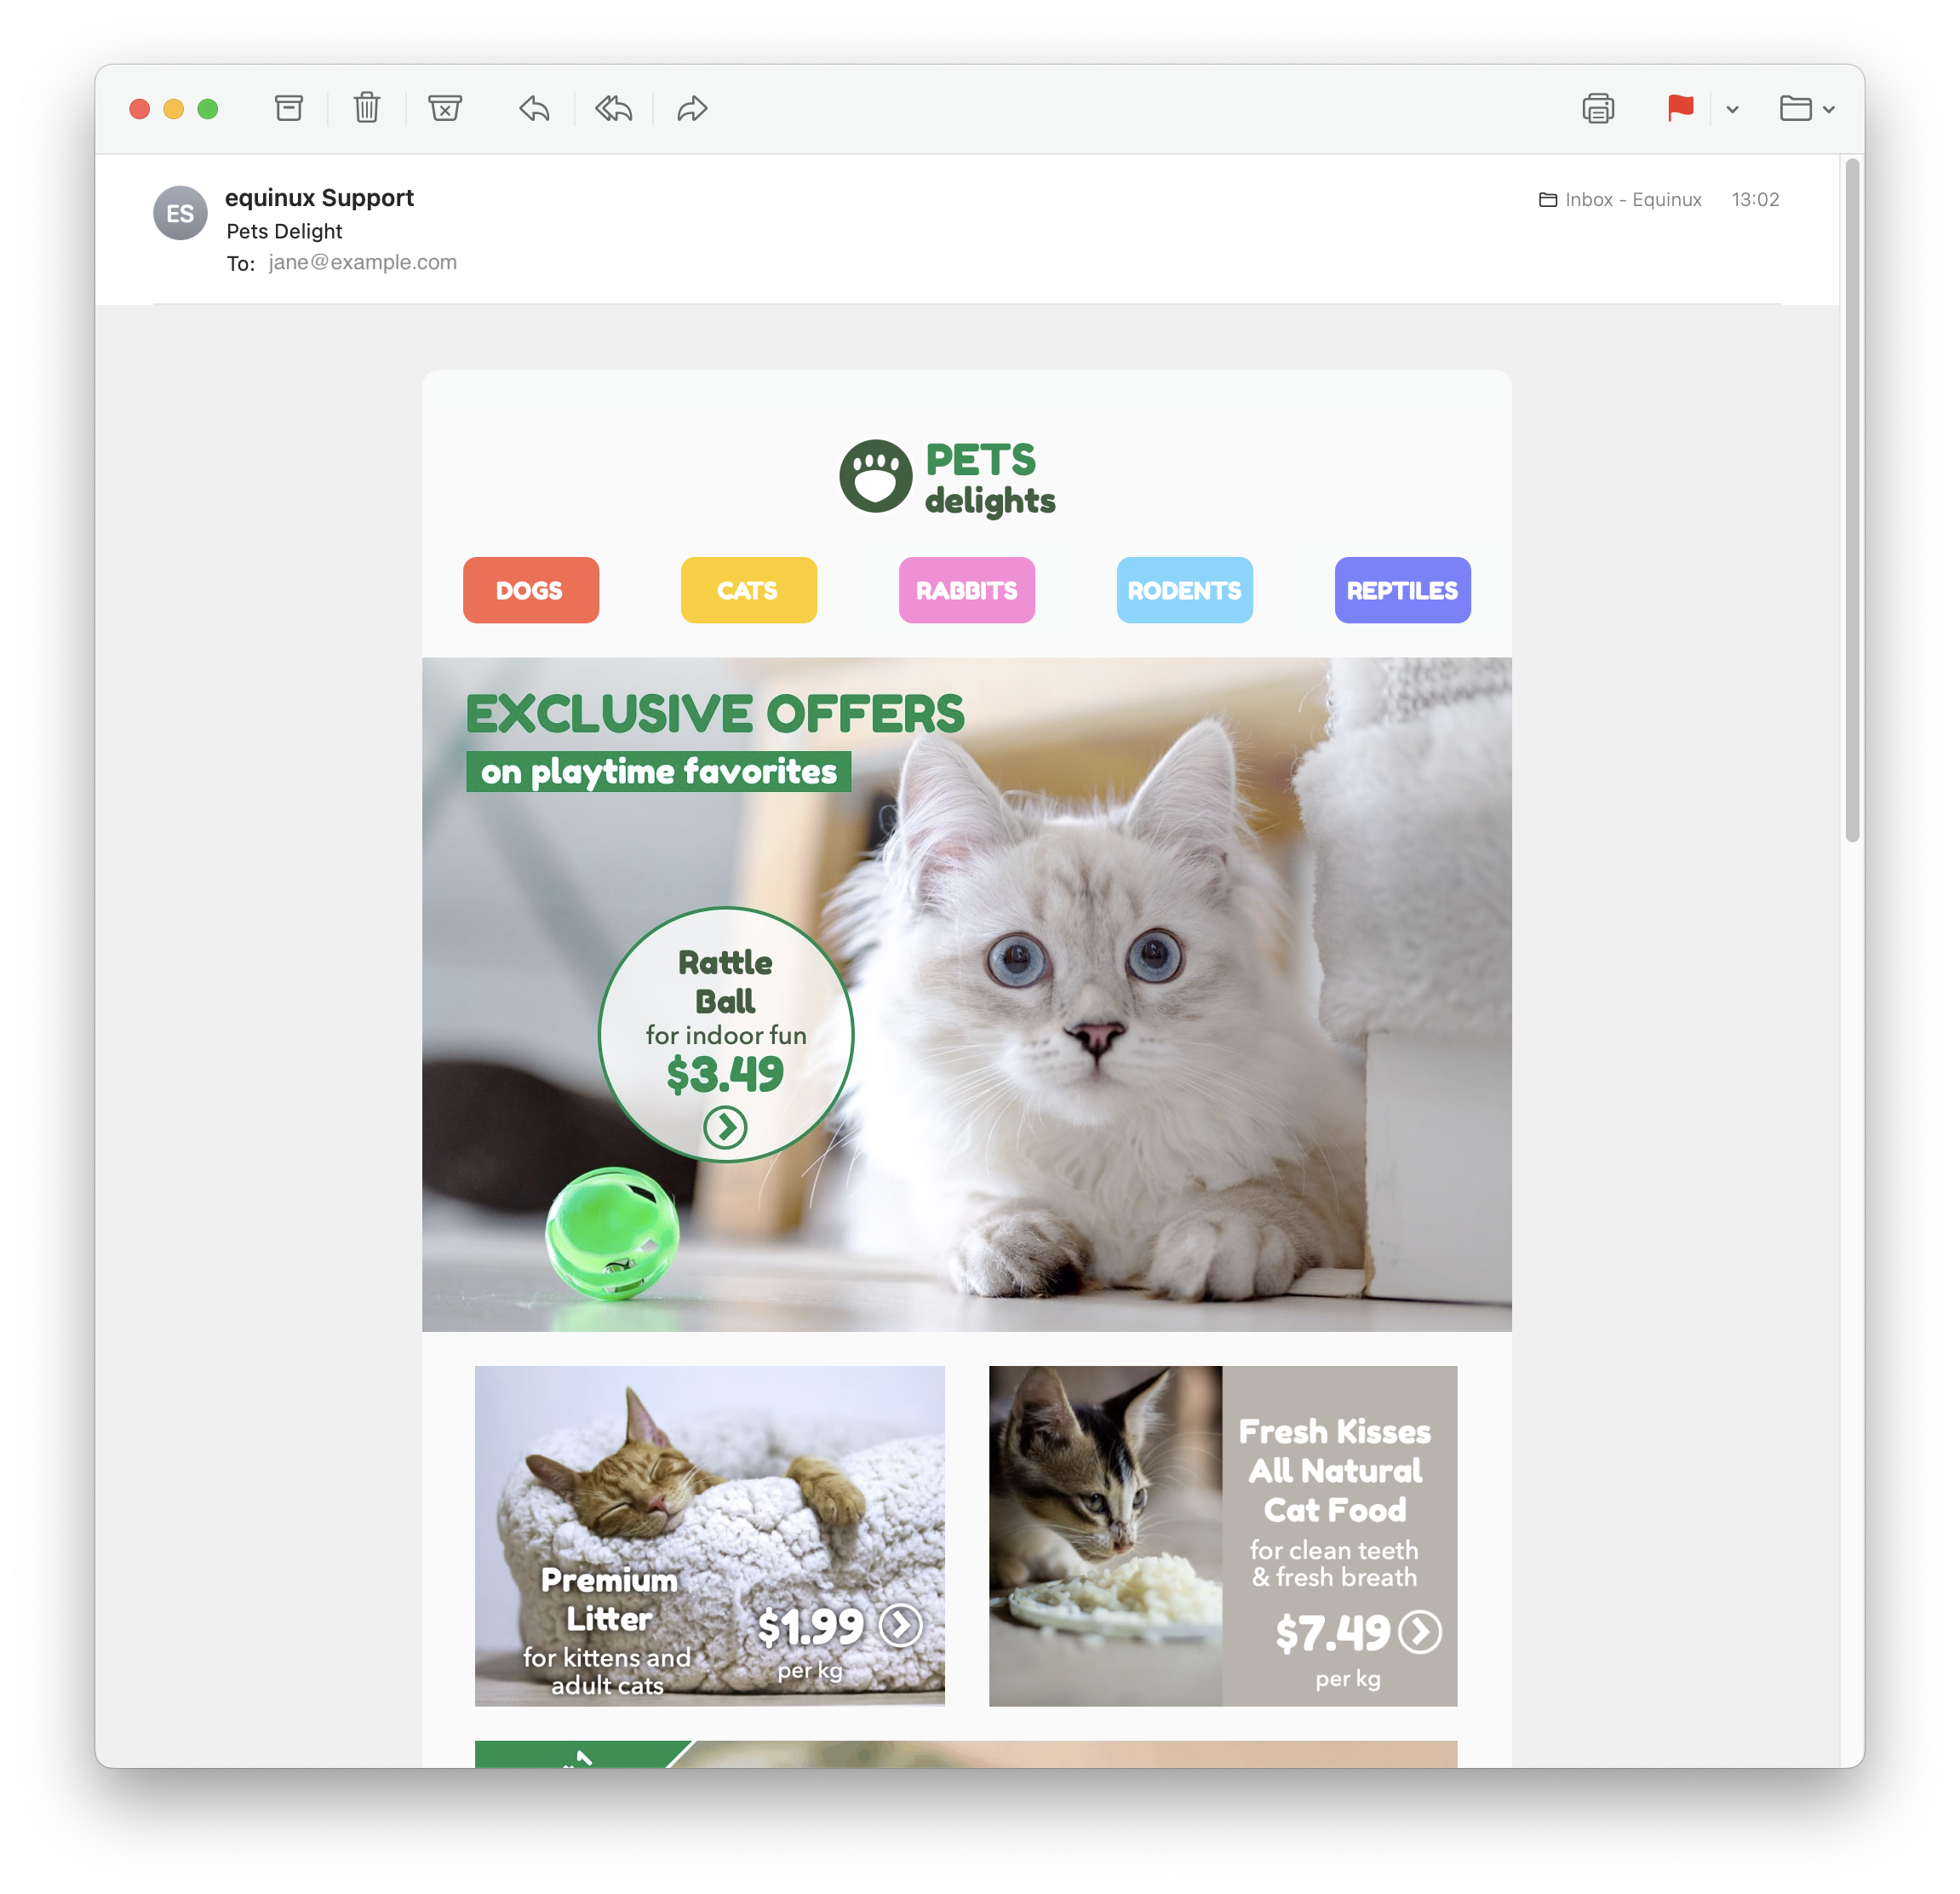
Good to know: Following send, you can easily check if your recipient has received and opened your email by clicking the analytics icon:

- Quit the Mail Designer 365 app.
- Open the "Keychain Access.app"
- Search for "Mail Designer" using the search field in the upper right corner of the window.
- Here you should find the entry "Mail Designer account." Double click on this entry to get details.
- Go to the "Access Control" tab and check to see if Mail Designer 365 is located under the "Always allow access to these applications" list.
- If you cannot see Mail Designer 365 on the list, please press the "+" underneath the list, find Mail Designer 365, and add it.
- Restart the app and login if prompted.
 Your login details for Mail Designer 365 should now be stored on your Mac. If you are still experiencing problems, please send us your debug logs and let us know via support@maildesigner365.com.
- View, comment on and approve email design drafts
- Receive test emails
- Manage email contacts and audiences
- Schedule and send email campaigns
- Access post campaign analytics
- Open the Terminal on your Mac (Applications > Utilities > Terminal)
- Copy and paste the following command, then hit enter
defaults delete com.equinux.VPN-Tracker-World-Connect.mac VPNGatewayList
WireGuard is a registered trademark of Jason A. Donenfeld.
- Security software (e.g. virus scanners, Malware blockers)
- Malware or Adware
- Kaspersky
- Roll out VPN connections via TeamCloud
- You can see who has access to your VPN and identify any users who should not have access to the connection.
- You do not have to share your admin account with any other users.
- You can easily revoke licenses from team members who pose a potential security risk (i.e. ex employees.)
- Without Team Management, any of your other VPN Tracker users have the ability to sign in to your admin account and gain access to critical features, including assigning or revoking plans.
If you change your equinux ID password later on, VPN Tracker can no longer decrypt your Personal Safe. You will need to re-enter your original password so VPN Tracker can re-encrypt your connections.
If you have forgotten your original password, you have the option of entering your recovery key, instead of the original password.
If you have forgotten both your original password and your recovery key, the only way to gain access to your Personal Safe is by resetting it on the server.
Hinweis: If you no longer know the original password, please check the Keychain (possibly also on an old computer or in a backup) to see if your original password is still stored there. In the "Keychain Access" app, search for the following:
- Recovery password for the Personal Safe Master Key
- VPN Tracker 365 Application Password
Important: Please be aware that, as a security measure, you will lose all of your stored connections if you perform a server reset. This FAQ instructs you how to perform a reset of your Personal Safe if required.
- Open Mail Designer 365 > Preferences
- Choose Mail Accounts…
- Click + to add a new account
- Enter your email account details
Tip: Find your email account settings in Apple Mail under Mail >
Preferences > Accounts > Server Settings > Outgoing Mail Server. Visit the Mail
Designer 365 Manual for a
step-by-step guide.
- Image optimisation
- Subject line preview
- Built in spelling & grammar checker
- Mobile optimisation tools
Server name: securesmtp.t-online.de
Port: Standard ports
Security: STARTTLS
Authentication: Password
Username: max.mustermann@t-online.de (your full T-Online email address)
Password: You must create a separate email password for Mail Designer 365 in the T-Online Customer Center.
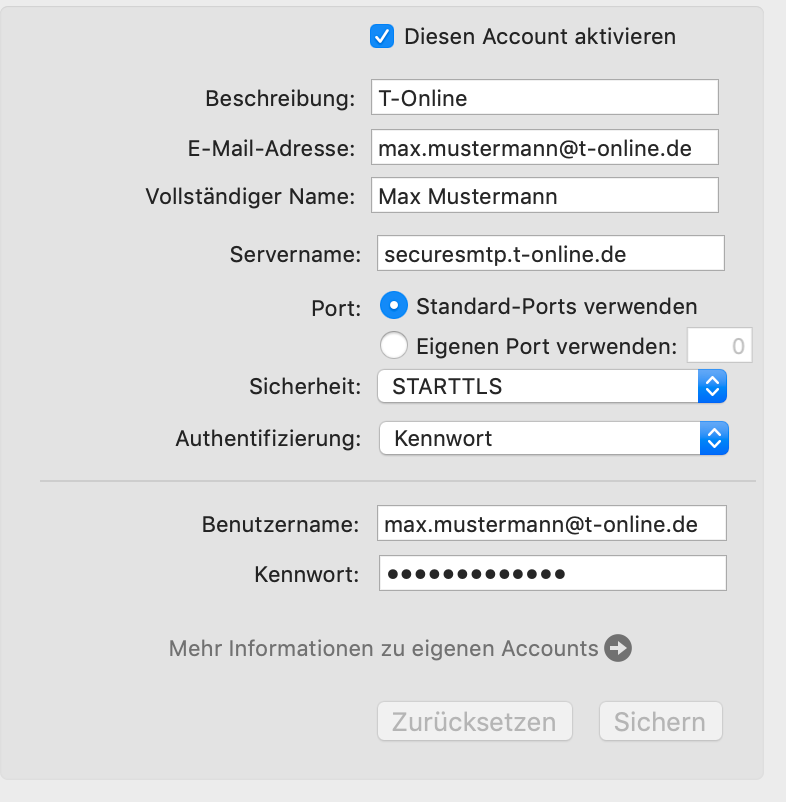 Password note: As described above, a separate password for email programs must be used. Sending will not work with the regular online login password.
- External
Ideal for: clients, external employees, and managers who want to contribute content and approve or launch campaigns. Can use TeamCloud, Crew Chat, Direct Mail, and campaigns. Cannot purchase plans or stamps for the team. - Member
Ideal for: employees who work closely on emails. Can use TeamCloud, Crew Chat, Direct Mail, and campaigns. Can purchase plans or stamps for the team. - Project Manager
Ideal for: administrators of your team, who don’t necessarily have to be involved in design. Can manage team members, purchase, and assign plans and licenses.
- Download VPN Tracker 365
- Create an account
- Verify your email address
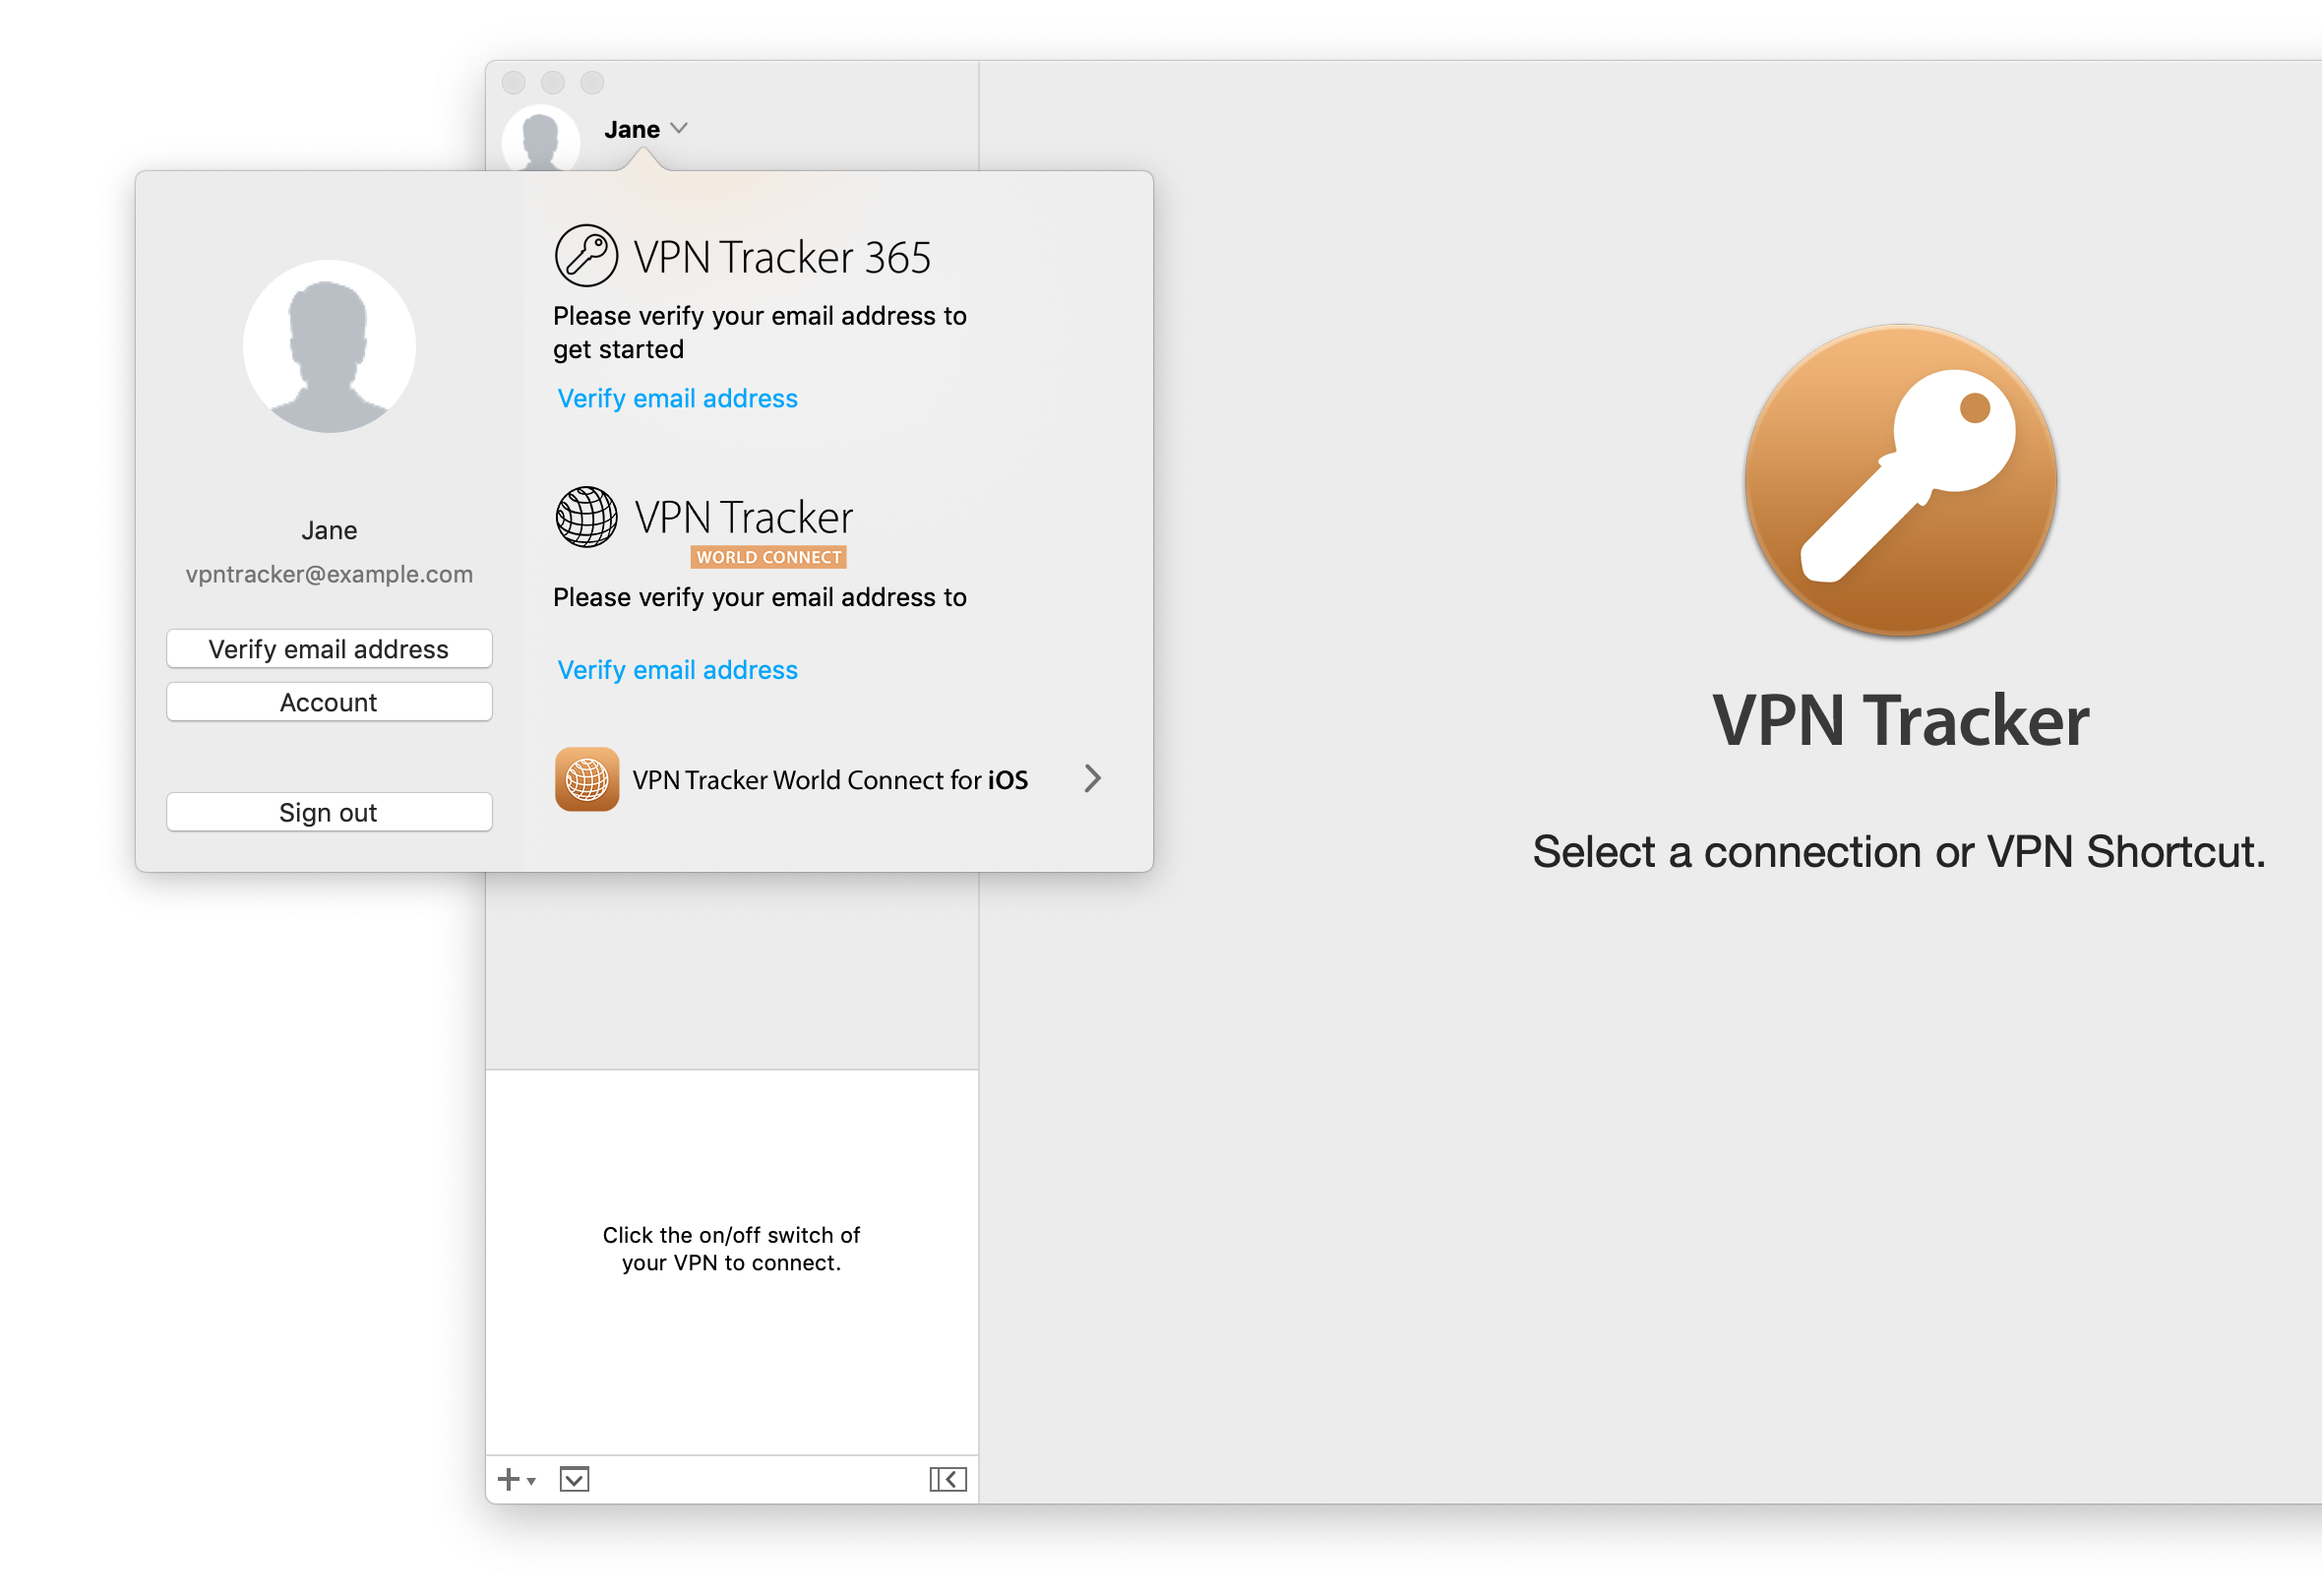
VPN Tracker for Mac fully supports all the latest macOS versions, including macOS Sequoia
Starting from macOS 11, Apple have made some key changes to the macOS security architecture. VPN Tracker for Mac offers full support for all the latest macOS versions. This includes support for: IPsec VPN, IKEv2 (Beta), OpenVPN, L2TP VPN, PPTP VPN, SonicWall SSL VPN, Fortinet SSL VPN, Windows SSTP VPN, Cisco AnyConnect VPN and WireGuard® VPN. Tip: Sign up for VPN Tracker Insider Updates to get Beta releases as soon as they are available. WireGuard® is a registered trademark of Jason A. Donenefeld.
- After you've downloaded and opened VPN Tracker 365, click on Sign in > Create Account
- Enter the credentials for your new account (Name, Email, Password) in the space provided.
- Next you'll receive an email to the address you used to sign up with:
- Click on the link in the email to verify your address. If you can't find the email in your main inbox, make sure to check your spam folder.
- Once your address has been verified, you will be able to purchase a VPN Tracker 365 plan and set up your own connections.
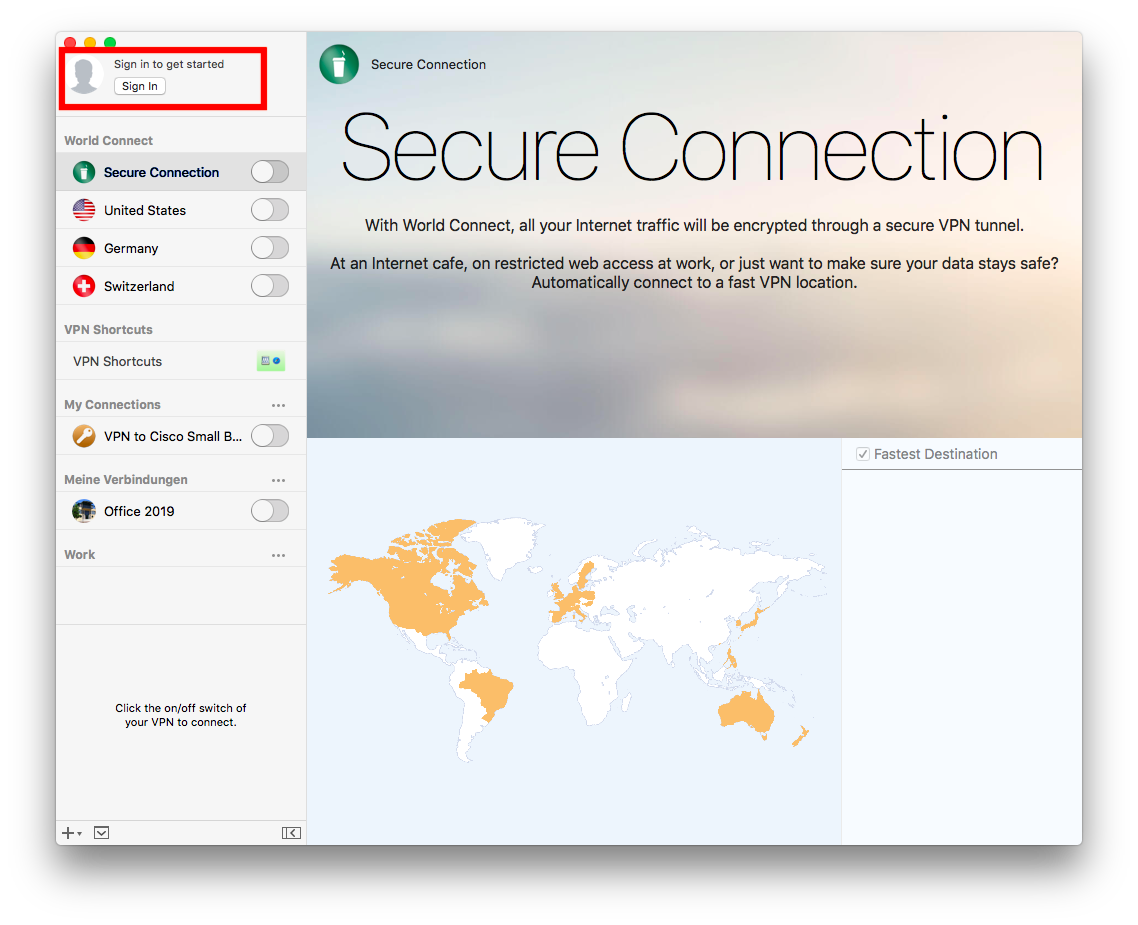
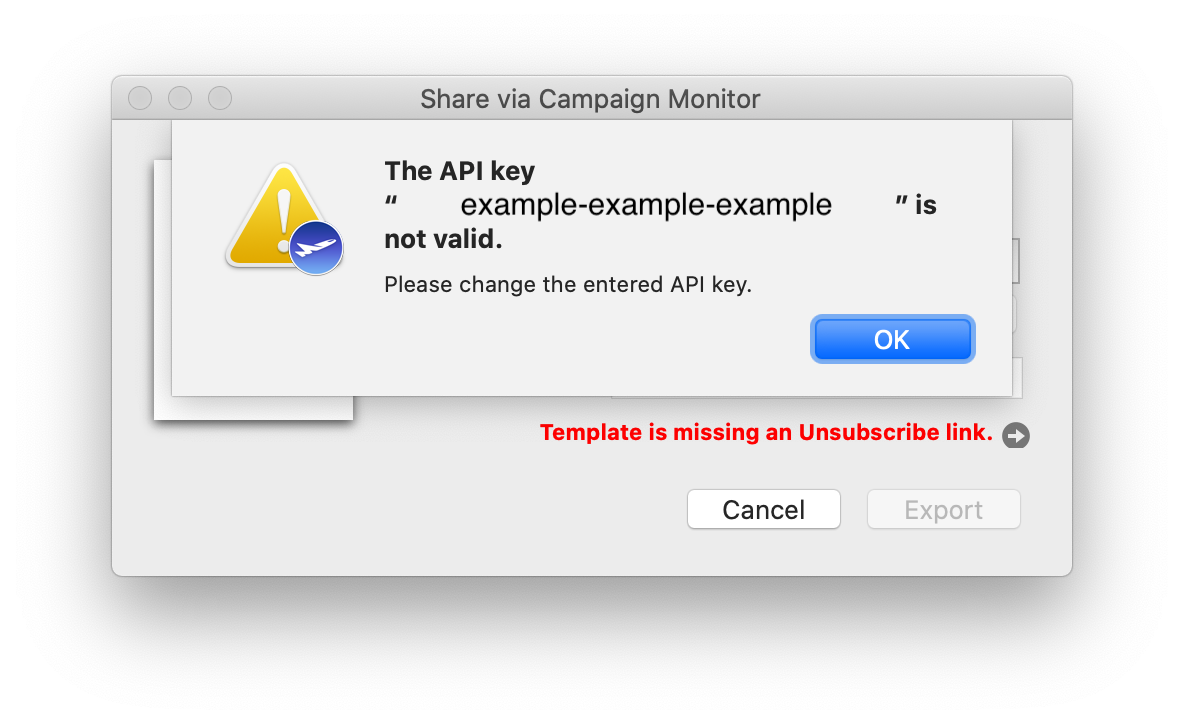 In order to generate a new API key and carry on exporting designs from the app as usual, log in to your Campaign Monitor account and head to "Account settings":
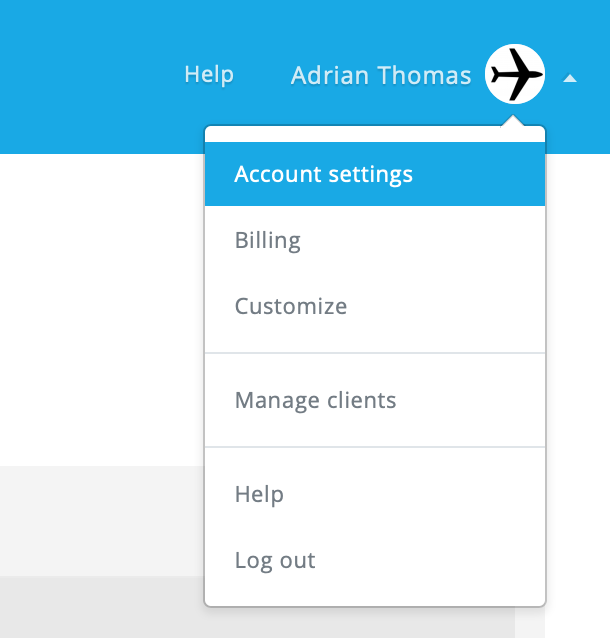 Then, go to "API keys", where you can generate a new API key:
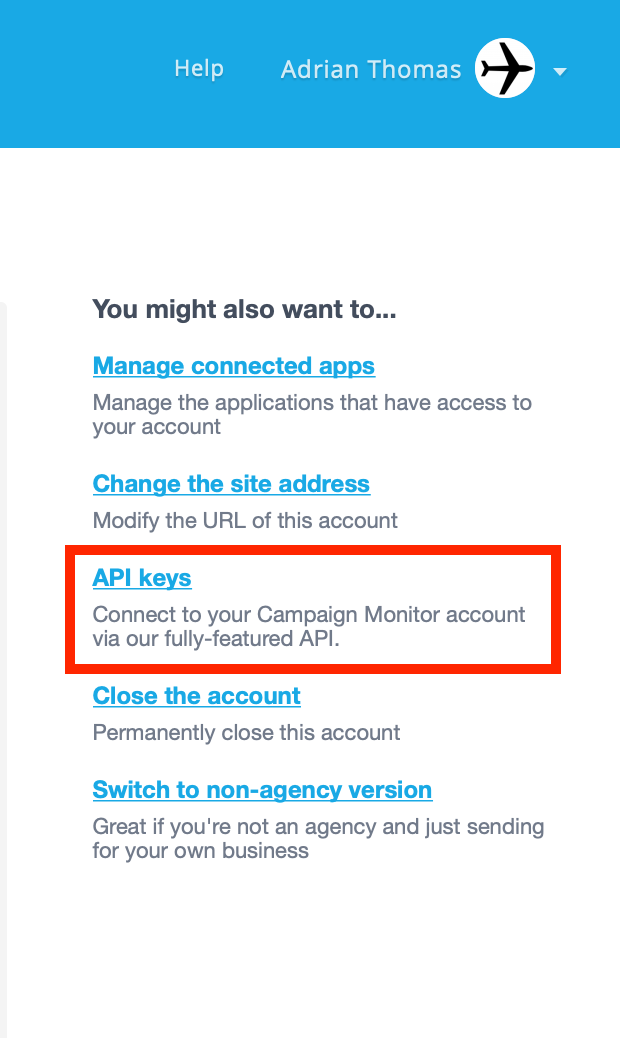 Once you have done this, update your new API key in the app and try your export again.
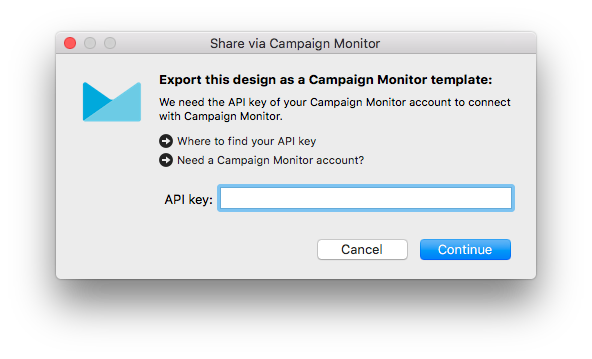
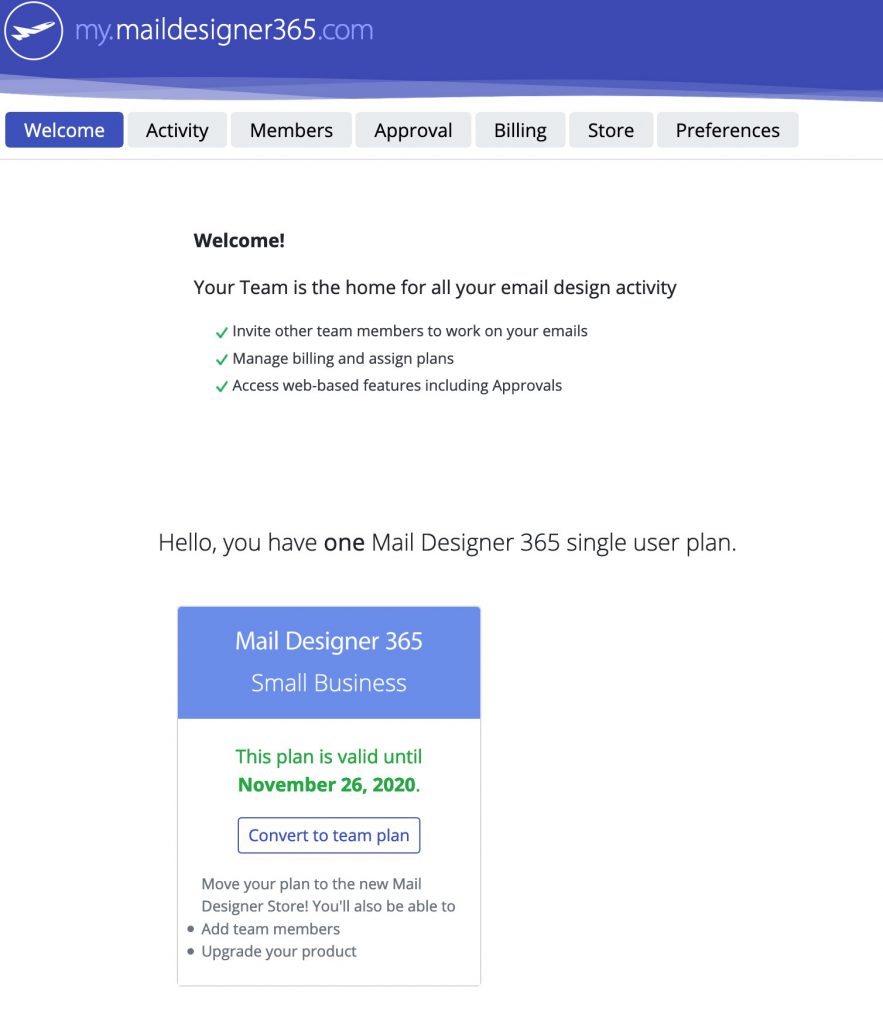 Once you've completed your purchase, your plan will be available for you to use or to assign to a team member.
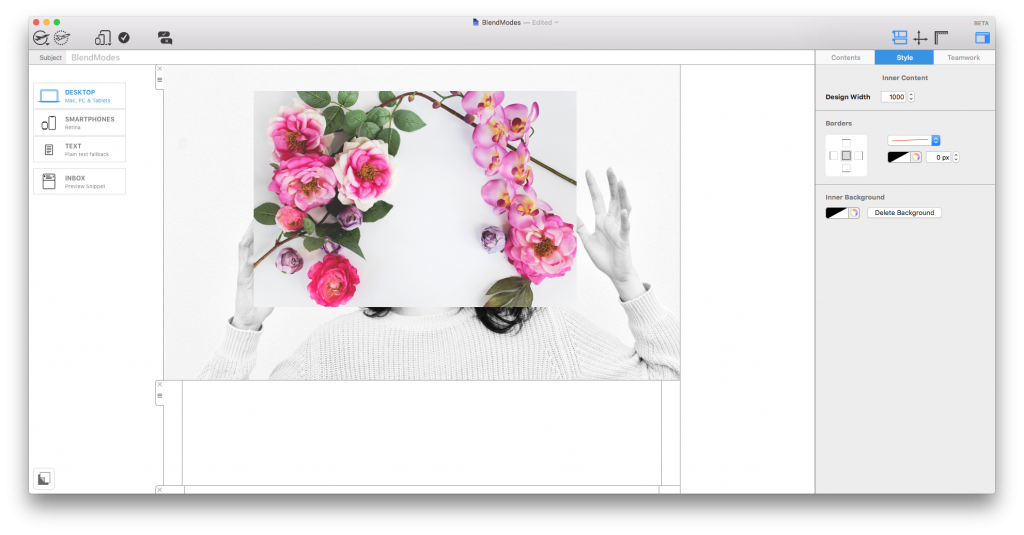 However, there are in fact multiple ways in which you can layer image elements. You can control this by applying various Blend Modes to modify the way two layers blend with each other.
Access Blend Modes under the "Style" menu after clicking on a design element. Here you can scroll through the different modes to find the effect which works best for your design.
However, there are in fact multiple ways in which you can layer image elements. You can control this by applying various Blend Modes to modify the way two layers blend with each other.
Access Blend Modes under the "Style" menu after clicking on a design element. Here you can scroll through the different modes to find the effect which works best for your design.
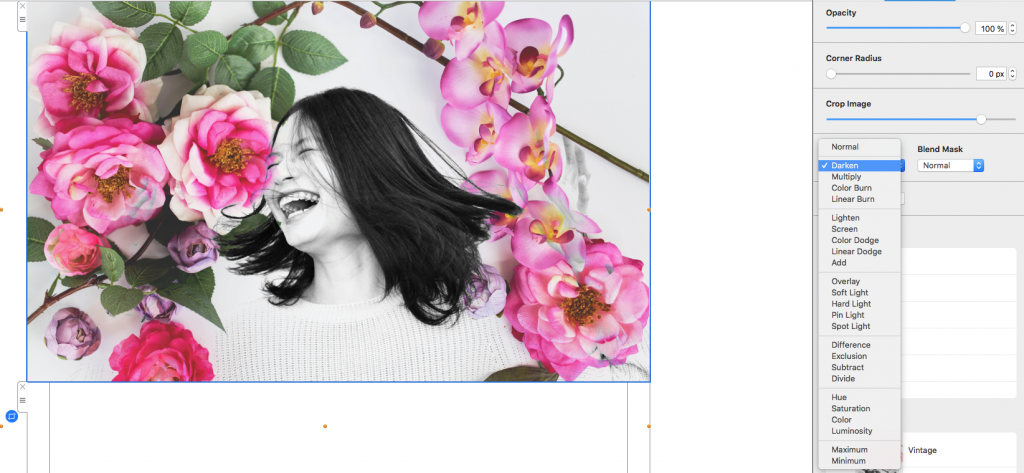 You can find more detailed information about the different Blend Modes available in Mail Designer 365 in this guide.
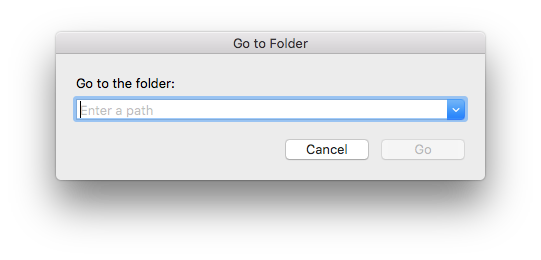 Enter this path into the search box:
~/Library/Containers/net.tower-one.MailDesigner to locate and then delete. Following this, enter this path into the search box:
~/Library/Group Containers and delete the Mail Designer folder. Finally, to uninstall Mail Designer from your Mac, go to the Applications folder (or wherever you stored the app) and move it to the trash. This will completely remove the app and all files from your Mac. To also remove its settings, open Terminal.app (from Applications > Utilities) and enter the following command:
defaults delete net.tower-one.MailDesigner
Using guide lines
Guide lines act as a visual guide to help you align different elements within your design. To insert a guideline, go to "Insert" > "Horizontal/Vertical guideline":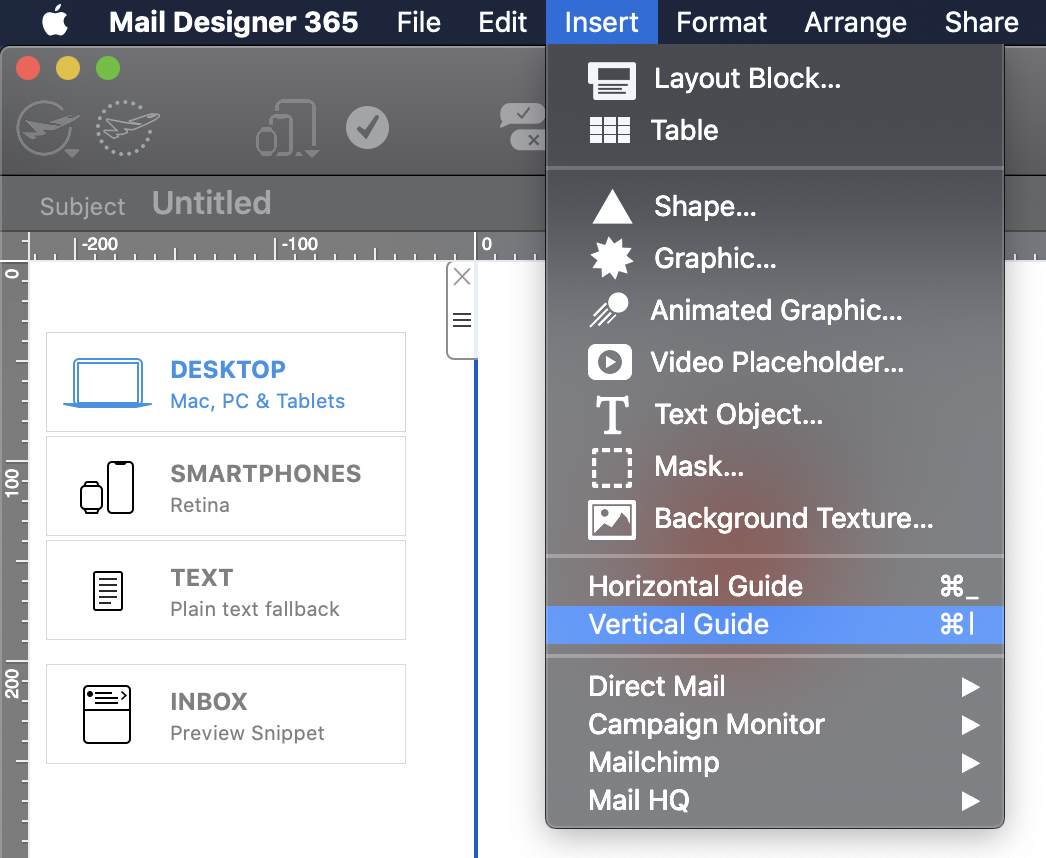 Drag guidelines across your design to position them where you want to align objects, then use the line as a guide to align images, shapes, text, graphics, etc. throughout your design or just in one layout block:
 To hide the guidelines once you are done aligning, click on the "Hide layout outline" icon at the top right of the page:

If you are using an older copy of VPN Tracker 9 and a supported macOS version, please update to the last release.
If you are using a current macOS release, or plan to soon, we recommend moving to VPN Tracker 365. It offers support for new macOS releases, improved security, Connection Safe backup and sync and more.
→ Get VPN Tracker 365Licenses purchased at different times may have different prices. To check the renewal price for a specific plan, check your products overview in my.vpntracker.com.
To keep any pricing benefits, please ensure that you have automatic renewals turned on. If you forget to renew your license and it expires, you will lose legacy pricing benefits.
- Creating a VPN Tracker team
- Inviting team members
- Assigning VPN Tracker plans to team members
- Using the package installer and onboarding tools
- Sharing VPN connections
- Managing billing and invoices for your team
1. Router must support PPTP Passthrough
PPTP uses a special protocol (GRE, protocol 47) in addition to TCP port 1723. Many routers block this by default.
To use PPTP behind a NAT router, your router must support "PPTP Passthrough" and this option also needs to be enabled.
Please ensure that your router supports "PPTP Passthrough" and please ensure it is also enabled. Check your router's manual. If your router has no support for it, you may have to replace it if you require to use PPTP.
2. Check if your ISP is using DS-Lite
If your ISP uses “DS-Lite” (Dual Stack Lite), you do not receive a public IPv4 address. Instead, you get a private IPv4 address that is translated at the provider level (Carrier-Grade NAT).
Please also check if your ISP is running "DS Lite" connection to you. With "DS Lite", users only get private IP addresses that are network address translated at the provider and this is usually incompatible with PPTP. You require a public IPv4 address or switch to a different VPN protocol. Call your ISP and ask for "a public IPv4 address".
What does Extended Diagnostics mean?
If you activate extended diagnostics, you give us permission to request additional TSRs for the duration of the permission. This has the same security parameters as described abobve. With this option selected, we can check if reported problems still exist and provide faster support without additional user interaction. To send us a TSR, open the VPN Tracker App and choose "Help">"Contact Support" in the top menu bar.
- Log in to you your account at my.vpntracker.com
- Go to "My Plans and Billing" in the sidebar, where you will see your current active plan(s), in case your plan is a team plan, please go to "Team Plans and Billing" in the sidebar
- To deactivate your renewal, flip the switch from blue to grey
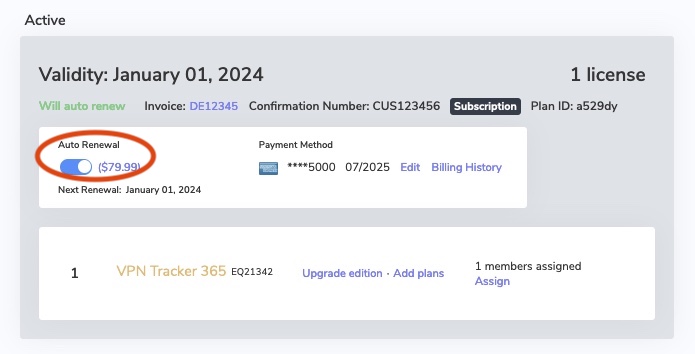
- After deactivating auto renewal, you will receive an email confirming the deactivation.
- Log in to you your account at my.vpntracker.com
- Go to "My Subscriptions" in the sidebar, where you will see your current active plan(s)
- To activate automatic renewal, flip the switch from grey to green

- After activating auto renewal, you will receive an email confirming the activation.
- Log in to your account at my.vpntracker.com
- In the Teams view under "Subscriptions", you will see a list of both your active and your expired plans
- To renew an expired plan, please click on: “Reactivate license
- You will then be shown your available plan options
- Grandfathering pricing is exclusively available for customers using the automatic renewal option. If your plan has expired, you can re-obtain VPN Tracker for the current price tier
- After starting your new plan, you will regain full access to your account including your Personal Safe and Team Management features.
- Log in to your account at my.vpntracker.com
- In the Team overview, go to "Licenses". Here you can see all your existing plans
- Then, click on “Add plans”
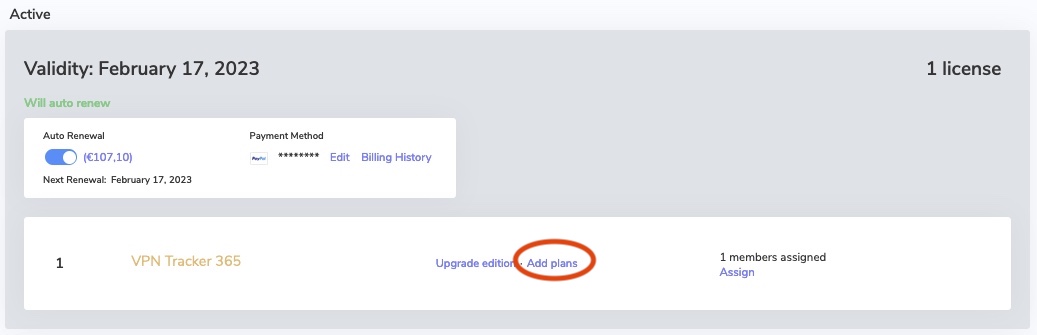
- On the following page enter the number of licenses you would like to add and select the edition. Then click on "Add to plan"
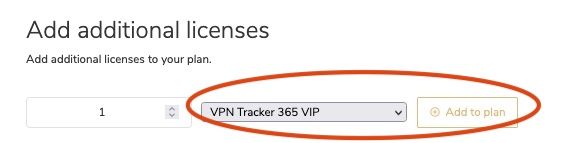
- Under Checkout you will see your new plan. Your new plan will start from today’s date and will run for one year.
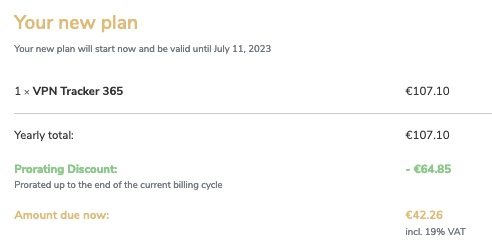
- The "Yearly total" is the total price for one year
- If applicable (i.e. if you have merged your plans), the "Prorating Discount" is the remaining value of your existing licenses which gets deducted from the yearly total to make the "Amount due now".
- Check the Terms and Conditions and click "Pay now"
- You can now assign your licenses to your team members
- Log in to your account at my.vpntracker.com and select your team from the sidebar menu
- Under Subscriptions, you can see an overview of your existing plans
- At the top of the page you will see a "Merge Subscriptions" button. Press this.
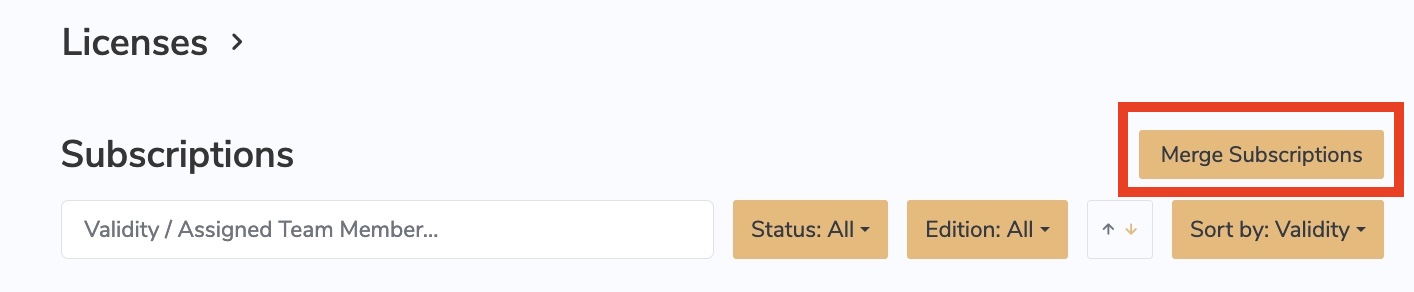
- Select the plans you would like to combine by clicking on the checkbox on the left side next to each plan
- Once you have selected all plans, click Combine Subscriptions at the bottom of the window
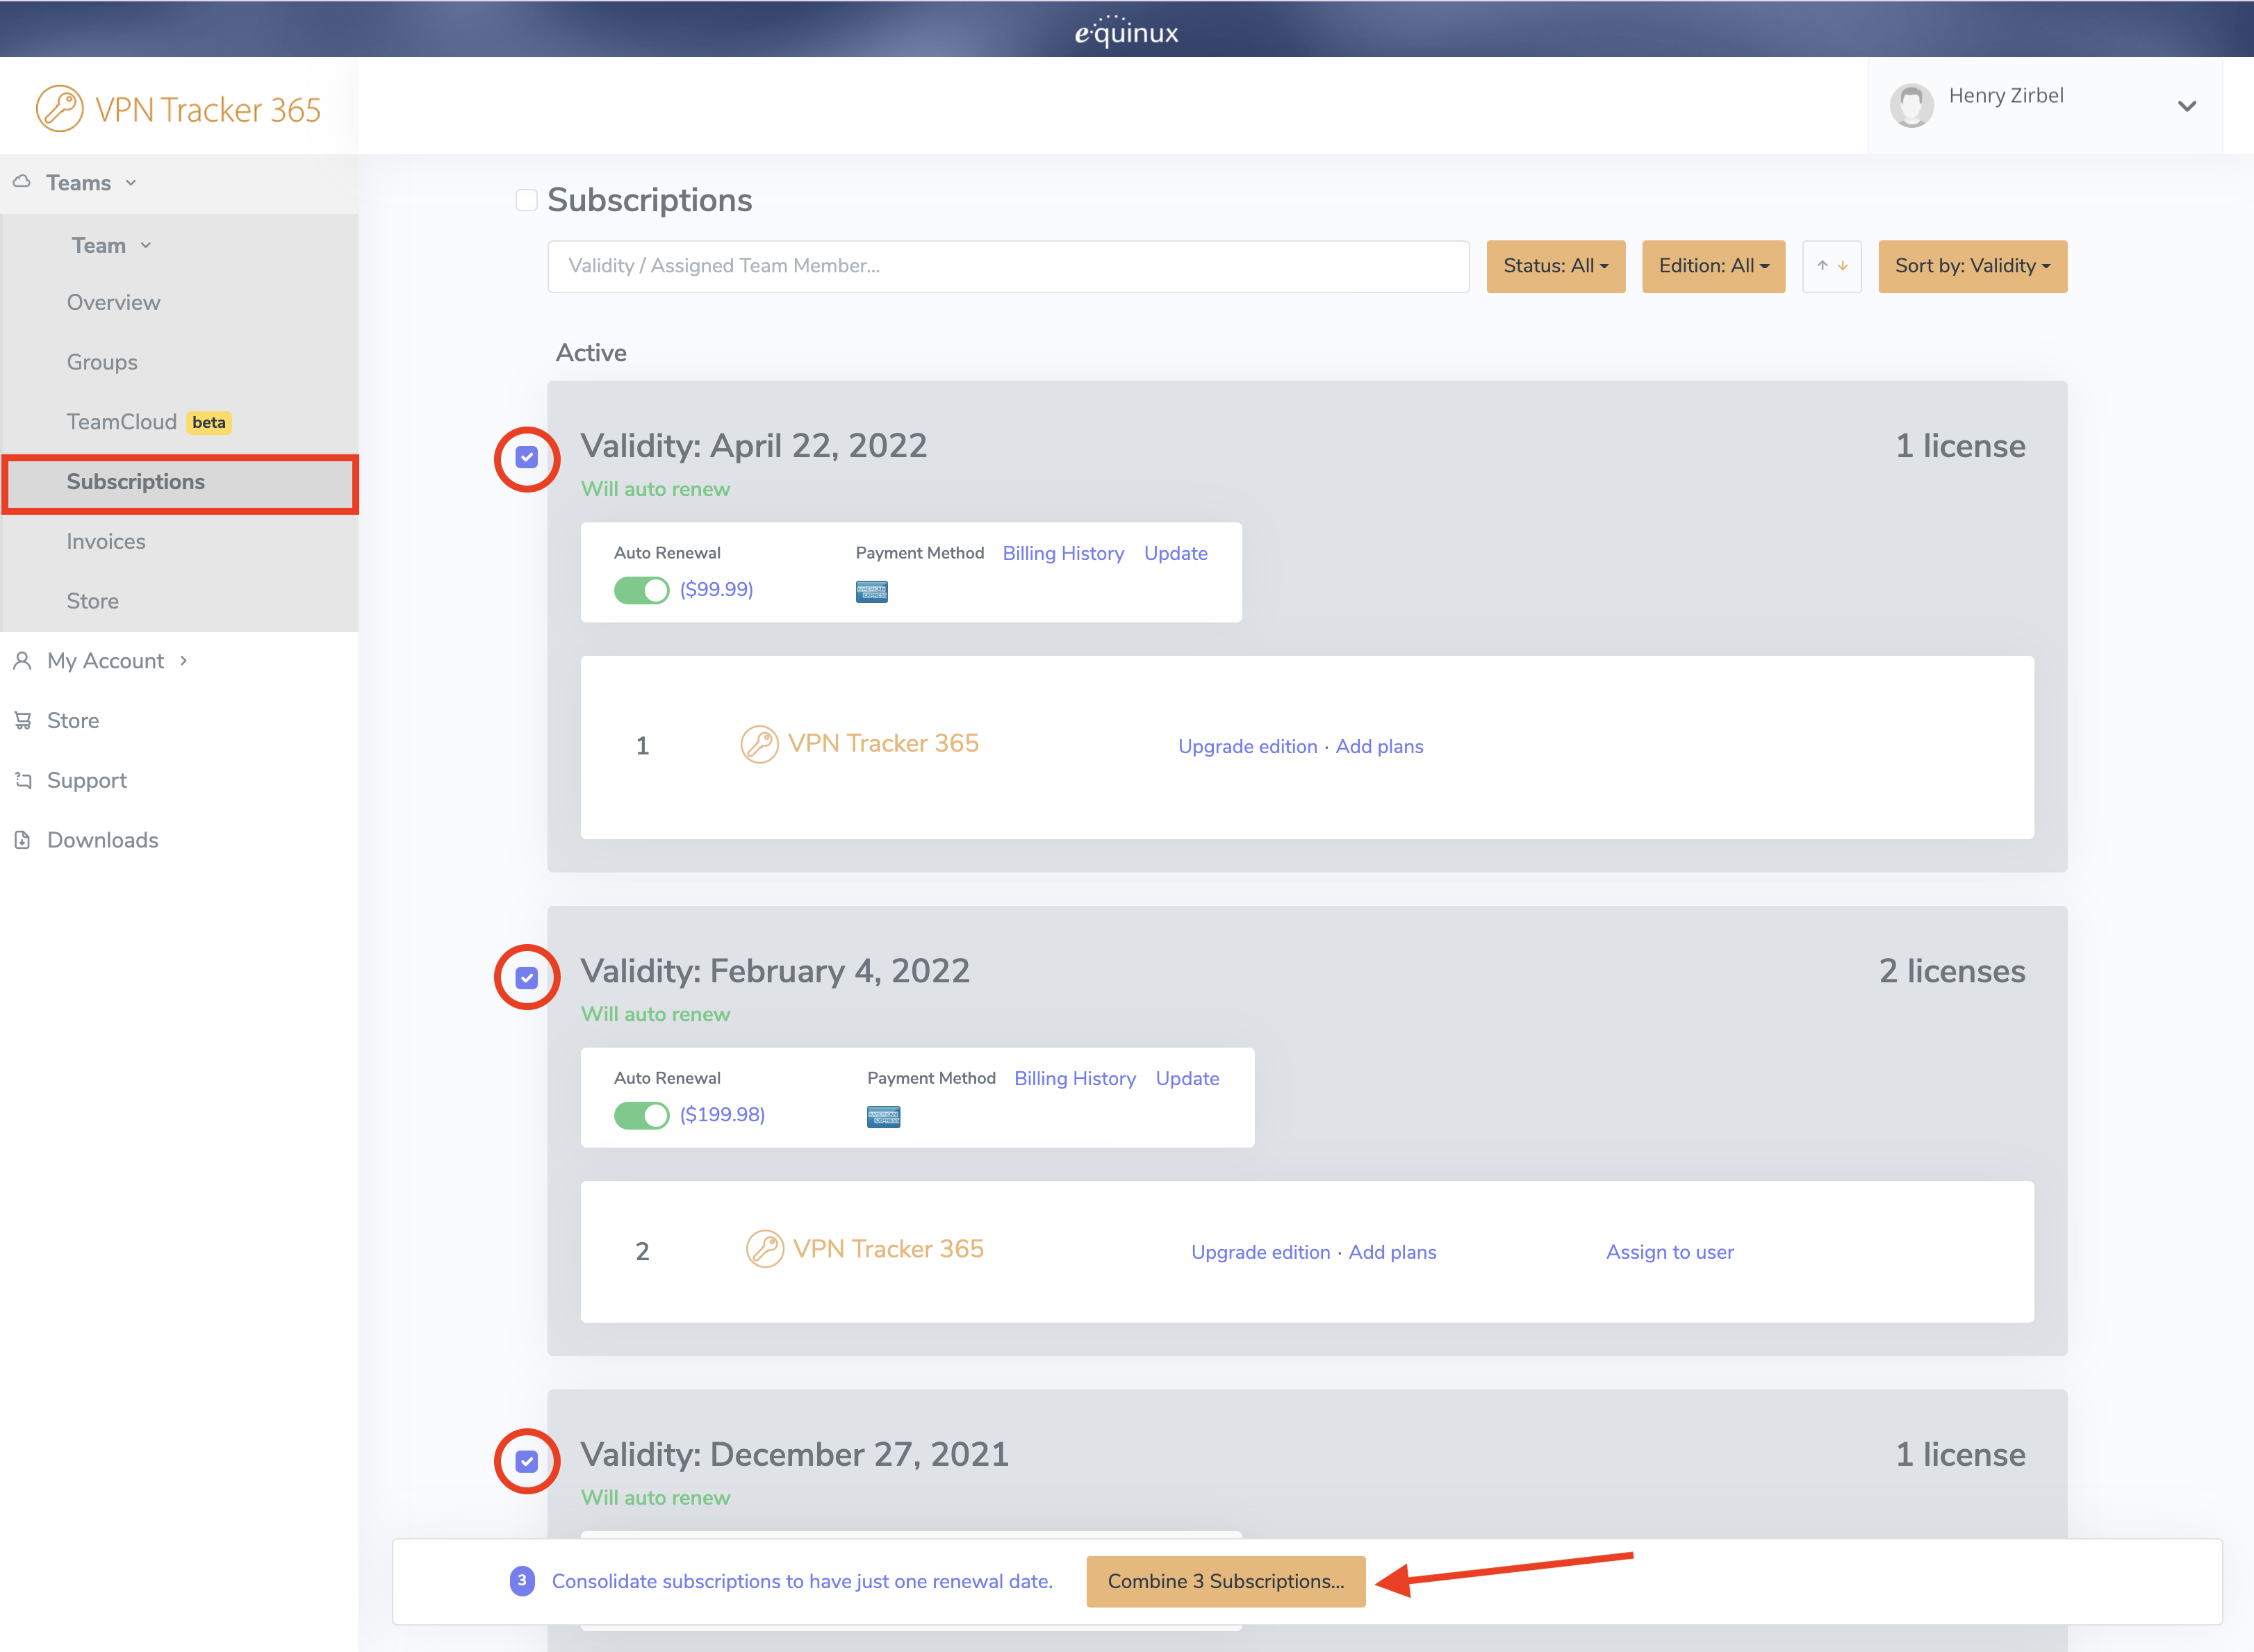 On the next page, you can preview the plans which will be merged and also have the option of upgrading to a different license type or adding new licenses, if needed.
On the right, you will see your new plan. Your new plan will start from today’s date and will run for one year. Your existing licenses will also be renewed.
On the next page, you can preview the plans which will be merged and also have the option of upgrading to a different license type or adding new licenses, if needed.
On the right, you will see your new plan. Your new plan will start from today’s date and will run for one year. Your existing licenses will also be renewed.
 The Yearly total is the total price for one year. The Prorating Discount is the remaining value of your existing licenses which gets deducted from the yearly total to make the Amount due now. Check the Terms and Conditions and click Pay now to finalise your changes.
- Go to Configure > Basic
- Click on the currently selected Profile under "Connection based on"
- Choose "IPsec/L2TP/OpenVPN/SSL/PPTP"
- Choose your VPN protocol from the list and click Apply
- Choose "Don't overwrite" to preserve the default settings for your device
 You'll now be able to choose all options supported by VPN Tracker 365 for your VPN protocol.
 This is the pre-configured VPN connection that you need in order to connect your Mac to your office network and access your internal services.
Here's how it works:
This is the pre-configured VPN connection that you need in order to connect your Mac to your office network and access your internal services.
Here's how it works:
- Double click the connection file to import into VPN Tracker 365.
- Enter the import password - your network admin will give this to you.
- Now, click the toggle switch to connect to your VPN. Note: If you are asked to enter user credentials, your admin will tell you which login you need to use. This video tutorial shows you how to get started with your company VPN:
 A VPN Tracker 365 plan allows you to connect to your company's VPN from home and securely access the internal services you need.
Here's how it works:
A VPN Tracker 365 plan allows you to connect to your company's VPN from home and securely access the internal services you need.
Here's how it works:
- Click the link in the email to accept the invitation.
- Create an equinux ID with the email address you received the invitation on.
- Now, download the VPN Tracker 365 app and sign in with your equinux ID. Your admin will assign you a plan. You can now get started with importing a connection and connecting to your company VPN. Watch this quick video tutorial to learn more about joining a team:
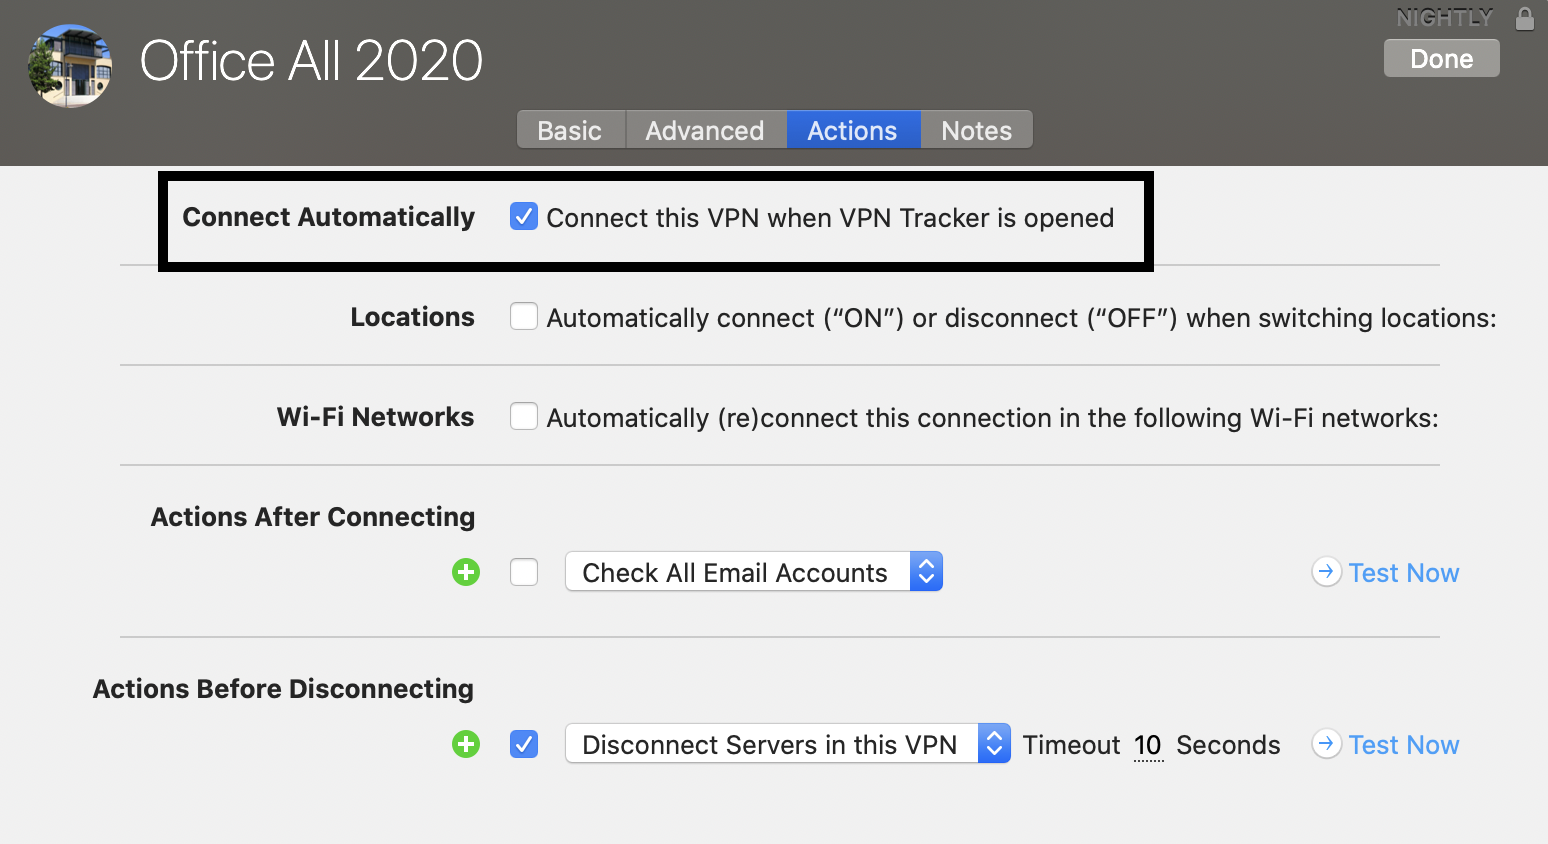 Note: If this auto start connection has an issue (e.g. no VPN gateway has been entered), you will be prompted with an error message each time you start VPN Tracker. Either solve the issues with the connection or – if you do not need to run the connection – uncheck the option "Connect this VPN when VPN Tracker is opened" to stop the error message from appearing.
In certain circumstances, due to a bug in macOS, the Kernel Extension required by VPN Tracker may not be installed correctly by your System.
If that happens, you may see the error above.
To fix the problem, please try this:
- Go to Macintosh HD/Library/Extensions and delete the file com.vpntracker.365mac.kext
- Then open the Terminal app (under Applications > Utilities) and enter the following command:
sudo kextcache --clear-staging - Then reboot your Mac and try launching VPN Tracker 365 again
If the problem is not fixed, please try this:
- Restart your Mac and hold down Command+R to boot into Recovery Mode
- Choose "Disk Utility"
- Choose your harddrive and click "Mount"
- Exit Disk Utility
- Go to the menu bar and choose "Utilities > Terminal"
- Enter the following commands:
cd /Volumes/Macintosh\ HD/Library/StagedExtensions/Library/Extensions/
rm -rf com.vpntracker.365mac.kext - Restart your Mac and try launching VPN Tracker 365 again
- Open the VPN Tracker 365 app and go to "VPN Tracker 365" > "Preferences"
- Next to "Update", check the box "Get early access to Pre-Release versions"
- From the drop down menu, select "Beta versions"
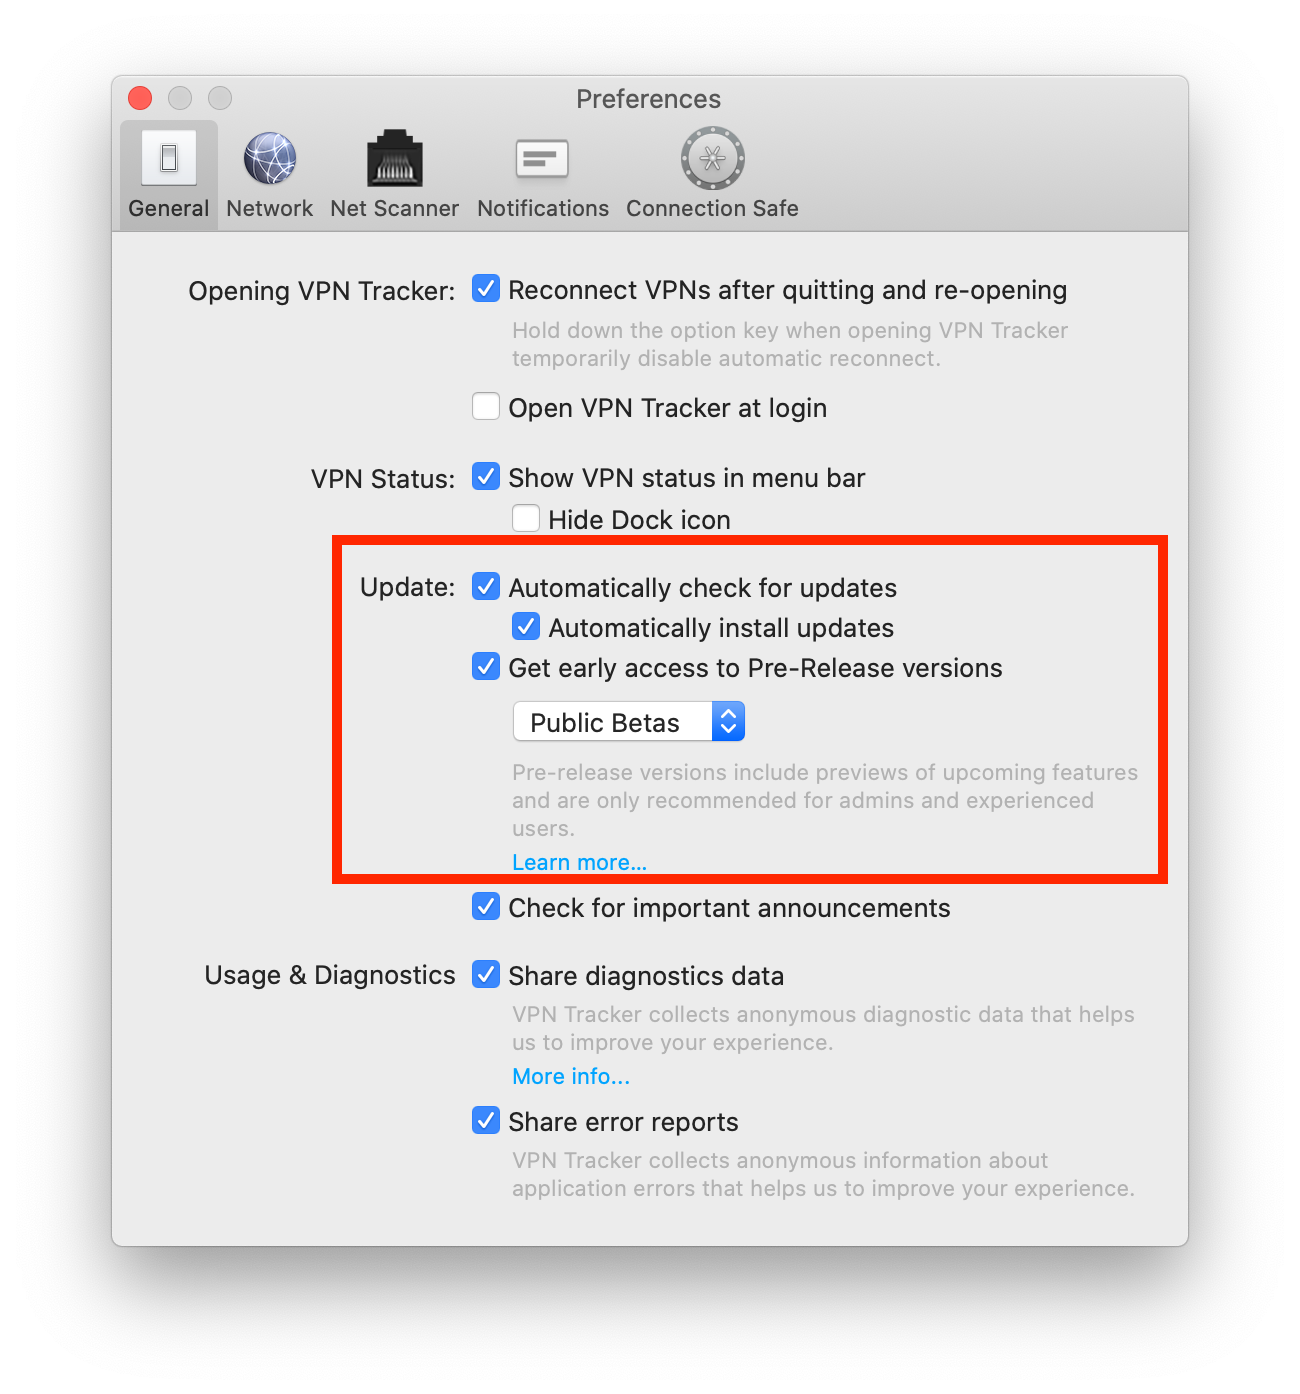 Tip: Next to "Update" you can also check "Automatically check for updates". This way, VPN Tracker 365 will inform you whenever a new beta version is available for testing.
Are you an experienced IT admin wanting to take things one step further? Check out our Nightly builds...
If you run into issues on a beta version and want to get back to an older build, you can always find our latest official release on the version history page. Please also note that you can deactivate beta testing at any time by unchecking the box in your app preferences.
Tip: Next to "Update" you can also check "Automatically check for updates". This way, VPN Tracker 365 will inform you whenever a new beta version is available for testing.
Are you an experienced IT admin wanting to take things one step further? Check out our Nightly builds...
If you run into issues on a beta version and want to get back to an older build, you can always find our latest official release on the version history page. Please also note that you can deactivate beta testing at any time by unchecking the box in your app preferences.
- Open the VPN Tracker 365 app and go to "VPN Tracker 365" > "Preferences"
- Next to "Update", check the box "Get early access to Pre-Release versions"
- From the drop down menu, select "Nightly Builds"
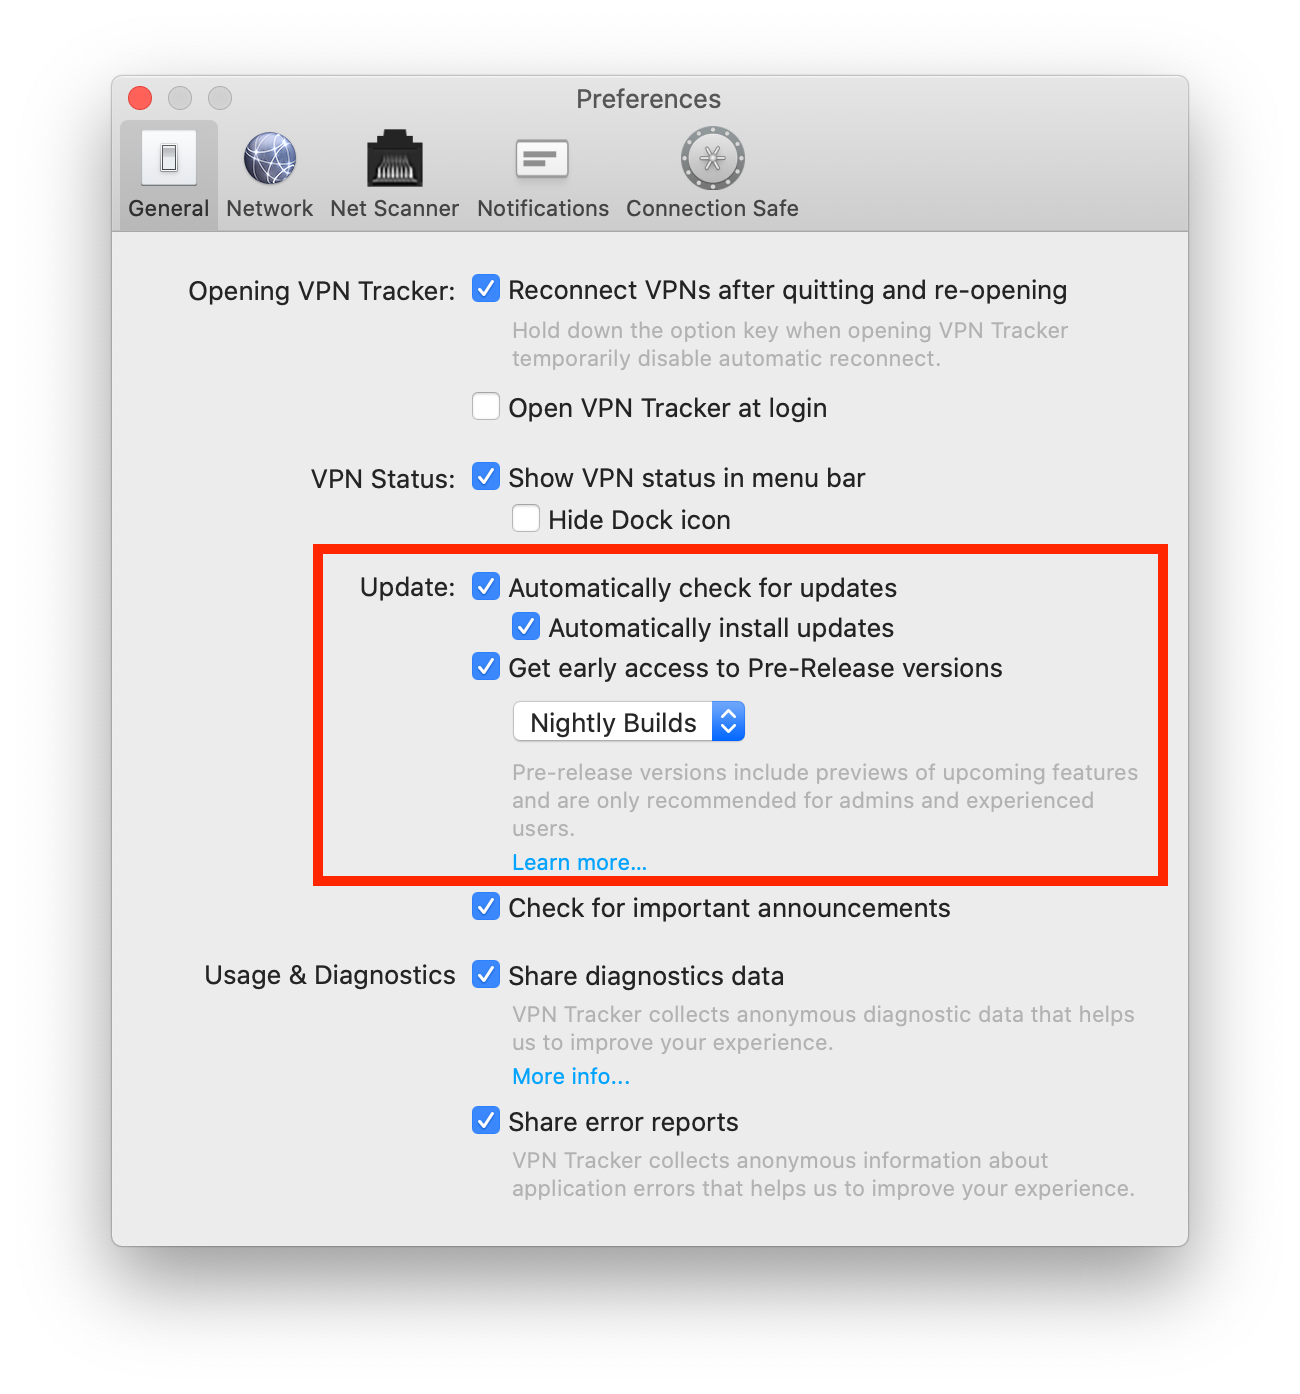 Tip: Next to "Update" you can also check "Automatically check for updates". This way, VPN Tracker 365 will inform you whenever a new Nightly build is available for testing.
Not sure you're up for Nightly testing? If you want to test a more ready-to-launch version of VPN Tracker before it goes live, our beta testing program is another great alternative.
If you run into issues on a Nightly version and want to get back to an older build, you can always find our latest official release on the version history page. Please also note that you can deactivate Nightly testing at any time by unchecking the box in your app preferences.
Tip: Next to "Update" you can also check "Automatically check for updates". This way, VPN Tracker 365 will inform you whenever a new Nightly build is available for testing.
Not sure you're up for Nightly testing? If you want to test a more ready-to-launch version of VPN Tracker before it goes live, our beta testing program is another great alternative.
If you run into issues on a Nightly version and want to get back to an older build, you can always find our latest official release on the version history page. Please also note that you can deactivate Nightly testing at any time by unchecking the box in your app preferences.
- Find your PPTP VPN connection settings in the Control Panel of your Windows PC
- Start VPN Tracker 365 on your Mac and click the "+" to create a new PPTP connection
- Copy the connection settings from the first step into the configuration window
- Finally, start up your PPTP connection to test
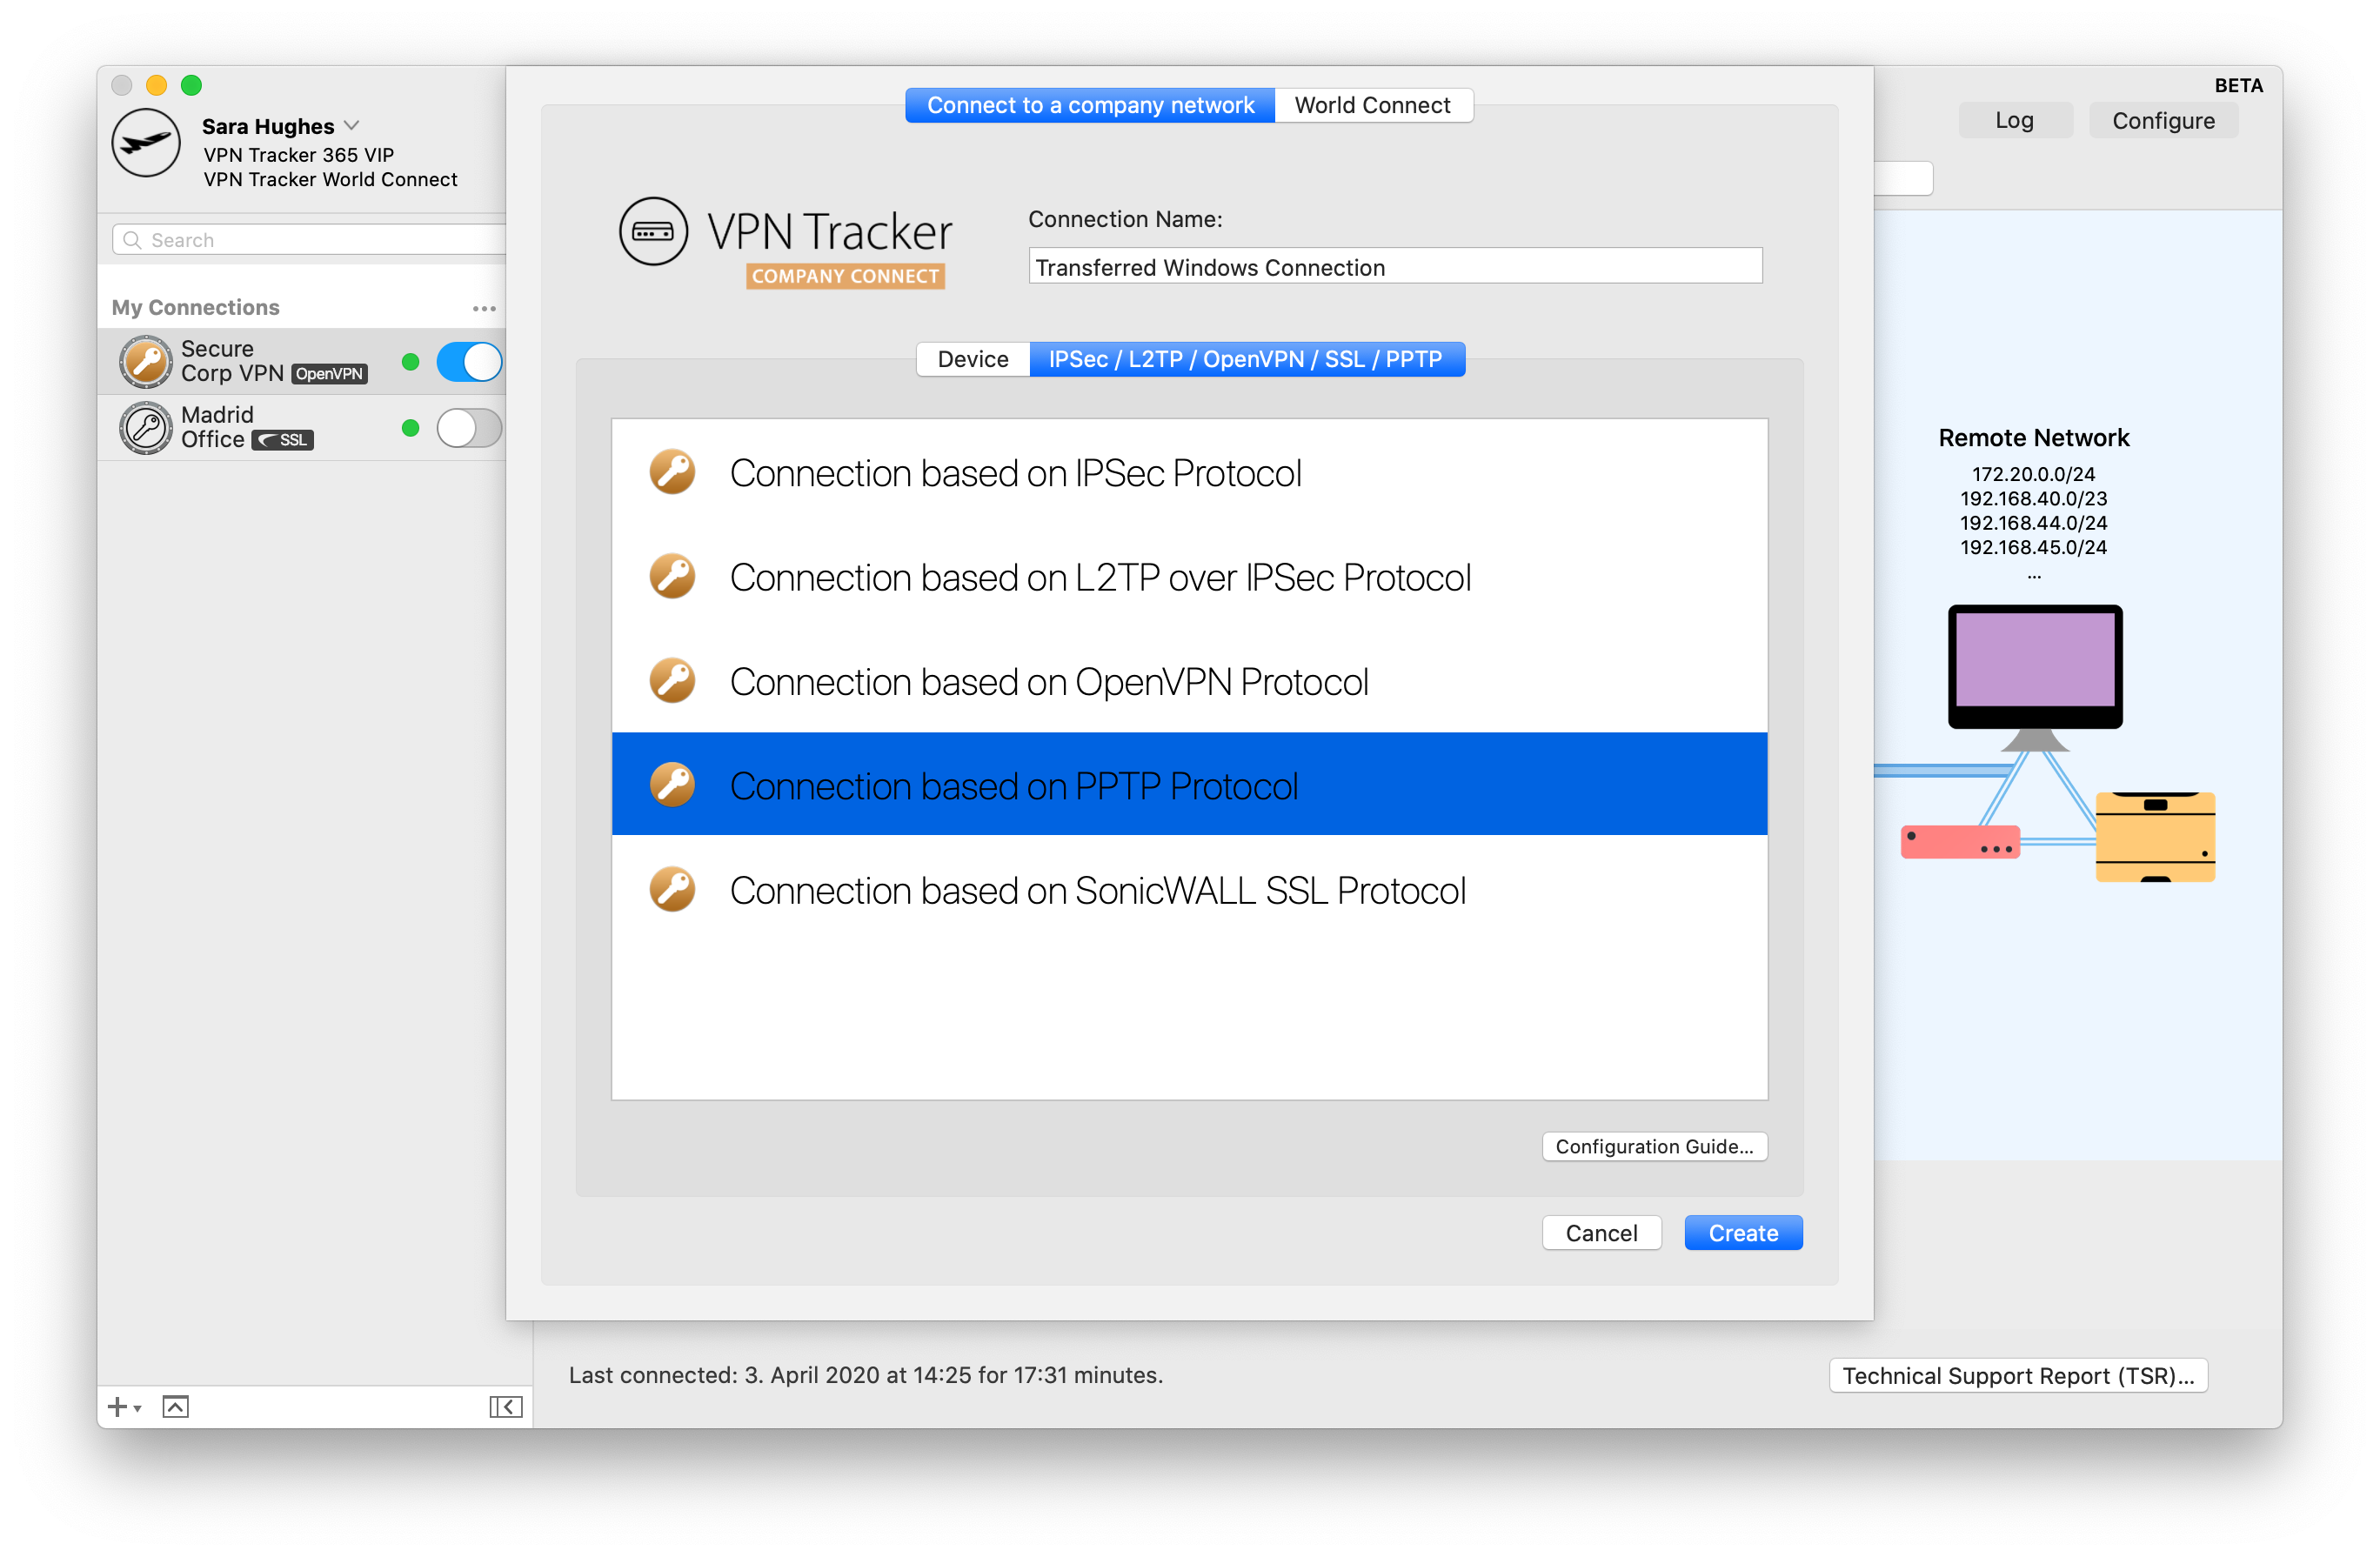 You can now use your Windows PPTP VPN connection on your Mac, thanks to VPN Tracker 365. If you require a more detailed walkthrough, please check out this step-by-step PDF guide: Migrating a Windows PPTP VPN Configuration
Find out more about PPTP VPN under macOS Big Sur
You can now use your Windows PPTP VPN connection on your Mac, thanks to VPN Tracker 365. If you require a more detailed walkthrough, please check out this step-by-step PDF guide: Migrating a Windows PPTP VPN Configuration
Find out more about PPTP VPN under macOS Big Sur
- Private IP Addresses, and
- Public IP Addresses
- 192.168.0.x, and
- 192.168.1.x
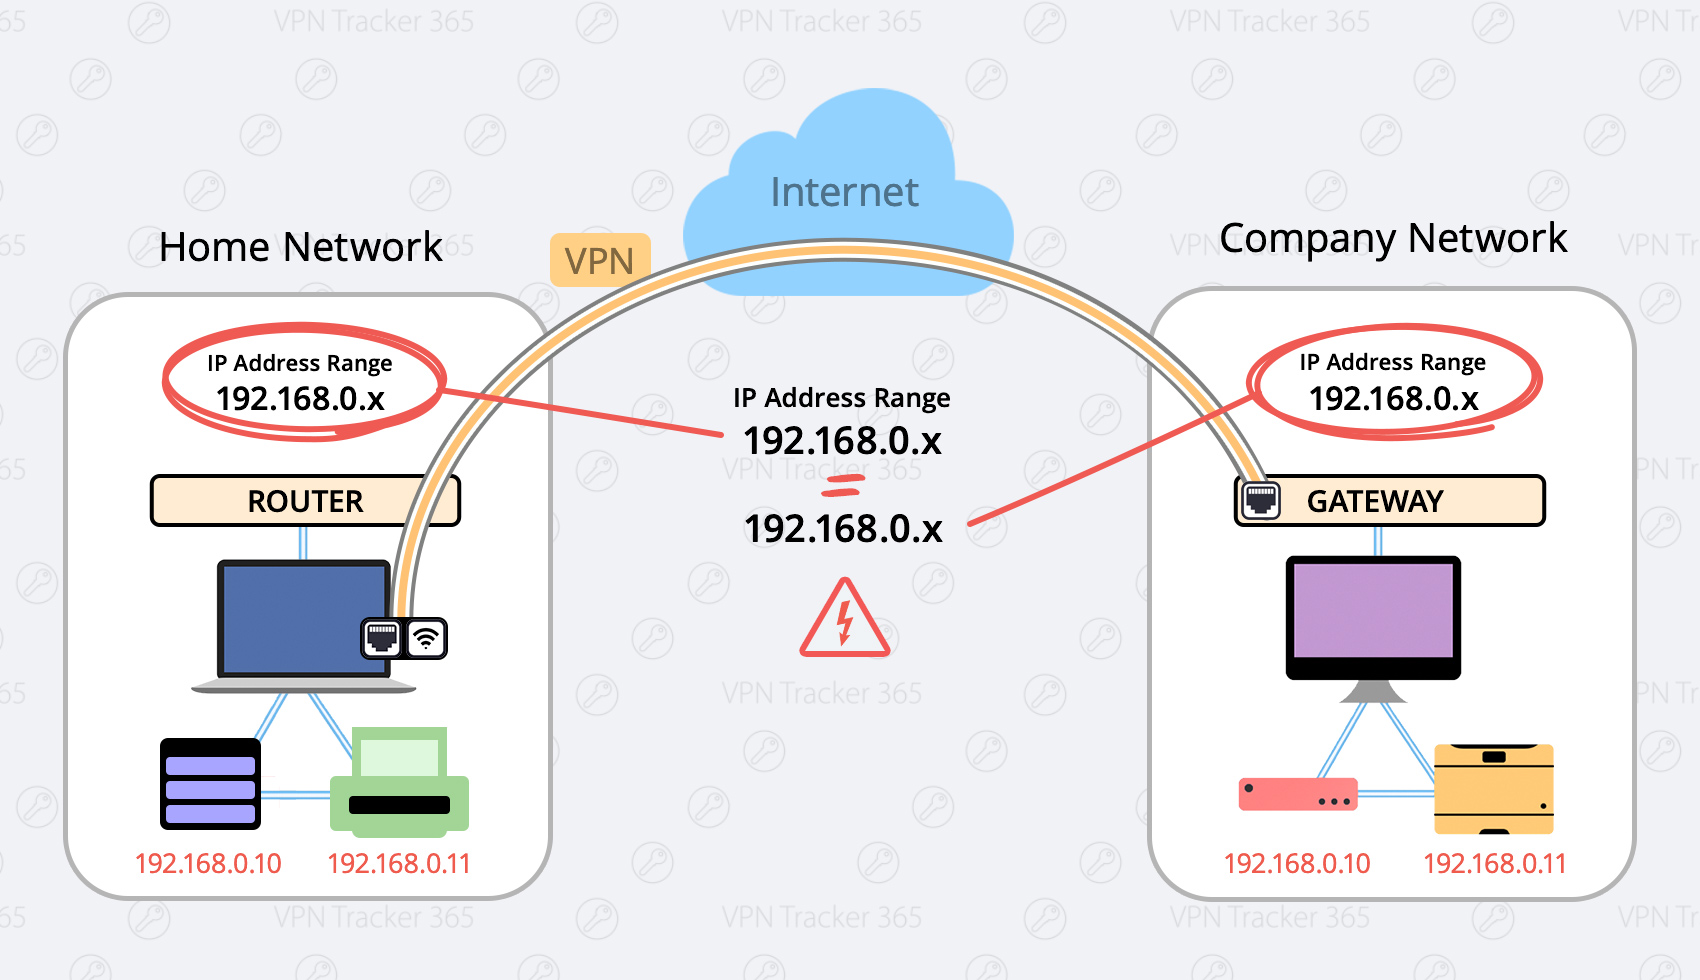 Here are two possible solutions:
Change your local network to a different range (Preferred)
Possible Ranges are:- 10.250.250.x
- 172.30.30.x
- 192.168.250.x
- Login to your home router
- Find the setup section with “DHCP” settings.
- Change your router to a different IP adress (for example an address from one of the ranges listed above, for example 172.30.30.1)
- Change the DHCP Server Settings to the same range of your router (If your router IP is 172.30.30.1, your range could be 172.30.30.10 to 172.30.30.253)
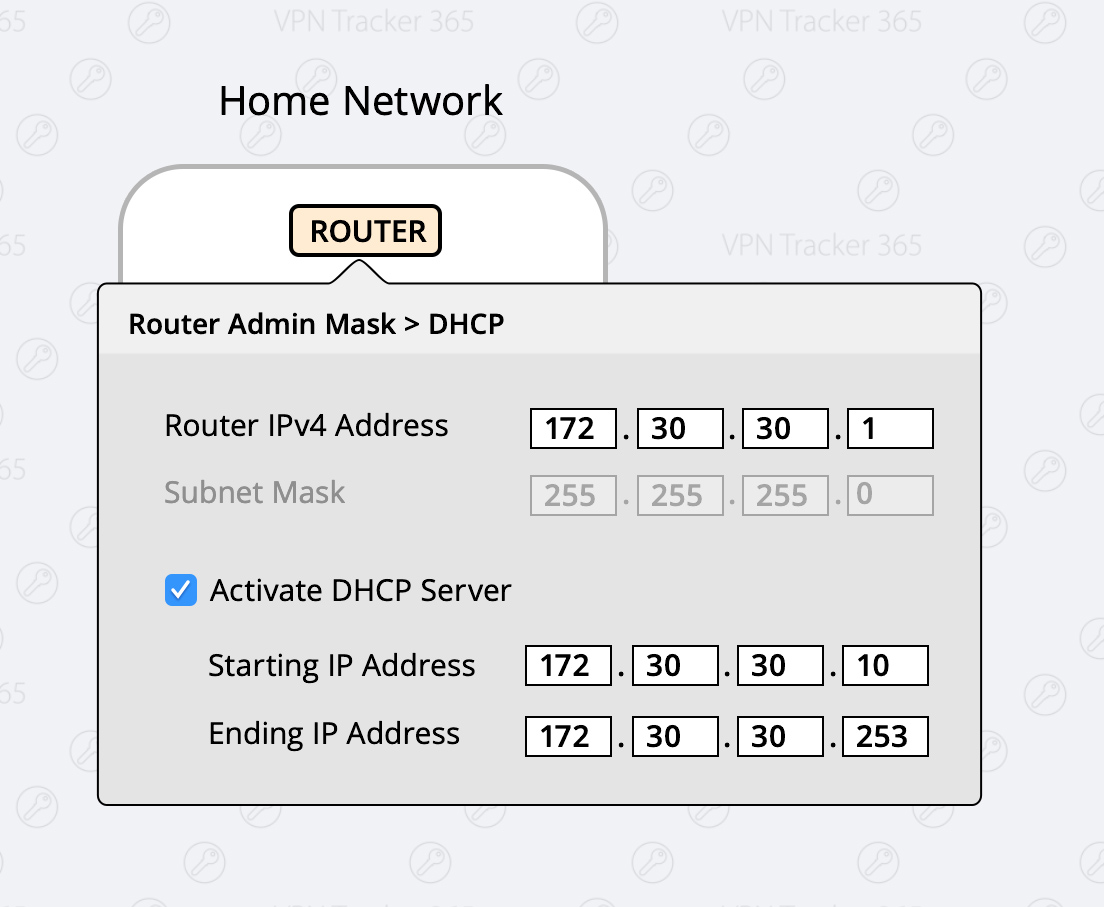
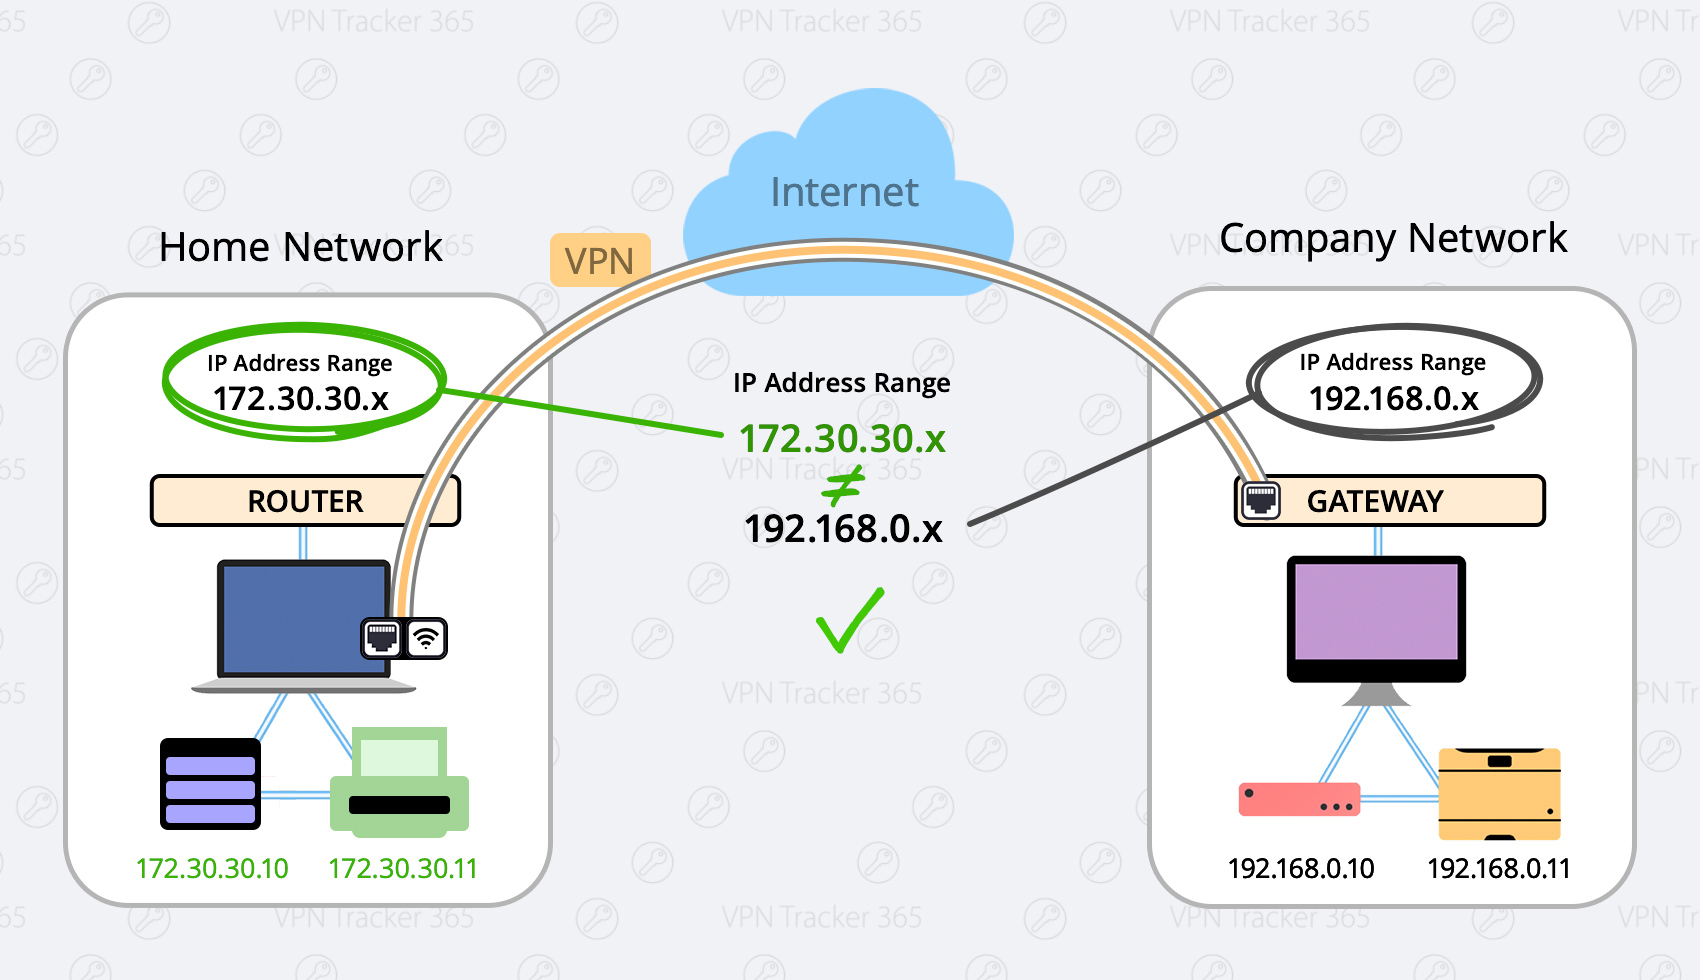
Force Traffic over VPN
There may be situations where it's not possible to use the first option (for example if you're in a coffee shop or hotel) In this case you have the option to force the traffic over your VPN Network, this means your VPN Network (company network) will always win. Advantage: This setting is global, meaning no matter what network you are in you will always be able to connect. Disadvantage: Once you are connected to your company’s VPN, you can not access local service, like home router, local storages or printers. What to do:- Configure your VPN Tracker connection
- Select the "Advanced" Tab at the top
- In the "Traffic control" section, activate the Checkbox "Force traffic over the VPN if remote networks conflict with local networks"

Mail Designer- Support ended: September 2014 Mail Designer 2 - Support ended: February 2015 Mail Designer Pro - Support ended: May 2016 Mail Designer Pro 2 - Support ended: May 2017 Mail Designer Pro 3 - Support ended: October 2018 Mail Designer Pro HS - Support ended: January 2019What this means: While some of these versions of Mail Designer may still work on your current Mac, should you need to get a new Mac, or upgrade to a new macOS, they will no longer be supported. What to do: If you are still using an older version, we strongly suggest you upgrade to a modern Mail Designer 365 plan to guarantee regular updates and consistent support throughout the lifetime of your plan.
Google Calendar
If you've created a Google Calendar event which you want to share with your email subscribers, you will need to create an event link to include in your email. Here's how:- Set up your event in your Google Calendar.
- Click on "Options" > "Publish Event"
- Copy the event link to include in your email template. Important: Make sure your calendar is set to public to ensure all recipients will be able to view the event.
 Now you can insert the link into your Mail Designer 365 template; either as a text link, or attached to a call to action button:
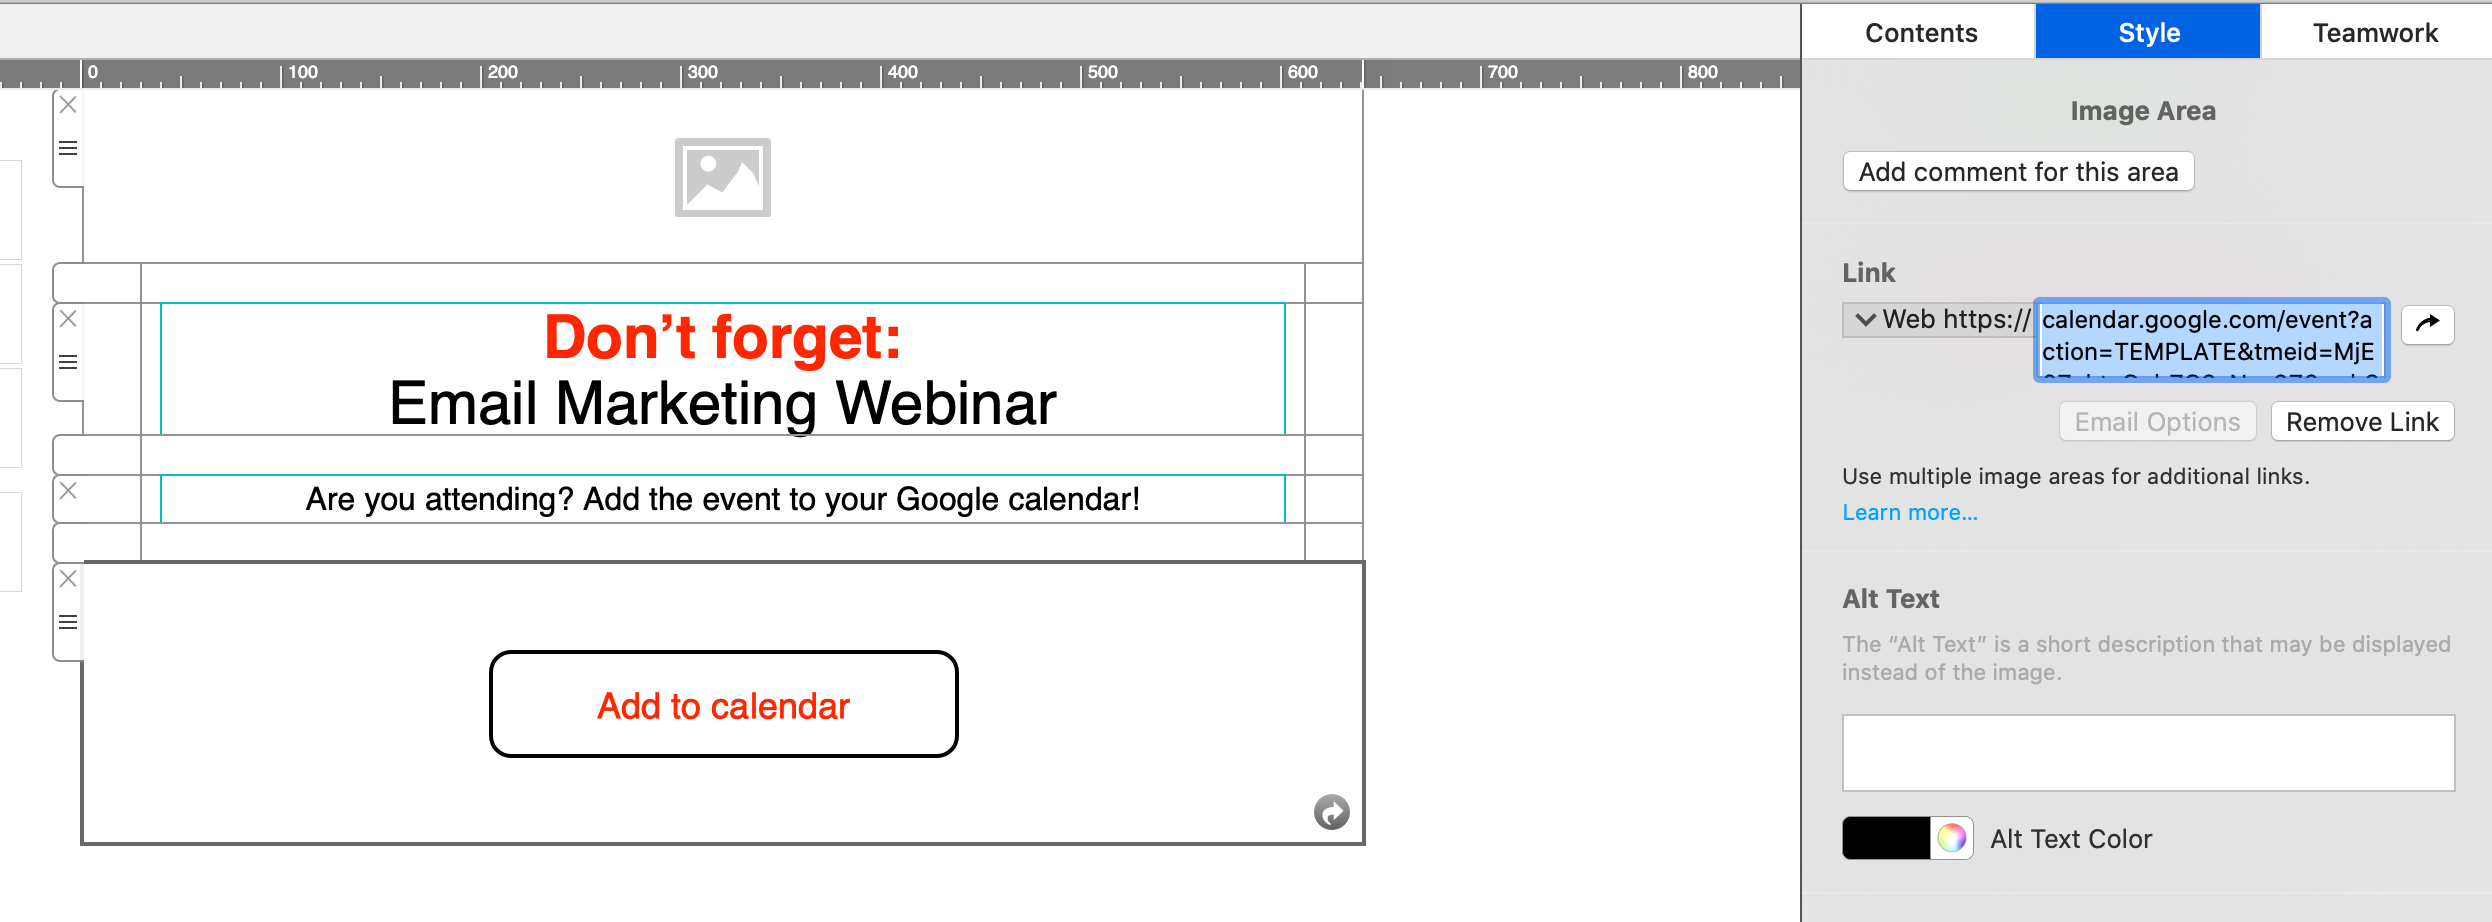
Apple and Outlook Calendar
For Apple and Outlook calendars, you will need to create an .ics file for the calendar event. Simply set up your event in the calendar, then drag it on to your desktop to create the file: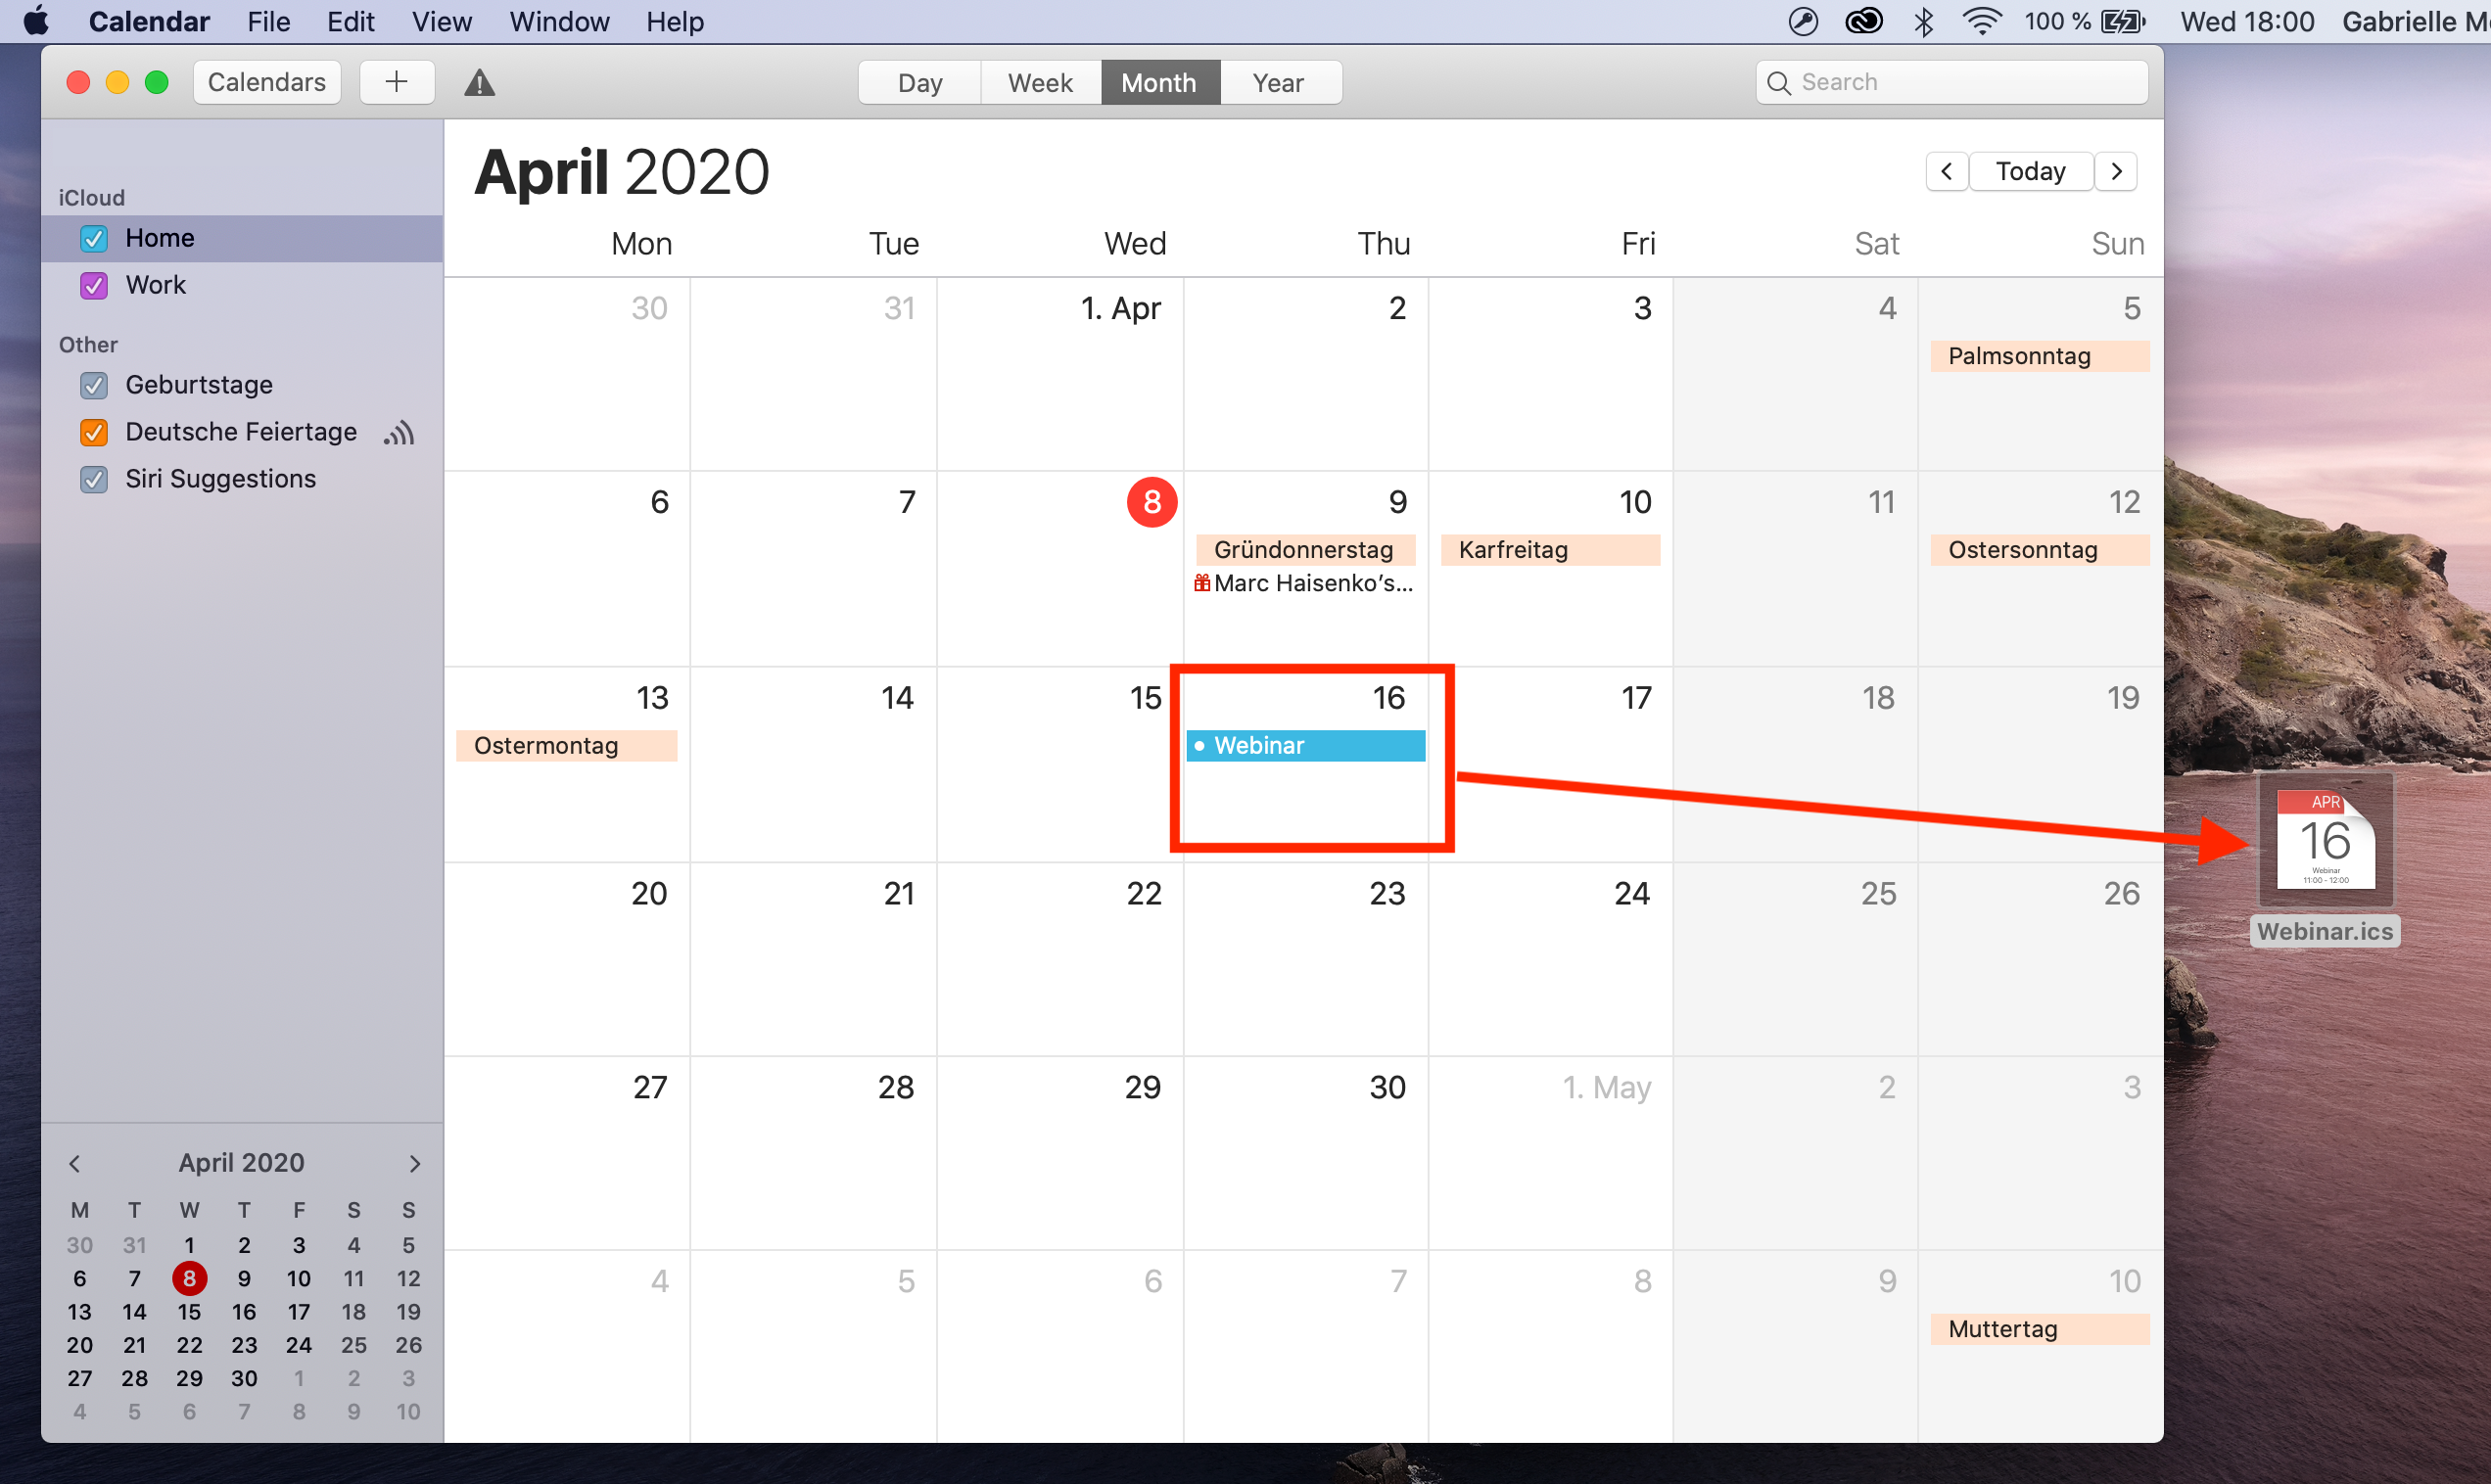 Now, upload the file to an online file hosting service (in this example, we will use Google Drive.) Right click the file to create a shareable link which you can insert into your email design:
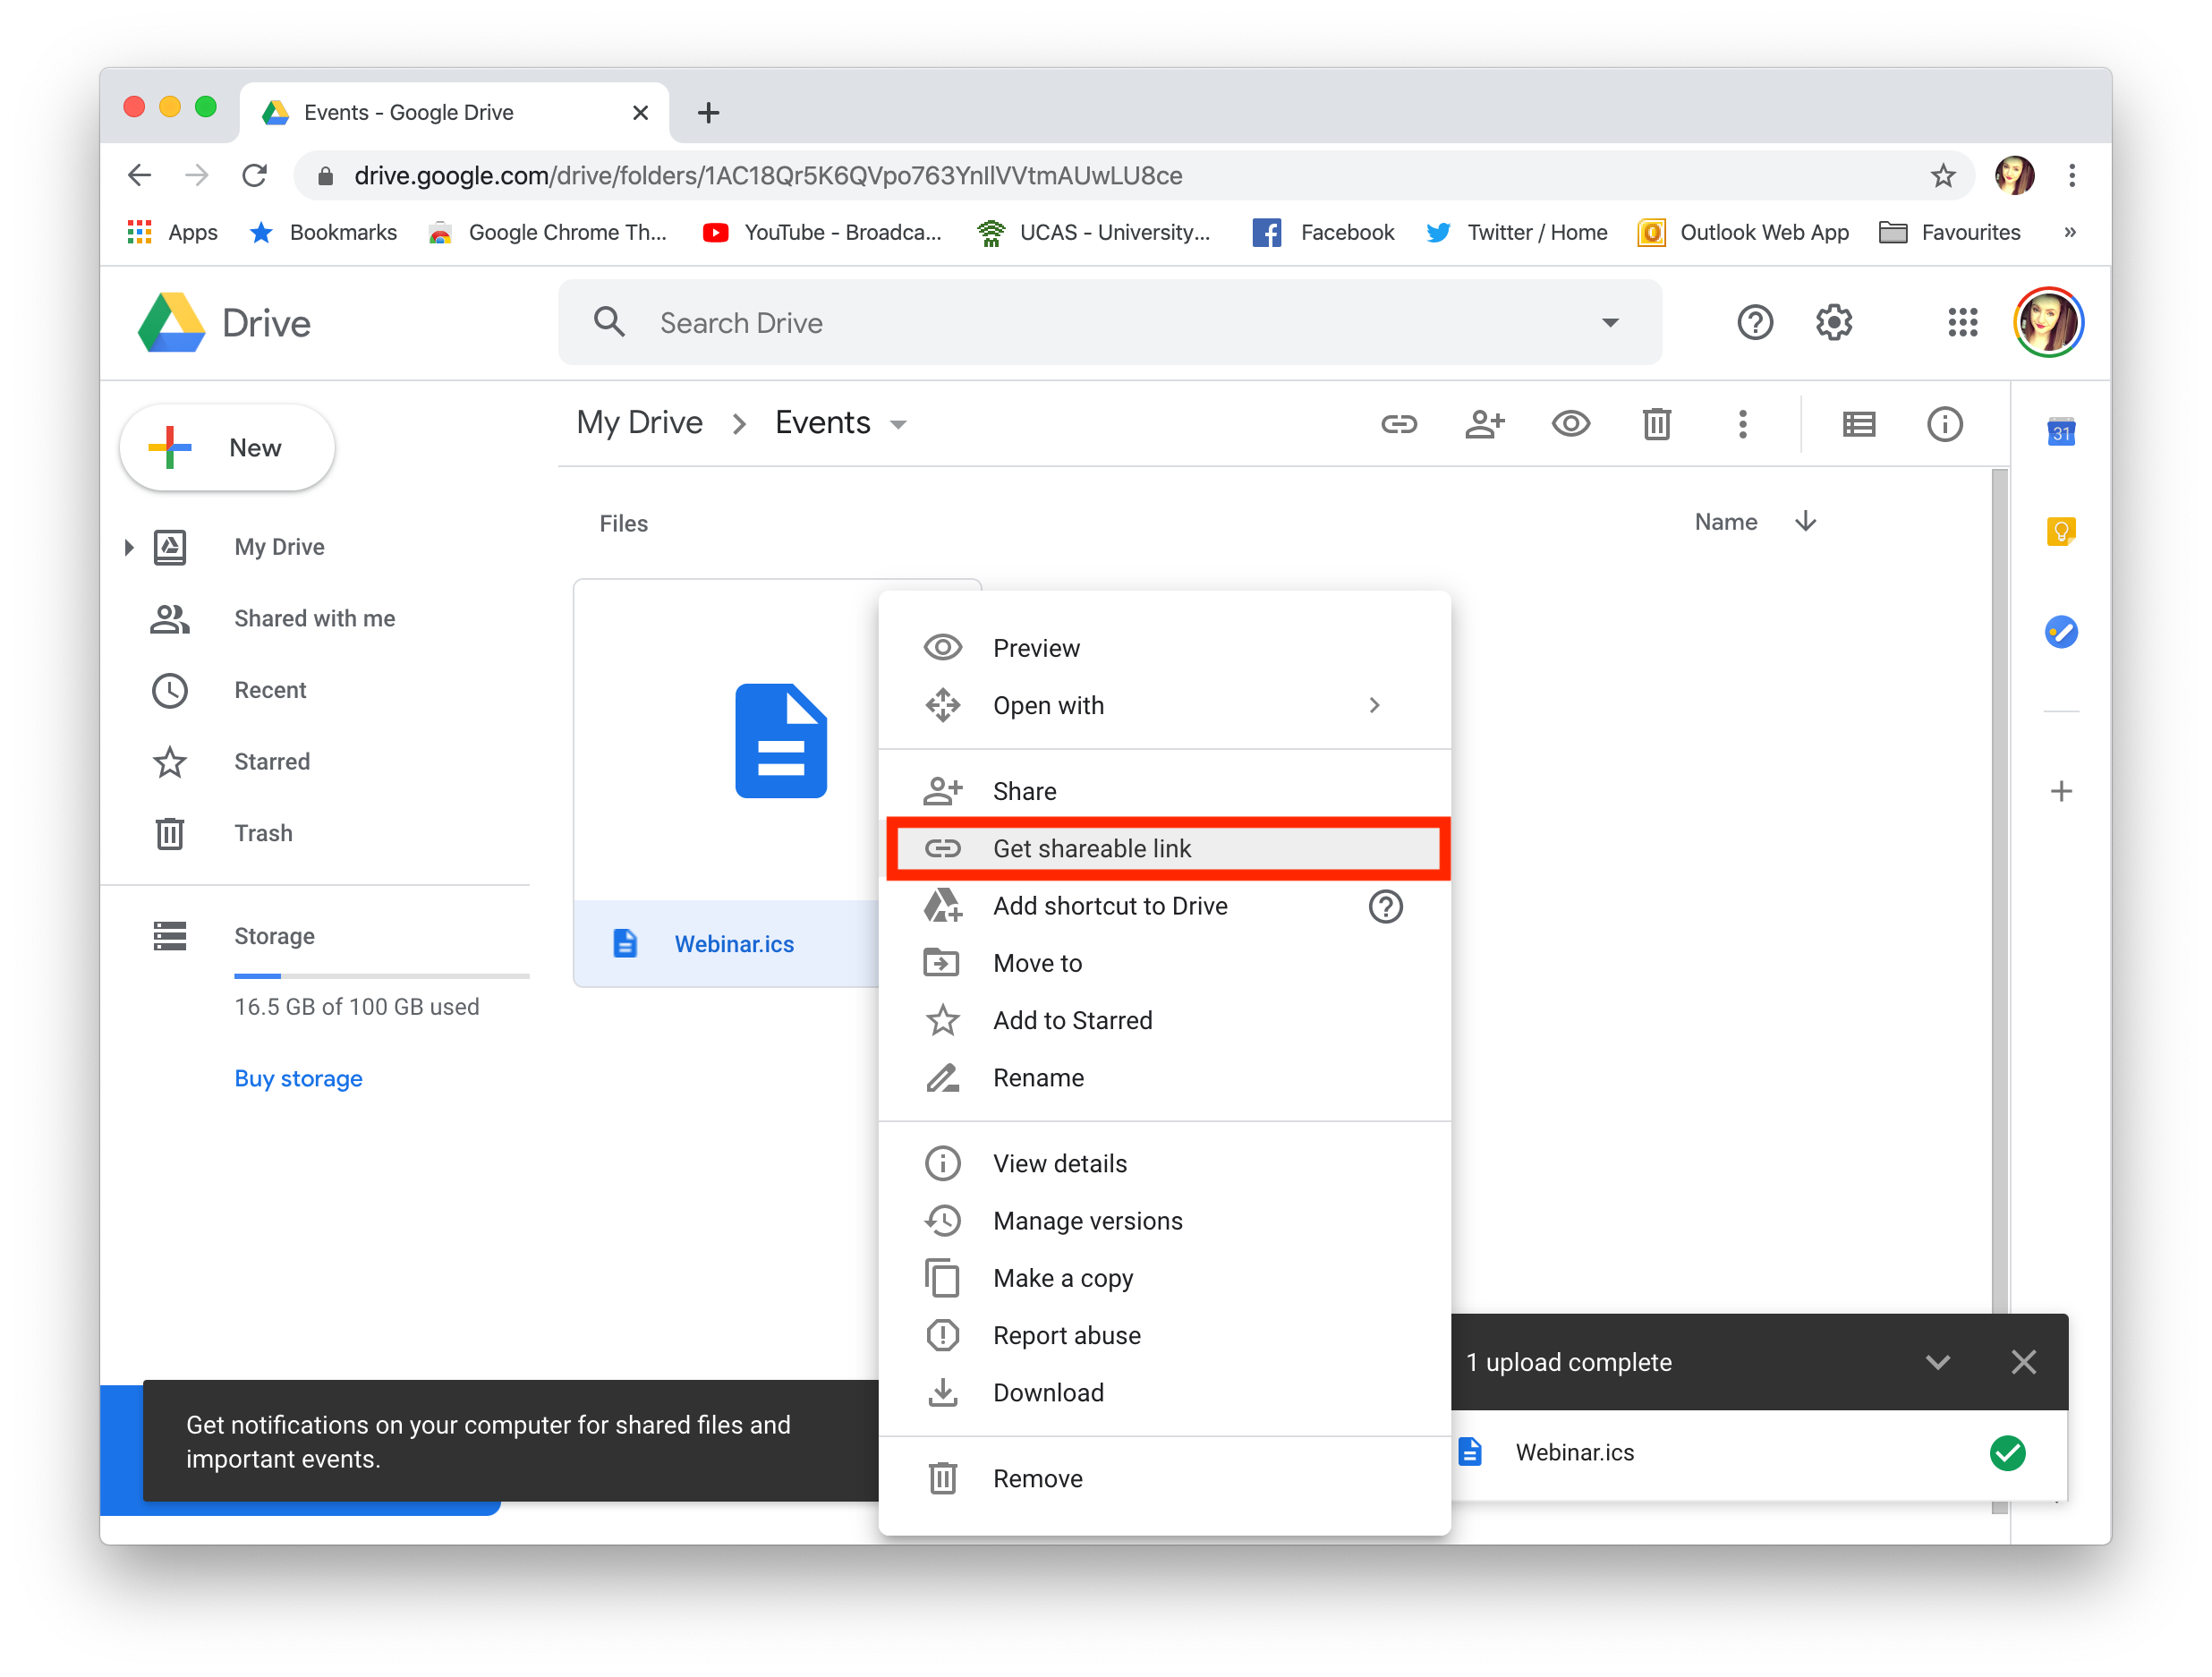 Remember to set the file to public if you are sharing it:
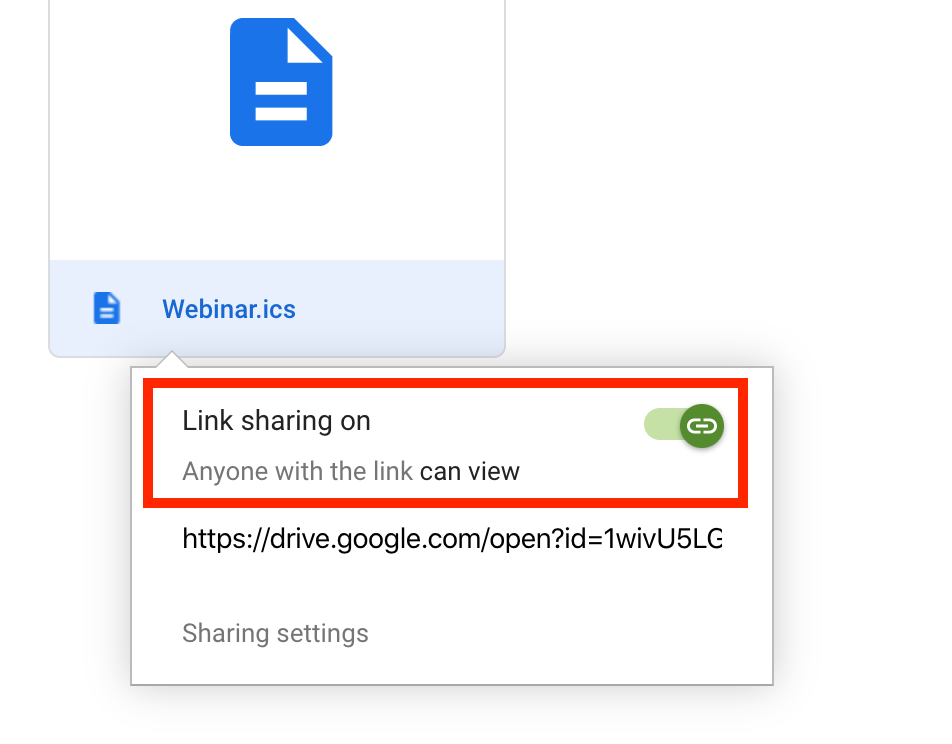 You can now send a link to the calendar event to your subscribers, who can simply download the .ics file to add to their own calendar.
Tip: This tool is another great way of creating custom add to calendar links. Fill out your event's details and select the calendar service you wish to generate a link for (i.e. Google, Office 365, Outlook or Yahoo.) You can then copy the result to use in your Mail Designer 365 design.
You can now send a link to the calendar event to your subscribers, who can simply download the .ics file to add to their own calendar.
Tip: This tool is another great way of creating custom add to calendar links. Fill out your event's details and select the calendar service you wish to generate a link for (i.e. Google, Office 365, Outlook or Yahoo.) You can then copy the result to use in your Mail Designer 365 design.
Please follow these steps:
- Your Mac may not be remotely controlled during installation. Further details can be found here:
Be sure to perform the initial setup locally on the computer.
- There may be a problem with
launchd, which is responsible for installing and starting the background processes of VPN Tracker. In the easiest case, this problem can be solved by just restarting your computer.
- In case a restart did not solve the problem, start the program
Terminal(fromApplications → Utilities → Terminal) and perform (copy and paste) the following commands:
sudo launchctl bootout system/com.vpntracker.365mac.agent sudo rm /Library/PrivilegedHelperTools/com.vpntracker.365mac.agent sudo rm /Library/LaunchDaemons/com.vpntracker.365mac.agent.plist sudo rm /var/run/com.vpntracker.365mac.agent.socket
Confirm commands with your password when being prompted for it (note you won't see the password being typed). Afterwards, please restart your computer.
- If none of the above did solve the problem, see if you can locate any crash logs Start the App "Console" ( from
Applications → Utilities → Terminal) and open/Library/Logson the left, then selectDiagnosticReports. Search for a current entry ofcom.vpntracker.365mac.agent. In case there is a new entry for every start of the app, please send us one of these reports for analysis.
- Head to our website to view all plan options.
- Choose your preferred plan and click "Buy"
- Log in to my.maildesigner365 with your equinux ID to complete your purchase (this is the login you use for Mail Designer)
- Once you've purchased a plan, download the app and move it to your Applications folder.
- Find Mail Designer 365 on the App Store
- Choose your plan and complete your purchase to download the Mail Designer 365 app to your Mac.
- Open the app and log in with your equinux ID

In dark mode, email apps display this as a readable shade of gray.
Further reading:
https://www.maildesigner365.com/email-design-for-dark-mode/ https://litmus.com/blog/the-ultimate-guide-to-dark-mode-for-email-marketers
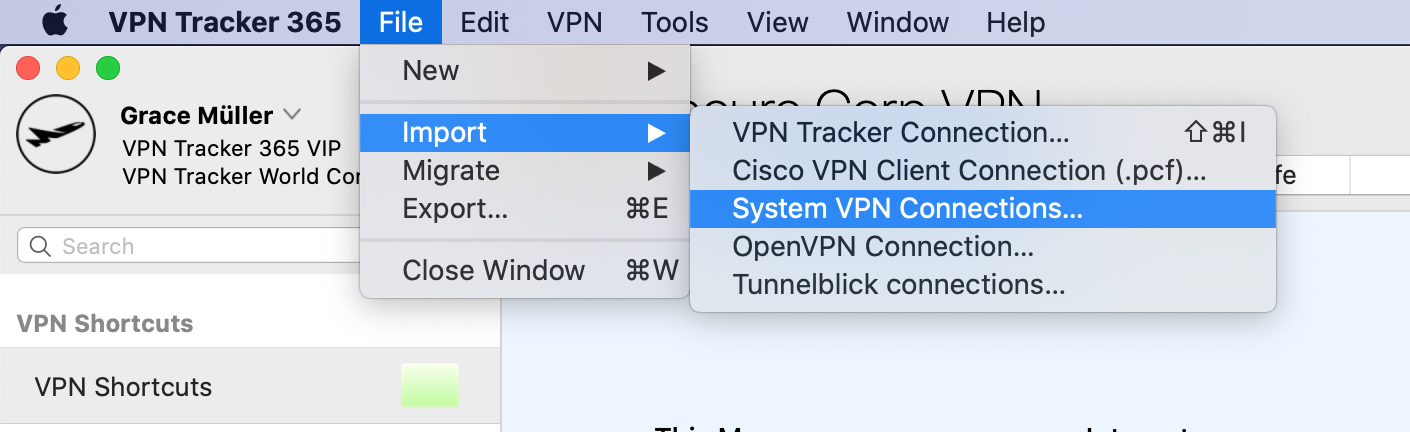 VPN Tracker will scan your Mac for VPN connections that are compatible with VPN Tracker 365. You can then select and import the connections you want.
Please note that only compatible connections can be imported.
VPN Tracker will scan your Mac for VPN connections that are compatible with VPN Tracker 365. You can then select and import the connections you want.
Please note that only compatible connections can be imported.
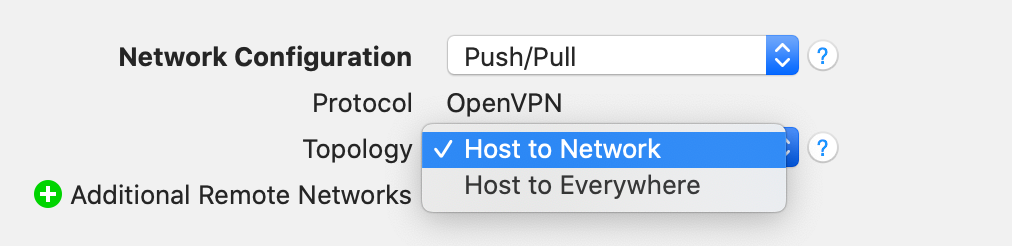 Ihre neue VPN Verbindung für Fritzbox können es mit der kostenlosen VPN Tracker 365 Demo testen:
http://www.vpntracker.com/de/download.html#vpnt365
Ihre neue VPN Verbindung für Fritzbox können es mit der kostenlosen VPN Tracker 365 Demo testen:
http://www.vpntracker.com/de/download.html#vpnt365
- Open the Terminal app (from Applications → Utilities → Terminal)
- Paste in this command:
sudo rm -f /var/run/vpncontrol.sock - Confirm it with your password
- Then reboot your Mac
Then try connecting again. The problem caused by the underlying networking components should be resolved.
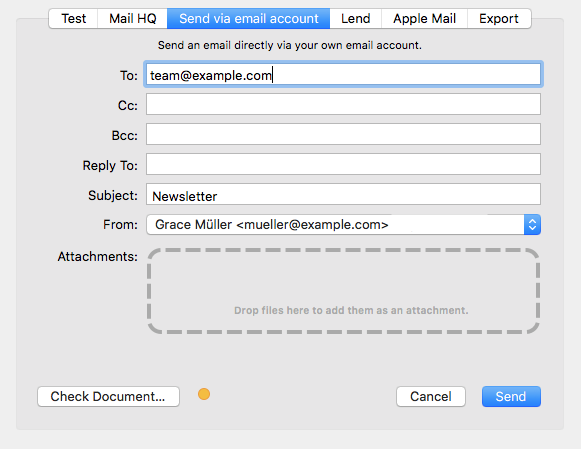 Sending via Delivery Hub:
When you send your email design via Delivery Hub, Mail Designer 365 behaves the same way as all other email clients and embeds your images in the email. In this case, your image will not need to be hosted elsewhere.
Sending via Delivery Hub:
When you send your email design via Delivery Hub, Mail Designer 365 behaves the same way as all other email clients and embeds your images in the email. In this case, your image will not need to be hosted elsewhere.
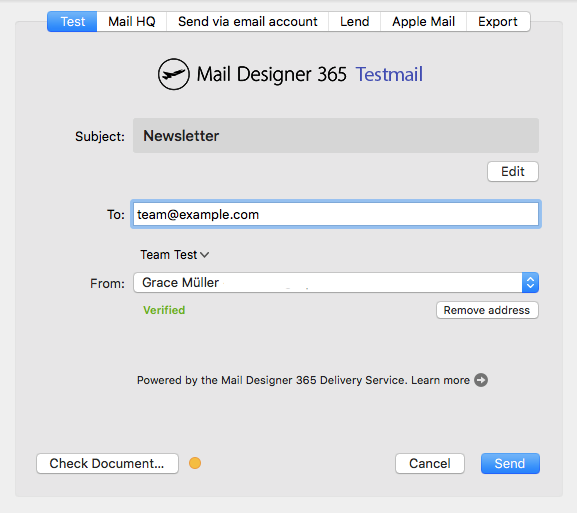 Exporting to Mailchimp, Campaign Monitor or Direct Mail
When you use one of Mail Designer 365's direct integrations, your images will be exported together with the email design and hosted by the respective platform.
Sending via another external service:
The way images are handled by external services such as email service providers varies based on the provider. Some providers will host your images for you; however, many others will require you to host your images yourself.
Mail Designer 365 has an option to enter your web server's URL during HTML export that lets you reference images that way. Learn more.
Exporting to Mailchimp, Campaign Monitor or Direct Mail
When you use one of Mail Designer 365's direct integrations, your images will be exported together with the email design and hosted by the respective platform.
Sending via another external service:
The way images are handled by external services such as email service providers varies based on the provider. Some providers will host your images for you; however, many others will require you to host your images yourself.
Mail Designer 365 has an option to enter your web server's URL during HTML export that lets you reference images that way. Learn more.
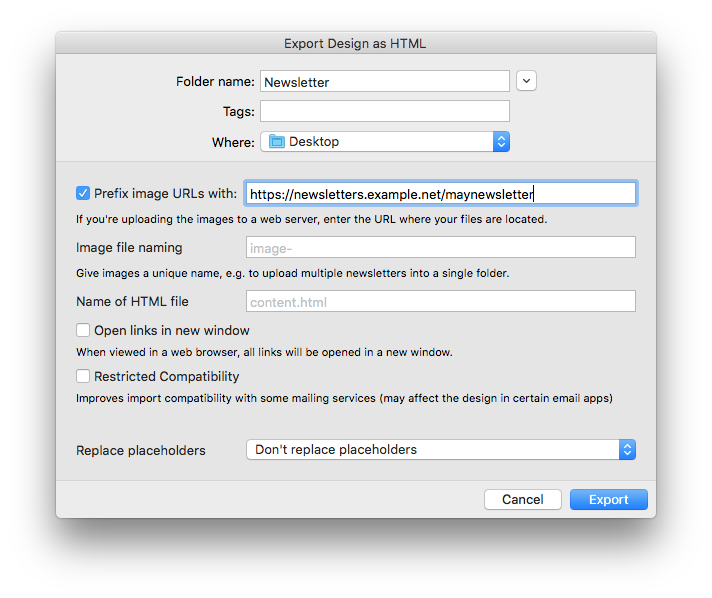 Refer to the documentation provided by your ESP for more information on what is required.
Please try this:
Open the Terminal app (from Applications → Utilities → Terminal) and paste in this command:
sudo launchctl enable system/com.vpntracker.365mac.agent
Confirm it with your password (note you won't see the password being typed).
The problem should be resolved.
- File Servers
- Company intranet & internal websites
- Company email accounts
- Internal databases
- Remote Desktop
- Internal calendars
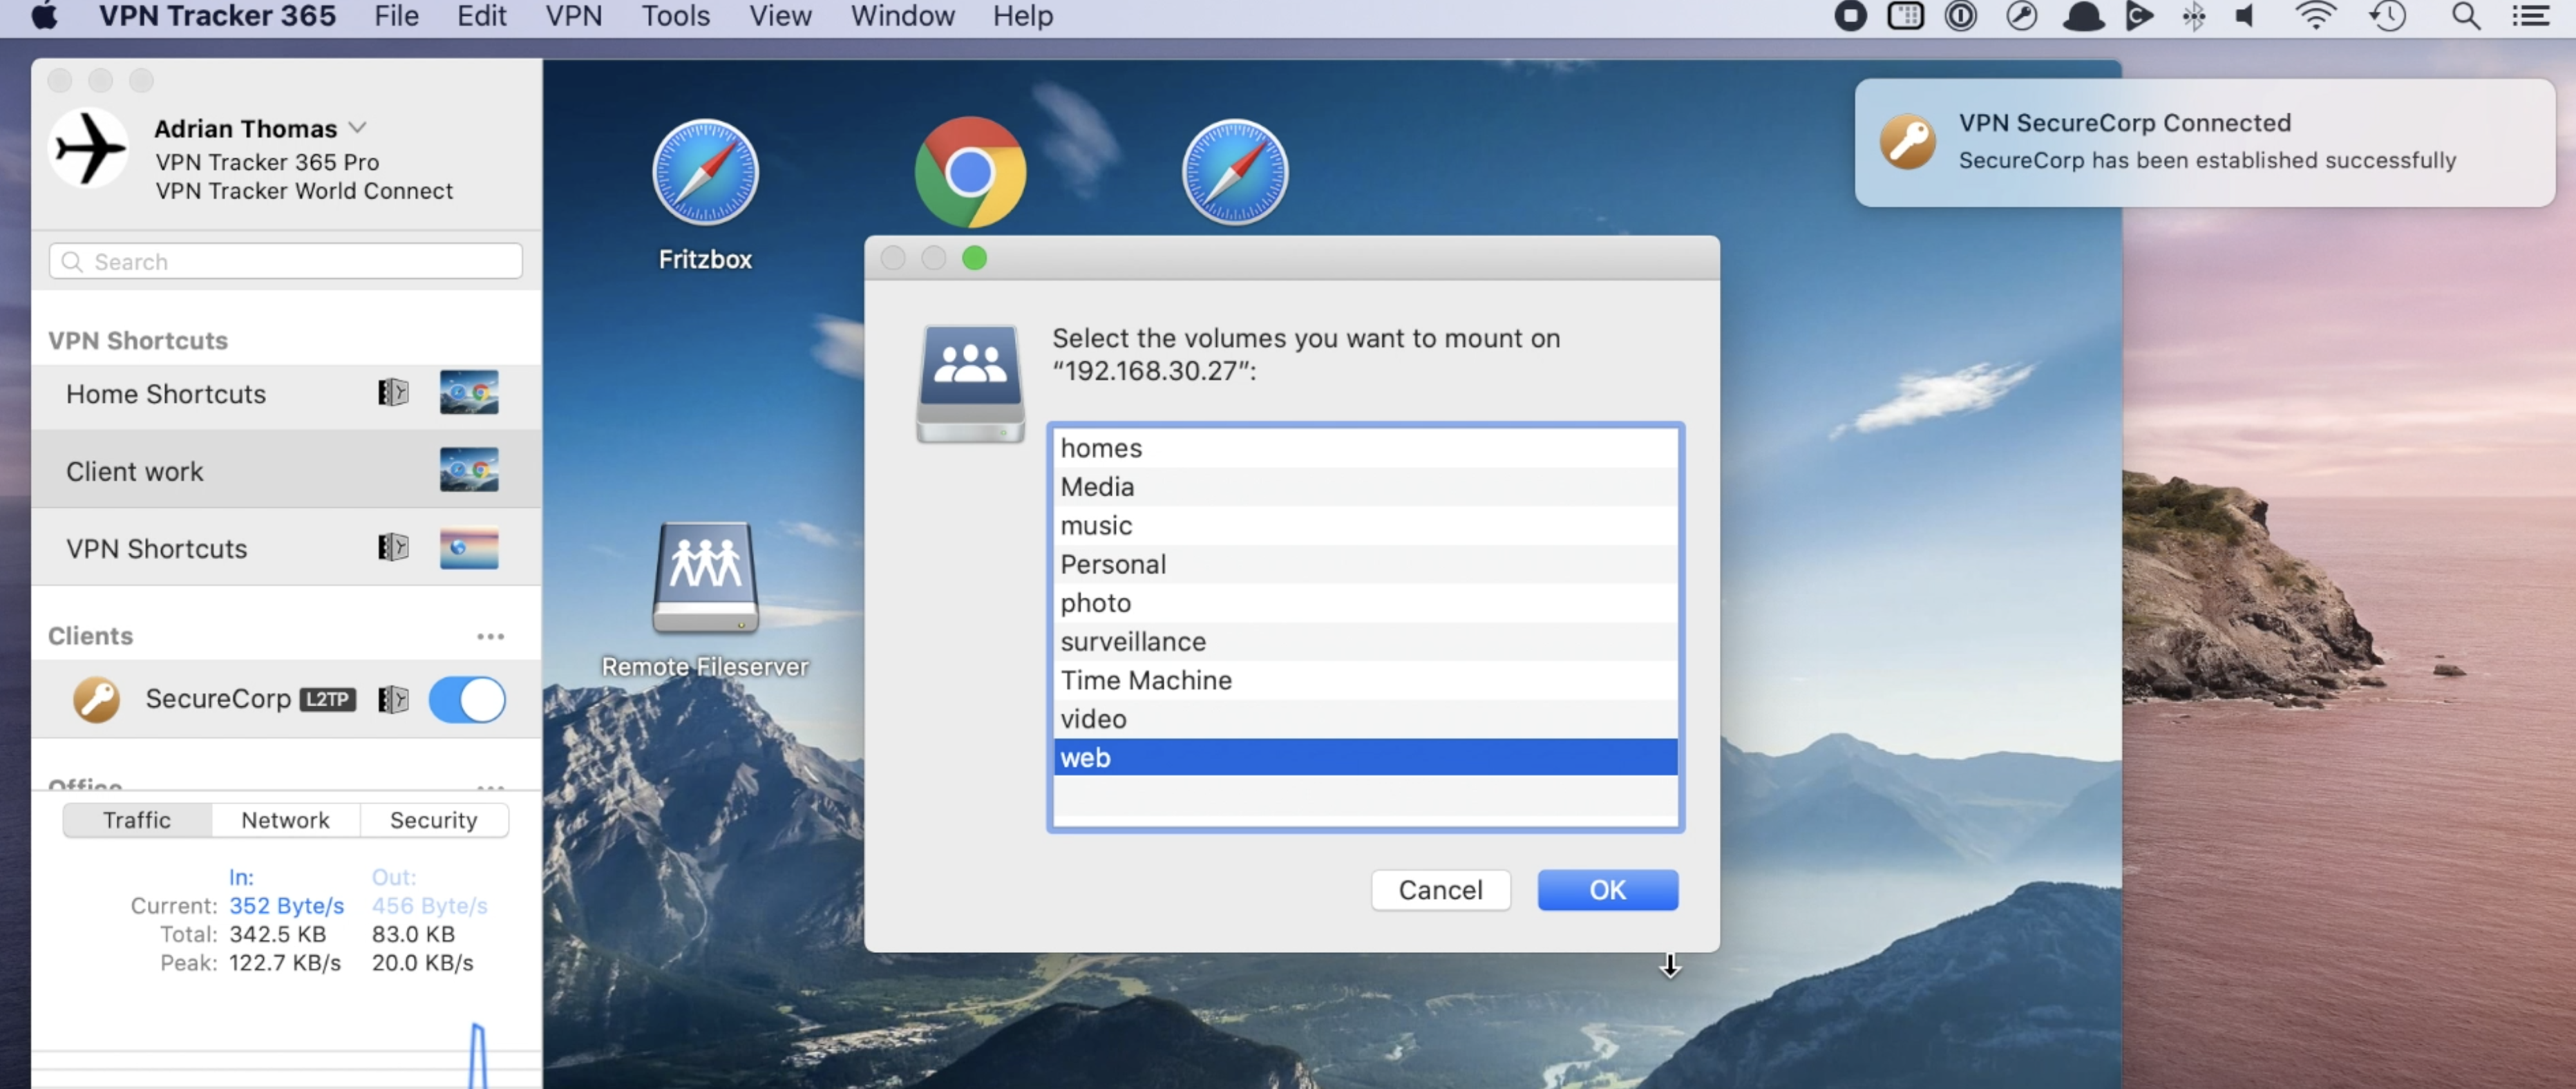 To learn how to set up VPN Shortcuts in VPN Tracker 365, check out this 2 minute video tutorial:
 Now configure your Shortcut by filling in all the requested information as prompted by VPN Tracker 365. If you are unsure of any details, your network admin or a member of our support team will be able to help you get set up.
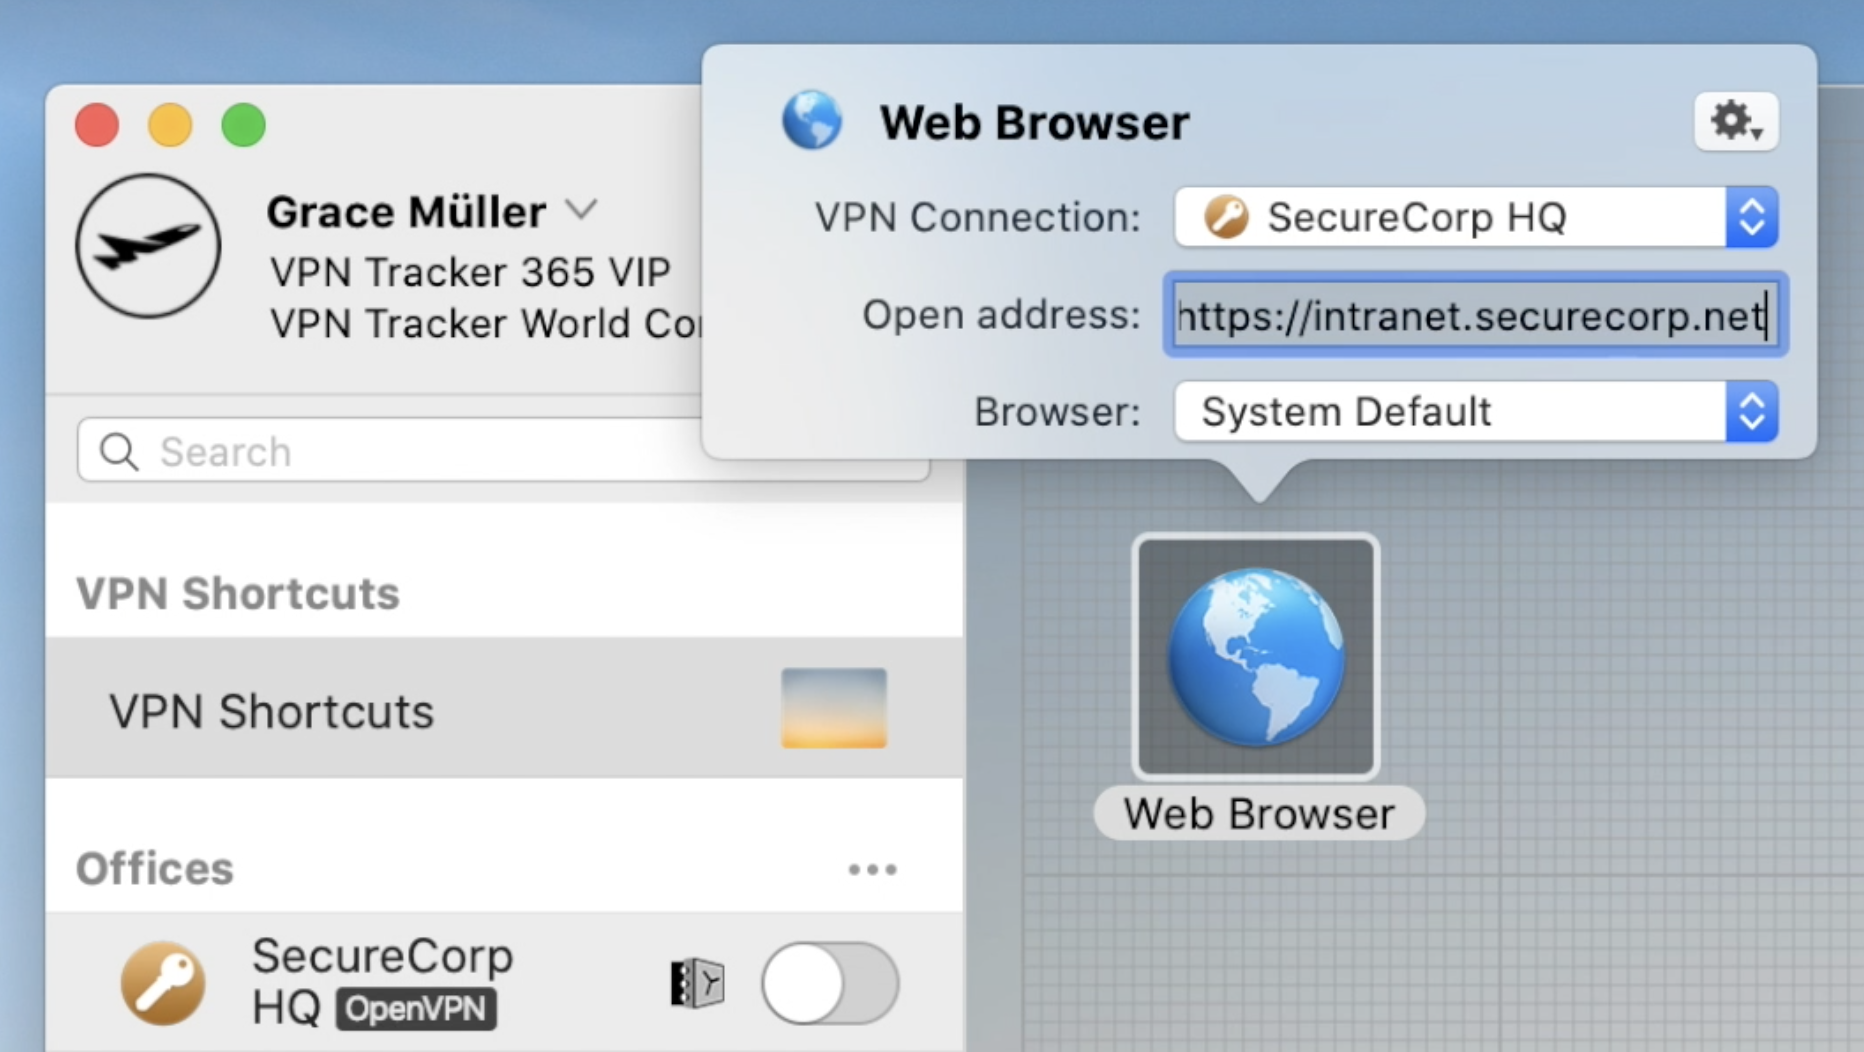 Continue this process until you have built up a collection of Shortcuts for all your most-used external services. Then, exit the editing mode by clicking again on the arrow at the bottom of the window to close the Shortcuts Dock:
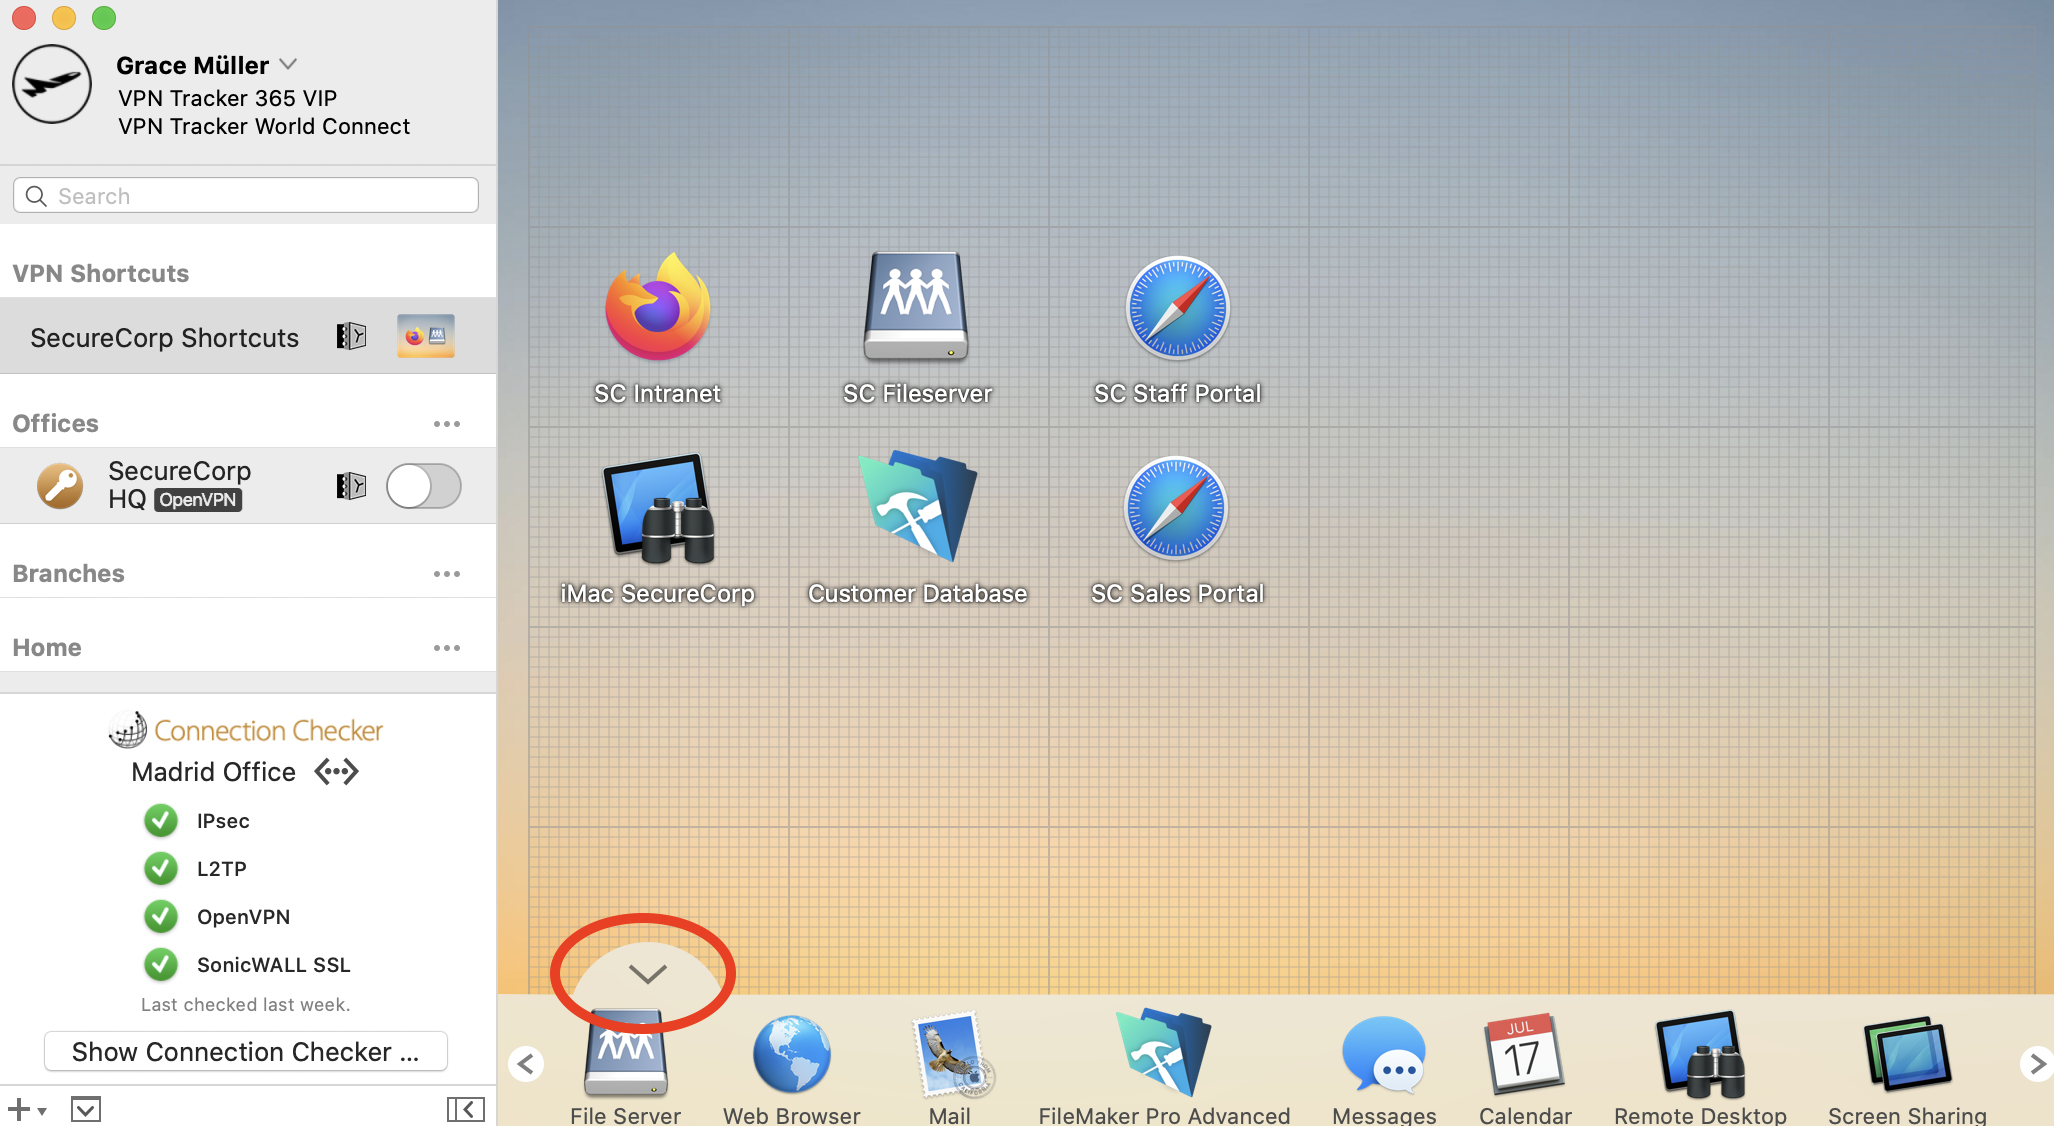 To test your Shortcut, simply click on the icon. This should launch your VPN connection and instantly start up your service.
Want to see Shortcuts in action? This 2 minute video tutorial shows you how to set up VPN Shortcuts in VPN Tracker 365:
To test your Shortcut, simply click on the icon. This should launch your VPN connection and instantly start up your service.
Want to see Shortcuts in action? This 2 minute video tutorial shows you how to set up VPN Shortcuts in VPN Tracker 365:
- Network shares
- Databases
- Email accounts & calendars
- Company intranet
- Remote Desktop
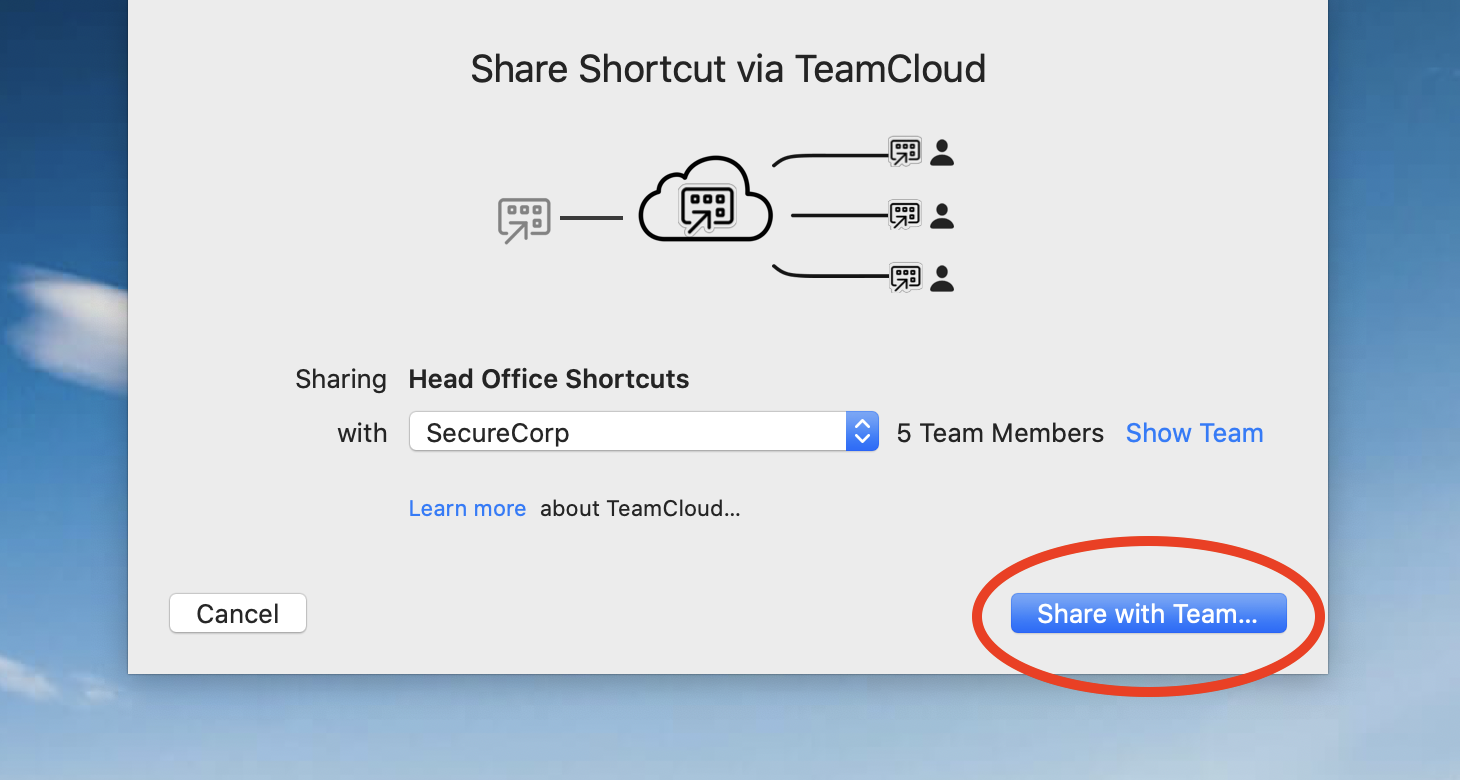 Once a Shortcuts collection has been shared, it will be available for all of your team to access with no further action required.
How to export VPN Shortcuts as a .zip file
Alternatively, you can also opt to export VPN Shortcuts as a .zip file which users can manually import into VPN Tracker 365.
Go to the VPN connection where your Shortcuts are configured and click "Configure" to open the configuration settings.
At the bottom of this window, go to "Export Settings" here you will see a range of different settings for your connection export. Go to "VPN Shortcuts" and check the box next to the Shortcuts Collection you wish to share:
Once a Shortcuts collection has been shared, it will be available for all of your team to access with no further action required.
How to export VPN Shortcuts as a .zip file
Alternatively, you can also opt to export VPN Shortcuts as a .zip file which users can manually import into VPN Tracker 365.
Go to the VPN connection where your Shortcuts are configured and click "Configure" to open the configuration settings.
At the bottom of this window, go to "Export Settings" here you will see a range of different settings for your connection export. Go to "VPN Shortcuts" and check the box next to the Shortcuts Collection you wish to share:
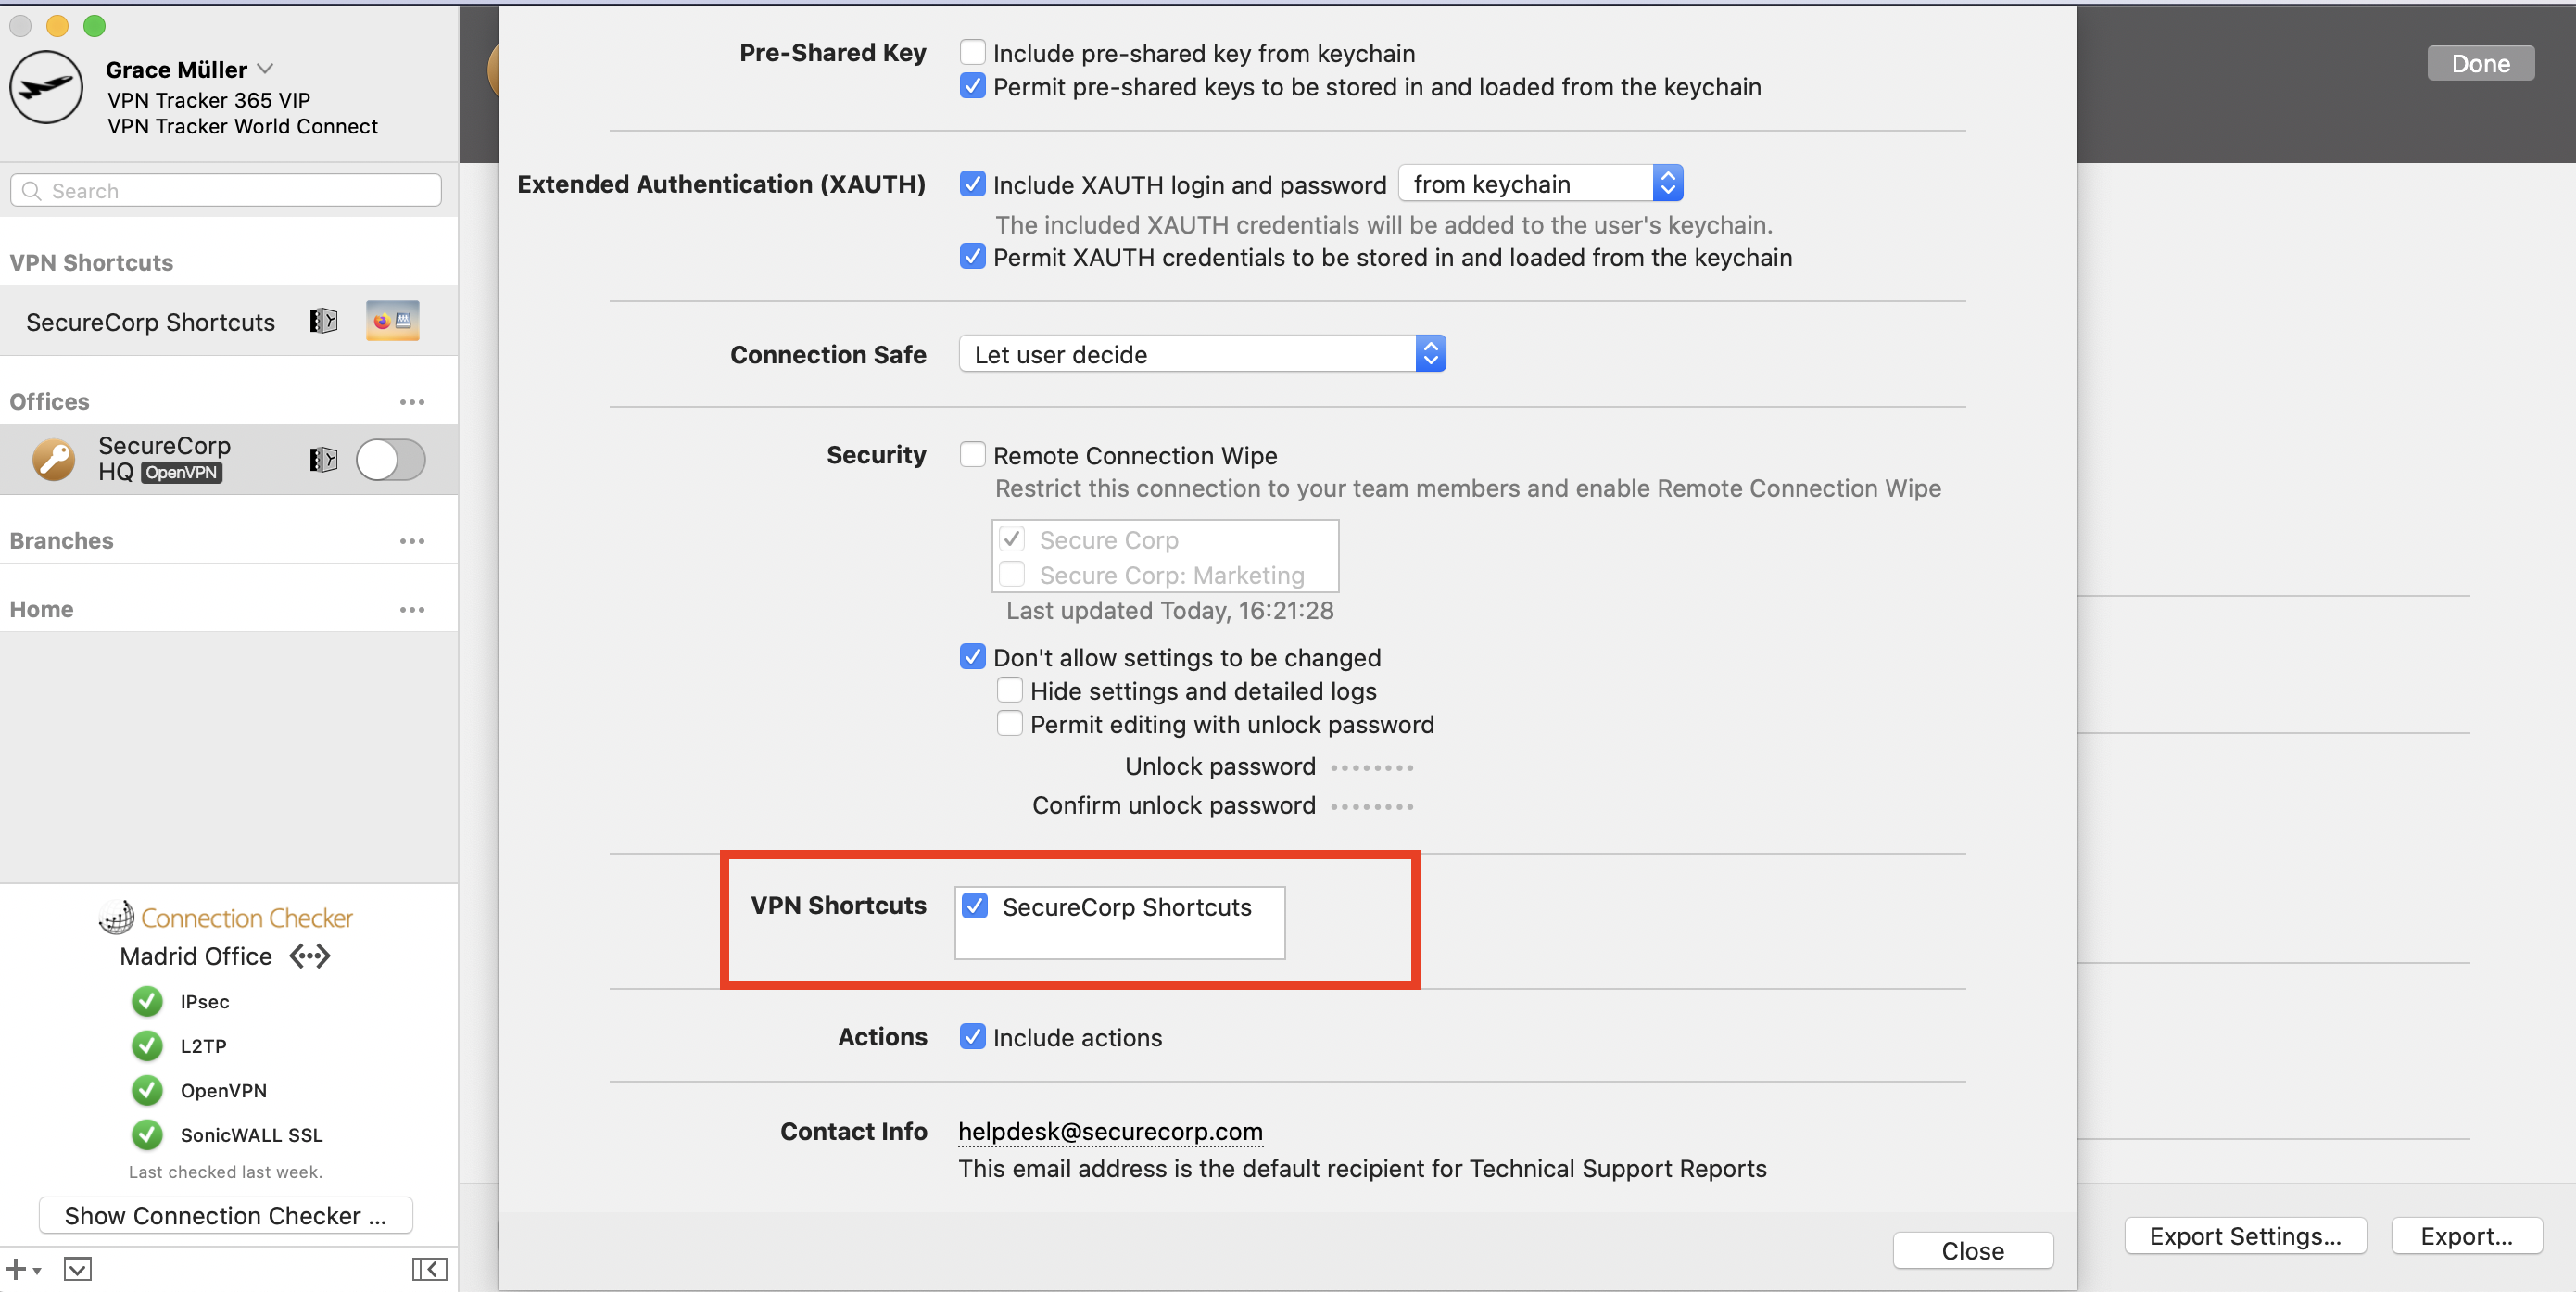 Close the settings window, then click "Export". Select an export location and enter an import password for better security. Once you're ready, click "Export" to create a .zip file of the connection which you can send to your team members:
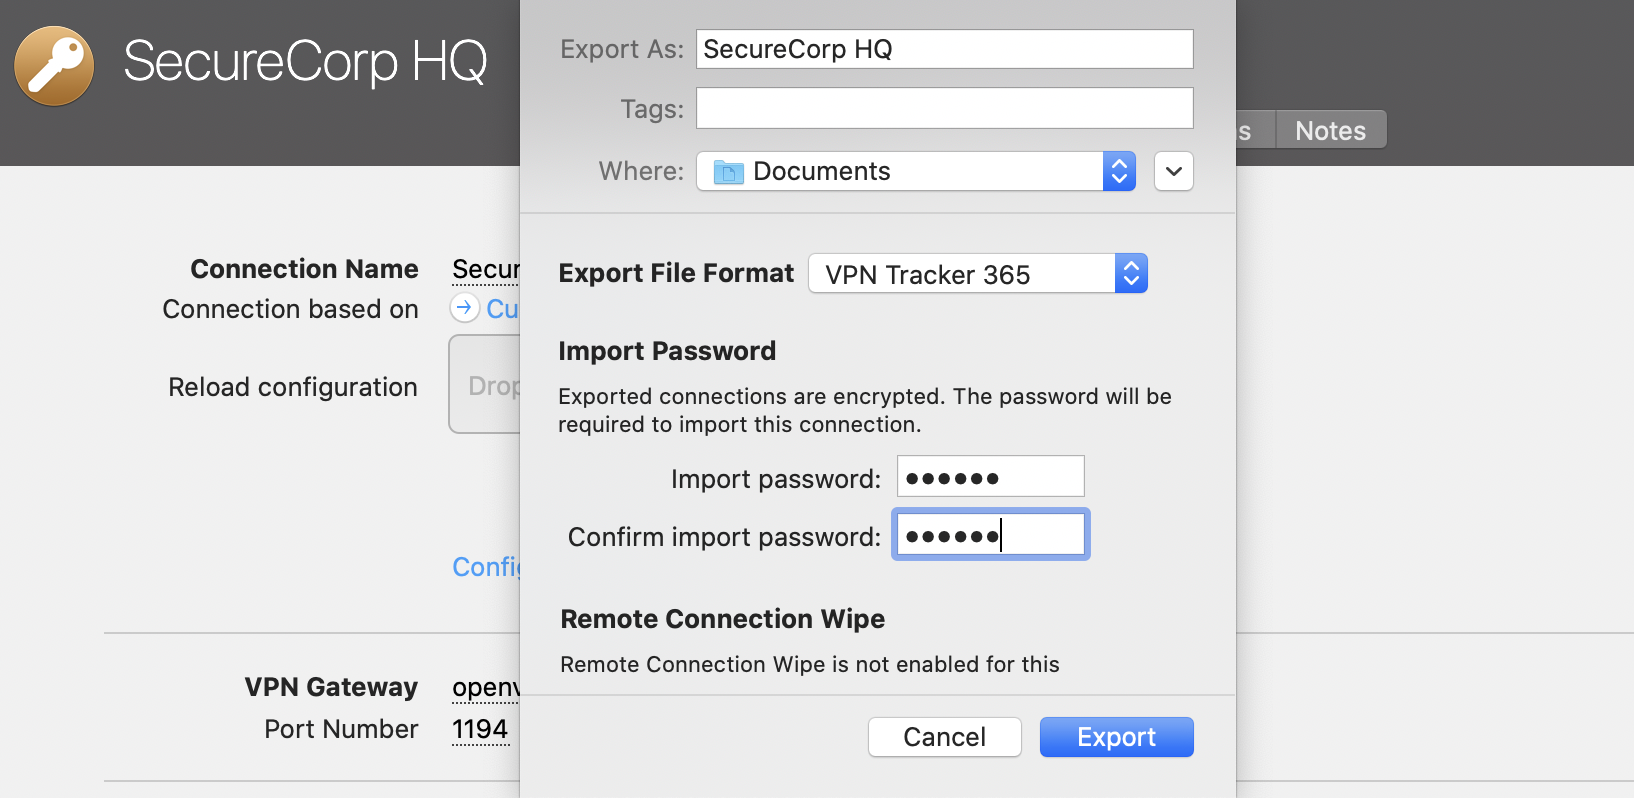 Once a team member receives the file, they can double click it to open the connection in the VPN Tracker 365 app on their Mac, then enter your chosen import password. Following this, the VPN connection, along with all the Shortcuts you configured, will be ready to use straight away.
Alt text and Apple WebKit
Email services using Apple's WebKit (Apple Mail & email clients accessed via Safari) only display image alt text when the alt text is short enough to fit in the first "line" of the image area: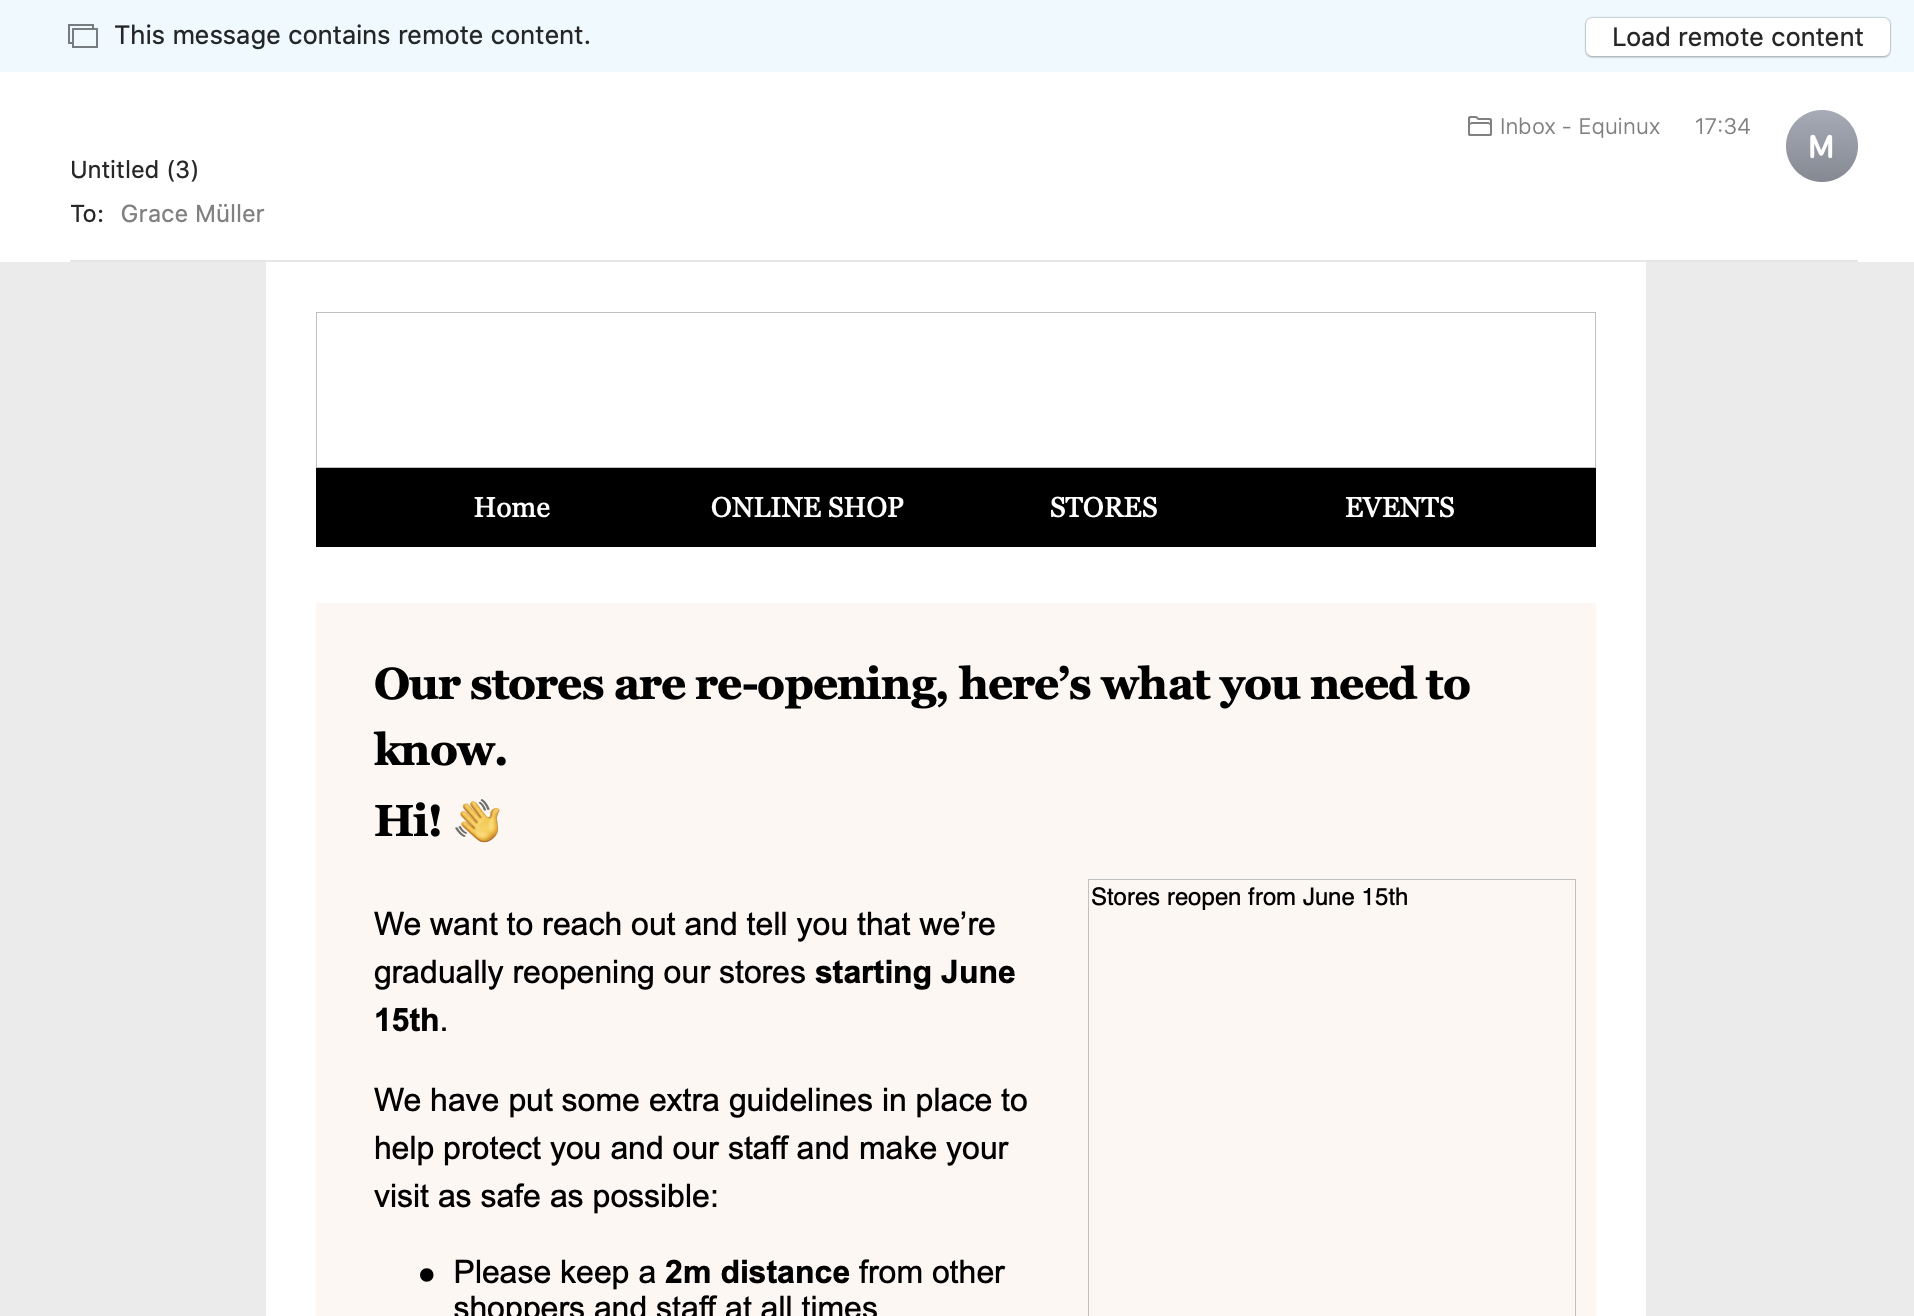 If the alt text is longer than this, Apple will display no alt text for the image area at all:
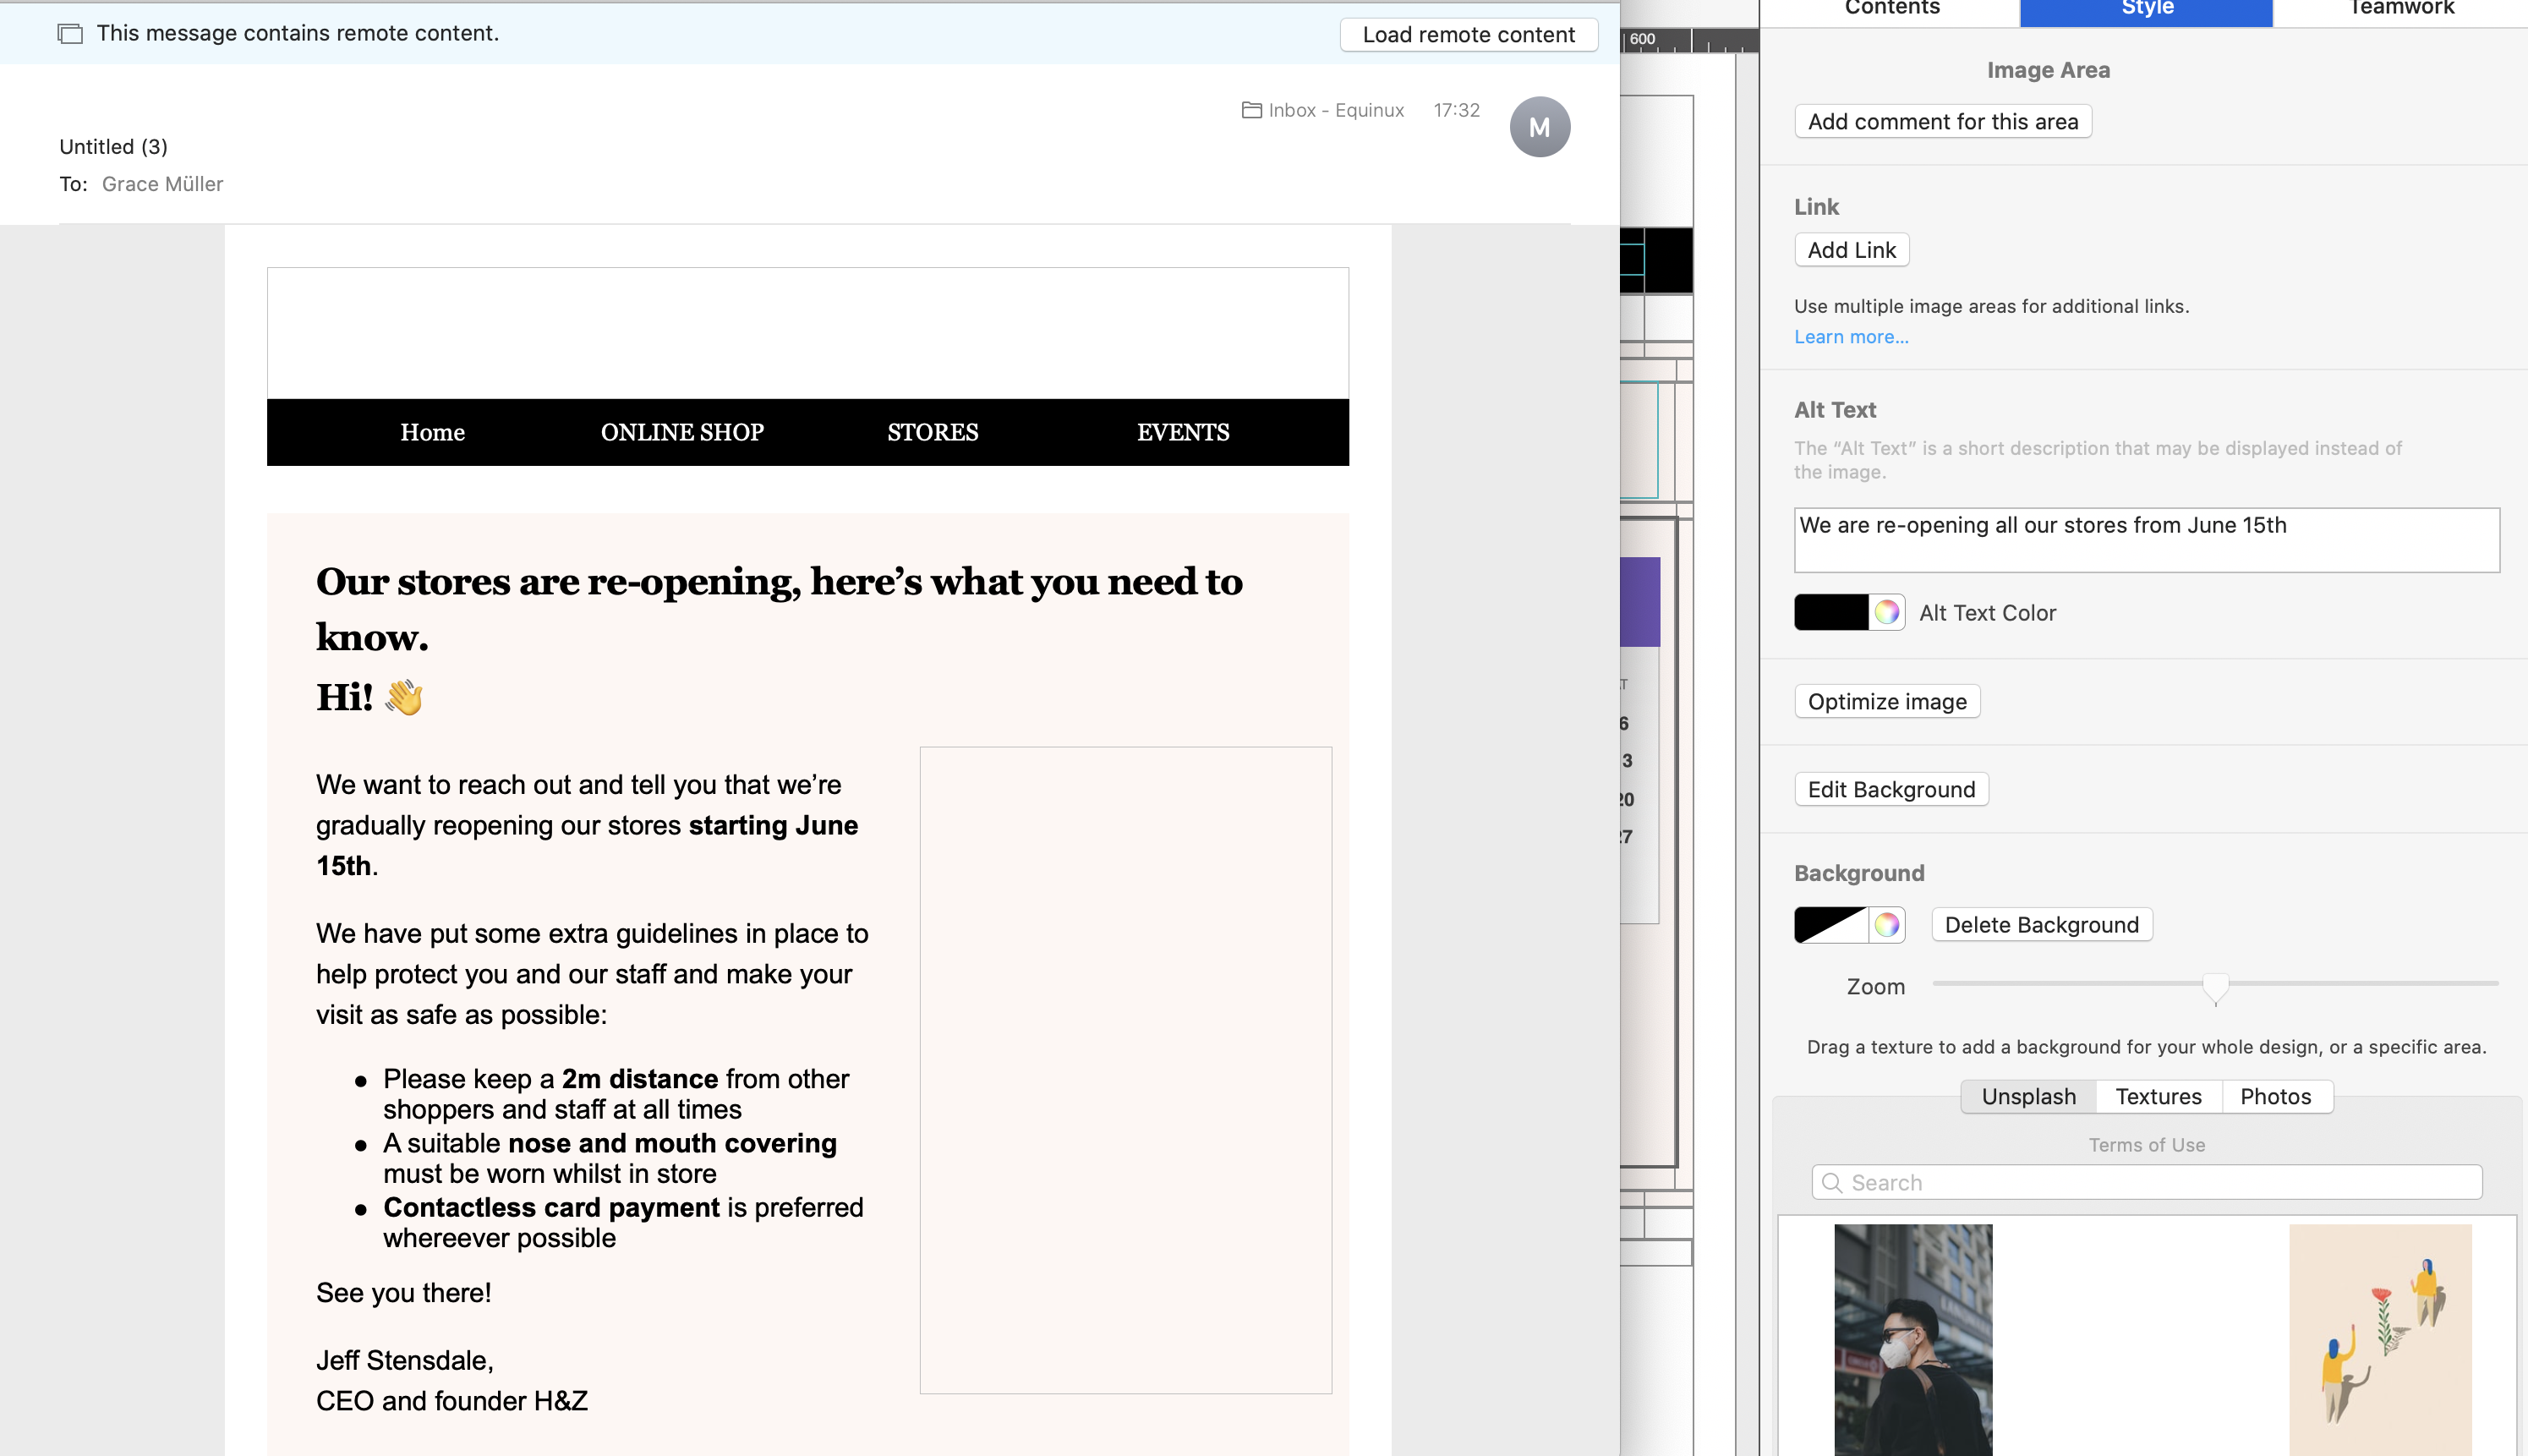
Other issues to be aware of
When you are working with a design in Mail Designer 365 where image areas in the desktop and mobile versions are attached, your desktop alt text will also be used for the mobile version of your email. As image blocks in the smartphone view aren't as wide, this means the cut-off point for your alt text will come sooner, so the alt text will need to be even shorter if the design versions are paired.Ways to resolve this issue
We appreciate this is a difficult issue and unfortunately, there is no one-size-fits-all approach that can be applied to your alt text length. This is mainly due to the fact that the size of image areas can vary massively in different email designs, as well as the mobile issue mentioned above. Ideally, the optimal solution would be for Apple to change things behind the scenes. However, until this happens, the best workaround is to keep your alt text as short as possible and TEST TEST TEST! To test the length of your alt text is suitable before you send, carry out the following steps:- Go to Mail > Preferences > Viewing and uncheck the box by "Load remote content in messages."
- In Mail Designer 365, use the Testmail service to send yourself a test version of your design.
- Open the email in Mail and check through all the image areas to see if the alt texts appear. Then, do the same on an iPhone to check the mobile version.
VPN Tracker is licensed per user. That means each person using VPN Tracker needs their own license.
To prevent security issues, account sign-ins are checked by an automatic system. There are multiple possible causes that can trigger an account lock:
- Sharing one account with other people
- The account is being used as a "generic" account (e.g. "Lab computer 1"), instead of being personalized for one person
- Go to my.vpntracker.com
- Sign in with your equinux ID
- Go to "My Subscriptions" and choose "Add plans…"
- Add additional licenses for each person that needs VPN access and complete your order
- Once you have the correct number of licenses for your team, assign the new licenses to your co-workers – check out our Team Setup Guide for step-by-step instructions
Once you have completed these steps, please contact our support team and include your equinux ID and order confirmation number. A team member will review your details and will be able to lift the restrictions on your account.
For any other questions, please reach out to our Account Security Team.
Important Notes
The lifetime of the tunnels is explicitly not negotiated. The standard allows that a tunnel has different lifetimes on both sides of the connection. The side, where the lifetime expires first, determines the further procedure. Only if VPN Tracker is that side, it can determine what happens next, otherwise VPN Tracker can only react passively. The latter will always result in a short interruption or even a complete loss of the connection in case of Phase 1. For Phase 2, it depends on whether the other side wants to actively negotiate new Phase 2 tunnels or only deletes the existing ones; the latter also leads to a short-term connection loss. It's always best to set VPN Tracker to the same lifetime as the other side, because VPN Tracker will always try to intervene in time to avoid a connection loss. Since there are also IKE/IPSec implementations that delete all Phase 2 tunnels as soon as the corresponding Phase 1 tunnel is deleted, it's always a good idea to select Phase 1 on devices to match the maximum VPN session time expected.Visit my.maildesigner365.com, log in to your account, and go to the "Billing" tab to change your payment method. Click on your current payment method in the top right corner and select "Choose another way to pay." You can now add a new credit card or alternatively, add a PayPal account. This will be used as your new default payment method for your Mail Designer 365 plan.
You can easily turn off the automatic renewal for your Mail Designer 365 plan in your my.maildesigner365 account.
- Log in to your account.
- Go to “Purchases & Plans” under Settings.
- Disable the automatic renewal for your plan.
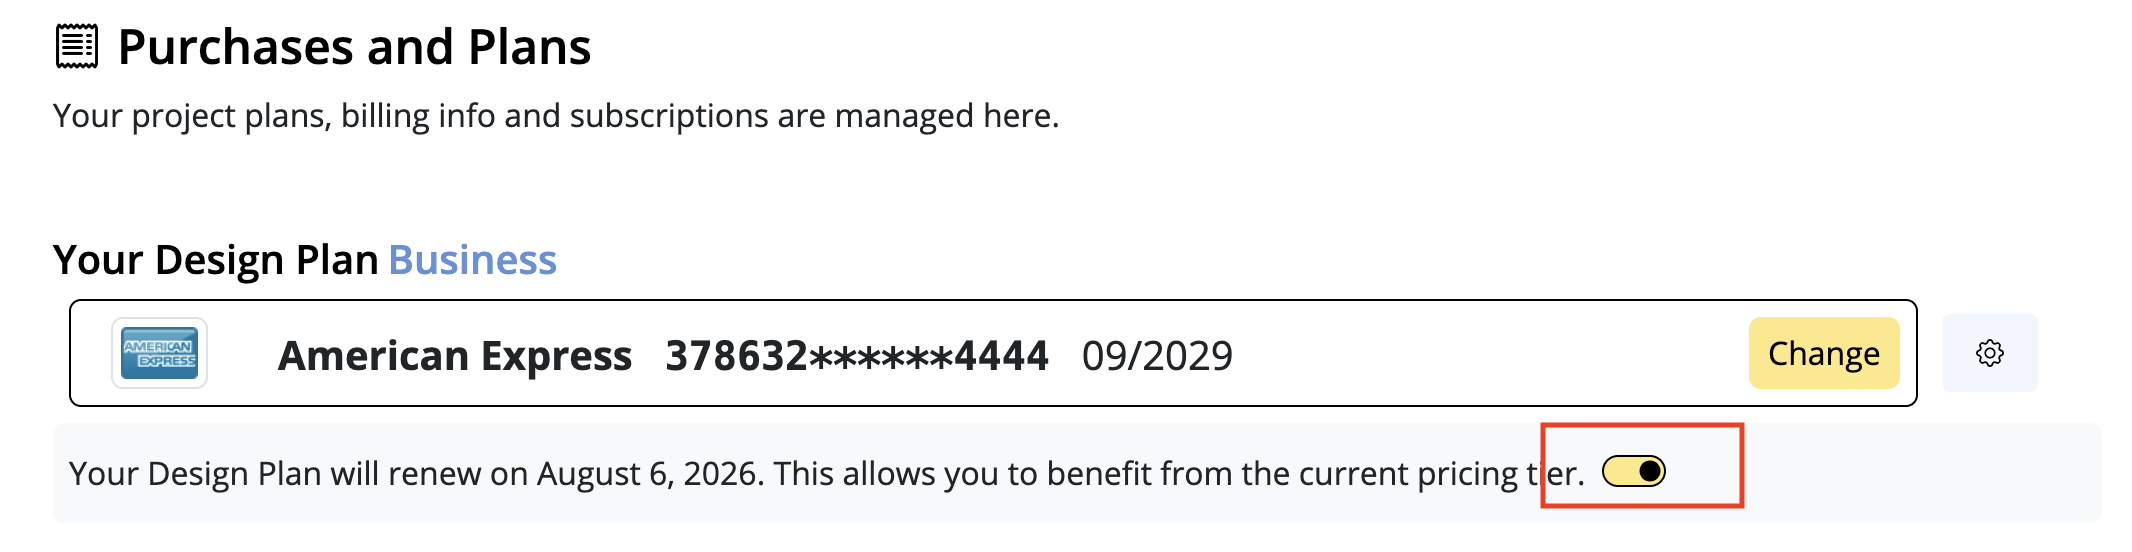
Important:
By turning off automatic renewal, you may lose any existing price advantages.
Once your current plan expires, it can’t be reactivated — however, you can purchase a new plan at the then-current price at any time.
- Two-factor (2FA) or multi-factor authentication (MFA)
- Certificate-based authentication
- Main Mode exchange
- 3DES or AES encryption
- Perfect-Forward-Secrecy needs to be used
- SSL and TLS 1.0 are probihibited
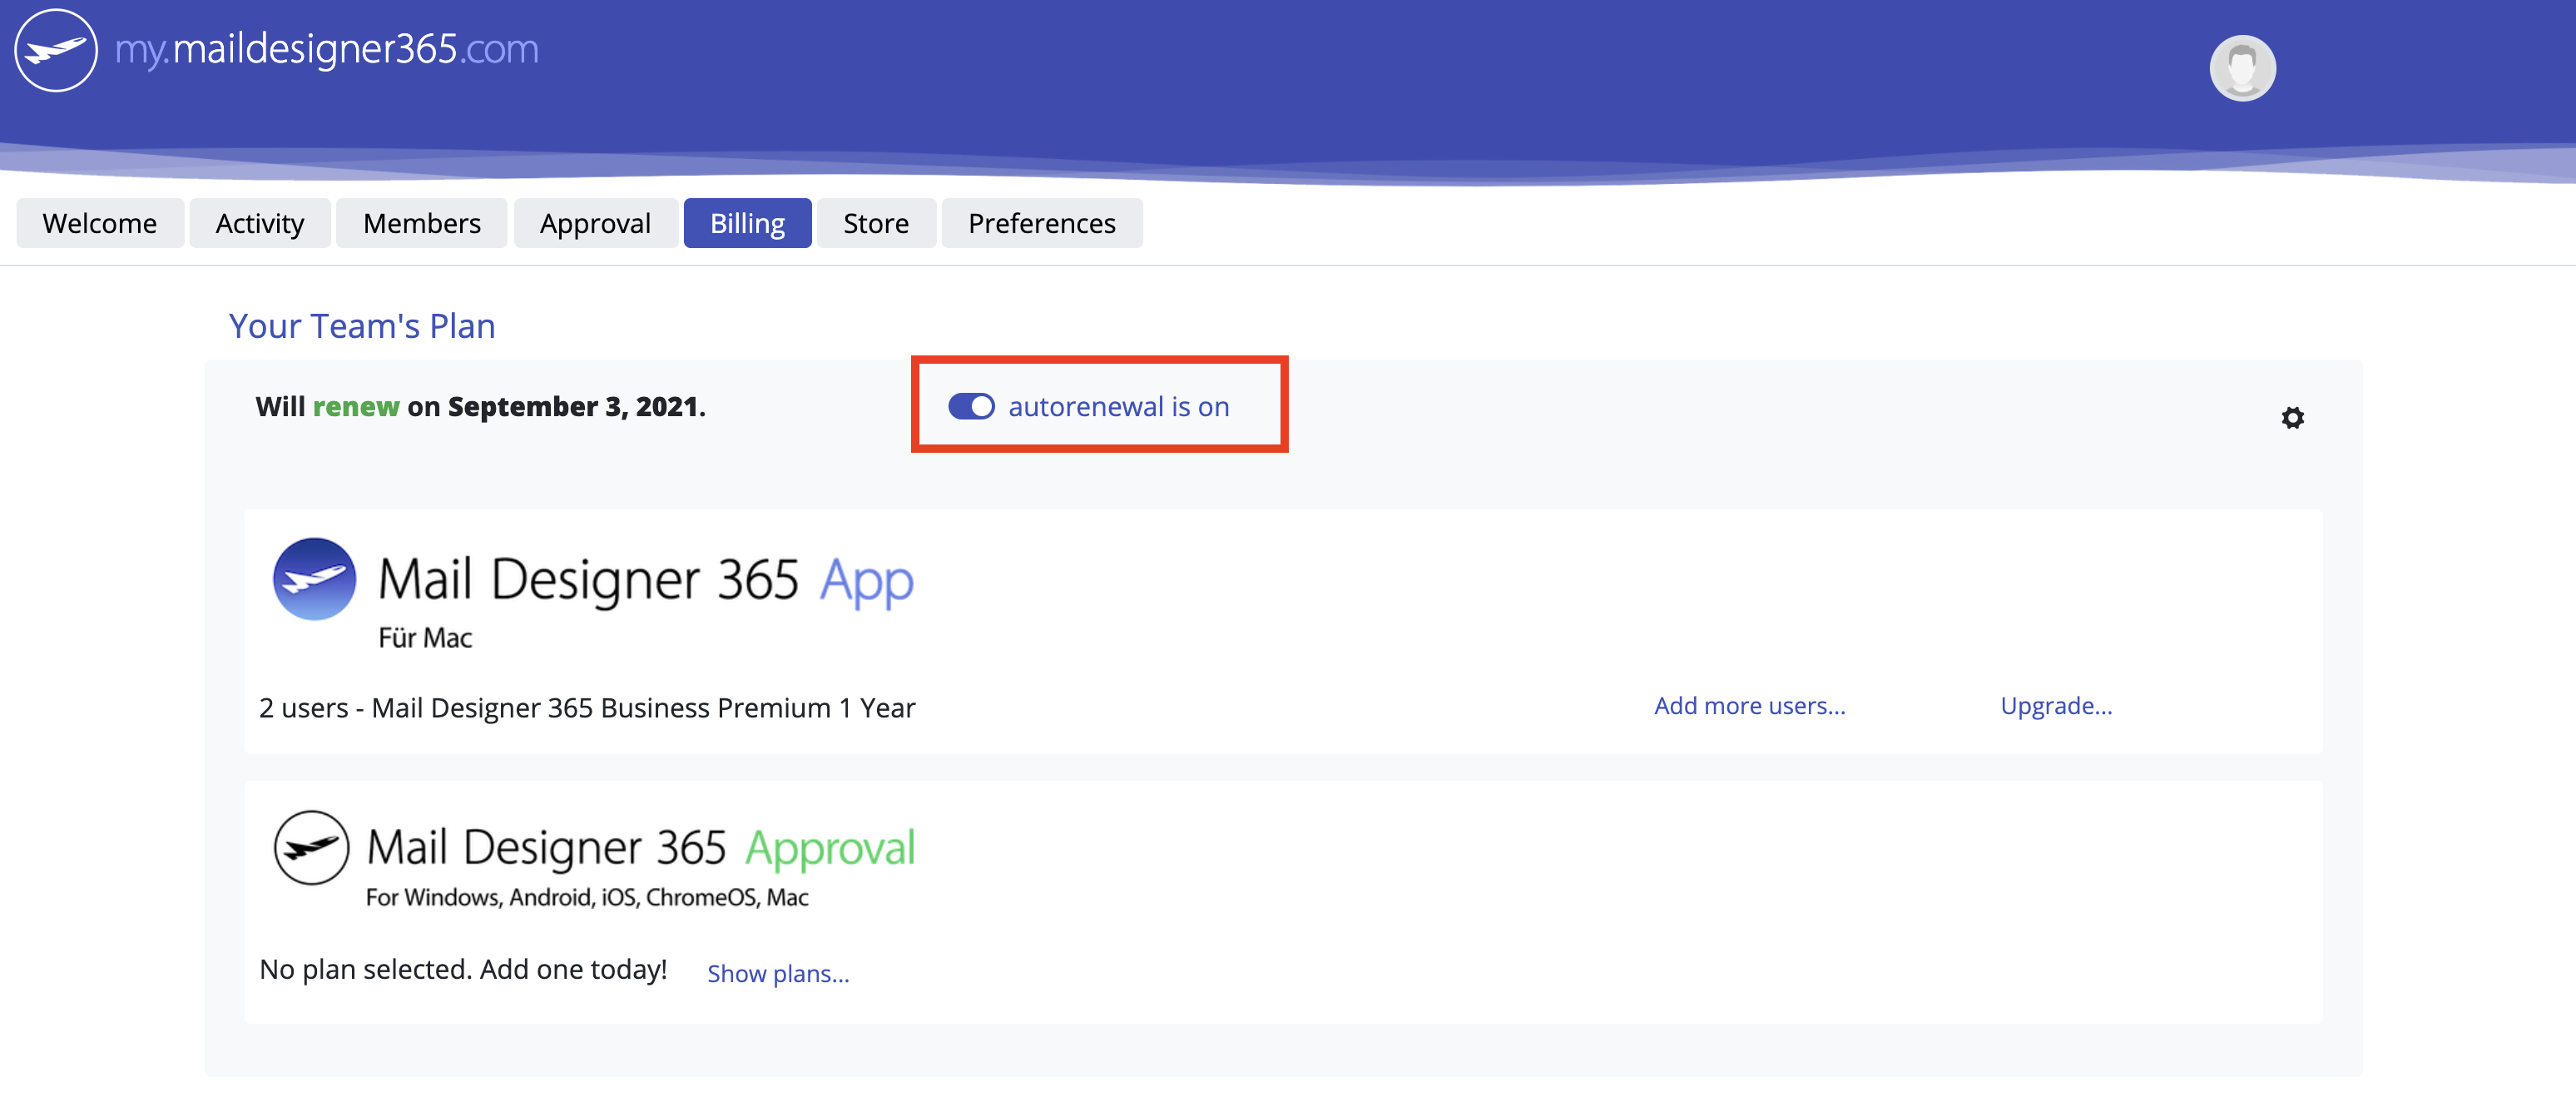
- Visit the license transfer page and log into the account which holds the license you would like credit for
- Select the license you would like to exchange and confirm the license conversion. Your promo code for the remaining durations will be sent to your account’s email address. Go to my.vpntracker.com portal and log in with the account you would like to add the license to.
- Click on “Buy additional licenses or upgrades” and add an additional license. Additional information on adding licenses can be found here:
- Apply the promo code to your order at the bottom of the page, check the Terms and Conditions and click "Pay now"
Step One: Add a connection
- Open VPN Tracker 365
- Click on File > New > Company Connection
- Click on IPSec/L2TP/OpenVPN/SSL/PPTP
- Select “Connection based on OpenVPN protocol”
- Click “Create”
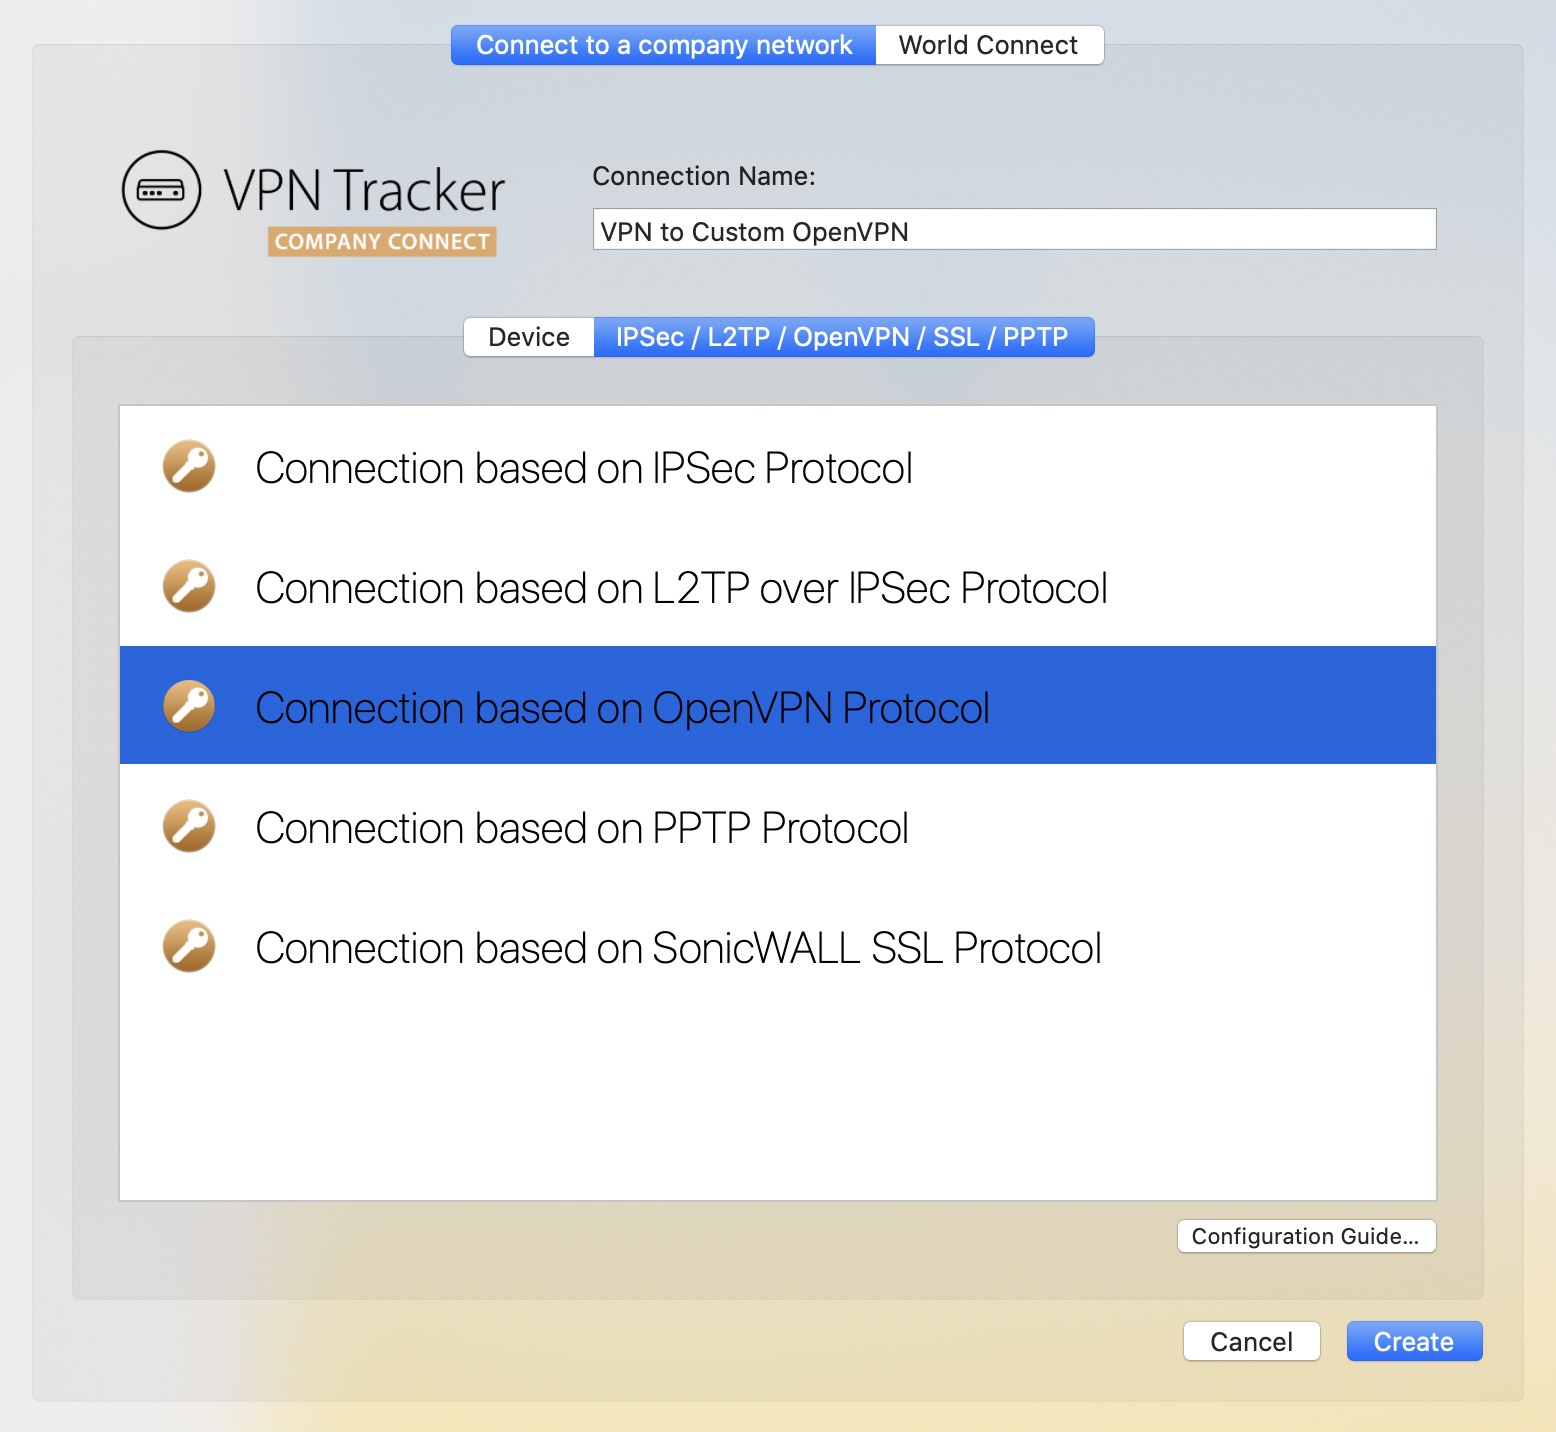
Step Two: Configure your VPN connection
- Click on “Configure” and go to the “Basic” tab
- Drag and drop your ovpn file into the grey space "Drop OpenVPN configuration file here", or click on the space to browse for your file in Finder
- Your device’s unique configuration settings will be automatically filled out by VPN Tracker 365
- Click “Done” to save your settings
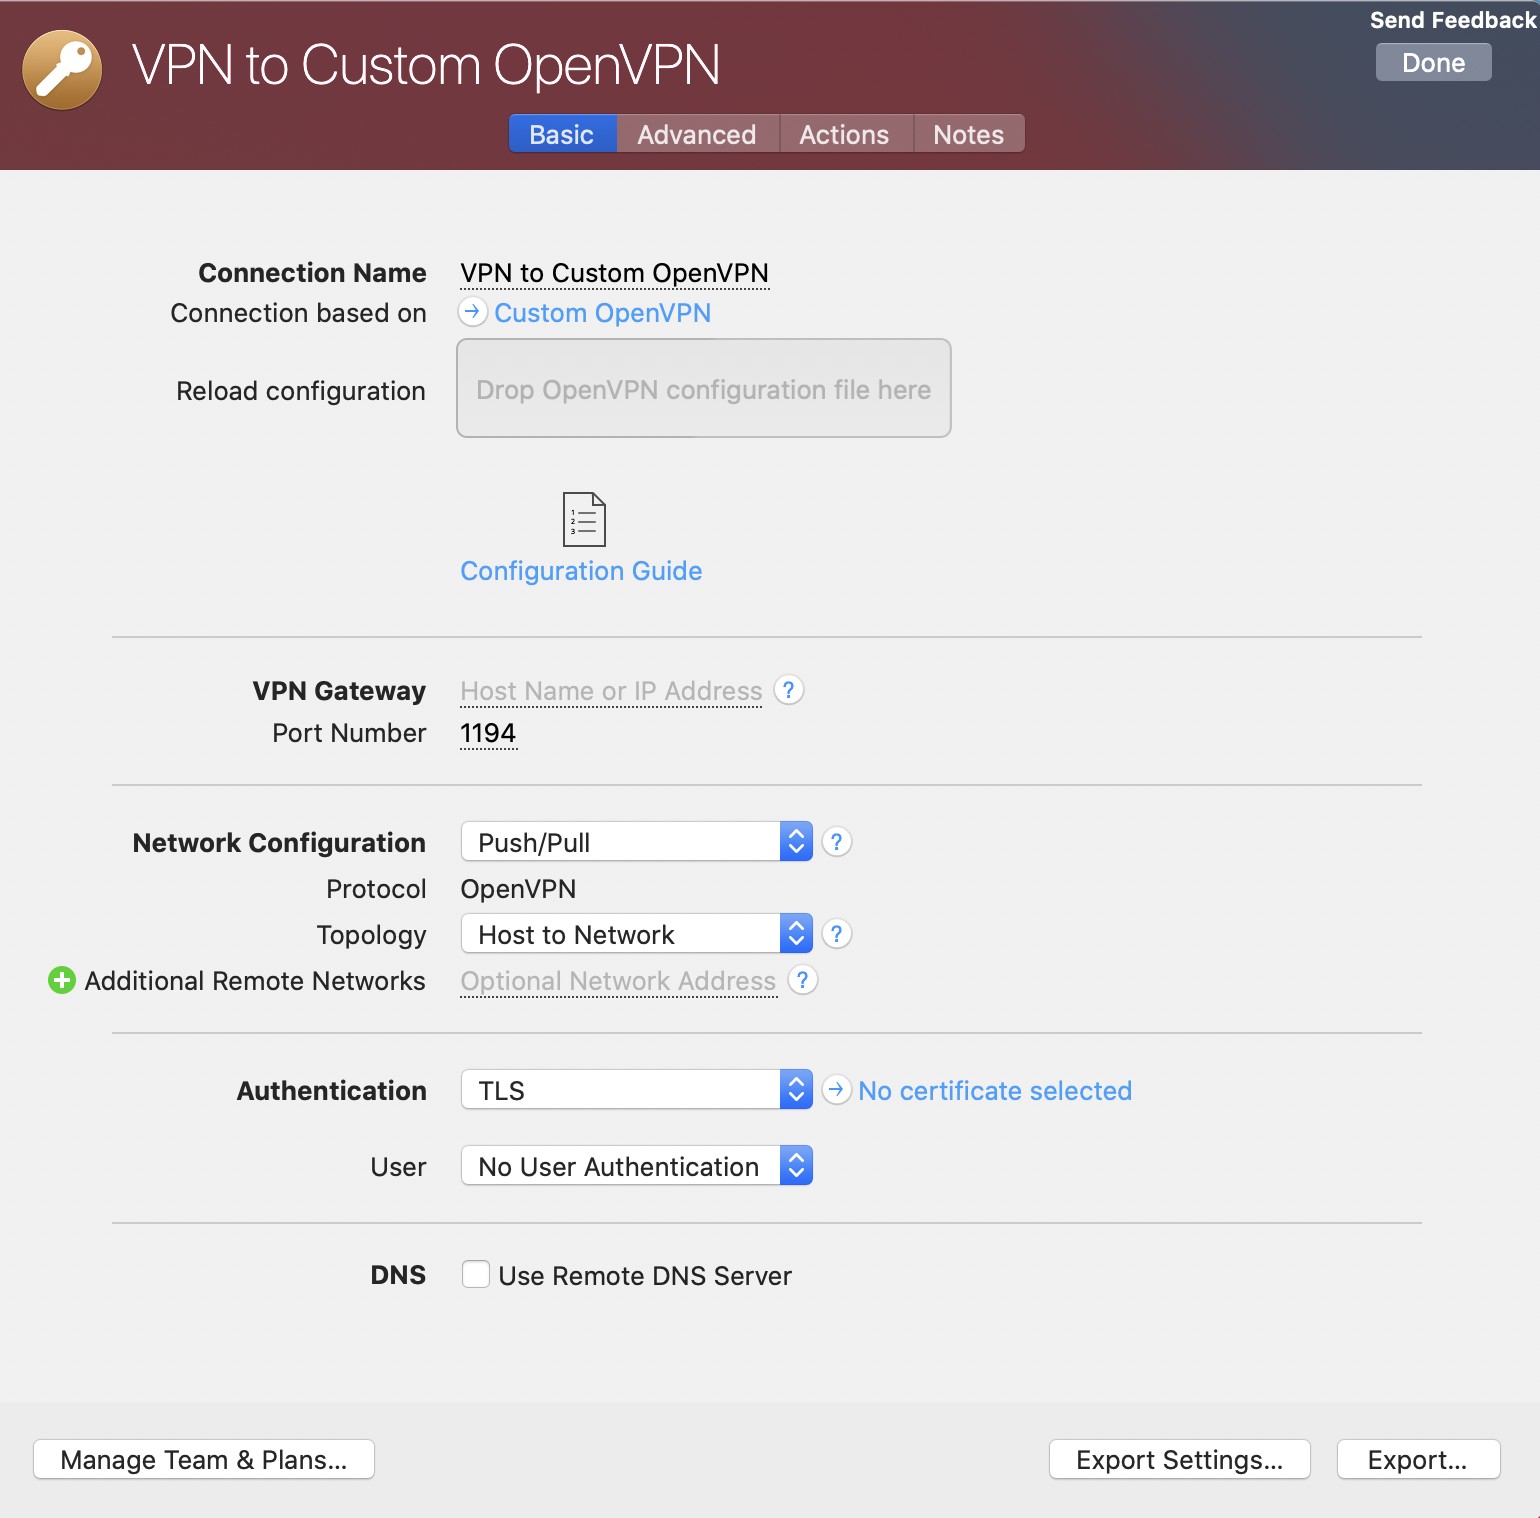
Connect to your VPN
- Check first of all that your internet connection is working as it should be
- Use this link as a test: http://www.equinux.com
- Start the VPN Tracker 365 app.
- Click on the On/Off slider to turn on your connection.

And with full support for macOS Tahoe, you're all set even with the latest releases.
Start your free VPN Tracker trial today.
Learn more
 Note: All of our apps are digitally signed and verified for security, so you can download with confidence.
- VPN Tracker 365: Download here
- An internet connection
- A VPN Router/Gateway
Create a new connection
In VPN Tracker 365, try the following:‣ Click on the plus symbol in the bottom left corner:‣ Choose: "New Company Connection"
Choose your VPN Router
‣ In the list of VPN Gateway vendors, choose the manufacturer and model of your VPN router. In case your VPN router does not appear in the list, try the following: ‣ Choose "Use custom device profile." ‣ Click on "Create" to add your VPN connection.

Your configuration guide
Our engineers have tested a large number of VPN gateways with VPN Tracker. For many of these, detailed configuration guides are available. In the newly created connection, you will be able to find the router specific configuration guide: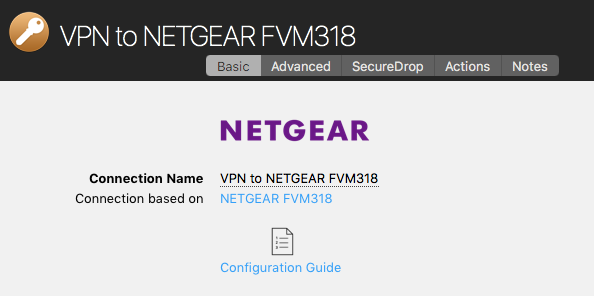
Alternatively you will be able to find the configuration guides on our website at http://vpntracker.com/interop
Further details for creating your VPN connection on Mac OS X can be found in the configuration guide or in the VPN Tracker handbook.
MJMRT6WJ8S.
(Note: Earlier versions used Team ID CPXNXN488S - these should be replaced with the current version)
VPN Tracker uses a Kernel Extension (KEXT) on macOS 10.15 Catalina and lower. The following bundle identifiers can be used to pre-authorize the KEXT:
New (version 21 and later): com.vpntracker.365mac.kext
Older versions: com.equinux.vpntracker365.kext
Starting with macOS 11 Big Sur, a new System Extension is used:
com.vpntracker.365mac.SysExt
Troubleshooting
If users are still seeing the "Allow System Extension" prompt, please try explicitly listing the System Extension identifier com.vpntracker.365mac.SysExt in your MDM profile (and not just referencing the Team ID).
To check the status of the System Extension, you can run systemextensionsctl list in Terminal.
Please see Apple's Support Document for more details.
- VPN Tracker 365: Download here
- An internet connection
- A VPN Router/Gateway
Create a new connection
In VPN Tracker 365, try the following:‣ Click on the plus symbol in the bottom left corner:
Choose your VPN Router
‣ In the list of VPN Gateway vendors, choose the manufacturer and model of your VPN router. In case your VPN router does not appear in the list, try the following: ‣ Choose "Use custom device profile." ‣ Click on "Create" to add your VPN connection.
Your configuration guide
Our engineers have tested a large number of VPN gateways with VPN Tracker. For many of these, detailed configuration guides are available. In the newly created connection, you will be able to find the router specific configuration guide:Alternatively you will be able to find the configuration guides on our website at http://vpntracker.com/interop
Further details for creating your VPN connection on Mac OS X can be found in the configuration guide or in the VPN Tracker handbook.
- Start your VPN connection in VPN Tracker
- Go to the Finder > Go To >Connect to Server
- In the Server Address field, enter the name or IP address of the server you want to connect to
- Click on the Connect button.
Create a VPN Shortcut:
VPN Tracker offers convenient shortcut options for frequently used connections. You only have to set up the shortcut once. Afterwards you will be able to connect to your VPN and open your files with just one button click. Find out more:
MJMRT6WJ8S
Kernel Extension:
com.vpntracker.365mac.kext
System Extension:
com.vpntracker.365mac.SysExt
Please see Apple's Support Document for more details.
- Log in to your AOL account and go to your account settings
- Go to the "Account Security" tab and choose "Manage app passwords."
- From the dropdown menu, select "Other" and give the app a name (i.e. Mail Designer 365)
- Click "Generate" to create a new password. This will appear on your screen
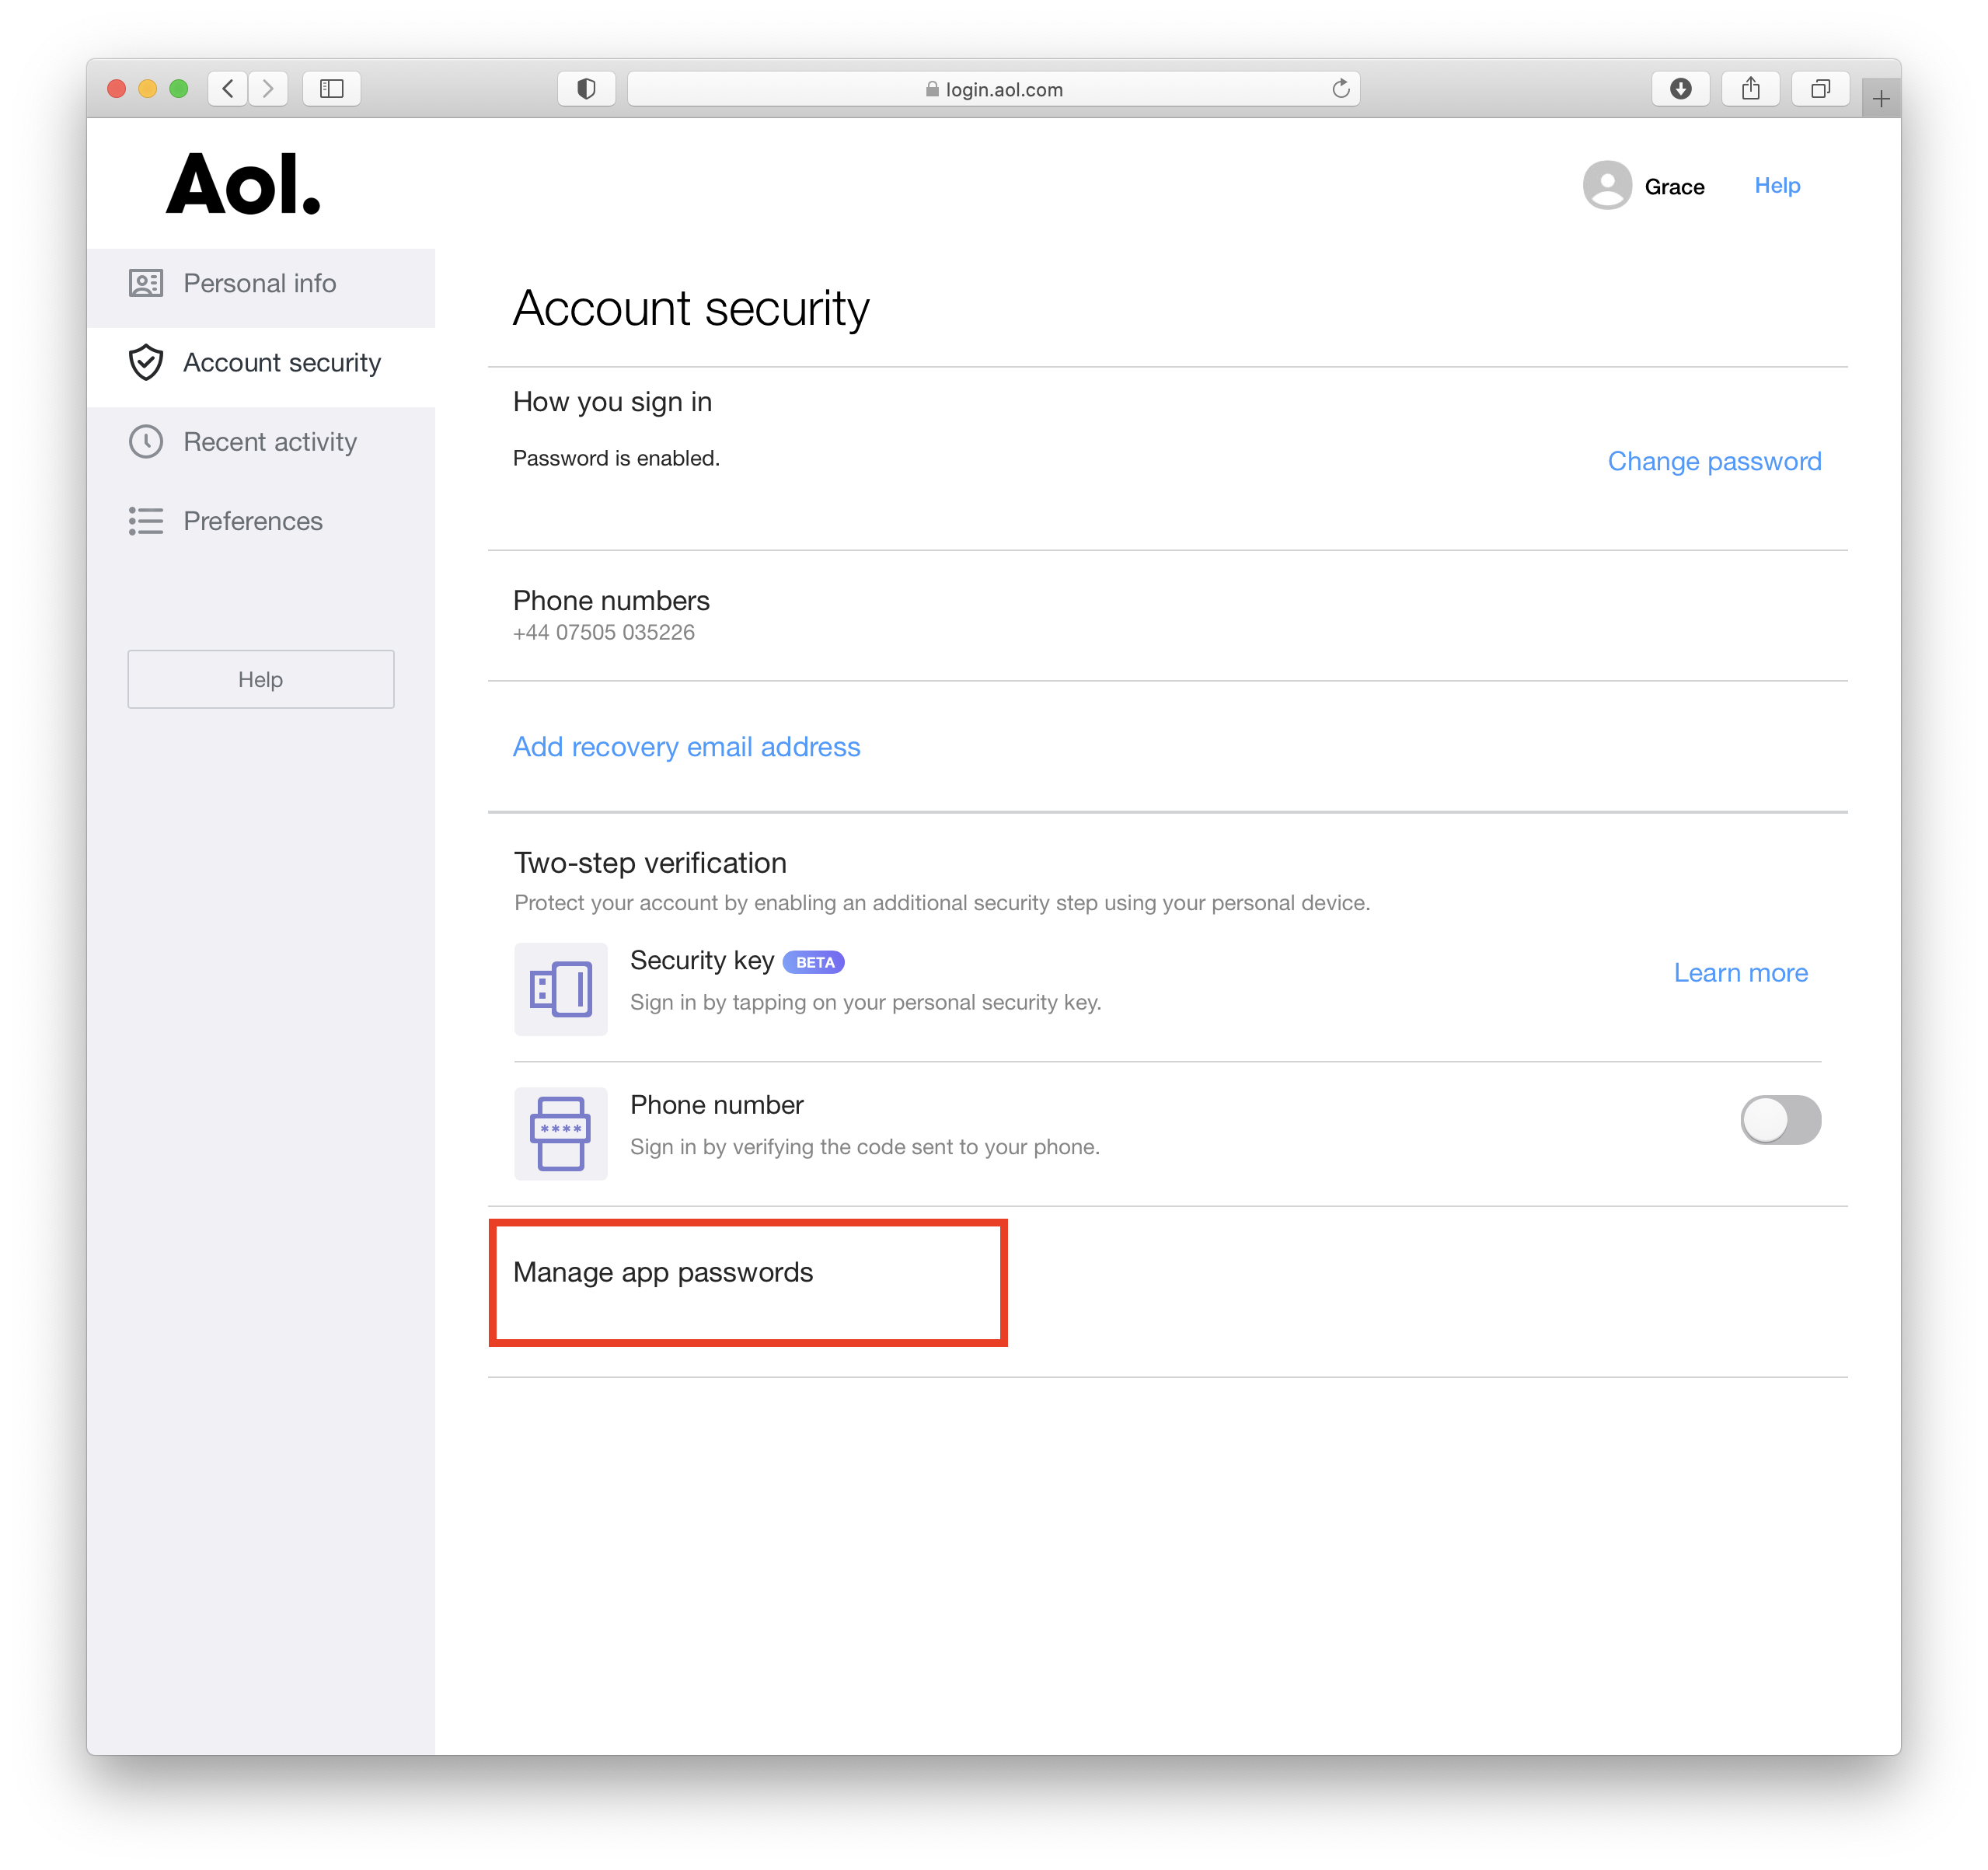 This password you have just created is the password you will need to use to set up your AOL account in Mail Designer 365.
- Enter a text of your choice, e.g. "Manage your preferences", highlight this text and go to "Add Link" in the Style menu. Here you can choose "Placeholder" from the dropdown menu and enter the relevant placeholder (i.e. "unsubscribe".)
- Alternatively, you can insert a placeholder via the "Insert" menu and manually overwrite the default text. With this option, make sure the placeholder link is still attached to the text (you can check this by clicking on the text and going to "Link" in the sidebar.)
- Go to the VPN Tracker Store
- Add the requested licenses to your shopping cart by clicking the Plus Symbol.
- Be sure to select: “Purchase as new plan”. The quote tool does not currently support the “Add to an existing plan” feature.
- Once you have added the licenses to your cart click on the blue “Save as quote” button on the right side of the page
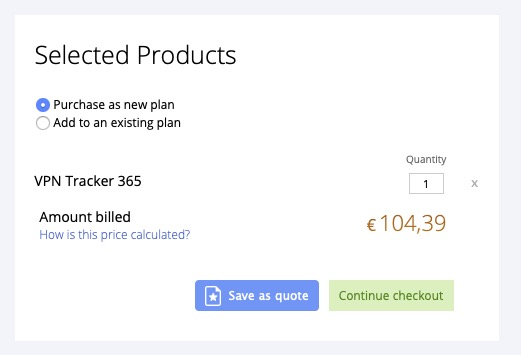
- Your product selection and price will be saved into a quote which will remain valid for seven days after it has been generated.
- Be sure to log in to your account to see your final price.
- You can share your quote with others by sending them the URL of your quote.
- Alternatively, you can export the quote as a PDF or print it.
- Once you are ready to purchase, just click the “Purchase Now” button and all items from your quote will be directly put back into your shopping cart and you can proceed with your purchase.
- The Mail Designer 365 free download only allows you to view the app and open and edit email templates.
- Without an active demo, you will be unable to save or send created templates.
Activating your Mail Designer 365 demo
To activate your free demo, please carry out the following steps:- Start the Mail Designer 365 app on your Mac.
- Log in with your equinux ID and password or create an account.
- If you are starting the app for the first time, you will see a list of plan options. Here you can choose to activate your free trial.
- If you have previously logged in to the app, you can find the option to start your free trial in the top left corner under your name.
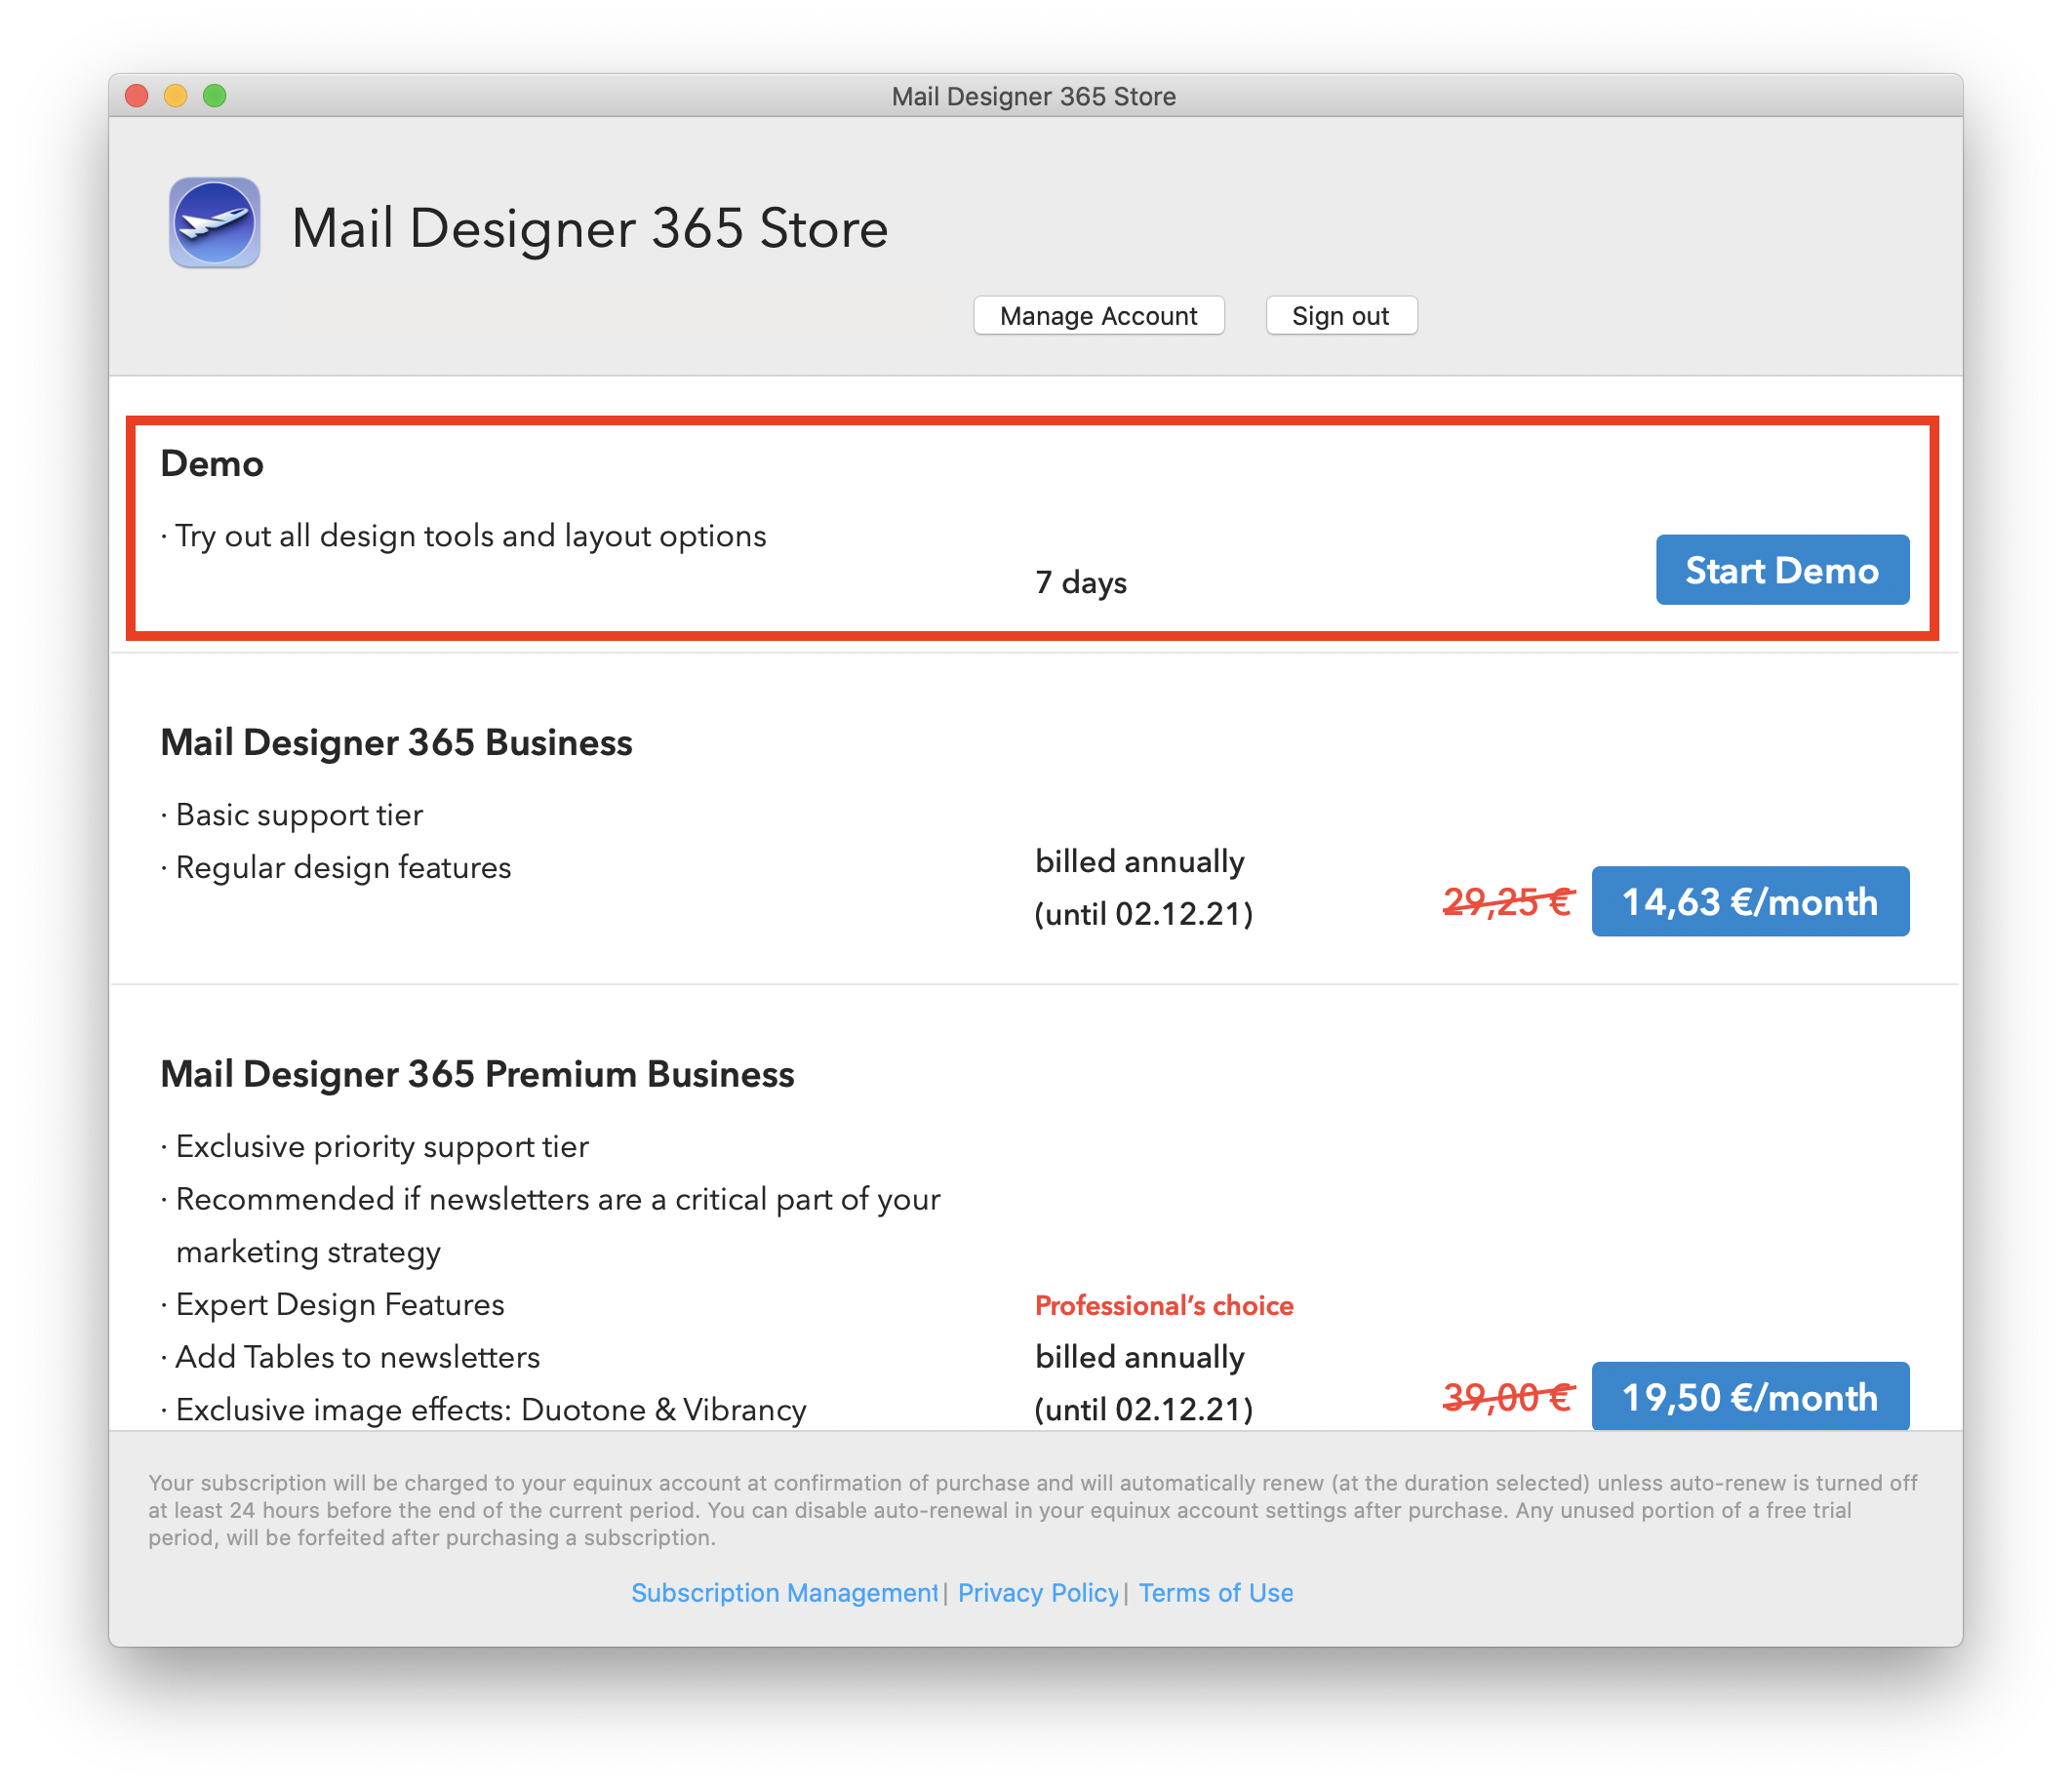
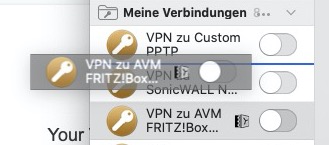 It’s also possible to create Groups of VPN Connections by clicking on the plus symbol in the lower right and selecting “New Group”. Just drag your connections into the appropriate group.
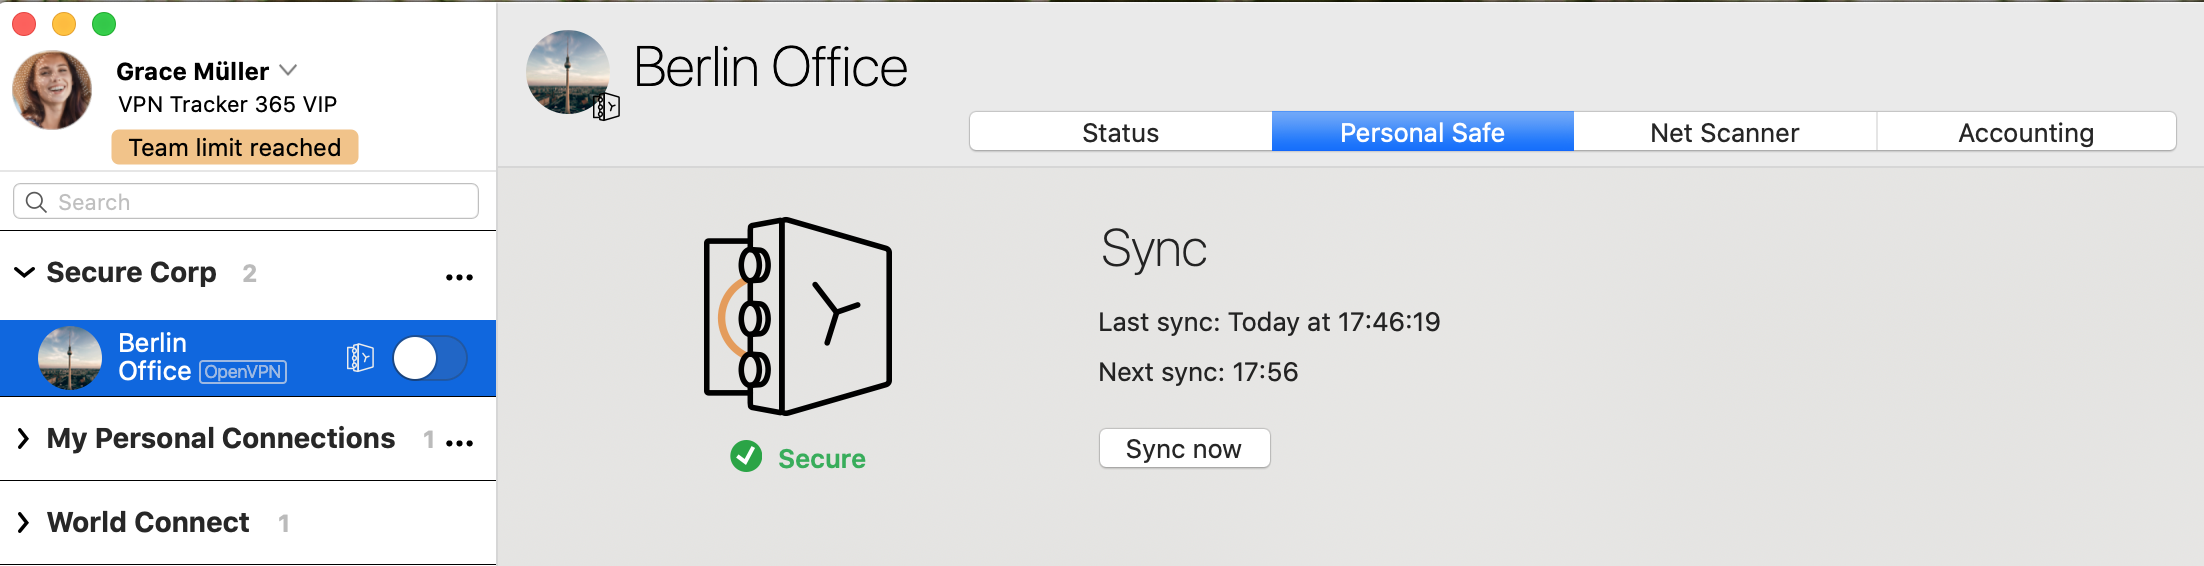 The VPN connection is now saved to your account and can be accessed on a new Mac and on iPhone and iPad with VPN Tracker for iOS.
If you used an earlier VPN Tracker 365 beta, you may run into a Connection Safe sync issue with the following error message:
Connection could not be downloaded. The operation couldn’'t be completed.
VPNTHQ.HQConnectionSyncKeyError error 0
To fix this problem
- Sign out of VPN Tracker 365
- Quit VPN Tracker 365
- Open Applications > Utilities > Keychain Access
- Search in the top right for VPN Tracker entries mentioning "master key", "sync master key", or "connection safe"
- Delete these entries (Edit > Delete
- Launch VPN Tracker
- Sign in again and wait for your Connection Safe to sync (check under VPN Tracker > Preferences > Connection Safe)
If you're trying to set up your email account in Mail Designer 365 and your password is being rejected, you may need to set up an app-specific password.
What is an app-specific password for? Many email providers now require a separate password to be used in 3rd party apps, in order to increase your overall account security. This may be required, even if you do not use 2-factor authentication to sign in to your email.
This means that you may need to create a separate password and use that in Mail Designer 365 in order to send emails directly from Mail Designer 365.
Please refer to your email provider's security or account settings, or visit your email provider's help pages on how to set up a 3rd party email app.
Links for selected email providers
 This means that the local saved version of the connection does not match the version in the cloud. To resolve the conflict, click on the connection in the left menu and open the tab "Personal Safe"
Click on the button "Fix sync issue".
A dialogue will open. You have the option to choose which version of the connection you would like to keep. The local version, or the cloud version.
This means that the local saved version of the connection does not match the version in the cloud. To resolve the conflict, click on the connection in the left menu and open the tab "Personal Safe"
Click on the button "Fix sync issue".
A dialogue will open. You have the option to choose which version of the connection you would like to keep. The local version, or the cloud version. 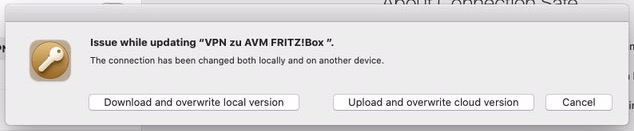 To keep the local version, please choose: "Upload and overwrite cloud version"
To keep the Cloud version please choose: "Download and overwrite local version"
To keep the local version, please choose: "Upload and overwrite cloud version"
To keep the Cloud version please choose: "Download and overwrite local version"
Oftentimes, this padding will appear more noticeable if a background color has not been set. In order to create the illusion of a full-width design, you can set the outer background to a different shade to create a subtle contrast between your email content and design background.
For best results, typing your email copy directly into the text layout blocks in Mail Designer 365 is most effective. Where this is not possible and you need to copy in text from elsewhere, we would recommend first copying and pasting your text into a plain text editor (such as TextEdit on the Mac) to strip any formatting before entering it into Mail Designer 365.
If you have text styles set up already, you can use the "Paste and Match Style" option and you won't need to reformat anything.
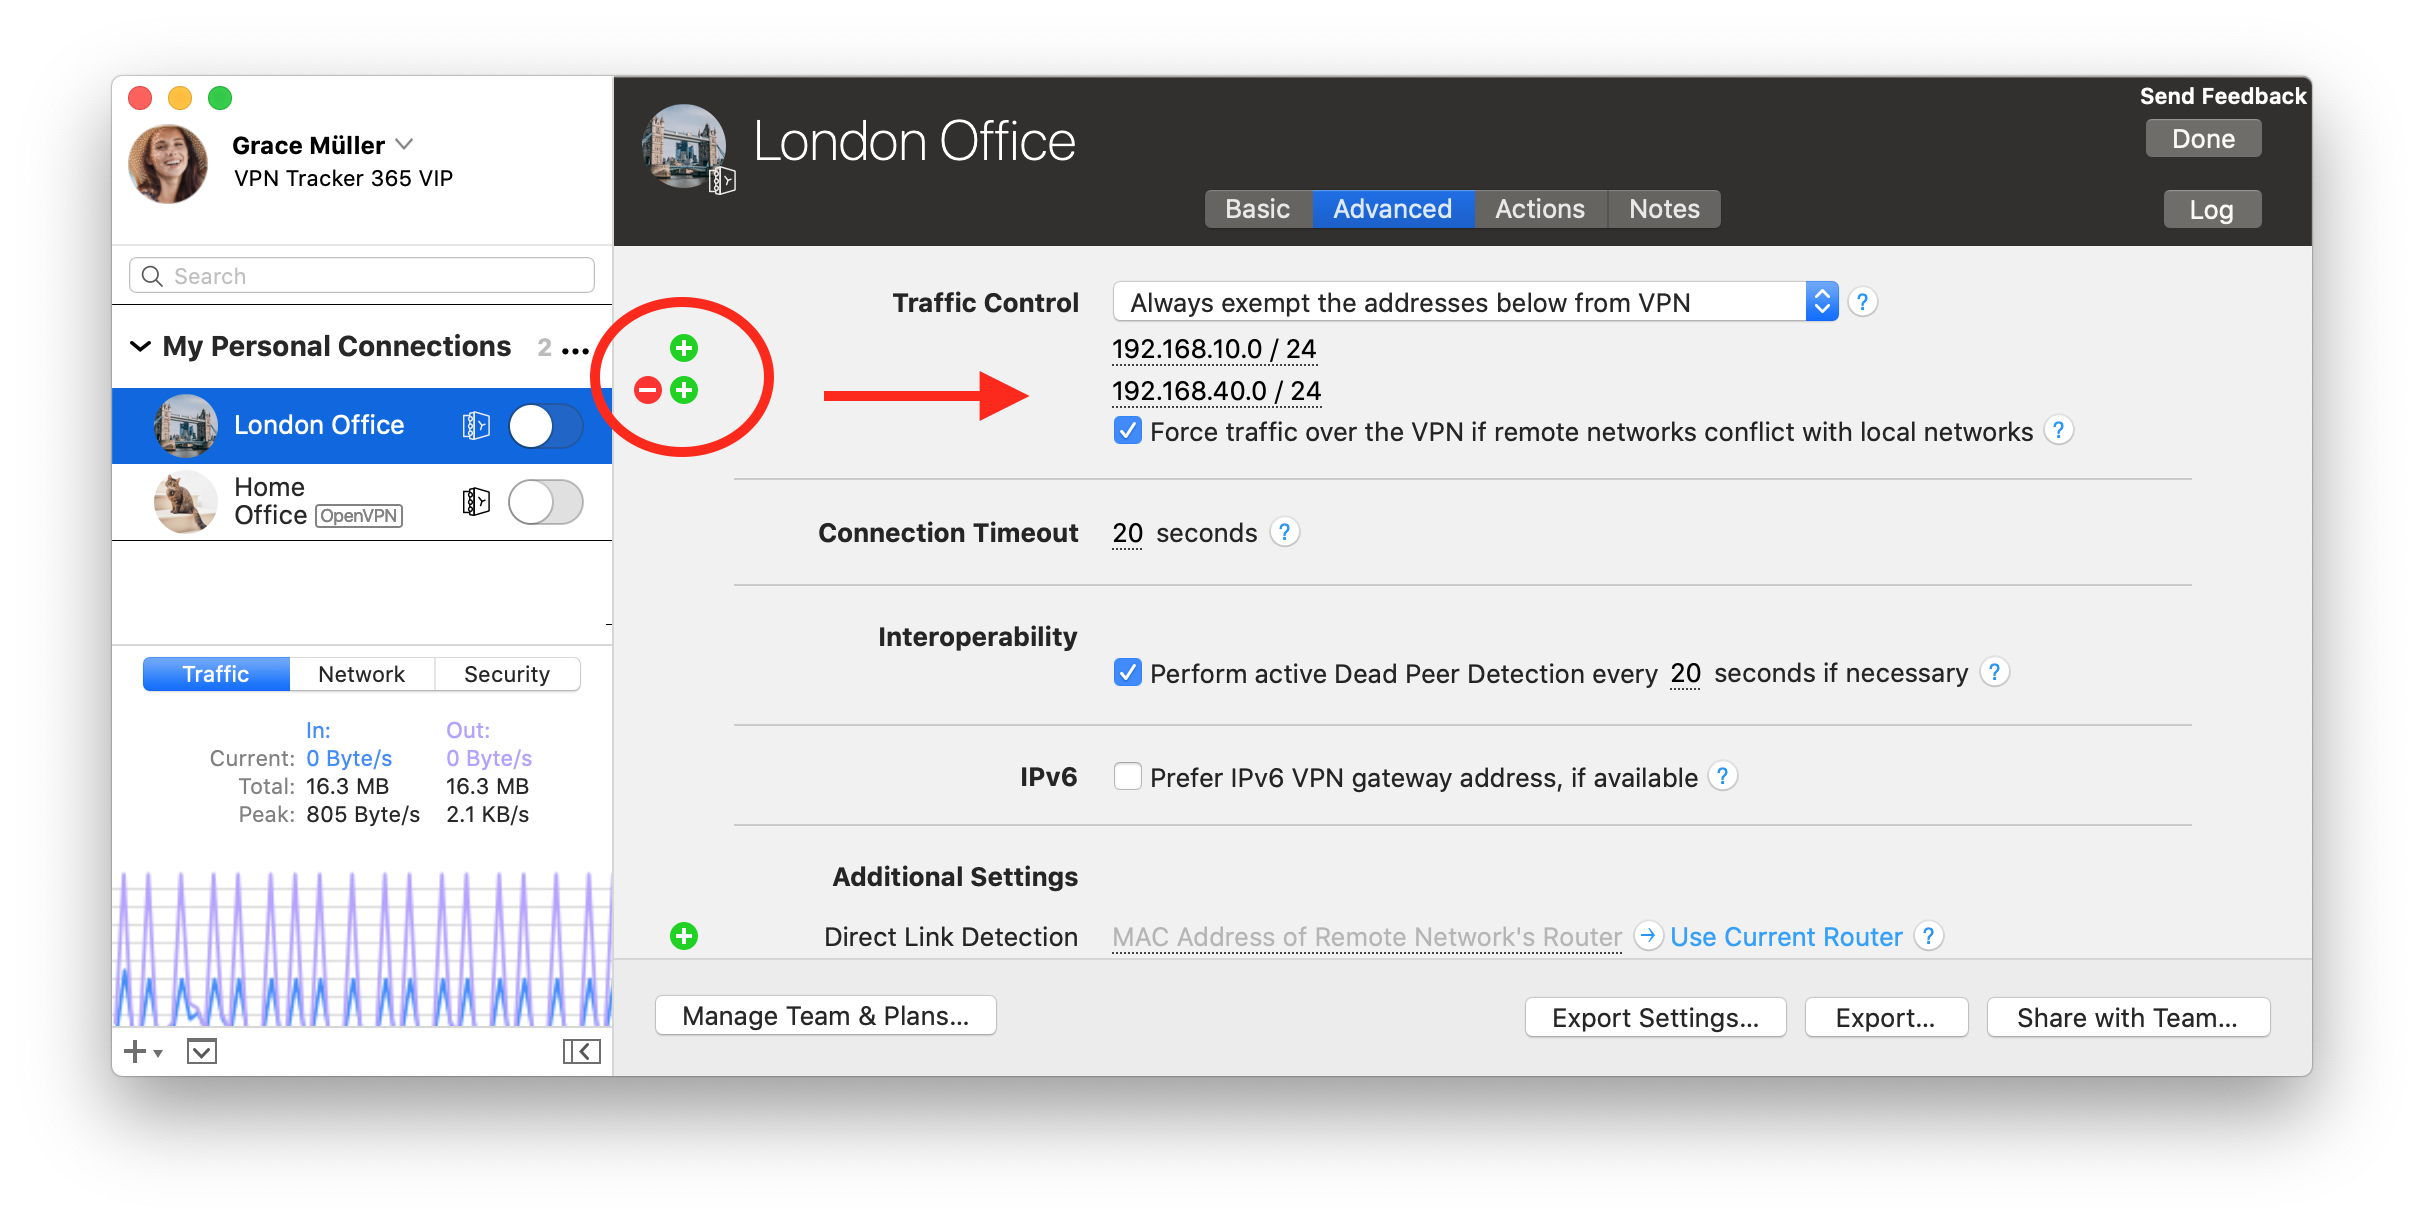
Here you can add and remove address fields to use with Traffic Control.
You can enter the addresses or networks in the following formats:
- As a single address, e.g. "192.168.10.4",
- as a single remote network, e.g. "192.168.10.0" (VPN Tracker will use the most typical subnet),
- in CIDR notation, e.g. "192.168.10.0/24",
- or with the full subnet, e.g. "192.168.10.0 / 255.255.255.0", which VPN Tracker will then convert to CIDR notation.
Step One: Download a local copy of your Personal Safe connections from your Reseller account
- Go to VPN Tracker 365 > Preferences > Personal Safe
- Uncheck the box "Enable Personal Safe" to disable Personal Safe sync for all saved Shortcuts and connections and download a local copy on your Mac:
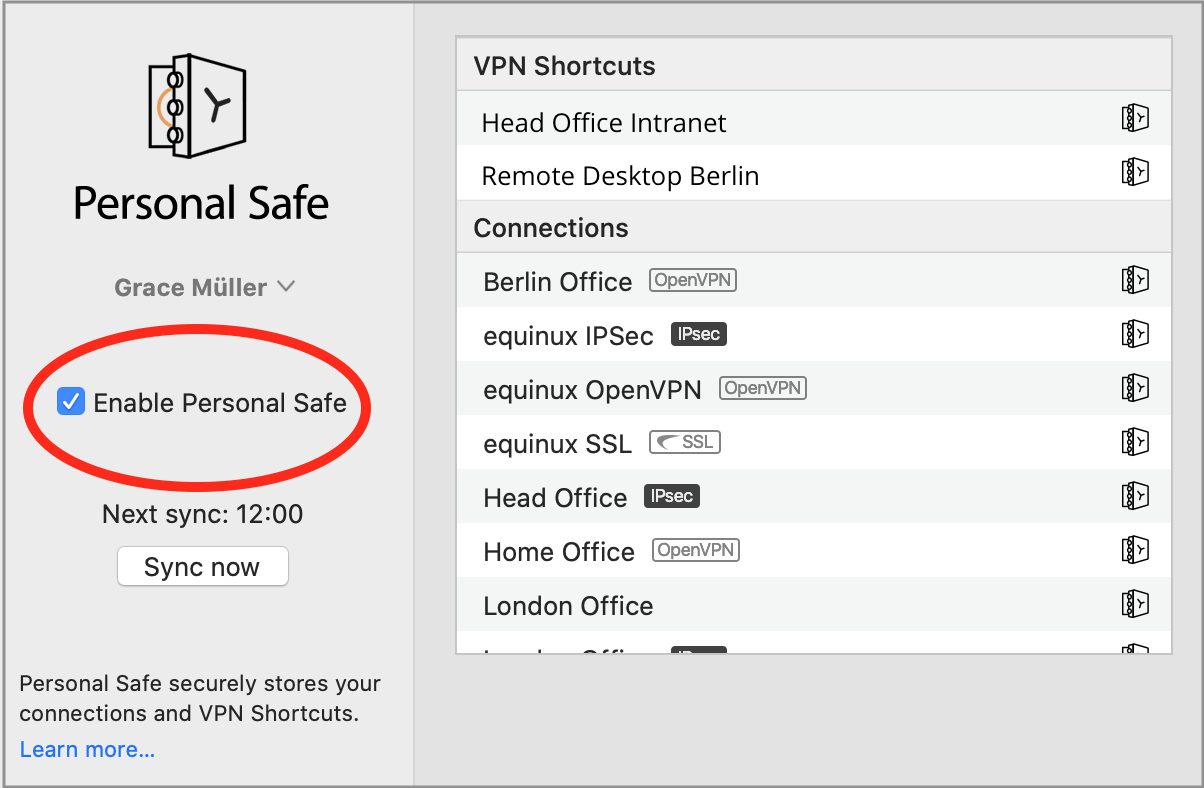
- Important: In the dialog, select "Only Remove from Personal Safe"

- Your connections will be stored locally on your Mac
Step Two: Set up a new personal account
- Sign out of your Reseller account via the button in the top left corner:

- If you have not done so already, you should now create a new personal account.
- This will be the account you use with your own personal VPN Tracker plan, as well as for internal Team Management (if relevant)
Step Three: Assign your plan to your new account
- Log in to my.vpntracker using your original Reseller account
- Using the Reseller tools, transfer licenses to your new Personal account
- Sign in to my.vpntracker with your new Personal account and assign yourself the license
Step Four: Re-sync your connection and shortcuts data to your Personal Safe
- Sign back in to VPN Tracker 365 with your new personal account
- Open up your Personal Safe preferences again
- Check "Enable Personal Safe" to add your connections to Personal Safe
invalid_grant: Bad Request (-10)Please carry out the following steps:
- Go to Mail Designer 365 > Preferences > Mail Accounts.
- Remove your Gmail address from the list using the "-" icon.
- Then, click the "+" icon to re-add your Gmail account. You will be prompted to sign in with your Gmail credentials again.
How can I verify that my copy of VPN Tracker 365 or Mail Designer has not been modified?
All our apps are properly code-signed by Apple, so macOS can verify that the app has not been tampered with. You can check the integrity by opening Terminal.app and entering the following command:spctl --assess "/Applications/VPN Tracker 365.app"Please note that double quotes around the path are required because the path contains spaces. If your copy is in a different location, please replace "/Applications/VPN Tracker 365.app" with the proper path to the app. The output may look like this:
/Applications/VPN Tracker 365.app: accepted
source=Notarized Developer ID
If the app has been modified, an error message like this is printed:
Mail Designer 365.app: invalid signature (code or signature have been modified)Please contact us if your copy of VPN Tracker 365 or Mail Designer 365 has an invalid signature.
How can I verify that my copy of VPN Tracker 365 or Mail Designer 365 was signed by equinux?
All our apps are properly code-signed by Apple, so macOS can verify that the app has not been tampered with. You can review this signature by opening Terminal.app and entering the following command:codesign -d -vv "/Applications/VPN Tracker 365.app"Please note that double quotes around the path are required because the path contains spaces. If your copy is in a different location, please replace "/Applications/VPN Tracker 365.app" with the proper path to the app. The output may look like this:
Executable=/Applications/VPN Tracker 365.app/Contents/MacOS/VPN Tracker 365
Identifier=com.vpntracker.365mac
Format=app bundle with Mach-O universal (x86_64 arm64)
CodeDirectory v=20500 size=81953 flags=0x10000(runtime) hashes=2550+7 location=embedded
Signature size=9071
Authority=Developer ID Application: equinux AG (MJMRT6WJ8S)
Authority=Developer ID Certification Authority
Authority=Apple Root CA
Timestamp=1. Jun 2021 at 17:22:51
Info.plist entries=42
TeamIdentifier=MJMRT6WJ8S
Runtime Version=11.1.0
Sealed Resources version=2 rules=13 files=684
Internal requirements count=1 size=216
The important parts to look out for here are the lines starting with "Authority": They list the chain of trust. The last entry must always be "Apple Root CA", the entry above must either be "Developer ID Certification Authority" or "Apple Worldwide Developer Relations Certification Authority" for App Store versions. The first entry must either be "Developer ID Application: equinux AG" (VPN Tracker 365), "Developer ID Application: Tower One GmbH" (Mail Designer 365 non-App Store), or "Apple Mac OS Application Signing" (Mail Designer 365 App Store).
Again, if you see a different entry, please contact us.
launchctl unload -w /System/Library/LaunchDaemons/com.apple.netbiosd.plist
Please note that disabling the NetBIOS daemon may affect your network file shares.
When you share a connection using TeamCloud, it is encrypted and then shared with members of your VPN Tracker Team.
General Security Information- TeamCloud uses strong encryption to protect all data
- The connection is encrypted using end-to-end encryption for each Team member individually
- End-to-end encryption means that we can never access your encrypted connection
Here's a brief overview of how the following security settings are handled by TeamCloud:
Pre-Shared Key- Pre-shared keys for a connection are automatically included, so your team members can connect right away
- The pre-shared key will not be added to a team member's Keychain, so they cannot access it
- Your username and password are not shared with your team, they are removed before the connection is shared
- Each Team member can enter their own username and password
- These can be stored inside their Keychain and additionally will be added as user-specific credentials to TeamCloud (only available to that team member)
- Remote Connection Wipe: By removing a team member from your Team, their access to TeamCloud is also immediately revoked. Any connections they have on their Macs will be removed automatically.
- Don't allow settings to be changed prevents users that aren't Team managers or owners from editing a connection
- VPN Shortcuts can be shared to TeamCloud directly
If you have any feedback regarding these settings, please get in touch and let us know your requirements.
If you're not able to access your team's VPN connection via TeamCloud, please check the following:
- Make sure you have the latest version of VPN Tracker 365.
- You'll need to be a member of your company's VPN Tracker Team – contact your IT person if you haven't been added.
- If you have just been added to your Team, your Team manager will need to launch VPN Tracker or go to my.vpntracker.com to complete your TeamCloud setup.
- If you see some, but not all of your Team's TeamCloud connections, you may need to upgrade your license to access them all.
If your question isn't answered above, please get in touch.
- You'll need to be a Manager or Organizer in your team – multi-admin support is currently rolling out to teams – reach out if you'd like this enabled for your Team right away.
- Select a connection in VPN Tracker and choose the 'Share with Team' option from the Status or Configure views
A note on new users
The person receiving the connection needs to be a member of your VPN Tracker team and has to have set up their TeamCloud encryption keys.
This happens automatically when they open VPN Tracker and other Team members are online. If another team member is not available, their TeamCloud setup can also be confirmed by a Team manager under my.vpntracker.com.
TeamCloud - Key Security Architecture
- Built using end-to-end encryption - our servers have no access to your connection data
- Securely encrypted with user-specific encryption keys for additional security
- Encryption runs locally in your browser
Managing connections on the web
my.vpntracker uses sophisticated WebAssembly technology to securely decrypt and encrypt your sensitive connection details locally within your browser - without sending any unencrypted data through the VPN Tracker servers. This allows Team Managers to edit connection files and add additional Team Members to TeamCloud on the web, without needing a Mac or VPN Tracker 365 running locally.Should you require more storage than you have allocated in your current plan, you can easily cross-upgrade. Your remaining balance will be pro-rated against your new plan.
You can assign different roles to Team members, which give them access to certain features.
Note: Roles are currently being rolled out – if you do not see the role dropdown option in your Team, please reach out and we can set your team up.
You can assign the following roles:
| Manager | Organizer | Member | Billing | |
|---|---|---|---|---|
| Purchase and manage subscriptions | Yes | - | - | Coming soon |
| Invite and remove Team members | Yes | Yes | - | - |
| Change roles | Yes | - | - | - |
| Add, edit and remove TeamCloud connections | Yes | Yes | - | - |
| Receive TeamCloud connections | Yes | Yes | Yes | - |
| Download invoices | Yes | - | - | Yes |
TeamCloud Groups let you use TeamCloud features with just part of your team, e.g. to share a certain VPN connection with just your IT admins.
To create and edit Groups, you need
- Team Manager or Organizer status
- A VPN Tracker VIP or Consultant plan
To receive a connection from a TeamCloud Group, you need
- To be a member of the team
- A VPN Tracker Executive, VIP, or Consultant plan
- Choose your team or your account in the sidebar menu and click on Subscriptions
- Choose the plan you wish to upgrade and click on Upgrade edition
 You will then be taken to the checkout page. Here you can choose which edition to upgrade to. On the right hand side under New plan, select a product from the dropdown list (i.e. VPN Tracker VIP) to calculate your upgrade price.
You can now review your new plan before purchasing. The Prorating Discount is the remaining value of your existing license(s) which is deducted from the yearly total to result in the Amount due now.
You will then be taken to the checkout page. Here you can choose which edition to upgrade to. On the right hand side under New plan, select a product from the dropdown list (i.e. VPN Tracker VIP) to calculate your upgrade price.
You can now review your new plan before purchasing. The Prorating Discount is the remaining value of your existing license(s) which is deducted from the yearly total to result in the Amount due now.
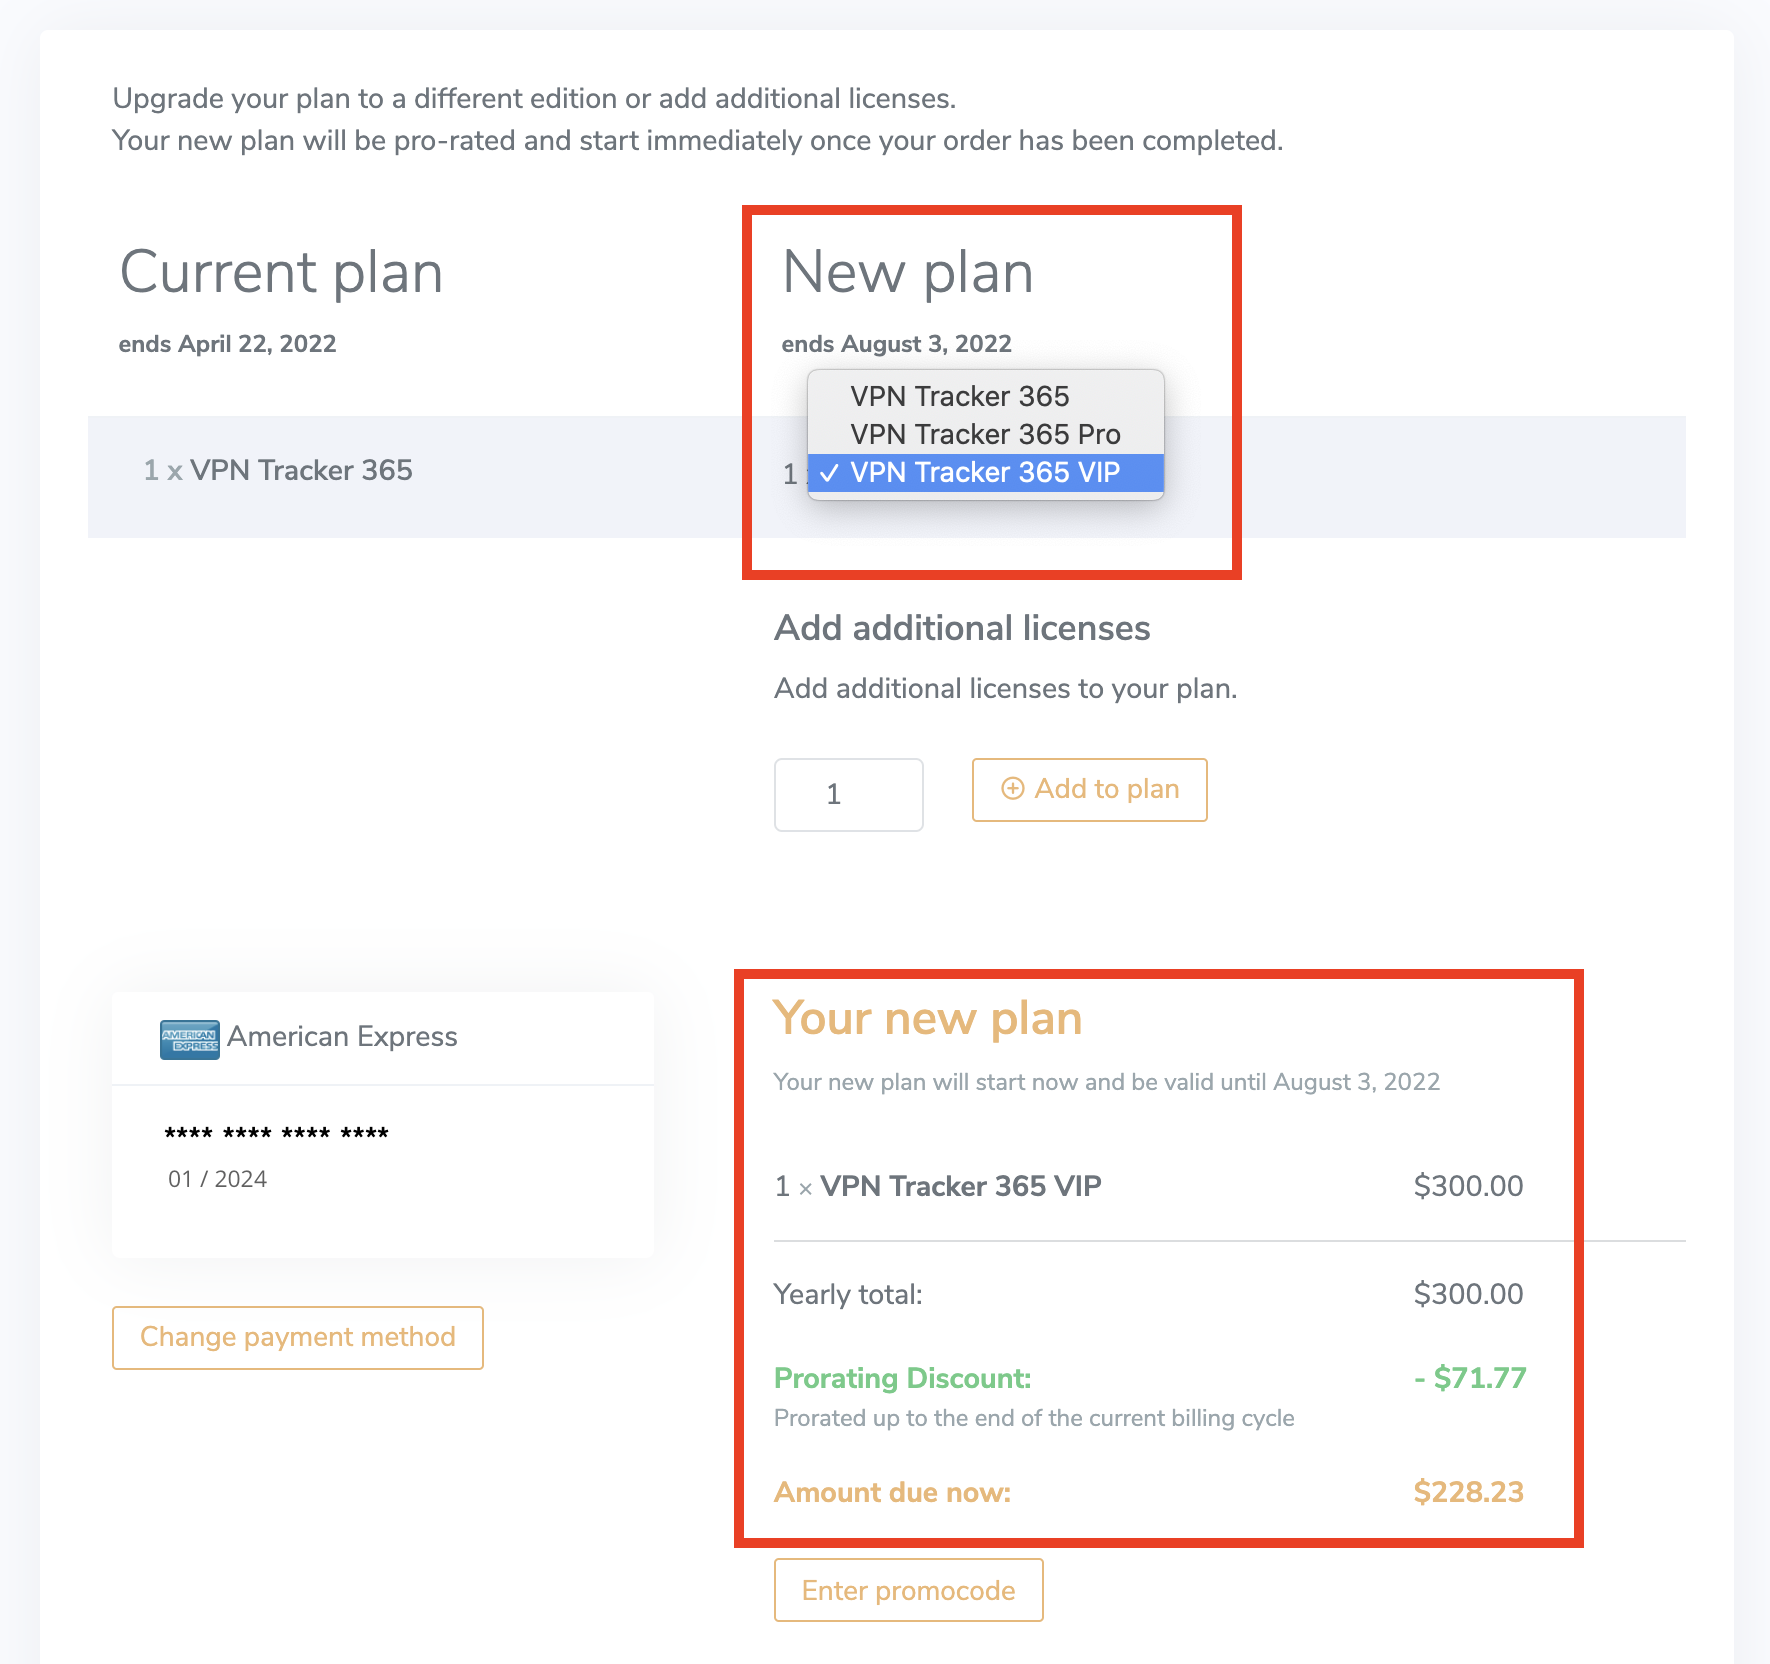
- Log in to your my.vpntracker account and select your team in the sidebar
- Scroll to Team Members. Here you will see a list of the colleagues you have invited to your team and their current license
- Click Manage to be shown your available licenses and select a product from the list to assign it to a user
- If you have no available licenses, you can purchase more from the Team Store by clicking Buy licenses
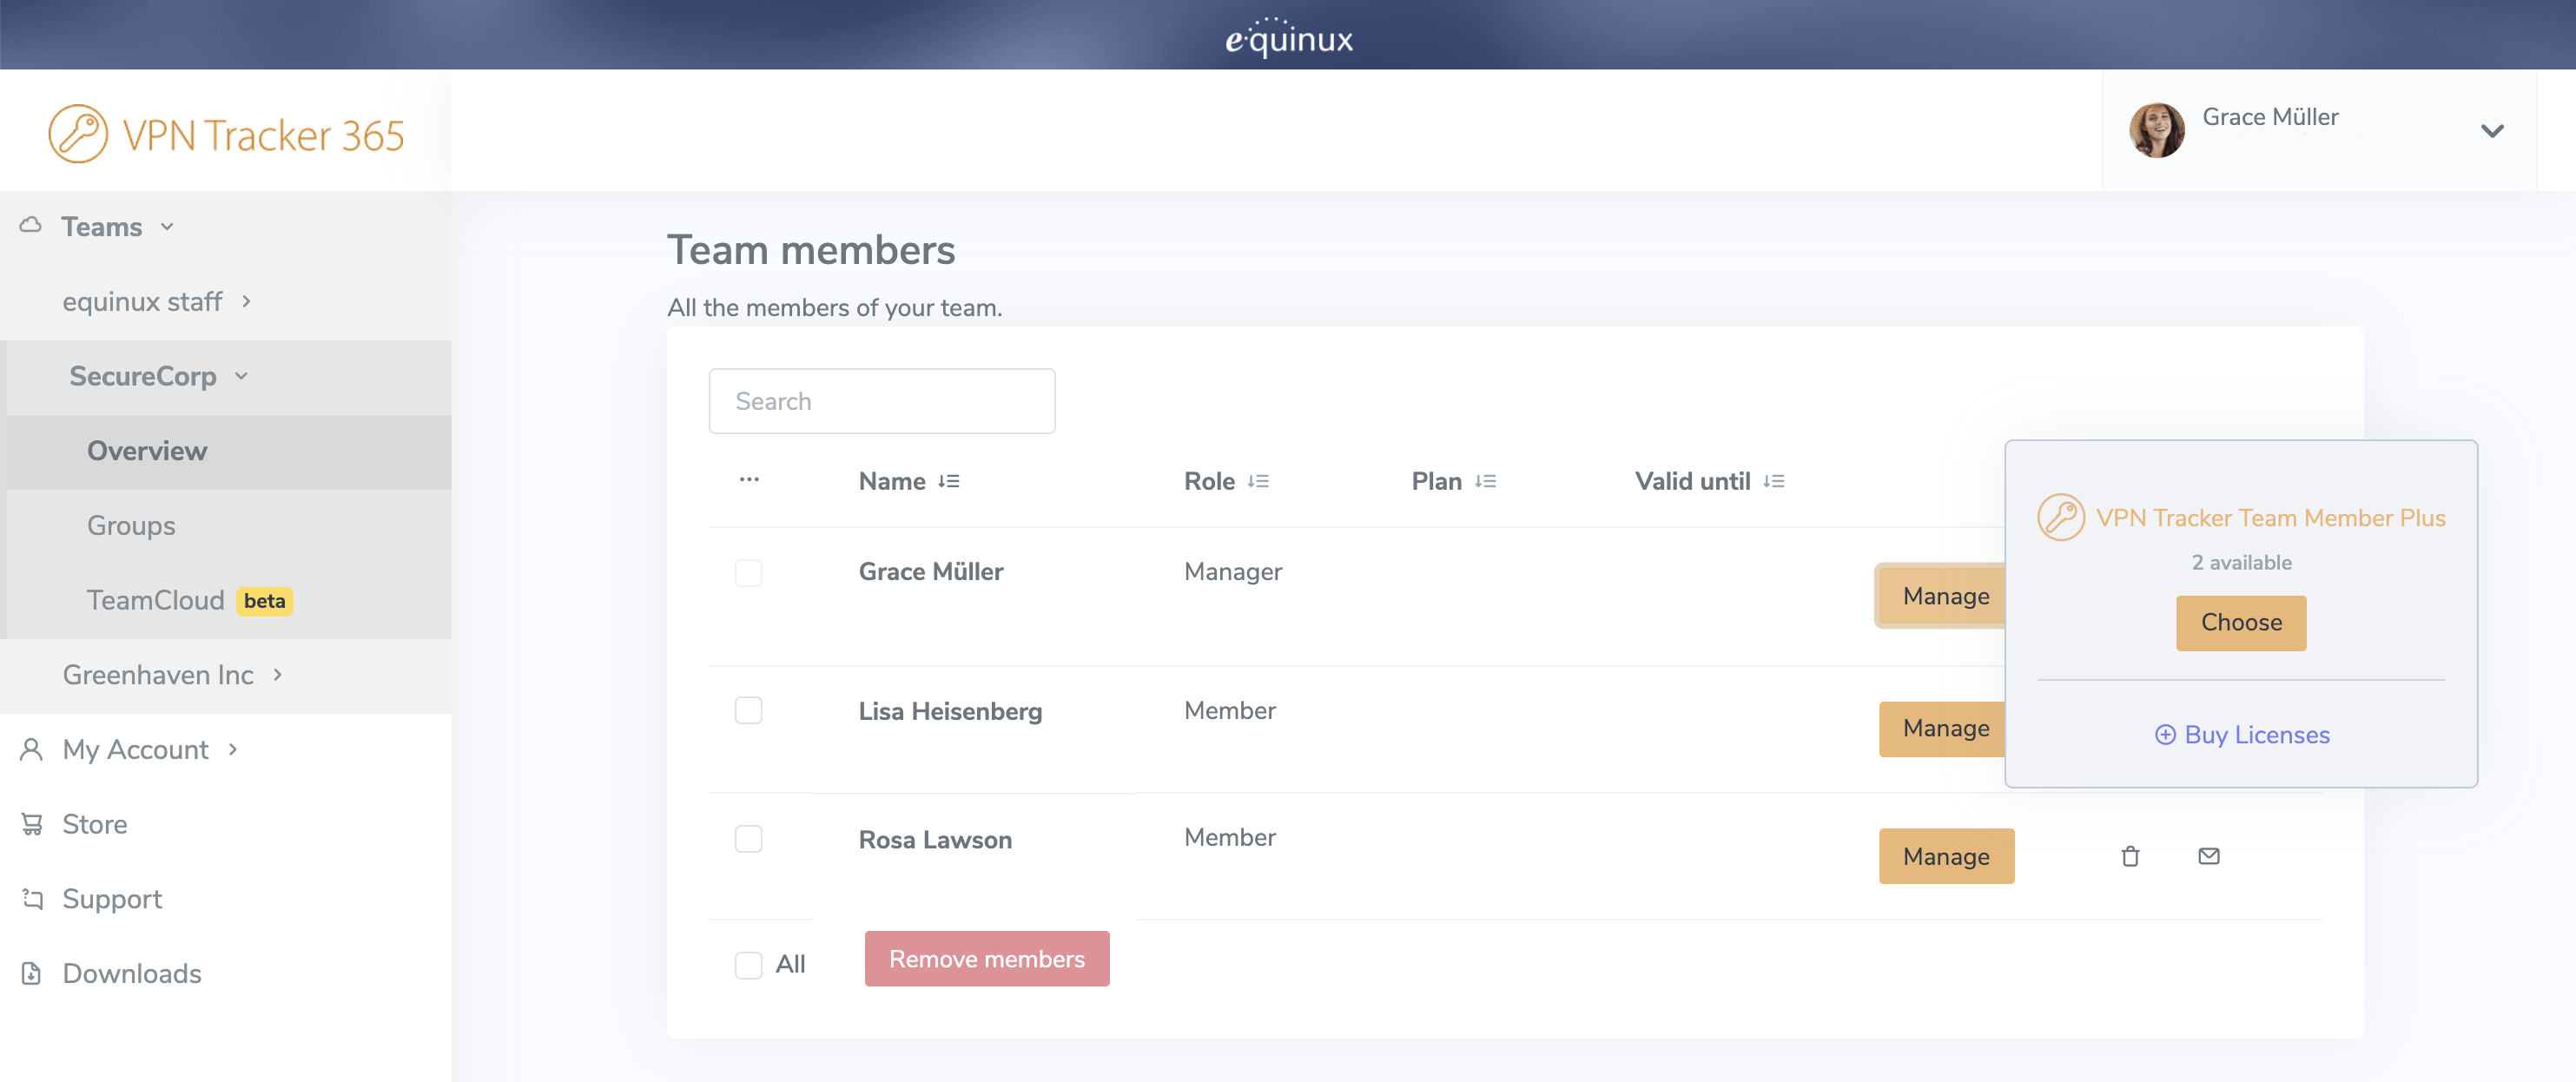 For more step-by-step information on setting up and managing your VPN Tracker Teams, check out this detailed guide.
- Check if you can reach my.vpntracker.com
- If you can access my.vpntracker, try quitting and relaunching the app
- If that doesn't help, try again a bit later
- If it's still not working after a cup of coffee - reach out
- Make sure your connections are stored in your Personal Safe or in TeamCloud (look for the safe or cloud icons in the Status tab)
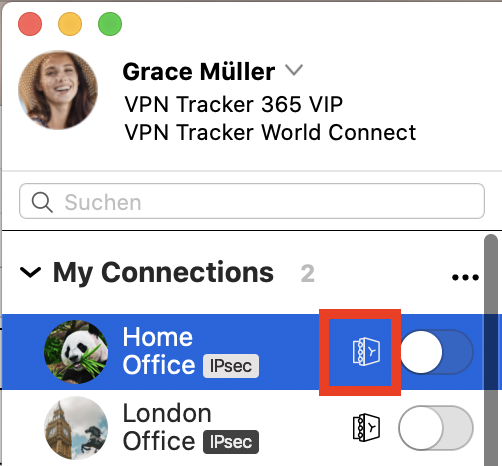
- Sign out of VPN Tracker 365 on your old Mac (choose "VPN Tracker 365 > Sign out… " from the menu bar)
- Sign in to VPN Tracker 365 on your new Mac with your equinux ID and password
- Download VPN Tracker for Mac or iPhone
- Copy your VPN connection details from the AnyConnect app
- Connect and enter your username and password when asked
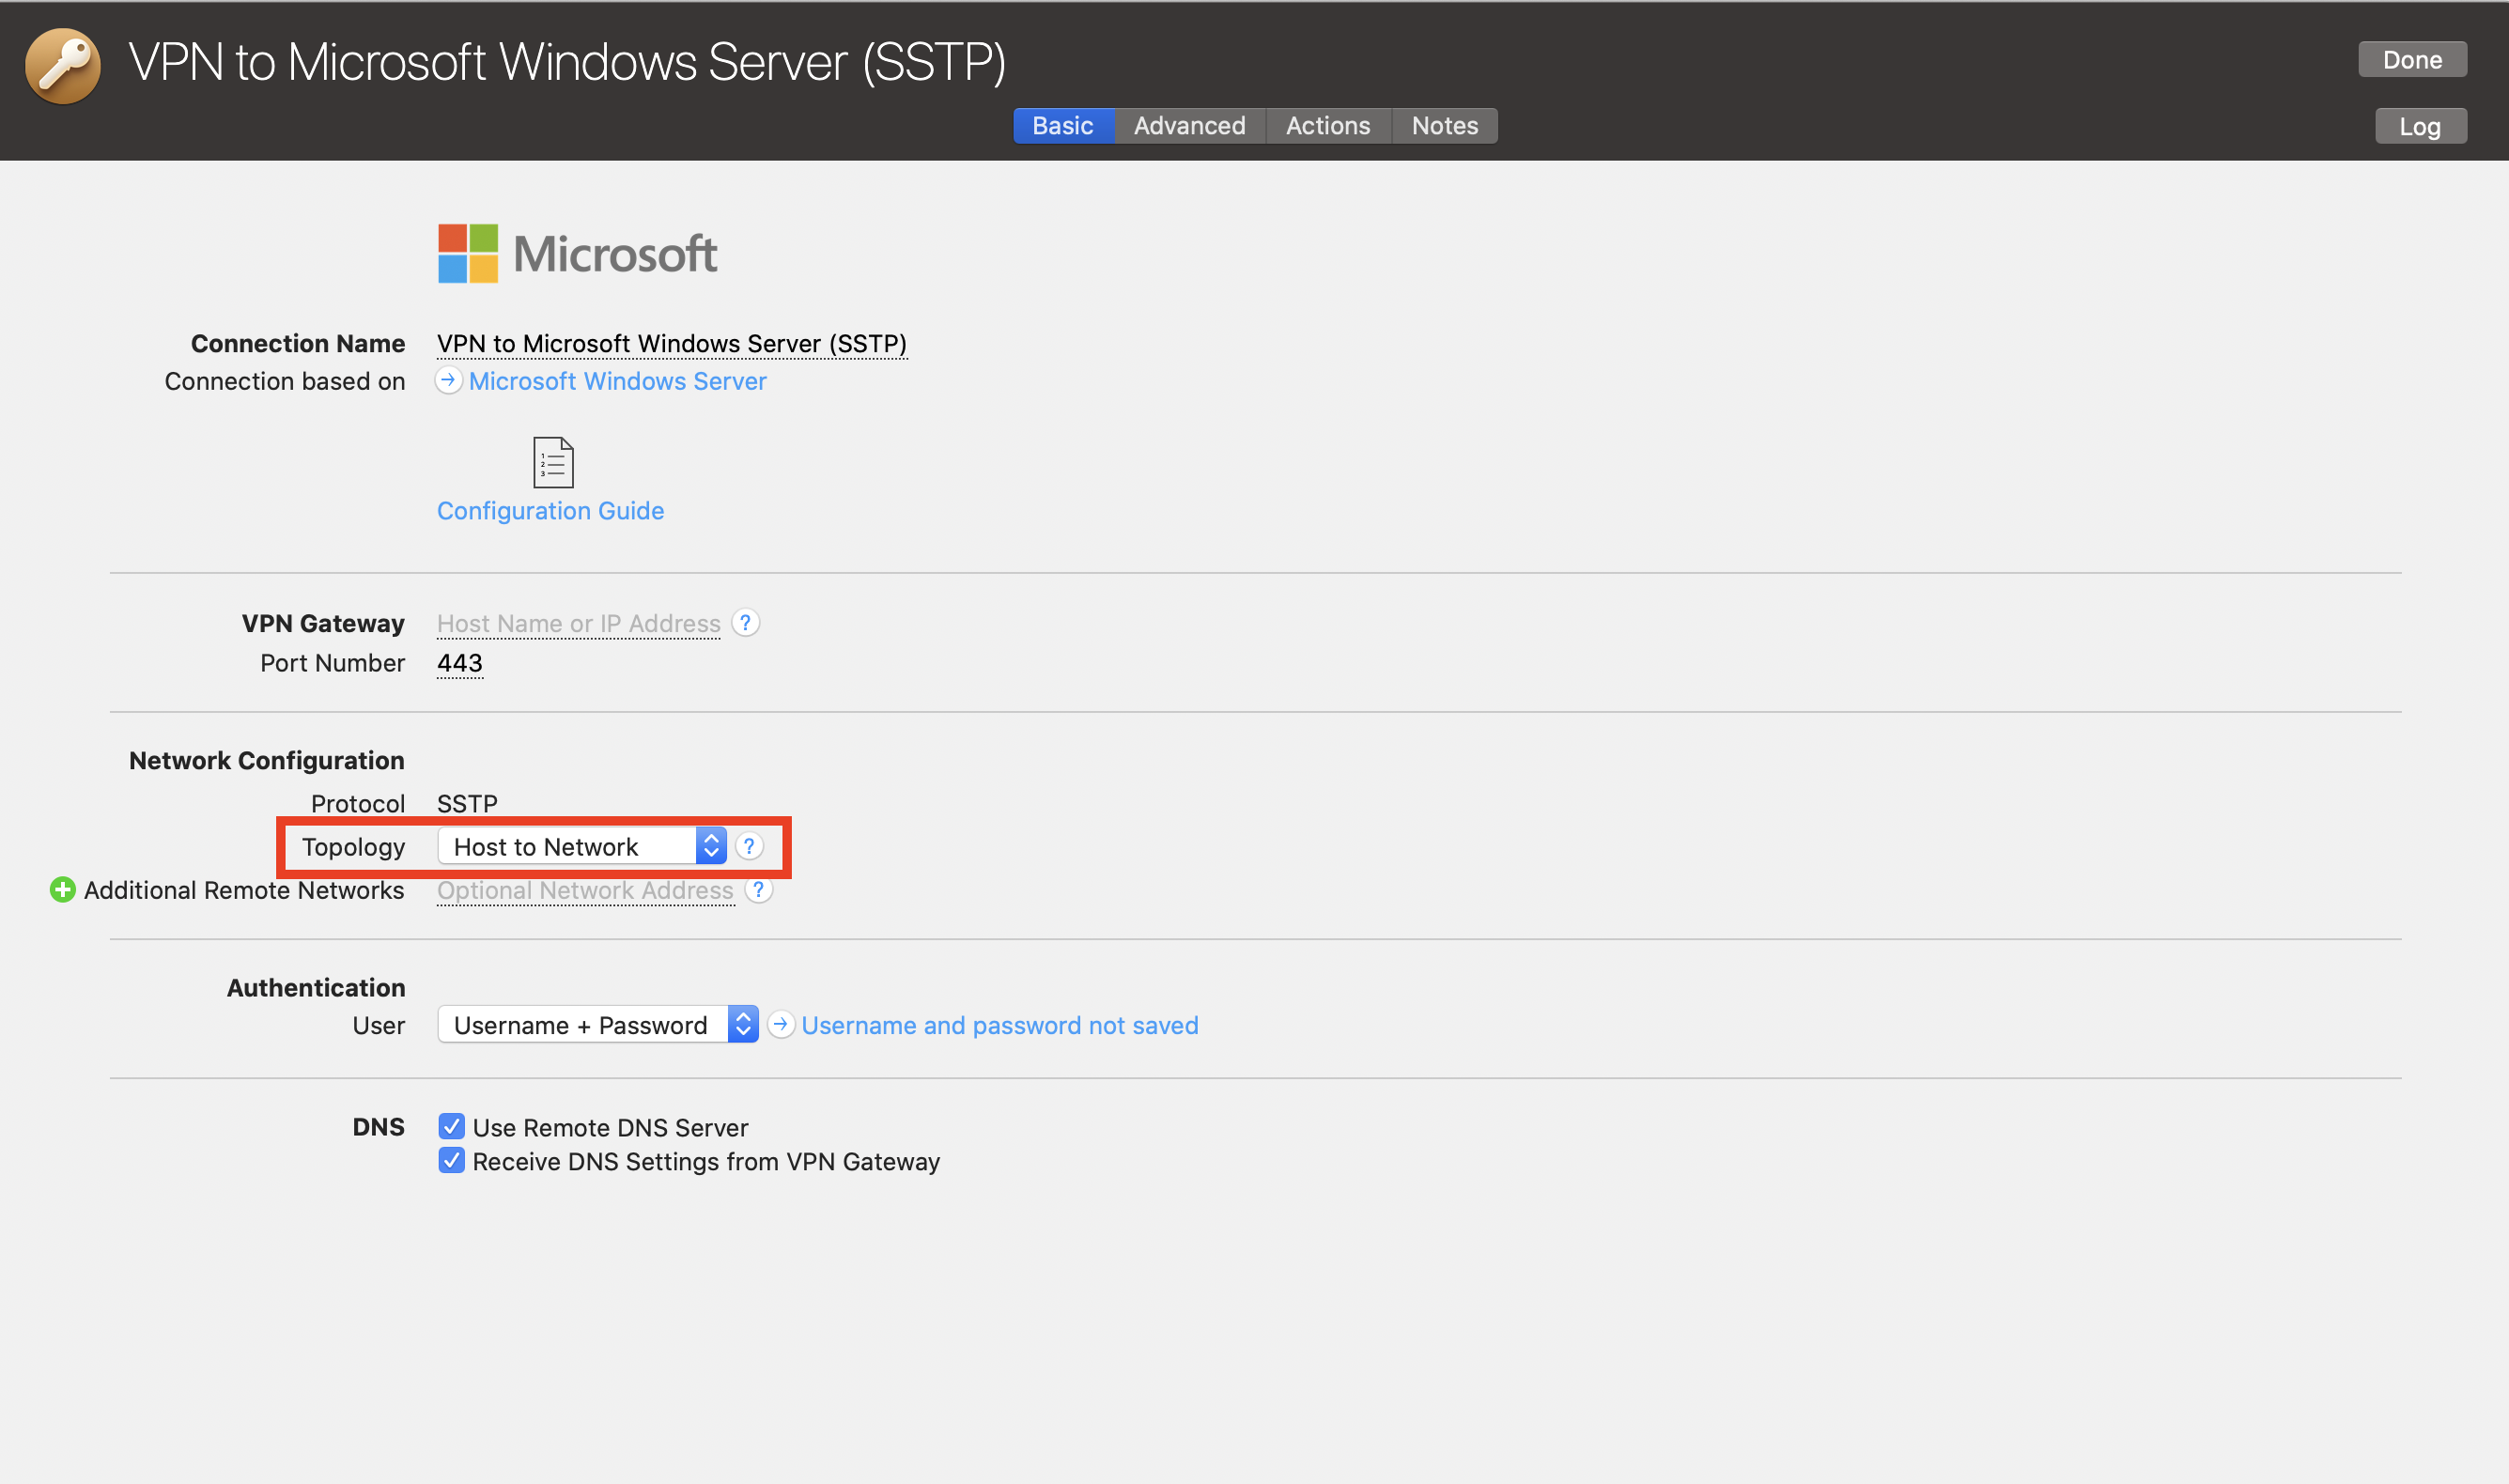 Note, this will give you the same behaviour as unchecking the "use default gateway on remote network" option on Windows.
In September 2021, root certificates for "Let's Encrypt" expired. Because Apple has not updated older Mac OS X versions (10.9 - 10.11) with current root certificates, problems occur on these systems when communicating with secure websites. If you have noticed that many websites are no longer loading correctly in Safari, this is most likely the reason.
Note: This is a general Mac OS X problem that affects many applications and websites.
Secure communication with my.vpntracker.com - the service behind VPN Tracker 365 - is also affected.
How to fix the problem:- Install the correct VPN Tracker version for your system:
- Mac OS X 10.9 or 10.10: VPN Tracker 365 20.0.1
- Mac OS X 10.11: Download the latest VPN Tracker version
- Add the current root certificates:
- Visit our troubleshooting page
- Download the profile there
- Open it from the Downloads folder
- Double-click the profile to open it in System Preferences and confirm the installation
- Restart VPN Tracker and log in again
If the problem persists:
- Open Safari
- Go to Preferences > Privacy > Manage Website Data
- With the search, you can find and remove all data for 'equinux' and 'vpntracker'
Older VPN Tracker versions may also have certificate problems. Because these versions are end-of-life, we can no longer offer support for them. The above steps should also apply to these versions. To get support and use VPN Tracker on the latest macOS versions, please purchase a modern VPN Tracker license.
On iOS, the Mail app includes several privacy features — one of them is called Mail Privacy Protection. When this feature is enabled, all images are loaded through Apple’s proxy servers to mask the recipient’s IP address.
In our testing, this can sometimes cause certain email images not to load correctly. In this case, you’ll see a message at the top of your Mail app saying "Unable to load remote content privately":
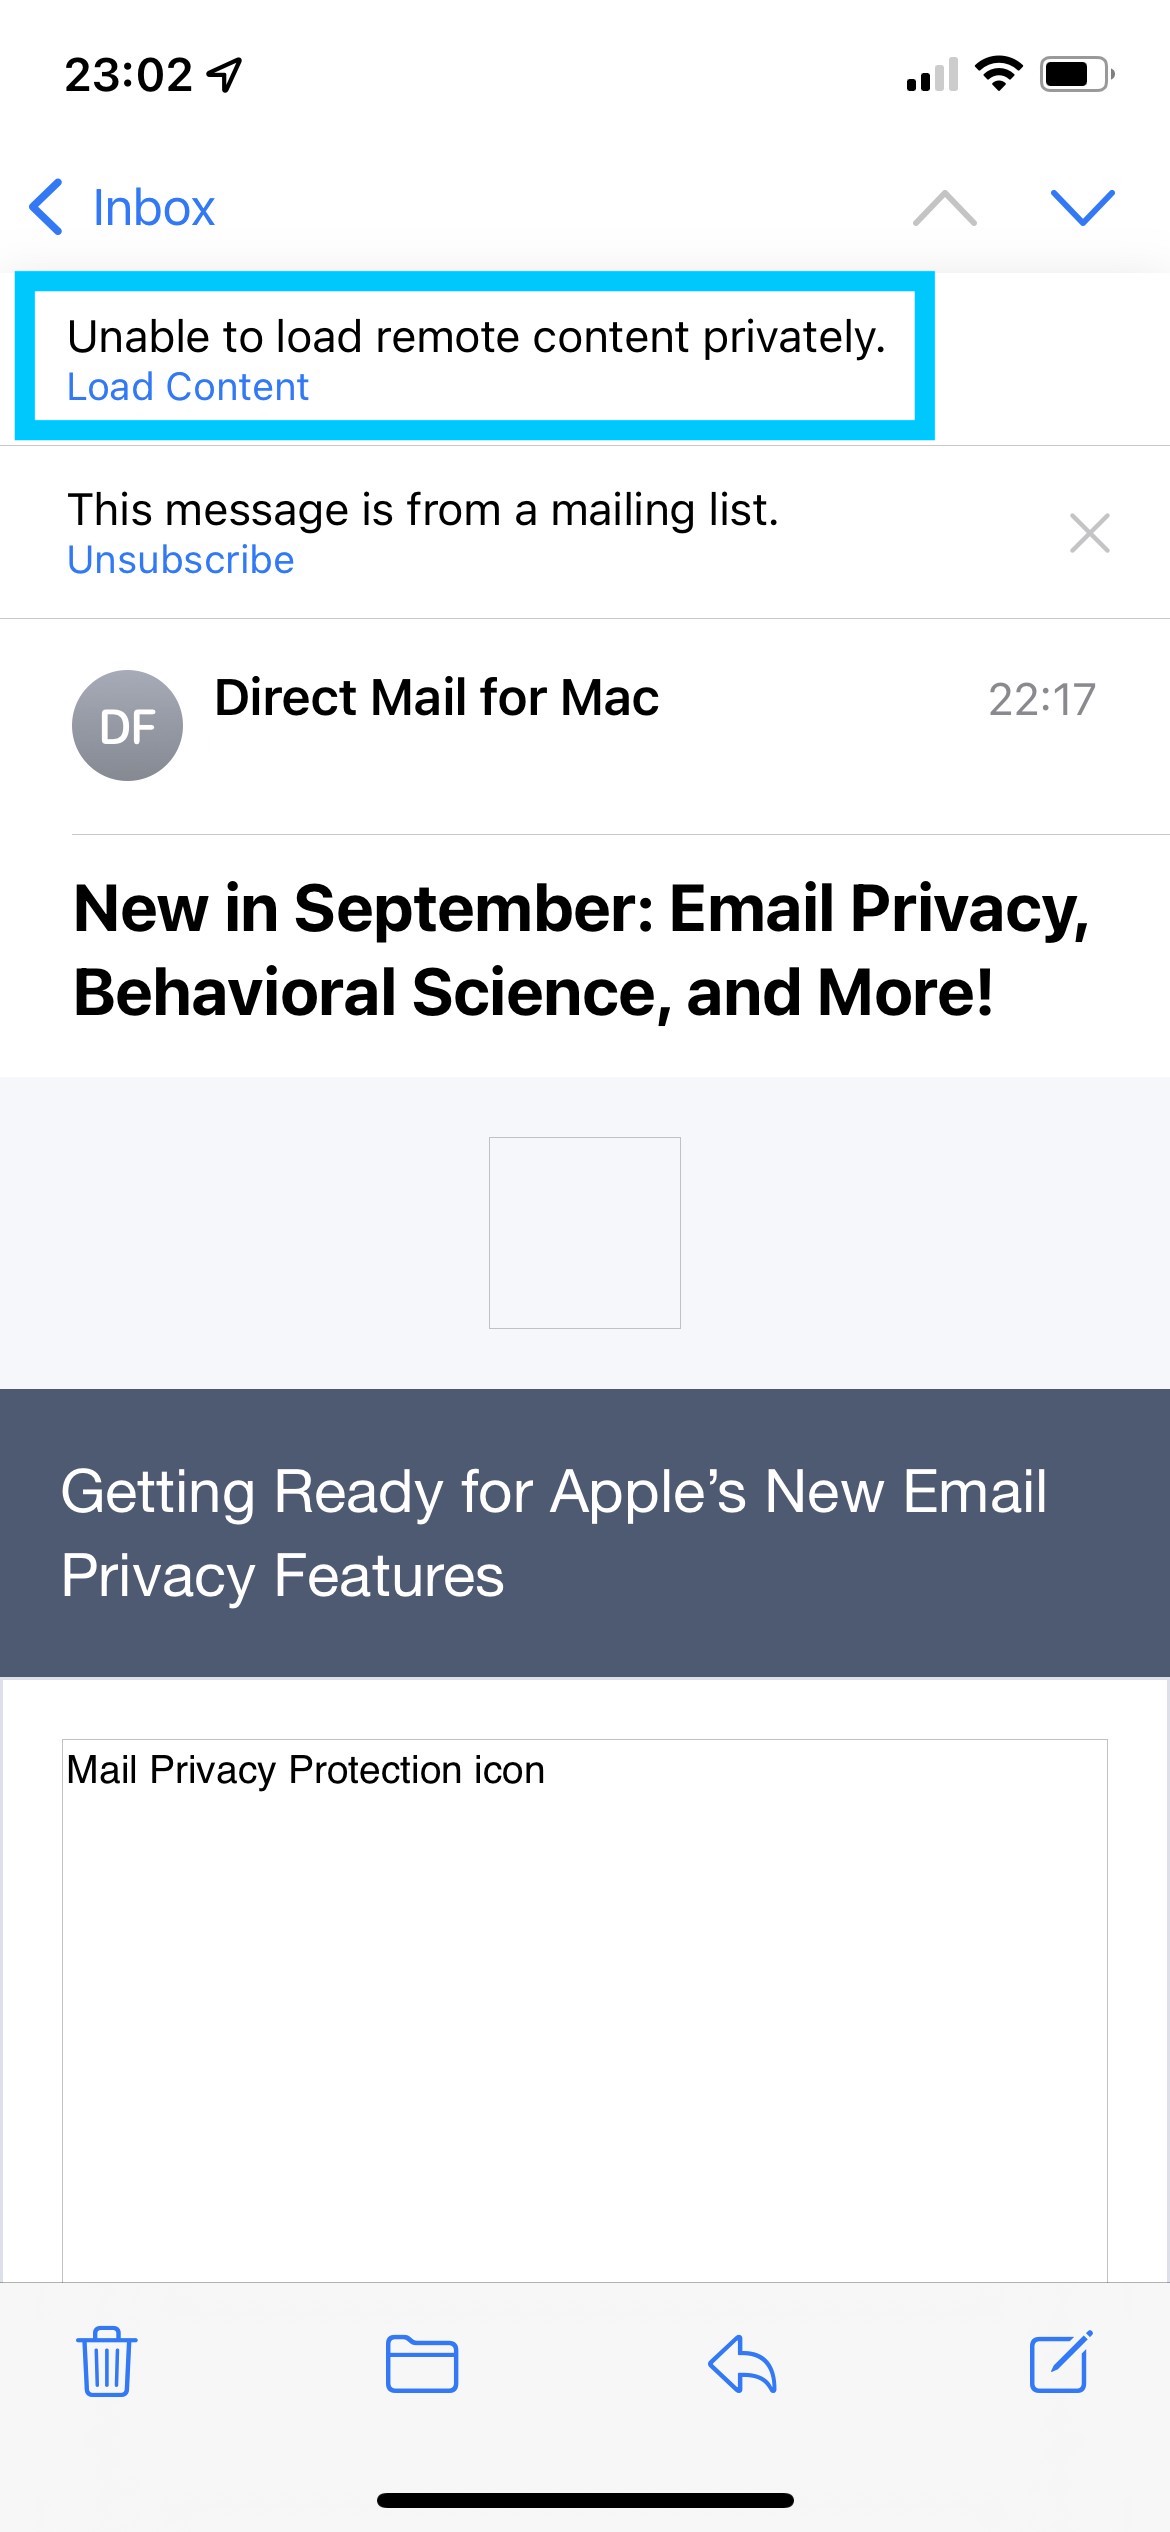
If you are unable to load images in your email, try deactivating this feature and reopening or resending your message.
To deactivate Mail Privacy Protection, open the Settings app on your iPhone and go to:
Mail > Privacy Protection > Protect Mail Activity
- Open VPN Tracker or log in to your my.vpntracker account on the web
- In the sidebar, go to Manage Team and scroll down to the Settings area
- Under Team Logos, you will see the option to upload a light and a dark version of your team's logo. Select your logo files and click Save to sync the changes for your team
 Want to unlock Corporate Branding and additional VIP featues? View all plan options here.
If you use Shimo and have found that it has stopped working, check out VPN Tracker.
Alternative to Shimo 5
VPN Tracker supports many of the same VPN protocols as Shimo, but is built to support new Macs and macOS releases, including macOS Sequoia and new macOS Tahoe.
Fix your VPN - download VPN Tracker freeInstall the free VPN Tracker 365 trial and set up your VPN connection. Once you're connected, choose a VPN Tracker plan for ongoing updates, compatibility with the latest macOS releases and professional support.
Need help setting up your VPN? How to move your Shimo VPN connection to VPN TrackerFirst, start VPN Tracker and create a new free user account to start your trial. Now we can set up your VPN connection:
- In VPN Tracker, go to File > New > Company Connection
- Choose your VPN gateway manufacturer and device model or
- Go to Protocols and select your VPN protocol
Now you have a connection, you'll need to enter the connection details. You can look up some connection details in your Mac's Keychain:
- Go to Applications > Utilities > Keychain Access
- Search for "Shimo" in the top right corner
- You'll find entries named "Shimo: vpn.example.com" – where "vpn.example.com" is your VPN's gateway address
- Double-click the entry to open its details
- To find your pre-shared key: Locate the Shimo entry with an "Account" label ending with "groupPassword"
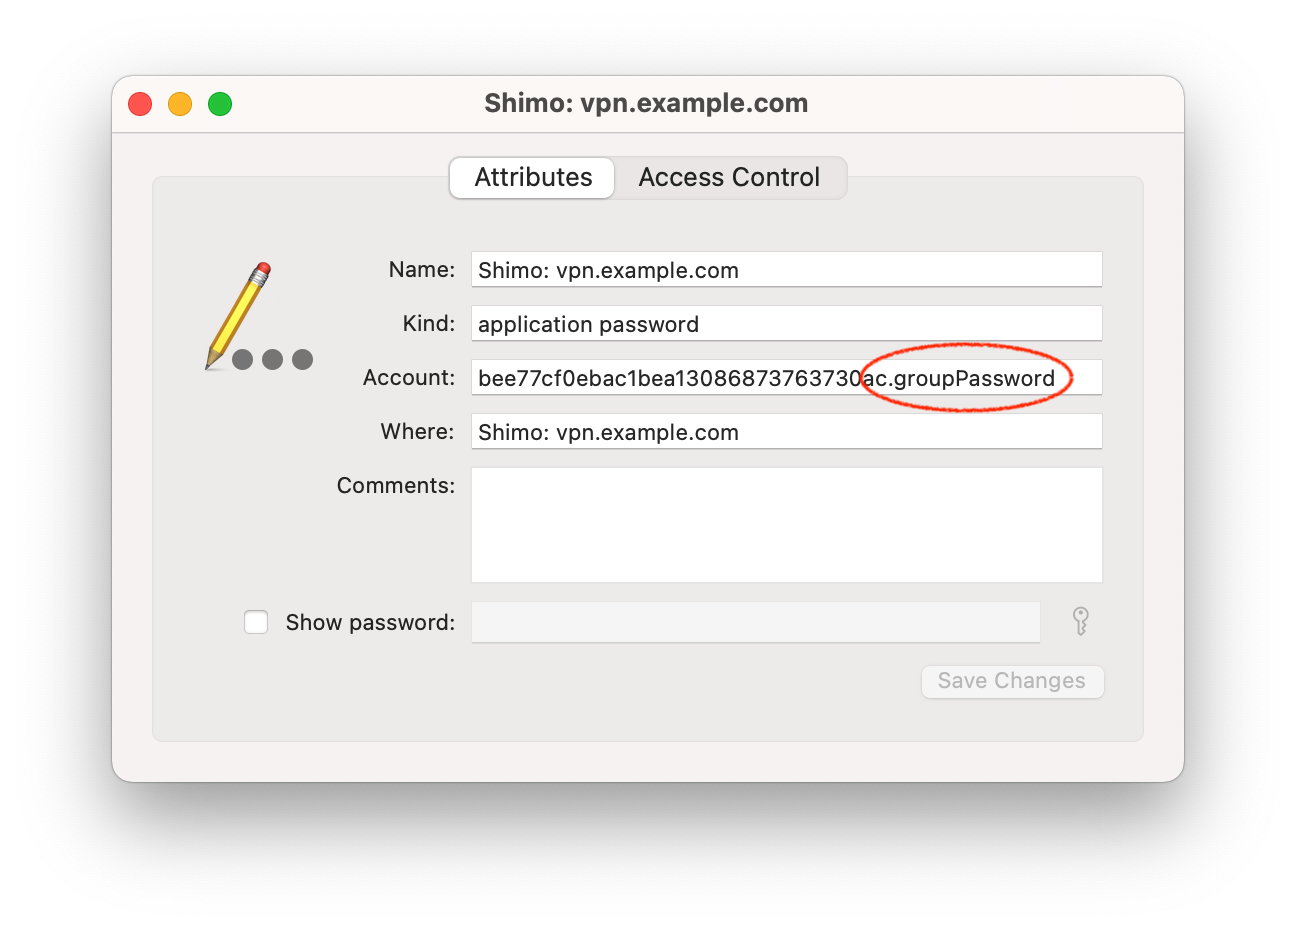
- To find your login password: Locate a Shimo Keychain entry with the account label ending in "userPassword"
- Click "Show password" and enter your macOS account password to reveal the password (note you may be prompted twice for it)
Choose "Configure" from the top right corner of your connection and put the details for your VPN connection in:
- For VPN gateway address, enter the gateway hostname from the Keychain entry names ("vpn.example.com" in our example)
- For the pre-shared key, enter the password from the Keychain labeled "groupPassword"
- Enter your username and password
- Start your connection and see if you're able to connect
Choose your authentication options
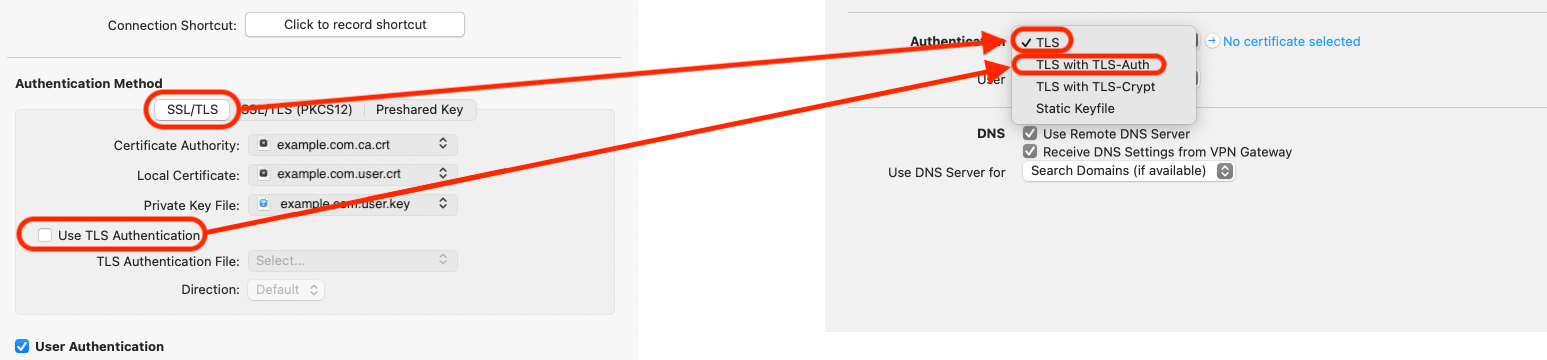
Information about certificates
Please keep in mind that, as well as the public part of the certificate, you also need to export the private key.
Important: Private keys cannot be imported into the Keychain alone and can only be imported together with the corresponding certificate. For this to occur, the certificate and private keys need to be in PKCS12 format. You can generate this format by entering the following command into the Terminal:
openssl pkcs12 -export -in (example.com).user.crt -inkey (example.com).user.key -out (example.com).user.p12
Following this, (example.com).user.p12 can be imported by a double click. When generating your keys, you will be asked to enter a password, as private keys in PKCS12 format are always encrypted. This can be a password of your choice but please be aware you will need to enter it again during the import.
Troubleshooting
What to do if you can't connect?
You may need additional details that your VPN admin might have given you when you first set up your VPN connection. Check your emails (tip: try searching for the VPN gateway address).
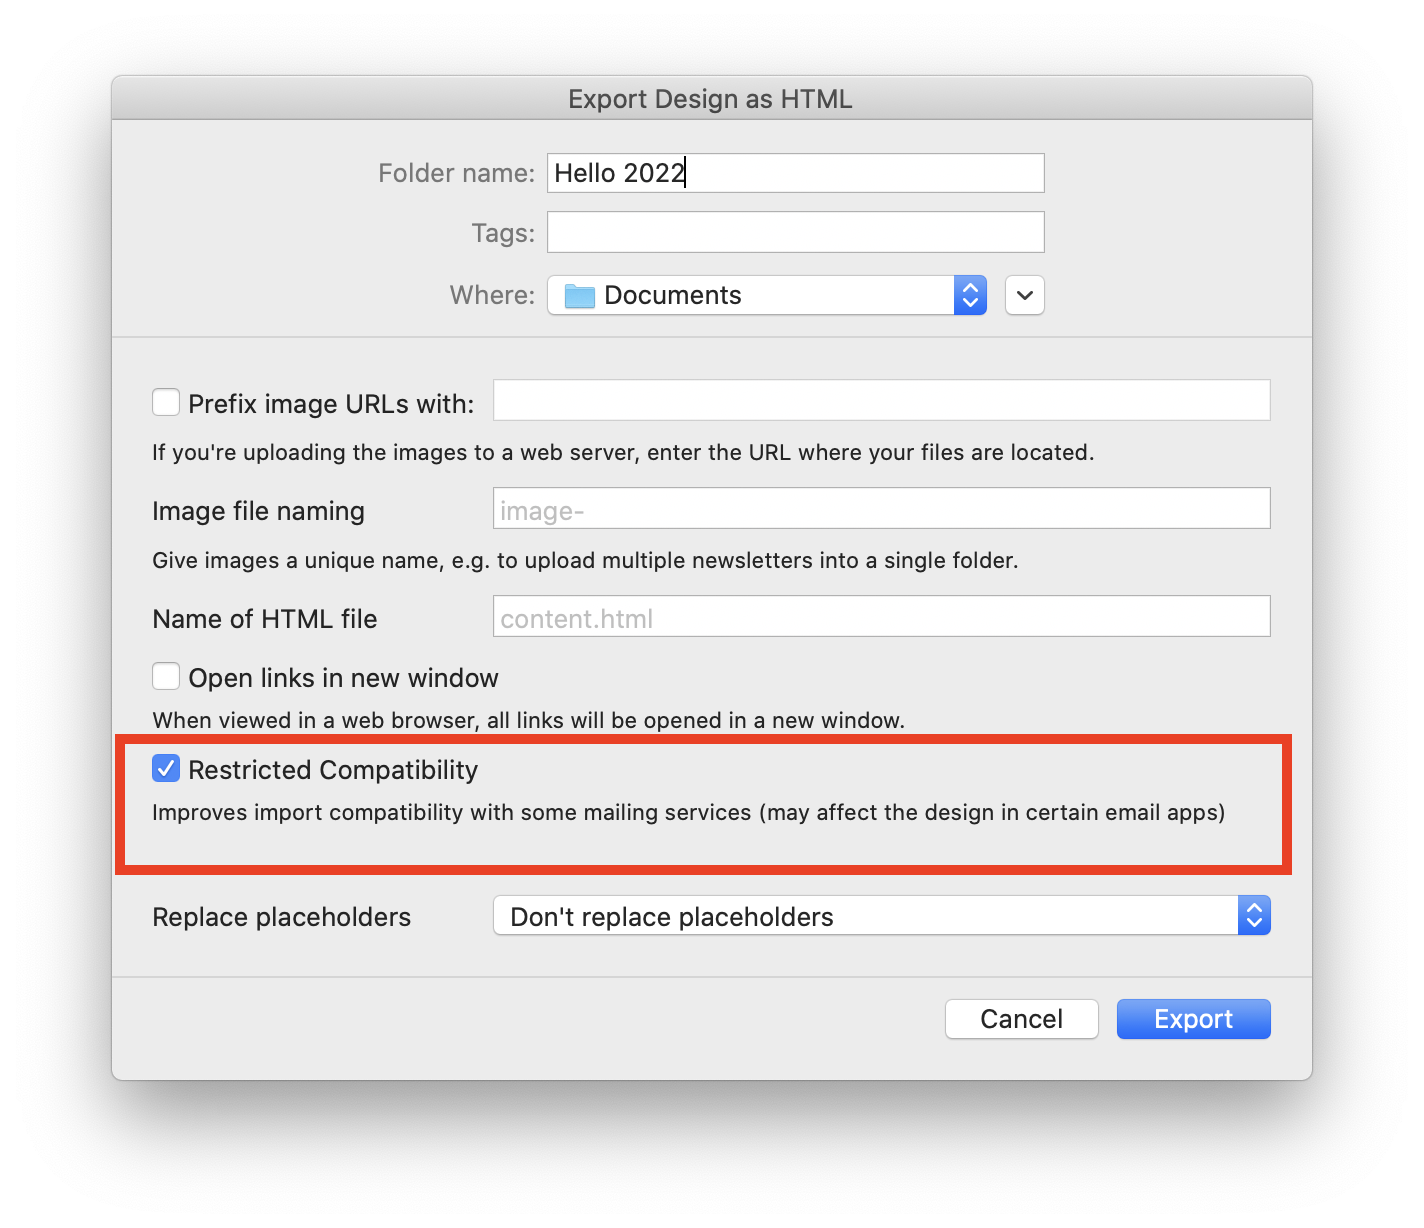 Mail Designer 365 uses the second HEAD tag to improve your design's compatibility with Yahoo Mail, however some email services think this is an error and are therefore unable to process the HTML.
For example, if you are using Constant Contact and experiencing compatibility issues, please try this option.
Mail Designer 365 uses the second HEAD tag to improve your design's compatibility with Yahoo Mail, however some email services think this is an error and are therefore unable to process the HTML.
For example, if you are using Constant Contact and experiencing compatibility issues, please try this option.
- PPTP VPN connections are not supported, as iOS and Android do not support PPTP passthrough
- For IPsec VPN connections, it's possible you may have to adjust your settings for NAT-T.
You can create and edit connections right inside my.vpntracker.com using any browser. Thanks to advanced engineering, this works with the same data security you know from VPN Tracker on the Mac.
It works like this
- Choose your device brand and model
- Enter your connection details
To save your new connection:
- You enter your equinux ID password
- Your encrypted secure master key is fetched from my.vpntracker
Now a program is run locally on your device through your browser that handles encryption:
- The local encryption program decrypts the master key on your device
- Then it uses your master key to encrypt the new connection data
- The fully encrypted connection is then uploaded to your Personal Safe or TeamCloud on my.vpntracker
- Your Mac, iPhone or iPad can then fetch the encrypted connection, ready for you to connect
So there you have it. Integrated connection editing on my.vpntracker with the full security and end-to-end encryption you know from VPN Tracker for Mac.
If a new version is available, you will see an update notification right away. Click it to install the update.
If you don't see an update notification when you start the app, go to "VPN Tracker 365" > "Check for updates..." in the menu.
Tip: If you're unable to update, you can also download VPN Tracker 365 from the Version History page.
You can access files on your network file storage on your iPhone or iPad using the Files app. Here's how it works:
- Open the Files app
- Tap the ··· option button and choose "Connect to Server" (or hit ⌘+k on your iPad keyboard
- Enter your file server's IP address or hostname
- Enter your username and password when prompted
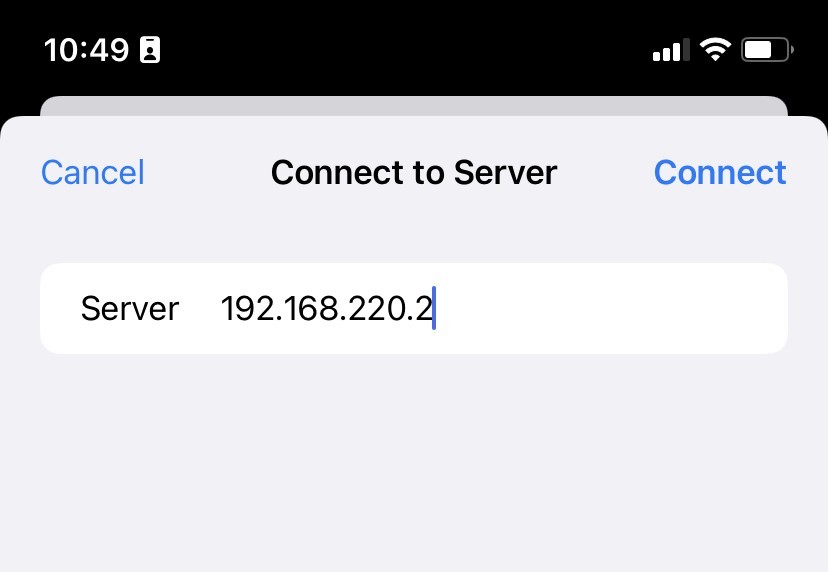
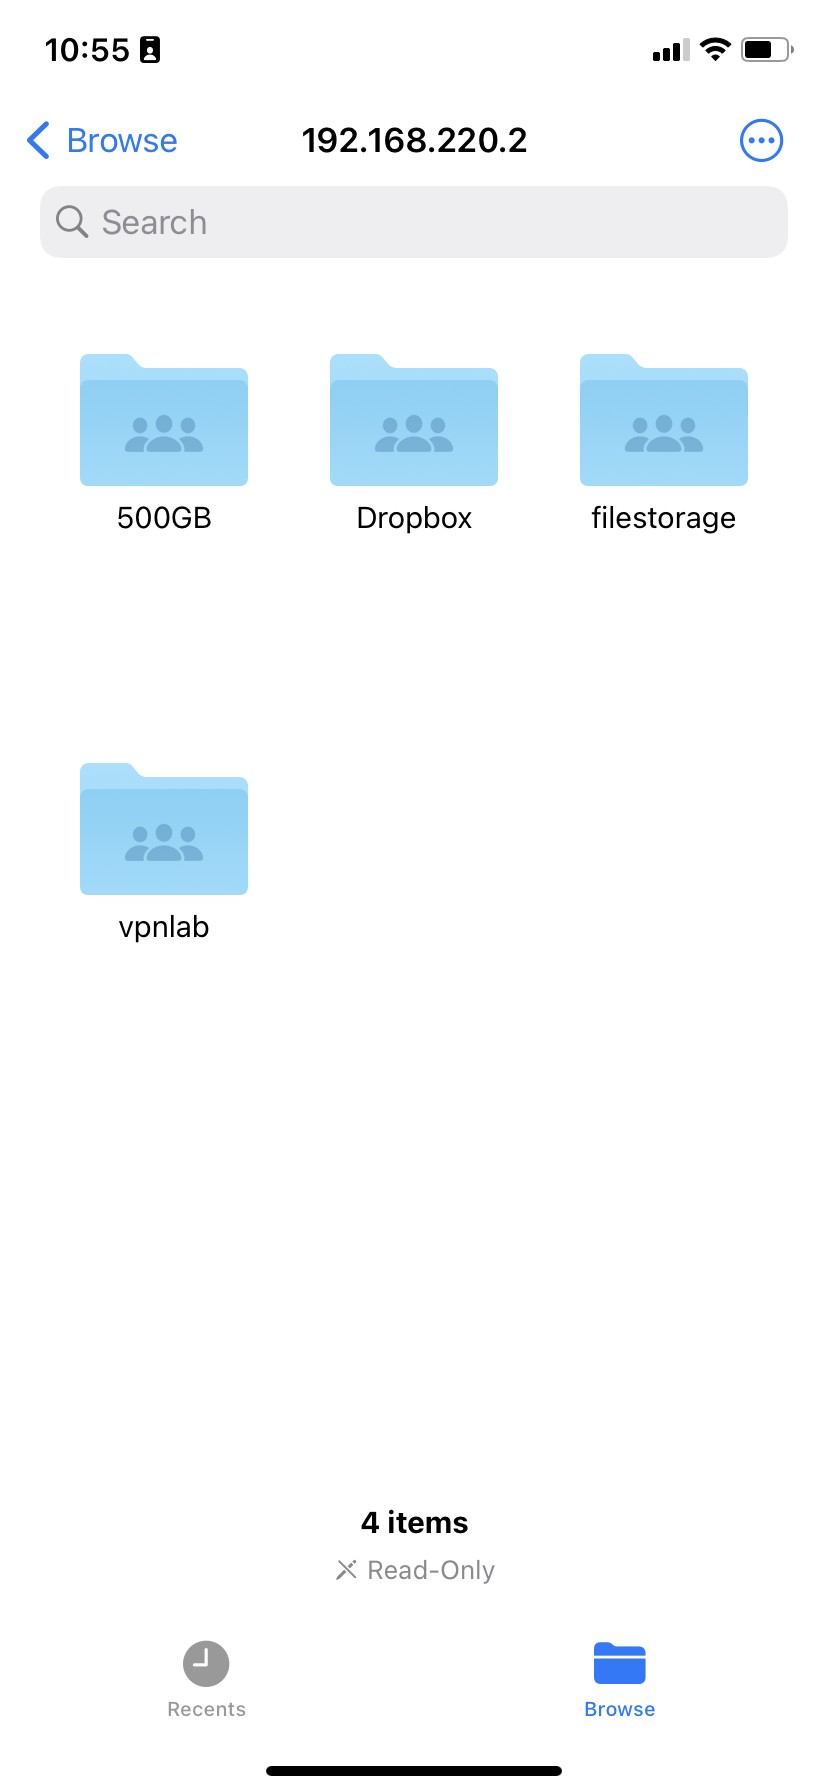
Can't see your file shares?
If you just see an empty directory instead of shares, you may need to add the share you're trying to access to the path.
For example: If you are trying to access the file share work on the server 192.168.50.2, enter the server address as smb://192.168.50.2/work
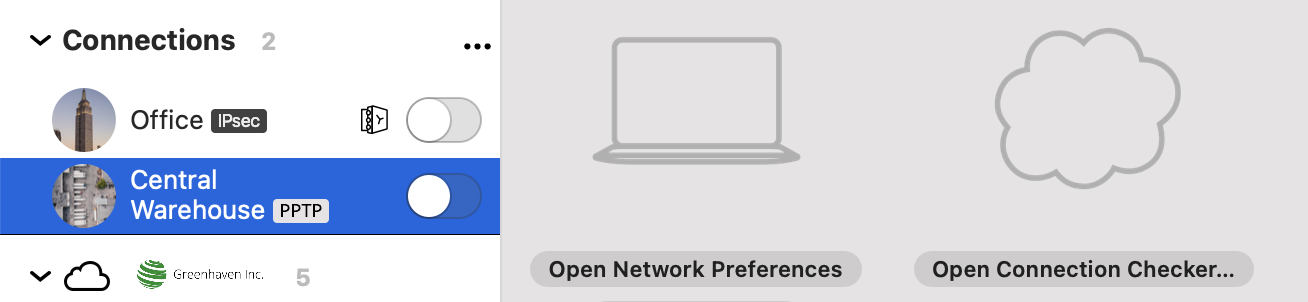
Accessing connections on iOS
When you sign in to VPN Tracker for iOS with your equinux ID and password, your Personal Safe and TeamCloud connections will show up in the app. Use the filter in the top left corner of the app to only see TeamCloud connections from your team or personal connections from Personal Safe.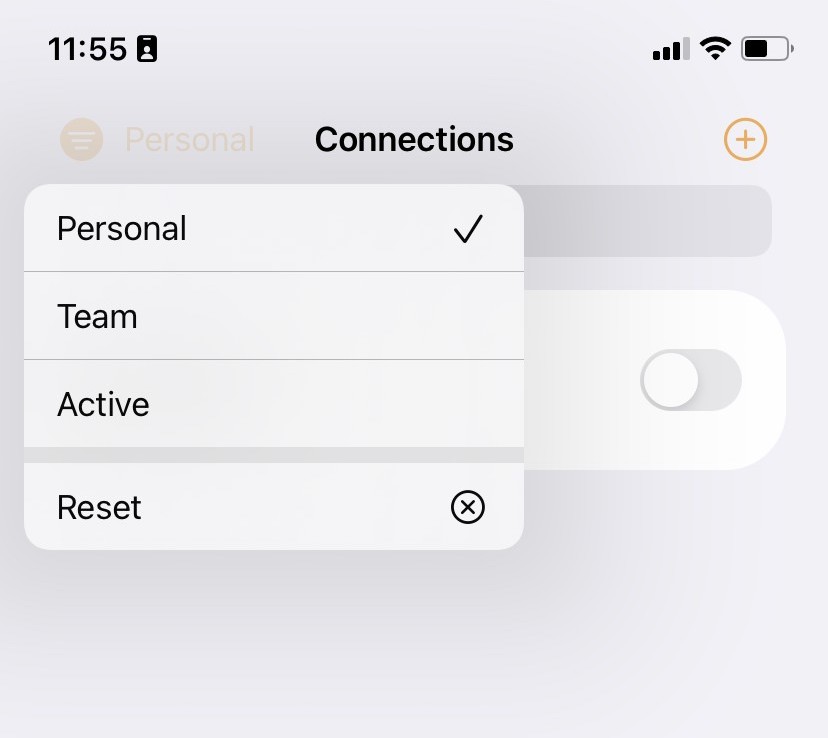 Important: If you have connections which you have only saved locally on your Mac, these will not be available on your other devices. To get those connections onto your iPhone or iPad, right click the connection and choose "Add to Personal Safe" or "Share with TeamCloud".
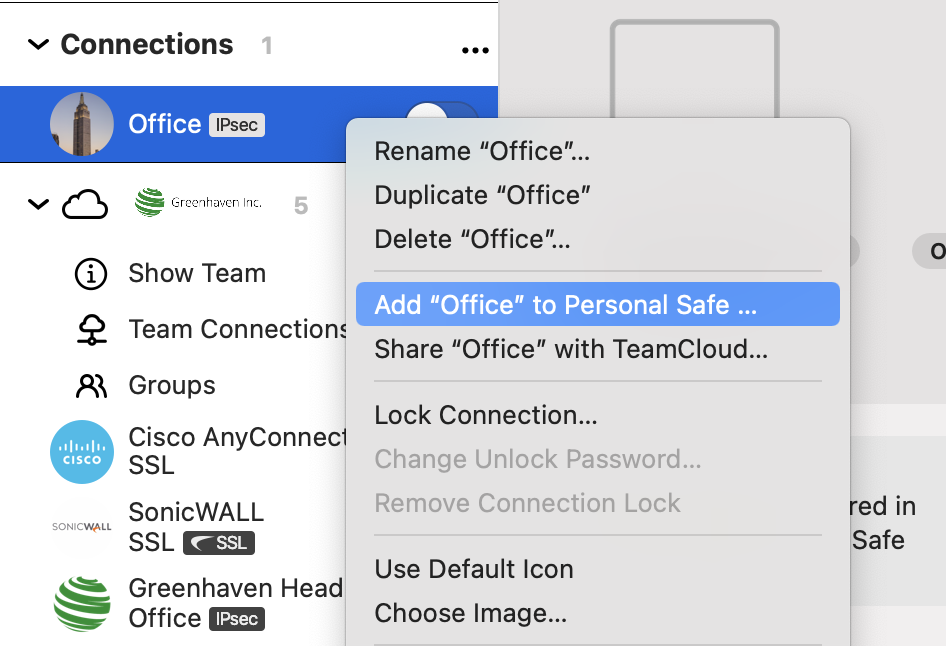 Those connections will show up on your iPhone or iPad.
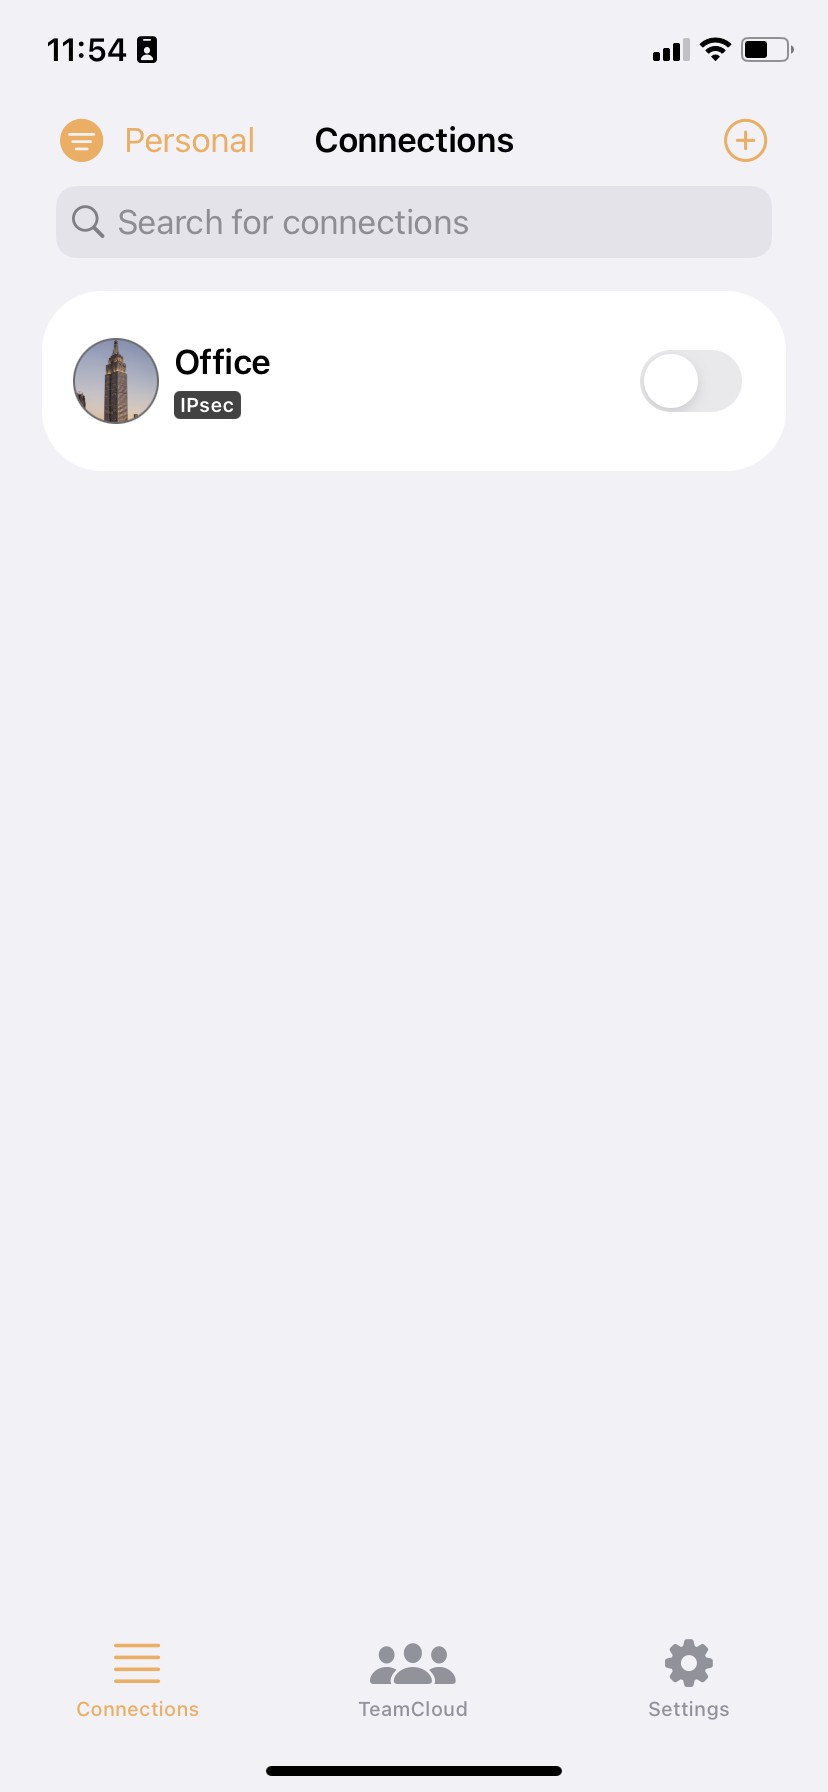
You can access file servers on your iPhone and iPad using VPN Tracker for iOS and the Files app:
- Connect to your VPN
- Open the Files app
- Tap the ··· icon in the top right corner
- Choose 'Connect to Server'
- Enter your file server hostname or IP address (e.g.
fileserver.internal.example.com) - Sign in with your company login credentials when prompted
You should now see your file server volumes as you do on macOS.
Troubleshooting tips
If you experience trouble listing your files, there are a few things to try:
- Enter the full volume path, not just the server hostname: e.g. if you are connecting to the share called
Marketingon your fileserver, enterfiles.internal.example.com/Marketing - Ask the person who manages the file server to enable SMBv2 as well as SMBv3 (iOS uses some v2 features to set up the connection)
- Try a 3rd party file server app from the App Store. Some of them offer better compatibility with certain file server configurations
PPTP VPN is currently not supported by VPN Tracker for iPhone / iPad.
Workarounds
Many VPN gateways support more than one VPN standard. Check your VPN gateway or ask your network administrator and see if a compatible protocol can be enabled instead.
Tip: Hide Unsupported Protocols
Inside VPN Tracker, go to Settings → Connection Settings to hide unsupported connections from your list.
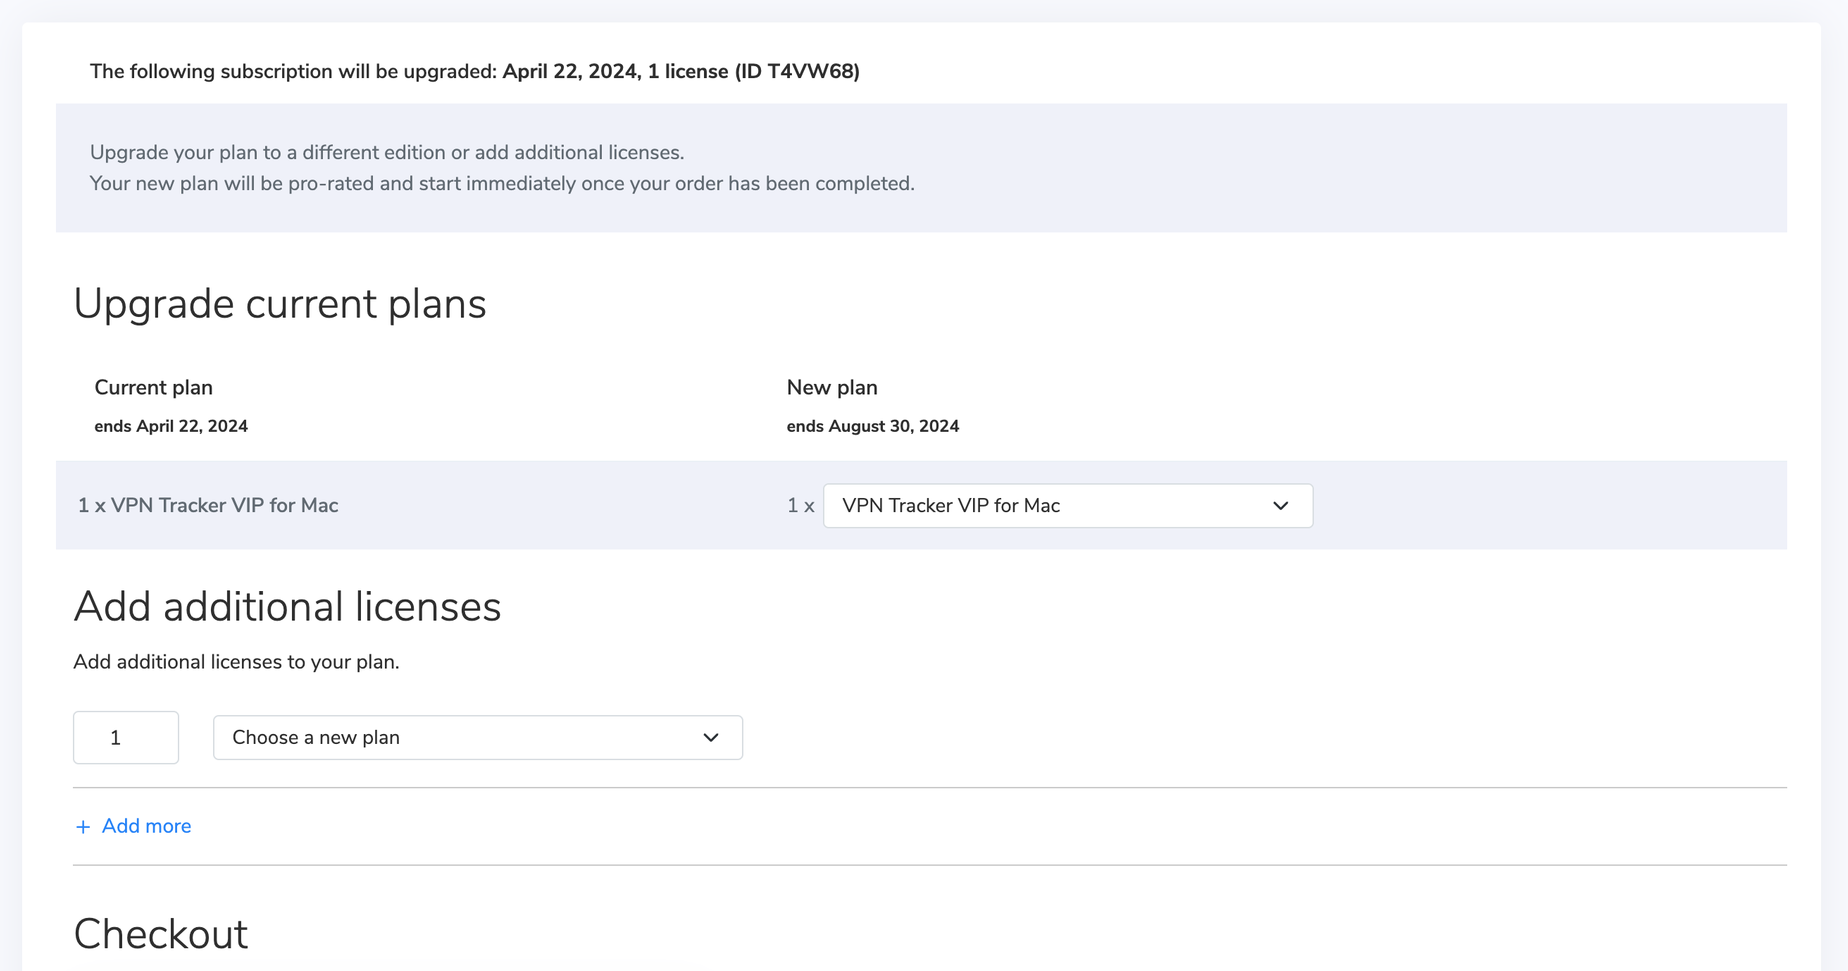 The remaining value of your current plan will be credited toward your new plan.
Alternatively, you can choose a new VPN Tracker plan that contains iOS support.
Availability of pre-release testing
Generally, pre-release testing of Beta and Nightly builds is available to all VPN Tracker users. However, if you are considering updating to a pre-release version, please carefully consider the following information:Important information for pre-release testers
Nightly and Beta versions of VPN Tracker are still in the development stages. The aim of pre-release testing is to identify any possible connection issues experienced by our testers and get these fixed for the final public release. This means we can't guarantee perfect stability and compatibility for existing connections. For this reason, we do not recommend an update to a pre-release version for production systems or anyone who requires critical access to their connection. In this case, we advise you stay on the main branch.Getting back to the main branch:
If you've updated to a pre-release version and are experiencing issues with your connection, you can easily switch back to the last stable release. I am having issues with a pre-release version. What can I do?
Having issues? You can easily get back to the last stable release by visiting our version history overview and downloading the last full VPN Tracker version.
If you decide you want to deactivate pre-release testing for the future, you can do this in the app preferences.
Please note that pre-release testing is generally not advised for production systems or users who require critical access to their VPN.
Need further support?
If you need help with a certain connection issue, feel free to contact the support team. Remember to also send a TSR (technical support report.)
I am having issues with a pre-release version. What can I do?
Having issues? You can easily get back to the last stable release by visiting our version history overview and downloading the last full VPN Tracker version.
If you decide you want to deactivate pre-release testing for the future, you can do this in the app preferences.
Please note that pre-release testing is generally not advised for production systems or users who require critical access to their VPN.
Need further support?
If you need help with a certain connection issue, feel free to contact the support team. Remember to also send a TSR (technical support report.)
- Open VPN Tracker and add a new WireGuard® connection
- Upload your WireGuard® configuration file or scan your QR code
- Save your connection to your account using secure end-to-end encryption
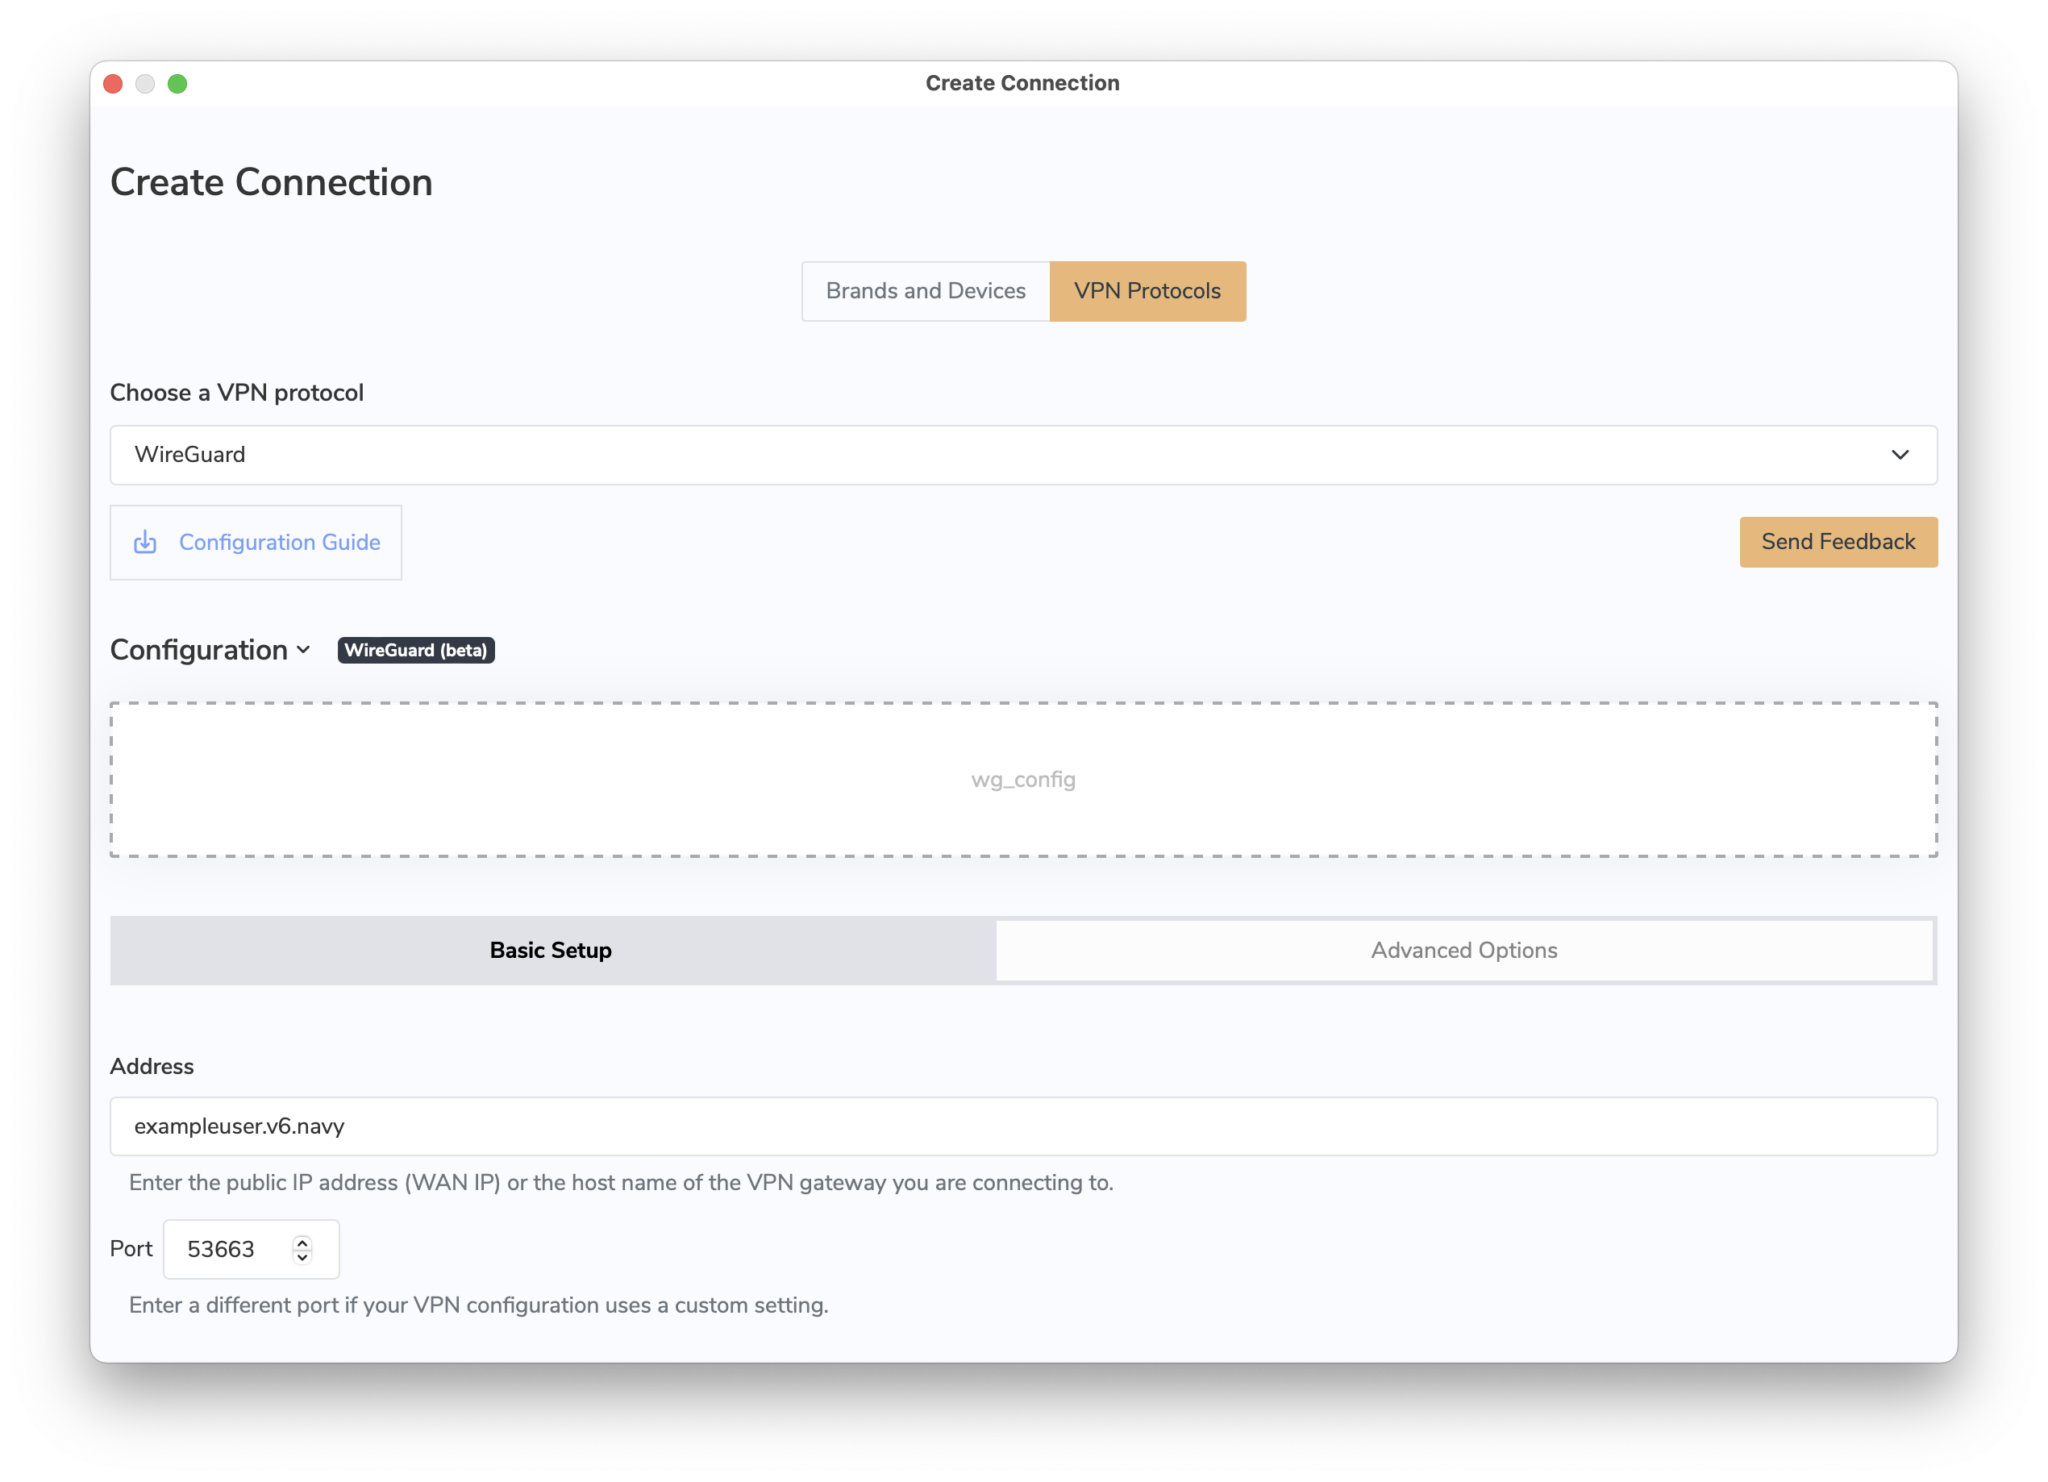 You can now connect to your WireGuard® VPN server on Mac, iPhone or iPad.
→ More information on connecting to WireGuard® VPN in VPN Tracker
WireGuard® is a registered trademark of Jason A. Donenfeld.
You can now connect to your WireGuard® VPN server on Mac, iPhone or iPad.
→ More information on connecting to WireGuard® VPN in VPN Tracker
WireGuard® is a registered trademark of Jason A. Donenfeld.
- Log in to your my.vpntracker.com account
- Select your team in the top left corner
- On the left side choose "Team Cloud"
- Scroll down to the section "Rename your team"
- Enter your new Team Name and press "Rename"
- Log in to your my.vpntracker.com account
- Select your team in the top left corner
- On the left side choose "Team Cloud"
- In the Invite section at the top, enter your new Team Member's name and company email address, then click "Send invitation".
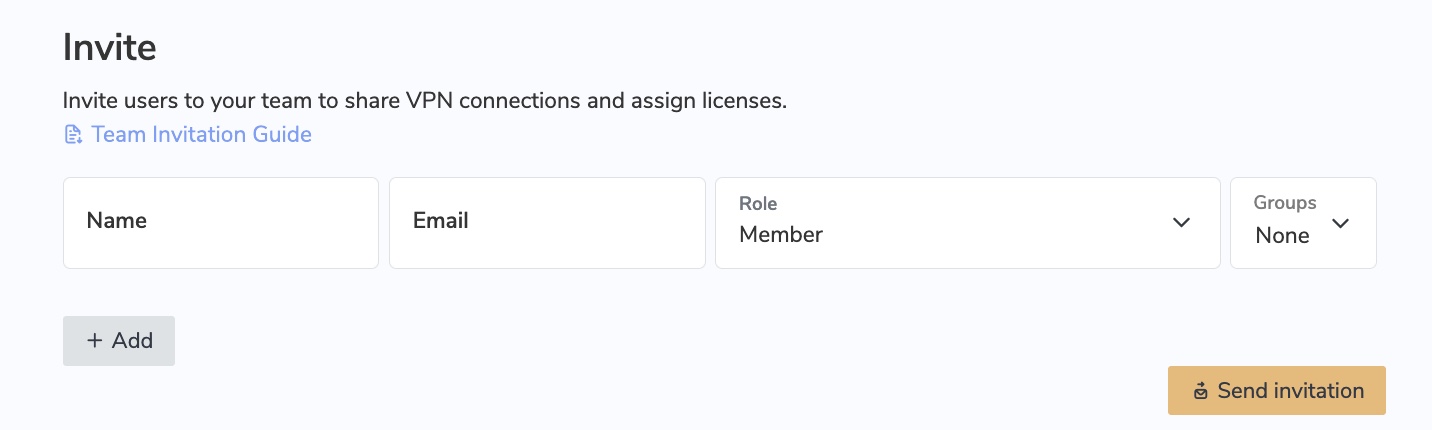
- The invited team member will then receive an automatic email invitation with a personalised link to click on and join your team.
- Tip: Each VPN Tracker 365 user needs their own, personal equinux ID. After the user receives a team invitation from you and clicks the invite link, they can either create a new equinux ID or log in using their existing account.
- In case the user does not receive the invitation email, you can access the invitation link by clicking on "Details" next to the user name
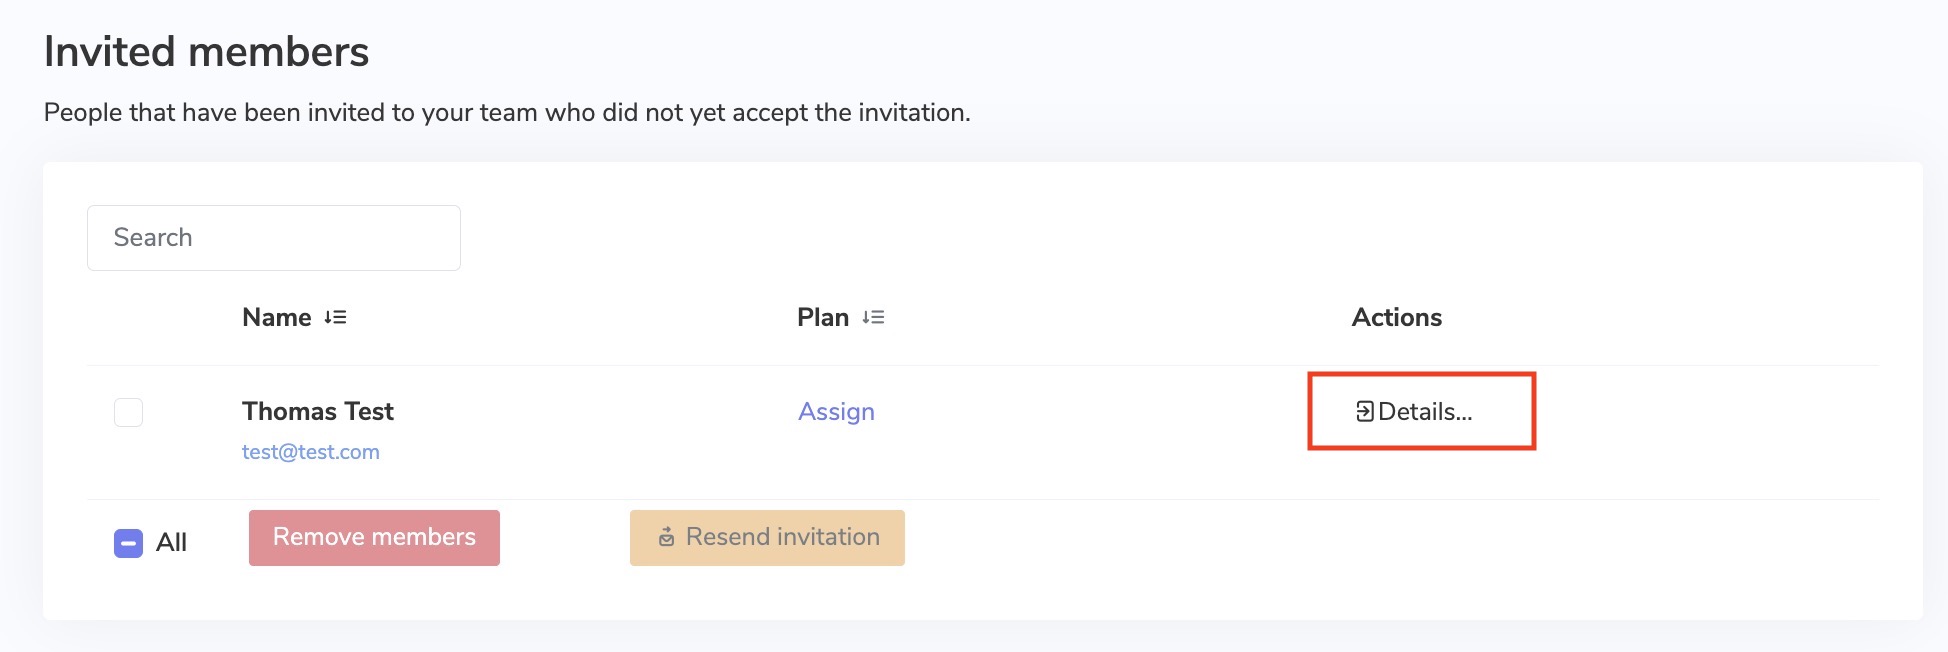
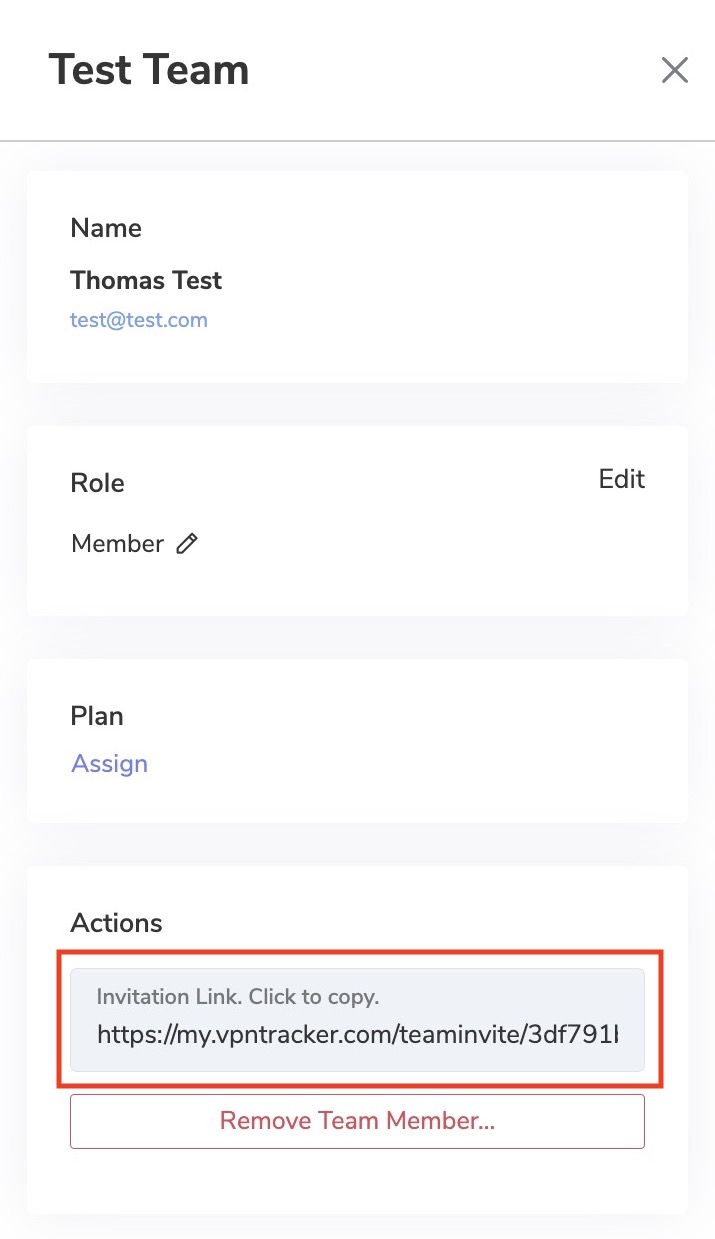
- Once a team member has accepted your email invitation, you will be notified via email
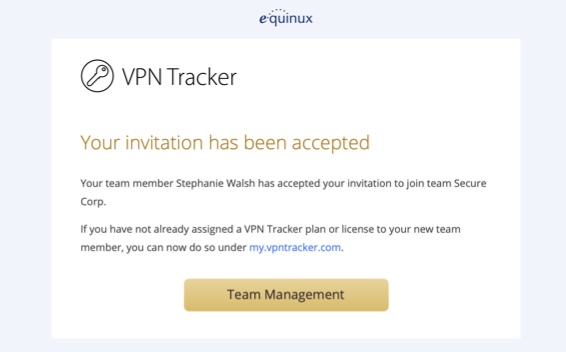
If you have already purchased a VPN Tracker license but would like to change to a different product, you have two options:
1. Purchase an upgrade
In most cases you can upgrade your existing plan. The VPN Tracker store will automatically pro-rate your purchase based on the remaining value of your current product.
Go to your my.vpntracker upgrade page to see your upgrade options.
2. Convert your product to store credit If you purchased with a different account or want to swap to a different product line altogether, you can convert your existing license to store credit and put that towards your new purchase:
- Visit our store promocode transfer page and follow the steps to receive your promocode
- Choose your new product on the my.vpntracker store
- Enter your promocode during checkout
Every Mail Designer plan offers a certain number of AI credits. These credits are automatically renewed every month as part of your subscription. During the beta, we have assigned all plans a number of credits for testing purposes, the number of credits in each plan may change in the future.
Every time you use TextScout AI features in Mail Designer, this is automatically reflected in your available AI credits.
How many credits are used?
How many credits a TextScout AI query will use depends on the complexity of the query itself and the number of results that TextScout was able to return. As the AI models are still being improved during the beta, the number of credits being consumed may vary.
Teams
If you are part of a Mail Designer 365 team with multiple plans, your credits are pooled so you can all use each others' credits.
I've run out of credits – what now?
Upgrade to Mail Designer 365 Business Premium to add additional credits to your account.
Already on Business Premium? Please reach out to our support team, we'd like to hear more about your experience using TextScout AI Beta.
When are credits refreshed?
AI Credits are automatically reset on the first of the month. Unused credits from the previous month do not roll over.
How to access TextScout AI
TextScout AI is available to try out in all Mail Designer 365 plans in the latest Mail Designer 365 version. The number of AI credits available to you for generating subject lines varies depending on your plan tier. Check your status using the credits indicator within the TextScout AI window.What does this mean?
When DoH is enabled, it bypasses your DNS server and instead, domains you enter into your browser are sent via a DoH-compatible DNS server using an encrypted HTTPS connection.This is intended as a security measure to prevent others (e.g. your ISP) from seeing the websites you are trying to access. However, if you're using a DNS server provided by your VPN gateway, it allows DNS queries to run outside the VPN tunnel. Moreover, if the VPN specifies a DNS server that resolves internal host names, these are either not resolved at all or resolved incorrectly when DoH is enabled.
How to disable DNS over HTTPS in Firefox
To ensure all your DNS queries run via your VPN's DNS, you will need to disable DoH in Firefox. To do so, open your Firefox browser, go to Firefox > Preferences > Network Settings and deselect the checkbox by "Enable DNS over HTTPS":
Click OK to save your changes.
Due to a bug in macOS 13.4 you may encounter a System Extension issue when starting a VPN connection. Please update to VPN Tracker 23.1.4 which mitigates this issue.
Download latest VPN Tracker version
Note that in certain cases, you may still experience a System Extension issue when connecting to multiple VPNs. Restarting VPN Tracker will temporarily resolve the issue.
We are working on an additional update to work around this bug in macOS 13.4.

equinux 2FA supports all major authentication and password apps, including:
- Google Authenticator
- Microsoft Authenticator
- Twilio Authy
- 1Password
- FreeOTP
- Bitwarden
- Log out of your account in the VPN Tracker App
- Follow this link and press: "Remove all devices"
- Get the latest version of the OCLP:
OpenCore Legacy Patcher Releases
- Start and click Settings:
- Check "Disable AMFI":
- Then select "Post-Install Root Patch" in the main menu and restart the device.
Mail Designer 365 offers multiple options for sending your email designs to your audience.
Testmail
Mail Designer 365's Testmail service is designed for sending internal test emails to yourself or to your team – i.e. to preview how your finished email design will look in the inbox.
Test emails will be sent from the Mail Designer 365 Testmail service via our secure servers.
Sending external emails
You also have the option to send your email design to external email addresses (i.e. contacts who are not part of your Mail Designer 365 team) via Delivery Hub. These emails will be sent from your own email address.
Choose between an email campaign: Send to a list of contacts or an individual mailing: Send to individual email contacts.
Check out this guide for more information on sending email campaigns via Delivery Hub.
The current, streamlined VPN Tracker lineup offers a simpler set of options. If you previously purchased a different edition, here's the right edition to order going forward:
| Old edition | Current edition | |
|---|---|---|
| VPN Tracker for Mac / VPN Tracker 365 | → VPN Tracker Personal | |
| VPN Tracker Pro for Mac | → VPN Tracker Pro for Mac & iOS | |
| VPN Tracker VIP for Mac | → VPN Tracker VIP for Mac & iOS | |
| VPN Tracker Team Member | → VPN Tracker Personal | |
| VPN Tracker Team Member Plus | → VPN Tracker Executive for Mac & iOS | |
| VPN Tracker Consultant | → VPN Tracker Consultant for Mac & iOS | |
| VPN Tracker + | → VPN Tracker Executive for Mac & iOS | |
| VPN Tracker Pro+ | → VPN Tracker Pro for Mac & iOS | |
| VPN Tracker VIP+ | → VPN Tracker VIP for Mac & iOS | |
| VPN Tracker Consultant+ | → VPN Tracker Consultant for Mac & iOS |
You can purchase upgrades for your existing licenses on your my.vpntracker upgrade page, or order new plans through the VPN Tracker Online Store
We have put together a list of the best known providers including a link to the corresponding DNS setup guide.
If you cannot find your provider in the list please do not hesitate to contact our support team for assistance.
The Anatomy of an Email
Before diving into DKIM, let's briefly understand how emails work. When you send an email, it's like sending a digital letter. It travels through various servers and networks before reaching its intended recipient. Each server it passes through can potentially be a point of vulnerability where malicious actors might tamper with the email's content or disguise themselves as legitimate senders.
Enter DKIM: The Email's Digital Signature
DKIM, which stands for DomainKeys Identified Mail, is a security protocol designed to verify the authenticity and integrity of an email message. It does this by adding a digital signature to the email before it leaves the sender's server. This signature is like a seal of approval, assuring the recipient that the email has not been tampered with and genuinely comes from the claimed sender.
How DKIM Works
DKIM relies on a pair of cryptographic keys: a private key kept by the sender and a public key published in the sender's DNS (Domain Name System) records. Here's how it works:
- Email Signing: When an email is sent, the sending server uses the sender's private key to generate a unique digital signature based on the email's content. This signature is added to the email's header.
- Recipient Verification: Upon receiving the email, the recipient's email server retrieves the public key associated with the sender's domain from the DNS records.
- Signature Verification: The recipient's server uses this public key to verify the email's digital signature. If the signature matches the email's content and has not been altered in transit, the email is considered authentic.
- Filtering and Delivery: If the email passes DKIM verification, it's more likely to be delivered to the recipient's inbox. If not, it may be flagged as suspicious or sent to the spam folder.
The Importance of DKIM
- Protection Against Spoofing: One of the most significant benefits of DKIM is its ability to prevent email spoofing. Without DKIM, cybercriminals can easily forge email headers and pretend to be someone they're not. DKIM ensures that the email you receive from a trusted sender is indeed from that sender.
- Email Integrity: DKIM safeguards the integrity of your emails. It guarantees that your message hasn't been altered during transit, ensuring that the recipient receives the content exactly as you intended.
- Enhanced Deliverability: When your emails are DKIM-signed, email providers are more likely to trust them. This means your legitimate emails have a better chance of landing in your recipients' inboxes rather than getting lost in spam folders.
- Reduced Phishing: By reducing the effectiveness of phishing attacks, DKIM helps protect individuals and organizations from falling victim to scams that could result in data breaches or financial losses.
Conclusion
In an era where email fraud and phishing attacks are prevalent, DKIM serves as a crucial line of defense. It's like a digital fingerprint that assures the authenticity and integrity of your emails. While it may operate behind the scenes and go unnoticed by most email users, DKIM is a vital tool in the ongoing battle against cyber threats. Its use should be encouraged and embraced by individuals, businesses, and email service providers to create a safer digital communication environment for everyone. So, the next time you receive an email, remember that DKIM might be silently working to protect you from potential harm in the vast digital landscape.Email has become an integral part of our daily communication, from personal conversations to business dealings. However, with this convenience comes the constant threat of email-based fraud and phishing attacks. To combat these threats and ensure the authenticity of your emails, there's a simple yet crucial tool known as SPF or Sender Policy Framework.
The Vulnerabilities in Email Communication
Understanding SPF requires a brief insight into how email communication functions. When you send an email, it travels through multiple servers and networks before reaching its intended recipient. At each stop, malicious actors can potentially intercept, modify, or impersonate the email.
SPF: The Guardian of Email Authenticity
SPF, which stands for Sender Policy Framework, is a security protocol that acts as a guardian, protecting your email domain from being used by cybercriminals to impersonate you. SPF helps verify the legitimacy of incoming emails by checking if they originate from authorized servers associated with the sender's domain.
How SPF Works
SPF is relatively straightforward in its operation:
- Sender Declaration: The domain owner (you or your organization) publishes a DNS record specifying which servers are authorized to send emails on its behalf. This record is known as the SPF record.
- Email Reception: When an email is received by the recipient's email server, the server checks the SPF record of the sender's domain to see if the server that sent the email is authorized to do so.
- Validation: If the sending server's IP address matches one of the authorized IP addresses listed in the SPF record, the email is considered legitimate and is accepted for delivery. If not, it may be flagged as suspicious or rejected.
The Significance of SPF
- Protection Against Spoofing: SPF plays a crucial role in preventing email spoofing. It ensures that emails claiming to be from your domain indeed originate from authorized servers, making it harder for cybercriminals to impersonate you.
- Enhanced Email Deliverability: When you implement SPF, email providers are more likely to trust your emails, leading to better deliverability rates. Your legitimate emails are less likely to end up in spam folders.
- Reduction in Phishing: By making it more difficult for cybercriminals to impersonate trusted senders, SPF contributes to reducing phishing attacks, protecting individuals and organizations from potential harm.
- Branding and Reputation: SPF helps maintain your email domain's reputation. It assures recipients that your emails are legitimate, strengthening trust in your brand or organization.
Conclusion
In an age where email is a primary mode of communication and email-based threats are prevalent, SPF serves as a reliable shield against impersonation and fraud. Although it may work silently behind the scenes, SPF is a powerful tool in the fight against cyber threats. Its implementation is highly recommended for individuals, businesses, and email service providers alike to bolster the security of email communications. So, the next time you send or receive an email, remember that SPF is working diligently to protect you from potential email impersonation in the vast digital landscape.
Email is the lifeblood of modern communication, but its ubiquity also makes it a prime target for cybercriminals seeking to deceive, defraud, or disrupt. To safeguard against these threats and ensure the integrity of your email communications, there's a powerful tool known as DMARC, or Domain-based Message Authentication, Reporting, and Conformance.
The Challenge of Email Impersonation
Before we dive into DMARC, it's essential to understand the challenges of email communication. Emails pass through multiple servers and networks on their way to the recipient, creating numerous opportunities for malicious actors to tamper with or impersonate senders.
DMARC: Your Email Security Guardian
DMARC, which stands for Domain-based Message Authentication, Reporting, and Conformance, is a comprehensive email authentication protocol designed to combat email impersonation, phishing attacks, and other email-based fraud.
How DMARC Works
DMARC builds on the foundations of SPF and DKIM but takes email authentication to a whole new level:
- Policy Declaration: The domain owner (the sender) publishes a DNS record that specifies how email from their domain should be handled if it fails SPF or DKIM checks. This DNS record contains DMARC policy settings.
- Email Reception: When an email is received by the recipient's email server, it performs SPF and DKIM checks as usual. If these checks fail, the server consults the sender's DMARC record.
- DMARC Verification: DMARC instructs the recipient's server on how to handle emails that fail SPF or DKIM checks. The sender can choose to monitor these failures, quarantine suspicious emails, or reject them outright.
- Reporting: DMARC provides valuable feedback by generating reports about email authentication activity. These reports help domain owners monitor and improve their email security.
The Significance of DMARC
- Protection from Impersonation: DMARC is a formidable defense against email impersonation. It ensures that emails claiming to be from your domain are indeed legitimate, making it exceedingly difficult for cybercriminals to impersonate you.
- Enhanced Email Trustworthiness: Implementing DMARC enhances the trustworthiness of your emails. Email providers are more likely to recognize your emails as safe and deliver them to the recipient's inbox.
- Reduced Phishing Risks: DMARC is a powerful deterrent against phishing attacks. By reducing the success rate of such attacks, it safeguards individuals and organizations from potential harm.
- Reputation Management: DMARC helps protect your domain's reputation. It ensures that your legitimate emails are not diluted by fraudulent ones, preserving trust in your brand or organization.
Conclusion
In an era where email threats are prevalent and sophisticated, DMARC emerges as the ultimate guardian angel of email authenticity. Although it operates discreetly in the background, DMARC is a potent tool in the fight against cyber threats. Its implementation is highly recommended for individuals, businesses, and email service providers, as it offers a robust defense against email impersonation and enhances the overall security of email communications. The next time you send or receive an email, know that DMARC is diligently working to protect you from email-based deception and fraud in the vast digital landscape.
To send your first email campaign, you first need to set up your email address and domain, so it's ok for Mail Designer 365 Delivery Hub to send emails on your behalf.
There are a few technical steps involved during setup. These steps are crucial, as leading email service providers will check that DKIM, SPF and DMARC authentication are configured in order to prevent spam.
Rest assured we've done all we can to make the setup process as simple and fuss free as possible for you. We recommend that you add all three methods to your domain so that your emails reach all recipients. If you require assistance at any point, reach out to your IT admin or get in touch with our support team.
Ready? Let's get started!
Step 1: Add and Verify your Email Address
Before you start, make sure that you have already set up a Mail Designer team. (If you have not done so already, check out our easy team setup guide).
- Go to Settings > "From: addresses"
- Under "From: addresses for Campaigns", add a new sender by entering the "From Name" and email address your campaign will be sent from
- You'll now receive a verification email. Click the link to confirm you own the email address:
Step 2: To avoid to get marked as spam: Set up DKIM
For this you'll need to create a DNS entry for DKIM (DomainKeys Identified Mail) (more details about DKIM and why it's essential. You should definitely set up DKIM if you want to avoid your mailings ending up in the spam folder.
- Stay in "From: addresses" and scroll down to "Domain verification". You will now see the domain for the email address you just set up
- Now it's time to determine the DNS provider for your domain. Most likely, our system has already identified the provider and displayed it as a "Potential Provider," along with a link to the provider's guide. Tip: We've also compiled a list of links to setup guides for common providers in this article.
- Click on the "DKIM" icon in the "Domain verified" column:
- A DKIM record will be generated for your domain, along with the necessary type, name, and value of the record. Please use the exact information shown to set up the DNS record (including any special characters such as " or . ).
- Depending on your DNS provider, it may take up to 48 hours for the changes to propagate. Delivery Hub will periodically perform automatic checks. Alternatively, click the refresh icon to update results in real time:
- Once you've completed the setup, and the verification is successful, you'll see a green checkmark next to the DKIM icon:
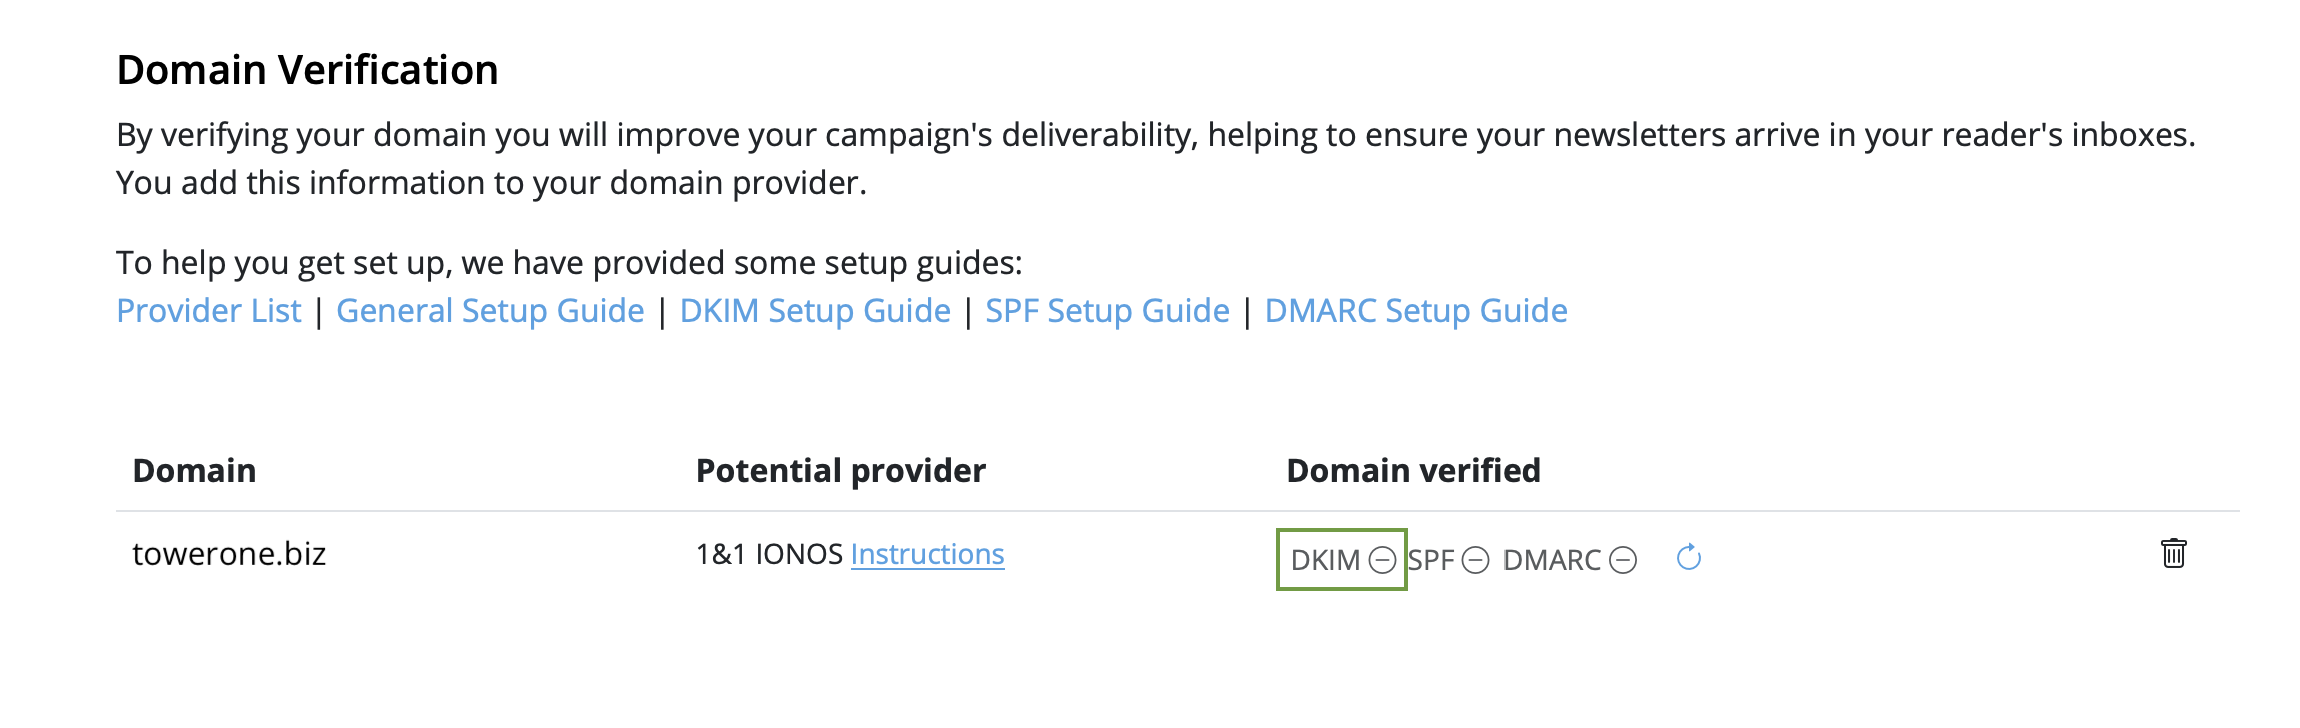
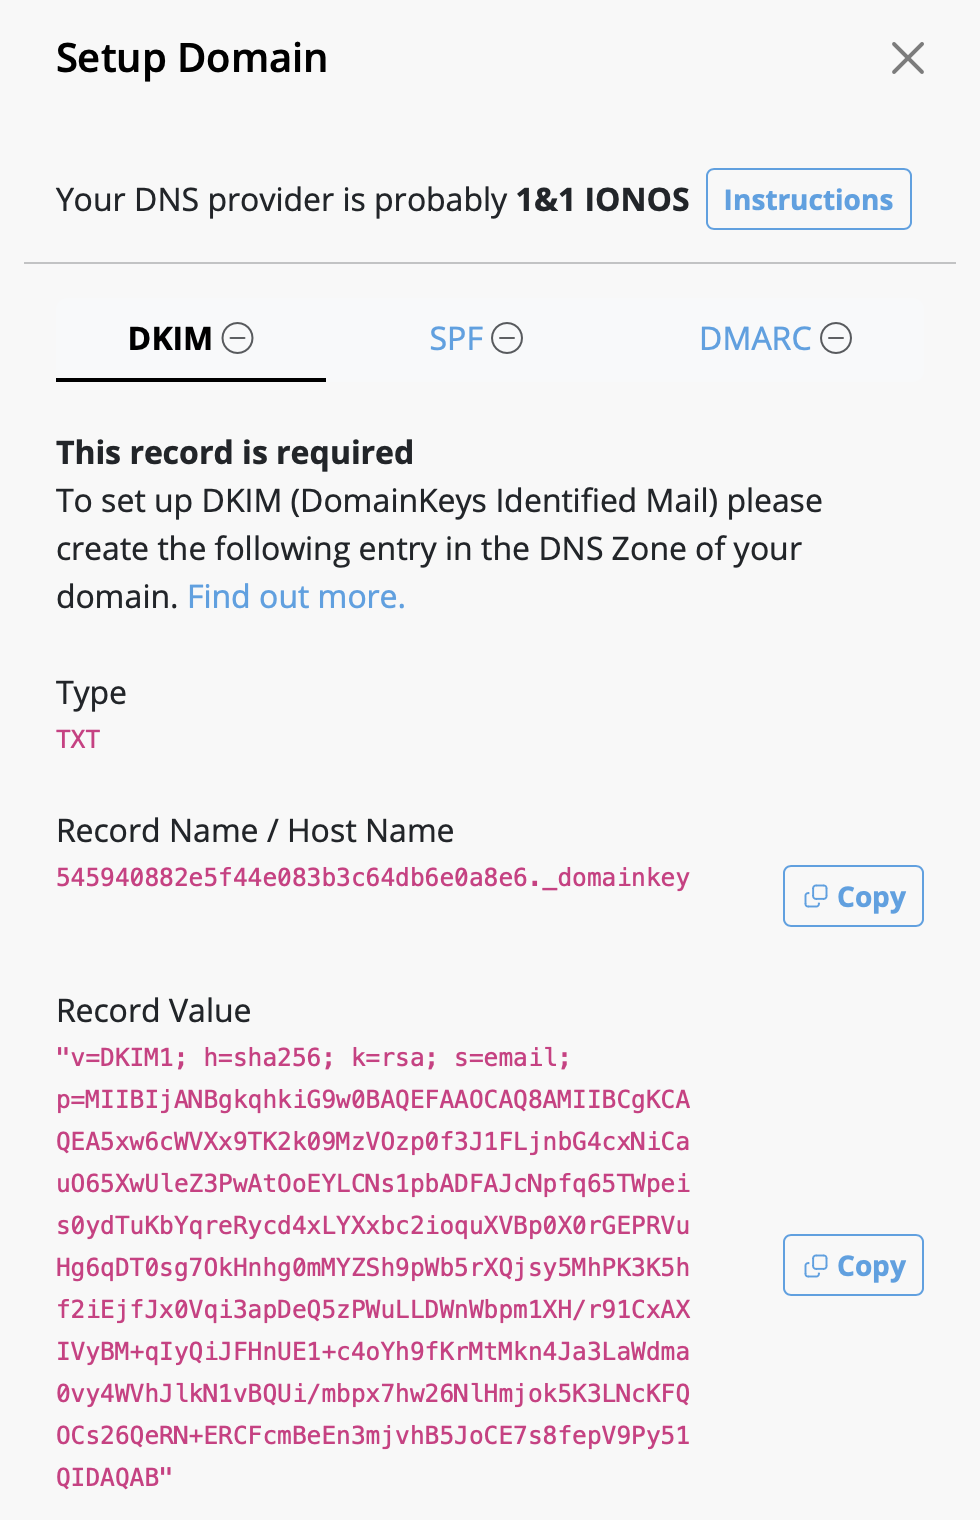

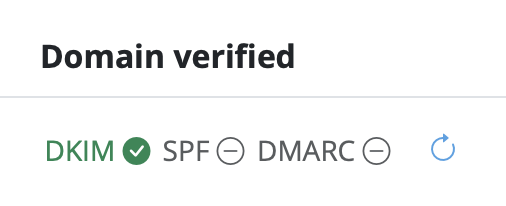
Step 3: To avoid to get marked as spam: Set up SPF
Now, let's ensure your emails are properly authenticated with SPF (Sender Policy Framework), which prevents email spoofing (more details on SPF).
- Go back to your domain under "Domain Verification" and click "SPF":
- Next, go to your DNS provider and create an SPF record for your domain. The exact steps vary depending on your provider, so follow their guidelines.
-
Note: If you or your company have already created an SPF record, our
system will try to include the required part and display the full record
value respecting your previous content. If you feel confident and know what
you are doing, you can also manually edit your existing record and add the
following part:
include: spf.welovemails.com. - Once the verification has successfully completed, you'll see a green checkmark next to the SPF icon:
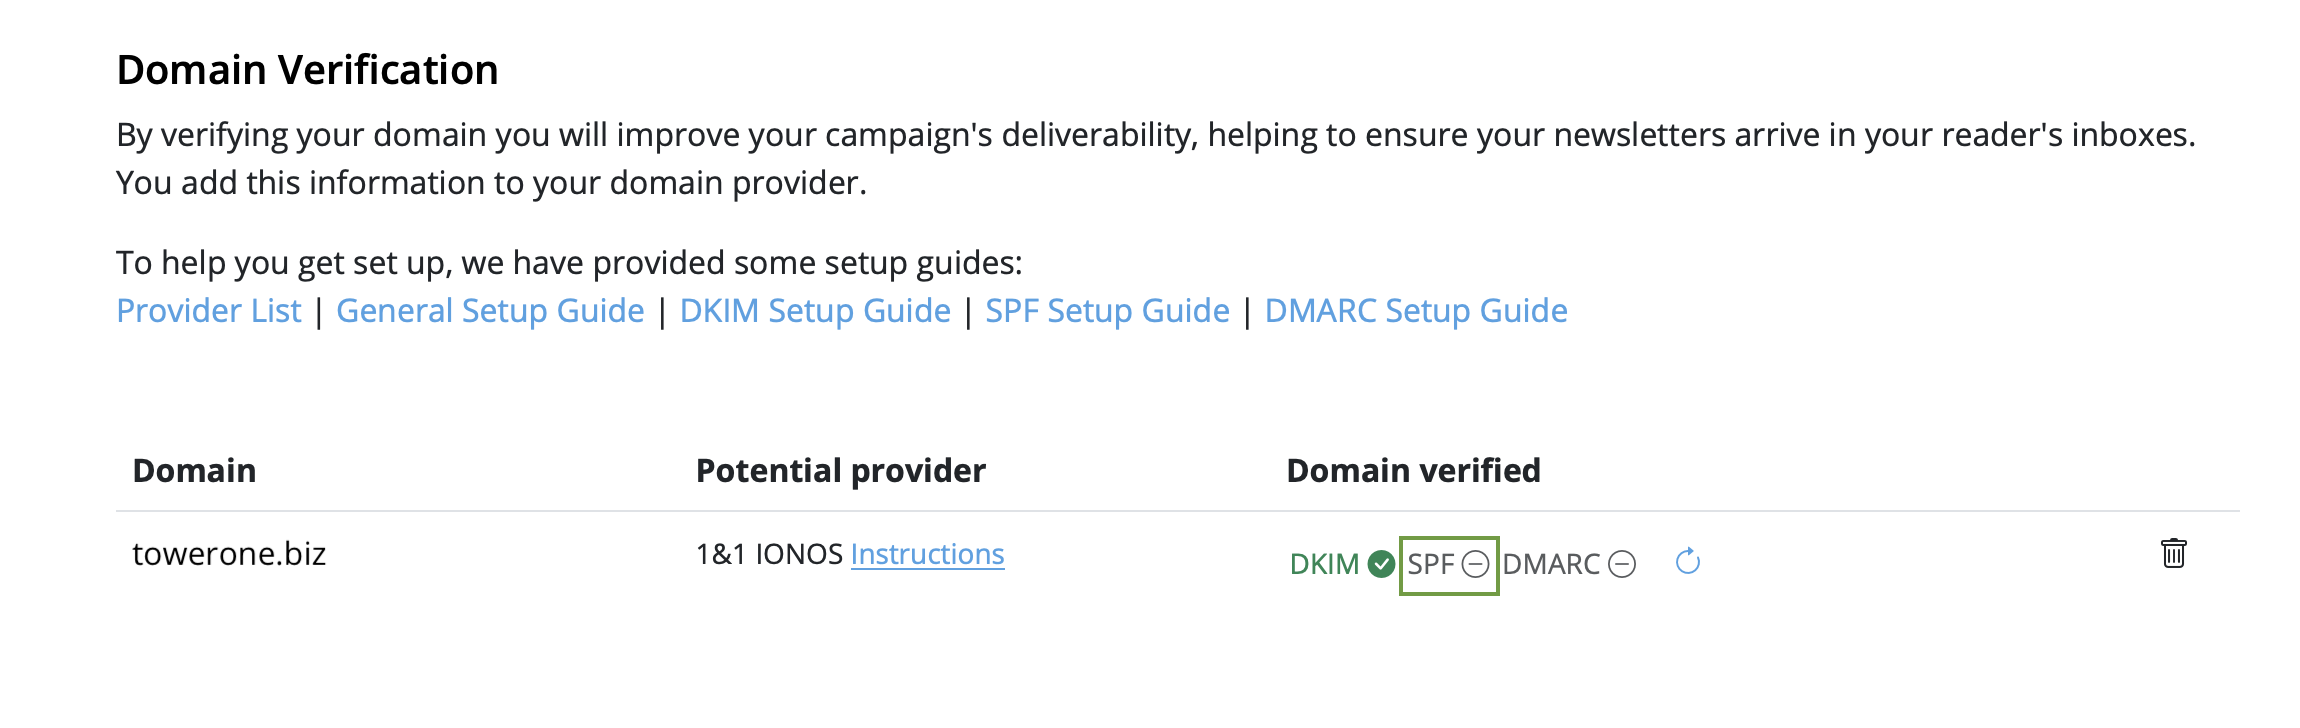
Step 4: Set up DMARC
Although not mandatory, setting up DMARC (Domain-based Message Authentication, Reporting, and Conformance) is recommended to add an extra layer of security to your emails (more details on DMARC).
- Click on the "DMARC" icon under "Domain Verification":
- Then, create a DMARC DNS record for your domain
- Feel free to use the suggested record, or your own values. If you're unsure, check your organization's policies or ask your IT team
- Just like with SPF and DKIM, once the DMARC verification has successfully completed, you'll see a green checkmark next to the DMARC icon:
Congratulations! You've now set up and verified your from address and can start sending email campaigns to your audience.
As part of the free Campaigns plan included with your Mail Designer 365 design plan, a Mail Designer 365 banner is displayed in the footer of emails sent via Delivery Hub:
These banners can be removed after switching to any paid Campaigns plan. Log in to your my.maildesigner365 account to explore the Mail Designer Campaigns plan options.
- Automatic unsubscribe handling (Delivery Hub will remove unsubscribed contacts for you)
- Clean email list – your campaigns are only being sent to engaged subscribers
- Fewer spam complaints
- Campaign-based unsubscribe rate tracking
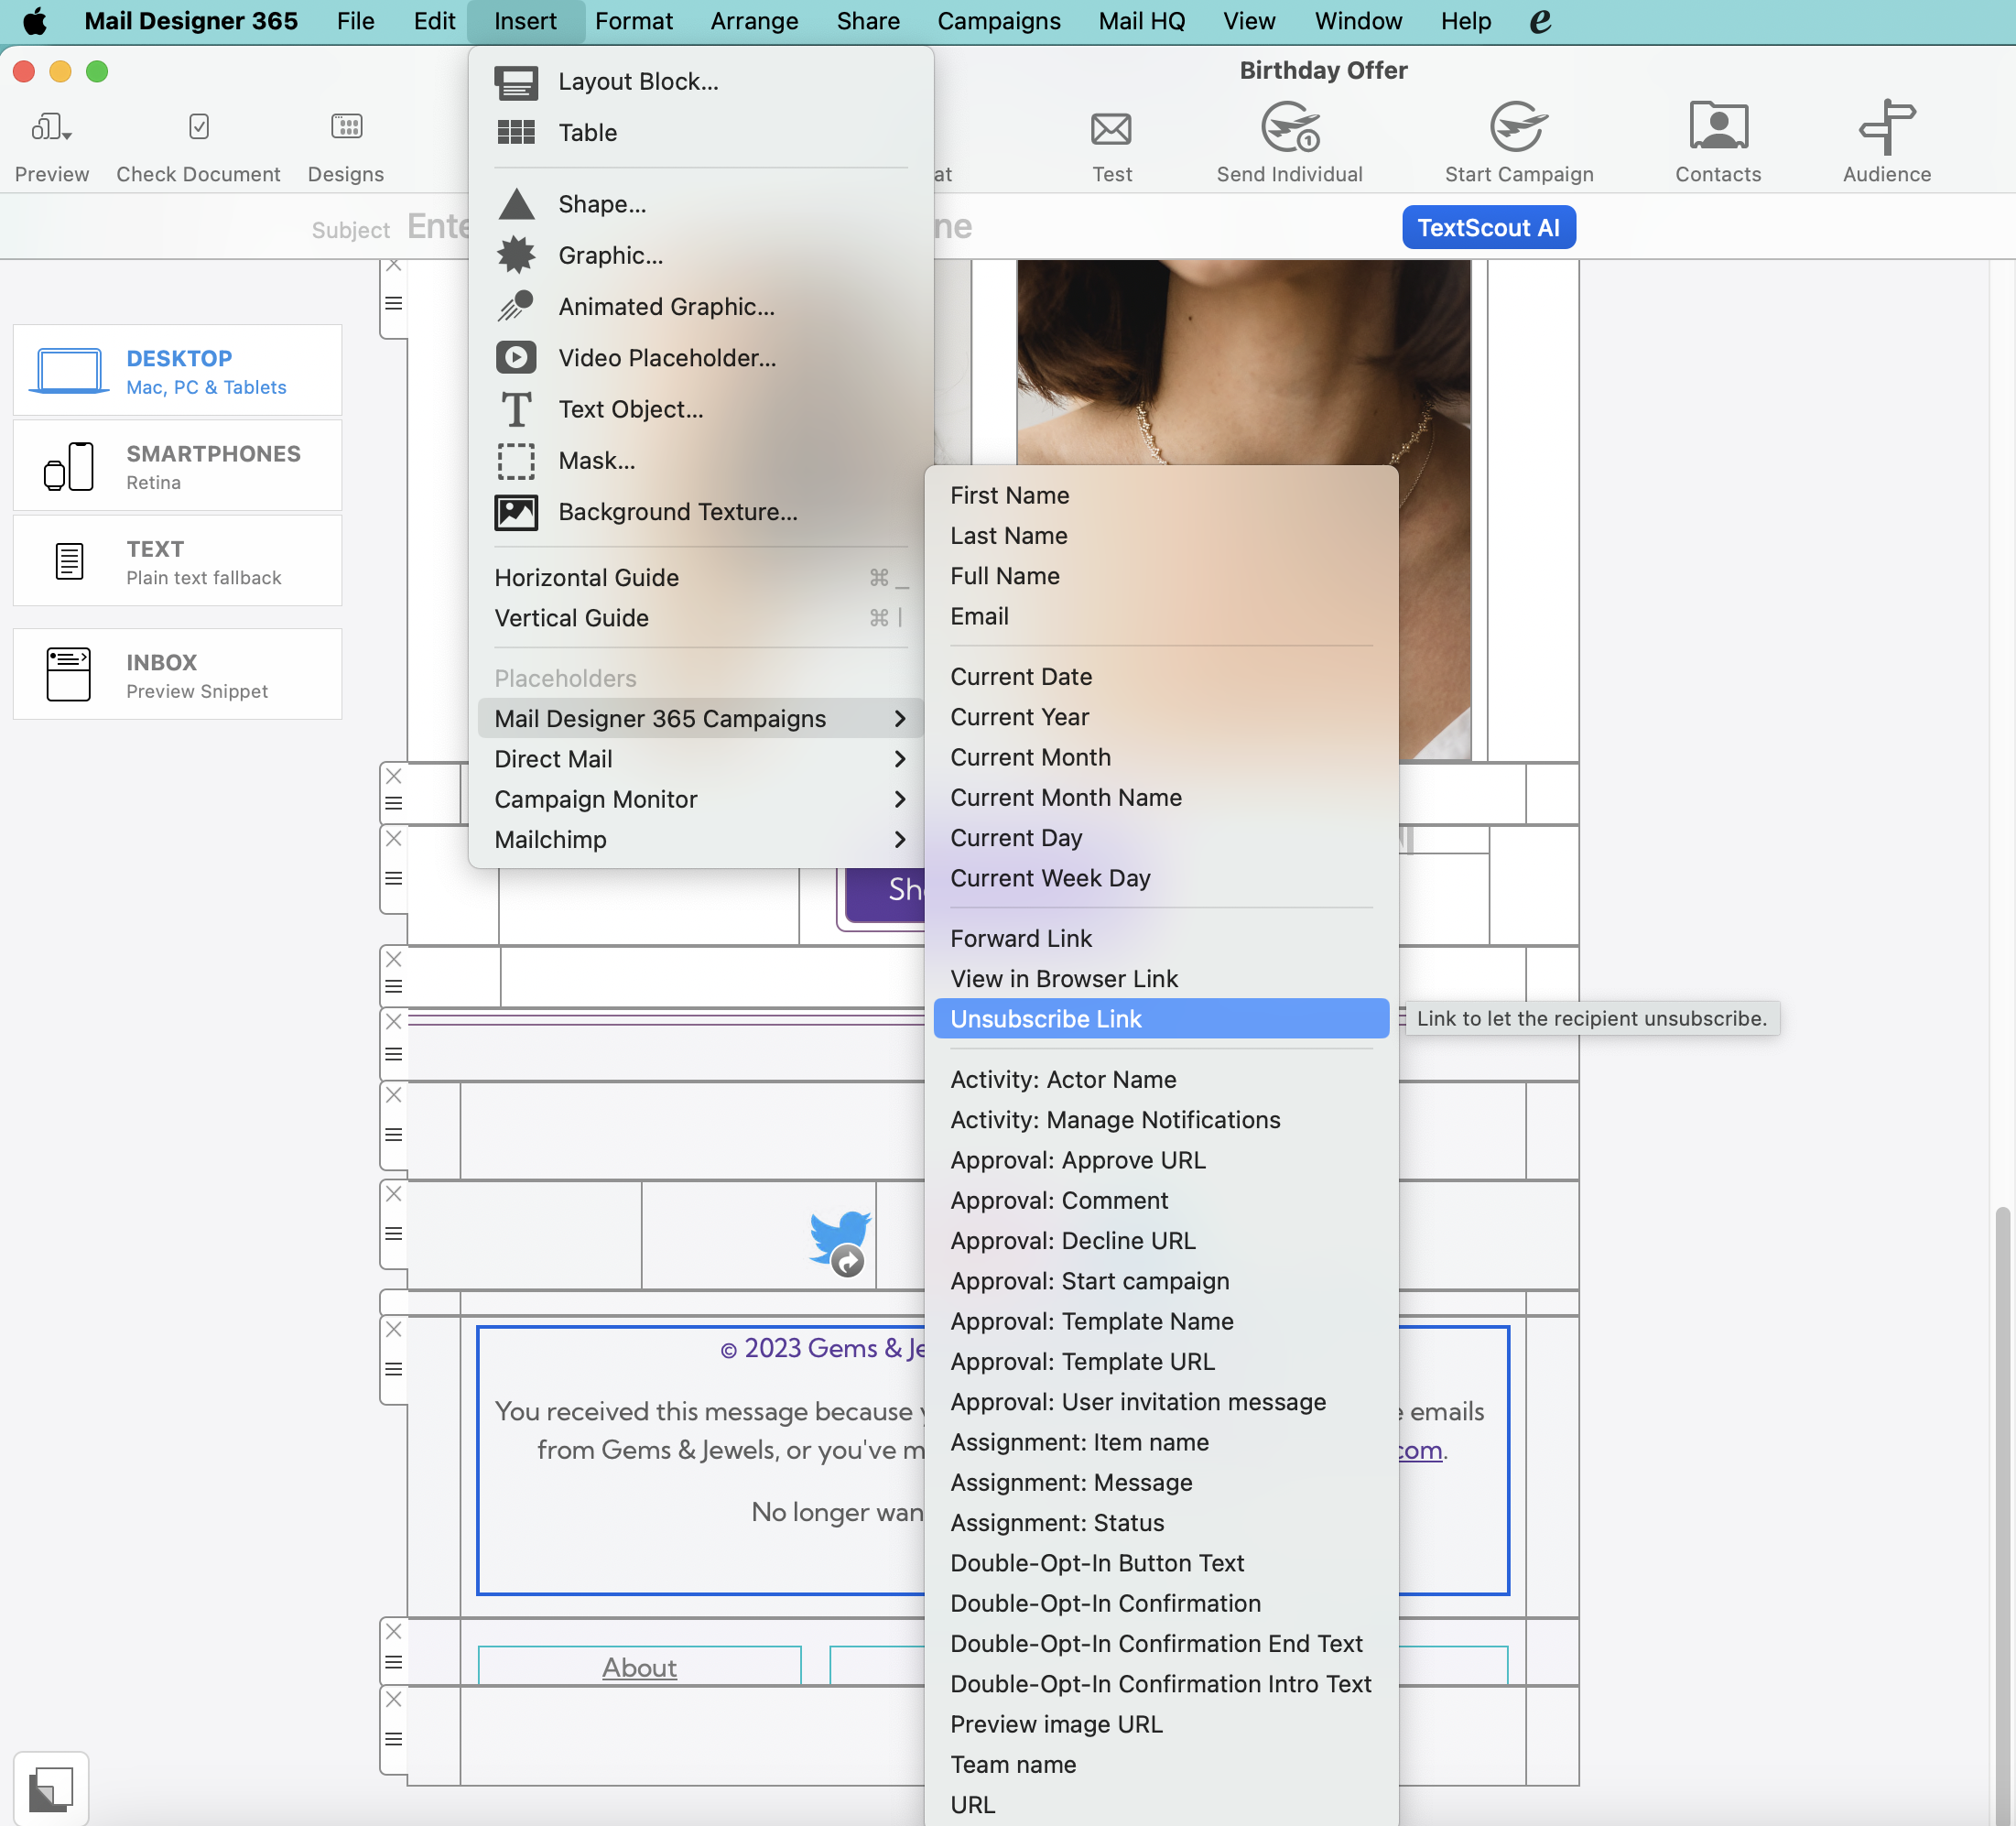
When you send your campaign via Delivery Hub, recipients will see the unsubscribe option in the footer of your email:
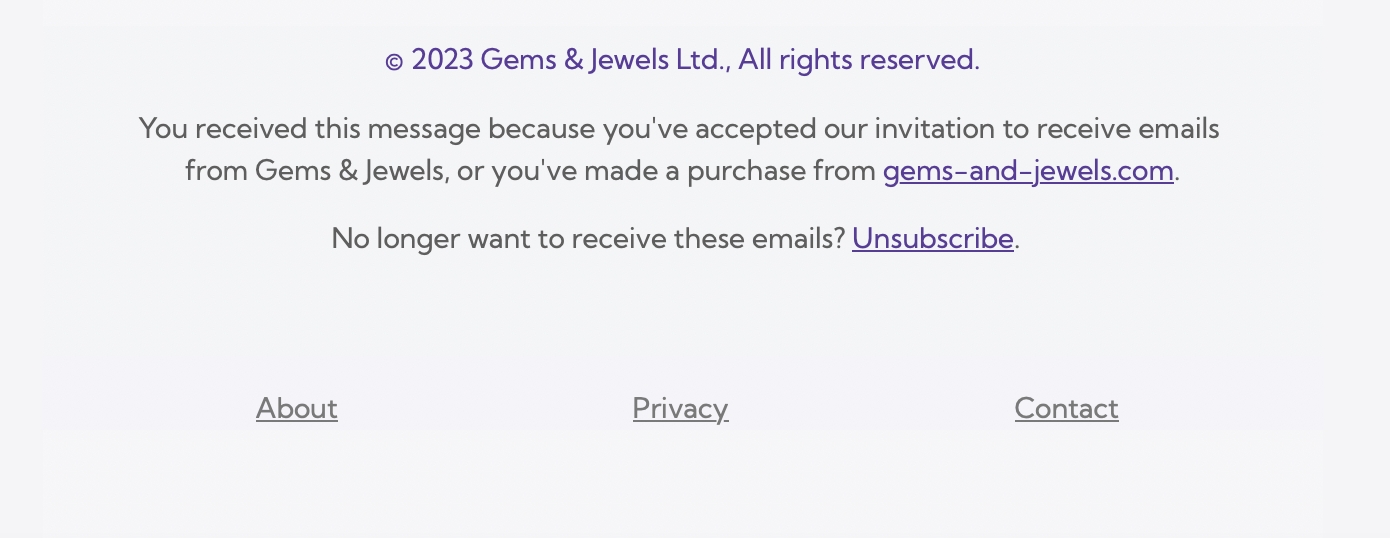
Learn more about Delivery Hub →
If your VPN connection is configured to be Host to Everywhere, all non-local network traffic is sent over the VPN tunnel once the connection has been established. All non-local traffic includes traffic to public Internet services, as those are non-local, too. Those services will only be reachable if your VPN gateway has been configured to forward Internet traffic sent over VPN to the public Internet and to forward replies back over VPN, otherwise Internet access will stop working.
A possible workaround is to configure a Host to Network connection instead, where only traffic to configured remote networks will be sent over VPN, whereas all other traffic is sent out like it is when there is no VPN tunnel established at all. In case the remote network are automatically provisioned by the VPN gateway, this has to be configured on the VPN gateway, automatic provisioning has to be disable in VPN Tracker (not possible for all VPN protocols), or the Traffic Control setting has to be used to override the network configuration as provided by the gateway (Traffic Control is currently not available on iOS).
A Host to Everywhere setup may be desirable for reasons of anonymity or to pretend to be in a different physical location (e.g. a different country), since all your requests will arrive at their final destination with the public IP address of the VPN gateway instead of your own one. Also that way you can benefit from any maleware filters or ad blockers running on the VPN gateway, yet it also means that the gateway can filter what services you have access to in the first place. If Host to Everywhere is desired but not working, this has to be fixed on at the remote site, since what happens to public Internet traffic after being sent over the VPN is beyond VPN Tracker's control.
If the connection is configured to use remote DNS servers without any restrictions, all your DNS queries will be sent over the VPN. Before any Internet service can be contacted, its DNS name must be resolved to an IP address first and if that isn't possible, as the remote DNS server is not working correctly or unable to resolve public Internet domains, the resolving process will fail and this quite often has the same effect in software as if the Internet service is unreachable.
A possible workaround is to either disable remote DNS altogether, if not required for VPN usage, or to configure it manually, in which case it can be limited to specific domains only ("Search Domains"). By entering a search domain of example.com, only DNS names ending with example.com (such as www.example.com) would be resolved by the remote DNS servers, for all other domains the standard DNS servers will be used as configured in the system network preferences.
Using a remote DNS server may be desirable to filter out malicious domains, to circumvent DNS blocking of an Internet provider, to hide DNS queries from local DNS operators (since DNS is typically unencrypted), or to allow access to internal remote domains that a public DNS server cannot resolve, as they are not public. For the last case, configuring the internal domains as search domains is sufficient. For all other cases, the issue must be fixed at the remote site, since what happens to DNS queries after being sent over the VPN is beyond VPN Tracker's control.
VPN Tracker does not maintain VPN connections when the computer goes to sleep for the following reasons:
Immediately after waking up, the system may have different network settings than when it went to sleep, e.g. because the network cable was replugged while the computer was asleep, or the computer was moved to another location where a different WLAN is available, or a DHCP lease has expired and the DHCP server has to assign a new IP address to the computer after waking up because it has already given the old one to someone else, or the network interface no longer exists, e.g. if a USB network adapter was unplugged. In these cases, not only would the connection immediately stop working after waking up, VPN Tracker would also no longer be able to log off correctly from the remote peer.
VPN Tracker would also not be directly aware of some of these events, as applications do not receive network events while the system is asleep and would therefore have to compare all network configurations after waking up with those before sleeping and decide whether the connection could still work or not, because with some VPN protocols there is no way to actively test this, with others only if certain options are used (e.g. DPD). A misjudgement leads to a tunnel being kept up that can actually no longer work and the user would then have to restart it manually before it works again.
NAT gateways remember in a table how they map private IP addresses to public ones and how they rewrite ports for a limited time only. Depending on the protocol, this time span can be in the range of seconds or minutes (some gateways only remember this for 20 seconds with UDP). If such a table entry is lost, this does not result in an error, but a new entry is created for the next packet, which often results in a different mapping, which the remote station cannot cope with, because it now looks to them as if someone else is trying to hijack the connection, as the packets are suddenly coming from a different sender. VPN Tracker cannot know or check when it wakes up whether the previous table entry still exists or has already been lost and will not receive an error from the NAT gateway in the latter case, but the connection will still no longer work, which leads to the same problems as in the first case. It does not matter whether a local NAT gateway is used (as in most home routers or modems) or a carrier grade NAT gateway, which is located at the ISP and via which several customers can share a single public IPv4 address. The latter is increasingly the case, as there are no longer any free IPv4 addresses and therefore not every customer can get an own one.
VPN protocols that use some form of Dead Peer Detection (DPD) expect regular data traffic from the other side. If this fails to occur, they send DPD packets and expect these DPD requests to be answered. If they are not answered, the other side considers the connection to be dead and deletes it. VPN Tracker is also unaware of this while the computer is asleep and cannot respond to these requests. After waking up, the connection would again no longer be functional, but even with DPD in use, this would often only be noticed after about a minute and until then the system would try to continue using this connection without the slightest chance of success, so that various applications would run into errors or disconnects.
If a VPN connection is disconnected without the client logging off from the VPN gateway and without the gateway being aware of this, the client may not be able to re-establish this connection immediately or a connection error may occur the first time it is established. In the worst case, the client may even be locked out for a few minutes. This can occur in the first two cases if the network settings have changed after the sleep phase or if a NAT table entry has been lost.
Mail Designer 365 is licensed per user. That means each person using Mail Designer 365 needs their own license.
To prevent security issues, account sign-ins are checked by an automatic system. There are multiple possible causes that can trigger an account lock:
- Sharing one account with other people
- The account is being used as a "generic" account (e.g. "Lab computer 1"), instead of being personalized for one person
- Go to my.maildesigner365.com
- Sign in with your equinux ID
- Go to "Store" and choose "Add plans…"
- Add additional licenses for each person that needs Mail Designer access and complete your order
- Once you have the correct number of licenses for your team, assign the new licenses to your co-workers – check out our Team Setup Guide for step-by-step instructions
Once you have completed these steps, please contact our support team and include your equinux ID and order confirmation number. A team member will review your details and will be able to lift the restrictions on your account.
For any other questions, please reach out to our Mail Designer Team.
~/Library/Group Containers/C3HCD5RMD7.net.tower-one.MailDesigner/DocumentsThe tilde (~) represents your home directory. This exception is only necessary for read operations; write operations can still be monitored.
Email,First Name,Last Name,Favorite Color,Location miller@example.com,Peter,Miller,blue,New York smith@example.com,Jody,Smith,red,San FranciscoGood to know: You can re-import the CSV at any time with additional columns to enhance your contacts. All new placeholders will then be attached to your contacts. Need help? Download an example CSV file here for reference: Mail_Designer_365_Campaigns_Email_Import_Example.csv
Scenario: Suppose we run a jeans shop that offers three different fashion newsletters: one for women, one for men and one for children's fashion. The shop already has lists of email addresses for the respective groups.
What is the best way to import these email lists into Mail Designer Campaigns in order to send newsletters to them?
1. Add new email contacts
Add contacts in Mail Designer Campaigns: https://my.maildesigner365.com/team/deliveries/contacts/add
Email addresses can be added via copy and paste or via CSV file.
Add contacts via copy and paste
Insert your email addresses into the field separated by a comma or return. To start with, we are only using the newsletter addresses for the “Women” newsletter.
Then select below: "Add placeholder"

Now you can assign a placeholder name.
What are placeholders? Placeholders are used so that we can later filter contacts according to their characteristics – for example, if we want to identify all contacts who are interested in women's fashion. Placeholders can be understood like columns in an Excel table.
In this example, we will call the placeholder “Newsletter Type”. The new placeholder is then created by clicking on “New placeholder: + Newsletter Type”.
We can now assign a placeholder value: “Women”:
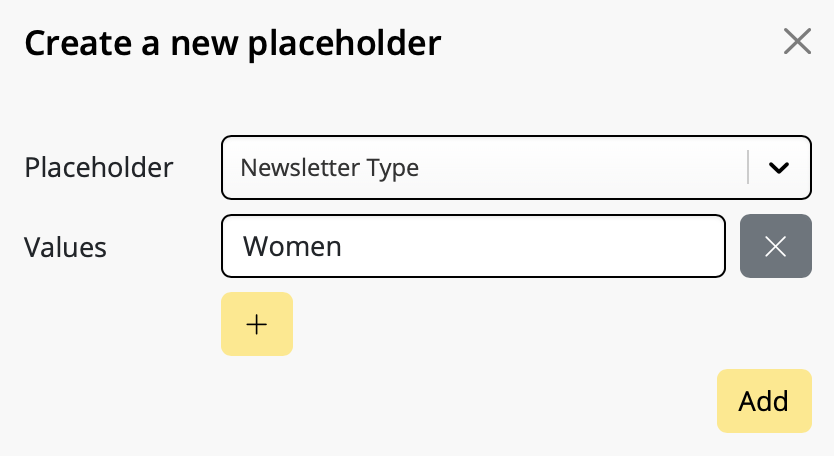
Finally, click on “+ Add Contacts” to import all contacts and assign them the placeholder value “Women”. This way, we can later see that these contacts are interested in women's fashion.
Add more contacts
We can now repeat the entire process for the “Men” and “Children” newsletters. Use the “Newsletter Type” placeholder we created in the previous step, but this time use the placeholder values “Men” and “Children”.
Important information:
- If an email address already exists in your saved contacts, it will not be re-imported, but the placeholder and its value will still be added. This means you can safely add email addresses again and again without ending up with duplicates in your list.
- A placeholder can have multiple placeholder values.
Example: Grace Müller with the email address mueller@example.com is interested in both women's and children's fashion and therefore appears on both lists. If you import the contact once with the placeholder "Newsletter Type" and the value "Women" and then again with the placeholder "Newsletter Type" and the value "Children", both placeholder values will appear in your search results:
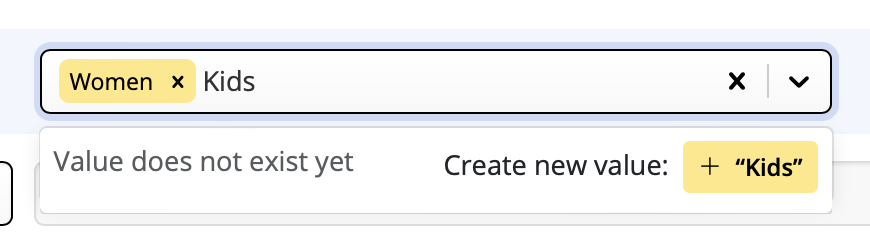
We have now finished importing our contacts and can proceed to create target groups in the next step.
2. Create target groups
Once you've added contacts and assigned placeholders to them, you can create your first audiences. These are the email lists (or target groups) your newsletters will later be sent to.
Audiences can be created at: https://my.maildesigner365.com/team/deliveries/contacts/targetgroups
Creating a new audience
We will start off with the newsletter for women's fashion. Create a new audience and give it a name (i.e. "Women".)
Now, select the placeholder (i.e. “Newsletter Type”) that you created during the contact import from the menu.
Next, select the corresponding value (e.g. "Women"):

Now all contacts with the placeholder value "Newsletter Type = Women" will be displayed below. Click to save your new audience.
Create additional audiences
These steps can also be carried out for the “Men” and “Children” lists by selecting the appropriate placeholder values.
Good to know:
- Mail Designer audiences are dynamic. This means that if you add new contacts later on, they will automatically be added to the appropriate audience, provided the same placeholder value was assigned during import.
3. Sending newsletters
We refer to each sent newsletter as an individual campaign. This means that there is one campaign per target group.
Have you created your email template for the women's fashion campaign on your Mac in Mail Designer 365? Excellent! Click Start Campaign to get started.

Plan a campaign
When you prepare a new campaign, the subject line and sender address fields are automatically filled out for you. Assuming you don't want to change anything here, you can immediately go to "Who?" and select your audience.
Here you can choose the audience (i.e. “women”) that we created in the last step:
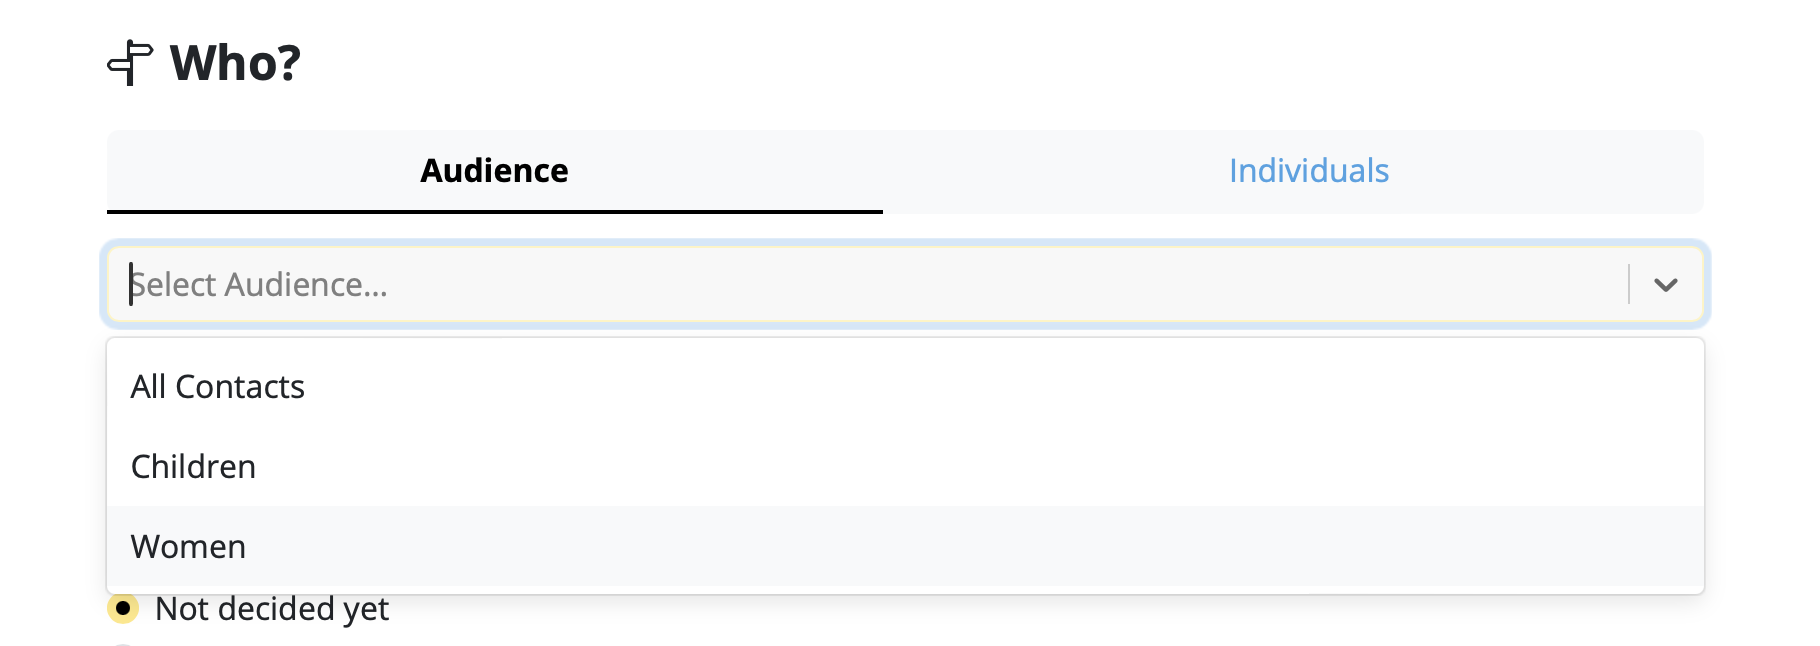
Choose a time for delivery or click on "Now" to send the email right away. Afterwards, you can check over your email one last time by selecting "Queue this email for delivery".
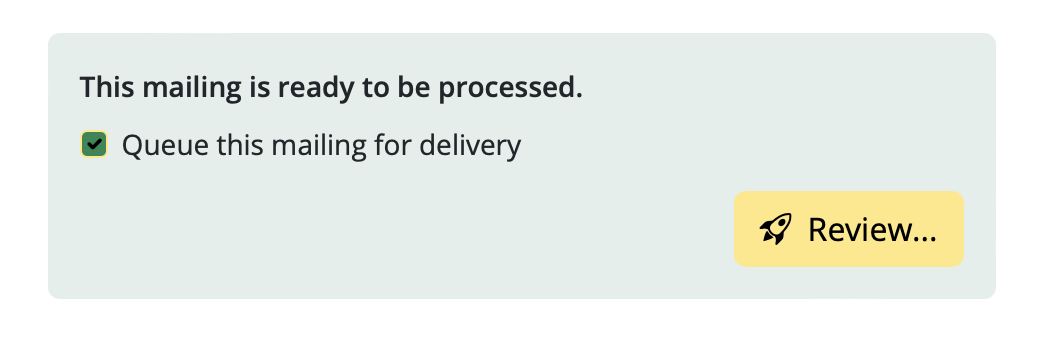
You are now ready to send!
Ready for the next one? Repeat these steps for any additional newsletters and their respective email lists.
When would I need to edit links post sending?
- You accidentally entered the wrong link
- You forgot to change a link because you duplicated a design
- You want to change a link because the old URL no longer exists (e.g. a limited time offer or live stream)
How to change a link in an email after sending
Mail Designer 365 Delivery Hub users can use Link Rescue to easily change email newsletter links after a campaign has been delivered. To get started, open the Analytics view for your chosen campaign and switch to the Link Overview tab: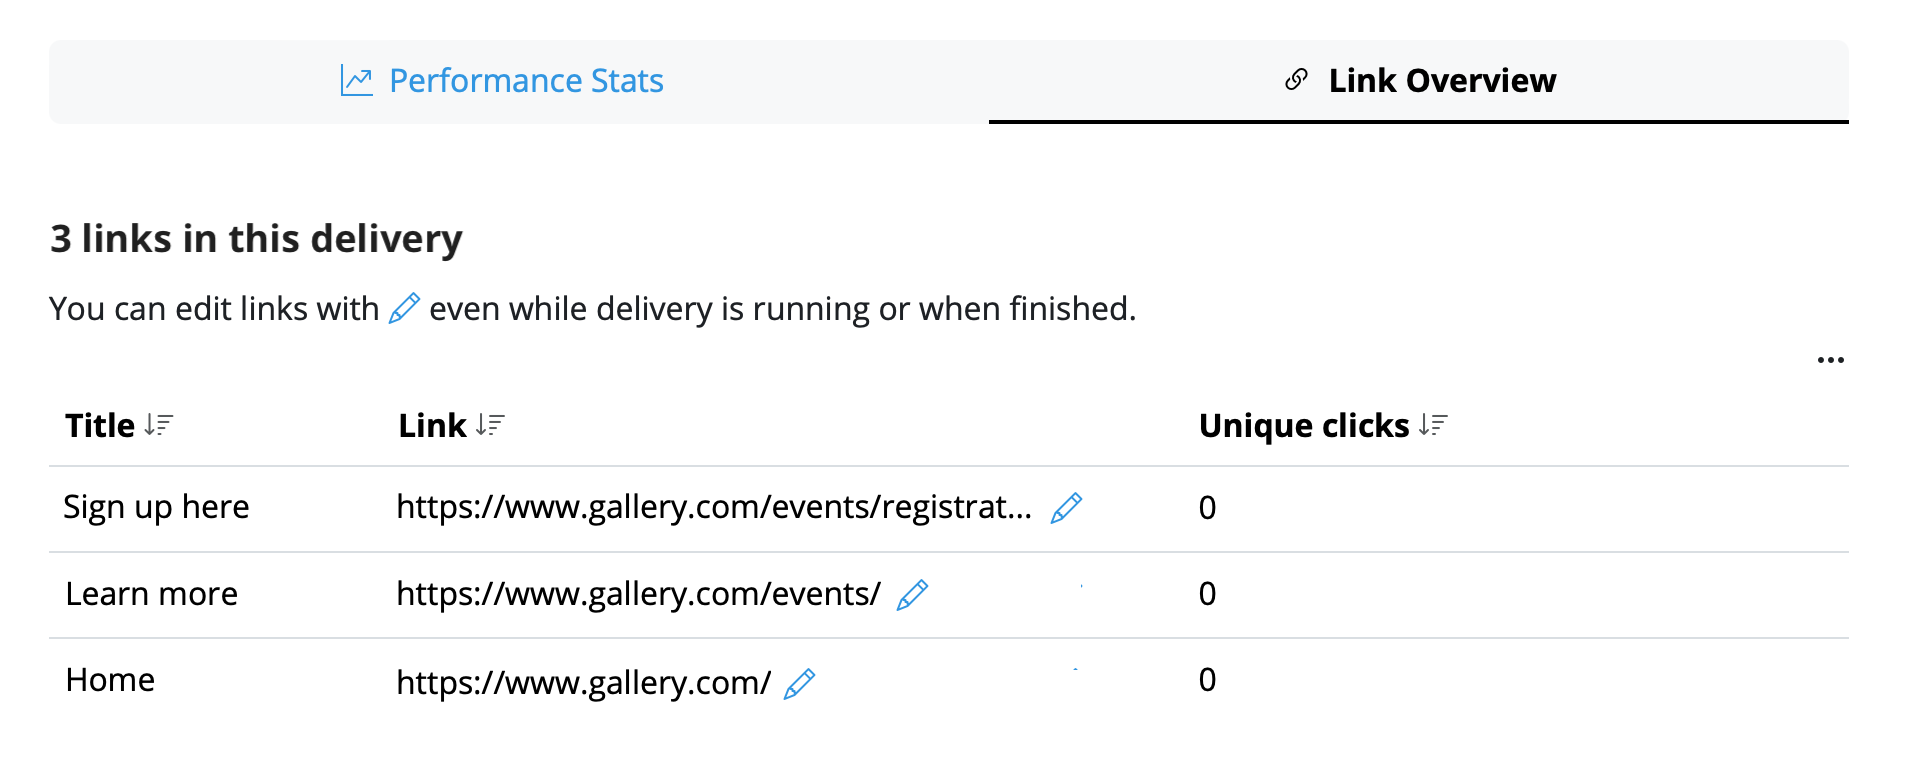 Here you can select any link and edit it at any time. Once you have replaced any given link, click Save to update the change for all recipients – including those who have already opened the email!
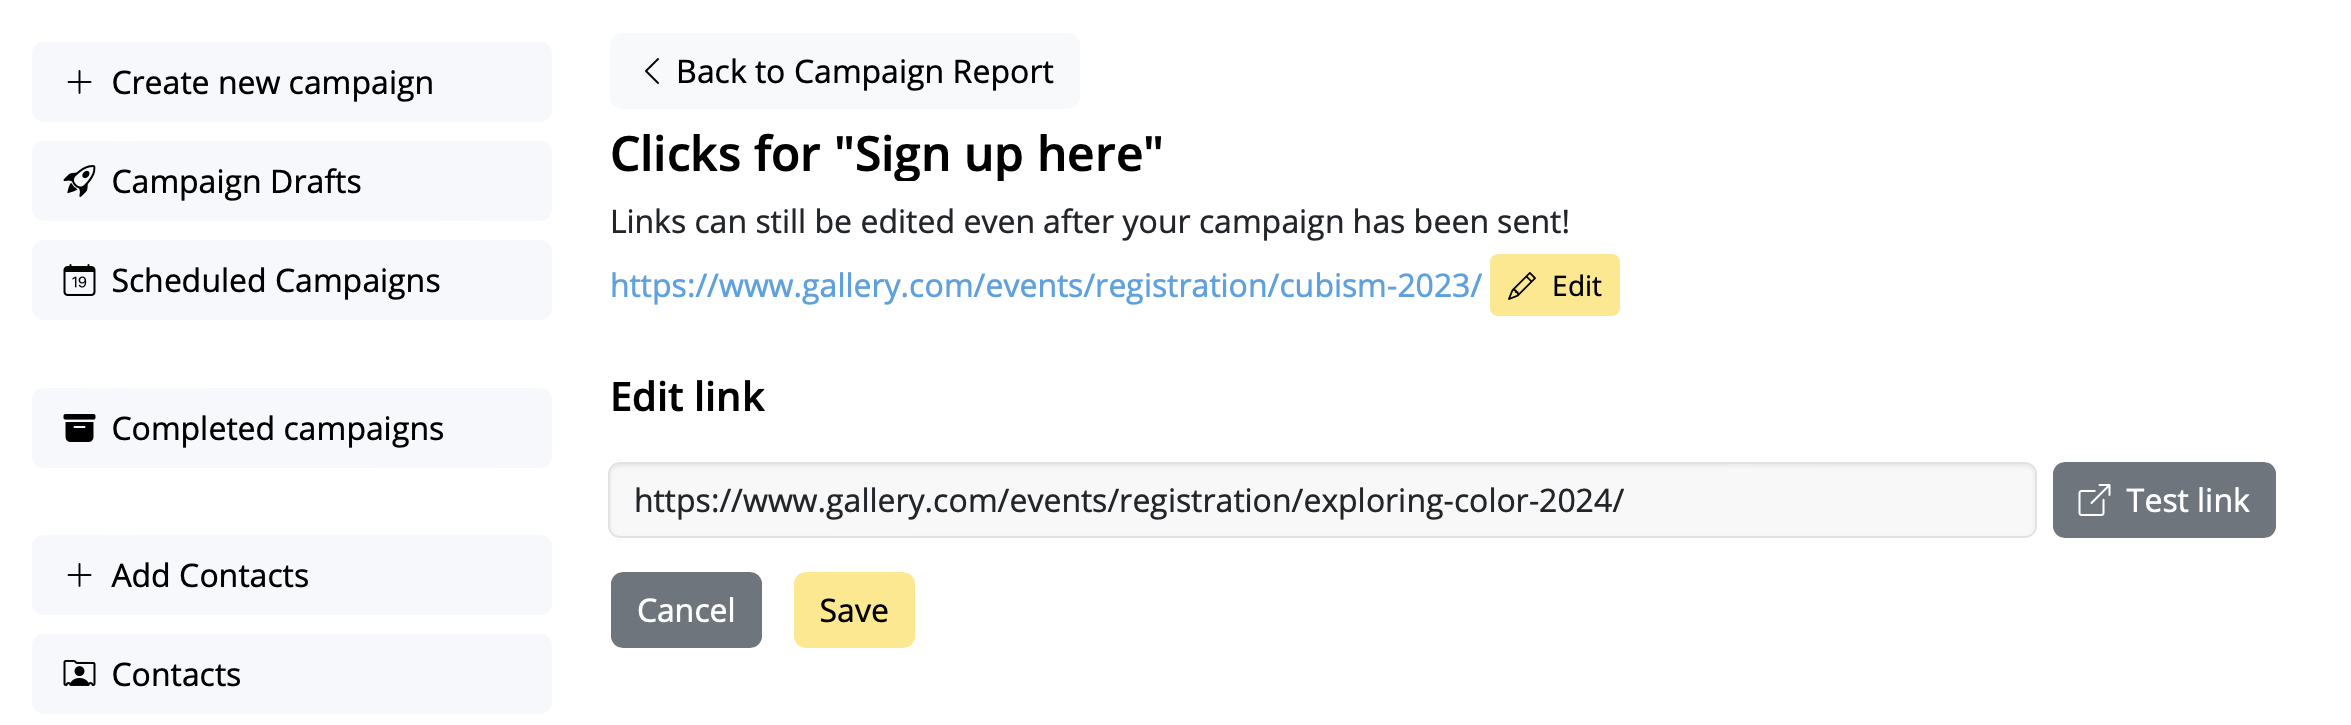 Your changes will be synced immediately, giving you ultimate peace of mind.
Important:
Mail Designer 365 Link Rescue is available to Mail Designer Campaigns users with a Seoul plan or higher. View all plan tiers here →
Your changes will be synced immediately, giving you ultimate peace of mind.
Important:
Mail Designer 365 Link Rescue is available to Mail Designer Campaigns users with a Seoul plan or higher. View all plan tiers here →
How to View Your Email Campaign Performance Report
So you've sent out your email campaign and now want to see how well it has performed – no problem! Mail Designer Delivery Hub offers you a detailed performance report for all your sent campaigns.
How it works
You can access performance reports for any given campaign under https://my.maildesigner365.com/team/deliveries/campaigns/finished.
Find your chosen campaign and click the statistic icon to open its performance report:
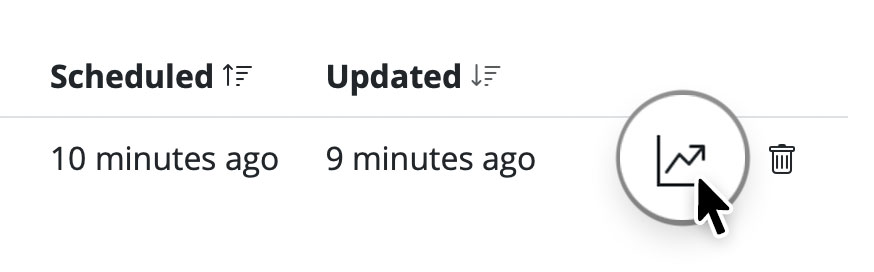
During the delivery
As soon as an email campaign is sent, you can use Delivery Hub's live reporting tools to track the progress of your newsletter in real time. This includes email deliveries, bounces, and opens.
The numbers in the overview will be updated live as your email is delivered to your target group.
After the delivery
Once delivery has completed, you can view an overview of all campaign statistics.
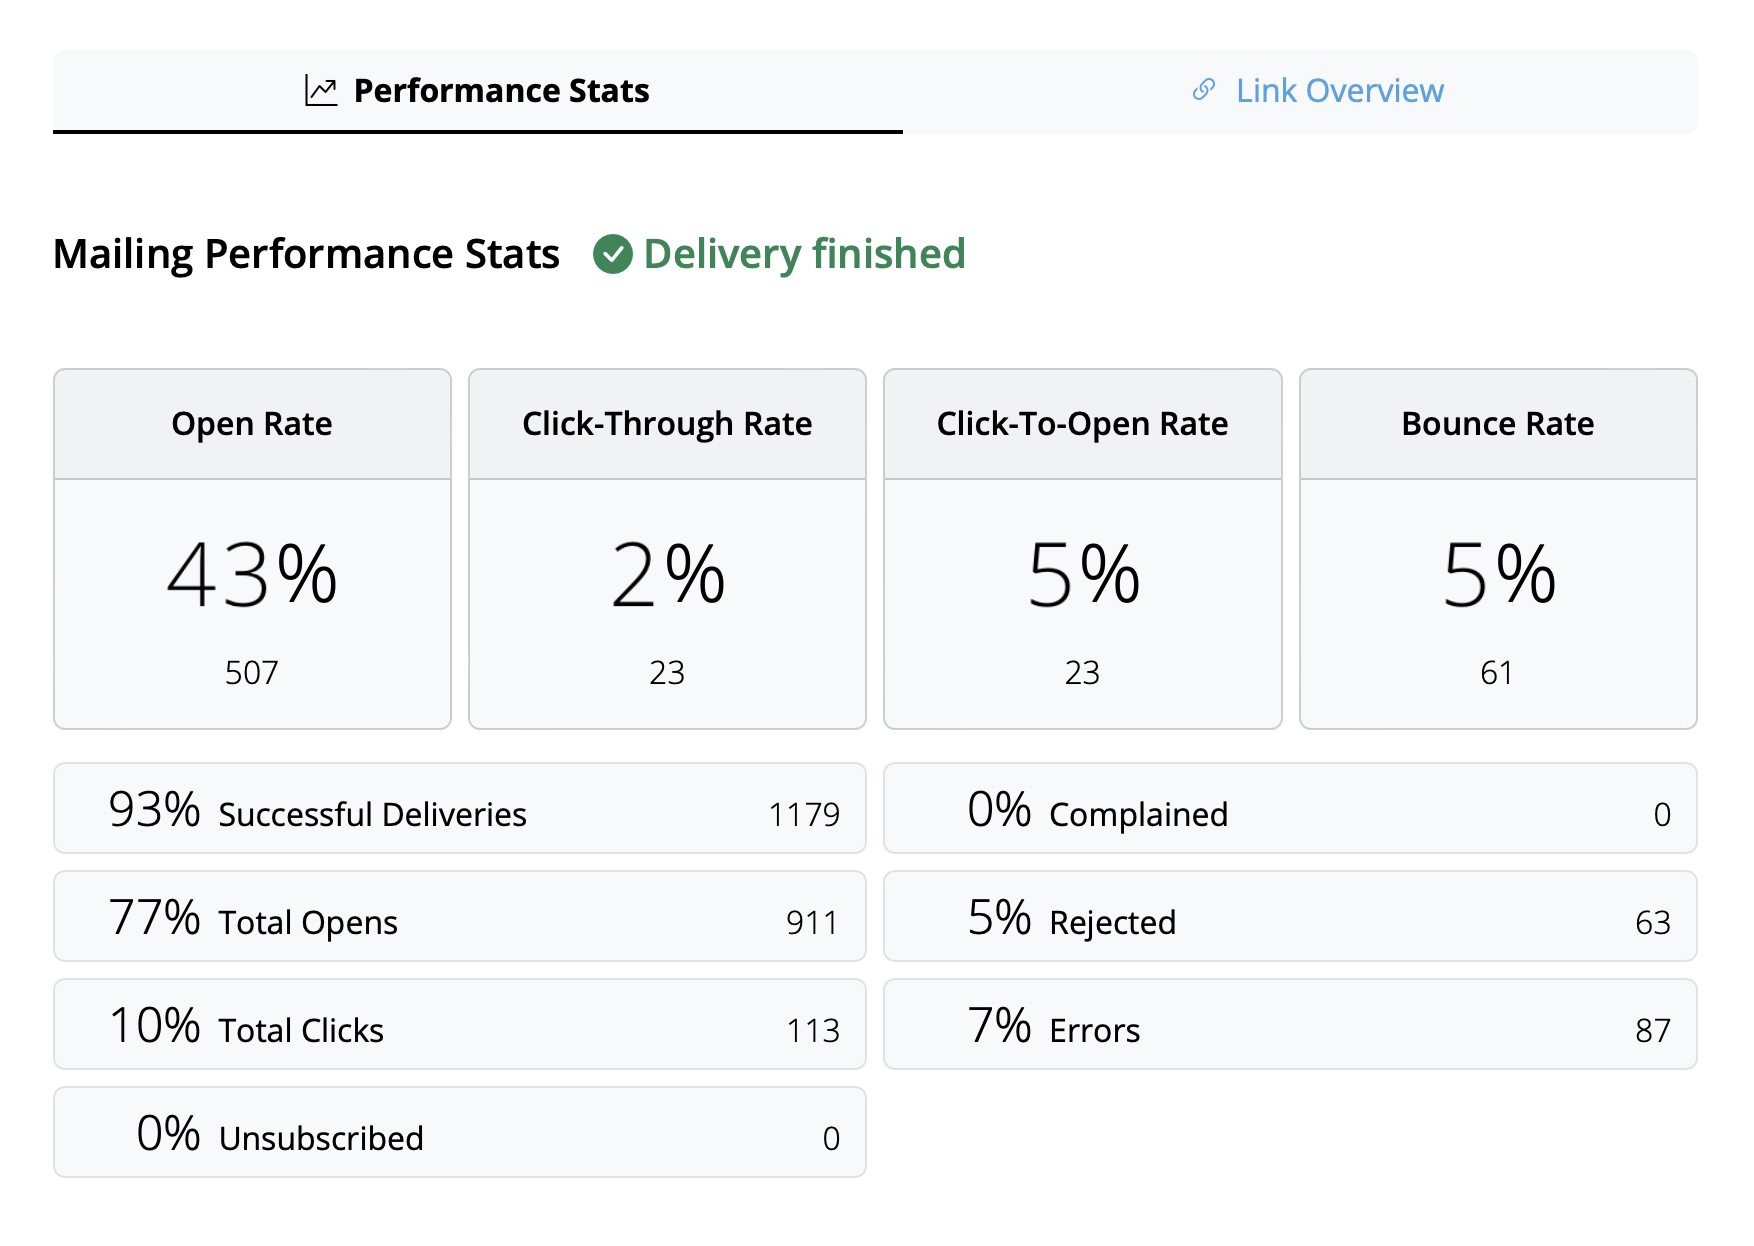
Tip: For best results, we recommend carrying out your final analysis from 24 hours after delivery. This helps ensure all recipients have had time to read and interact with your campaign.
Interpreting email metrics
The performance report covers a wide range of analytics data which aim to help you better understand how your campaign did and what you can improve on next time.
Here is a breakdown of the most important email metrics, what they represent and some current industry benchmarks:
- Open Rate: The number of times your email was opened compared to the amount of successful deliveries. The benchmark for this can vary depending on industry but anything above 25% can be considered a good result.
- Click-Through Rate: The number of email link clicks compared to the number of successful deliveries. This value is often quite low, with an average of around 2–3% across all industries.
- Click-To-Open Rate: The number of email link clicks compared to the number of email opens. This helps you understand how your email content resonated with readers. A good benchmark to aim for here is 10%.
- Bounce Rate: The percentage of emails which were not successfully delivered to the recipient – e.g. because the email address is incorrect or inactive. Here, the lower the number, the better. Anything above 3–5% should be cause for concern.
- Unsubscribe Rate: The percentage of recipients who unsubscribed from your email list after receiving this email. Again, you want this number to be as low as possible – ideally 0! However, anything under 0.5% can be considered a good result.
Tip: If you are noticing higher unsubscribe rates, you should take a look at the type of content you are sending, the frequency of your emails, and also consider segmenting your audience appropriately.
Other useful statistics
These metrics are also worth a mention and shouldn't be overlooked in your email analysis:
- Complained Rate: This calculates the number of recipients who marked your email as spam. This is never a good sign and if you notice your emails being marked as spam, check out this post for our tips →
- Rejected Rate: This calculates the number of times your email was rejected by an email provider (e.g. Gmail, Outlook, Yahoo, etc.) and can be an indicator for a more serious issue. If your emails are being rejected, please ensure you are sending from a verified email domain. More information →
How to Create a Signup Form for Your Website
Want to offer your customers an easy way to subscribe to your email newsletters?
Mail Designer Delivery Hub can be conveniently connected to your website, offering your website visitors a direct way to sign up to your email list. Here's how it works!
Create a signup form
The signup form builder in Delivery Hub is easy to use and a great way to grow your email list.
Good to know: Signup forms are available in all Mail Designer 365 Campaigns plans. The number of forms you can create depends on your plan tier.
Setting up your form
To get started, go to https://my.maildesigner365.com/team/deliveries/contacts/signupForms to set up your new signup form.
You can begin by giving your form a name, e.g. Website Signups. This helps you identify where the contacts came from and is not visible to customers.
Additionally, you can add a catchy title which will be visible on your site.

Form fields
The next step is setting up the fields of your form. This is an important step, as it determines how contacts will be categorized later in Delivery Hub.
First and last name
You have the option to allow subscribers to enter a first and last name into your form. This can be helpful if you wish to send personalized emails, but also adds an extra step to the signup process.
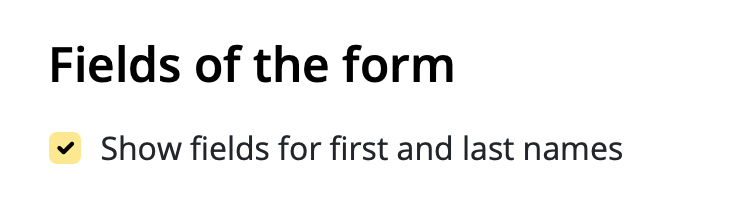
Automatic placeholders
These placeholders will be automatically assigned to new contacts who sign up via this form. Subscribers will not be able to see the placeholder name when they sign up.
Choose an existing placeholder from the list or enter a new one, for example "Origin", then click "Create new placeholder...":
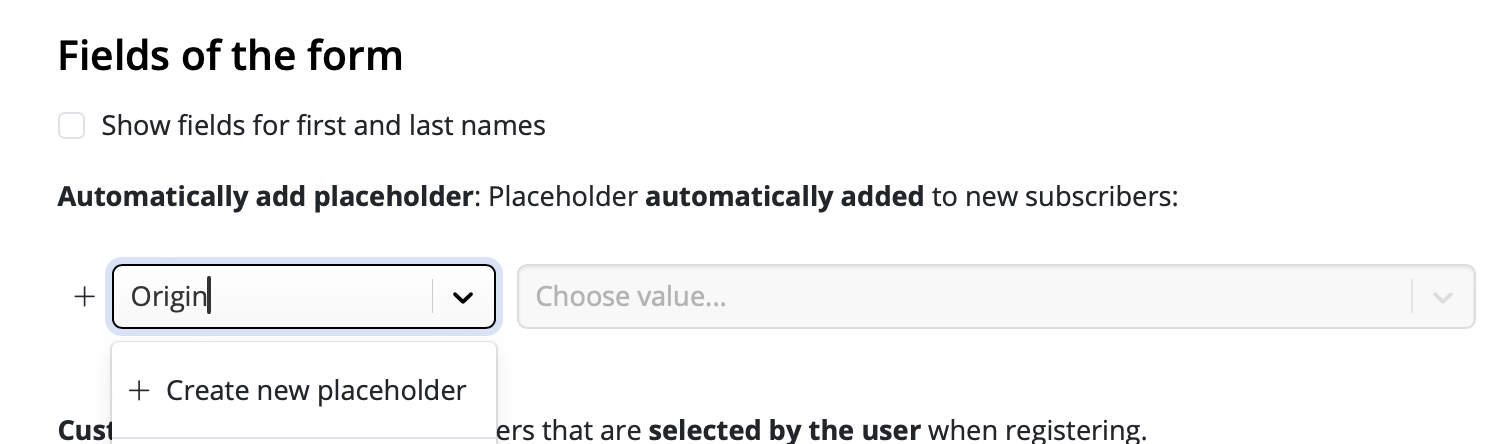
Following this, enter a placeholder value. For example, "Website", then click "Click to create new value...":
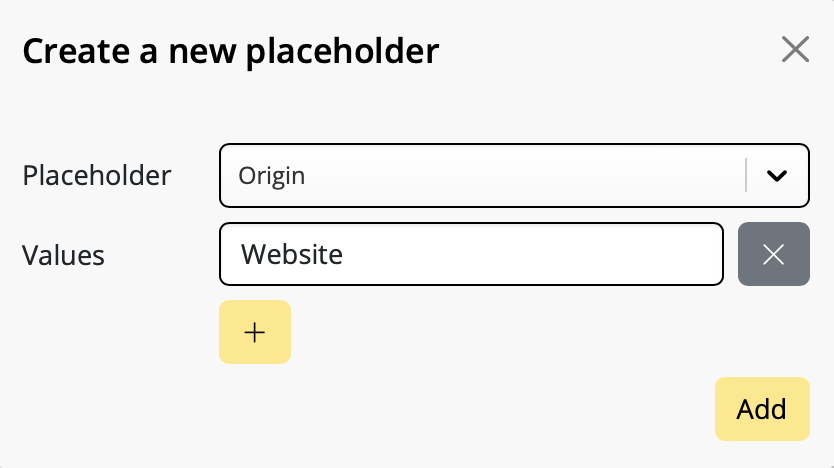
New signups via this form will now be automatically assigned this placeholder, meaning you can see how many contacts came via your website and even create tailored content for them.
Customer placeholders
In many cases, it's helpful for customers to self assign placeholders to help show you what type of content they are interested in.
Let's say you are a clothing store and regularly create newsletters with news and offers on women's, children's and men's fashion. You can include these as options in your signup form to let your subscribers determine which newsletters they want to receive.
This is a great way to make sure your email content stays relevant and reduces the risk of contacts unsubscribing later.
Again, you can choose an existing placeholder from your list, or enter a new one as described in the previous step. Here, we are using the placeholder "Newsletter Type" with the values "Women", "Children", and "Men". These will be the options your website visitors can choose from.

As soon as you've specified these placeholders, you can also customize how they are displayed to users.
Check the box "Show placeholder label" to enter a text which best describes the choices shown to users – e.g. "I'm interested in offers for"

You can now choose a display type. In most cases, "Checkbox" makes sense, i.e. if you want to offer multi selection. However, if users should only choose one option (e.g. location) or can input their own values (e.g. birthday), you can select the appropriate option from the dropdown menu.
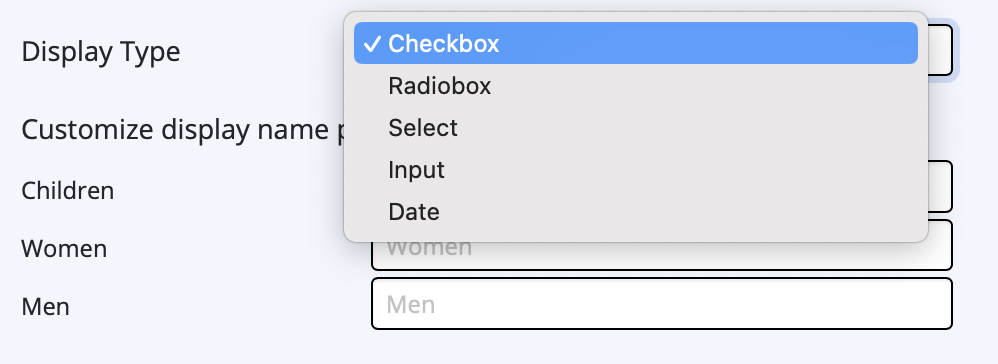
Finally, you can enter a custom button text for your signup form in the field provided:
Double Opt-In
A double opt-in email is essential for all new sign ups, as it helps ensure your newly obtained email addresses are genuine – a good measure for preventing email bounces later on. Therefore we recommend keeping this option active.
The Delivery Hub signup form generator allows you to customize your double opt-in emails. Fill out the fields for email subject line, body text, and button.
In this section, you can also specify a custom landing page (e.g. a thank you page) for new subscribers.
Layout & Preview
In the final setup step, you can choose between different layout options for your signup form. For example, light or dark design.
To preview a design option, select your design settings, then click the refresh icon to see the latest version of your form. This also includes a preview of all the form fields selected in the previous step:
Once you're happy with the design, remember to save the form by clicking "Save Form":
Adding a signup form to your website
Adding your finished form to your website is super easy, thanks to Delivery Hub's code generator.
- Click on "Generate code" to create the code needed for your form
- Click "Copy code" to copy the form code to your clipboard
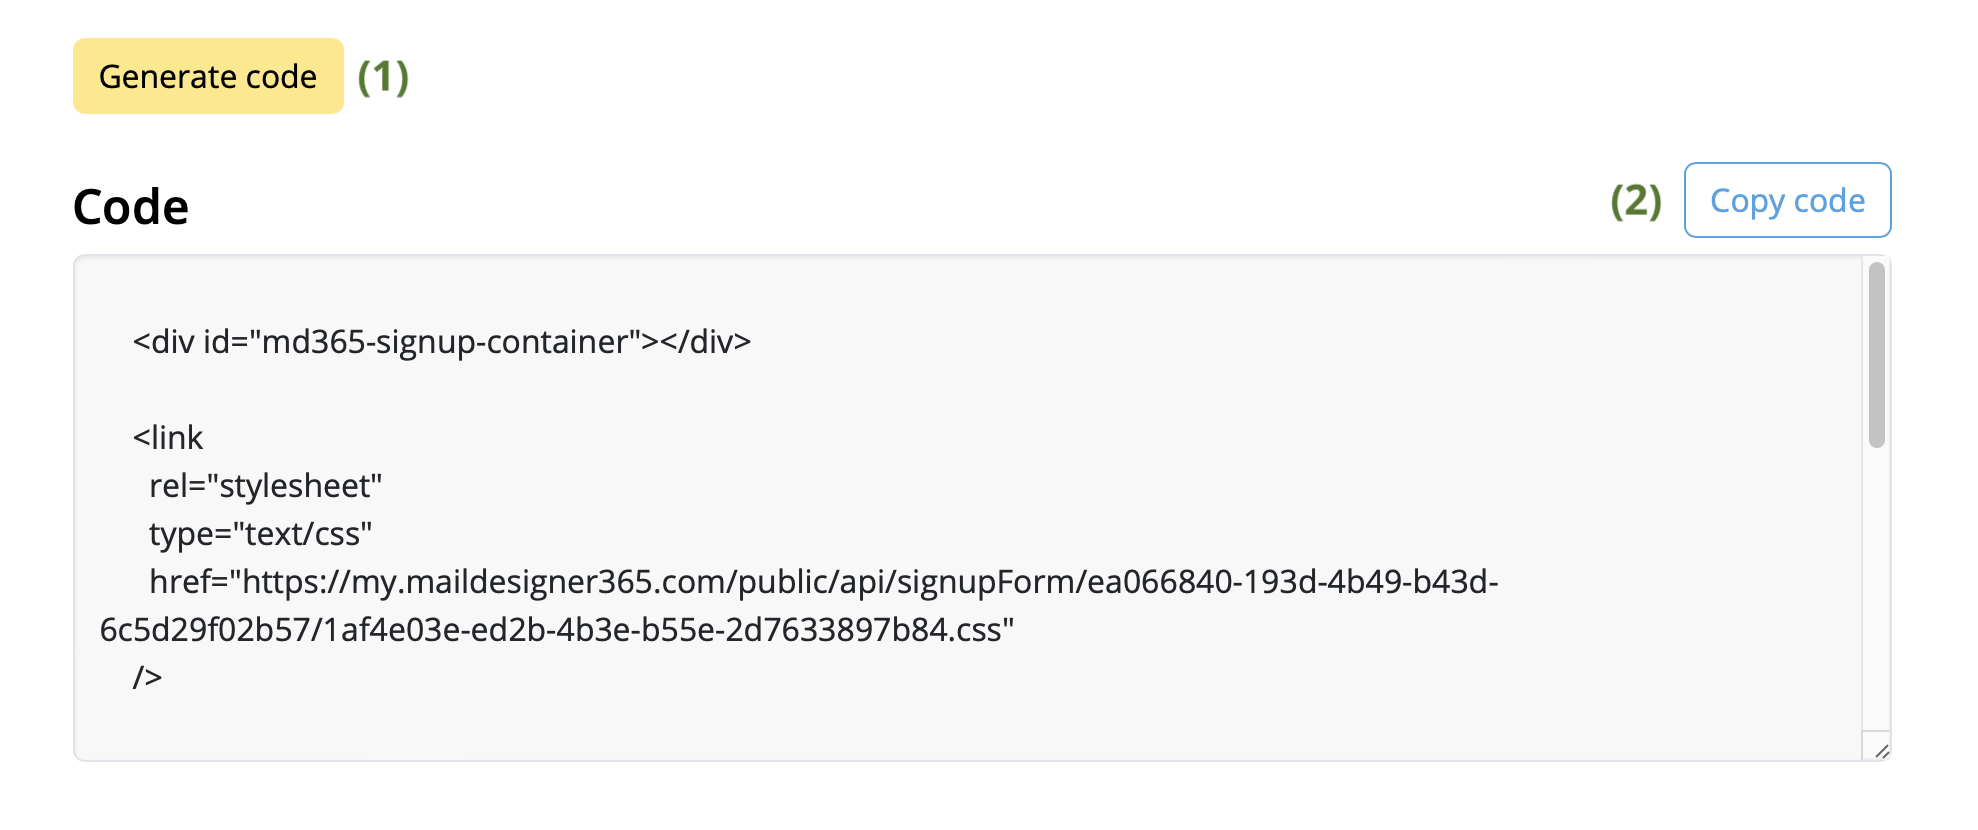
You can then paste this code into the desired area of your website and start collecting new subscribers!
Your next step - creating an audience
If you have not done so already, now is a good time to set up your email list(s). We call these audiences.
You can base your audiences on certain criteria, known as placeholders i.e. the placeholders you specified in your signup form. For example, our clothing store needs at least three audiences for their newsletters: for women's, children's, and men's fashion.
Audiences can be created at: https://my.maildesigner365.com/team/deliveries/contacts/targetgroups
Creating a new audience
We will start off with the newsletter for women's fashion. Create a new audience and give it a name (i.e. "Women".)
Now, select the placeholder (i.e. “Newsletter Type”) that you created during form setup.
Next, select the corresponding value (e.g. "Women"):
Now all contacts with the placeholder value "Newsletter Type = Women" will be displayed below. Click to save your new audience.
Create additional audiences
These steps can also be carried out for the “Men” and “Children” lists by selecting the appropriate placeholder values, providing you with dynamic audiences for each newsletter type.
Whenever a subscriber signs up via your website form, they will be automatically added to the respective audience(s) based on the categories they select.
If you want to create one audience with all your website signups, follow the steps above using the placeholder and value that you specified during form setup, i.e. "Source" and "Website". All new subscribers will be automatically added to this list – even if they don't select one of your optional fields.
- Open team management and invite another member.
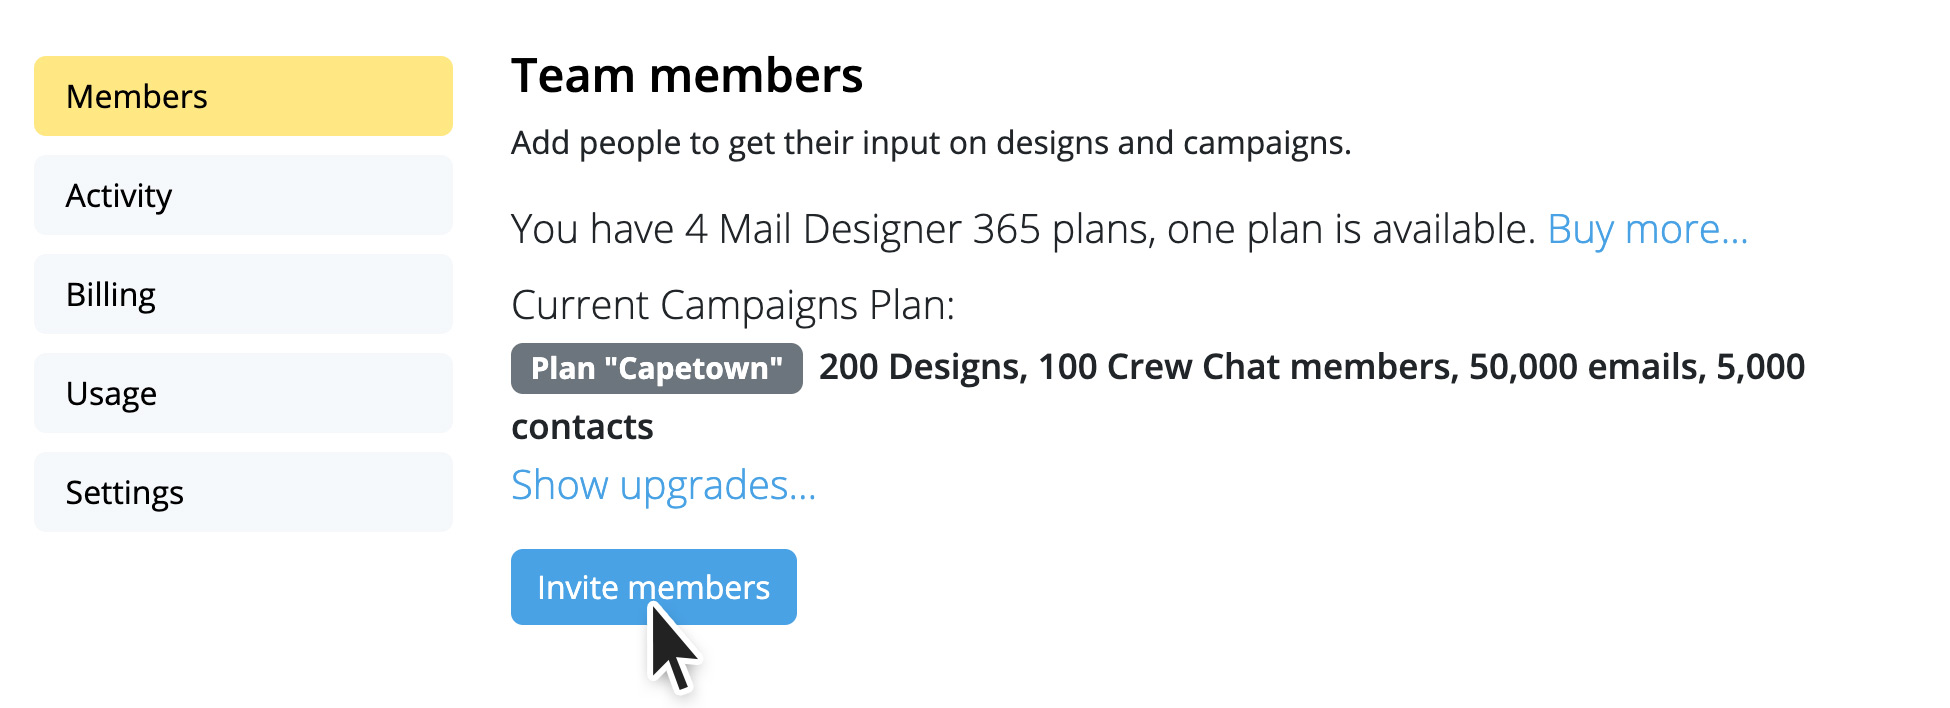
- Then log out of your current Mail Designer account (top right)
- Now open the invitation link from the email from your second email address.
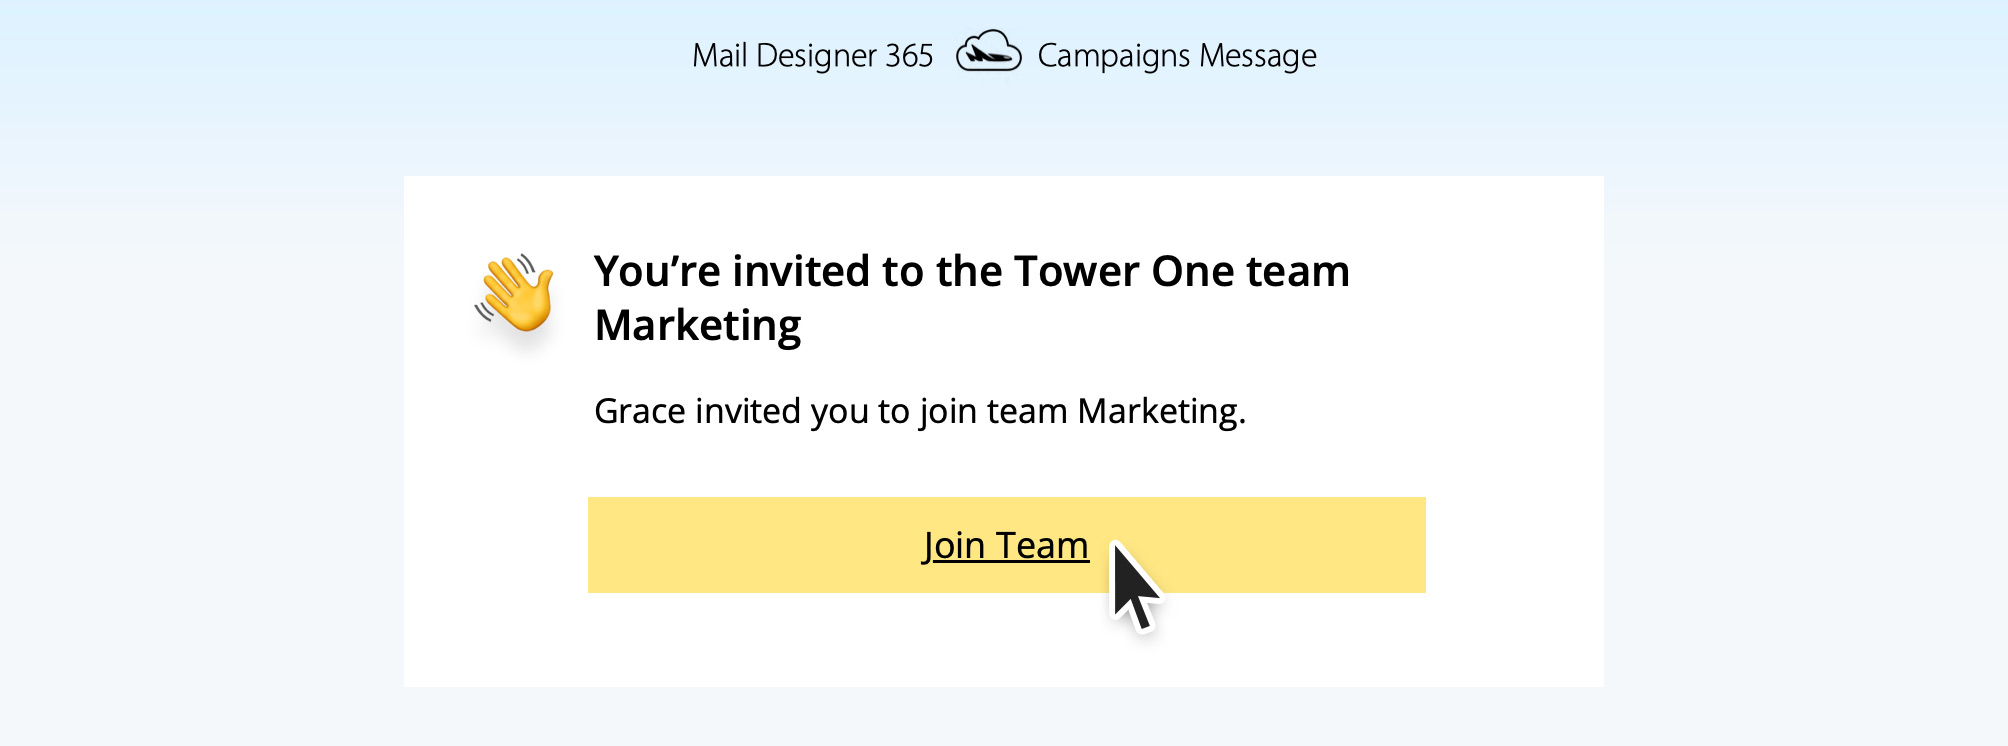
- Create a new account with the second email address.

- When you start the test send now, select the bottom option “Team”.
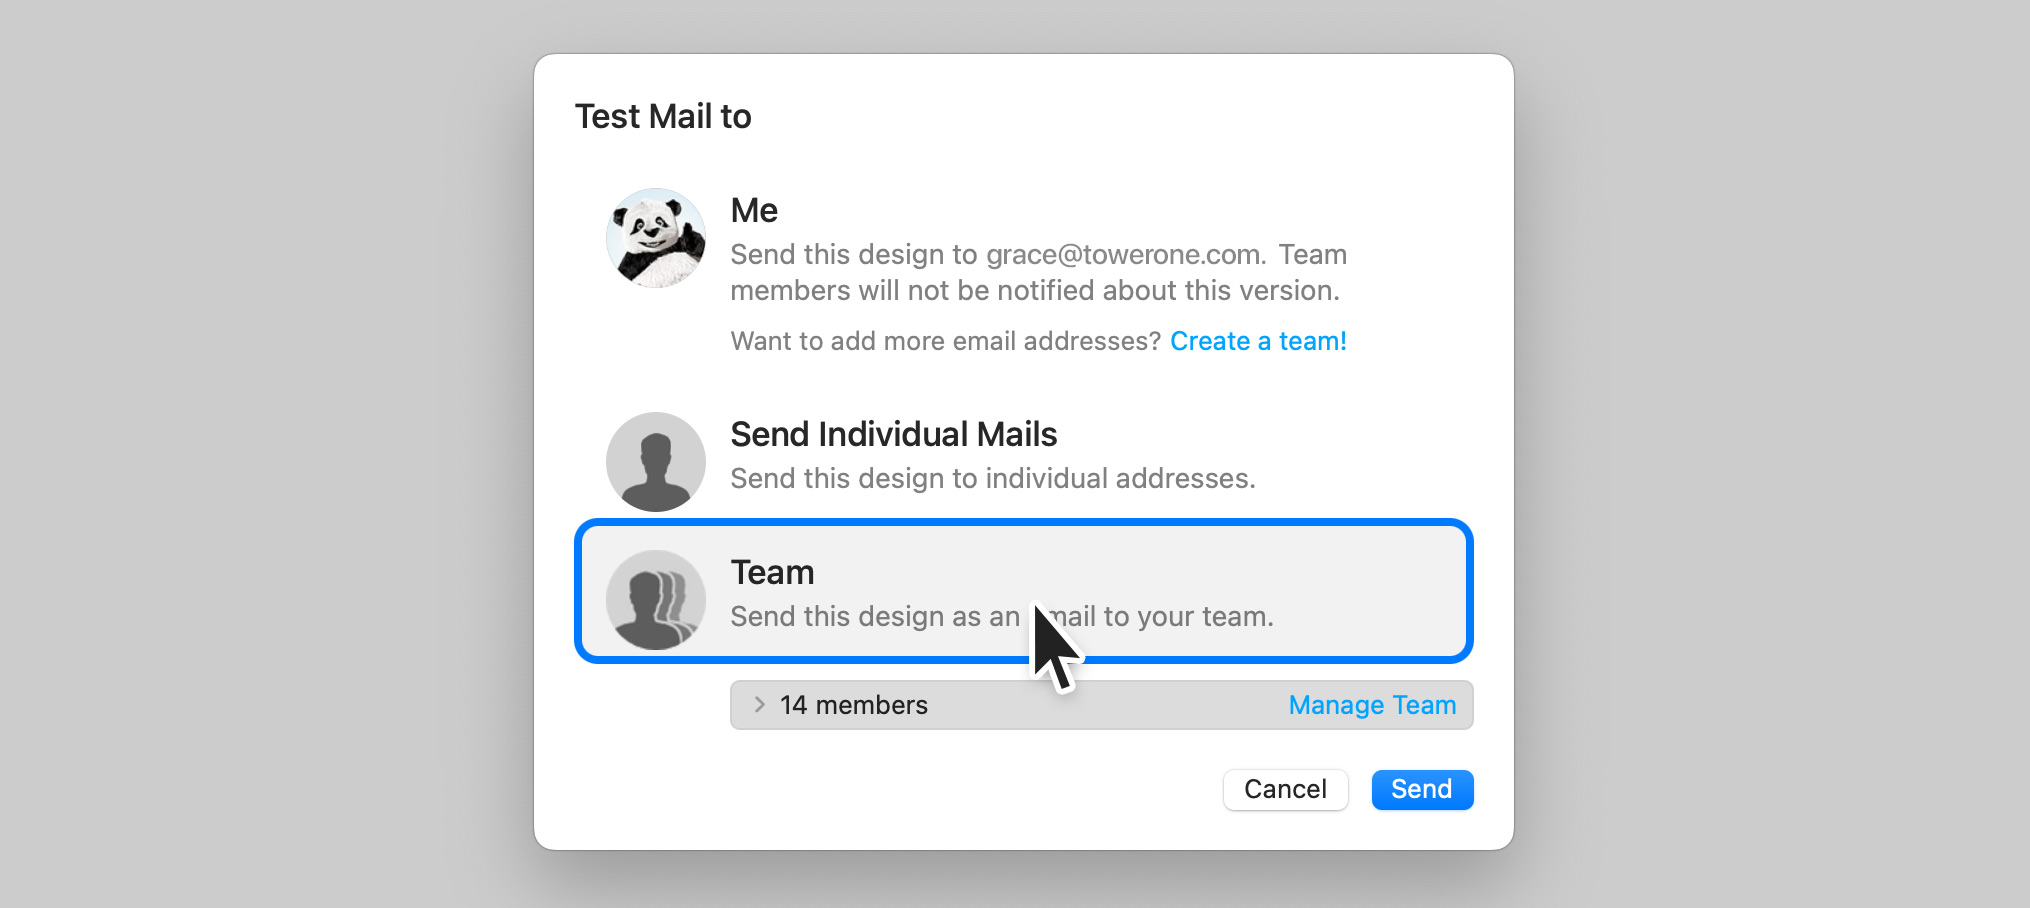
This will send the test email to all members of the team, including your second email address.
You can repeat these steps for other email addresses. Up to 10 team members or additional email addresses can be added.
- Tap the connection. The connection card appears.
- Tap on “Feedback”
- Provide a short description of the connection problem
- Tap on Send
- Edit your connection.
- Navigate to the “Advanced Options” section.
- In “Additional Settings”, change the setting “Connect using IPv4 or IPv6” to “Use IPv4”.
- Save your connection and start your connection.
sudo networksetup -setv6off Wi-Fi
Note: If your Wi-Fi interface has a different name (e.g., `en0`), replace "Wi-Fi" with the correct name. You can check the name of the interface using this command:
networksetup -listallnetworkservices
3. After entering the command, you'll be prompted to enter your admin password.
This will completely disable IPv6 for your Wi-Fi connection.
- Protocol Explanation:
- Point-to-Point Tunneling Protocol (PPTP): PPTP is a protocol that facilitates the secure transfer of data between a user's device and a VPN server. It creates a tunnel through which data is encapsulated, providing a secure connection.
- Encryption and Security:
- Encryption: PPTP employs various encryption methods to secure the data transmitted through the tunnel, making it difficult for unauthorized parties to intercept or decipher.
- Ease of Setup:
- User-Friendly Setup: PPTP is known for its simplicity and ease of setup. It's often the preferred choice for users who prioritize a straightforward configuration process.
- Compatibility:
- Widespread Compatibility: PPTP is compatible with a wide range of devices and operating systems, including Windows, macOS, Linux, iOS, and Android, making it accessible for users across different platforms.
- Speed and Performance:
- Performance Considerations: PPTP is recognized for its relatively fast connection speeds, making it suitable for activities like streaming and online gaming.
- Considerations for Security-Conscious Users:
- Security Concerns: While PPTP offers a convenient solution for many users, it's important to note that some security experts have raised concerns about its vulnerability to certain types of attacks. Users with high-security requirements may want to explore alternative VPN protocols like OpenVPN or L2TP/IPsec.
- Choosing the Right VPN Protocol:
- Consider Your Needs: When selecting a VPN protocol, it's essential to consider your specific requirements, including the balance between ease of use and the level of security needed for your online activities.
The thing triggering these blocks of email transmissions is not the nature of the email. Even personal Christmas Greetings will potentially get blocked if sent to a large enough audience. After all, how would the email provider know what nature the content of the email is? They block emails purely based on the number of emails being sent at the same time from the same origin.
Here is how Mail Designer Campaigns can help in this situation:
- When you don't have your own domain email address, we replace the From Address automatically with one of our verified Domains
- This address replacement would look as follows: Original Address - supercoolmails@yahoo.com New Address: supercoolmails.yahoo.com@sentwith.maildesigner365.com
- Since the Domain @sentwith.maildesigner365.com is fully DKIM certified, these emails would not be blocked due to DKIM issues.
Alternatively if you do have your own Domain, Mail Designer Campaigns allows you to DKIM verify your send address, so you can send from your own Domain without being blocked by the providers.
Are you new to Mail Designer? Why don't you try the Mail Designer Free Demo for Mac users.
On rare occasions, the VPN Tracker support team might ask you to record the network traffic between your VPN gateway and your Mac. Here's how to do that:
First, you need to know the hostname or IP address of your VPN gateway. You can see it in the status page of your connection (the hostname is in the third column), or by editing your connection.
Then, follow these steps:
- Open Terminal.app, which you can find via Finder in Applications > Utilities.
- Enter the following command, and replace [hostname] with the hostname or IP adress of your VPN gateway:
sudo tcpdump -i any host [hostname] -w ~/Desktop/traffic.pcap - You will be asked for a password: this is the password of your Mac user account. You get asked for it because recording network traffic requires elevated privileges.
- After entering the password, the command appears to hang. It is now recording traffic until you press Ctrl+C (but please don't press that yet).
- If you see the command prompt again you have likely entered the wrong password. Please run the command again (Tip: press the arrow-up key to recall the command).
- Go back to VPN Tracker and start the connection you might experience trouble with.
- After you have reproduced the problem (for example, after the connection failed to connect), go back the Terminal.app window in which tcpdump is running.
- Press Ctrl+C to stop the recording.
- On you desktop, there's now a file traffic.pcap. Please send this file to equinux support.
1. Trust the certificate in VPN Tracker manually
You can make VPN Tracker always accept the certificate if you know that the certificate belongs to your device and are willing to accept the risk: in the warning dialog, click on “Show certificate” and verify that the certificate is the one you expect. Then check the “Alway trust …” checkbox and press “Continue”. Subsequent connection attempts should then skip this dialog.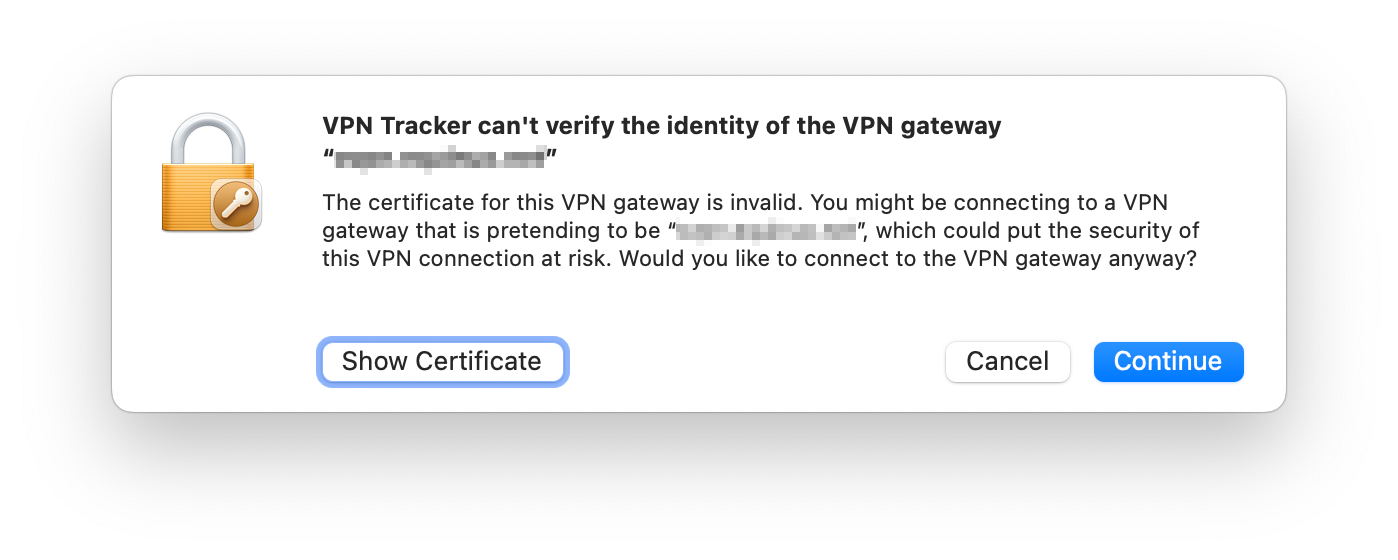
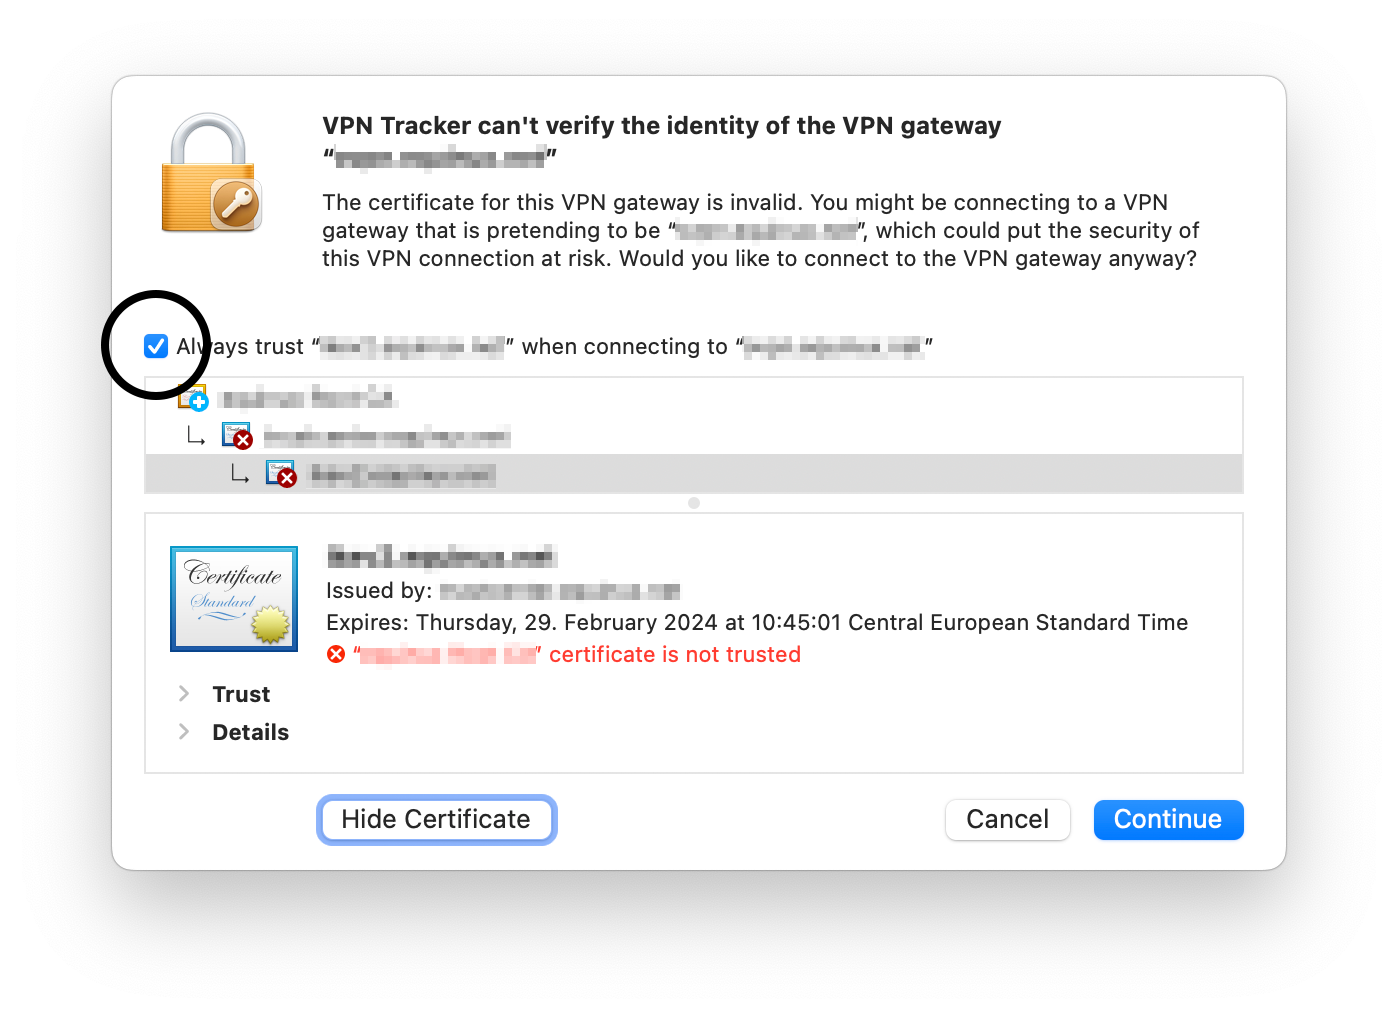
2. Turn off the certificate warning in the connection settings
If you are rolling out a connection to a team and you want to avoid each user having to trust the certificate manually, you can deactivate the verification in the connection settings. To do this, edit the connection, navigate to the “Advanced Options” section, expand the “Certificates” section and uncheck “Verify Remote Certificate”. Then save the connection and restart it.Please be aware that we cannot process refunds in the following scenarios:
- Non-usage of the app or service
- Failure to cancel your account within the cancelation period
- Lack of features or functionality on your subscribed plan
- Purchases made in error
- Exceptional circumstances beyond our control
- Violations to our Terms of Use
- Non-usage of the app or service
- Failure to cancel your account within the cancelation period
- Lack of features or functionality on your subscribed plan
- Purchases made in error
- Exceptional circumstances beyond our control
- Violations to our Terms of Use
What is a MAIL FROM Domain?
When sending an email, there are two addresses that reveal its source:- a FROM address, visible to the recipient
- a MAIL FROM address denoting the message's source
When do I need a MAIL FROM Domain?
When you use Mail Designer 365 Campaigns for sending emails, the default MAIL FROM domain automatically uses a subdomain of Mail Designer 365 Campaigns (sentwith.maildesigner365.com). In this case, Sender Policy Framework (SPF) authentication effectively validates these messages since the default MAIL FROM domain aligns with the Mail Designer – i.e. the application responsible for sending the email. However, if you would prefer not to use Mail Designer 365 Campaigns' default MAIL FROM domain, and instead wish to opt for a personalized subdomain under your own domain, this is known as utilizing a custom MAIL FROM domain within Mail Designer 365 Campaigns. In short, using a custom MAIL FROM domain allows you to gain the flexibility to utilize SPF, DKIM, or both for attaining Domain-based Message Authentication, Reporting, and Conformance (DMARC) validation. DMARC empowers a sender's domain to signal that emails dispatched from the domain are safeguarded by one or more authentication systems. DMARC validation can be achieved through SPF compliance, DKIM compliance, or both methods.Requirements for a custom MAIL FROM domain
When setting your own MAIL FROM domain, the following requirements must be met:- Must be a subdomain of the parent domain of a verified email address or domain
- Should not be the same as a subdomain that you are using to send email from
- Should not be the same as a subdomain that you are using to receive email
How to set up a custom MAIL FROM domain in Mail Designer 365 Campaigns
In order to set up a custom MAIL FROM domain, you'll need to add records to the DNS configuration for the domain. Mail Designer 365 Campaigns requires users to publish an MX record so that your domain can receive the bounce and complaint notifications sent to you by email providers. You will also have to publish an SPF (type TXT) record to show that Mail Designer 365 is authorized to send emails from your domain.- Log in to your my.maildesigner365 account and go to From:addresses > Domain Verification
- Locate your domain in the list and click on the tab MAILFROM:
- You will now see and be able to copy the text for the new MX record you need to add to your domain's DNS record
Please note once you are done, it could take up to 48 hours to update your settings, depending on your DNS provider. The green checkmark will indicate when the setup is complete:

- Open up your template in Mail Designer 365 and make the changes in your design
- Go to Delivery Hub and open your scheduled campaign
- The new version of your template will be picked automatically.
- Press Save to save your campaign with the new design
- Repeat for other scheduled campaigns using the same design
- id.equinux.com
- my.maildesigner365.com
- data.maildesigner365.com
- my.featurenotes.com
- polyfill.io
- www.gravatar.com
- wp.com
- api.rudderlabs.com
- VPN Tracker for Mac BASIC - 1 Connection
- VPN Tracker for Mac PERSONAL - 10 Connections
- VPN Tracker Mac & iOS EXECUTIVE - 15 Connections
- VPN Tracker Mac & iOS PRO - 50 Connections
- VPN Tracker Mac & iOS VIP - 100 Connections
- VPN Tracker Mac & iOS CONSULTANT - 400 Connections
- Regular email with several contacts in the To field
- Regular email with several contacts in the BCC field
- An email to a predefined group, such as an Outlook Group
- Your email service provider or the recipient's email service provider may raise suspicions of SPAM (unsolicited junk emails) sending, potentially leading to your account's suspension or temporary freeze.
- Receiving an email with an extensive list of recipients often diminishes its perceived relevance to individual recipients, making it seem impersonal and more likely to be classified as junk mail.
- Messages sent to a large number of recipients are often flagged by Junk Mail Filtering systems as Spam, increasing the risk of your message being blocked and not reaching its intended recipients.
- Mail Designer Campaigns enables you to fully verify your domain, ensuring optimal verification for your emails to reach recipients' inboxes.
- If you don't have your own domain or prefer not to undergo the verification process, we can provide you with a custom address from a fully authenticated domain, significantly reducing the risk of your emails being marked as Spam.
- We offer intelligent list management for your contact lists, allowing you to either send emails to all contacts or create targeted groups tailored to your audiences.
By default Zyxel creates firewall policies to allow traffic to flow from SSL VPN to LAN zone and from LAN to SSL VPN zone. Those rules are required to allow VPN traffic flow once the connection has been established. But there is no policy that actually allows VPN management traffic at the WAN port, client requests arriving at the WAN port are discarded by the firewall.
To allow an OpenVPN connection on the WAN port, you first have to create an own policy. In the main navigation, select Security Policy > Policy Control, click on the + Add button and create a policy that allows traffic for the service SSLVPN to flow from WAN to ZyWALL. Please see screenshot below.
- Brew must be installed on the computer: https://brew.sh
- Enter in the terminal:
brew install --cask vpn-tracker-365
- Open Finder and use the menu “Go > Go to Folder…”.
- A dialog opens. Into this dialog, please copy & paste the following path without quotation marks: “/Library/Application Support/VPN Tracker 365/var” and press Enter.
- You should see a folder named log. Please drag it to your Desktop, which will copy its content.
- On your Desktop, right-click (or click while holding down the Control key) on the log folder and select the Compress “log” menu entry.
- Please send the resulting log.zip file to our support.
- Open Console.app, which you can find in Finder in Applications > Utilities.
- Either press the “Start streaming” text or the “Start” toolbar icon.
- Start VPN Tracker 365 and reproduce the issue.
- Switch back to Console.app and click on the “Pause” toolbar icon.
- In Console.app, click into the log message list and press ⌘+A to select all messages, then press ⌘+C to copy them.
- Open any text editor and create a new file, for example using TextEdit.app.
- Press ⌘+V to paste the copied log messages into your text editor.
- Save the file and send it to our support.
If your OpenVPN connection drops after a while, it may be due to the rekeying period. Test whether extending the period can solve the problem.
Proceed as follows:
- Edit your OpenVPN connection in VPN Tracker
- Navigate to "Advanced Settings > Phase 2"
- Change the Lifetime value to 28800 (which corresponds to a period of 8 hours)
If this doesn't resolve your issues, may also want to check your interoperability keep-alive, activity, and dead peer detection settings.
If you continue to have problems with your VPN connection, please send us a TSR report.
Convert Your Products into Store Credit
If you wish to change the number of your licenses, you have the option to convert your existing license into store credit. You can then use this credit for your next purchase:
- Visit our Store Promo Code Transfer Page and follow the instructions to receive your promo code.
- Select your new products in the my.vpntracker Store.
- Enter your promo code during the checkout process.
Note: If the remaining value of your old product exceeds the amount for the new product, you will receive an additional promo code for the remaining value.
'Your Sonicwall' is either currently unreachable or is not a valid SonicWall appliance. Would you like to save this connection anyway?
When starting the connection, the following appears:
Connection Error
'Your Sonicwall' is not a SonicWall SSL VPN server.
In such cases, we recommend switching to VPN Tracker. VPN Tracker is available for both Mac and iOS. An added advantage is that once a connection is set up, it’s immediately available on both devices, as VPN Tracker securely syncs the settings through the Personal Safe.
Update September 2024: SonicWall has introduced another update with SonicOS 6.5.4.15-116n, which has rendered SSL VPN functionality non-operational for many SonicWall devices.
Update November 2024: This issue seems to be addressed by the SonicOS 6.5.4.15-117n update. For more information, please visit:
https://www.sonicwall.com/support/knowledge-base/mobile-connect-breaks-after-upgrade-to-sonicos-6-5-4-15/240903132324983
After upgrading to macOS 15 Sequoia, you might notice that your Mac constantly changes its MAC address, affecting your ability to connect to your VPN. This behavior is due to macOS 15’s new privacy features, which can assign randomized MAC addresses for network connections. However, you can configure your network settings to always use a fixed MAC address, which can resolve issues with VPN connectivity, such as DHCP reservations failing due to MAC address changes.
How to Set a Fixed MAC Address in macOS 15 (Sequoia):
-
Open System Settings:
- Click the Apple logo in the top-left corner of your screen.
- Select System Settings from the dropdown menu.
-
Go to Wi-Fi Settings:
- In the left sidebar, click Wi-Fi.
- Select the Wi-Fi network you usually connect to for VPN access and click on "Details...".
-
Configure the MAC Address:
- Look for the option labeled Private Wi-Fi Address.
- Change this option to "Fixed" to use a fixed MAC address instead of a randomized one.
In some cases, the Fixed Setting may still cause issues. If this is the case, change the setting to "Off"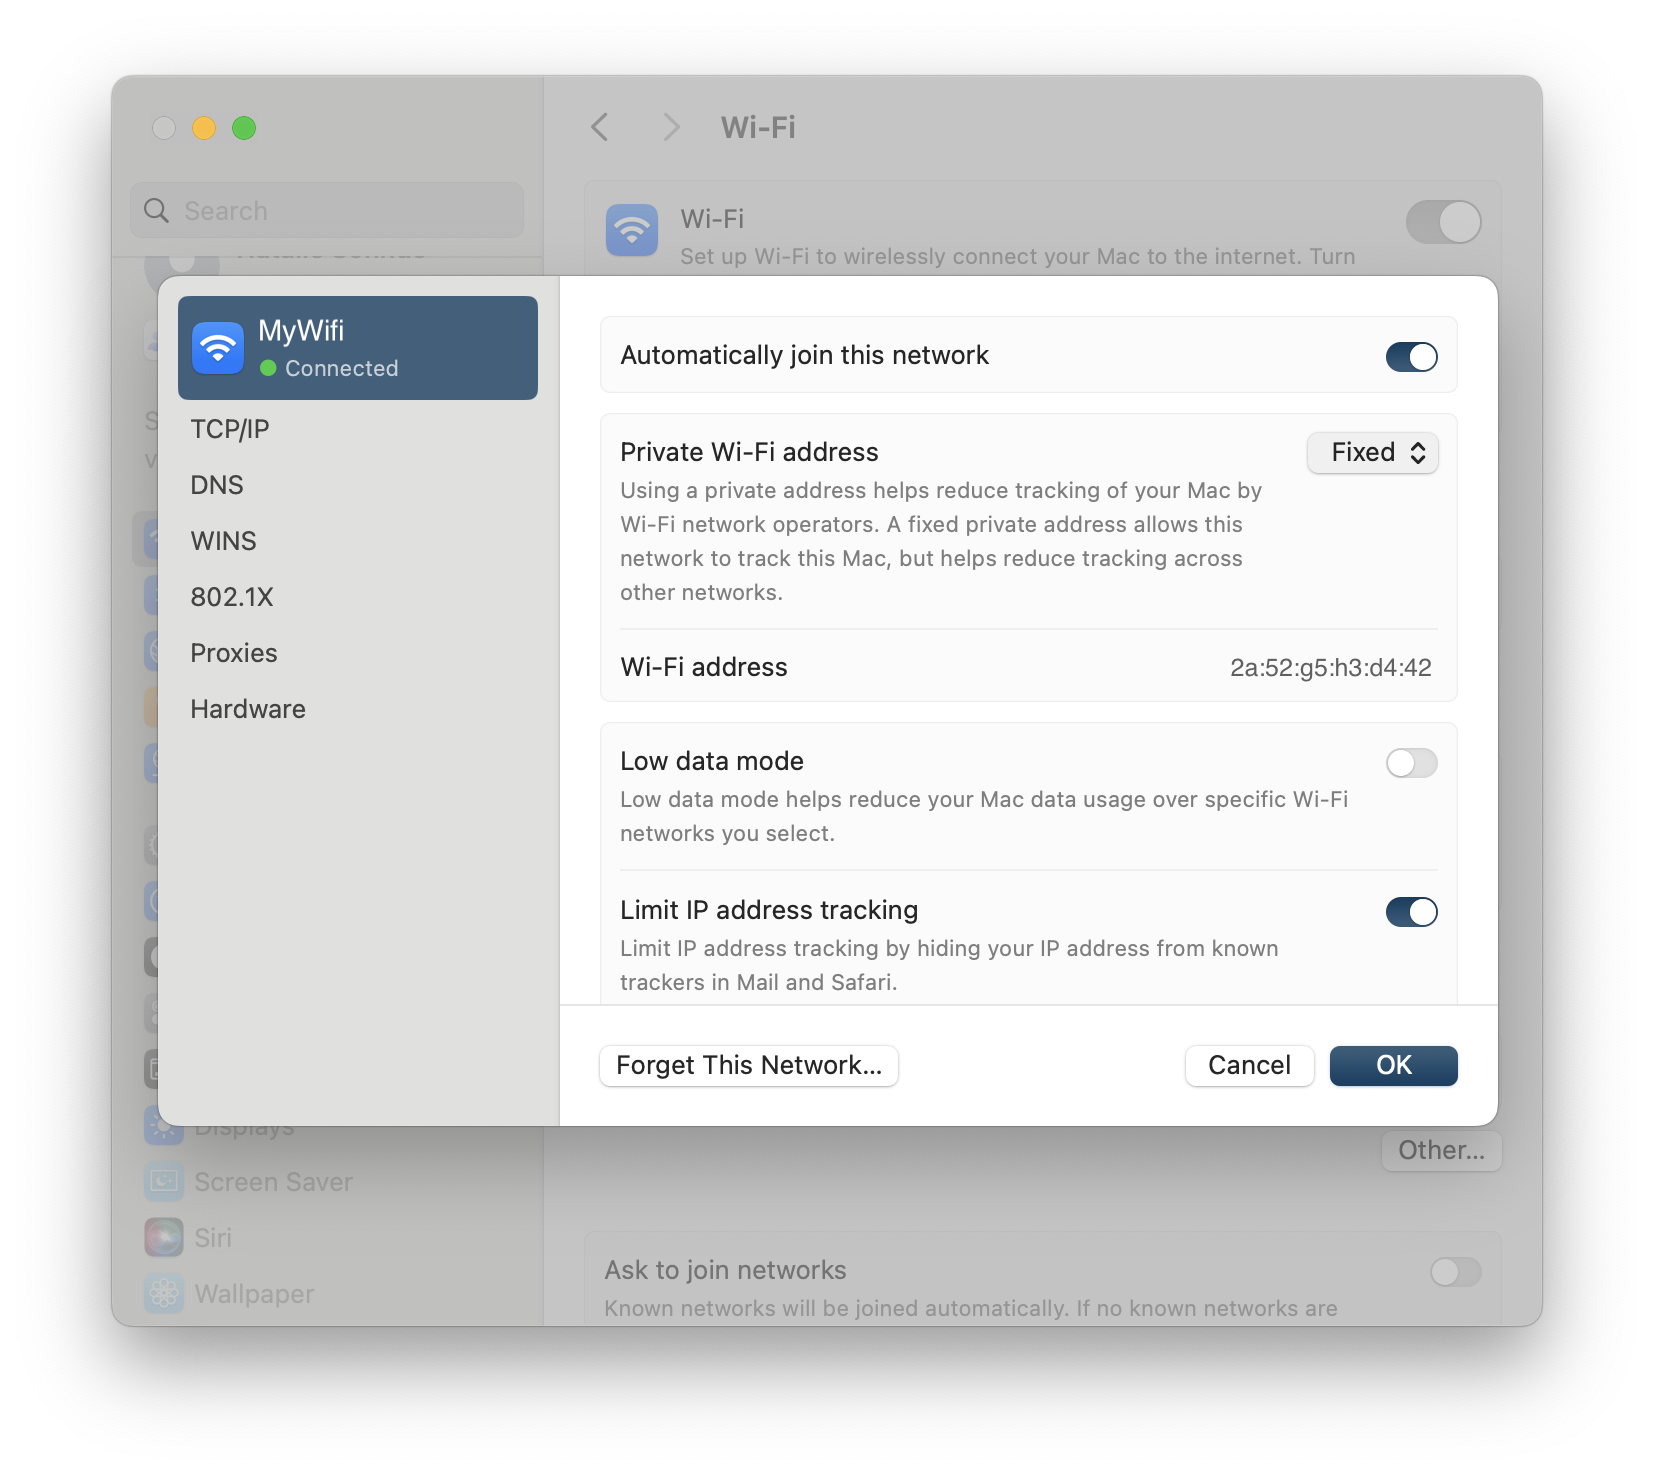
- Your network will now always connect using the same MAC address, helping maintain your VPN connection stability.
-
Re-establish VPN Tracker Connection:
- Once you've set a fixed MAC address, ensure that your VPN’s DHCP reservation or configuration aligns with this MAC address.
This process will restore the VPN Tracker’s ability to connect reliably using a consistent MAC address, resolving issues caused by macOS 15 Sequoia’s default MAC address randomization feature.
-
What are connection drops during rekeying?
Connection drops during rekeying occur when the VPN connection is interrupted during the key update (rekeying). This causes traffic to not be processed for a short period, which is particularly problematic for stable connections such as video conferences.
-
Why does the problem occur during rekeying?
The problem arises because, when using TCP with OpenVPN, the firewall does not accept any traffic during the rekeying process. This leads to an interruption of the traffic.
-
What impact do connection drops have on a video conference?
During a video conference, connection drops during rekeying can result in a complete interruption of the traffic. This causes the connection to break, disrupting or even ending the video conference.
-
Why is TCP susceptible to this problem?
According to OpenVPN, TCP is problematic for VPN connections because it is more sensitive to traffic congestion during network disruptions or the rekeying process. OpenVPN therefore recommends using UDP instead, as it can better handle rekeying processes.
-
What solution does VPN Tracker provide for the problem?
VPN Tracker offers a particularly user-friendly solution: when establishing a connection, VPN Tracker automatically sets the rekeying timer to 24 hours. This significantly minimizes connection drops due to rekeying processes, keeping the connection especially stable. Additionally, VPN Tracker supports switching to UDP, which allows for an even more reliable connection.
-
Why should the rekeying timer be set to 24 hours?
A longer rekeying cycle reduces the frequency of connection drops. By setting the timer to 24 hours— as VPN Tracker does by default— the likelihood of the rekeying process being triggered during a critical phase, such as a video conference, is decreased.
-
What advantages does VPN Tracker have when using UDP over TCP?
VPN Tracker makes it easy to configure UDP, which offers faster connections and less sensitivity to packet loss. UDP is more efficient and resilient to interruptions during the rekeying process, which is particularly beneficial for bandwidth-intensive applications like video conferencing or streaming.
-
What recommendations does VPN Tracker provide for companies to optimize their VPN connections?
For companies relying on stable connections, VPN Tracker offers simple and effective solutions:
- By default, the rekeying timer is set to 24 hours to minimize connection drops.
- It is recommended to use UDP instead of TCP whenever possible to further enhance performance.
Emails that contain only images are often flagged as spam because spam filters rely on text to evaluate the content's legitimacy. Without text, the filters may assume the email is hiding suspicious or harmful content, a tactic commonly used by spammers. Additionally, image-only emails can load slowly, frustrating recipients and increasing the likelihood that they will mark your email as spam.
To improve your email's chances of landing in the inbox, follow these best practices:
- Avoid image-only layout blocks: Instead of using layout blocks that consist only of images, opt for blocks that combine text and images. This ensures your text gets displayed as actual text, not as part of a large image, which helps filters and recipients better understand your content.
- Include relevant text: Clearly explain the purpose of the email using text. This gives spam filters context to analyze and helps your audience engage with your message.
- Use alt text for images: Add descriptive alt text to each image. This ensures that even if the images don’t load, recipients (and spam filters) can still understand the email’s content.
- Maintain a good text-to-image ratio: A balanced approach, where there’s more text than images, can reduce the chances of your email being flagged as spam. The text gives spam filters more material to evaluate.
- Use a combination of image and text blocks: Combining both elements not only enhances readability and engagement but also prevents spam filters from interpreting your email as an attempt to hide important information in images.
- Use a reputable email service provider like Mail Designer 365 Campaigns: Many email service providers such as Mail Designer 365 Campaigns help optimize email structure and offer authentication protocols like SPF, DKIM, and DMARC to enhance deliverability.
By following these guidelines and ensuring your email contains a mix of well-placed text and images, you can improve its deliverability and reduce the risk of it being sent to the spam folder.
- Set Up a New Email List: Create a new email list with recipients who did not open your original email. Resend the email to this group after a short delay, ideally with a different subject line or slight modifications to the content. This can help re-engage those who may have missed the first message.
- Review Email Content: Analyze the content of the emails that went to spam. Look for elements that could trigger spam filters, such as excessive use of images, spammy keywords, or poor formatting, and make necessary adjustments.
- Engage with Your Audience: Foster a positive relationship with your recipients by providing valuable content and encouraging interaction. Engaged recipients are less likely to mark your emails as spam.
- macOS 15 Sequoia and later: Go to System Settings > General > Login Items & Extensions, scroll down, and click the ⓘ icon next to 'Network Extensions'. Enable the switch next to VPN Tracker 365 in the dialog that appears.
- macOS 11 Big Sur to macOS 14 Sonoma: Navigate to System Settings > Privacy & Security, scroll down, and select 'Allow' in the confirmation box.
- Check your Wi-Fi connection: Make sure Wi-Fi is enabled on your device and connected to the correct network.
- Check cable connections: If you are using a wired connection, ensure the cable is securely connected and undamaged.
- Restart the router: Disconnect the router from the power source for about 30 seconds, then plug it back in. Wait a few minutes for the connection to re-establish.
- Contact an administrator or provider: If the problem persists, there may be an issue with your internet provider. Contact your administrator or your internet provider's customer service.
- Use a mobile hotspot: If you have access to mobile data, try setting up a hotspot to test the connection.
- You can see and configure if your currently active VPN connection excludes certain internet addresses in the connection configuration: In VPN Tracker, select the connection, choose "Edit," and then "Advanced Settings." In the "Traffic Control" area, there may be internet addresses listed that the VPN restricts access to.
- To check if your firewall excludes certain internet addresses, temporarily disable your firewall and try again the action in VPN Tracker that triggered the error message.
- Check your firewall settings for blocked applications or websites. Some firewalls allow specific IP addresses, domains, or applications to be selectively blocked or allowed.
- If you find that a rule is blocking access, you can adjust this rule or add an exception to allow access to specific websites or services.
- If you are still unable to gain access to certain areas, contact your firewall manufacturer's support or your IT support.
LCP: PPP peer accepted proposal but also modified it which isn't allowed.Please update your Sonicwall to at least SonicOS 6.5.4.15-117n to fix this problem. For more information, please visit: https://www.sonicwall.com/support/knowledge-base/mobile-connect-breaks-after-upgrade-to-sonicos-6-5-4-15/240903132324983
 Our experience also shows that IPsec connections are significantly more performant, so we likewise recommend using IPsec.
If you're struggling with email deliverability—especially with Gmail users—there are proven strategies to improve sender reputation and ensure your emails land in inboxes rather than spam folders. Follow these steps to get back on track:
Steps to Improve Email Deliverability:
-
Warm Up Your Email Lists Gradually
- Treat the process as if warming up a completely new account.
- Divide your mailing into smaller batches and send them on different days. For example, start with 500 emails on Monday, 1,000 on Tuesday, 2,000 on Wednesday, and so on.
-
Focus on Engaged Recipients First
- Begin by sending emails only to contacts who have opened your emails recently (e.g., within the last 30 days for weekly senders).
- Gradually increase this timeframe as your deliverability improves.
-
Leverage Google Postmaster Tools
- Set up Google Postmaster Tools to monitor spam rates, domain reputation, and other deliverability metrics.
-
Create Test Gmail Accounts
- Subscribe a test Gmail account to your email campaigns.
- Monitor where emails land. If emails go to spam, interact with them (e.g., open, click, and reply) but do not move them out of the spam folder. This helps train Gmail’s algorithms.
-
Adjust Based on Metrics
- Use Google Postmaster Tools to track your spam rates. If spam rates are too high, reduce the timeframe of your engaged recipients or maintain the current level of sending until the rates stabilize.
-
Monitor Progress
- As Gmail deliverability improves and emails stop landing in spam, expand your email list incrementally to include less recently engaged recipients.
How Mail Designer Campaigns Can Help:
Mail Designer Campaigns provides several built-in features to optimize email deliverability and improve your sender reputation:
- Professional Email Authentication: Ensure your emails are authenticated with SPF, DKIM, and DMARC, reducing the likelihood of being flagged as spam.
- Engagement Tracking: Identify active and inactive recipients in your mailing list, allowing you focus on your most engaged contacts first.
- Custom Domain Support: Addd your own domain to Mail Designer Campaigns to reinforce trust with email providers like Gmail.
- Clean and Optimized Designs: Mail Designer 365 helps you to create email content that is visually appealing while avoiding spam-triggering elements, increasing inbox placement rates.
- Advanced Segmentation: Mail Designer Campaigns allows for advanced segmentation, such as creating lists of only people who have opened the email in the past X days, and options for sending to only a portion of your subscriber list. This ensures that your emails reach the most engaged recipients first, improving overall deliverability.
By following these best practices and leveraging Mail Designer Campaigns' tools, you can rebuild your sender reputation, enhance Gmail deliverability, and achieve more successful email marketing campaigns.
Email marketing isn’t dead—it has simply evolved. While it’s true that inboxes are busier than ever, email marketing remains one of the most effective ways to connect with audiences when done right. Here’s why:
- People value quality over quantity: Subscribers are more selective about the emails they sign up for, so it’s crucial to offer valuable, engaging, and relevant content that stands out. Generic or repetitive emails won’t cut it anymore.
- It’s a personal choice: Unlike unsolicited messages on platforms like WhatsApp, email gives recipients control—they’ve opted in to hear from you. For many people this makes emails far more welcome than intrusive messages on other channels.
- Still an ROI powerhouse: Email marketing continues to deliver one of the highest returns on investment (ROI) in digital marketing. When you focus on personalization and value, email can drive conversions better than almost any other medium.
While automation and messaging apps like WhatsApp are growing, they serve different purposes. Instead of replacing email, they complement a well-rounded marketing strategy. So, no—email marketing isn’t dead. It’s just more competitive, and that’s a good thing because it pushes brands to be better.
If you don’t have a warmed domain or custom email address, Mail Designer 365 offers a professional solution for sending email campaigns without the need for your own domain.
How does it work?
Mail Designer 365 uses its Mail Designer Delivery service, which ensures that your campaigns are sent reliably and securely from a trusted, pre-configured email domain. This avoids potential issues like deliverability problems caused by an unprepared domain or emails landing in spam folders.
Why choose Mail Designer Delivery?
- No Setup Hassle: You don’t need to purchase, warm up, or configure your own domain.
- Trusted Reputation: Mail Designer’s sending infrastructure is optimized to ensure high deliverability.
- Professional Appearance: Your emails are sent with an authenticated domain, giving a polished and professional look to your campaigns.
- GDPR-Compliant Sending: All data is handled in compliance with GDPR, ensuring the privacy of your recipients.
What’s the catch?
While using a shared domain is a quick solution, a custom email domain (e.g., yourname@yourbusiness.com) is always recommended in the long term. This gives you full control and enhances your brand image. Mail Designer 365 supports this setup with tools to configure SPF, DKIM, and DMARC authentication for maximum deliverability.
Ready to get started?
Mail Designer 365 is perfect for sending individual emails or thousands of recipients quickly and professionally. Start your campaign with our delivery service today and reach your audience without worrying about technical setup or deliverability!
- Edit your connection.
- Go to Advanced Options.
- Locate and expand the Traffic Control section.
- From the drop-down menu, choose “Only use VPN for the following addresses”.
- In the text field, specify the network you want to access through the VPN. For example, enter 192.168.123.0/24.
- Save your changes.
This error appears when VPN Tracker cannot decrypt your connection.
This can happen after password changes or due to network issues during the sync or encryption process.
Important: With an error like this, DO NOT log out of VPN Tracker on your Mac. Logging out removes all locally stored connections and makes recovery impossible.
What you can try
- Duplicate the connection in VPN Tracker.
Even if the Personal Safe is damaged, a locally stored connection can usually be duplicated and edited without issues. - Try editing the duplicated connection.
If the duplicate works normally, you can continue using it.
If the error persists
If the duplicated connection also fails or shows the same error, the underlying cause is likely a broken encryption key in your Personal Safe.
Please contact our support team and include:
- A screenshot of the exact error message
- Confirmation that you have already tried the recovery steps in this FAQ (including duplicating the connection)
Our team will then advise you on the next steps.
- Send keep-alive ping every
This option controls whether and how often VPN Tracker sends keep-alive pings. A keep-alive ping is not a normal ping, and is not considered tunnel traffic by the VPN gateway, so it does not keep the connection alive at the gateway. The sole purpose of these pings is to keep the connection alive through firewalls and NAT routers between VPN Tracker and the gateway when no other tunnel traffic is being sent.
- Disconnect if inactive for
This option controls if and after how long VPN Tracker will disconnect due to inactivity. Only tunnel traffic is considered activity, keep-alive pings sent from either side and protocol management traffic are not considered tunnel traffic.
- Consider the peer dead if no sign of liveliness for
This option controls if and after what time VPN Tracker will disconnect due to no sign of life. Any traffic from the gateway is considered a sign of life, regardless of whether it is tunnel traffic, keep alive ping, or protocol management traffic.
This option has no effect if the gateway is not configured to send pings (
--pingoption orpingin the server configuration file), because without pings enabled, there may be no tunnel or management traffic for quite some time, but this is not proof that the gateway is no longer alive, since it won't send anything if there is nothing to send. With ping enabled, the gateway would at least send keep-alive pings in such a situation, and if those don't arrive either, the gateway has most likely dropped the connection or gone offline.
Yes, you can print to your home printer while connected to VPN Tracker away from home. To ensure a seamless remote printing experience, follow these steps:
1. Assign a Static IP Address to Your Printer
- Access your router’s web interface by entering its IP address in a web browser (e.g., 192.168.1.1 or 192.168.0.1).
- Navigate to the LAN or DHCP settings.
- Assign a static IP address to your printer (e.g., 192.168.50.100) so it remains consistent.
2. Configure Your Mac for Remote Printing
- Connect to your > Printers & Scanners on your Mac.
- Click "+" to add a new printer.
- Select the IP tab and enter the static IP address assigned to your printer.
- Choose the correct printer driver to ensure compatibility.
3. Avoid Bonjour for Remote Printing
Apple’s Bonjour service helps detect devices on local networks but does not work reliably over VPN due to its reliance on multicast DNS (mDNS). Instead, always connect to your printer using its static IP address.
4. Check Firewall & Network Settings
- Ensure that your firewall allows print traffic over VPN.
- Verify that the printer and VPN settings do not block remote connections.
By setting up a static IP address, avoiding Bonjour, and ensuring proper firewall rules, you can print documents remotely via VPN Tracker without issues.
The VPN Tracker 365 Connection Checker helps determine which VPN protocols your current internet connection supports. This is particularly useful in places like hotels, cafés, or offices, where network restrictions may apply.
Understanding the Results
- ✅ Green Check Mark: The protocol was successfully tested and is expected to work on your current network.
- ⚠️ Yellow Exclamation Mark: The test was inconclusive. The protocol may or may not work due to network restrictions or unstable conditions. You can try connecting, but success isn't guaranteed.
Why is a VPN Protocol Not Working?
If a protocol gets a ⚠️ yellow exclamation mark, possible reasons include:
- Network Restrictions – Some Wi-Fi networks (hotels, workplaces) limit or block certain VPN protocols.
- Firewall Rules – A firewall may be filtering VPN traffic, preventing stable connections.
- ISP Limitations – Some internet providers restrict or throttle VPN usage.
- Router Settings – Your router may not allow VPN passthrough for certain protocols (e.g., PPTP, L2TP).
- Double NAT Issues – If you're behind multiple routers (common in hotels, mobile networks), VPN connections can be disrupted.
- Unstable Internet Connection – High packet loss or weak connectivity can interfere with VPN protocols.
Explanations for the VPN Connection Test for IPsec
For IPsec, at least the ESP (Encapsulating Security Payload) or NAT-T (Network Address Translation Traversal) protocol must function to establish a stable VPN connection. Often, ESP is not usable in certain environments, such as due to firewall settings or network configurations. However, as long as NAT-T is available, the connection can still be established.
What to Do If a Protocol Fails?
- Switch networks – If possible, test from a different Wi-Fi Network
- Try a mobile hotspot – Create a hotspot with your mobile phone and test if you get a different result
- Try a different protocol (e.g., if IKEv2 is unstable, try OpenVPN).
- Check router settings if you're on a home or office network.
- Use VPN Tracker's built-in troubleshooting tools for more insights.
With the VPN Tracker Connection Checker, you can quickly identify network issues and choose the best protocol for a stable connection.
If your internet provider or router does not fully support GRE, VPN Tracker can initiate the TCP part but fails to receive a response when the GRE connection starts.
To check if your network supports PPTP connections, use the VPN Tracker Connection Checker. If the result does not indicate a successful connection, verify your internet setup.
Some routers require “PPTP Passthrough” to be enabled for GRE to function correctly. Check your router’s manual for instructions.
This error occurs when VPN Tracker lacks the necessary permissions to configure system VPN settings. Possible causes include:
- An incomplete installation.
- macOS reaching its limit on VPN configurations due to existing VPN setups from other apps.
How to Fix:
1. Check Existing VPN Configurations:
- Open System Settings and navigate to the VPN section.
- Review all listed VPN connections, paying special attention to duplicate or outdated configurations.
- Remove unnecessary VPNs, particularly those from other apps.
- If you only have one other VPN configuration listed, remove it.
2. Restart VPN Tracker and Add the VPN Configuration:
- Launch VPN Tracker and attempt to add the VPN configuration again.
- If macOS prompts for permission to modify VPN configurations, click "Allow"—it should not require an admin password at this stage.
- Try connecting through VPN Tracker again. It should now work without any issues.
3. Restore Other VPN Connections:
- Open the other VPN app whose configuration you removed earlier.
- The app should prompt you to re-add its VPN configuration.
By following these steps, you should be able to resolve the permission error and successfully establish a VPN connection using VPN Tracker.
If you're experiencing issues with your World Connect connection in VPN Tracker, here's what to do:
1. Contact Support
In VPN Tracker, go to the Help menu and select "Contact Support".
In the window that opens:
- Enter "World Connect Issue" in the subject line.
- Describe the problem you're having so our support team can help you quickly.
2. Try These Steps in the Meantime
- If you're using a country-specific connection (e.g. "United States"), try unchecking the "Fastest Destination" option.
- Once unchecked, you can manually choose from the available cities (e.g. New York, Los Angeles, Miami, etc.).
- Try connecting to a different city to see if the issue is specific to one location.
These steps often help resolve temporary connection issues.
Dynamic DNS (DynDNS or DDNS) is a service that assigns a fixed domain name (like yourname.dnsprovider.com) to your home internet connection. This is especially useful when your internet provider assigns you a dynamic IP address – meaning your address can change at any time, such as after a router reboot or every 24 hours.
Why does this matter for remote access?
If you’re trying to connect to your home network remotely (via VPN, remote desktop, file server, etc.), these changing IP addresses can make it difficult to reach your router reliably. DynDNS solves this problem by keeping track of your current IP and automatically updating your domain name to match.
In simple terms
Think of DynDNS like a postal forwarding service when you move — instead of sending your VPN request to an outdated address, it always forwards it to your current one. That way, you can connect to your home network even if your IP has changed, without needing to check or reconfigure anything manually.
What happens when using Dynamic DNS?
- You connect using the same hostname every time (e.g.
yourname.dnsprovider.com) - Your current IP address is updated automatically in the background
- You avoid connection issues caused by changing IPs
- Remote access becomes stable and hassle-free
Yes, with Mail Designer 365 you can track whether an email was opened. The built-in Mail Designer Delivery email tracking features give you detailed statistics for every email and campaign you send.
Whether you're using Direct Send or sending a newsletter campaign: If you send your email using the built-in delivery service in Mail Designer 365, you'll get access to detailed analytics – including open rate, click rate, and many other important metrics.
You can view analytics for your newsletter campaigns here:
https://my.maildesigner365.com/team/deliveries/campaigns/finished
Detailed tracking is also available for Direct Send emails. You can find the relevant statistics here:
https://my.maildesigner365.com/team/deliveries/direct/finished
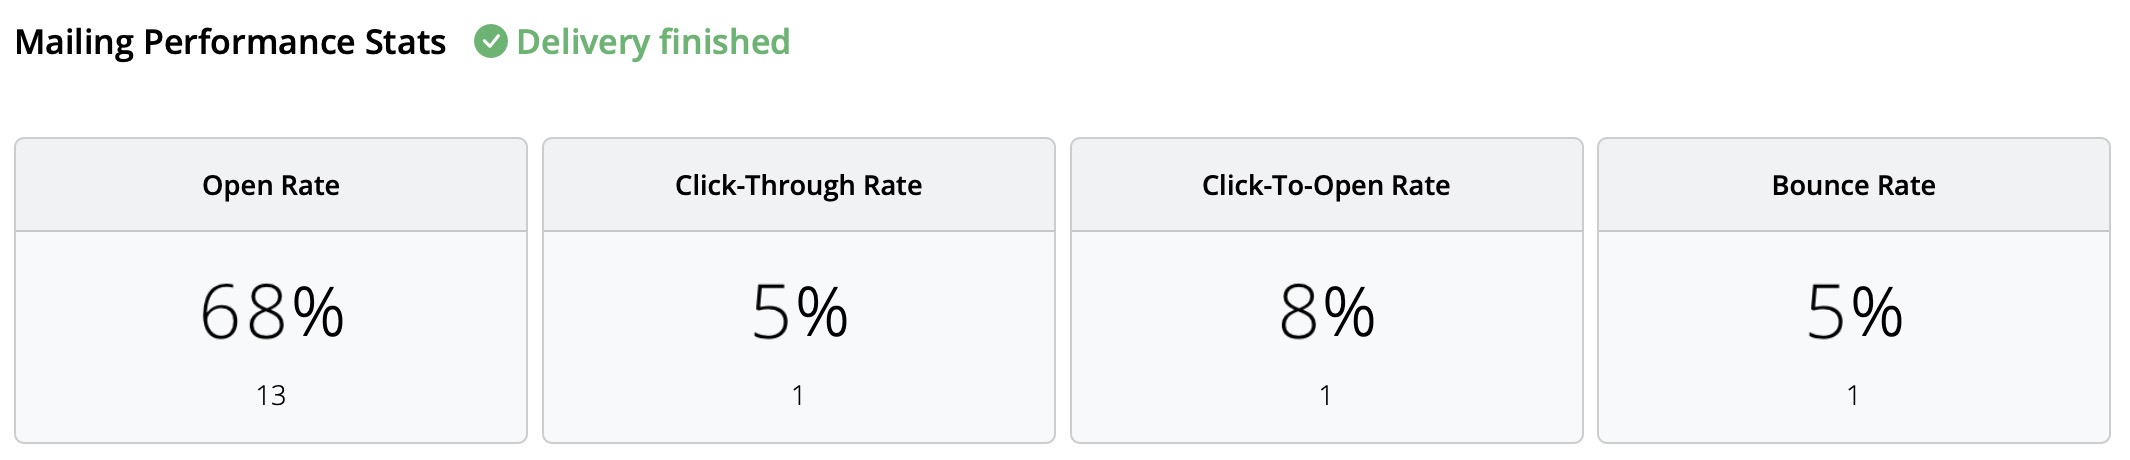
No matter which sending method you choose, Mail Designer 365 provides the following analytics:
- Open rate and total opens
- Click rate and total clicks
- Delivery status and bounces
- Unsubscribes (unsubscribe rate)
- Detailed link click tracking

- Recipient-level statistics
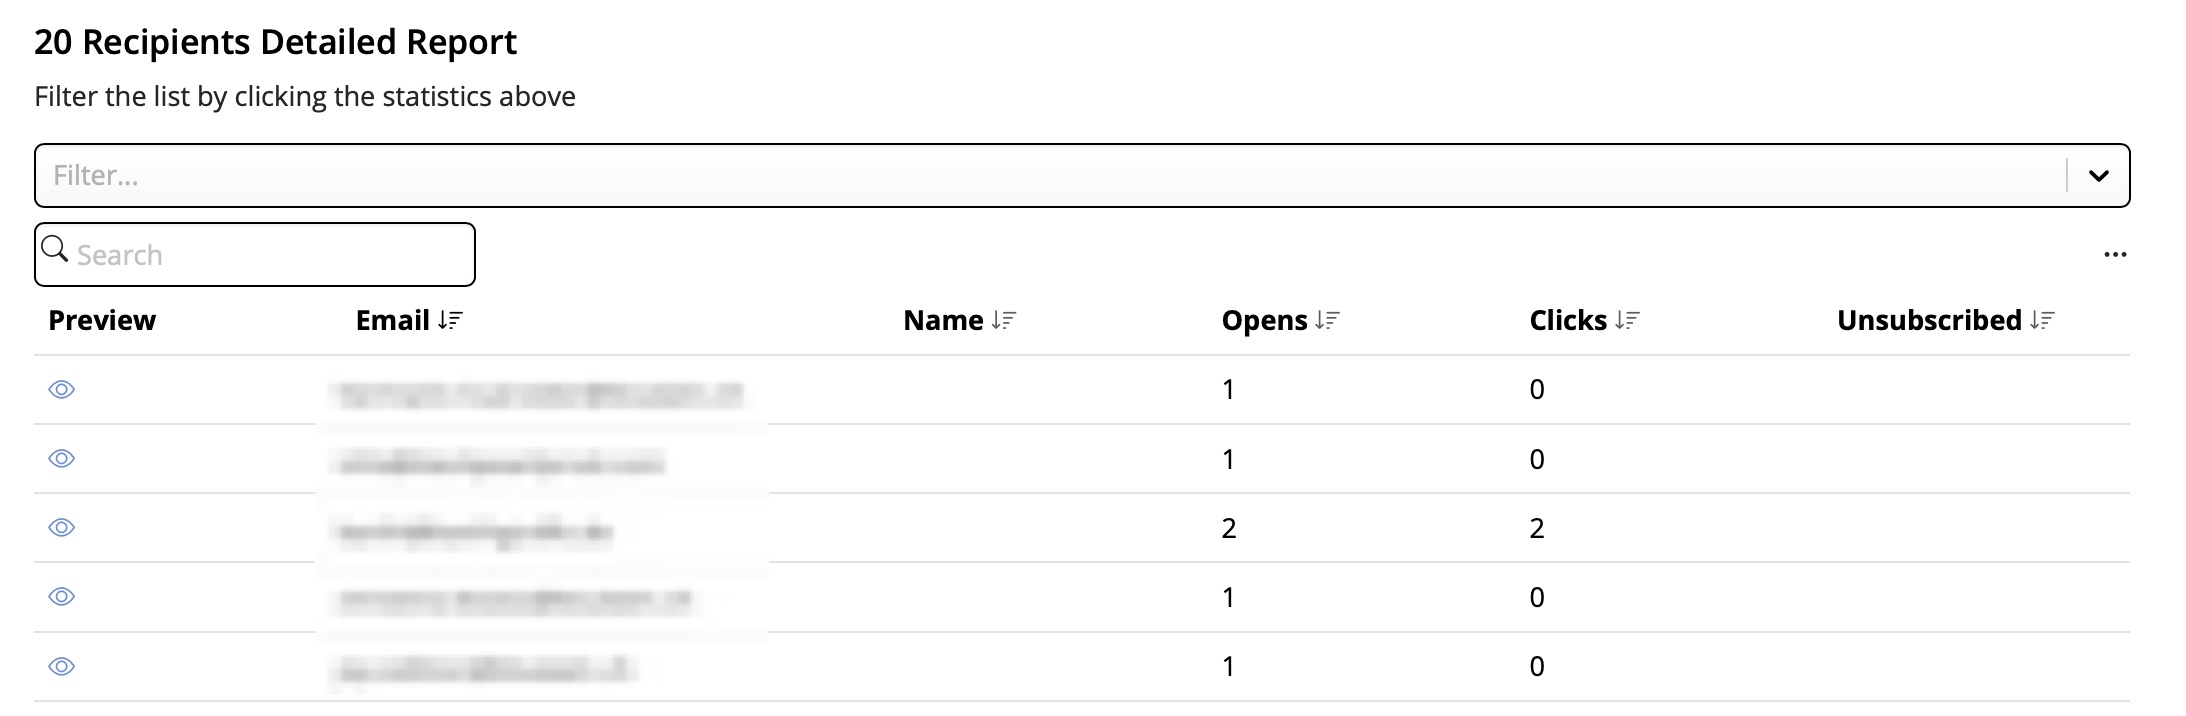
This performance analysis helps you better understand the success of your email campaigns and improve your content accordingly.
Tip: For accurate results, we recommend checking your statistics at least 24 hours after sending. This ensures your recipients had enough time to open and engage with your email.
Step 1: Create the $AttributeFields Variable
Start by creating a variable named $AttributeFieldsThis variable will contain the text string that defines the placeholder content used in your Mail Designer 365 email template. All values must be separated by commas.
Scenario A: FileMaker Field Names Match the Email Placeholders
Method: Use FileMaker field names that directly match the placeholders in your email design. Build the$AttributeFields variable by listing these field names, separated by commas.
In Mail Designer, you simply use the field name as the placeholder.
Format:
$AttributeFields = "Table::Field1,Table::Field2,Table::Field3"
Example Definition of $AttributeFields in FileMaker:
$AttributeFields="CityHotel::GUEST_FIRST_NAME,CityHotel::GUEST_LAST_NAME,CityHotel::GUEST_EMAIL,CityHotel::BOOKING_METHOD"
In Mail Designer 365, you can reference the values later using these placeholders:
GUEST_FIRST_NAME
GUEST_LAST_NAME
GUEST_EMAIL
BOOKING_METHOD
⸻
Scenario B: FileMaker Field Names Do Not Match the Email Placeholders in Mail Designer
Method: Build the$AttributeFields variable by manually mapping each placeholder name to the corresponding field or variable using the format:
$AttributeFields = "PLACEHOLDER_NAME:" & FieldName_or_Variable & "," ...
Example Definition of $AttributeFields in FileMaker:
"BOOKING_DATE:" & RESERVATION_DATE & "," &
"BOOKING_TIME:" & RESERVATION_TIME & "," & ...
⸻
Scenario C: Using FileMaker Variables as Placeholders
Method: If your FileMaker variable has the same name as the placeholder in Mail Designer 365, you can directly assign it like this:$AttributeFields = "$city,$country"
This tells Mail Designer to use the value of $city for the placeholder named “city”.
Example:
The FileMaker variable $city contains “Munich”. If your Mail Designer template includes a placeholder named “city”, then define:
$AttributeFields = "$city"
The script will reveal the content “Munich” and pass it to Mail Designer to populate the “city” placeholder.
⸻
The Best Scenario D: Mixing All Methods
You can combine the approaches above into a single$AttributeFields string.
Method:
Mix matching field names, manually mapped fields, and variables in the $AttributeFields variable.
Example:
$AttributeFields = "BOOKING_DATE:" & RESERVATION_DATE & "," &
"CityHotel::BREAKFAST_TYPE," & "$city"
In Mail Designer 365 you can then reference them with the name BOOKING_DATE, BREAKFAST_TYPE and city
The MailDesignerIntegrationExample file in FileMaker walks you through the required scripts step by step (.fmp12 FileMaker file):
And in the Mail Designer 365 template, you’ll find placeholders that show how your FileMaker fields come to life directly in the design (Mail Designer file):

Open this Mail Designer file and then go directly to File > Save to save it in your project.
Don’t have the Mail Designer app yet?

Visit our Mail Designer 365 Store.
If you have any questions or run into any issues during the trial period, feel free to contact us at any time.

The WireGuard protocol itself does not support 2-Factor Authentication (2FA) for VPN connections. However, when using WireGuard connections with VPN Tracker, you can enhance your overall security by enabling 2FA for your VPN Tracker account.
This means your VPN configuration and access are protected with an additional layer of security, while your WireGuard connections remain end-to-end encrypted for maximum protection.
Using VPN Tracker is the best way to benefit from the performance and security of WireGuard, along with modern account-level protections like 2FA.
If you're having trouble resizing the VPN Tracker window—especially if it seems to “bounce back” when you try to make it smaller—this is likely due to macOS’s built-in window management features.
Here’s what you can do:
-
Disable macOS window tiling:
macOS Sequoia includes automatic window tiling, which can cause a bounce-back effect when resizing, making windows jump back after adjusting their size. This can interfere with custom window resizing. To turn off automatic window tiling:- Go to System Settings > Desktop & Dock > Windows
- Disable the following options:
- “Drag windows to screen edges to tile”
- “Drag windows to menu bar to fill screen”
- “Hold ⌥ key while dragging windows to tile”
- “Tiled windows have margins”
After turning off these settings, you should be able to resize the VPN Tracker window more freely.
-
Alternatively, you can minimize the VPN Tracker window to show only the left sidebar:
To do this, click the small button at the bottom-right of the window (see screenshot below). This will shrink the window down to just the sidebar.

You can resize an image in two easy ways:
Option 1: Resize directly in the design
- Click on the image you want to resize.
- Drag one of the orange corner handles to adjust the size manually.
Tip: Hold Command (Cmd) while dragging to freely scale without keeping proportions (if desired).
Note: The blue handle in the top-left corner adjusts the corner radius of the image, allowing you to create rounded corners.
Option 2: Use the Size settings in the sidebar
- Select the image in your design.
- In the right-hand Image panel, under Size, enter a specific Width and Height in pixels.
- Make sure “Constrain proportions” is checked if you want to keep the image’s original aspect ratio.

Want to crop your image instead? Check out our guide on how to crop images in Mail Designer.
There are two main ways to change the background of a text area in Mail Designer 365:
Use Layout Blocks with Backgrounds
Mail Designer 365 offers layout blocks that come with built-in background colors for text areas:
- Go to the sidebar and select the Layout tab.
- Scroll down to the Text with image (sidebar) section.
- Here you will find several layout blocks where the text areas have a colored background (shown as yellow in the preview).
- Simply drag the desired block into your design to add text areas with backgrounds.
Add and Customize a Badge
If you want to add a background to specific parts of your existing text, you can use the Badge feature:
- Click inside your text area where you want to add the background.
- In the sidebar, select the Insert tab, then choose Badge.
- Browse the badge styles and select one to apply it.
- Once inserted, you can customize the badge’s background color, font style, border, padding, and more under the Format tab.
- Paste or type your text inside the badge and adjust the design to your liking.
![]()
![]()
Both methods let you create visually distinct text areas with backgrounds to enhance your email design.
If you’ve signed up for a free or discounted VPN Tracker trial and don’t wish to continue with a paid subscription, you can cancel it easily from your account.
How to cancel your VPN Tracker trial:
- Log in to your account at my.vpntracker.com.
- Go to “My Plans and Billing” in the sidebar.
- Locate your active trial plan.
- Click “Cancel Trial”.
Important information about trial cancellations:
- If you signed up for a free or discounted trial and don’t want to be charged, make sure to cancel at least 24 hours before your trial ends.
- Canceling your trial will end your access to the trial immediately.
Once canceled, the plan will no longer renew, and your payment method will not be charged.
Having trouble with your connection setup?
We're happy to help you get your connection up and running. Just contact our Support Team
What does BCC mean in email?
BCC stands for "Blind Carbon Copy." It allows you to send an email to multiple recipients without showing their email addresses to one another. It's a discreet way to include people in a conversation—without letting anyone else know.
What is CC, and how is it different from BCC?
CC stands for "Carbon Copy." Everyone listed in the CC field will receive the email—and everyone else will see that they received it. Use CC when transparency is important, or when you're looping someone in for visibility.
- CC: Recipients are visible to everyone.
- BCC: Recipients are hidden from each other.
- Use CC when visibility and transparency matter.
- Use BCC when privacy is important or to avoid reply-all chaos.
When should I use CC vs. BCC?
- Use CC when:
- You want others to know who’s involved.
- You’re keeping a colleague in the loop.
- You’re sharing info within a team or organization.
- Use BCC when:
- You’re sending to a large group and want to protect privacy.
- You’re sending a cold email and don’t want to expose other leads.
- You’re following up discreetly or avoiding unnecessary reply-alls.
Can I send a newsletter using BCC?
Technically, yes—but it’s not a good idea.
Using BCC for newsletters:
- Can get your email marked as spam.
- Feels impersonal and lacks personalization.
- Offers no way to track engagement or manage subscribers.
- Risks violating GDPR regulations.
Instead, use a purpose-built solution like Mail Designer 365 to send professional emails the right way—with full tracking, personalization, and legal compliance.
Why should I use BCC in emails?
BCC is useful when you:
- Need to keep recipient addresses private.
- Want to send a message quietly to someone else.
- Are emailing a large group without revealing each address.
Pro tip: Always include at least one address in the “To” field when using only BCC—some mail servers require it!
What should I avoid when using BCC?
- Don't send recurring emails to large lists via BCC—use a proper mailing tool.
- Don’t forget to comply with privacy and consent regulations.
- Avoid using BCC in sensitive situations where full transparency is expected.
What's the best way to send emails to many recipients?
Skip the manual CC/BCC and go for a smarter option.
With Mail Designer 365, you can:
- Design eye-catching emails (no coding needed).
- Manage and segment your audience.
- Track performance with open, click, and bounce rates.
- Stay 100% GDPR-compliant.
Is using BCC for email campaigns GDPR-compliant?
No, it’s not.
Under GDPR:
- You must prove consent for each recipient.
- You need to include an unsubscribe option.
- You must securely manage and store contact data.
BCC doesn’t support any of this. Mail Designer 365 does—and is hosted in Germany, offering fully compliant sending infrastructure.
Still unsure?
Looking for a better way to send professional emails? Discover how to design stunning newsletters with Mail Designer 365 for Mac.
Or explore how to send GDPR-compliant newsletters using the professional email features included in every plan.
Yes, this is possible. You can migrate an existing TheGreenBow IKEv1 connection to VPN Tracker by exporting the relevant connection data and manually entering it into VPN Tracker.
How to extract the required information:
- Open TheGreenBow and select the desired connection.
- Open the configuration menu and choose “Export”.
- In the next dialog, enable “Do not protect exported VPN configuration” to export the data in plain text.
- Save the file to a location of your choice.
Key information needed in VPN Tracker:
1. Gateway Address
The IP address or hostname of your VPN endpoint. In TheGreenBow, this is listed as “Remote VPN Gateway”.
2. Remote Networks
In VPN Tracker, you must define which networks should be reachable through the VPN tunnel. These are called Remote Networks or Target Networks, and correspond to:
Phase 2 > Network ConfigurationRemote LAN / Remote Network
Typical entries include:
192.168.1.0/24– a full subnet10.0.0.0/16– a larger network range172.16.0.10/32– a single host
Enter these under the “Remote Networks” or “Target Networks” section in VPN Tracker. Ensure these match the configuration on the VPN gateway, otherwise traffic might not be routed correctly.
Tip: If you're unsure, use 0.0.0.0/0 as a temporary setting. This allows access to all remote networks (if permitted). You can restrict this later as needed.
3. Preshared Key (PSK)
If you don’t already have the PSK, you can find it in the exported file under the “Authentication” section.
4. XAuth Credentials
Username and password for extended authentication (if used).
5. Local ID and Remote ID
These values define the identities of both VPN peers during the IKE handshake. They are especially important if:
- the VPN gateway doesn’t identify by IP address (e.g. due to NAT or dynamic IPs),
- certificates or advanced authentication profiles are used,
- the gateway expects a specific identity (e.g. FQDN or custom ID).
In the exported file, these are typically found under “ID Type”, “Local ID”, and “Remote ID”.
Enter them in VPN Tracker under “Identifiers” > Local / Remote, and use the correct format (e.g. FQDN, email address, Key ID, or IP address).
6. Encryption and Authentication Settings
Pay close attention to the algorithms used for Encryption, Authentication, and Hashing, and replicate them in VPN Tracker under Phase 1 and Phase 2 settings.
Definition
A newsletter is a form of written communication, usually distributed via email, that is sent to a group of people with a shared interest. It typically contains updates, news, tips, or promotional content and is a key tool for engagement and communication.
Purpose
The main purpose of a newsletter is to inform, engage, and build a relationship with your audience. Newsletters are commonly used to:
- Share product updates or company news
- Promote special offers and events
- Drive traffic to a website or online store
- Deliver valuable content such as tips or how-tos
With Mail Designer 365, you can easily design beautiful, branded newsletters that fulfill all of these goals.
Common Newsletter Content
Newsletter content can vary, but typical elements include:
- News and announcements about your business or organization
- Promotions such as sales or discount codes
- Educational content like how-tos, guides, or tutorials
- Customer stories or testimonials
Explore design ideas to find inspiration for your next newsletter campaign.
How Newsletters Are Delivered
Most newsletters today are delivered via email using a newsletter platform or email service provider (ESP). With Mail Designer 365, you can:
- Export directly to Mailchimp or Campaign Monitor
- Send via your preferred email platform
- Generate ready-to-send HTML for custom setups
Who Uses Newsletters?
Newsletters are used by a wide range of individuals and organizations:
- Businesses to market products and retain customers
- Non-profits to keep supporters informed and engaged
- Educational institutions to update students, parents, and staff
- Content creators and bloggers to grow and monetize their audience
How Often Should You Send a Newsletter?
There’s no one-size-fits-all answer. Frequency depends on your content strategy and audience expectations. Common cadences include:
- Weekly newsletters for time-sensitive content
- Monthly roundups or company updates
- Quarterly newsletters for less frequent communication
Why Are Newsletters Important?
Newsletters remain one of the most effective communication tools available. Key benefits include:
- High ROI — Email marketing consistently delivers one of the highest returns among digital channels
- Direct connection — Newsletters land in your subscribers’ inboxes, allowing for personalized and targeted communication
- Brand building — Consistent communication strengthens your brand and keeps your audience engaged
How to Start Your First Newsletter
Ready to get started? With Mail Designer 365, you can choose from a wide range of professionally designed templates, customize them to your brand, and export your finished newsletter in just a few clicks.
Conclusion
Newsletters are a powerful and flexible communication tool. Whether you're a small business, large organization, or creative professional, Mail Designer 365 gives you everything you need to create eye-catching, effective newsletters with ease.
Request Mail Designer 365 training from Denkform →
- In Mail Designer, switch to the Desktop view (top left of your design) and click on the outer margin area of your design (usually the white or gray background). The "Format" tab in the right-hand sidebar will now show the "Inner Content" section.
- Now switch to the Smartphone view (top left of your design).
- In the right-hand sidebar, under "Inner Content", increase the value under "Mobile Devices": 420 pixels is a good value for most smartphones.
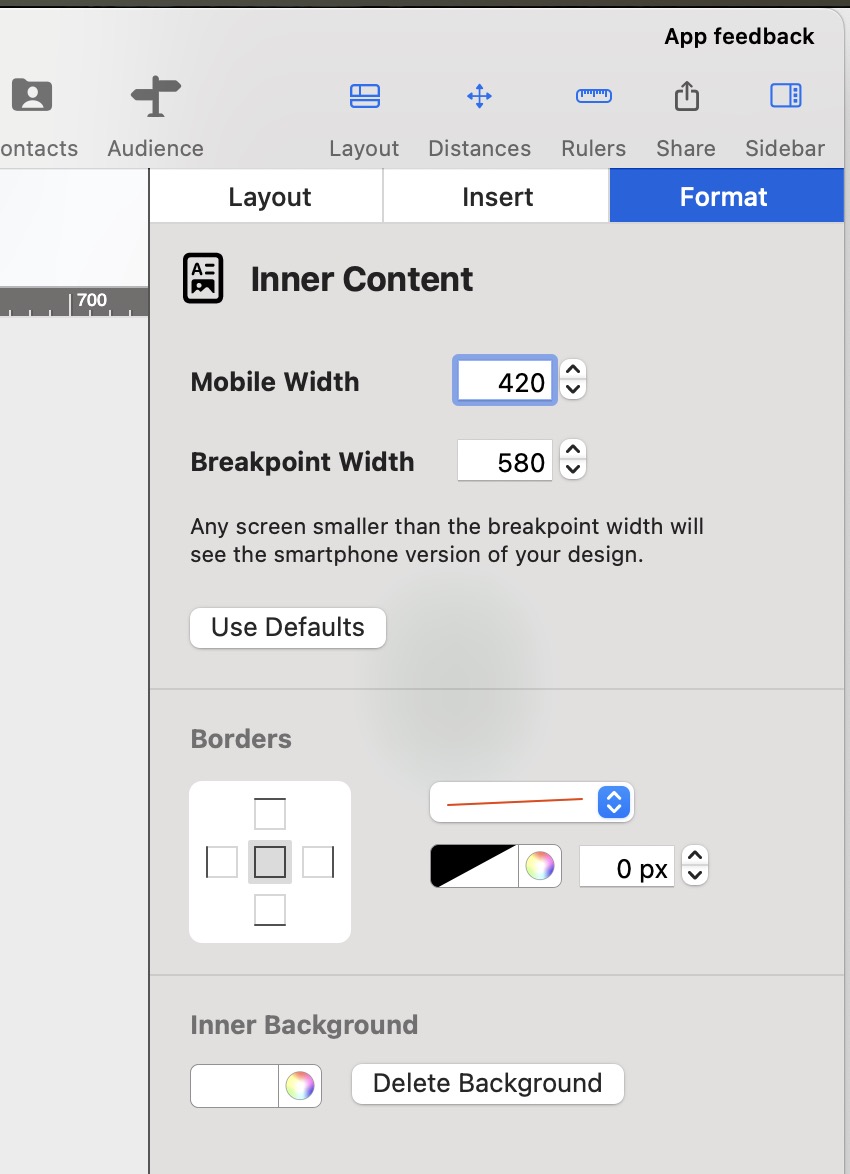
We’re here to help
If you're running into issues with your email design in Mail Designer 365, our support team is happy to assist you. The best way for us to provide fast and effective help is for you to save your design to your TeamCloud and invite us to your team. Follow the steps below:
Step 1: Move your design to TeamCloud
If the design isn't already stored in TeamCloud, move it there like this:
Step 2: Invite our support team
Next, invite us to your team so we can access your design:
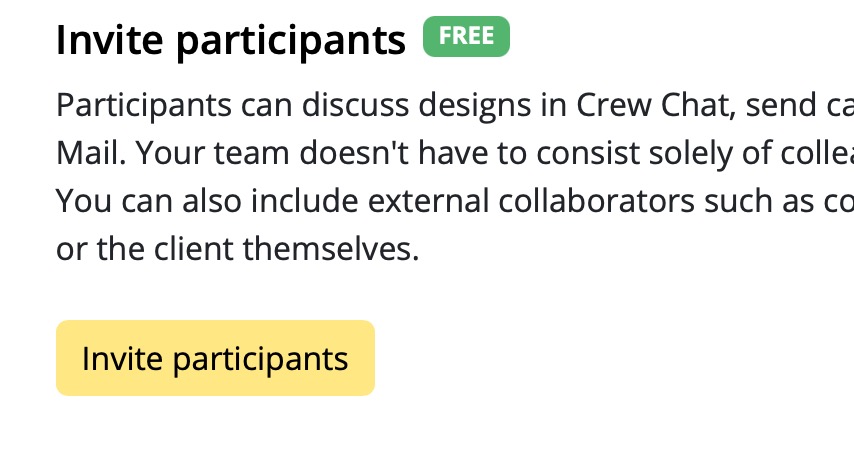
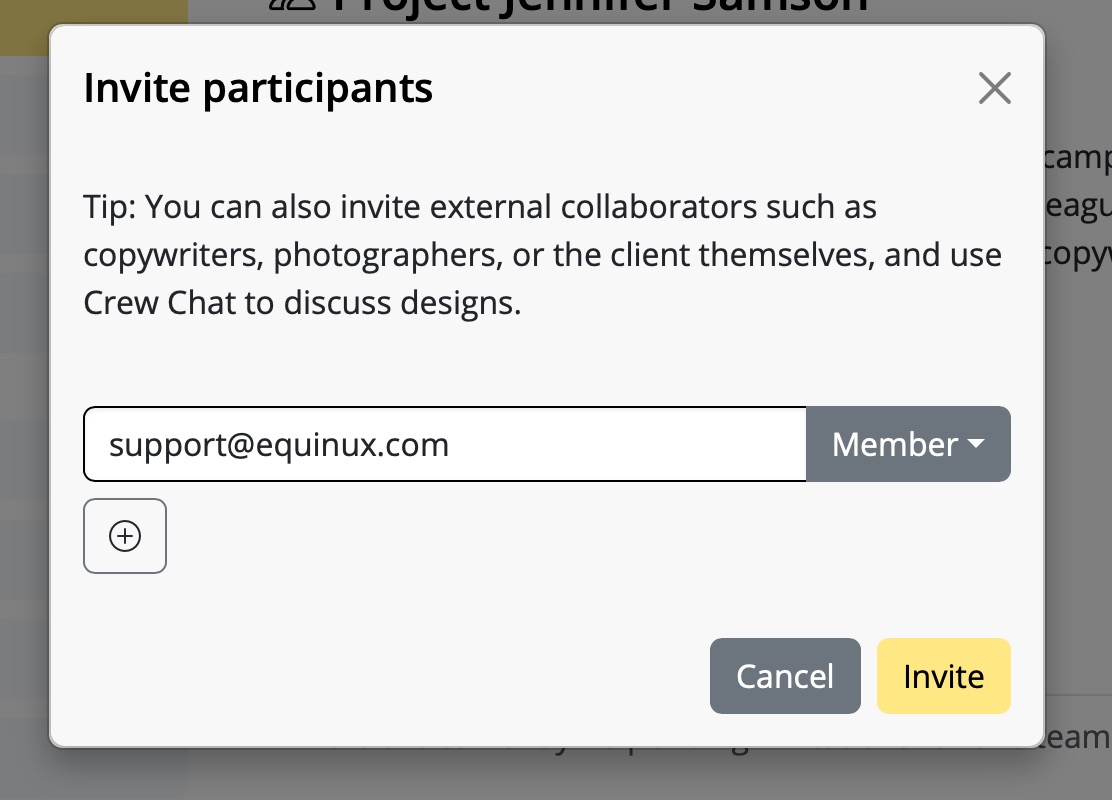
Step 3: Contact support
After inviting us, send us a short support request from inside Mail Designer 365:
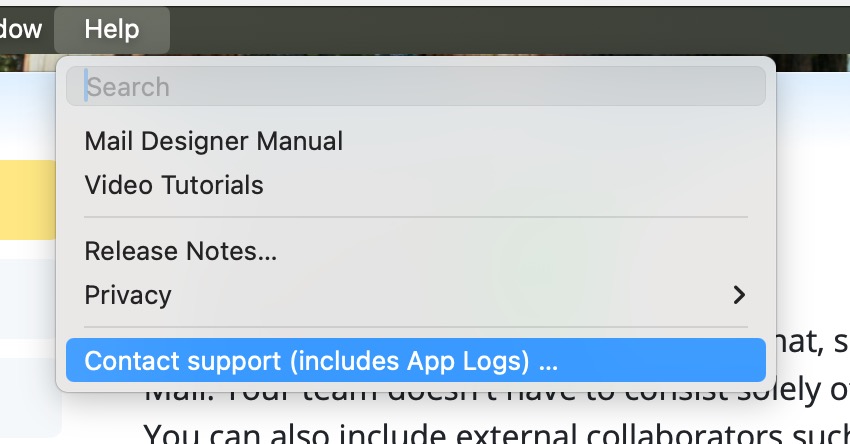
Make sure the box for Extended Diagnostics (14 Days) is checked — this helps us analyze any design-specific problems more thoroughly.
That’s it!
Once we receive your invite and message, we’ll be able to take a closer look and help you resolve your design issue quickly.
Email design refers to the strategic and visual process of crafting emails that not only look good but also drive engagement, deliver key messages clearly, and perform well across all devices. A well-designed email supports your marketing goals by guiding readers toward specific actions—like clicking a link, completing a purchase, or exploring more content.
Why is email design important?
Effective email design impacts open rates, click-throughs, and conversions. With limited time to capture attention, a clean, clear, and engaging layout can make all the difference. Good email design also reinforces your brand and ensures your messages are accessible across platforms and devices.
What does a good email layout include?
A strong email layout is made up of several key elements that work together for clarity and impact. As shown in the infographic below, these elements include:
- Header: Contains your brand logo and optional pre-header text
- Hero image: Visually engages and supports the main message
- Primary headline (H1): Grabs attention and sets the topic
- Body text: Clearly structured content that explains or informs
- CTA (Call to Action): Visually distinct buttons or links that guide readers
- Footer: Includes legal information, social links, and an unsubscribe option
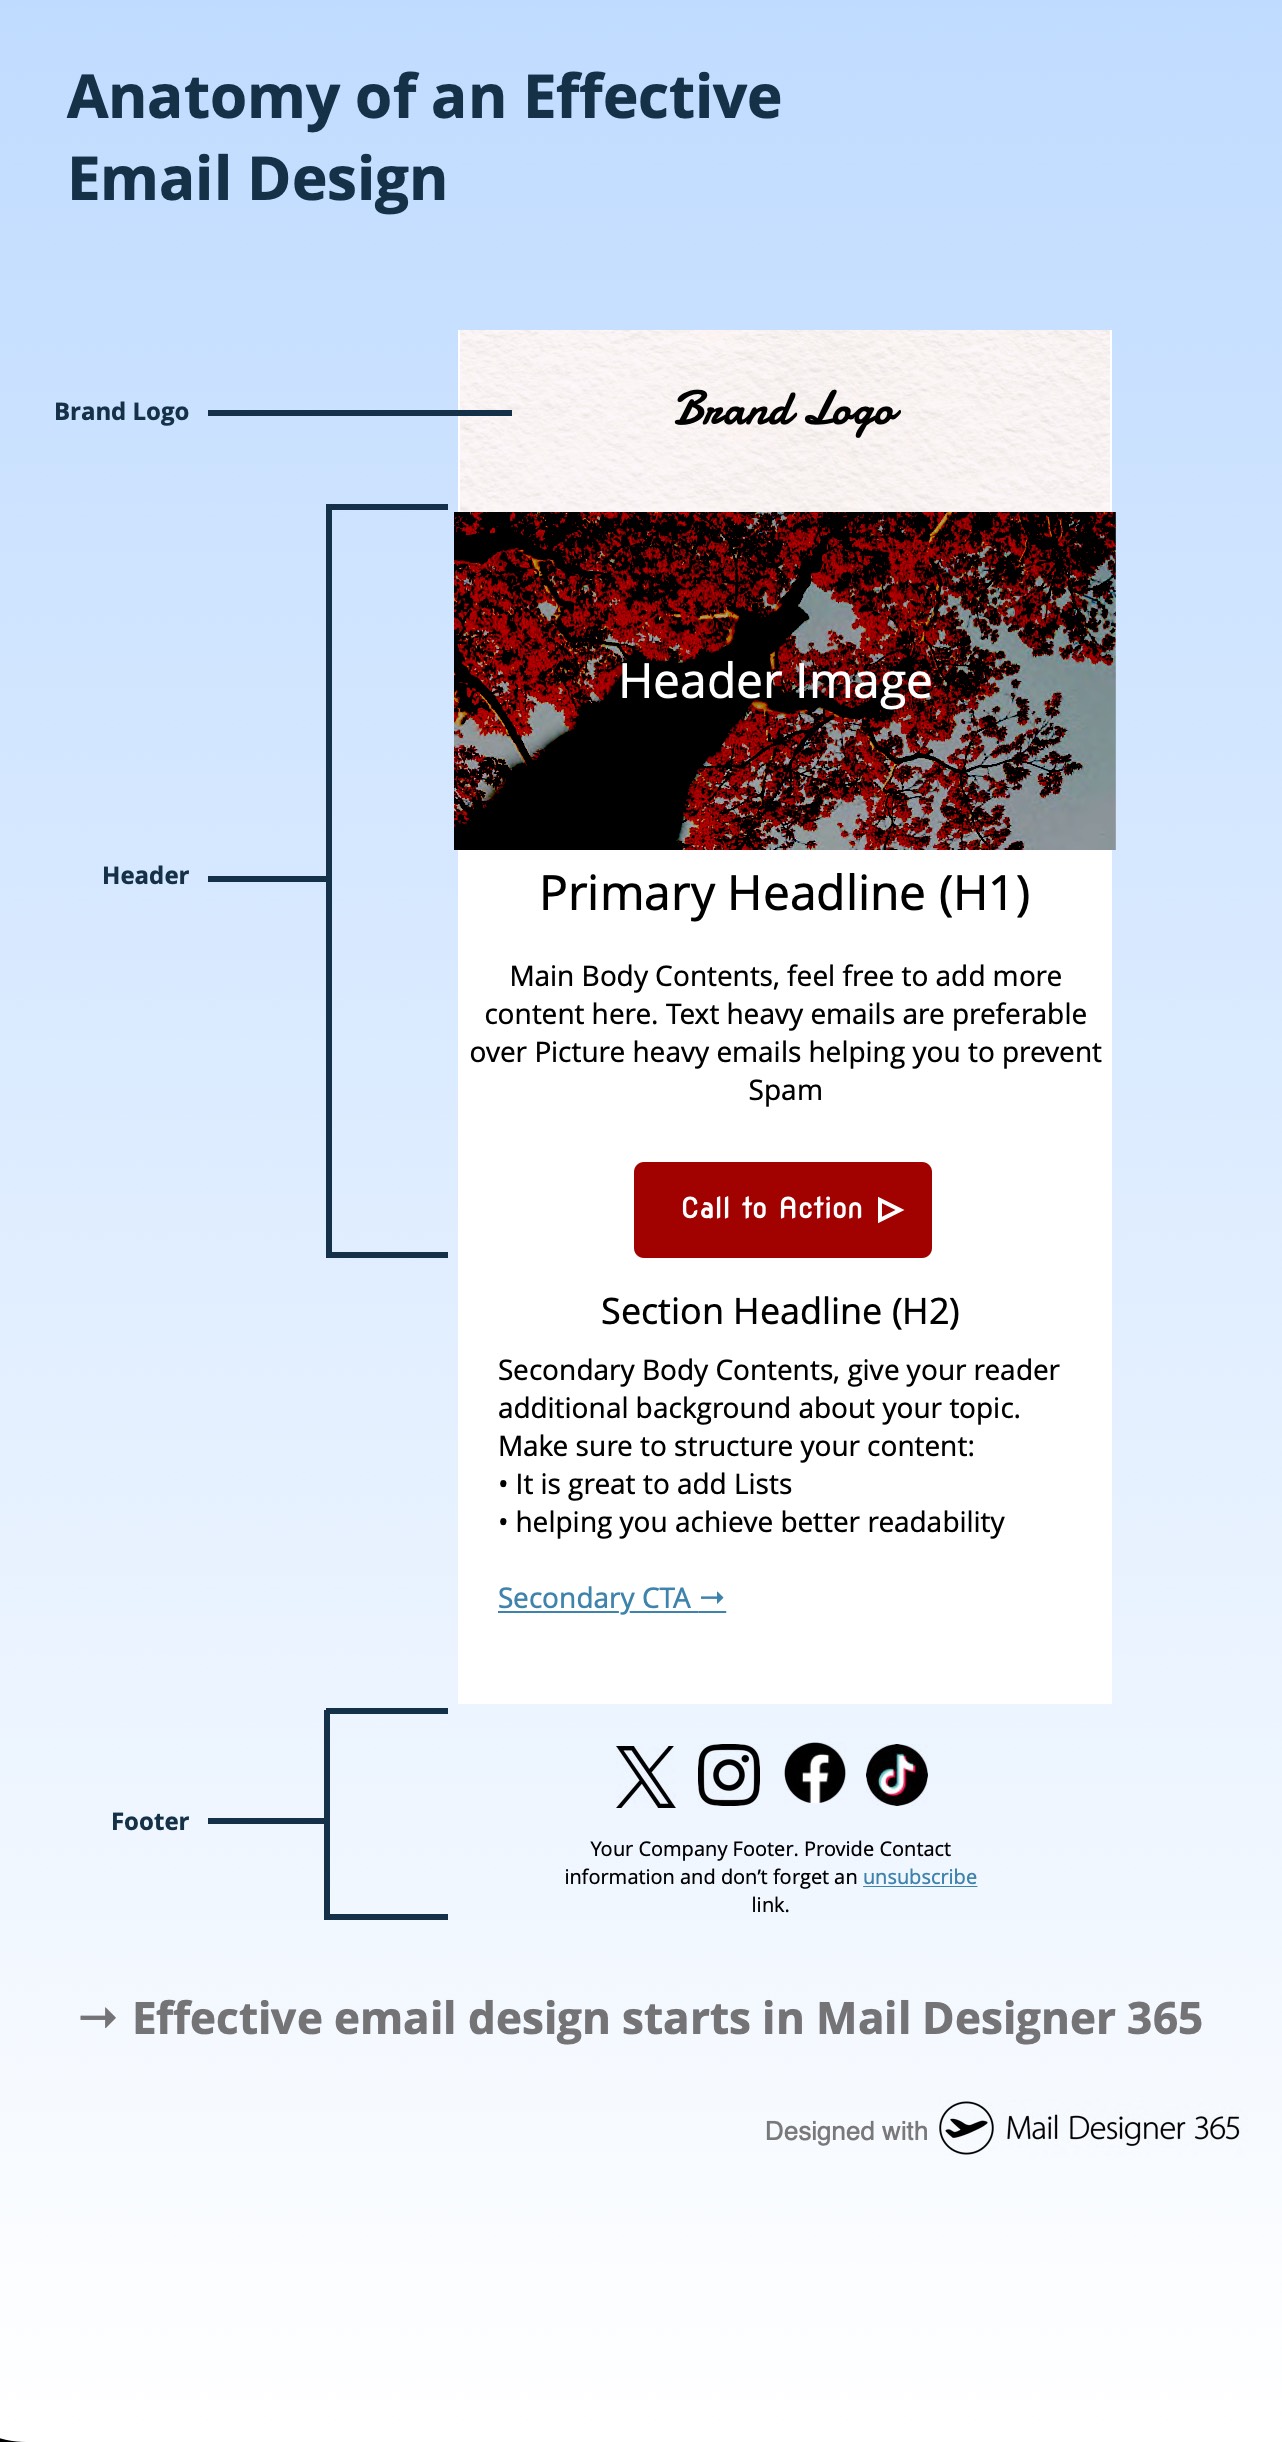
What are the essential elements of email design?
The following checklist highlights five essential components that every email should include:
- Header
- Hero Image
- Text
- CTA
- Footer
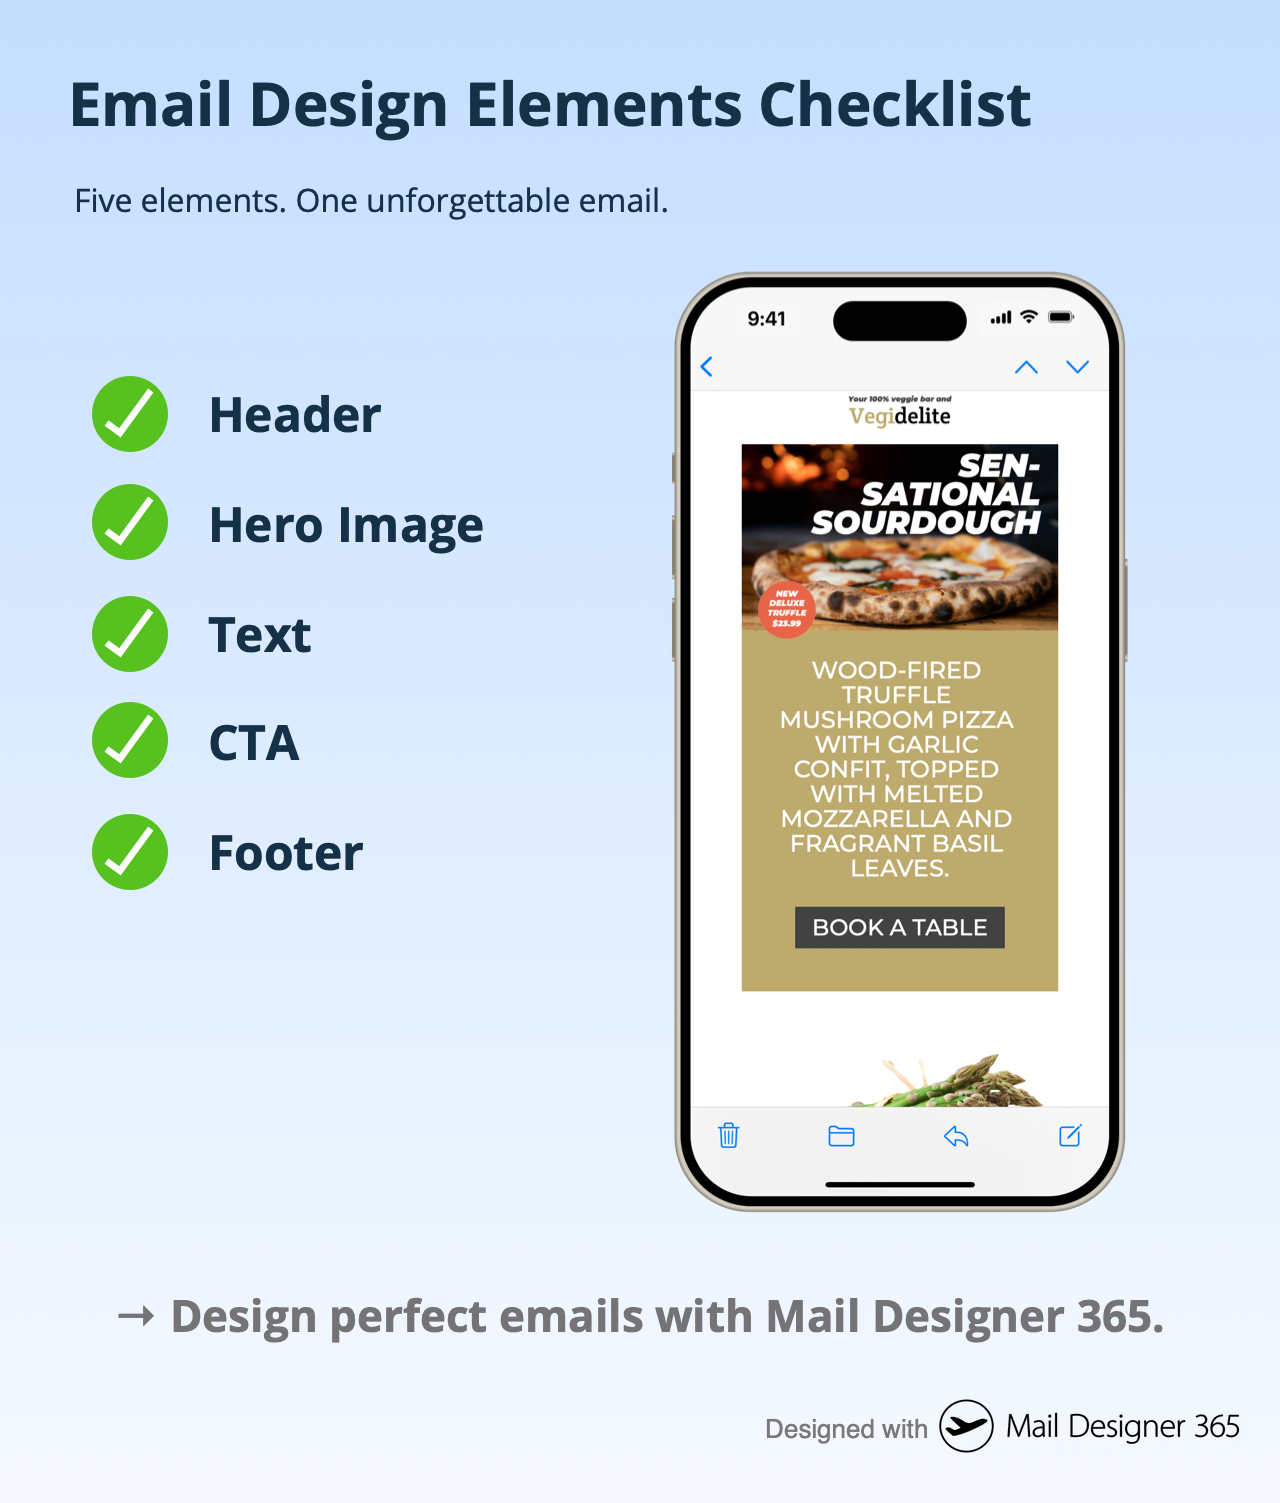
What makes an email design responsive?
Responsive email design means your email adapts fluidly to different screen sizes—whether it’s opened on a desktop, tablet, or smartphone. The side-by-side comparison below shows how a good design maintains structure and readability across formats. Mobile users make up a significant portion of email opens, so responsive layouts are essential.
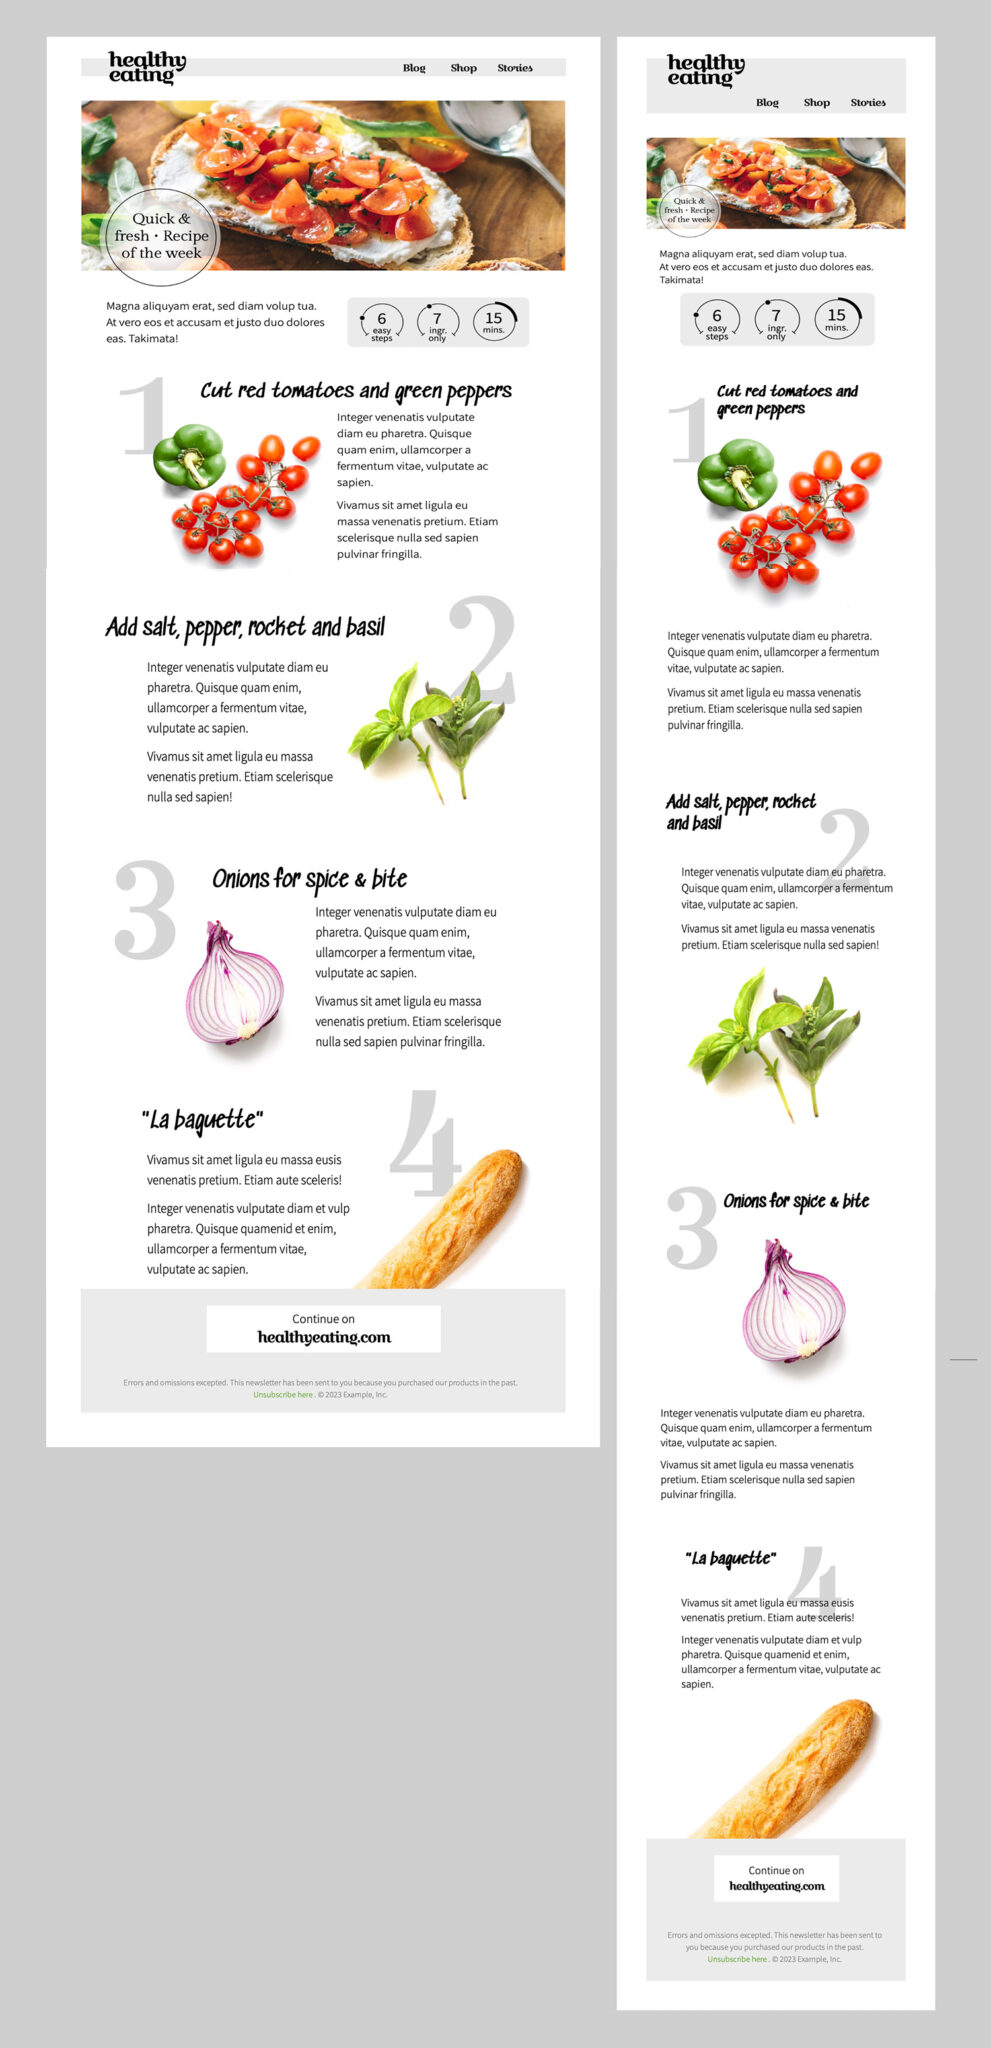
What tools help you design effective emails?
Designing an effective email doesn’t require code. Visual email builders like Mail Designer 365 let you create responsive, professional HTML emails using intuitive drag-and-drop tools, reusable blocks, and built-in preview options. Whether you’re crafting a promotional newsletter or a product announcement, Mail Designer 365 gives you full control over every design element.
Effective email design starts in Mail Designer 365.
Create better, smarter, and more beautiful emails with purpose-built tools. Start Designing your Emails with Mail Designer 365.
Email template design is the process of creating a pre-formatted layout that serves as a reusable foundation for email campaigns. These templates are usually built using HTML and inline CSS and contain structured placeholders for dynamic content—like personalized text, product images, or call-to-action buttons. Instead of starting from scratch each time, marketers and teams can use these templates to maintain consistency, save time, and ensure professional-quality emails every time.
A well-designed email template typically includes:
- Header with logo and navigation
- Hero image or featured content section
- Text areas for messages or offers
- CTA buttons to drive user action
- Footer with unsubscribe links and contact details
Why are email templates important?
Email templates ensure that emails remain consistent across devices, comply with design standards, and render properly in major email clients like Gmail, Outlook, or Apple Mail. They also help:
- Enforce brand consistency
- Save production time
- Reduce design and coding errors
- Improve responsiveness on mobile devices
Common use cases
- Newsletters: Regular updates sent to subscribers
- Promotions: Highlight product launches or sales
- Transactional emails: Send order confirmations, receipts, or alerts
- Event announcements: Share details and invitations
Reusability: A core benefit of email templates
The greatest advantage of an email template is its reusability. Once created, a template can be used again and again across different campaigns. Just update the specific content while maintaining the layout and branding. This makes scaling email marketing fast, consistent, and reliable—especially for teams working on regular mailings.
Blueprints in Mail Designer 365
Mail Designer 365 takes email template design even further with its unique Blueprints feature. A Blueprint acts as a protected master version of a design. When you or a team member opens it, a new draft is created automatically, leaving the original untouched. This means multiple versions can be customized—each tailored to different recipients or campaigns—without overwriting the base design. Want to learn more? Check out our full guide on using Blueprints for email design in teams.
Caption: Easily customize a Blueprint in Mail Designer 365 to create unique versions for each recipient—without ever altering the original design.
This collaborative workflow is perfect for teams: one person creates the base template, while others adapt it to their use case—ensuring quality and consistency across the board.
Want to create reusable, professional email templates on your Mac?
Get started with Mail Designer 365’s Email Template Creator
You can also conveniently purchase VPN Tracker via bank transfer. Please note that bank transfer is only available for regular purchases – trial versions cannot be ordered via bank transfer.
How to pay by bank transfer:
- Go to the VPN Tracker Store: my.vpntracker.com/store
- Add the product of your choice to the cart.
- Proceed to checkout.
- In the “Add payment method” section, click on the three-dot symbol (“…”) next to the other payment methods.
- Select “Bank Transfer” from the dropdown.
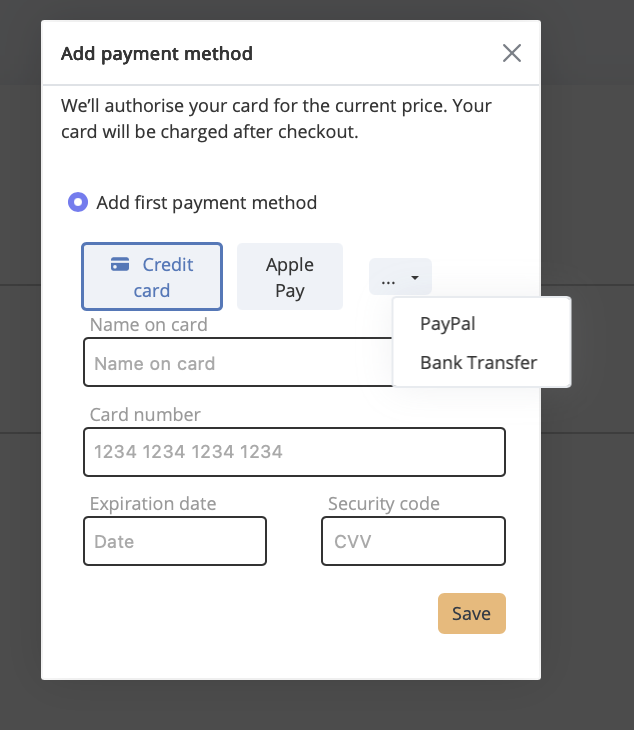
After completing your order, you will receive our bank details to make the payment. Your license will be activated once your payment has been received and processed. Please allow up to 5 business days for processing.
Note:
Unlike card or Apple Pay purchases, activation is not immediate. Your license will only be issued once the payment has been received and reviewed by our team.
- Open System Settings: Click the Apple menu in the upper left of your screen and then on “System Settings”.
- In the left sidebar, select Network.
- Select Your Active Network. Choose either Wi-Fi or Ethernet, depending on what you’re using.
- On the right side of your active connection, click the “Details…” button.
- In the new window that appears, click on “Hardware”.
- Change “Configure” to “Manually”.
- Adjust the MTU Value: In the MTU field, enter 1300. You may need to select “Custom” first.
- Click OK to apply the changes and save the setting.
- Try to connect your VPN Tracker connection. If the VPN connection succeeds, the MTU setting may no longer be necessary. You can revert it by repeating the steps above and setting the MTU back to “Automatic”.
- Log in at my.vpntracker.com.
- Navigate to your desired team → Members → Add Members.
- Enter the email address support@equinux.com in the Email field, set the name to equinux Support, and assign the role Admin.
- Click on Send Invitation.
- You can view the invitation you just sent under the Invitations tab.
To download VPN Tracker for Mac, go to the Download VPN Tracker Mac page. Once you’re there, press the Download for Mac button. The download will start automatically, giving you the latest version of the VPN Tracker app for macOS.
After downloading, open the installer and follow the on-screen instructions to complete the installation.
If you’re using macOS 26 Tahoe, check out this step-by-step installation guide for VPN Tracker on macOS Tahoe to ensure a smooth setup.
Yes, you can use VPN Tracker on both Mac and iOS — if you have the right plan.
VPN Tracker Executive, Pro, VIP, and Consultant plans include licenses for both Mac and iOS, so you can seamlessly use the app on your Mac, iPhone, and iPad without needing separate purchases.
Even better: Your connection information is securely stored in your VPN Tracker account, so as soon as you’re logged in with an eligible plan, you’ll instantly see your VPN connections on both devices — no extra setup required.
For other plans, like VPN Tracker Basic or VPN Tracker Personal, Mac and iOS licenses are sold separately. This means you’ll need to purchase a separate plan for each platform if you want to use VPN Tracker on both your Mac and iOS devices.
Summary: Check your plan — if it’s Executive, Pro, VIP, or Consultant, you’re all set for Mac and iOS. For Basic or Personal, make sure you add the right license for each device.
If your VPN connection requires two-factor authentication (2FA), where the token must be appended directly to the password (instead of being entered separately), you can set this up in VPN Tracker 365 as follows:
- Save username and static password:
Open the sidebar in VPN Tracker 365, right-click on your connection, and select “Edit User Credentials…”. Enter your username and the static part of your password (not the dynamic 2FA code). This data will be stored in the macOS Keychain. - Enable login prompt:
Then edit the connection. Under “Advanced Options”, in the “Additional Settings” section, check the box labeled “Always prompt for XAUTH credentials”.
When you connect next time, a login dialog will appear, pre-filled with your credentials from the keychain. You can now simply append the current 2FA token to the displayed password. Since “Save in Keychain” is not selected by default, this change is only applied for the current session. On the next start, the password field will again be pre-filled with the saved keychain data—ready for you to append the next token.
This method ensures a secure and flexible way to connect with VPN Tracker 365 without permanently saving the full password including the 2FA token.
If VPN Tracker fails to install its system components – for example, with an OSSystemExtensionErrorDomain error 10 – this is often caused by blocked system extensions or third-party security software on macOS. Here's how to resolve the issue:
Check macOS system settings (security warning)
Go to System Settings > Privacy & Security and scroll down. If you see a message like “System software from ‘equinux’ was blocked”, click “Allow”. Then restart your Mac.
Check for interfering network extensions (e.g. Bitdefender)
Some apps like Bitdefender install their own network components that may block VPN Tracker:
- Open System Settings > General > Login Items & Extensions
- Click the icon next to “Network Extensions”
- Uncheck securitynetworkinstallerapp.app and any other suspicious extensions
- Restart your Mac
Check System Integrity Protection (SIP)
If SIP has been disabled or modified – usually only in developer setups – macOS may block system extensions. SIP should normally remain enabled for VPN Tracker to function properly.
Reinstall VPN Tracker
Fully remove VPN Tracker from your Mac, restart the device, and reinstall the app. Important: When launching the app for the first time, click “Allow” when prompted by macOS to approve the system extension – do not dismiss or ignore it.
Still having trouble? VPN Tracker Support will be happy to assist you further.
To enable VPN Tracker to load its required system extensions via your MDM system, follow these steps:
1. Add a System Extension Policy
Create or edit a System Extension Policy payload in your MDM system.
Required values:
- Team Identifier: CPXNXN488S
- Allowed System Extension Types: Depending on your configuration, you can choose to allow all or specify only
Network Extensions.
2. Apply the Team Identifier Rule
The Team Identifier CPXNXN488S should be added under the allowed team identifiers. This setting ensures that all system extensions signed by the VPN Tracker team are trusted.
Important: The Team Identifier rule takes precedence over global "Allow All" settings. If a Team Identifier is present, the system will only allow extensions signed by listed identifiers—even if "Allow All" is enabled.
3. Push the Configuration
Save and deploy the updated configuration profile to your target Macs. After installation, VPN Tracker should be able to load its system extensions without requiring user approval.
If the Remove button is missing on my.vpntracker.com, the user is likely an Administrator.
- Edit the user and change their role to Member.
- Save the change.
- Open the user again and click Remove.
Older macOS versions — including 10.9 Mavericks, 10.10 Yosemite, 10.11 El Capitan, 10.12 Sierra, 10.13 High Sierra, 10.14 Mojave, and 10.15 Catalina — are not compatible with current versions of VPN Tracker. They also contain known security vulnerabilities and lack essential system certificates, which can make basic apps like Safari or Mail work unreliably or not at all.
Recommendation
Use OpenCore Legacy Patcher to upgrade your Mac to a current macOS version (e.g. macOS 15 Sequoia or macOS 26 Tahoe) — this will make VPN Tracker usable again.
Steps
- Check if your Mac model is supported: OpenCore Legacy Patcher — Compatibility List .
- Follow the step-by-step guide: VPN Tracker + OpenCore: Guide .
Note
OpenCore is a community project. Make sure to back up important data beforehand and carefully read the project guidelines.
If your IKEv2 VPN connection stopped working after upgrading to macOS 26 Tahoe, you're not alone. Apple has removed support for several legacy encryption, integrity, and key exchange algorithms in the built-in macOS VPN client. These include DES, 3DES, SHA1-96, SHA1-160, and older Diffie-Hellman groups (e.g., Group 2). As a result, macOS now fails to negotiate VPN connections that rely on these algorithms, often showing errors like “No acceptable proposal found” or “IKEv2 negotiation failed.”
This change breaks compatibility with many VPN gateways and firewalls—especially older models from vendors like Cisco, SonicWall, and Fortinet. Unfortunately, Apple does not offer a way to re-enable support for these deprecated settings.
The good news: VPN Tracker 365 still supports these legacy configurations and can restore compatibility without requiring changes on your VPN gateway. You can follow this step-by-step guide to get your VPN connection working again.
If your IPSec VPN connection stopped working after upgrading to macOS 26 Tahoe, the issue is likely related to Apple’s removal of legacy encryption and authentication algorithms in the built-in macOS VPN client. The update no longer supports older algorithms such as DES, 3DES, SHA1-based authentication, or outdated DH groups, which many IPSec configurations—especially on older firewalls and routers—still rely on.
These changes result in error messages like “No proposal chosen” or failed connection attempts with no further explanation. Affected devices include older models from vendors such as Cisco, SonicWall, Fortinet, and others.
VPN Tracker 365 still supports these legacy IPSec configurations, allowing you to restore your connection without modifying your existing VPN gateway settings. Follow this step-by-step guide to get your IPSec VPN working again.
If your IKEv2 VPN stopped working after updating to macOS 26 Tahoe and uses DES or 3DES encryption, the issue is due to a change in Apple’s VPN implementation. As part of broader security improvements, macOS 26 no longer supports outdated encryption algorithms like DES and 3DES for IKEv2 VPN connections. These algorithms are considered insecure by modern standards and have been removed from the built-in VPN client.
This change affects many older VPN setups—especially those used with legacy firewalls and routers—and leads to connection errors like “No acceptable proposal found” or “IKEv2 negotiation failed.”
VPN Tracker 365 continues to support DES, 3DES, and other legacy algorithms, allowing you to connect to your existing VPN without changing the gateway configuration. Learn more and get your VPN working again by following this step-by-step guide.
After upgrading to macOS 26 Tahoe, IPSec VPN connections that use DES or 3DES encryption may stop working. That’s because Apple has removed support for these older encryption algorithms from the built-in VPN client. DES and 3DES are now considered outdated and insecure, and macOS no longer negotiates VPN connections that use them.
This change breaks compatibility with many legacy VPN setups, especially those used with older routers and firewalls from vendors like Cisco, SonicWall, or Fortinet. You may see vague connection errors or messages like “No proposal chosen.”
VPN Tracker 365 continues to support DES, 3DES, and other legacy IPSec settings, allowing you to reconnect to your VPN without reconfiguring your gateway. To get started, follow this detailed guide.
With macOS 26 Tahoe, Apple has removed support for all Diffie-Hellman (DH) groups below group 14 in the built-in IKEv2 VPN client. This includes commonly used groups like DH Group 1, Group 2, and others up to Group 13, which were widely supported by older VPN gateways and firewall configurations.
These groups are now considered cryptographically weak and no longer meet Apple’s security standards. As a result, VPN connections using these groups will fail to negotiate, often with vague error messages such as “IKEv2 negotiation failed” or “No acceptable proposal found.”
VPN Tracker 365 continues to support legacy DH groups, including Group 2 and others, ensuring continued compatibility with existing VPN setups. You can reconnect without changing your VPN gateway by following this step-by-step guide.
With macOS 26 Tahoe, Apple has ended support for all Diffie-Hellman (DH) groups below Group 14 in the built-in IPSec VPN client. This includes commonly used groups like Group 2, Group 5, and others through Group 13, which many older VPN gateways and routers still rely on.
These DH groups are now considered too weak by current cryptographic standards, and connections that use them will fail. You may see generic error messages like “No proposal chosen” or failed VPN negotiations with no clear reason.
VPN Tracker 365 continues to support these legacy DH groups, so you can maintain compatibility with older IPSec configurations without needing to update your gateway. Learn how to restore your connection with this step-by-step guide.
No — with macOS 26 Tahoe, Apple has removed support for SHA1-based authentication algorithms in the built-in IKEv2 VPN client. This includes both SHA1-96 and SHA1-160, which were commonly used in older VPN configurations.
These algorithms are no longer considered secure and can lead to connection failures with messages like “IKEv2 negotiation failed” or “No acceptable proposal found.” Unfortunately, macOS 26 offers no option to re-enable SHA1 support.
VPN Tracker 365 still supports SHA1-96, SHA1-160, and other legacy algorithms, allowing you to keep using your existing VPN setup without modifying the gateway. Follow this step-by-step guide to restore compatibility.
While Apple has removed native support for SHA1-based authentication algorithms like SHA1-96 and SHA1-160 in macOS Tahoe, VPN Tracker 365 continues to support these legacy algorithms to ensure compatibility with older IPSec VPN setups.
Many VPN gateways still rely on SHA1 for authentication and integrity. On macOS 26, this may cause connection issues like “No proposal chosen” or silent negotiation failures. With VPN Tracker, you can continue using your existing configuration without needing to update your gateway.
To get your connection working again, follow this step-by-step guide.
If your VPN connection stopped working after updating to macOS 26 Tahoe, it’s likely due to Apple removing support for older VPN algorithms in the built-in IKEv2 and IPSec clients. Common issues include deprecated encryption types like DES, legacy SHA1 authentication, and outdated Diffie-Hellman groups (e.g., Group 2).
These changes impact many VPN setups — especially those using firewalls and gateways from vendors like Cisco, SonicWall, or Fortinet — and typically result in errors like “No acceptable proposal found” or silent connection failures.
VPN Tracker 365 offers full support for these legacy VPN settings, allowing you to reconnect without modifying your existing VPN gateway. Learn how to restore your VPN connection by following this step-by-step guide.
Yes — if your VPN setup relies on older encryption methods like 3DES or SHA1, VPN Tracker 365 is the right solution. While macOS Tahoe has removed native support for these legacy algorithms in the built-in VPN client, VPN Tracker 365 continues to support them for both IKEv2 and IPSec VPNs.
This means you can continue to connect to older firewalls and VPN gateways without having to update your configuration. Just install VPN Tracker and connect — no changes needed on the gateway side.
You can download VPN Tracker 365 here and start using it on macOS Tahoe today.
Yes — while Apple has removed support for Diffie-Hellman Group 2 and other legacy groups from the built-in VPN client in macOS 26, VPN Tracker 365 still allows you to connect using these older settings.
If your VPN gateway or firewall is still configured to use Group 2 or similar older DH groups, you don’t have to reconfigure anything. VPN Tracker 365 continues to support IKEv2 and IPSec VPNs that use these settings, even on the latest macOS.
You can download VPN Tracker 365 here and reconnect in just a few steps.
If you need to connect to an older VPN gateway using IKEv2 on macOS 26, VPN Tracker 365 is the ideal solution. While Apple’s built-in VPN client no longer supports many legacy encryption, integrity, and key exchange settings, VPN Tracker continues to offer full compatibility — including support for 3DES, SHA1, and DH Group 2.
This makes VPN Tracker the best choice for professionals, teams, and consultants who rely on legacy VPN configurations that no longer work with the default macOS VPN tools.
You can download VPN Tracker 365 here and get started right away on macOS 26.
If you're trying to use an IPSec VPN on macOS 26 and your connection no longer works, it's likely due to Apple dropping support for older encryption and authentication settings like 3DES, SHA1, or DH Group 2 in the built-in VPN client.
VPN Tracker 365 is a professional VPN client for Mac that still supports these legacy IPSec settings — even on the latest macOS versions. It’s ideal for maintaining compatibility with existing VPN gateways and firewalls without having to make changes on the remote side.
You can download VPN Tracker 365 here and start using it with your IPSec VPN on macOS 26.
If your VPN stopped working after updating to macOS 26, the built-in VPN client may no longer support the settings your connection requires — especially if you're using older IKEv2 or IPSec configurations with legacy algorithms like 3DES, SHA1, or DH Group 2.
VPN Tracker 365 is the best alternative VPN client for macOS 26. It supports legacy and modern VPN protocols and is fully compatible with older firewall and gateway setups. Whether you're a professional user or connecting to a business VPN, VPN Tracker gives you the tools you need to get back online.
You can download VPN Tracker 365 here and start using it on macOS 26 today.
In macOS 26 Tahoe, Apple removed support for several older IKEv2 encryption, integrity, and key exchange algorithms. Specifically, the following algorithms are no longer supported:
- DES
- 3DES
- SHA1-96
- SHA1-160
- Diffie-Hellman groups below 14 (e.g., Group 1, Group 2)
These changes affect VPN connections using legacy configurations that were common on older firewalls and gateways. If your VPN stopped working after upgrading, this is likely the reason.
VPN Tracker 365 still supports these deprecated IKEv2 settings, allowing you to reconnect without changing your existing VPN gateway. You can follow this detailed guide to get back online.
In macOS 26 Tahoe, Apple removed support for several legacy algorithms commonly used in IPSec VPN configurations. These include:
- DES
- 3DES
- SHA1-96
- SHA1-160
- Diffie-Hellman groups below 14 (e.g., Group 2)
If your IPSec VPN connection stopped working after updating to macOS 26, it’s likely using one of these deprecated settings.
VPN Tracker 365 still supports these legacy IPSec algorithms, making it easy to reconnect without needing to reconfigure your existing firewall or VPN gateway.
For more information and setup help, read the full guide here.
In a design, click “Crew Chat” in the toolbar to start a discussion with your colleagues — or invite us to help.
Here is how to invite Mail Designer support members to your Crew Chat:
1. Log in at my.maildesigner365.com
2. Choose your project and hit „Settings“, then “Invite participants”
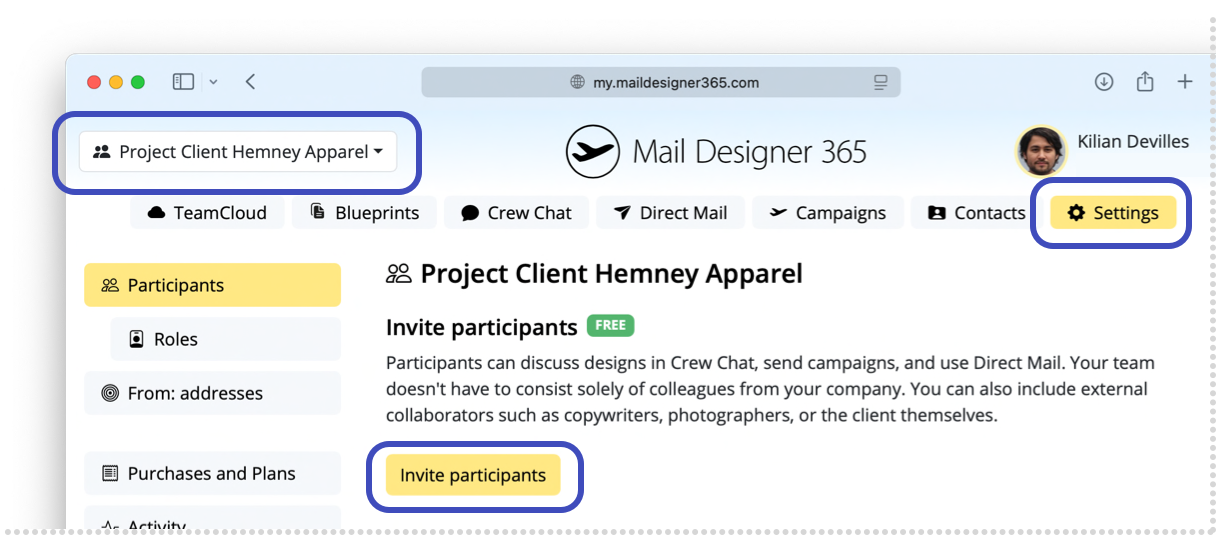
3. Enter our email address: support@equinux.com, then click “Invite”
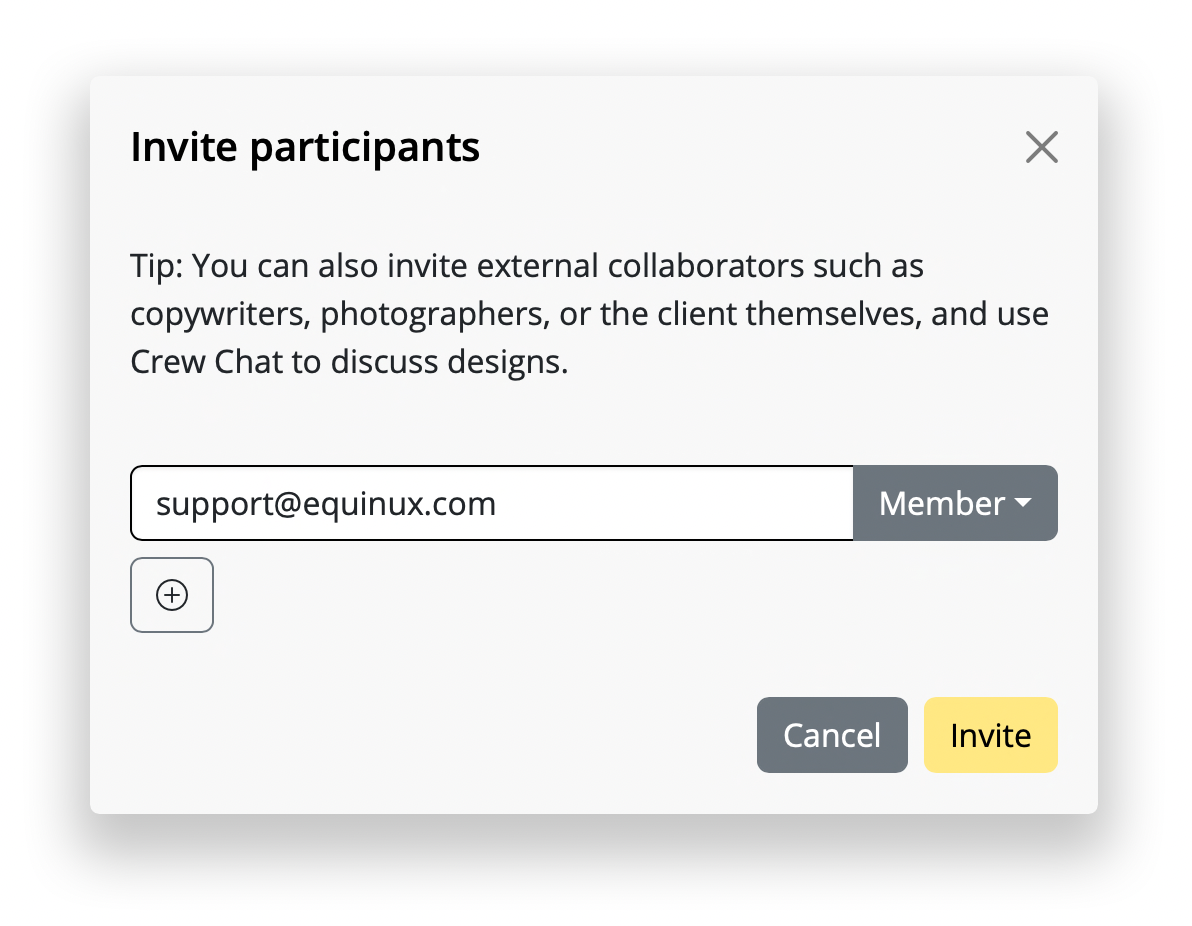
You’ll now see the member “equinux Support” listed under Pending Invitations.
As soon as we’ve joined your project (you'll get notified via email), you can open the design you have questions about (or any design) and click the Crew Chat button in the toolbar.
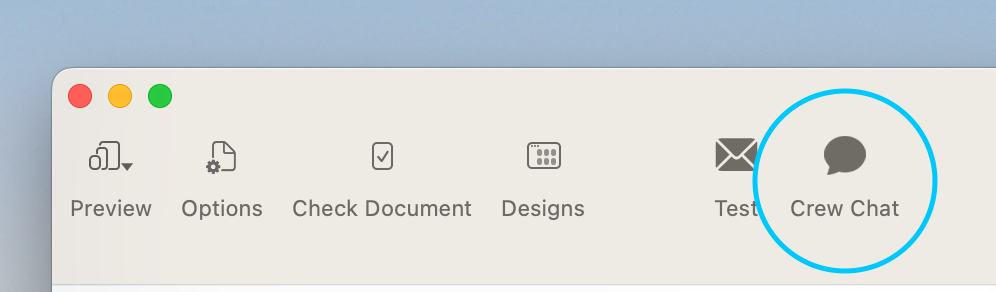
Then click “Invite” in the top right corner.
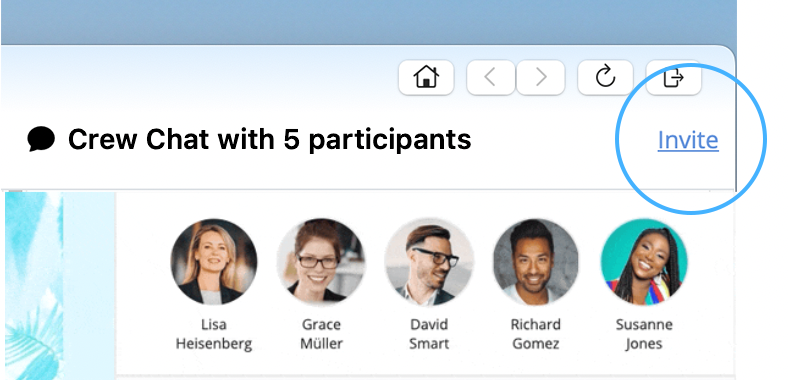
Check the member “support@equinux.com.” and hit Save.
Now, say Hello in Crew Chat, and we’ll be with you shortly.
To set up WireGuard on your Mac, use VPN Tracker — the leading VPN client for macOS. You can easily import your WireGuard configuration file (.conf) into the app and establish a secure WireGuard VPN tunnel in just a few clicks. VPN Tracker supports full WireGuard integration on macOS and gives you a simple way to manage your VPN connections without needing Terminal or additional tools.
➡ Learn more in our WireGuard Mac VPN client guide
To get started with WireGuard VPN on your Mac, download VPN Tracker — a professional WireGuard client for macOS. With VPN Tracker, you don’t need to worry about using the Terminal or installing command-line tools. Just import your WireGuard configuration file and connect instantly. The app is compatible with macOS Sonoma and all recent versions of macOS.
➡ Get the download here: WireGuard Mac VPN client download
Yes, WireGuard is fully compatible with all MacBook models. VPN Tracker offers a native WireGuard client for macOS that works seamlessly on MacBook Air, MacBook Pro, and all other Apple Silicon or Intel-based Macs. Simply import your WireGuard config and connect securely in seconds. VPN Tracker is optimized for the latest versions of macOS, including Sonoma.
➡ See details here: WireGuard Mac VPN Client
To configure WireGuard on your Mac, use VPN Tracker’s easy setup wizard. The app guides you step-by-step through the process — just import your WireGuard config file or manually enter the tunnel settings. VPN Tracker handles all the technical details and ensures your WireGuard VPN connection is securely configured for macOS, including support for the latest macOS Sonoma.
➡ Full guide here: WireGuard Mac VPN Client
Looking for a reliable WireGuard client for Mac? VPN Tracker is the best WireGuard VPN client for macOS, offering a fast, secure, and user-friendly experience. With native support for WireGuard tunnels, an intuitive interface, and full compatibility with macOS Tahoe, VPN Tracker is the ideal choice for professionals and everyday users alike.
➡ Get started here: WireGuard Mac VPN Client
If your current WireGuard client won’t open or isn’t working on your Mac, try VPN Tracker as a reliable alternative. VPN Tracker offers full WireGuard support on macOS, including compatibility with macOS Tahoe. VPN Tracker is a professional VPN client that handles your WireGuard configuration securely — no command line or manual setup needed.
➡ Learn more: WireGuard Mac VPN Client
Yes, you can import the FritzBox WireGuard configuration into VPN Tracker.
VPN Tracker supports WireGuard on macOS and allows you to connect to a FritzBox VPN easily. Simply export the WireGuard configuration from your FritzBox and import it into VPN Tracker. The connection will then be available on your Mac for secure access.
Learn how to set it up step-by-step:
VPN Tracker is a professional WireGuard® app for Mac, iPhone and iPad.
With VPN Tracker, you can securely connect to WireGuard VPNs on macOS as well as on your iPhone and iPad. It’s designed for professionals who need reliable, fast, and secure connections — fully optimized for macOS, including the latest macOS Tahoe release.
Learn more and download here:
Use VPN Tracker’s configuration wizard to set up your WireGuard® VPN on macOS.
VPN Tracker makes it easy to get started with WireGuard on your Mac. The built-in configuration wizard guides you through importing a config file or setting up your connection manually — fully optimized for macOS including the latest macOS Tahoe release.
Start your WireGuard setup here:
Yes, download VPN Tracker directly from our website — no App Store needed.
VPN Tracker supports WireGuard on macOS and can be downloaded directly from our website. There’s no need to use the Mac App Store — just download, install, and get connected to your WireGuard VPN.
Get the direct download here:
Yes, IKEv2 is considered one of the most secure VPN protocols available — especially when combined with IPsec. It offers robust encryption, modern authentication methods, and stable performance, even during network transitions. For Mac users, VPN Tracker is a professional IKEv2 VPN client for macOS, iPhone, and iPad. Learn more about the benefits of using an IKEv2 VPN in our detailed blog article.
An IKEv2 VPN uses the IKEv2 protocol to establish secure, encrypted VPN connections over IPsec. It's fast, stable, and ideal for mobile and macOS users thanks to its ability to handle network changes. To set up and manage IKEv2 connections on Mac, iPhone, or iPad, VPN Tracker offers a professional and user-friendly VPN client. Follow our step-by-step guide to connect to IKEv2 VPN on Mac, iPhone, and iPad.
FritzBox routers support VPN via IPsec but do not allow full IKEv2 VPN profiles. If you're trying to set up a secure VPN connection using IKEv2, we recommend using VPN Tracker in combination with the FritzBox’s IPsec or WireGuard support. Learn more about how to configure a VPN for FritzBox using VPN Tracker in our detailed setup guide.
IKEv1 is still a widely used VPN protocol and remains a solid option in many network environments. While it has some technical limitations compared to newer protocols, it continues to be supported in many systems and VPN solutions. VPN Tracker offers full support for both IKEv1 and IKEv2, so you can choose the protocol that best fits your setup. Want to learn more about the newer IKEv2 protocol? Our blog post on IKEv2 VPN covers its key features.
WireGuard VPN, OpenVPN, and IKEv2 VPN are all considered highly secure protocols. The best option depends on your specific use case. VPN Tracker supports all three, giving you the flexibility to choose the right solution for your Mac, iPhone, or iPad.
When using WireGuard in a team environment, keep in mind that each connection file contains all credentials and private keys. To prevent security risks, they must be shared with great care. VPN Tracker Team Safe makes it easy to share WireGuard connections securely using end-to-end encryption.
IKEv2 typically uses UDP port 500 for the initial connection and UDP port 4500 when NAT Traversal (NAT-T) is required — for example, behind firewalls or routers using NAT. If you're configuring an IKEv2 connection on your Mac, iPhone, or iPad, VPN Tracker makes setup easy. Learn how to connect to IKEv2 VPN with step-by-step guidance.
IKEv2 consists of two main phases: authentication and tunnel negotiation. In the first phase, both sides verify each other's identity. In the second phase, the secure VPN tunnel is established and encrypted. To understand how this works in practice, check out our blog post on IKEv2 VPN.
Please note: We cannot guarantee that your designs will be stored and available for longer than one year with no plan linked to your account.
Renew my plan ...
To update your password, login first to my.vpntracker.com/user/settings and then click on Manage Password… near the bottom of the page.
Dead Peer Detection (DPD) is a VPN feature that detects when the other side of a VPN tunnel is no longer responsive.
Without DPD, your VPN connection could silently fail without you noticing.
DPD keeps things running smoothly by checking the peer's status and cleaning up dead tunnels so they can reconnect automatically.
For a full explanation, check out our blog post:
What is Dead Peer Detection (DPD)?
Enable DPD whenever you’re using an IPsec VPN — especially in situations where your network may drop or change
(such as mobile work or public WiFi).
VPN Tracker's default DPD settings are optimized for most environments and ensure your VPN automatically recovers from interruptions.
Download VPN Tracker to keep your VPN connection protected:
Download VPN Tracker
DPD actively checks whether the remote VPN peer is still reachable and clears up stale tunnels.
In contrast, IKE Keep-Alive is often a vendor-specific workaround to keep connections open,
but it doesn't confirm if the peer is actually online.
For reliability, DPD is preferred and should not be used alongside IKE Keep-Alive unless your device specifically supports it.
Learn more about DPD in our blog:
Dead Peer Detection Explained
VPN Tracker includes InfiniConnect — a built-in feature that keeps your VPN running even if the network changes or drops.
Combined with DPD, it ensures your connection automatically recovers when switching between WiFi, mobile, or Ethernet.
Try InfiniConnect and see the difference:
Start your free VPN Tracker trial
Yes, VPN Tracker supports Dead Peer Detection for all IPsec-based VPN protocols, including IKEv1 and IKEv2.
You can enable DPD in your connection profile settings to make sure your VPN stays responsive, even on unstable connections.
Start your free trial today and experience secure, always-on VPN:
Get VPN Tracker Free Trial
Yes, you can belong to multiple VPN Tracker teams at the same time. What you are allowed to do in each team depends on your VPN Tracker license. These rules apply whether you are joining a new team or working in existing ones.
- With all licenses, team membership is supported. You can view, start, and stop connections across teams as long as you do not exceed your license’s total connection limit.
- With a VIP license, you may additionally edit team connections in up to 10 teams — ideal for advanced team management and flexible team roles.
- With a Consultant license, you can edit connections in up to 100 teams — perfect if you support many client teams or frequently switch between teams.
Bottom line: Multiple teams are fully supported. To edit team connections in many teams, choose the VIP or Consultant license according to your needs for efficient team management in VPN Tracker.
Yes! If you're testing VPN Tracker and run into setup issues or connection problems, you can book a 1:1 consulting session with our in-house experts. We offer real-time support via phone, video call or remote desktop.
Get help from our Expert VPN ConsultantsWhy am I seeing this message?
Your previously used PayPal account is no longer authorized for payments. You need to reauthorize PayPal once before you can complete the purchase.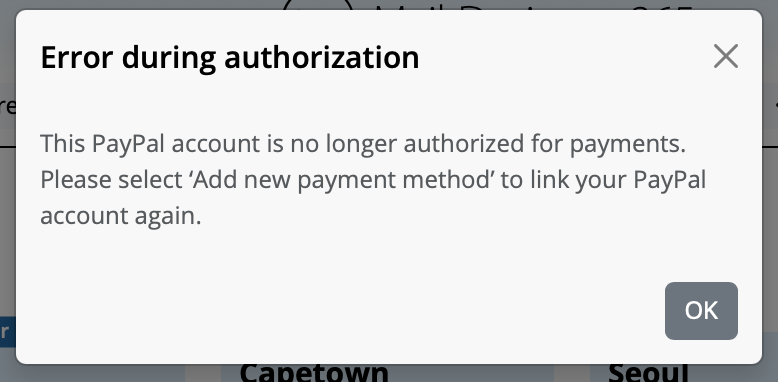
How to reconnect PayPal
- On the plan page under Payment, click Change payment method.
- In the Add payment method dialog, select Add a new payment method.
- Choose PayPal from the dropdown, then click the large PayPal button.
- Sign in to PayPal and confirm the authorization. You will be redirected back to checkout.
- Make sure PayPal is selected, then finish with Buy now.
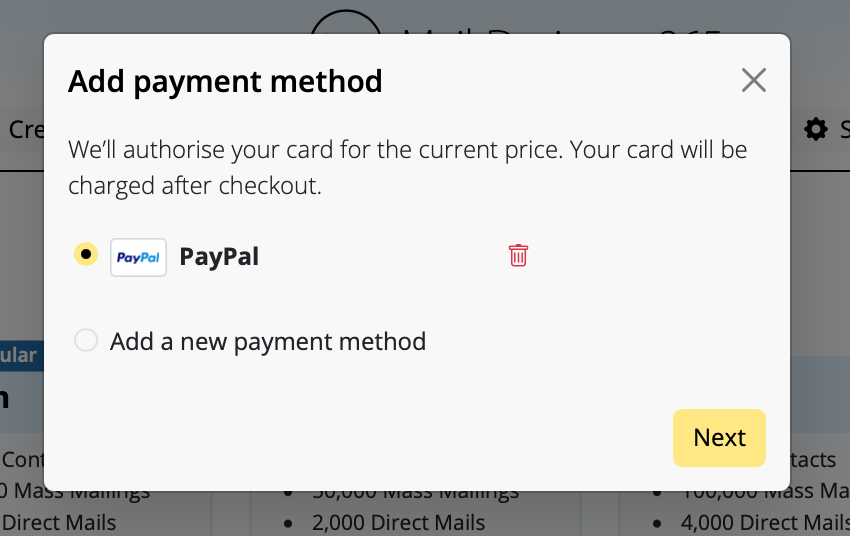
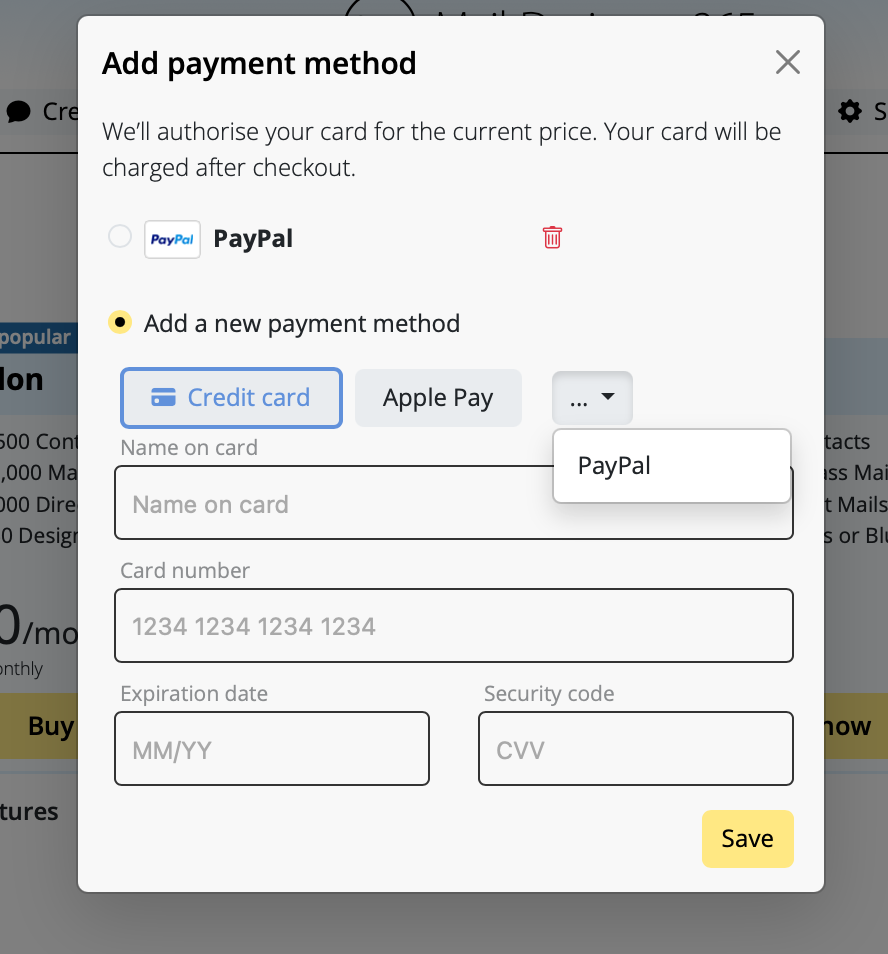
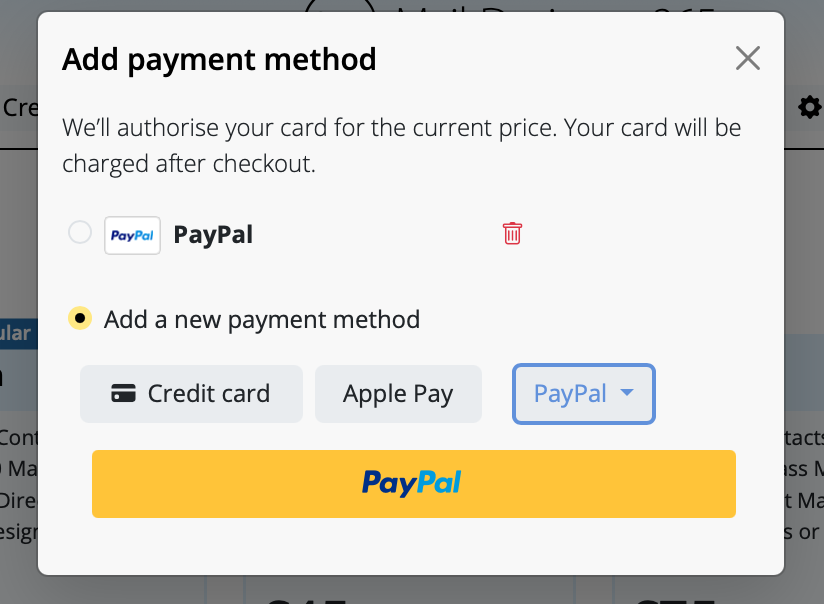
Tips
- If you still see Error during authorization, make sure you selected Add a new payment method instead of the old PayPal entry.
- Alternatively, add a Credit card or use Apple Pay and click Save.
- You can remove the old, unauthorized PayPal entry using the trash icon.
The best Mac VPN client is one that runs natively on macOS, is regularly updated, and supports all major protocols. VPN Tracker 365 is designed for professionals and supports IPsec, IKEv2, WireGuard®, OpenVPN, and more.
Yes, VPN Tracker 365 is fully compatible with macOS Sequoia, macOS Tahoe, and earlier versions. Thanks to native Apple Silicon optimization, the Mac VPN client runs fast and reliably on all modern Macs.
Yes. While many other clients no longer support these protocols, VPN Tracker 365 still allows access to L2TP (Mac and iOS) and PPTP (Mac only). This is ideal for companies with mixed infrastructures.
Free VPN clients for Mac, such as open-source tools, are usually limited to a single protocol and don’t provide professional support. VPN Tracker 365 is a professional Mac VPN client with team features, encrypted sharing, and support for over 300 gateways.
Yes. IT consultants and businesses can create preconfigured connections with VPN Tracker and share them securely. TeamCloud enables end-to-end encrypted collaboration without exposing login credentials.
Yes. VPN Tracker 365 fully supports Fortinet SSL VPN on Mac, including Apple Silicon Macs and the latest macOS versions like Sequoia and Tahoe.
Yes, VPN Tracker 365 is fully compatible with macOS 15 Sequoia. You can connect to Fortinet SSL VPN directly without installing FortiClient or additional tools.
Yes. VPN Tracker 365 supports Fortinet SSL VPN on macOS 16 Tahoe and earlier. It's optimized for the latest Apple Silicon Macs and VPN protocols.
No. VPN Tracker 365 is a full-featured Fortinet SSL VPN client for macOS — no additional Fortinet software like FortiClient is required.
FortiClient is available for Mac, but may stop working after macOS updates. For example, users have experienced issues on Sequoia and Tahoe. Read our FortiClient VPN not working on macOS Tahoe guide. For full compatibility, use VPN Tracker 365.
To connect to Fortinet SSL VPN on Mac, open VPN Tracker 365, create a new connection, and select Fortinet SSL VPN. Enter your server address, username, and password — then click Connect. For a full walkthrough, see our Fortinet VPN setup guide.
All current VPN Tracker 365 plans include full support for Fortinet SSL VPN connections on macOS. If you're using a legacy license, upgrade to a current plan for compatibility.
SSL VPN in FortiGate allows secure remote access over HTTPS. It creates an encrypted tunnel through a web browser or VPN client like VPN Tracker 365 — no special ports or firewall changes required.
SSL VPN uses HTTPS (TCP 443) for compatibility through firewalls, while IPsec uses separate ports and offers lower-level system integration. Both are supported by VPN Tracker 365. See our setup guide to choose the right one for your needs.
No. Fortinet continues to support and actively maintain SSL VPN in FortiGate firewalls. It remains a widely used and secure remote access option. VPN Tracker 365 will remain compatible with Fortinet SSL VPN.
To disable SSL VPN, log in to your FortiGate web interface, go to VPN > SSL-VPN Settings, and disable the portal or user group access. For more advanced instructions, see our Fortinet setup guide.
MAC address authentication allows FortiGate to identify or restrict devices based on their MAC address. This method is not typically used for SSL VPN. VPN Tracker 365 does not require MAC address filtering to connect securely.
MAC address filtering is possible in FortiGate but rarely used with SSL VPN, as MAC addresses are not exposed in VPN tunnels. Authentication should be handled via credentials or certificates, which are fully supported by VPN Tracker 365.
If your VPN isn't connecting, check your credentials, firewall settings, or FortiClient compatibility. For common issues, see our FortiClient not working on macOS Tahoe guide or try VPN Tracker 365 for a more reliable experience.
If your VPN isn't connecting, check your credentials, firewall settings, or FortiClient compatibility. For common issues, see our FortiClient not working on macOS Tahoe guide or try VPN Tracker 365 for a more reliable experience.
There are no free VPN clients that fully support Fortinet SSL VPN on macOS. VPN Tracker 365 is a professional-grade VPN client with native Fortinet SSL VPN support for Mac.
If FortiClient is not working after a macOS upgrade, consider switching to VPN Tracker 365. Many users on macOS Sequoia or Tahoe have resolved issues this way — see our troubleshooting guide for details.
Yes. VPN Tracker 365 is continuously updated for each new macOS release, including future versions beyond Sequoia and Tahoe. Stay informed by checking our compatibility blog.
If your email images aren’t showing and you see empty boxes with red Xs, Outlook has blocked automatic image downloads. This is a built-in privacy setting that affects all incoming emails — not just yours.
Outlook does this to protect your privacy, especially when images are hosted on external servers. This setting is common and can be changed by the user.
Tip:
If you're using Mail Designer 365, make use of styled text buttons instead of image buttons. These always appear, even if images are blocked, and help your recipients interact with your email. Learn more about text buttons and badges in Mail Designer.
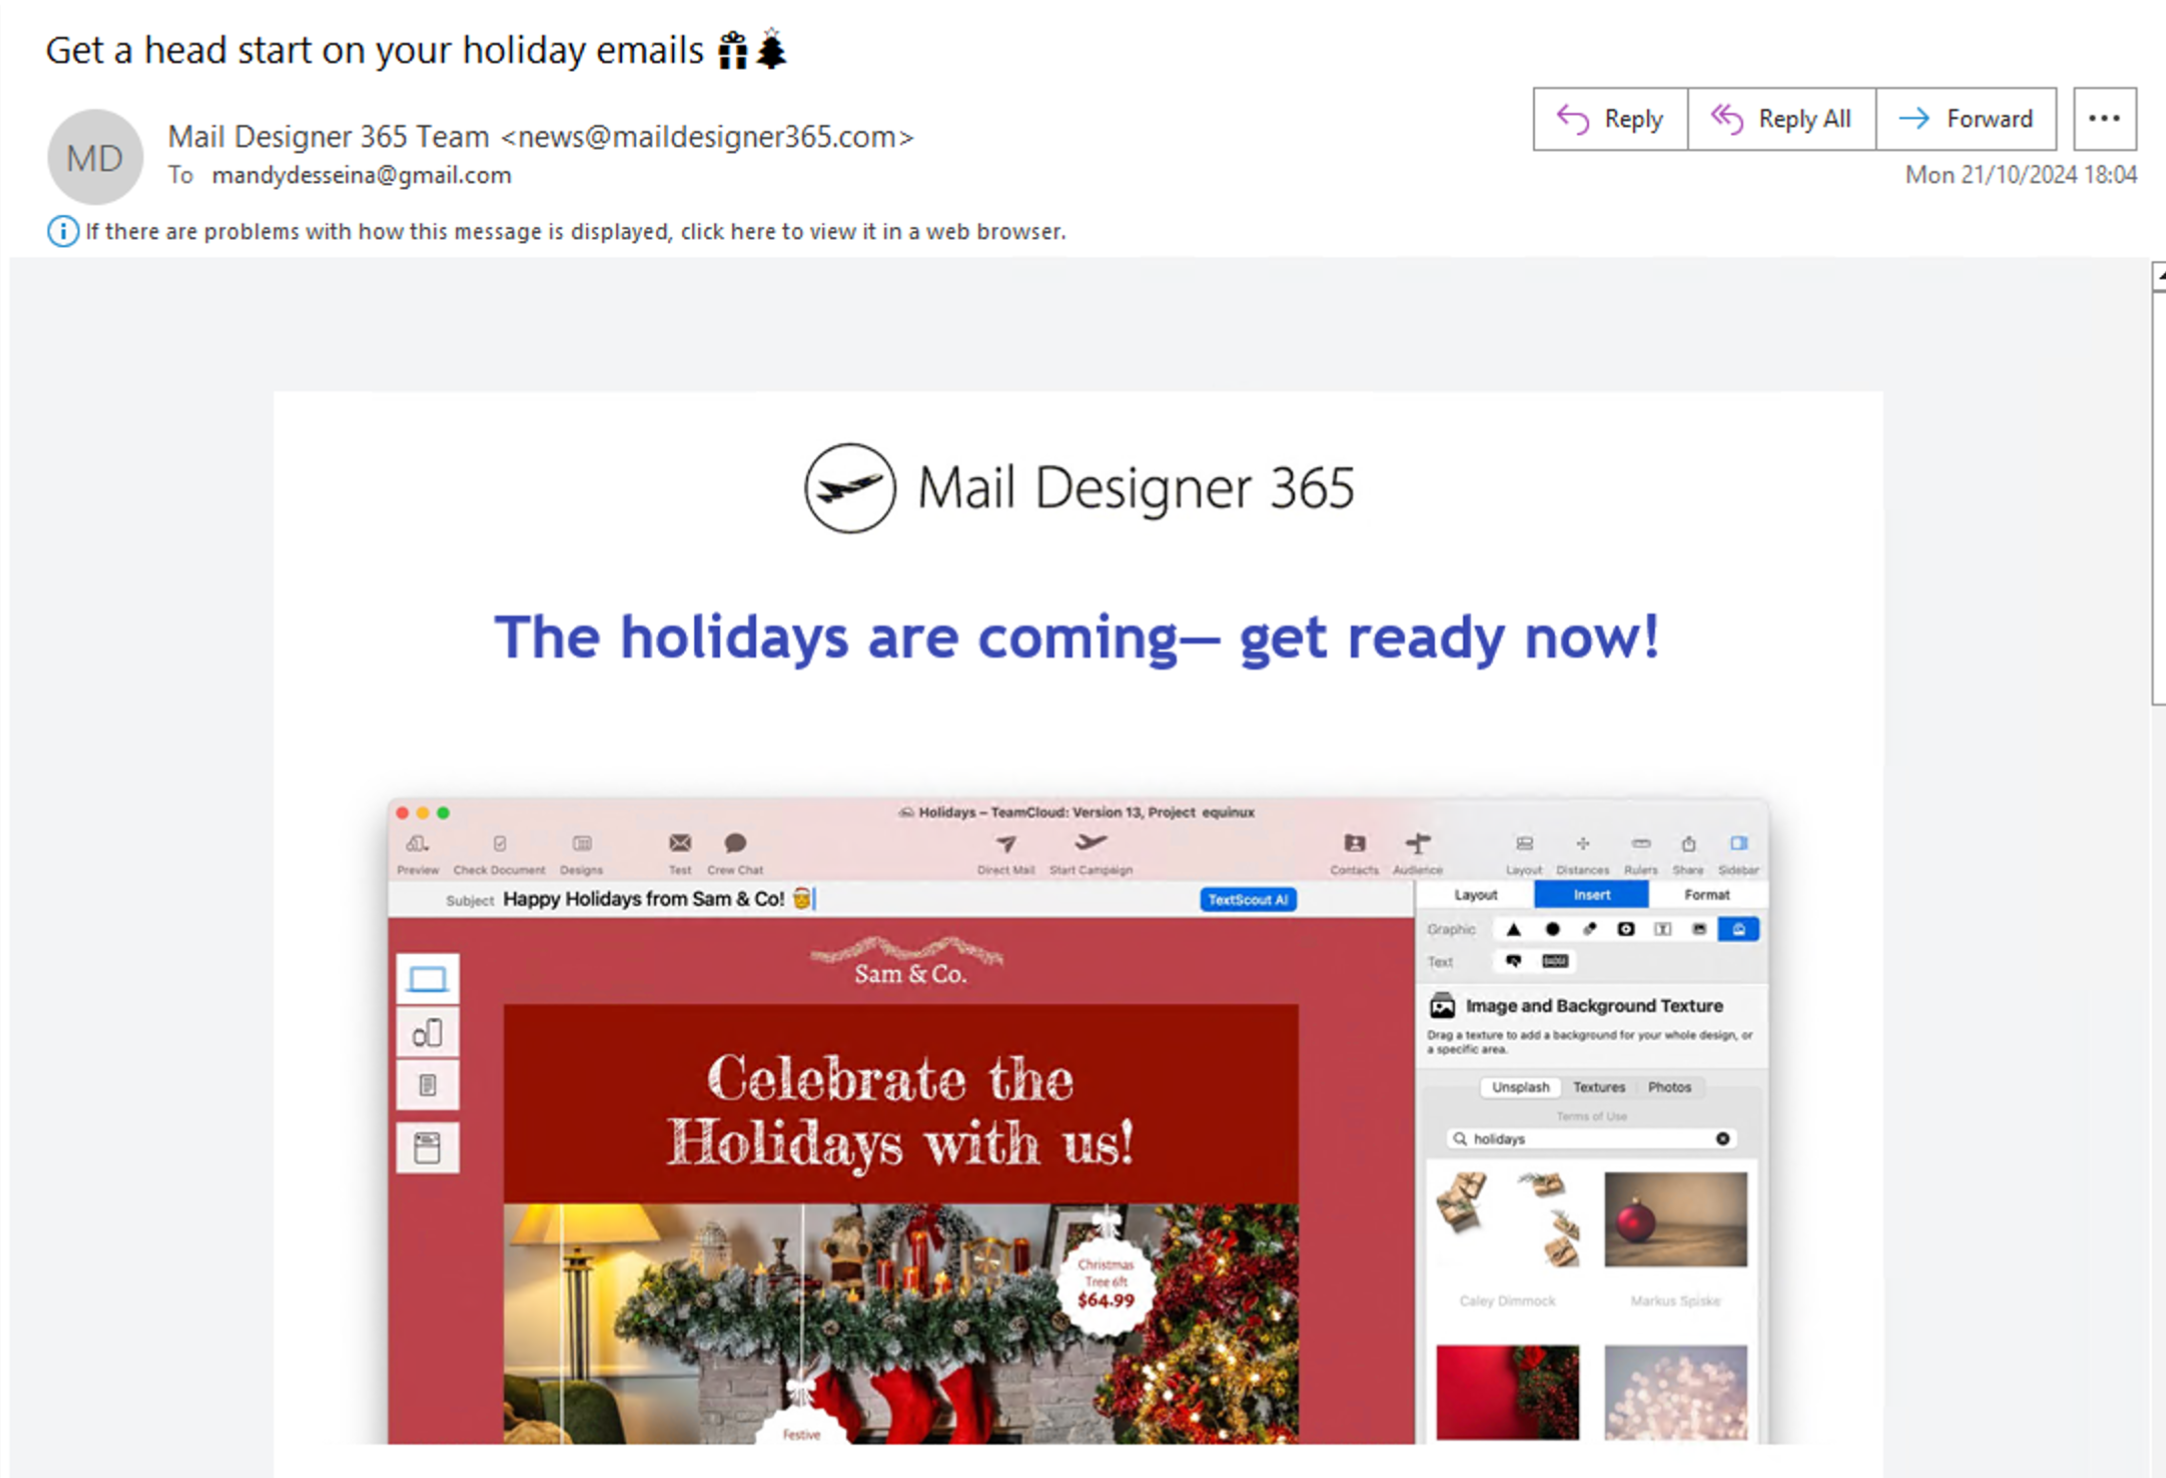
Want to show images in Outlook? Click here for step-by-step instructions on how to enable image downloads in Outlook.
If you’re seeing broken images or red X placeholders in your email, Outlook has blocked the content to protect your privacy. Here’s how the email might look with images blocked:
You can allow Outlook to show images in three ways:
Option 1: Show pictures for this email only
- Right-click the message banner at the top of the email.
- Select “Download Pictures”.
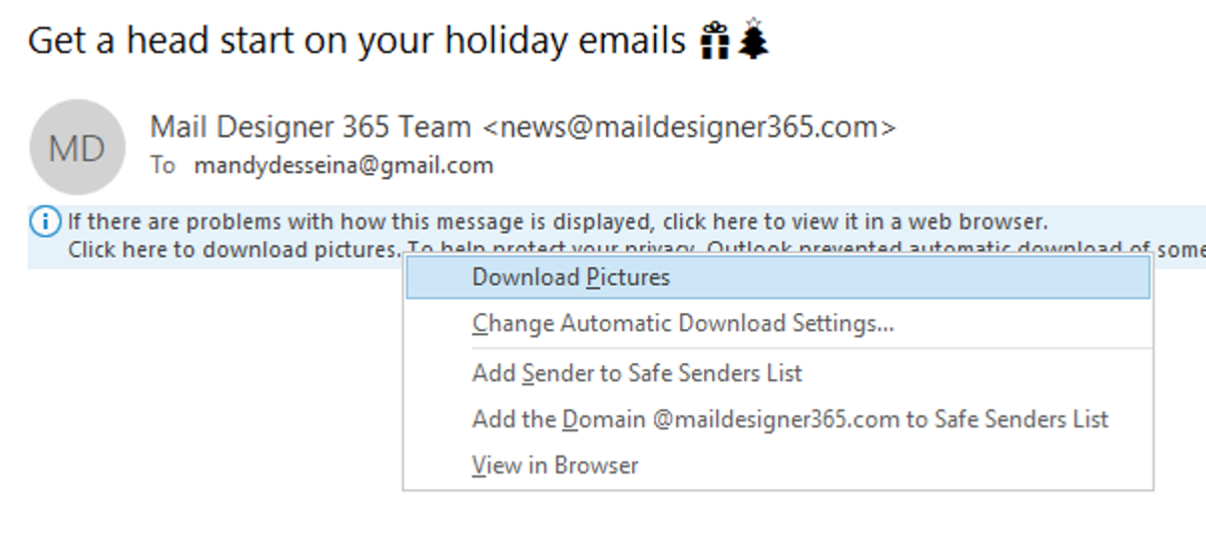
Option 2: Always allow images from this sender
- Right-click the banner.
- Select “Add Sender to Safe Senders List”.
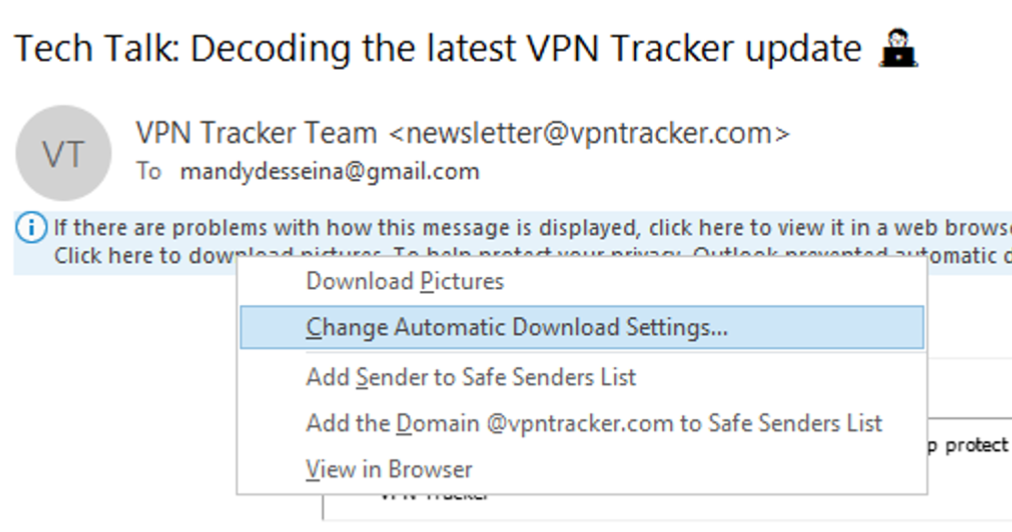
Option 3: Enable image downloads for all emails
- Go to File > Options > Trust Center.
- Click “Trust Center Settings…”.
- Choose “Automatic Download”.
- Uncheck: “Don’t download pictures automatically in standard HTML email messages…”
Once enabled, your email will display images correctly, like this:
Tip: Even if recipients don't allow images, your email can still include effective call-to-actions. Use styled text buttons in Mail Designer to create clickable buttons that always appear — even when images are blocked.
The client IP range must be outside of the target or remote network. Adjust the client IP range accordingly.
The SonicWall cloud backup breach occurred after attackers gained unauthorized access to SonicWall’s optional cloud backup service. This service stores firewall configuration data for customer devices, including VPN settings and pre-shared keys (PSKs). As a result, backup files containing sensitive VPN credentials were exposed, potentially enabling attackers to reproduce VPN connections and reach internal networks.
SonicWall confirmed that all customers using the cloud backup feature were affected. To reduce risk, admins should immediately rotate PSKs, reissue user credentials, and audit access to ensure that no shared keys are reused across connections. Even organizations that did not enable cloud backup should review VPN configurations and strengthen credential hygiene as a precaution.
For a clear, step-by-step plan to secure affected environments and roll out updated credentials to teams, follow the SonicWall leak recovery guide.
The SonicWALL data leak impacted every customer who was using SonicWall’s optional Cloud Backup Service. The breach exposed firewall configuration backups containing sensitive VPN credentials and pre-shared keys (PSKs). Attackers were able to obtain these configuration files, which could potentially be used to access internal networks or compromise connected VPN endpoints.
SonicWall confirmed that customers who did not use the Cloud Backup feature were not directly affected by this specific incident. However, due to the risk of shared or reused credentials, all SonicWall users are strongly advised to review their network configurations, rotate pre-shared keys, and verify VPN access logs to ensure their systems remain secure.
To help administrators protect their infrastructure, VPN Tracker has published a detailed 3-step guide to securing SonicWall VPNs that outlines exactly how to update your PSKs and safely roll out new VPN credentials to your team.
Researchers believe that the attackers gained access to sonicwall firewall configuration files stored in SonicWall’s cloud backup system by using valid credentials obtained through a targeted brute-force campaign. Once inside the cloud backup environment, the hackers were able to download configuration files containing VPN connection data, including pre-shared keys (PSKs) and other authentication details. These files could then be used to reconstruct or compromise VPN connections, giving attackers potential access to internal networks.
The incident highlights the importance of strong authentication practices and unique credentials for every VPN connection. Administrators are advised to rotate pre-shared keys, revoke unused accounts, and ensure that no credentials are reused across different VPNs or devices. Implementing multi-factor authentication and auditing access to SonicWall management interfaces are also recommended steps to reduce risk.
For detailed information on how to secure your VPNs and protect them against similar breaches, read the SonicWall VPN security article.
Yes, recent investigations suggest that multiple SonicWall SSLVPN devices were compromised in the wake of the SonicWall data breach. Researchers have observed that attackers are using stolen VPN credentials and pre-shared keys (PSKs) obtained from the leaked cloud backup files to gain unauthorized access to SSLVPN gateways. This allows them to connect directly to corporate networks, bypassing standard user authentication in some cases.
The breach serves as a critical reminder for IT administrators to take immediate action. All organizations using SonicWall SSLVPN devices should assume that their credentials may have been exposed and perform a full credential rotation. This includes updating VPN passwords and PSKs, reviewing access logs for suspicious connections, and verifying firmware is up to date with the latest security patches.
To reduce ongoing risk and ensure your setup follows best practices, review the Secure configuration checklist and follow the steps to harden your SonicWall SSLVPN configuration against further compromise.
The SonicWALL VPN breach involved the theft of sensitive firewall configuration backups from SonicWALL’s cloud backup service. These backups may contain critical data such as VPN usernames, passwords, and pre-shared keys (PSKs) used to authenticate VPN connections. In some cases, this information could allow attackers to reestablish VPN tunnels or gain access to internal corporate networks without detection.
Because pre-shared keys and user credentials were stored in these configuration files, it is vital for all SonicWALL administrators to treat the incident as a serious security event. Immediate steps should include rotating all PSKs, resetting user passwords, auditing connected devices, and reviewing access logs for unauthorized activity. Even if your organization did not directly use the cloud backup service, shared credentials or overlapping access could still pose a risk.
To protect your network and safely update affected VPN configurations, follow the recommendations in the SonicWALL leak guide.
Following the recent SonicWALL administrators leak incident, IT teams should take immediate action to secure their networks. The most critical steps include rotating all pre-shared keys (PSKs), changing all administrator and user passwords, and disabling or removing inactive accounts. These measures help ensure that any stolen credentials from the SonicWALL cloud backup breach cannot be used to gain unauthorized access to your VPN connections.
Administrators should also audit all SonicWALL devices to confirm firmware is up to date, review VPN connection logs for suspicious activity, and verify that each VPN connection now uses a unique PSK. For teams managing multiple users or devices, VPN Tracker’s TeamCloud feature offers a secure and efficient way to roll out new PSKs across all users without manual reconfiguration errors.
For detailed instructions, follow the SonicWALL leak recovery guide. If you need a VPN expert to help you secure your SonicWALL connection, or assistance assessing your current setup and planning a safe migration to new hardware, explore our VPN Consulting Service for personalized support.
The SonicWALL NetExtender breach primarily impacted customers whose VPN credentials were stored in SonicWALL’s cloud backup service. While the data breach focused on configuration backups rather than the NetExtender or Mobile Connect applications themselves, any VPN using shared credentials or reused pre-shared keys (PSKs) could still be vulnerable. Attackers who obtained stolen credentials from the leaked firewall configuration files may attempt to use them to log in via NetExtender or Mobile Connect clients.
To mitigate the risk, SonicWALL administrators should immediately rotate PSKs, issue new user passwords, and ensure that every VPN connection is protected by unique authentication credentials. Reviewing connection logs for suspicious login attempts and enforcing stronger password and MFA policies is also strongly advised.
For detailed steps to secure your VPN setup, read the SonicWALL leak article. If you need expert guidance on auditing your VPN configuration or migrating to a more secure setup, reach out to our VPN Consulting experts.
If you suspect your SonicWALL VPN configuration was stolen, the first thing to check is whether your device used SonicWALL’s optional cloud backup feature. SonicWALL confirmed that attackers accessed backups stored in this service, which included firewall configuration data, VPN credentials, and pre-shared keys (PSKs). If your organization had this feature enabled, you should assume that your VPN configuration may have been exposed.
Administrators should immediately rotate all PSKs, reset user and admin passwords, and verify that no old credentials are still active. It’s also important to review access logs for unusual VPN connection attempts and ensure that all devices are running the latest SonicWALL firmware updates. Even if you did not use the cloud backup feature, perform a quick audit of your network to confirm that all VPN connections are using unique and secure credentials.
For step-by-step instructions on how to secure your VPN after the SonicWALL leak, refer to the VPN Tracker guide.
Yes, SonicWALL firewalls remain safe to use after the data breach, provided that all recommended security measures are applied. The breach did not directly exploit the firewall hardware or firmware itself, but rather exposed configuration backups stored in the cloud. Once administrators update the firmware to the latest version, rotate all VPN credentials and pre-shared keys (PSKs), and review access logs, the devices can continue to operate securely.
To ensure your network remains protected, follow best practices such as enabling multi-factor authentication, using unique PSKs for each VPN connection, and regularly checking for new firmware updates. Performing a full security audit of your SonicWALL setup helps confirm that no compromised credentials are still in use and that all VPN endpoints are properly secured.
For detailed security recommendations, review the SonicWALL VPN hardening recommendations. If you need assistance assessing your network setup or want a VPN expert to help you secure your SonicWALL firewall configuration, contact our VPN Tracker Consulting experts.
Managing SonicWALL PSK updates efficiently is essential after the recent security incident. Instead of manually reconfiguring each VPN user connection, administrators can use VPN Tracker TeamCloud to distribute new pre-shared keys (PSKs) securely and automatically. TeamCloud ensures that all users receive the updated credentials instantly and that configurations remain consistent across the entire organization.
After generating a new PSK in your SonicWALL firewall settings, update the corresponding connection in VPN Tracker. Once saved and published, TeamCloud encrypts and syncs the new PSK to all assigned users. This approach eliminates human error, reduces downtime, and ensures that no outdated credentials are used to access your network.
For a full walkthrough of this process, consult the SonicWALL leak mitigation guide. If you would like personalized assistance securing your SonicWALL, configuring TeamCloud or optimizing your VPN rollout, reach out to our VPN Tracker Consulting team.
If your SonicWALL VPN connection suddenly stopped working, it may be related to a recent SonicWALL data leak that affects many devices worldwide. In this incident, attackers accessed SonicWALL’s cloud backup service and stole firewall configuration files containing VPN credentials and pre-shared keys (PSKs). As a precaution, SonicWALL advised all administrators to immediately change these credentials and update VPN configurations to prevent unauthorized access.
When your administrator updates the VPN’s PSK or other authentication settings in response to the data leak, your existing configuration may no longer match the new settings, resulting in connection failures. This is a sign that your administrator has likely secured the system, not that your VPN is permanently broken.
To fix this, reach out to your IT administrator or network manager and ask whether the VPN credentials or configuration details were recently updated. You may need to re-enter a new PSK, update your username or password, or adjust the connection parameters in your VPN client. If you’re using VPN Tracker, open the connection settings and verify that they match the latest information provided by your admin.
To better understand the incident and learn how to keep your VPN connection secure, visit Learn how to secure your SonicWALL VPN. If you need professional help restoring access or securing your setup, get help from our VPN Consulting Team.
If you’ve noticed that your SonicWALL VPN connection settings in VPN Tracker have recently changed, it’s likely due to your network administrator reconfiguring your SonicWALL VPN following the recent data breach. During this incident, attackers gained access to SonicWALL’s cloud backup service, which stored firewall configuration files containing VPN credentials and pre-shared keys (PSKs). To prevent unauthorized access, SonicWALL instructed all administrators to rotate PSKs, update user passwords, and modify VPN configurations.
When these updates are made on the SonicWALL firewall, any corresponding connection shared with you needs to be updated to reflect the new, secure configuration. These changes ensure your connection uses the latest credentials and settings, protecting your organization’s network from potential exploitation.
If you experience connection issues or are unsure about any recent changes, contact your network administrator to confirm that you are using the correct connection profile. You can also review the SonicWALL security guide to learn more about the incident and the steps taken to secure affected VPNs. For personalized help reviewing or restoring your connection, reach out to our VPN Consulting experts.
If you’re unable to connect and need to reconnect to your SonicWALL VPN after the recent cloud backup breach, it’s likely that your administrator has updated your VPN credentials or gateway configuration to improve security. During the incident, attackers accessed SonicWALL’s cloud backup service and obtained firewall configuration files that contained VPN settings and pre-shared keys (PSKs). To protect networks, administrators were instructed to rotate PSKs, update passwords, and adjust VPN configurations.
To reconnect, first verify with your network administrator that you have the latest VPN connection details. You may need to enter a new PSK, confirm the correct gateway address, or update authentication methods in your VPN client. If you’re using VPN Tracker, open your SonicWALL connection, go to the Setup tab, and replace the old PSK with the new one provided by your admin. Once saved, test the connection to ensure successful authentication.
For a full walkthrough on restoring connectivity and securing your setup, visit the SonicWALL leak guide. If you prefer expert help reviewing your VPN configuration or verifying your network’s security, contact our VPN Consulting team.
Yes, if you want your VPN Tracker plan to renew early (before the regular auto-renewal date), you can trigger the renewal manually in your account. This will start a fresh 12-month term from today and apply a prorated discount for the time remaining on your current plan.
Follow these steps to renew your plan now:
- Go to the my.vpntracker.com portal
- Click My Plans and Billing (for individual accounts) or Team Plans and Billing (if you’re managing a team)
- Click on Manage Plans for the plan you wish to renew
- You will be taken to a checkout page that allows you to modify your existing plan or manually renew it.
- Here you’ll see a Prorating Discount based on the remaining time on your current plan
- Click Buy now
- A message will appear: “You have not made any changes…” Confirm by clicking Buy now again


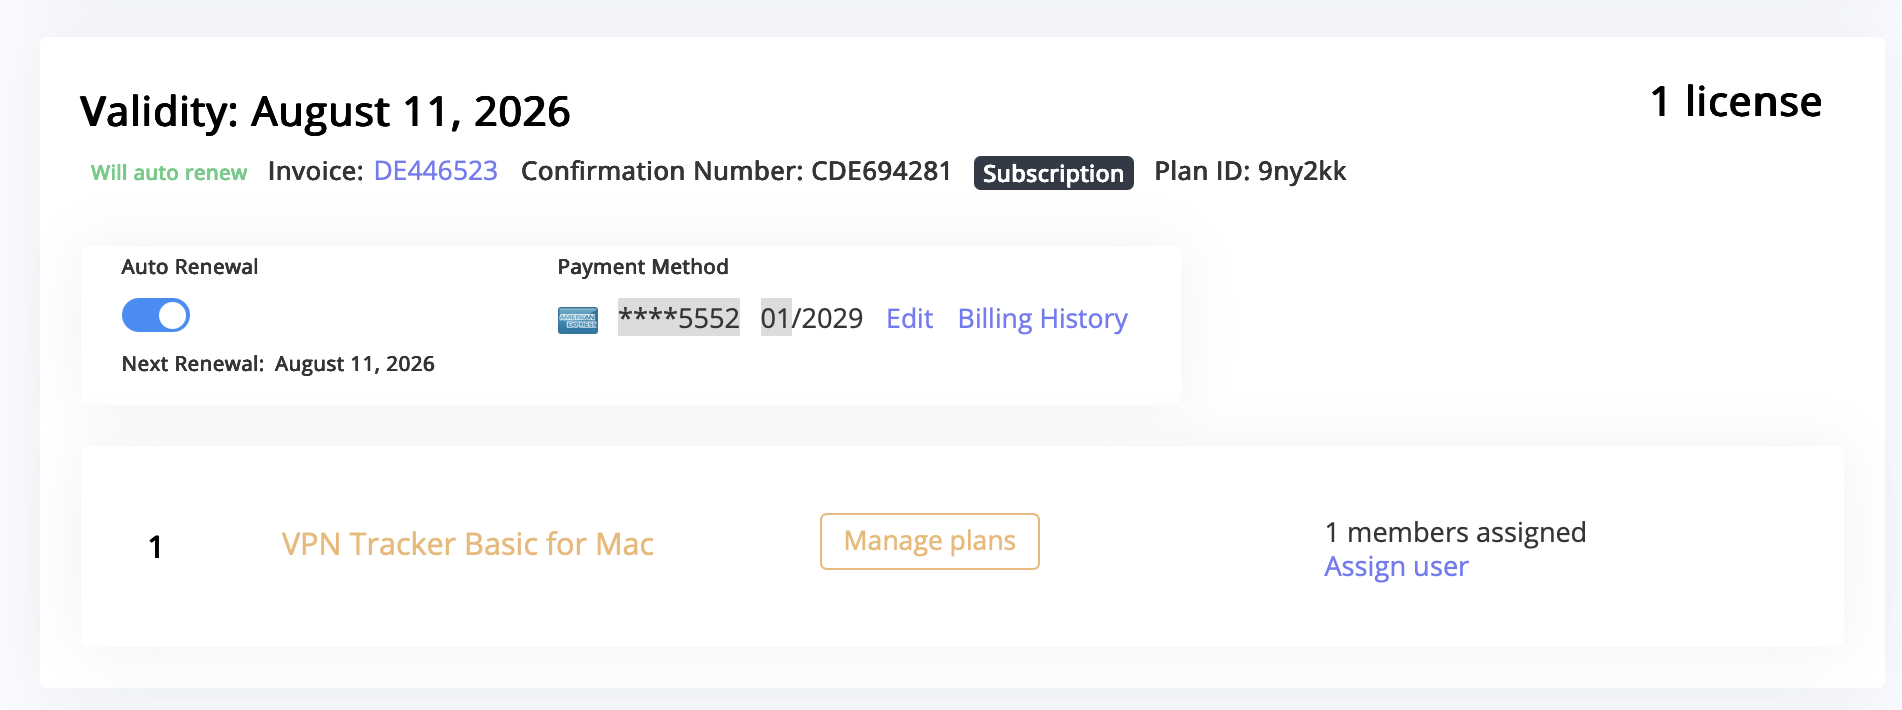

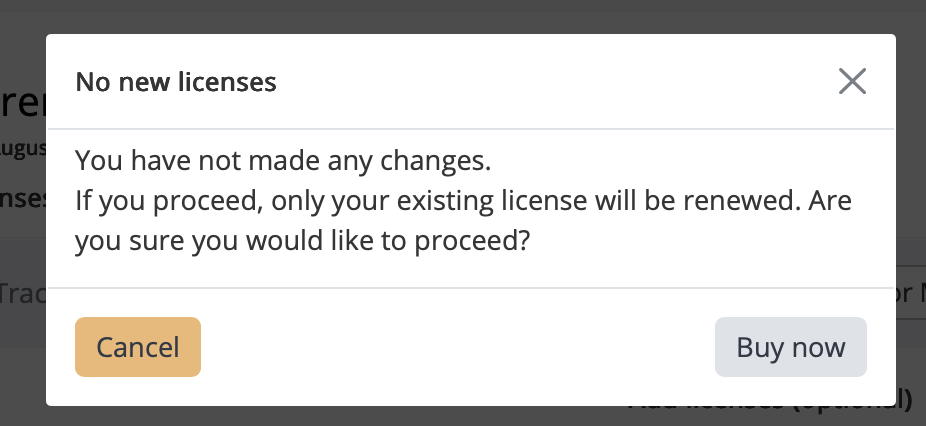
This is the fastest way to renew your VPN Tracker plan early without waiting for the automatic renewal.
After switching email accounts to Microsoft 365, many users encounter issues when trying to send emails using third-party apps like Mail Designer 365. The reason: Many Microsoft 365 plans no longer include traditional SMTP access or only allow it through complex OAuth2 authentication methods.
The classic login using just a username and password (for SMTP, IMAP, or POP3) is often blocked or disabled by default.
What does this mean for SMTP in Mail Designer 365?
Mail Designer 365 requires a working SMTP connection to send emails via SMTP. If that connection is no longer available after the migration, the login to the mail server will fail – even if the password is correct.
Solution:
Use the built-in Mail Designer 365 sending service instead, either with Direct Send or Campaign Sending. This allows you to send your newsletters reliably, without depending on your provider’s SMTP limitations.
Additional benefits:
With custom domain authentication (DKIM, SPF, and DMARC), you are set up for the future. Mail Designer 365’s sending service uses modern delivery technology to help ensure your emails reach the inbox – not the spam folder.
If you’re not seeing images in your emails on iOS, this may be caused by a privacy setting in the Mail app called Mail Privacy Protection. When it’s turned on, Apple loads all images through its own proxy servers to hide your IP address and protect your privacy.
Sometimes, this setting can prevent certain email images from displaying correctly. When that happens, you’ll see a message at the top of the Mail app saying "Unable to load remote content privately":
If your email images aren’t loading, try turning off this privacy feature and reopening or resending the email to see if the images appear correctly.
To turn off Mail Privacy Protection, open the Settings app on your iPhone and go to:
Mail > Privacy Protection > Protect Mail Activity
On macOS, the Mail app includes privacy options that let you block all remote content from loading. When “Block All Remote Content” is enabled, Mail won’t load any images or other external resources in emails. This can improve privacy, but it also prevents email images from displaying automatically.
Normally, this setting is off by default, so most users won’t see this issue. It only occurs if you’ve manually turned on the option to block remote content.
When remote content is blocked, you’ll see a notice at the top of your email saying “This message contains remote content” with a button to Load Remote Content:

To allow images to load automatically again, open Mail, go to Mail > Settings > Privacy, and make sure “Block All Remote Content” is not selected:
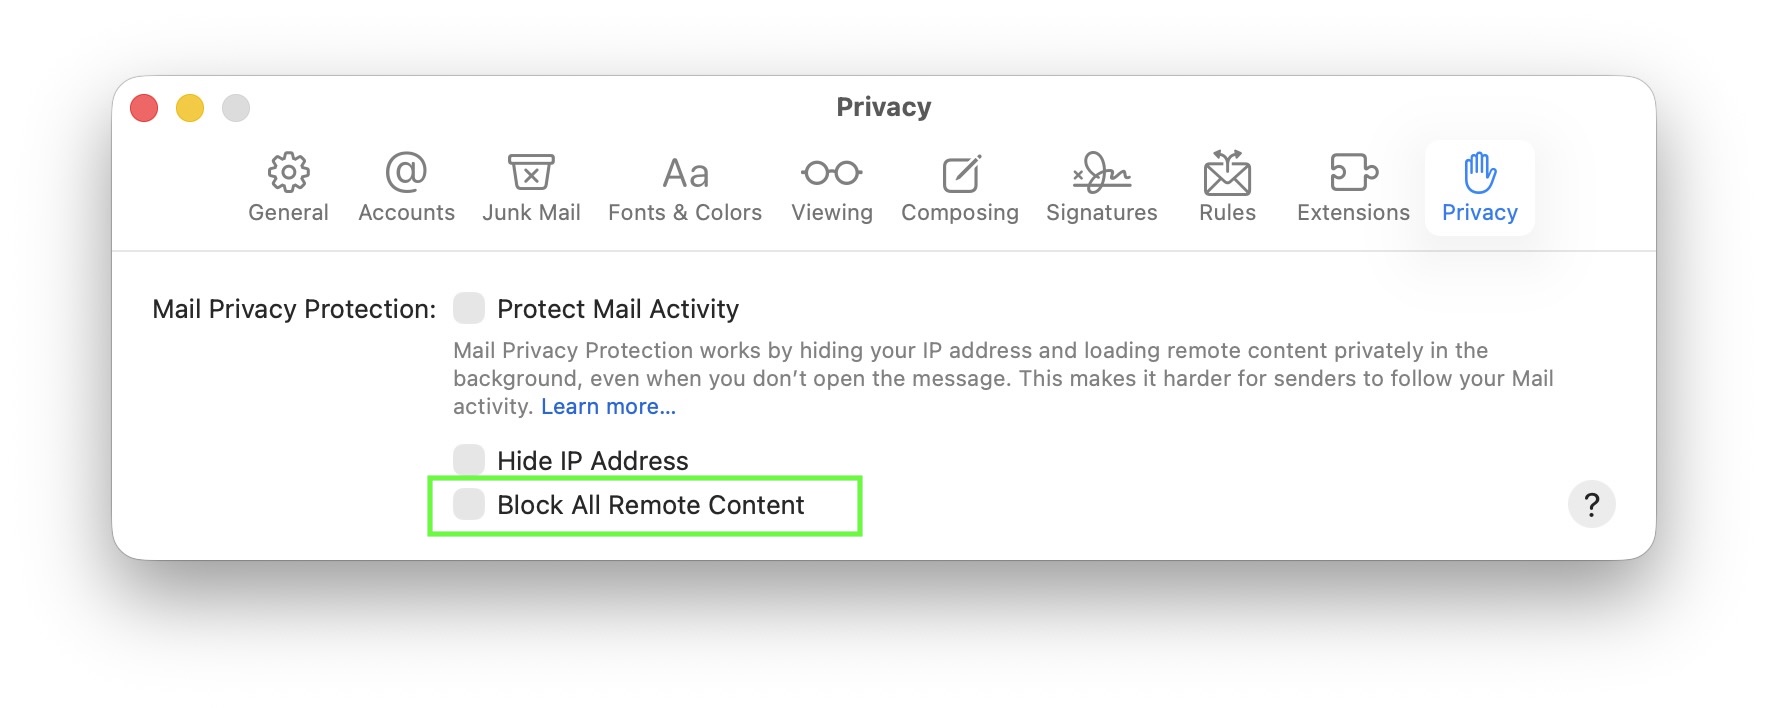
If you don’t see images in your emails on macOS, this may be caused by a privacy option in Apple Mail that blocks all remote content. This setting can be found in Mail > Settings > Privacy under “Block All Remote Content”.
When this option is turned on, Mail will not load any images or other external content. You’ll see a message at the top of your email saying “This message contains remote content” with the button Load Remote Content:
Normally, this setting is off by default, so most users will not experience this issue. It only occurs if you’ve manually enabled the option to block remote content.
To allow images to load automatically again, open Mail, go to Mail > Settings > Privacy, and make sure “Block All Remote Content” is not selected:
When this happens, you may notice slower VPN performance or occasional connection drops. VPN Tracker includes safeguards to help prevent disconnections for many VPN protocols, but performance effects cannot be fully corrected in software.
If your TP-Link model offers an option to disable hardware offloading, switching it off will resolve the issue. Note that doing so may occasionally reduce Internet performance when the router is under heavy load, as the router must process all traffic without hardware acceleration. This setting is usually available on business-class TP-Link models, while most consumer models do not include it but still use hardware acceleration.
When you upgrade to macOS 26, the built in VPN client no longer supports the older IPSec and L2TP components used by macOS Server. This causes many users to see their macOS Server VPN not working right after the update. Apple removed these outdated cryptographic components from the system, which breaks compatibility with the old macOS Server VPN stack.
To continue using a secure VPN connection on current macOS versions, you can switch to VPN Tracker. Our full guide explains what changed, why Apple removed these components, and how to reconnect: read the full guide on macOS Server VPN not working.
If your macOS Server VPN stopped working after upgrading to macOS 26, the fastest way to get connected again is to use VPN Tracker. It includes its own VPN engine that can still negotiate the legacy L2TP and IPSec settings used by older macOS Server installations.
Our main article shows you a simple five step process to restore your connection on macOS 26 using VPN Tracker: Fix macOS Server VPN not working.
No. Even though macOS 26 no longer supports the legacy VPN methods used by older macOS Server installations, you do not need to replace your server. The issue exists on the client side: macOS 26 blocks the outdated algorithms required by the macOS Server L2TP and IPSec VPN.
VPN Tracker includes its own VPN engine that remains compatible with these legacy macOS Server settings, allowing you to continue using your existing server without changes. Learn more here: macOS Server VPN not working.
Yes, but not with the built in macOS VPN client. The L2TP VPN from macOS Server relies on older IPSec proposals that macOS 26 no longer accepts.
VPN Tracker includes its own L2TP and IPSec engine that remains compatible with macOS Server, allowing you to keep using your existing setup without replacing the server: macOS Server VPN not working.
Your VPN worked on macOS 25 because that version still included compatibility code for the older IPSec and L2TP settings used by macOS Server. macOS 26 removes support for these legacy algorithms, so the client can no longer complete a connection.
The server did not change — the macOS 26 VPN client did. VPN Tracker uses its own VPN engine that still supports these older settings and restores compatibility on macOS 26: macOS Server VPN not working.
The easiest solution is to import your existing macOS Server L2TP or IPSec connection into VPN Tracker. The app supports the older encryption and key exchange methods that macOS 26 no longer accepts.
This removes the macOS Server VPN not working issue without requiring any changes to your server configuration: macOS Server VPN not working.
You can continue using macOS Server VPN if you use a compatible client like VPN Tracker. The app supports the legacy L2TP and IPSec settings that macOS 26 no longer accepts.
However, since macOS Server is no longer maintained by Apple, many organizations consider migrating to a modern VPN solution when the timing is right.
If you want to get your macOS Server VPN working again on macOS 26, follow our compatibility guide: Fix macOS Server VPN not working with VPN Tracker.
If you're exploring a long term upgrade path, our WireGuard migration article explains how to move from macOS Server VPN to a modern setup for Mac teams: macOS Server VPN: 5 Benefits of Upgrading to WireGuard Today.
Yes. VPN Tracker includes support for legacy encryption and authentication algorithms such as 3DES, DES, SHA1, and older Diffie Hellman groups that are required by macOS Server VPN.
These algorithms are no longer supported by the built in VPN client in macOS 26, which leads to macOS Server VPN not working errors. VPN Tracker maintains compatibility so you can continue using your existing macOS Server VPN setup.
Learn more here: Fix macOS Server VPN not working on macOS 26.
VPN Tracker supports importing a wide range of common VPN configuration files used by many leading VPN gateway vendors and network manufacturers.
You can quickly and reliably import the following VPN connections with VPN Tracker:
OpenVPN configuration files
- File formats: *.ovpn, *.conf
- Compatible with OpenVPN-based services such as OpenVPN Access Server, Sophos, Netgate/pfSense, OPNsense, Ubiquiti/UniFi, AsusWRT, and many more.
- Ideal for administrators working with flexible or complex OpenVPN setups.
- How to set up OpenVPN in VPN Tracker →
WireGuard® configuration files
- File formats: *.wg, *.conf
- Supports modern, high-performance WireGuard connections used by solutions from Netgate, OPNsense, MikroTik, AVM FRITZ!Box (Lab firmware), and many cloud VPN providers.
- Perfect for fast, lightweight and secure VPN deployments.
- How to set up WireGuard VPN in VPN Tracker →
Apple Mobile Configuration profiles
- File format: *.mobileconfig
- Supports IKEv1, IKEv2 and L2TP profiles for connections to devices and gateways from manufacturers such as Cisco, Juniper, SonicWall, Fortinet, Palo Alto Networks, DrayTek, Zyxel, Lancom, and many others.
- Ideal for organizations that distribute VPN profiles centrally or use Apple-specific configuration setups.
- How to import .mobileconfig files into VPN Tracker →
VPN Tracker 365 connection files
- File format: *.vpnt365connection
- Supports IKEv1, IKEv2 and L2TP profiles for connections to devices and gateways from manufacturers such as Cisco, Juniper, SonicWall, Fortinet, Palo Alto Networks, DrayTek, Zyxel, Lancom, and many others.
- Perfect for teams that centrally manage VPN profiles or rely on Apple-device-specific configurations.
LANCOM configuration files
- File format: *.ini
- Supports IKEv2 profiles for connections to LANCOM devices.
Step 1: Open your team in my.vpntracker.com
Go to my.vpntracker.com and log in with your account. In the sidebar, open your team and click Team Plans and Billing.
Step 2: Open Manage Plans
Under Active, find your current plan and click Manage plans. Here you can see how many licenses are currently included in your plan.
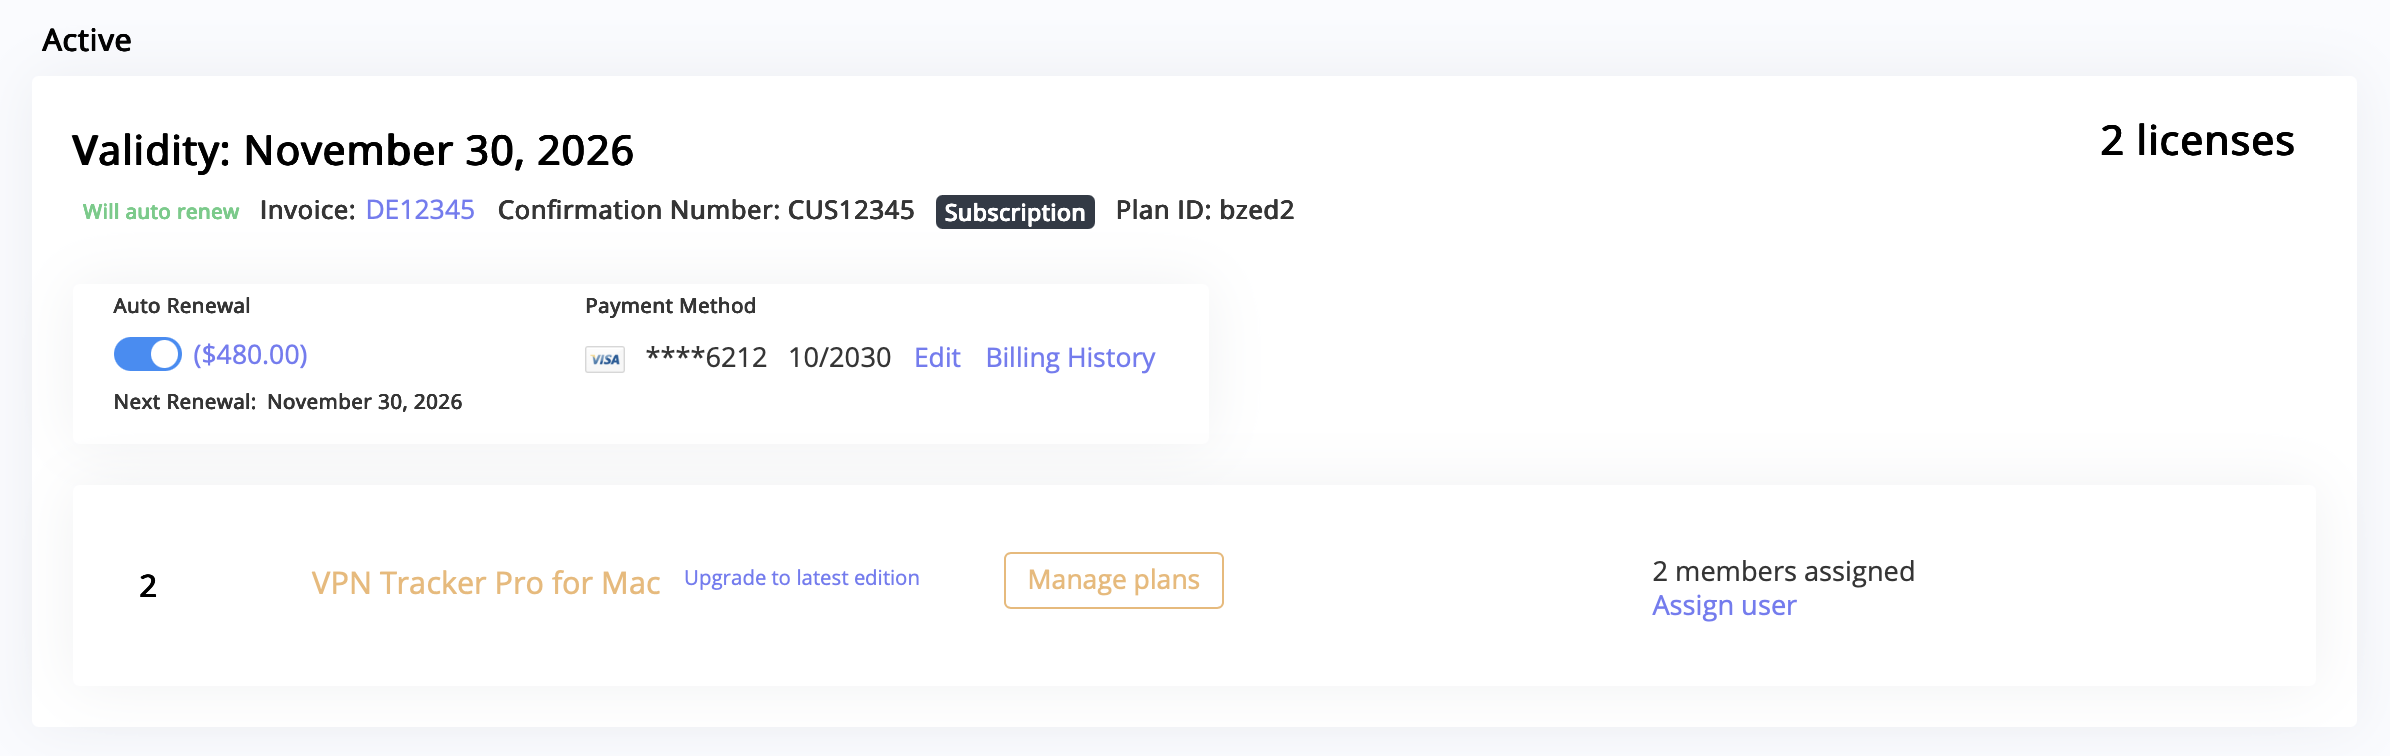
Step 3: Choose which license to remove
On the plan overview page, you will see a list of your licenses under Current plan and how they will look under New plan. For the license you want to remove, open the dropdown menu next to it.
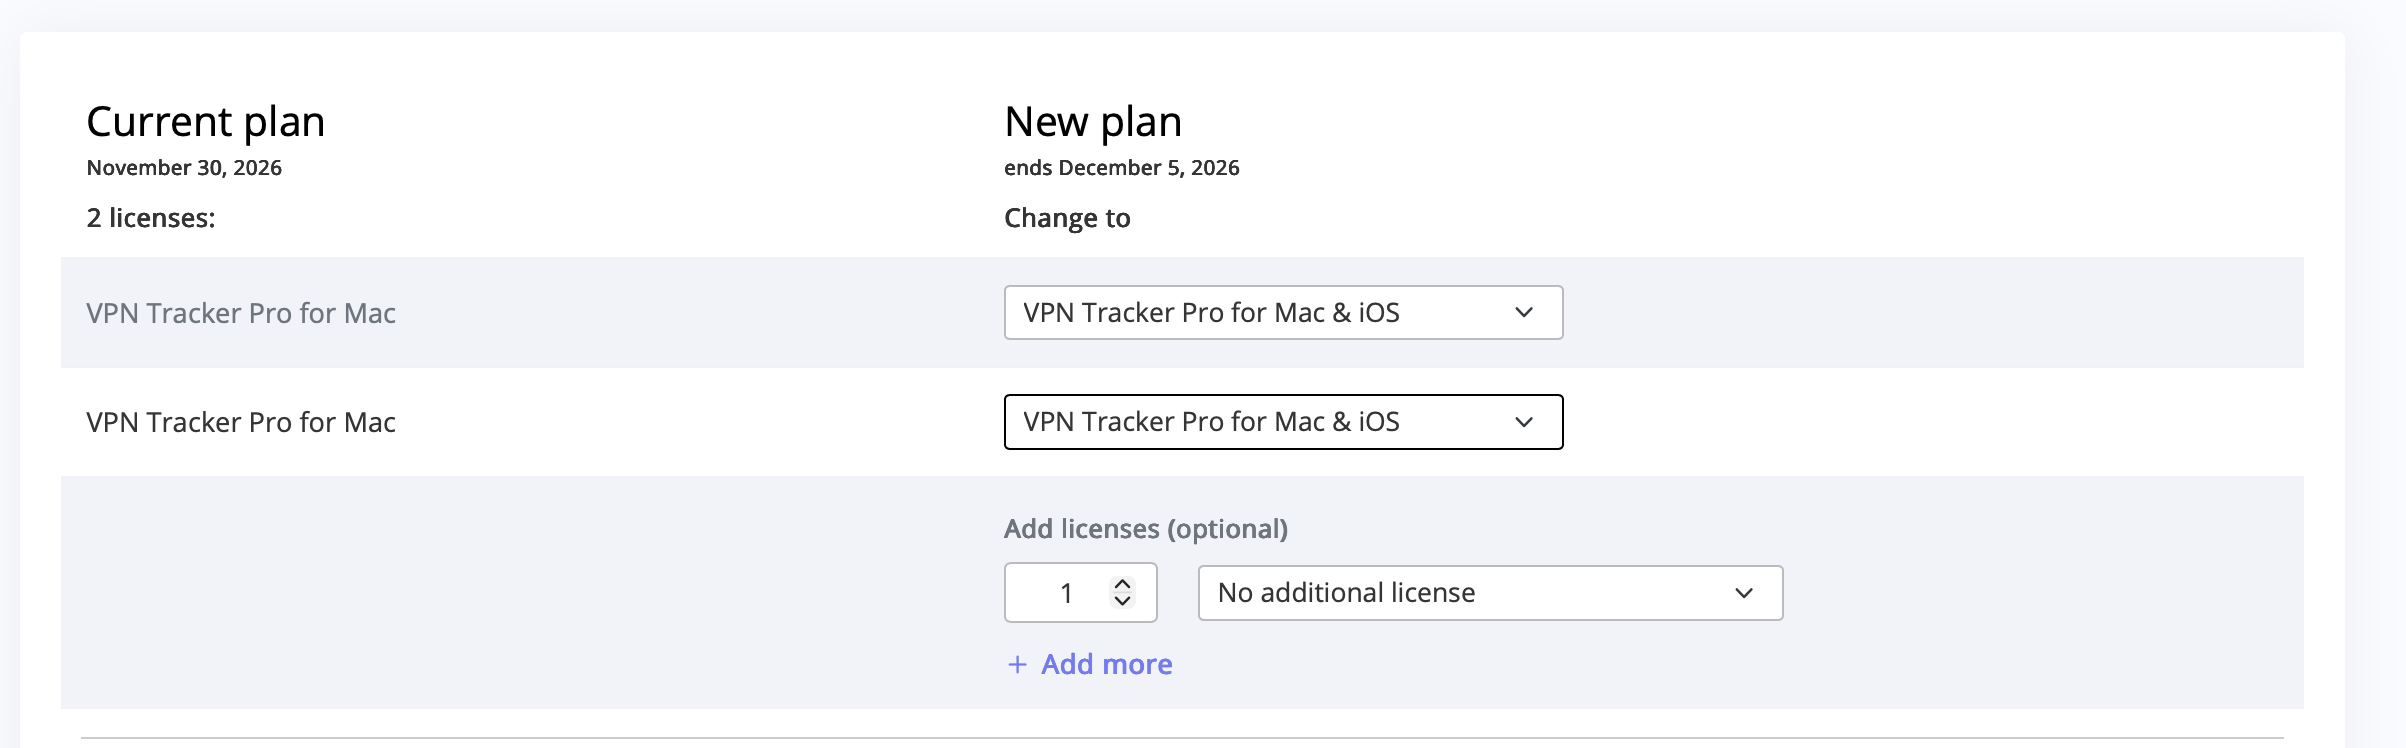
Step 4: Select “Remove License”
In the dropdown, select Remove License for the license you no longer need (for example, if user “xxx” is no longer using VPN Tracker, but “yyy” still is).
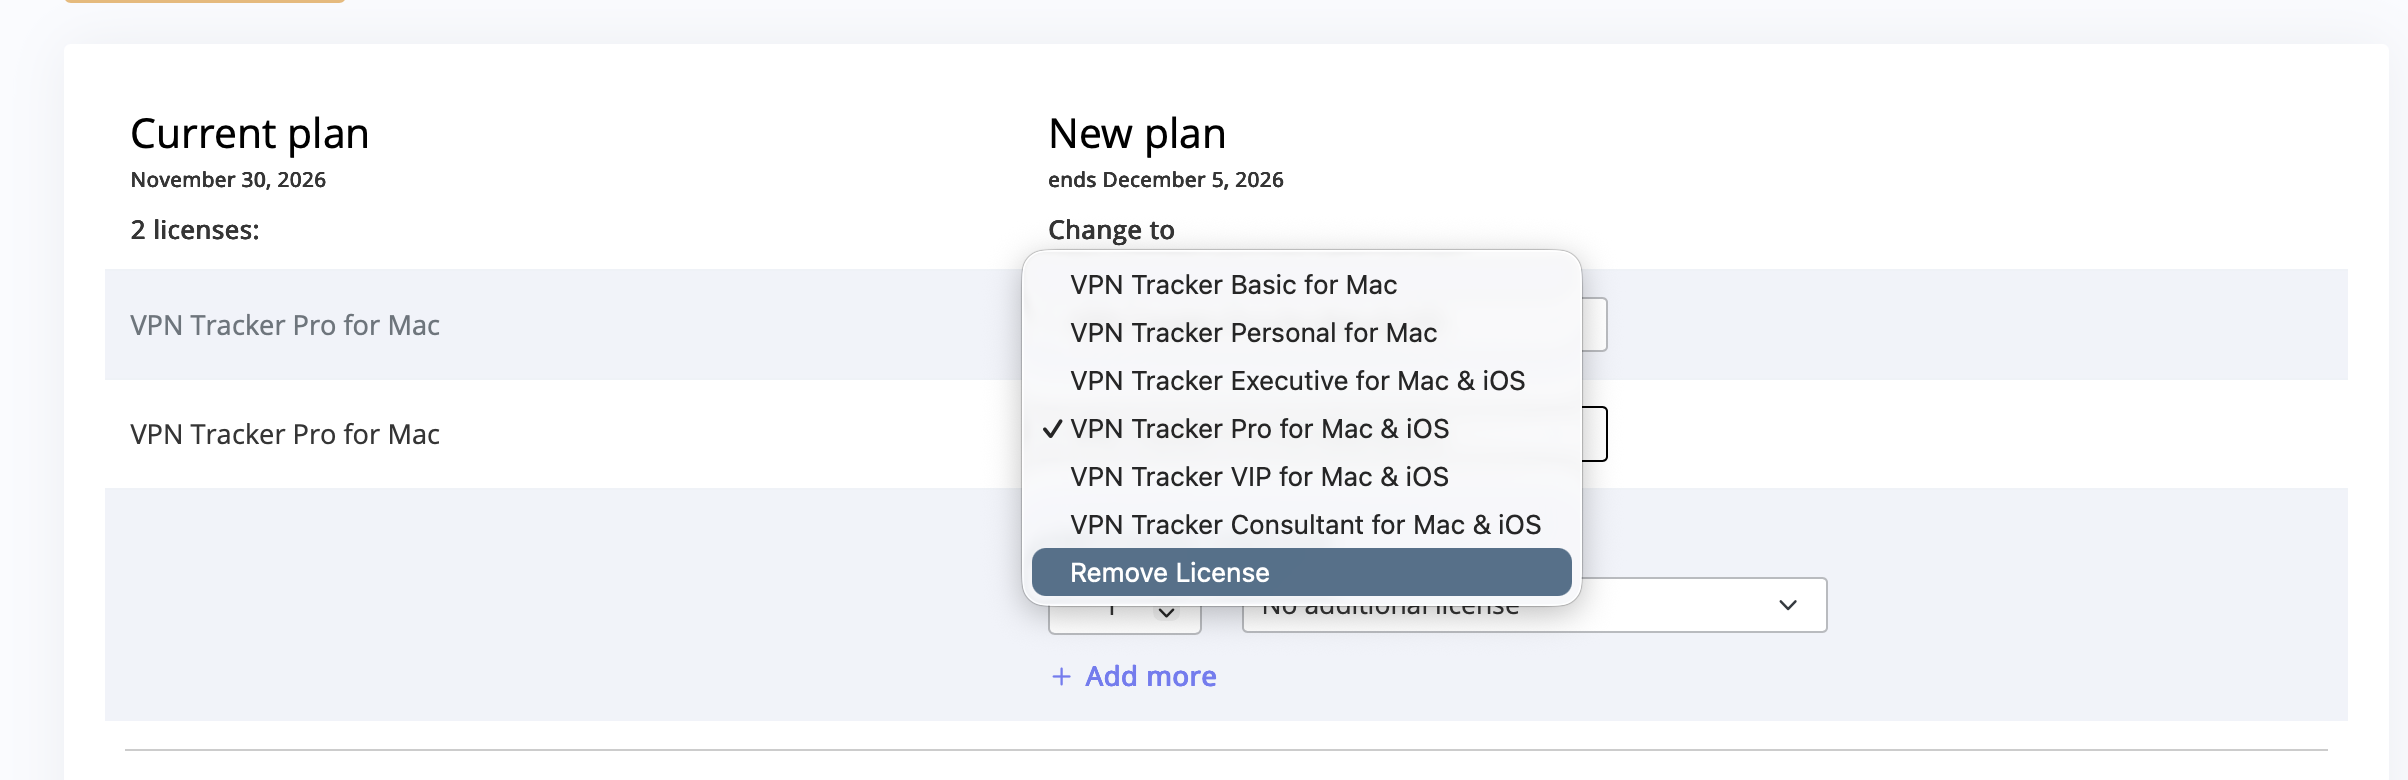
Step 5: Go to checkout and confirm
After adjusting your licenses, go to checkout to confirm the changes to your plan. Any remaining duration for the removed license will be credited automatically. The remaining license or licenses stay active for the users that still need VPN Tracker.
Step 6: Assign the remaining licenses
After updating your plan, go back to your team management area under Members and assign the remaining active licenses to the correct users. Since you removed one or more licenses, VPN Tracker does not automatically reassign them.

Learn more: Fortinet VPN 2FA: How to fix.
Yes. VPN Tracker for Mac and iOS supports the combined credential flow. Simply enter your FortiToken during login, and the app formats the password + token automatically for the FortiGate server.
Learn how: Fortinet VPN 2FA: How to fix.
Learn more: OpenVPN 2FA: How to fix.
Yes. VPN Tracker for Mac and iOS supports the legacy combined credential flow for OpenVPN. Simply enter your 2FA token when prompted, and VPN Tracker automatically combines it with your stored password in the correct format.
More details: OpenVPN 2FA: How to fix.
- Confirm your VPN location by checking your IP address. Use a service like WhatIsMyIP.com to make sure World Connect has assigned you an IP in the correct country.
- Restart your browser after connecting to World Connect. Modern browsers may keep DNS-over-HTTPS (DoH) sessions open from before the VPN connection. Restarting ensures all traffic is routed through the VPN.
- Use your browser’s Private Mode (or Incognito Mode). Websites can track previous sessions with cookies. Private Mode ensures your browser starts with fresh cookies, preventing the site from recognising your old session.
- Clear cookies or site data. If Private Mode is not convenient, manually clearing cookies and site data achieves the same effect and prevents the website from recognising your prior session.
- Disable DNS-over-HTTPS (DoH) in your browser. With DoH active, your browser may bypass the VPN’s DNS settings and resolve domains based on your physical location. Disabling DoH ensures DNS queries go through World Connect and reflect the VPN server location.
- Check whether the site blocks VPN traffic in general. Some websites block all known VPN IP ranges, regardless of location. You can test this by connecting to a US server while physically in the US. If access is still blocked, the site may simply prevent VPN usage.
Instead, you must press and hold the link to open a menu with available actions, such as composing an email to that address or adding it to a contact.
On iPads running iPadOS 26.1 or later, tapping mailto: links continues to work as usual.
The message "Missing Plug In" in Mail Designer indicates that a required technical component can no longer be loaded. This typically occurs when a legacy version of Mail Designer is used on a current macOS version.
Email design standards and operating systems evolve continuously. At the same time, technical requirements, security mechanisms, and system interfaces change. Software cannot be maintained and adapted to new operating systems free of charge indefinitely. As a result, older Mail Designer versions eventually reach a point where certain plug ins or features are no longer compatible.
No updates are provided for legacy Mail Designer versions. Missing or incompatible plug ins therefore cannot be updated or reinstalled. Even if the app may still launch, reliable operation on current macOS versions can no longer be guaranteed.
This is exactly where Mail Designer 365 comes in. Mail Designer 365 is continuously developed, regularly updated, and actively adapted to all current and future macOS versions. Changes to the operating system, new technical requirements, and modern email standards are continuously supported to ensure long term stability and compatibility.
Support end dates for legacy Mail Designer versions
- Mail Designer – support ended September 2014
- Mail Designer 2 – support ended February 2015
- Mail Designer Pro – support ended May 2016
- Mail Designer Pro 2 – support ended May 2017
- Mail Designer Pro 3 – support ended October 2018
- Mail Designer Pro HS – support ended January 2019
What does this mean for me?
If you are using a legacy Mail Designer version, macOS updates may lead to limitations such as missing plug ins, display issues, or incompatible designs. These limitations can no longer be resolved technically.
Solution
Updating or reinstalling the missing plug in is unfortunately not possible. For reliable long term use, we recommend installing Mail Designer 365.
Your free 30-minute session is a chance to get hands-on advice from our VPN experts. Here are some ideas for how to use it:
- Review your current VPN setup and troubleshoot connection issues
- Optimize VPN settings for speed, security, or reliability
- Switch gateways, servers, or VPN protocols for better performance
- Deploy VPN profiles efficiently across multiple devices
- Step-by-step guidance on certificates, authentication, or encryption settings
- Ask any other questions about your VPN workflow or security strategy
Your free 30-minute kickoff session is a chance to get hands-on advice from our email design experts. Here are some ideas for how to use it:
- Designing your first newsletter with expert layout support
- Use image effects, text styles, and tables effectively
- Get help sending emails using Direct Mail or Campaigns
- Create targeted email groups for better segmentation
- Fix "From" address and domain setup issues
- Use placeholders or connect to FileMaker for personalization
“This website has been blocked from automatically creating emails” To prevent this error from occurring for recipients, Mail Designer automatically disables tracking for mailto: link structures in email campaigns.
Technical explanation:
Mail Designer’s link tracking works by rewriting links so they first pass through a tracking URL before opening the final destination. This approach functions reliably for standard web URLs (https://), where the browser can safely redirect the request.However, mailto: links behave differently. Instead of opening a webpage, they trigger the user’s default email application and attempt to create a new message. In recent macOS versions, Apple treats this behavior as a potential security risk when initiated via a redirected or rewritten link.
As a result, macOS blocks tracked mailto: links to prevent unwanted or automated email creation. Since this restriction is enforced at the operating system level, it cannot be overridden by Mail Designer.
To ensure a smooth and secure experience for recipients, Mail Designer disables tracking for mailto: links by default. These links will continue to work as expected, but clicks on them will not be tracked.
- Modern engine:
- Offers improved support for Fritz!Box devices.
- Offers improved support for SonicWall devices.
- Is actively maintained and will receive more improvements in the future.
- Legacy engine:
- Has been the default in VPN Tracker up to version 26.1.
- Will not receive new features.
The configuration file may also contain an identifier setting named IkeIdStr. If present, set both the local and remote identifiers to the type “Email (UFQDN)” and use the value specified by this setting.
If the file includes a line Secret="…", configure the connection to authenticate using a pre-shared key. Set “Authenticate using” to “Pre-Shared Key” and enter the value from the Secret line, without the quotation marks.
If you continue to experience difficulties setting up the connection, please don’t hesitate to contact our support. When sharing your configuration file with us, be sure to create a copy and remove the Secret="…" line beforehand.
- Please create a copy of the file first.
- Open this copy in a text editor, for example, macOS' TextEdit.app.
- The LANCOM file usually contains a line that begins with Secret=. Remove this line or change the value after the equals sign to an example text.
- This entry contains the so-called pre-shared key and is similar to a password. It should remain secret.
- Save the file and send it to our support team.
Symptoms:
The OpenVPN client gets stuck during connection setup and eventually runs into a timeout before a TLS connection is established.
A typical message is “Waiting for RESET”.
Cause:
The TLS handshake is not completed successfully because the required UDP packets do not reliably reach the server.
Common reasons include:
- Restrictions or filtering on firewall, router, or ISP level
- Overly aggressive UDP timeouts on NAT gateways
- MTU or fragmentation issues (e.g. PPPoE, DS-Lite, mobile networks, IPv6/IPv4 translation)
- Network devices or providers that prioritize, throttle, or block UDP traffic
Because UDP is connectionless, these issues often occur without any meaningful error message.
Resolution:
Switch the OpenVPN transport protocol from UDP to TCP.
TCP is significantly more robust than UDP:
- TCP maintains a real connection state
- Lost packets are automatically retransmitted
- Firewalls and NAT devices usually handle TCP traffic more favorably
- MTU-related issues are less critical
This allows the TLS handshake to complete successfully and restores a stable VPN connection.
Symptoms:
The VPN connection setup fails or gets stuck during startup. The server is reachable, but the tunnel is not established.
Cause:
Jumbo frames may be enabled on the client's network. The resulting increased MTU was not fully supported across the network path, causing VPN packets to be lost.
Solution:
Disable jumbo frames on the client's network or configure a standard MTU. After disabling jumbo frames, processes that determine and apply the correct path MTU can work properly, allowing the tunnel to be established.
If you do not plan to send newsletters for a while, you can cancel your paid sending plan and switch to the free Karlsfeld plan. Your data will generally remain intact, but please note the following points:
Design limit in the Karlsfeld plan
In the Karlsfeld plan, you can store and fully edit up to 20 designs.
If you currently have more than 20 templates in your account:
- you can still open and view them
- however, you will no longer be able to edit or save them
Recommendation: Before switching plans, delete any unnecessary drafts until you reach the 20-design limit.
Handling your Stamps credit
Included Stamps: The monthly Stamps included in your sending plan (e.g. 15,000 per month) expire at the end of the respective billing period.
Purchased Stamps packages: Any additional Stamps packages you have purchased remain valid indefinitely and will still be available in the Karlsfeld plan.
Contacts and tracking statistics
- Your verified recipient addresses remain available (up to approximately 200 contacts in the Karlsfeld plan).
- The tracking statistics of your past campaigns remain accessible.
Data deletion and inactivity
As long as your Mail Designer 365 Design plan remains active, no data will be deleted.
Automatic data deletion for data protection reasons occurs at the earliest after 6 months of complete inactivity, meaning only if no active plan is being used.
Yes. In most cases, virtual machines work with VPN Tracker automatically, without any additional configuration.
When VPN Tracker establishes a VPN tunnel on your Mac, VM guest systems (for example Windows or Linux) can access remote company networks, as long as the VM uses the default NAT-based network mode (often called “Shared Networking” or simply “NAT”).
UTM is an exception. It requires additional NAT rules. VPN Tracker can configure these rules automatically.
General Recommendation
In your VM, use the default NAT network mode, such as:
- “NAT”
- “Shared Networking”
- “Shared with Host”
The following network modes will not work:
- “Bridged”
- “Host-Only”
Supported Virtualization Solutions
- VMware Fusion: Network type: NAT (Shared)
- VirtualBox: Network type: NAT
- QEMU: Network type:
-netdev user(userspace NAT) - Docker: Default bridge (
docker0) - UTM: UTM uses “Shared Networking (NAT)” by default. To allow VM guests to access remote networks through VPN Tracker, additional NAT rules on the Mac are required.
How to Enable UTM Support
- Open VPN Tracker.
- Open Preferences.
- Enable the option “Set NAT rules for UTM VM access”.
- By default, the network 192.168.64.0/24 is used. In almost all cases, this setting does not need to be changed.
VPN Tracker will automatically configure the required rules. After that, UTM VMs can access remote VPN networks just like other virtual machines.
You should see a SonicWall login page. If the page loads but you still cannot connect using VPN Tracker, please contact our support.
If the page does not load, here are some common issues and possible solutions:
- Check whether you have a firewall or endpoint security solution installed, such as Little Snitch or Symantec Endpoint Protection. Temporarily disable these tools or add an exception for your VPN gateway address.
- Try connecting using a different internet connection. For example, enable Hotspot mode on your iPhone and attempt to connect through your hotspot. If this works, the issue is likely related to your internet router or internet service provider.
- If you cannot reach the VPN gateway even with a different internet connection, contact your VPN administrator to verify that the gateway is running.
While it is technically possible to delete an existing contact list and upload a new CSV file, this approach is not recommended.
When you delete contacts, all associated data is permanently removed. This includes important information such as sending statistics, engagement history, and unsubscribe status. If you later re-import the same contacts, they will be treated as completely new entries, and this data cannot be recovered.
This can lead to several issues:
- Loss of valuable campaign insights and performance data
- Risk of re-adding contacts who have previously unsubscribed
- Inaccurate reporting in future email campaigns
Instead, Mail Designer allows you to easily update existing contacts.
When you upload a new CSV file, the system automatically checks for existing contacts. If a contact already exists, their details will be updated with the new data rather than added again. This means contacts will not be duplicated.
This ensures:
- No duplicate entries in your contact list
- Existing statistics and history remain intact
- Unsubscribe preferences are preserved
If you still want to delete your contacts, here’s how to do it:
- Log in to your account at my.maildesigner365.com and go to the Contacts section.
- Use the filter settings at the top to narrow down the contacts you want to delete.
To delete individual contacts:
- Click the clipboard icon next to the email addresses you want to remove and add them to your clipboard.
- Go to the Clipboard Tab, select Action → Delete from the dropdown menu, and confirm by clicking the red Delete button.
To delete multiple contacts at once:
- Apply the desired filters at the top of your contacts list.
- At the bottom of the list, select Action → Delete and confirm the deletion using the red button.
- Confirm the deletion in the popover window.
Once your contacts are deleted, you can safely re-import your new CSV file.
While standard SMTP is fine for one-on-one emails, it wasn't built for modern email marketing. Using Mail Designer 365’s integrated sending (via Campaigns or Direct Mail) solves the primary disadvantages of SMTP:
- Guaranteed Deliverability: We use high-reputation, "warmed-up" IP addresses to bypass the strict filters at Gmail and Yahoo that often block volume-based SMTP sends.
- Actionable Analytics: Unlike the "black hole" of SMTP, you get real-time data on opens, clicks, and engagement.
- Audience History: Keep a clear record of exactly what you sent to whom, so you never lose track of your client communications.
- Simplified Security: We handle the technical headache of DKIM and SPF authentication for you, ensuring your emails are verified and trusted.
- Automatic Compliance: Unsubscribe requests are managed automatically, keeping you compliant with GDPR and CAN-SPAM laws.
- Flexible Scheduling: Stay productive while out-of-office by scheduling your emails to send at the perfect time, rather than having to hit "send" manually.
For a full breakdown of these benefits, check out our deep dive here:
The Disadvantages of SMTP Sending & Why to Switch
Users on the Mail Designer 365 Essential or Essential Premium Plan may encounter an error message when opening and attempting to save a locally stored document. The message states: "Upgrade your license to save local documents." This occurs because the Essential tiers are optimized for cloud-based project management, whereas advanced local file handling is a feature of our professional tiers.
Option 1: Use the duplication workaround
You can bypass the saving restriction by moving the file into your active project database:
- Open the local design file.
- Select File > Duplicate from the menu bar.
- Save this duplicated version directly into your Project Selection.
- Once saved as a project, you will be able to edit and save changes normally.
Option 2: Upgrade your plan
For a more seamless workflow that includes advanced permissions for handling local files and documents outside of projects, we recommend upgrading to a Business or Business Premium Plan. These plans are designed to provide greater flexibility for file management and professional design workflows.